
How do I use Open Tracking?
Apple Mail
1. Make sure that you have Tracking enabled by default. Or enable it manually. For instructions see here.
2. Compose a new email and send it. Your email is being tracked.
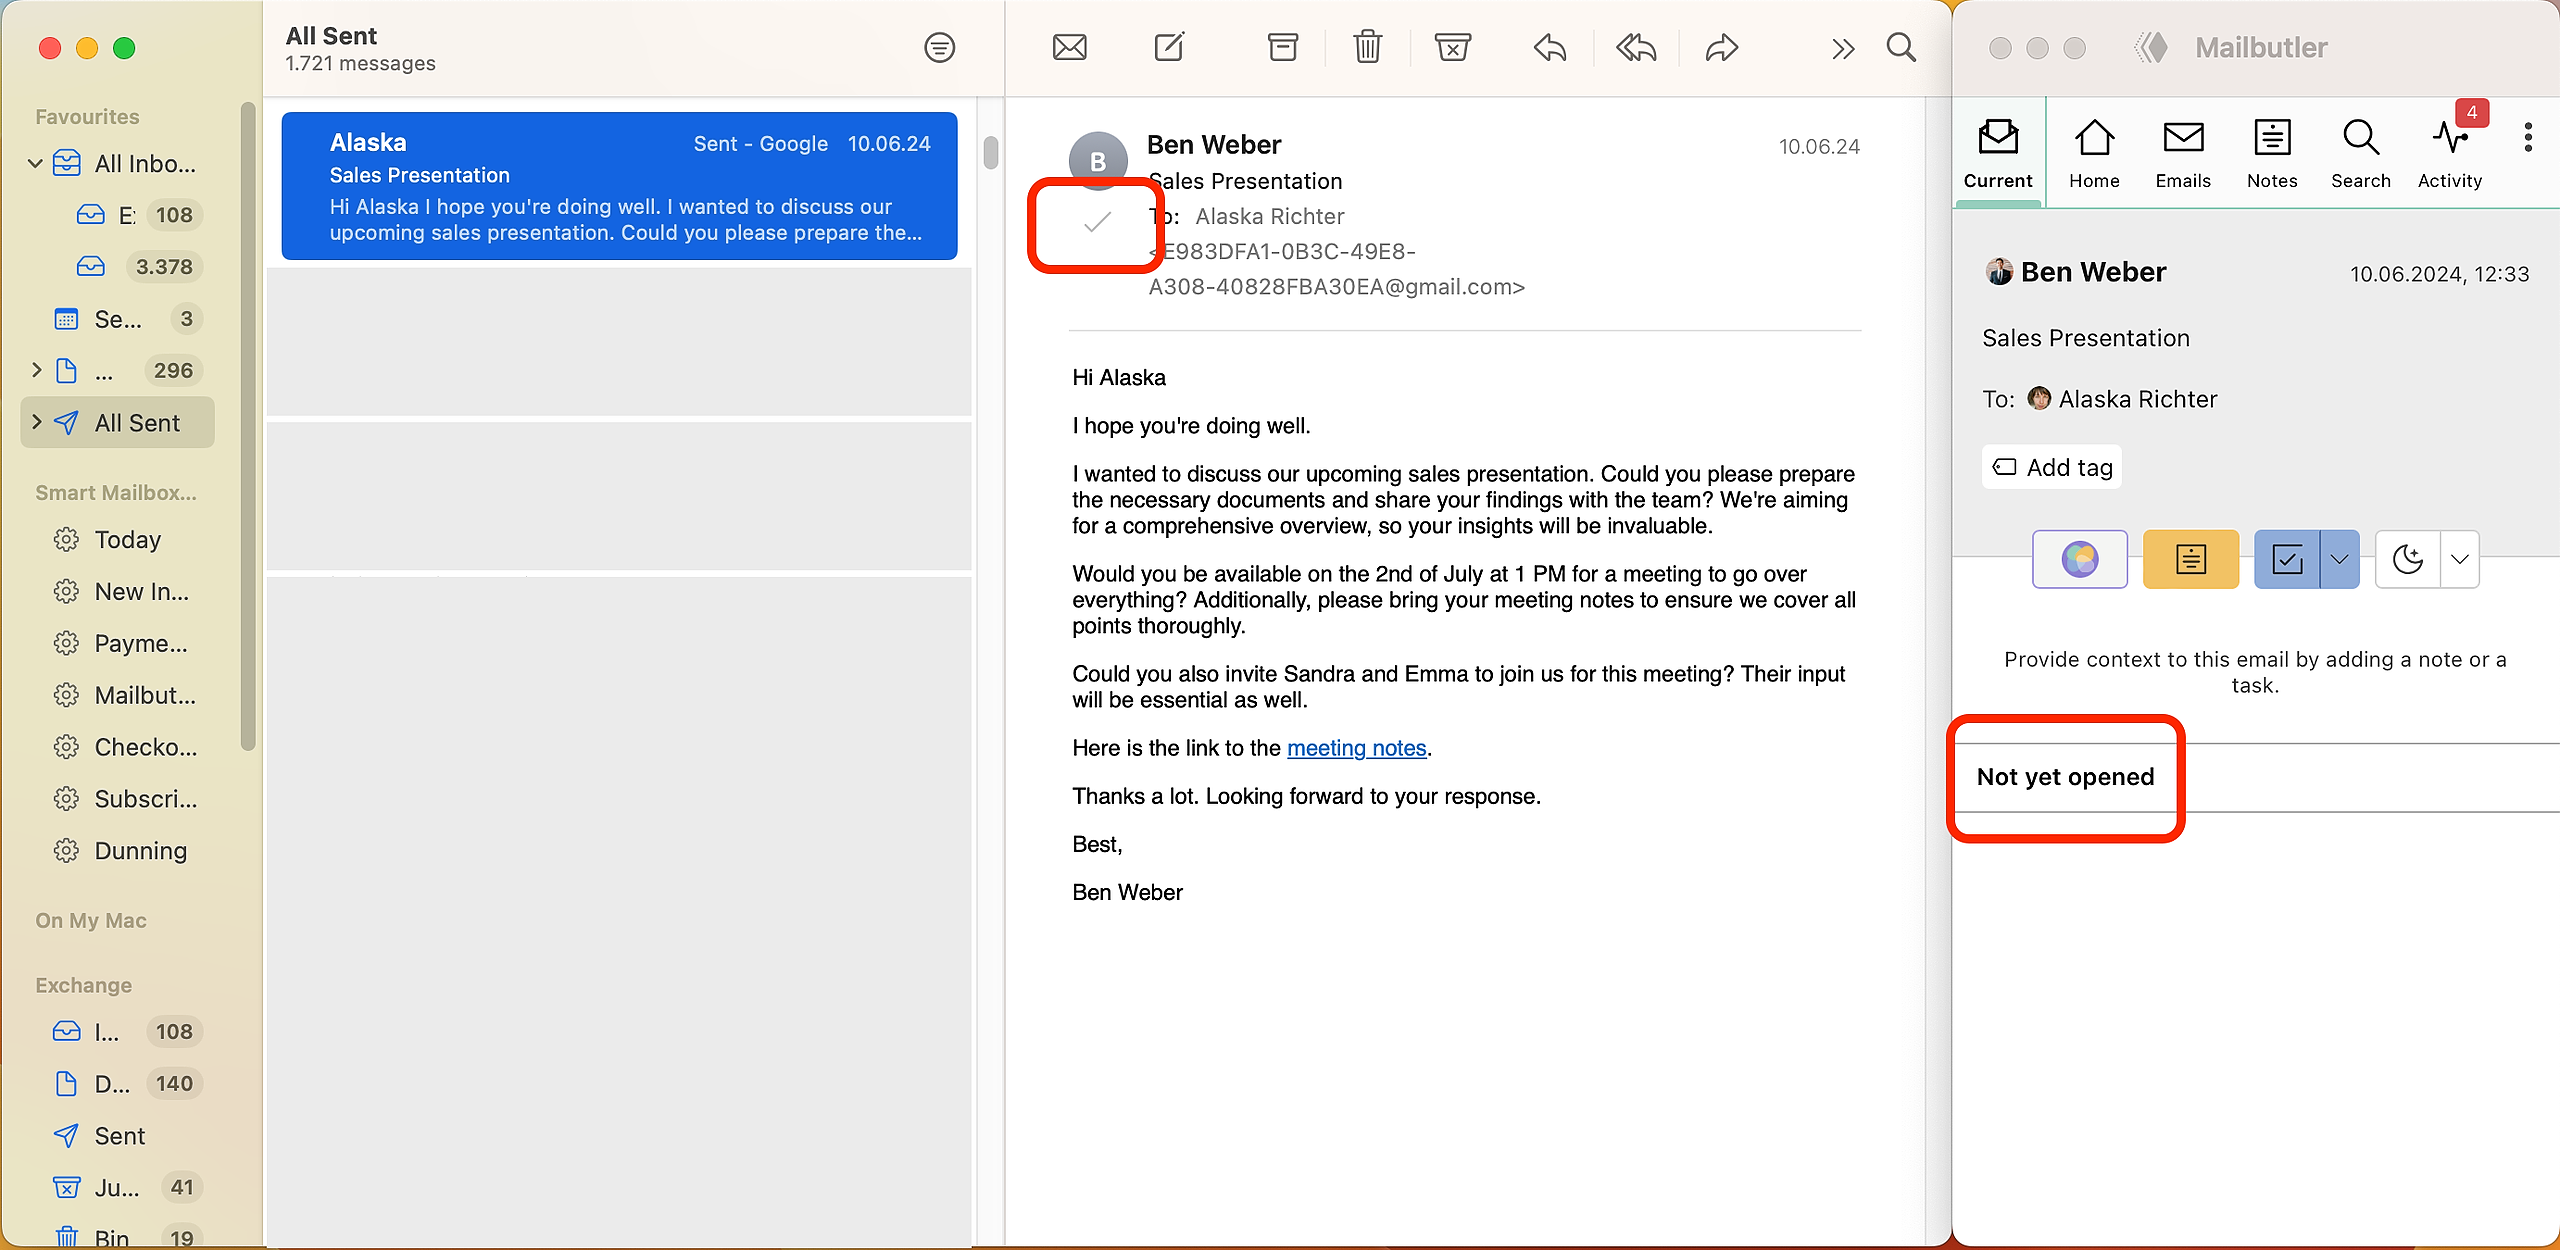
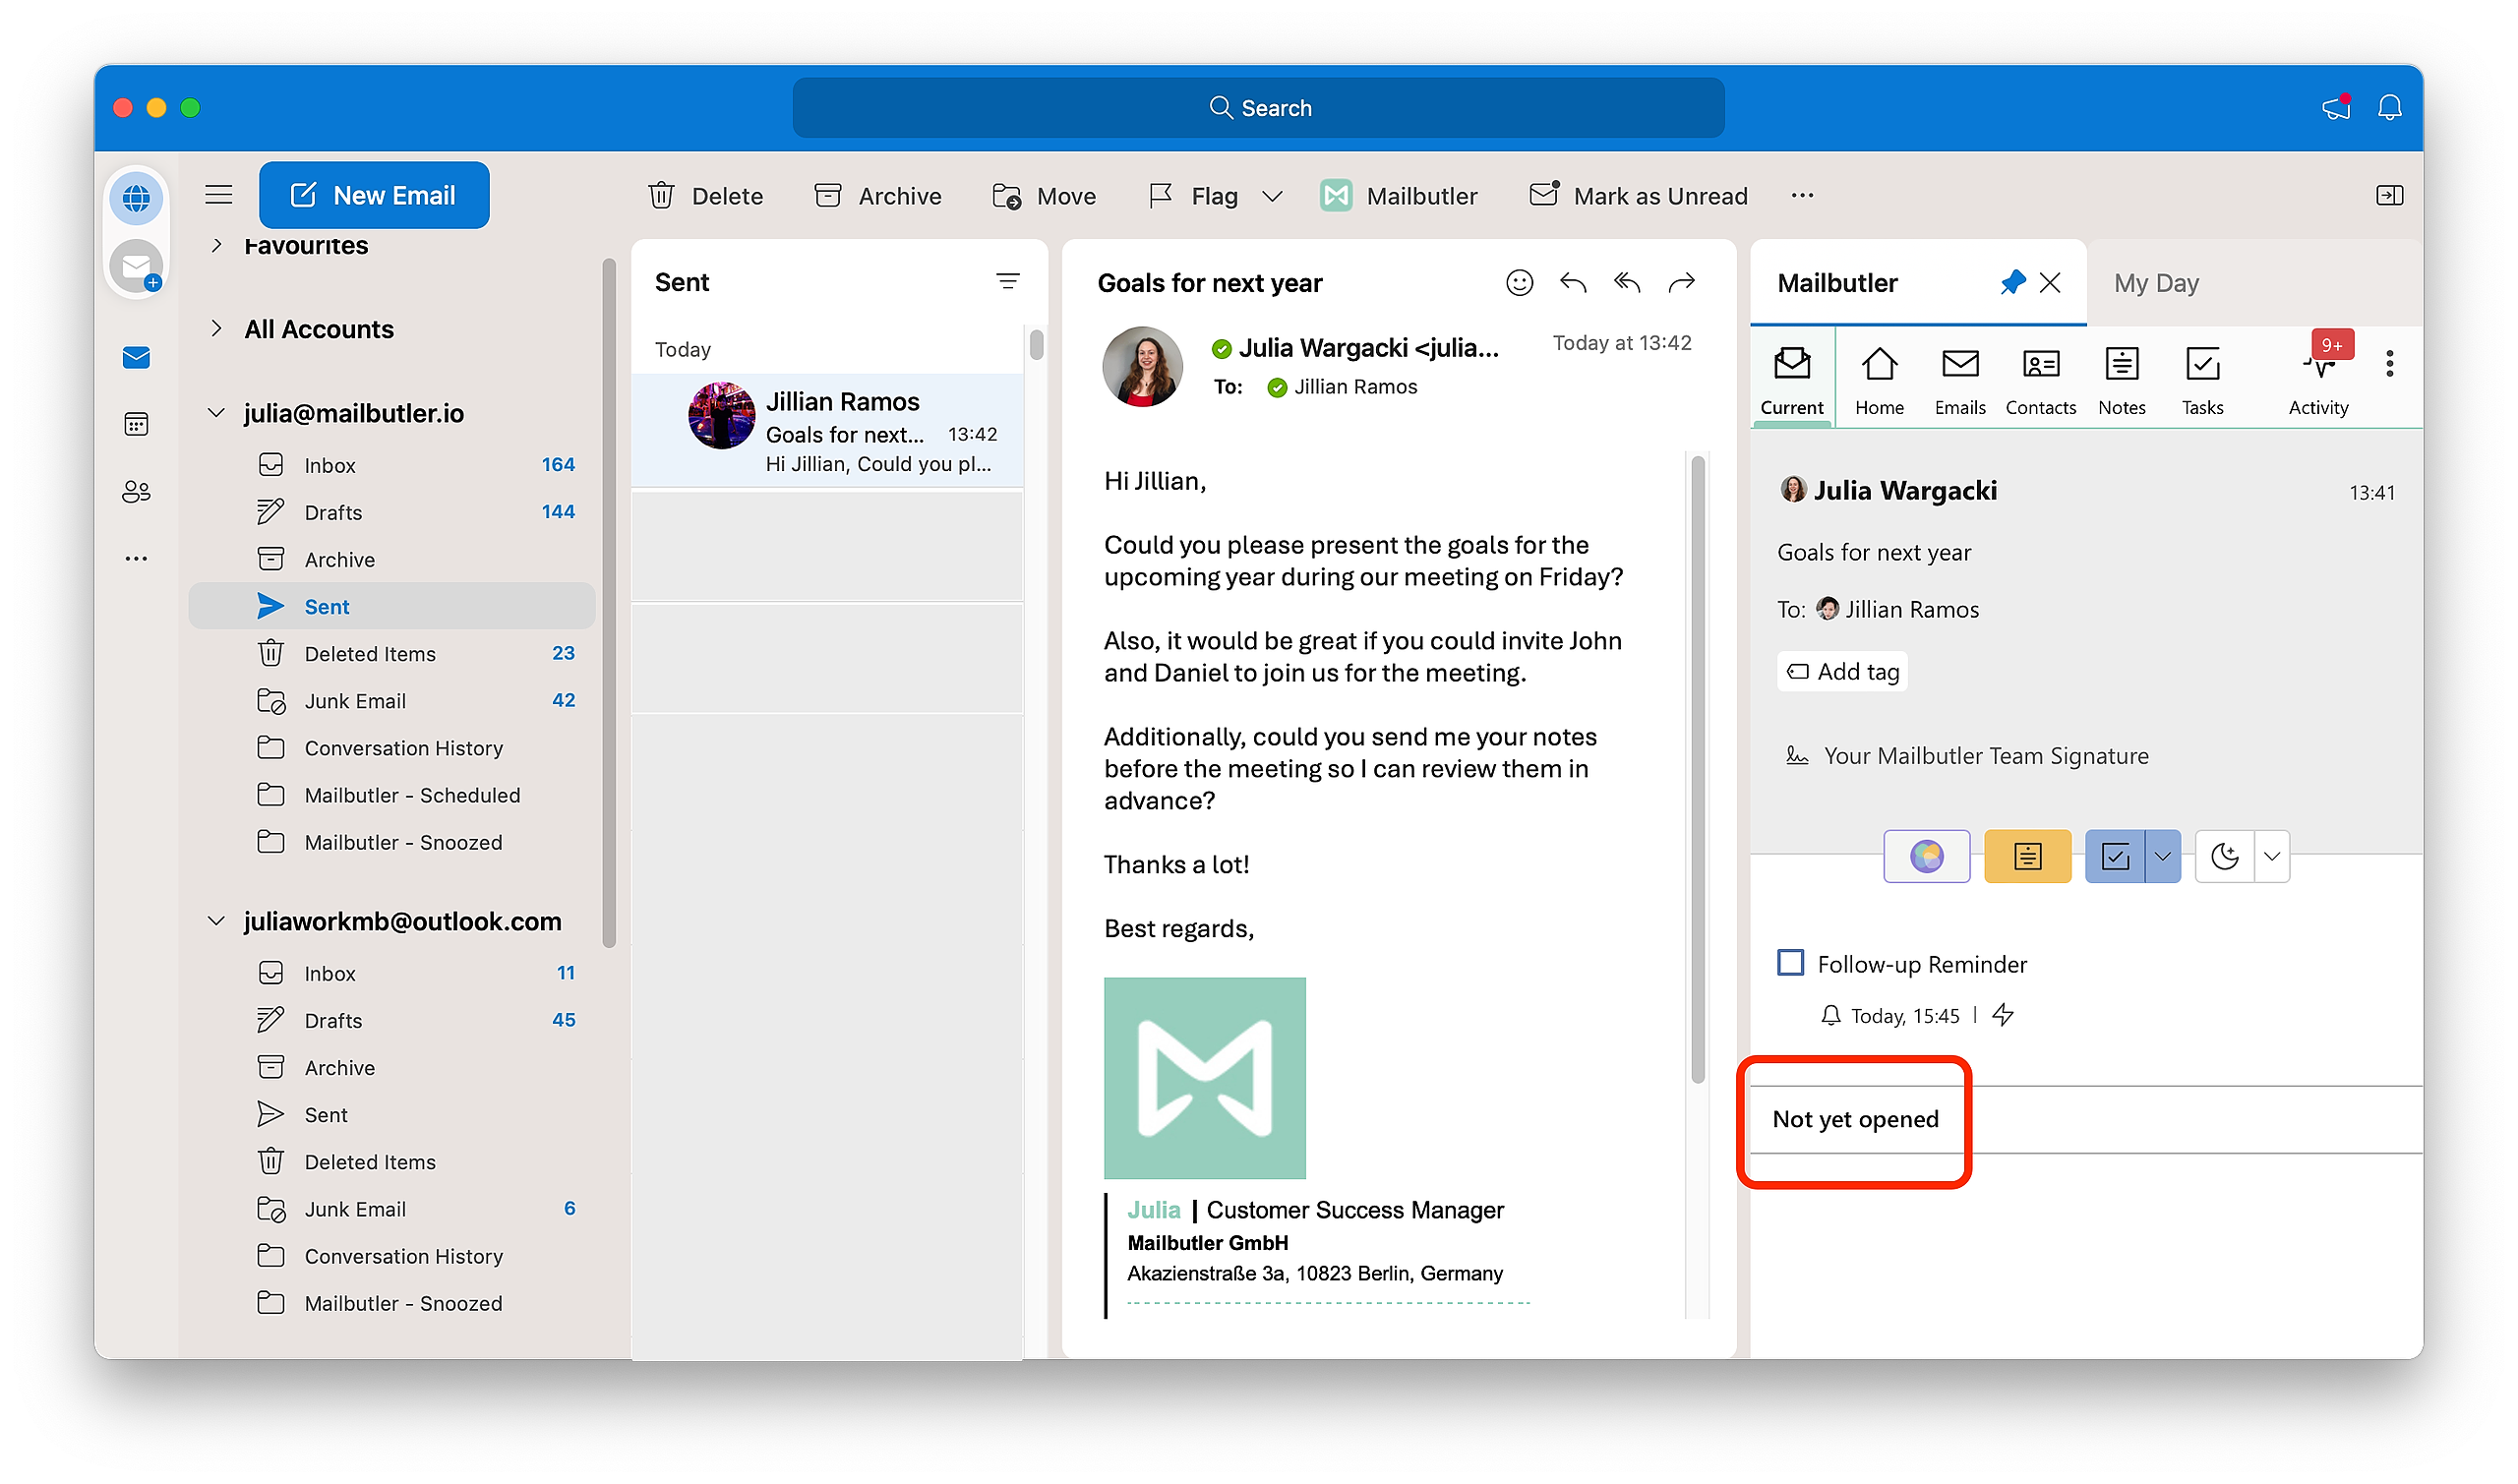
3. To check whether your email has been opened, go to your sent folder and select the email.
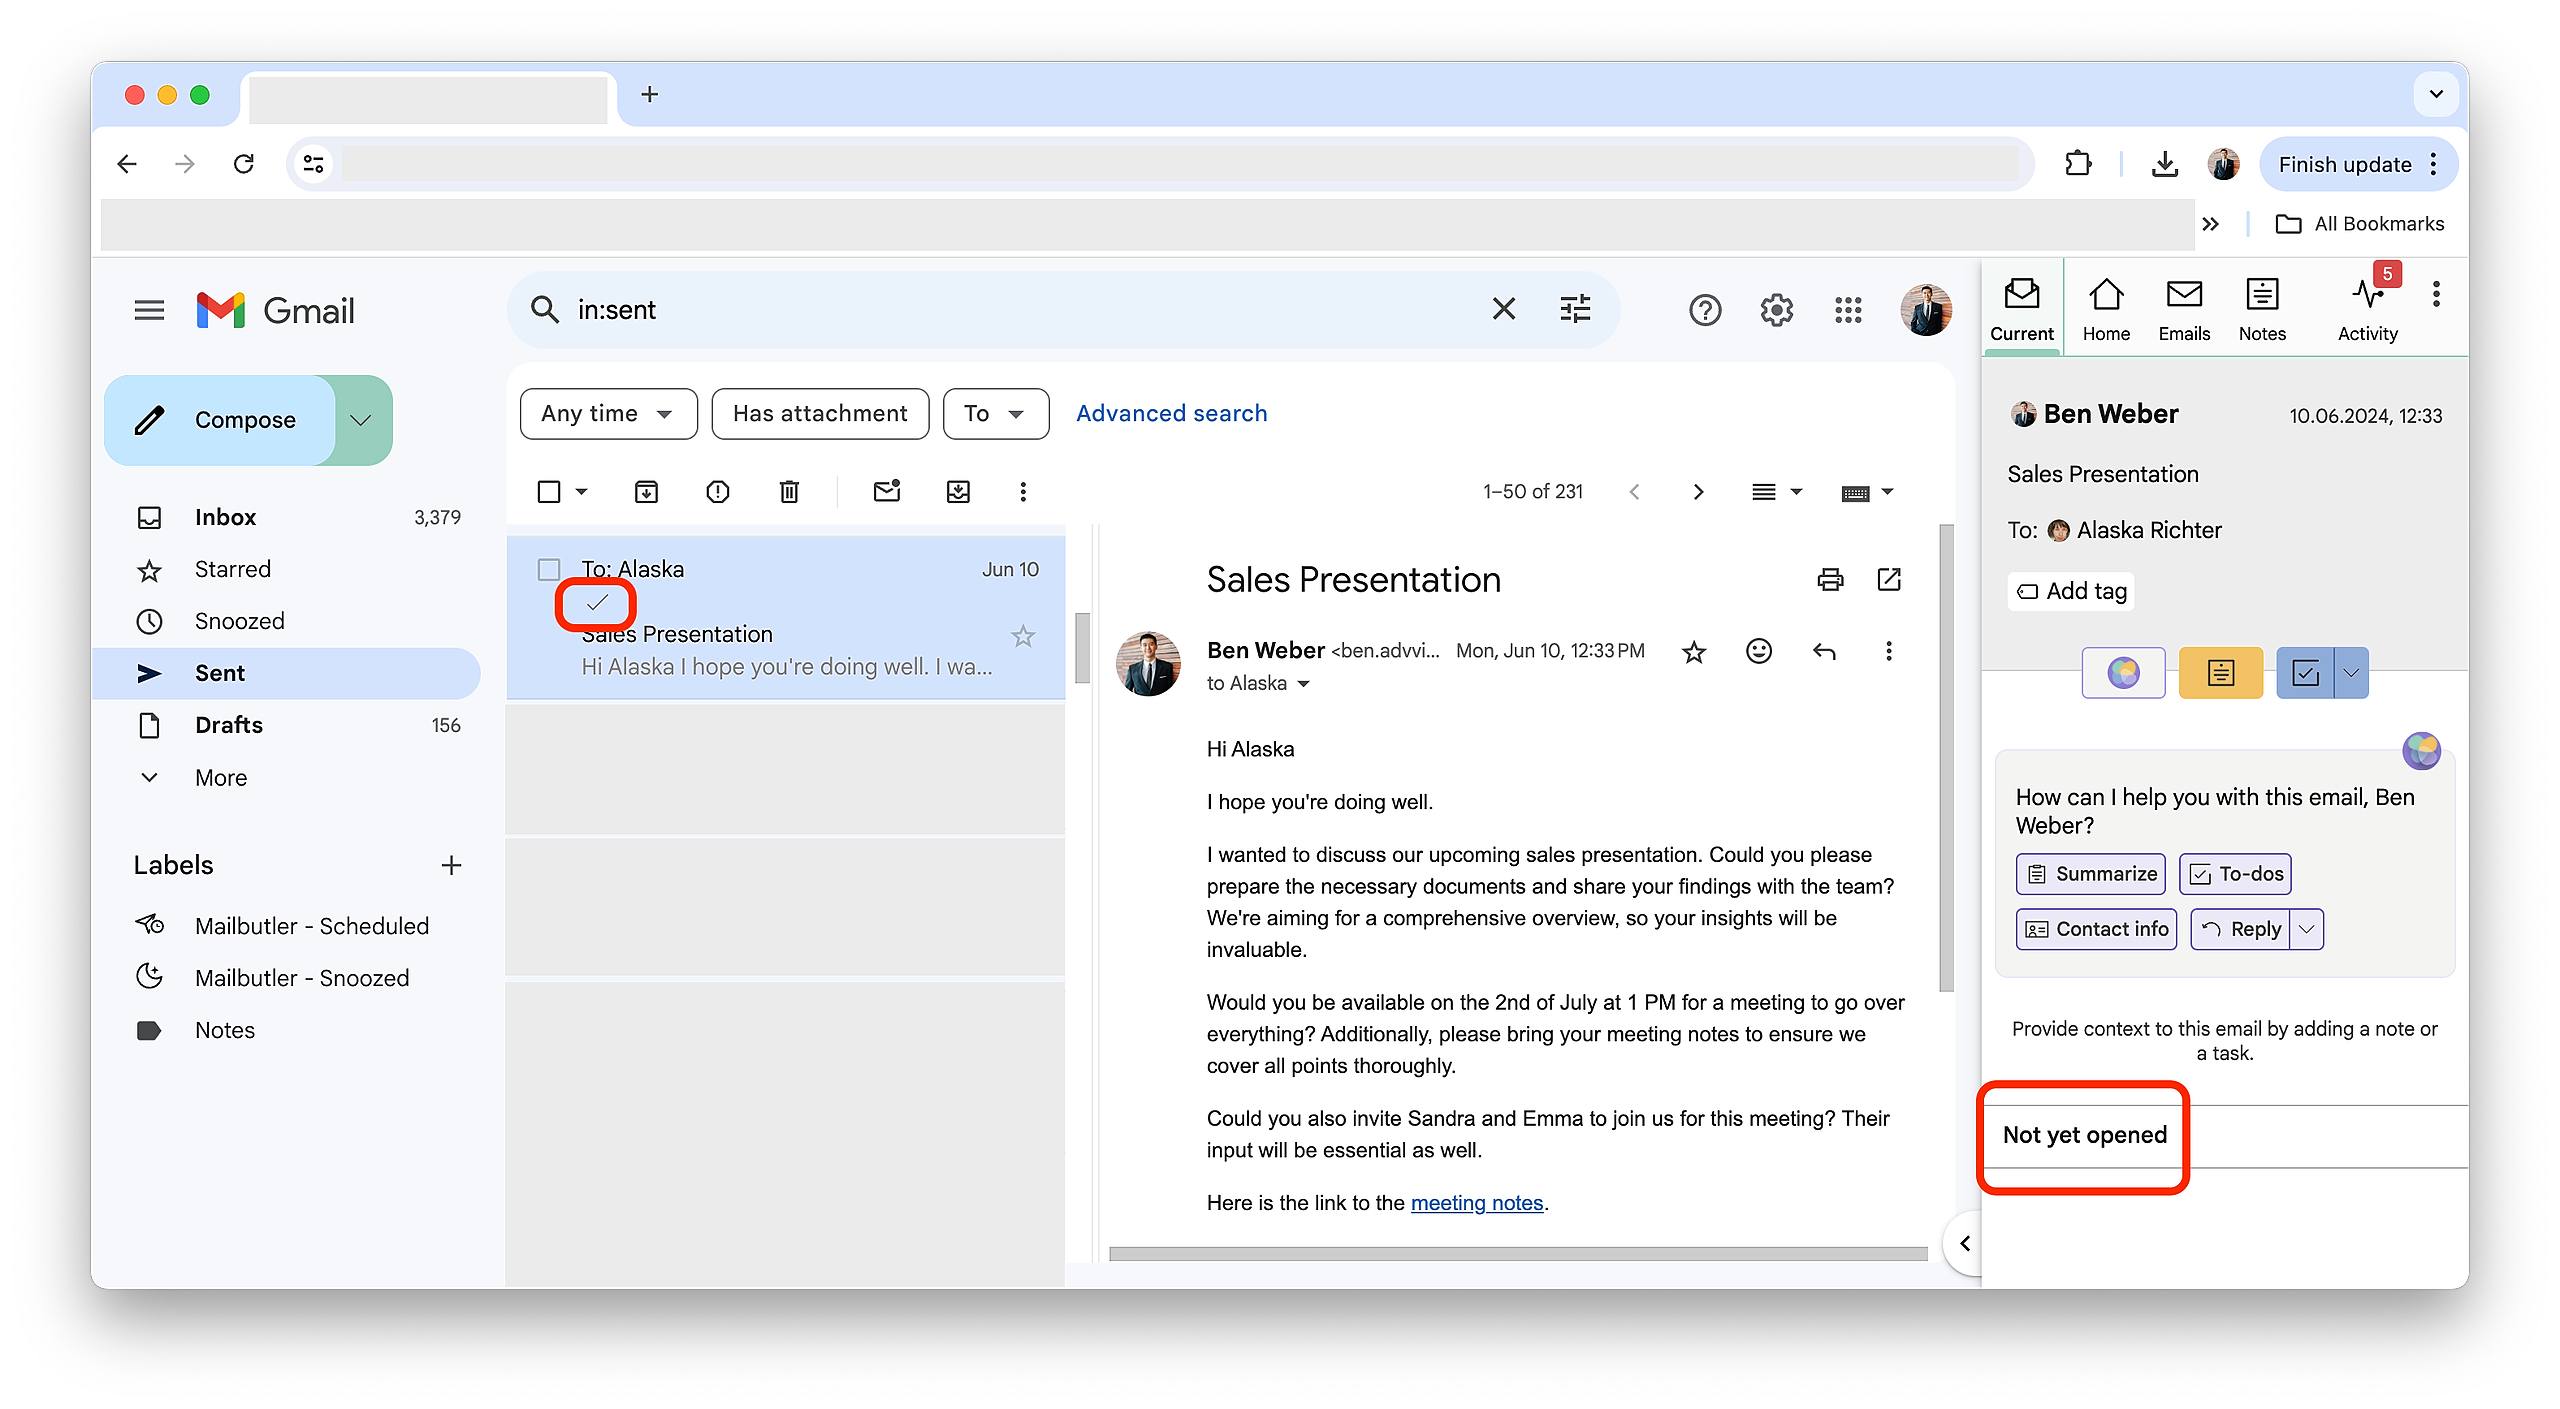
A single checkmark on the email and the information Not yet opened in the Mailbutler Sidebar indicate that your email is being tracked but the recipient hasn’t opened it yet.
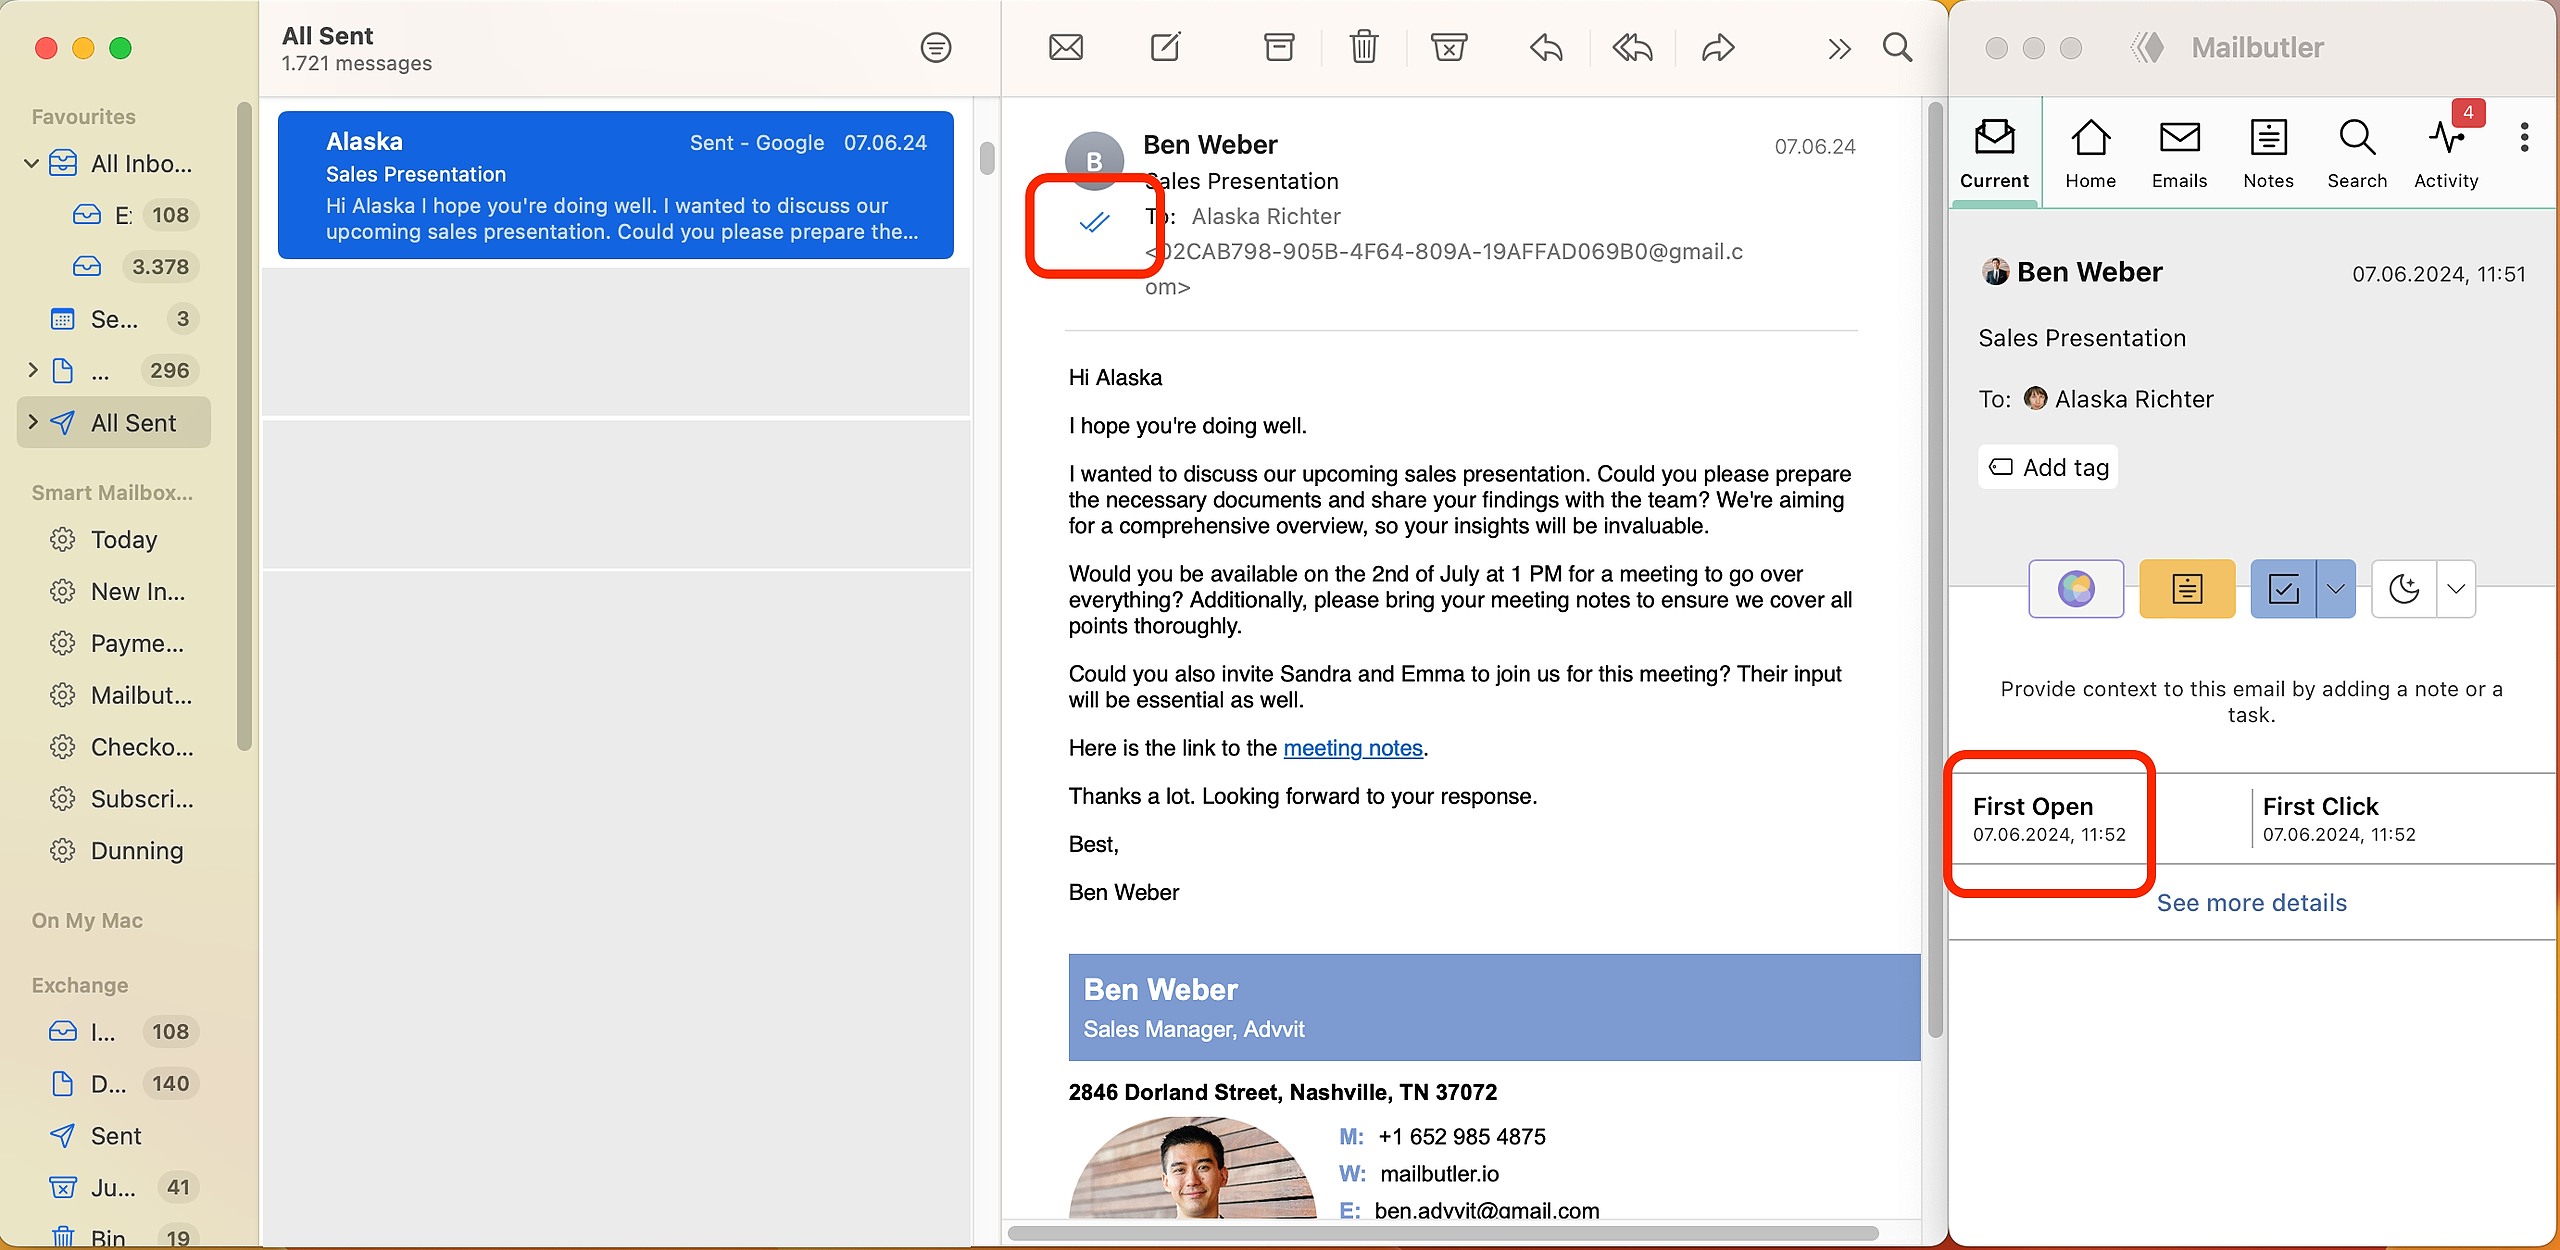
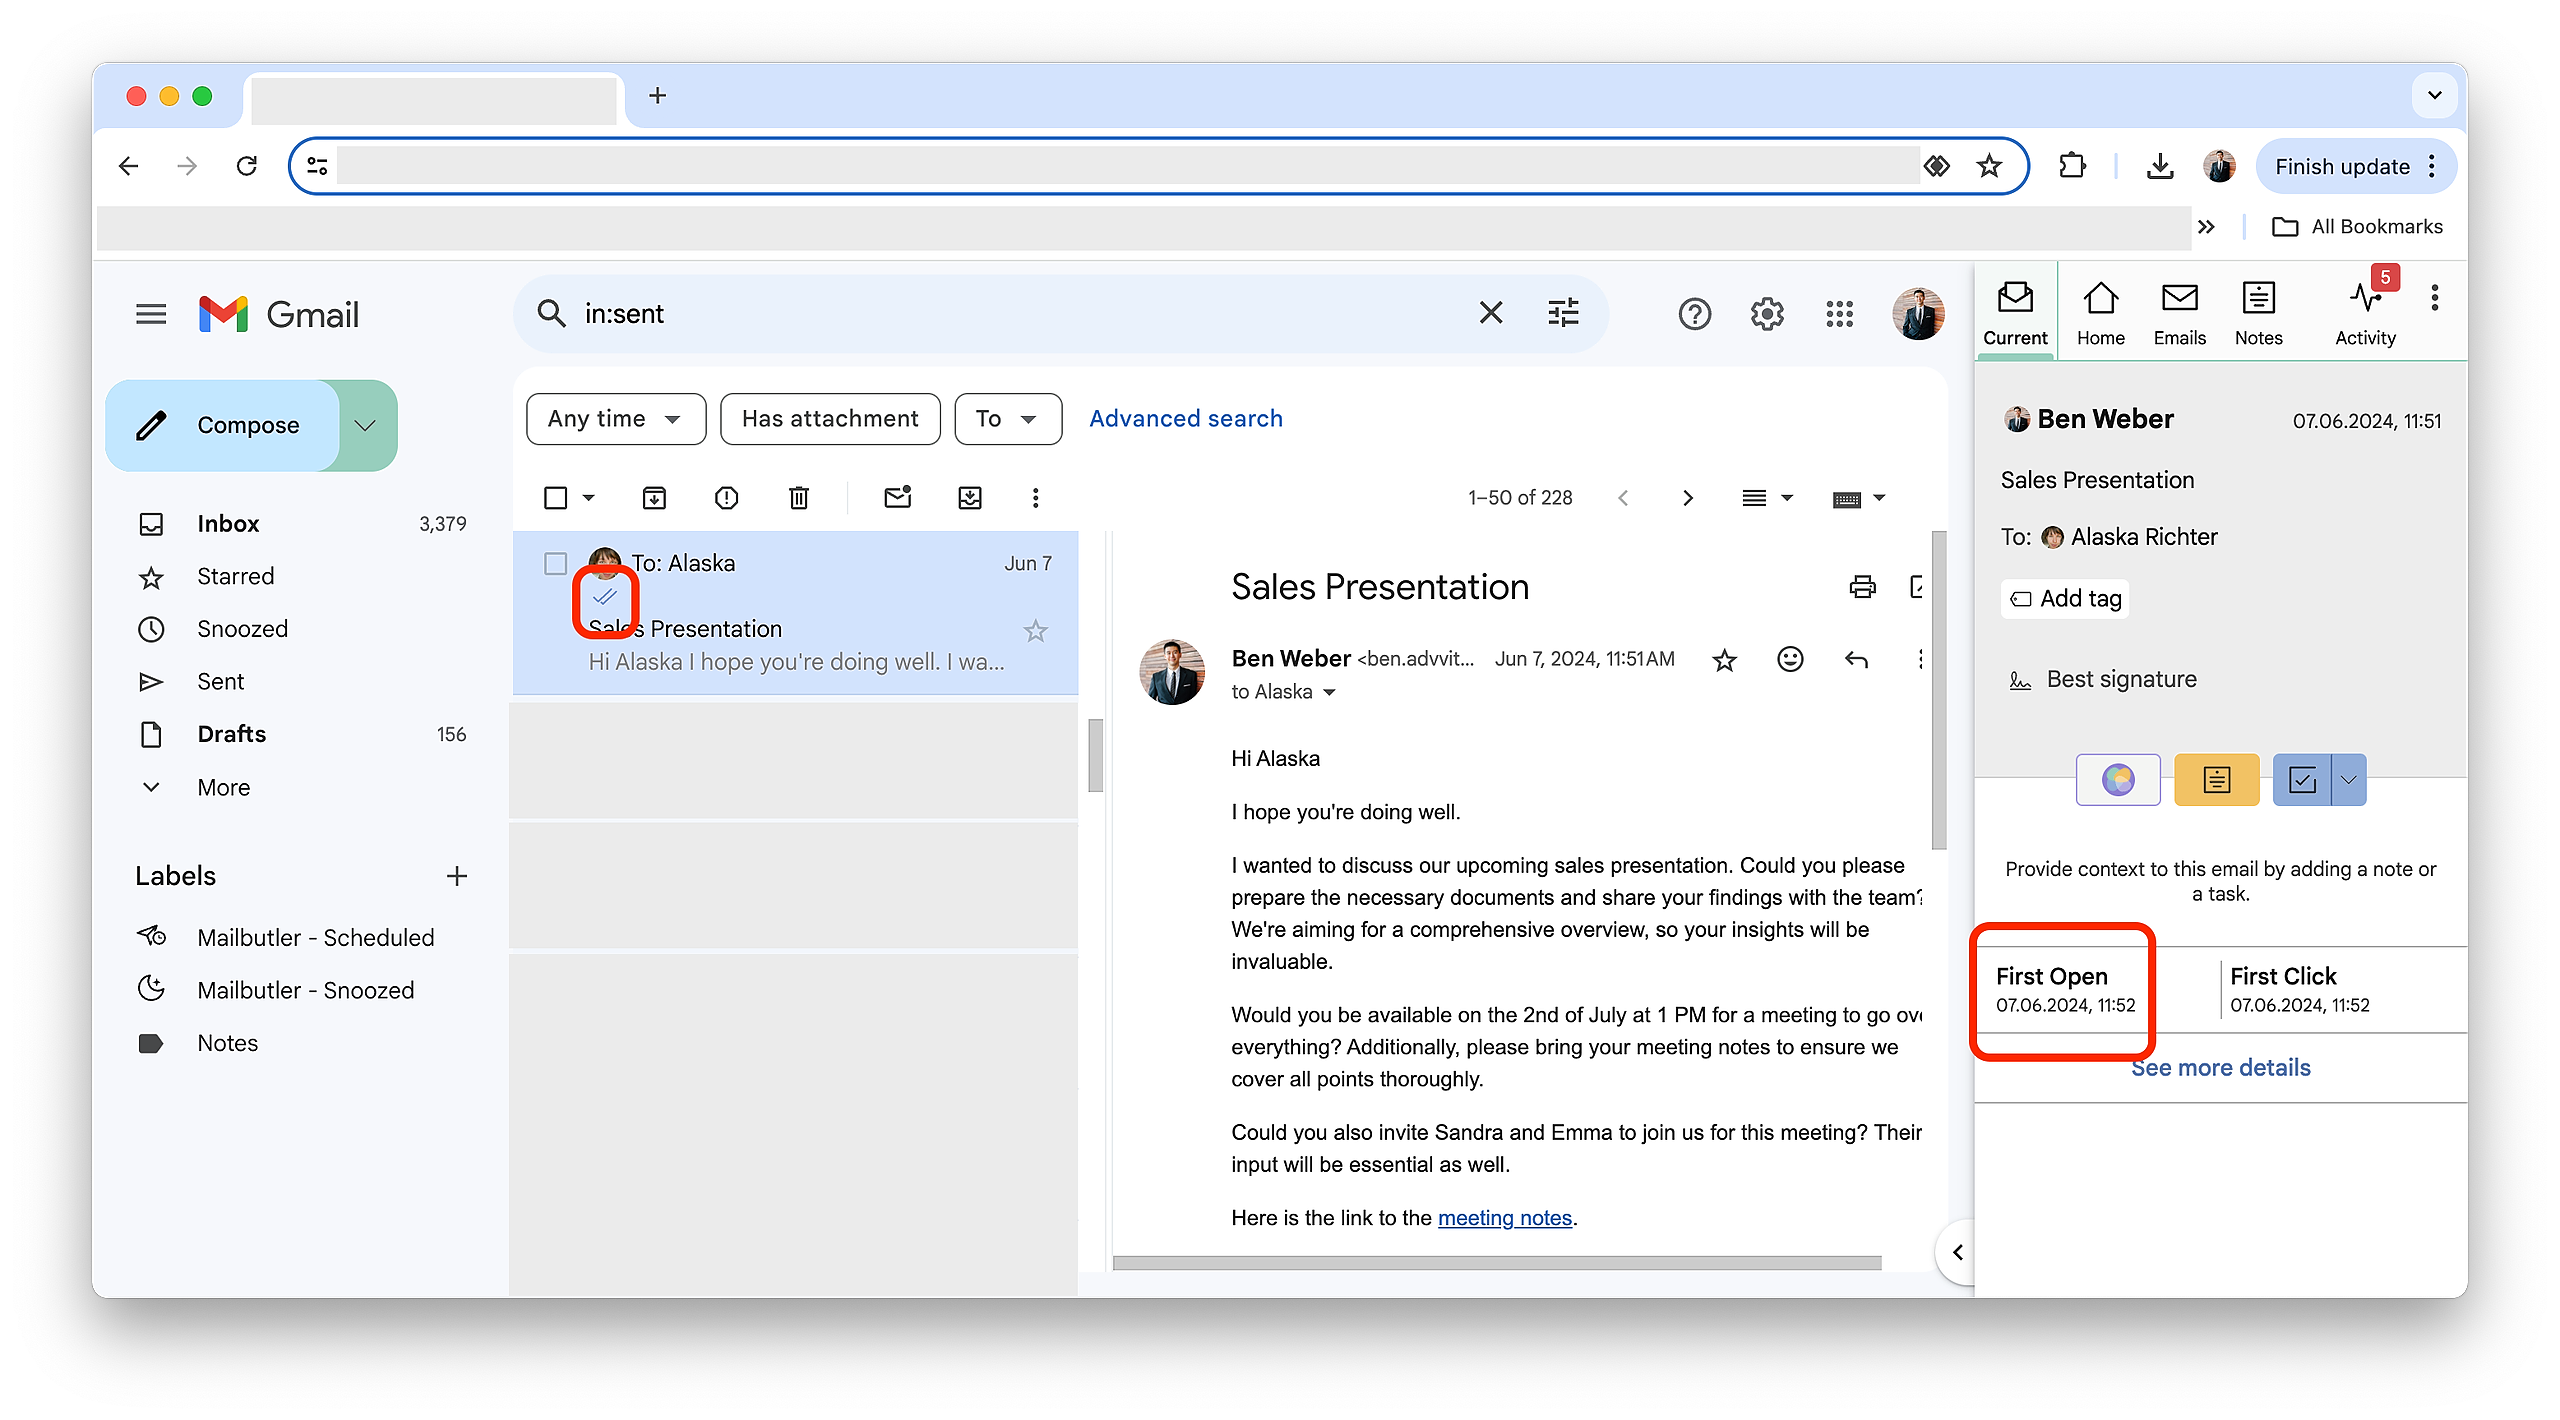
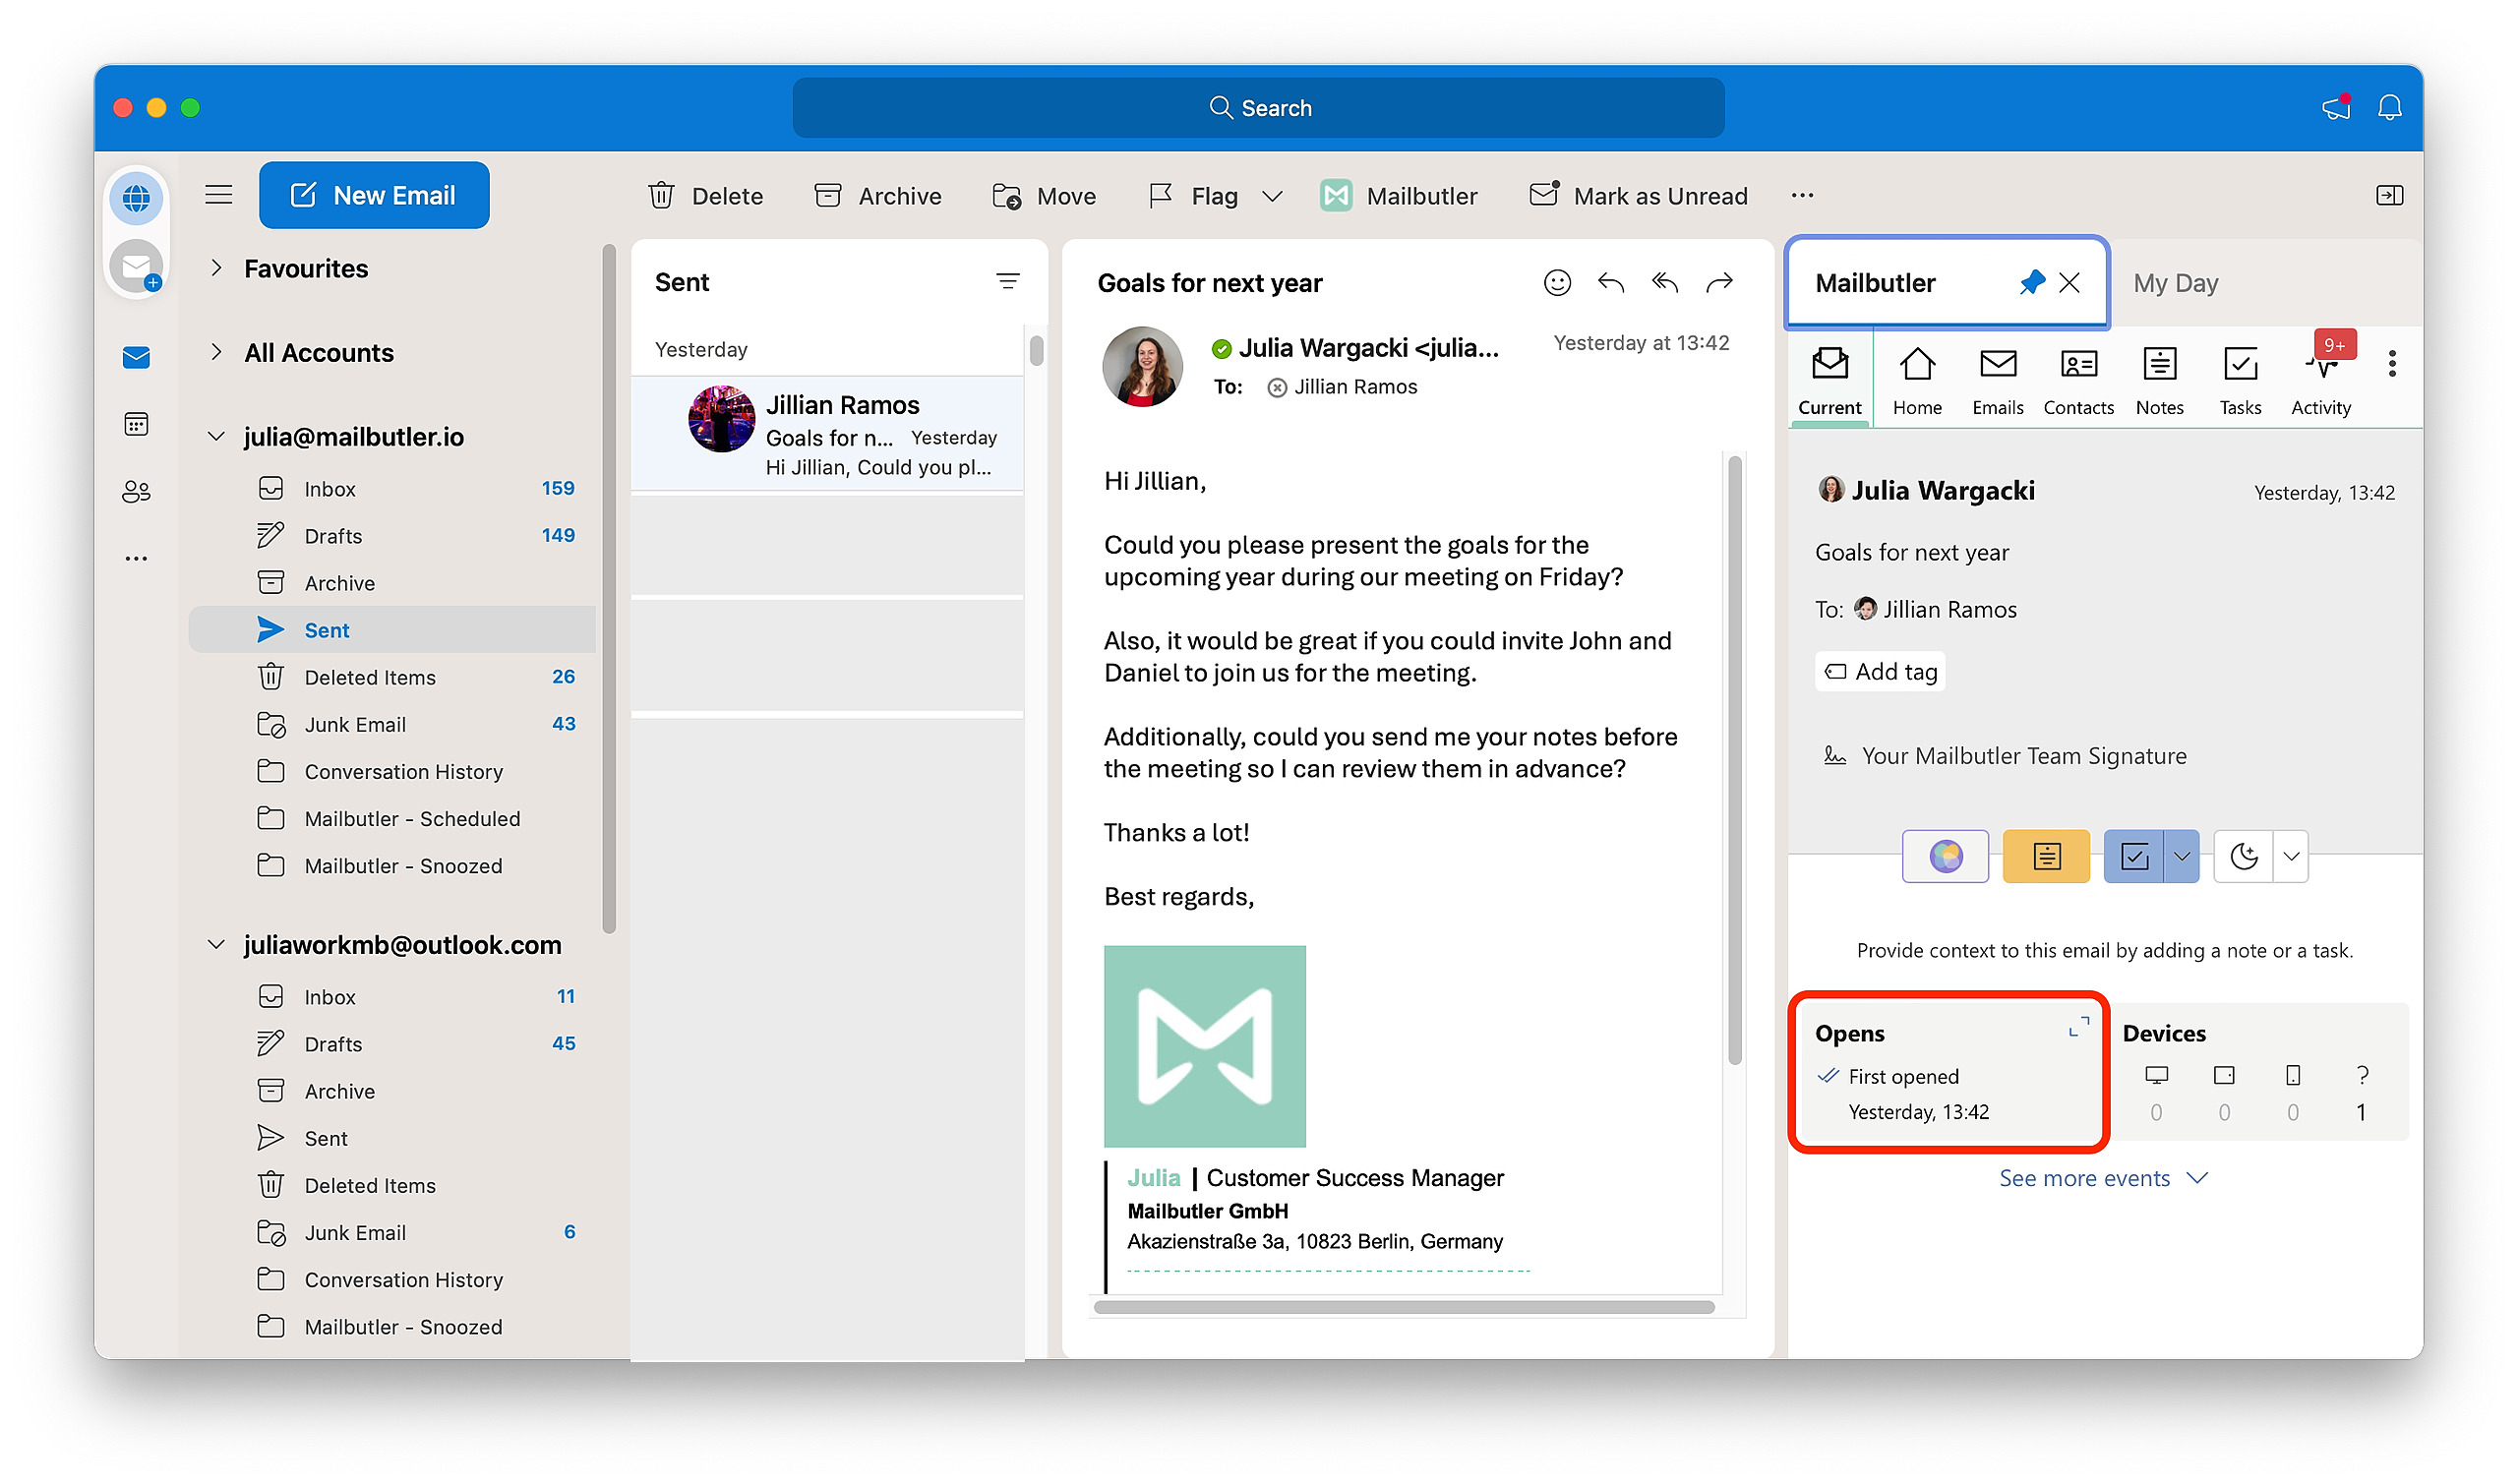
Two blue double checkmarks on the email and the date and time of the first opening in the Mailbutler Sidebar indicate that your email has been read.
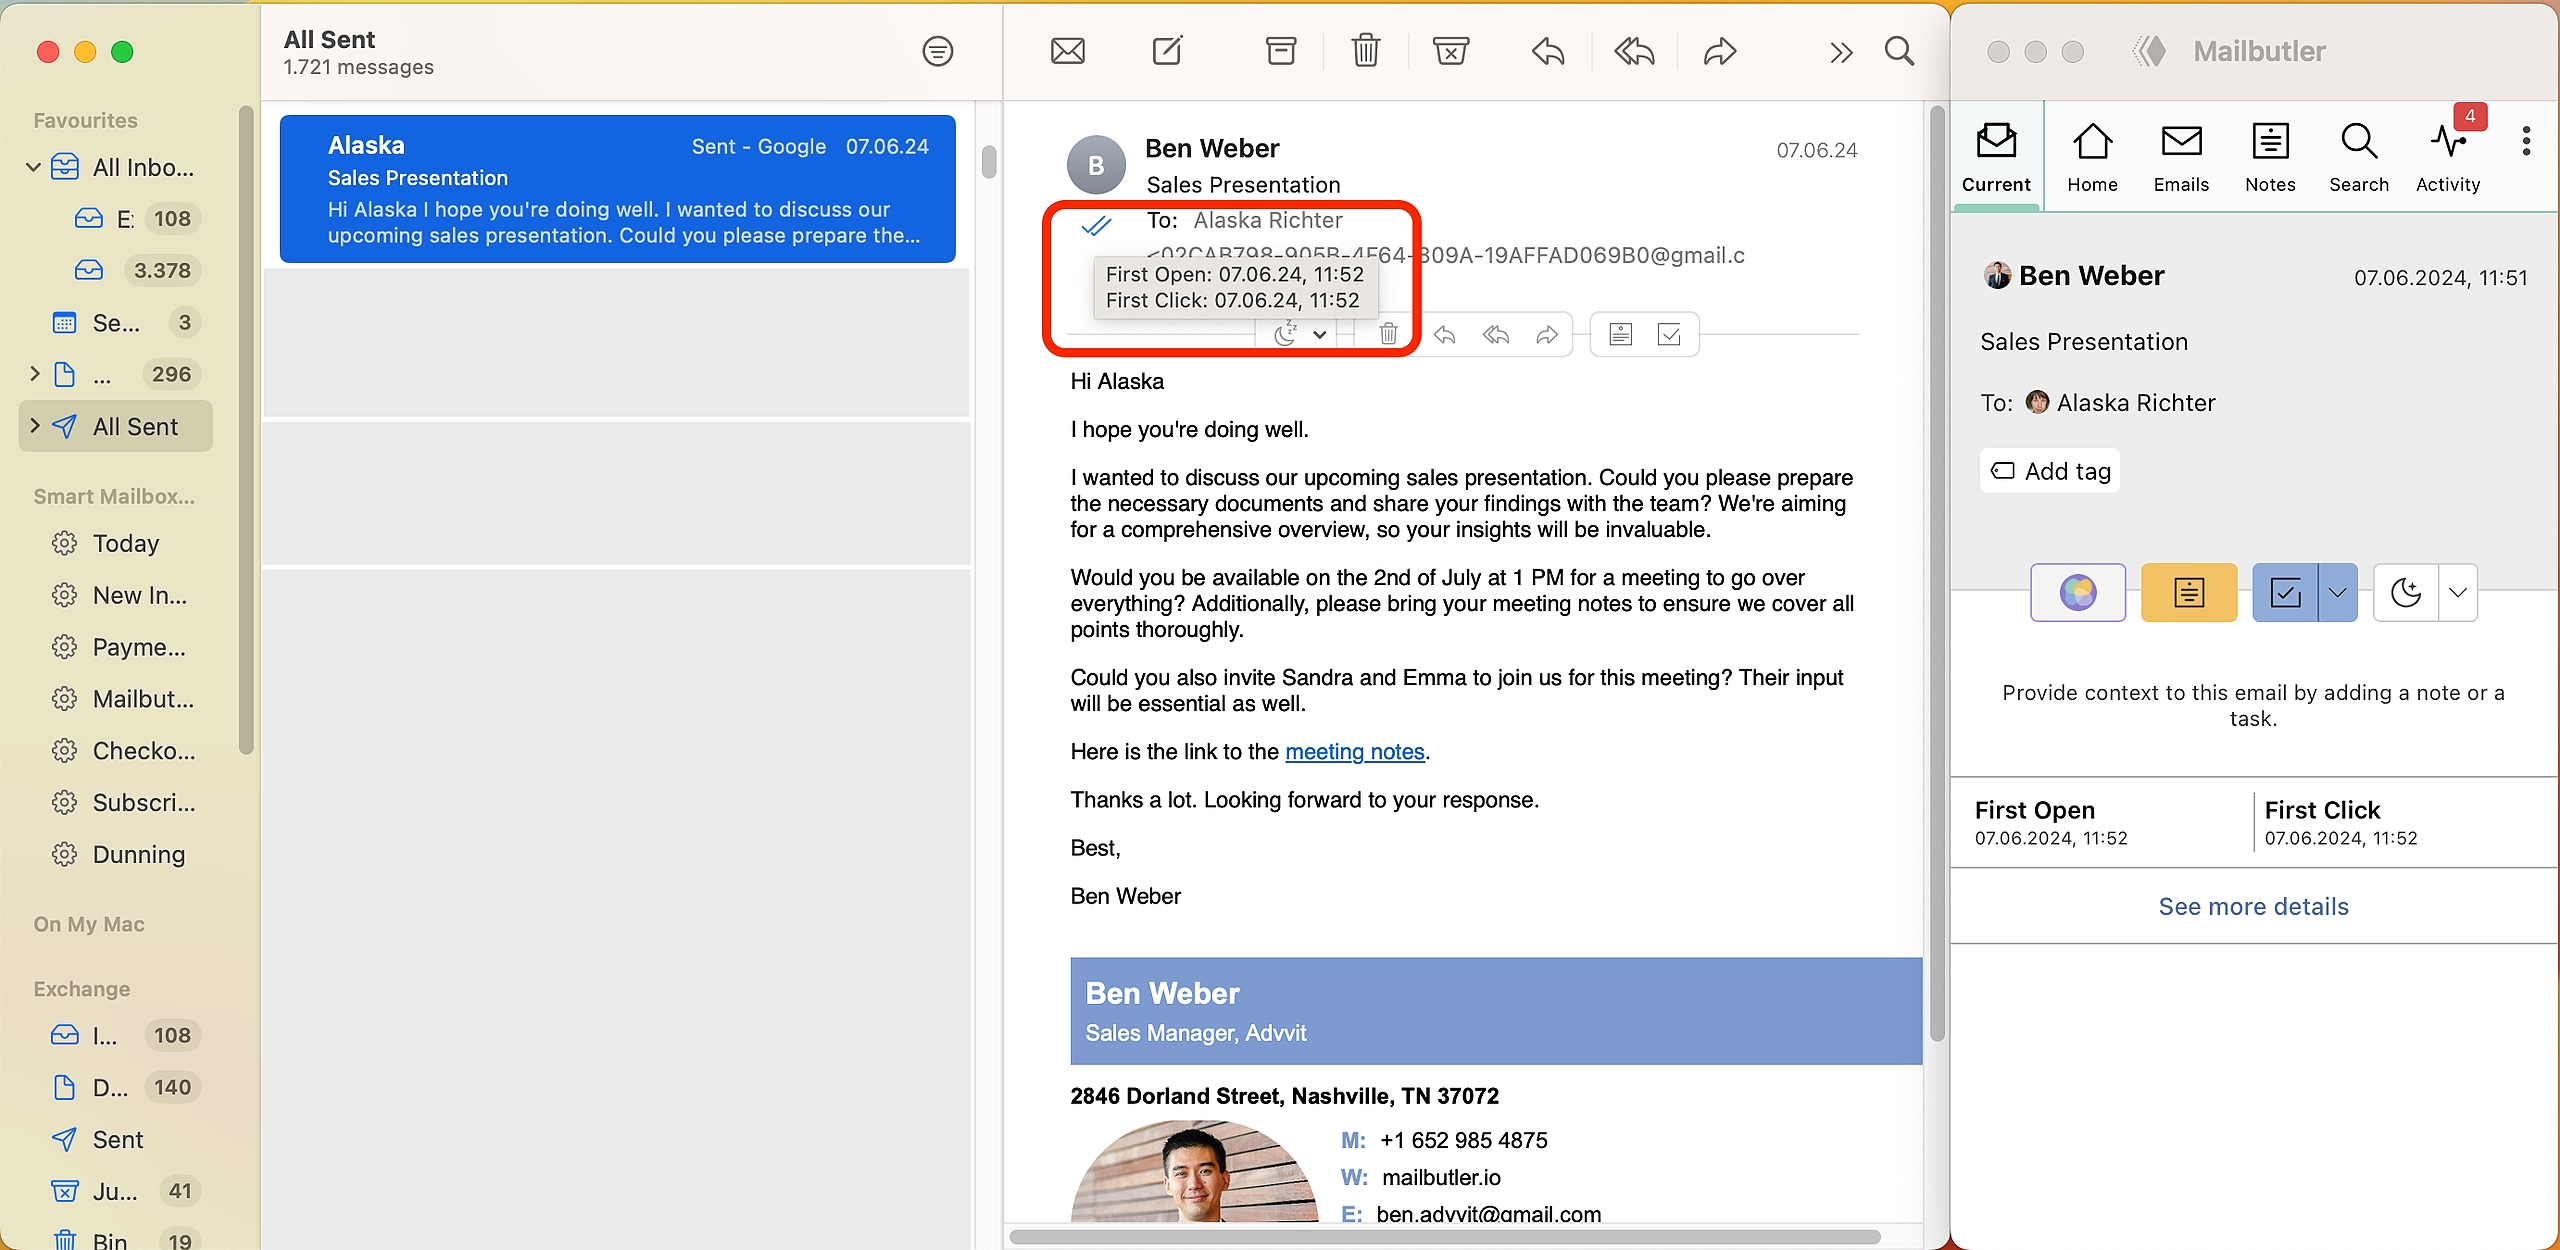
Please note: You can hover over the checkmarks to see when your email was fist opened.
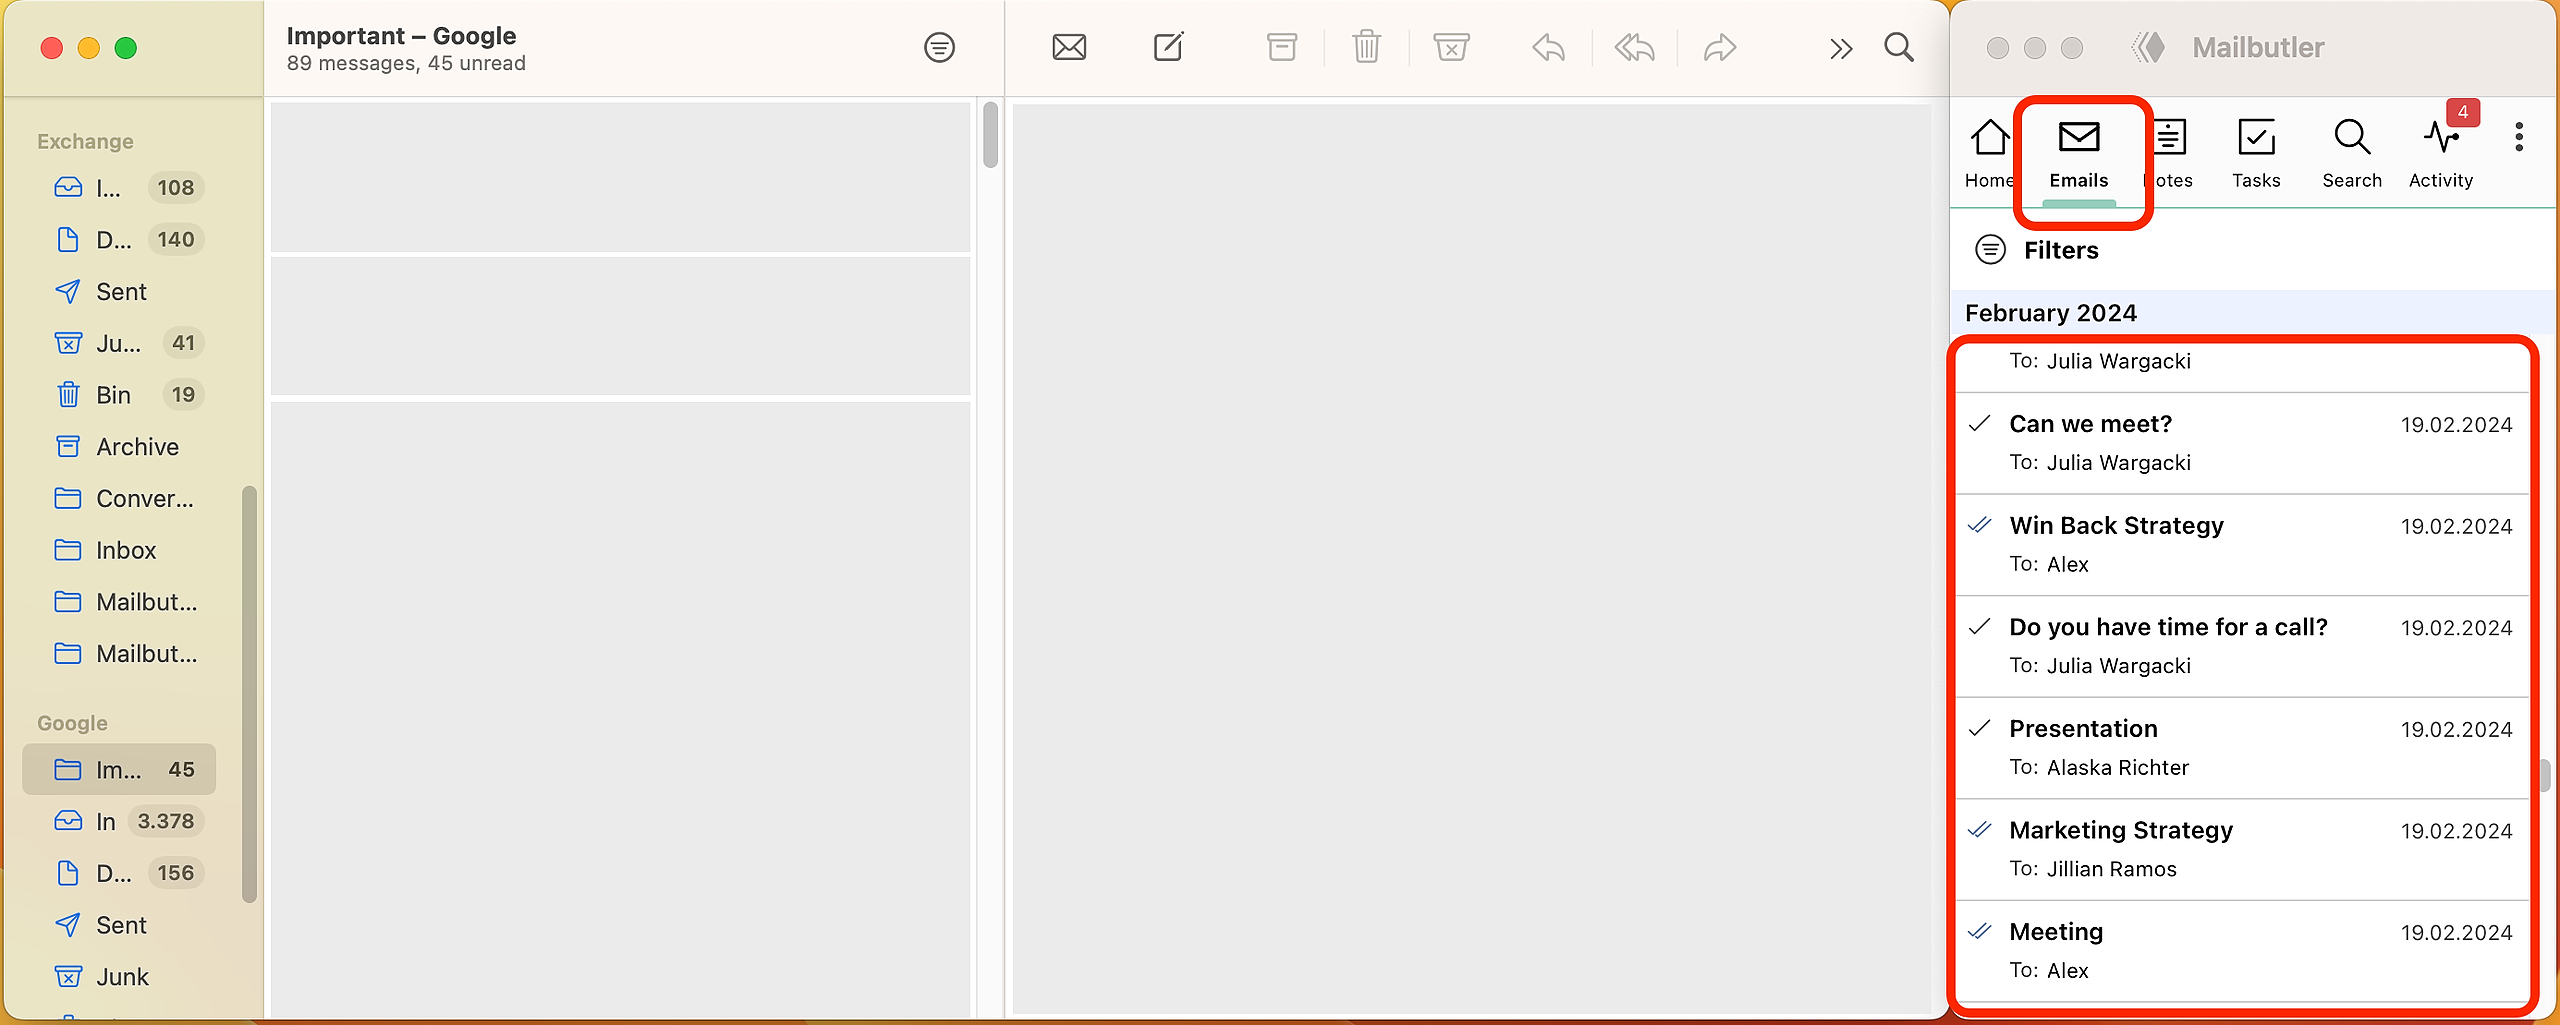
4. Or, to view tracking information for all of your sent emails, select the Emails tab in Mailbutler's navigation bar and see an overview of all of your tracked emails with a tracking checkmark next to the emails.
If you want to see more detailed tracking information, head to this article to learn how to reveal Tracking Details.
Gmail
1. Make sure you that have Tracking enabled by default. Or enable it manually. For instructions see here.
2. Compose a new email and send it. Your email is being tracked.
3. To check whether your email has been opened, go to your sent folder and select the email.
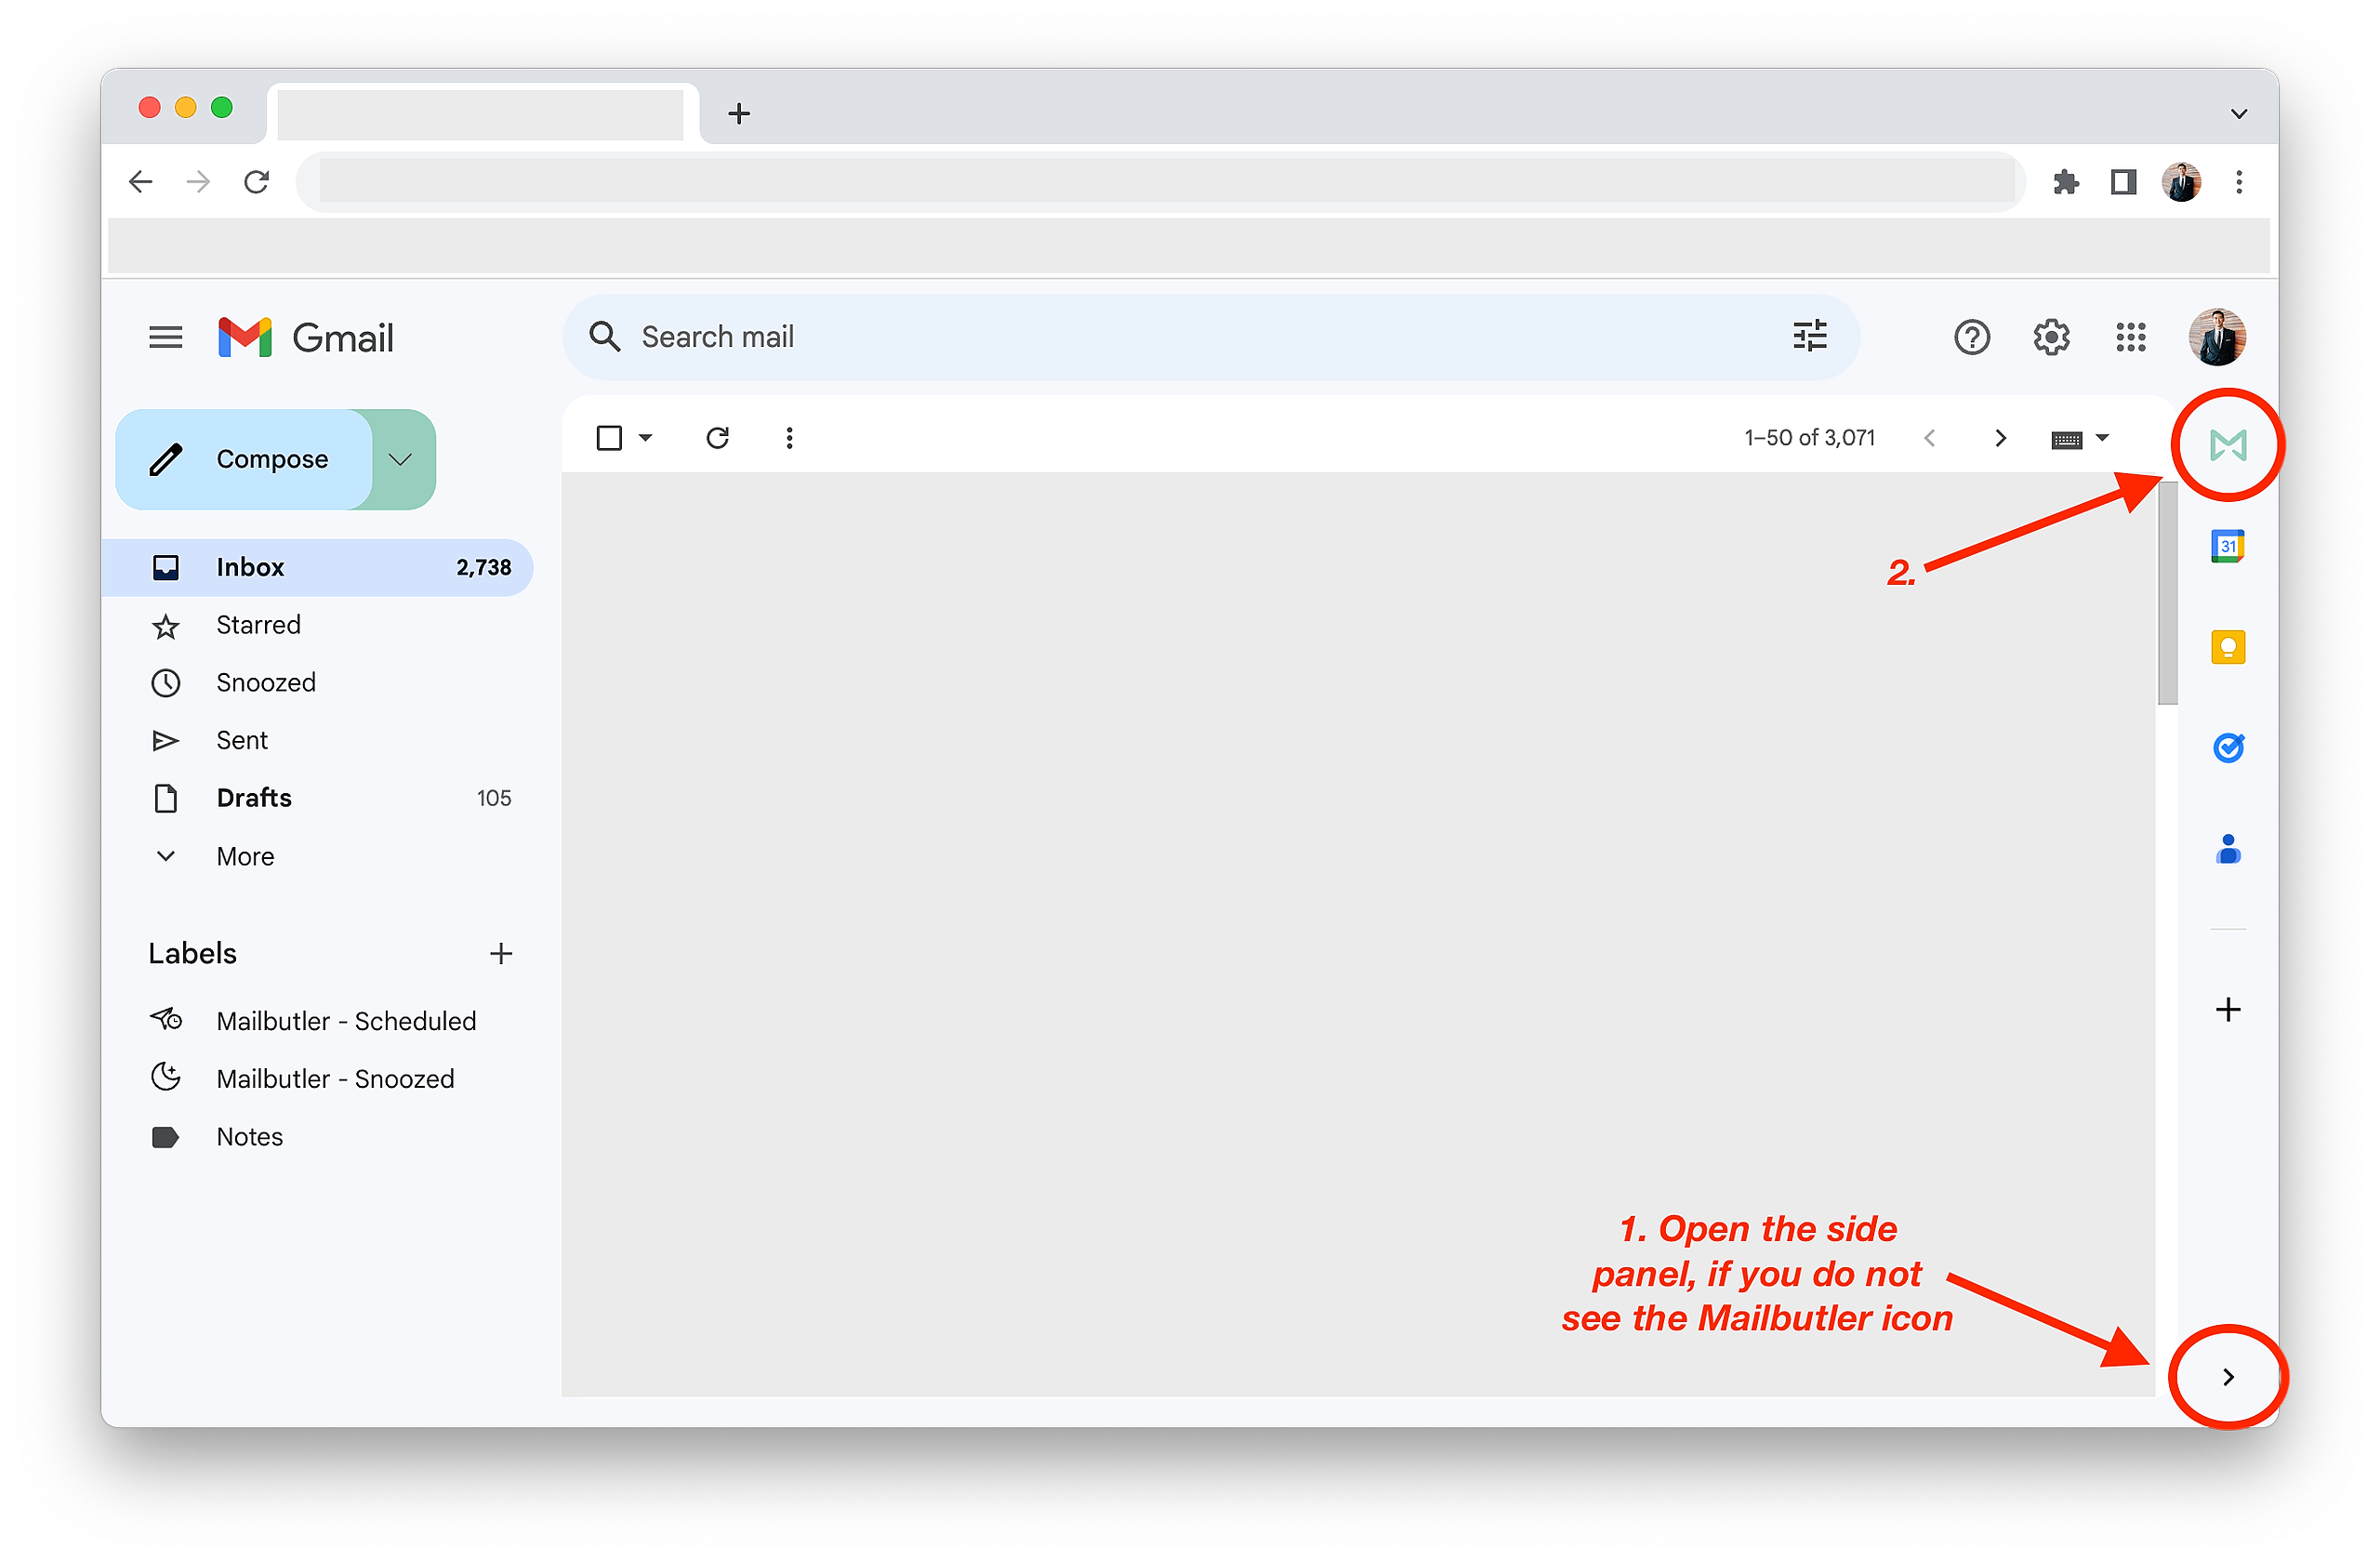
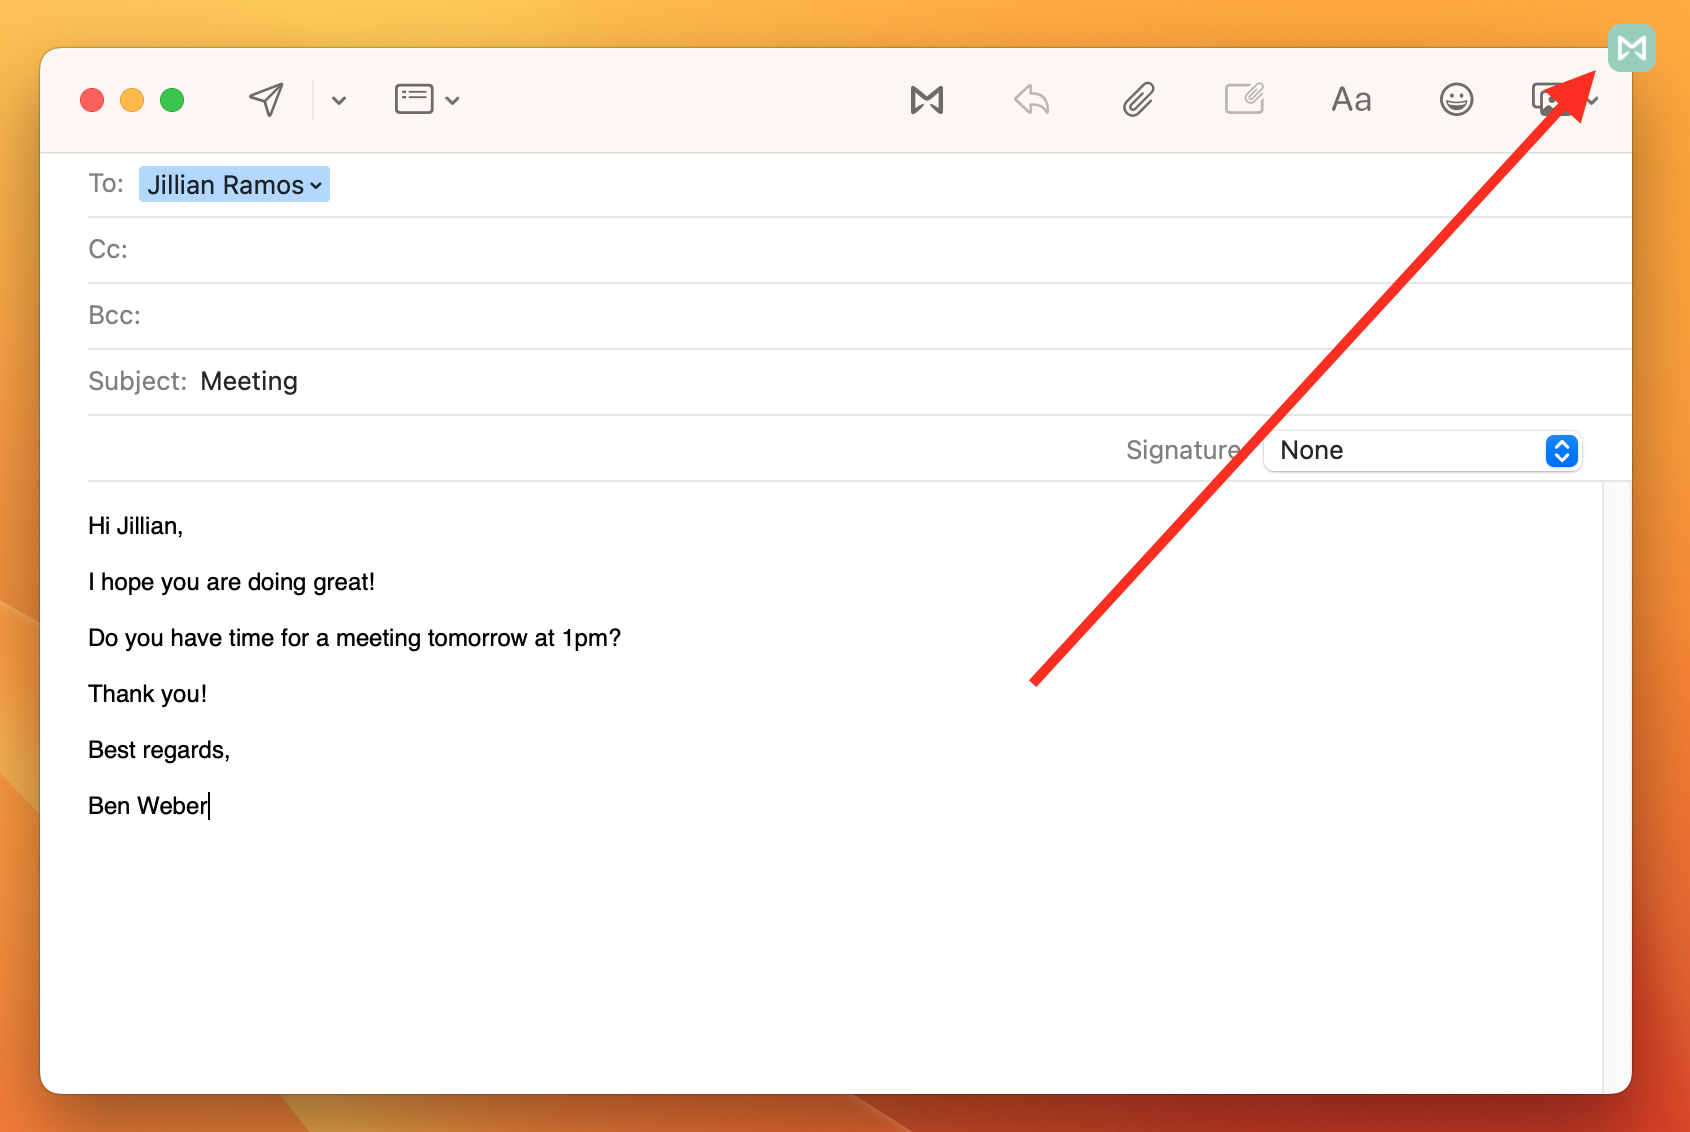
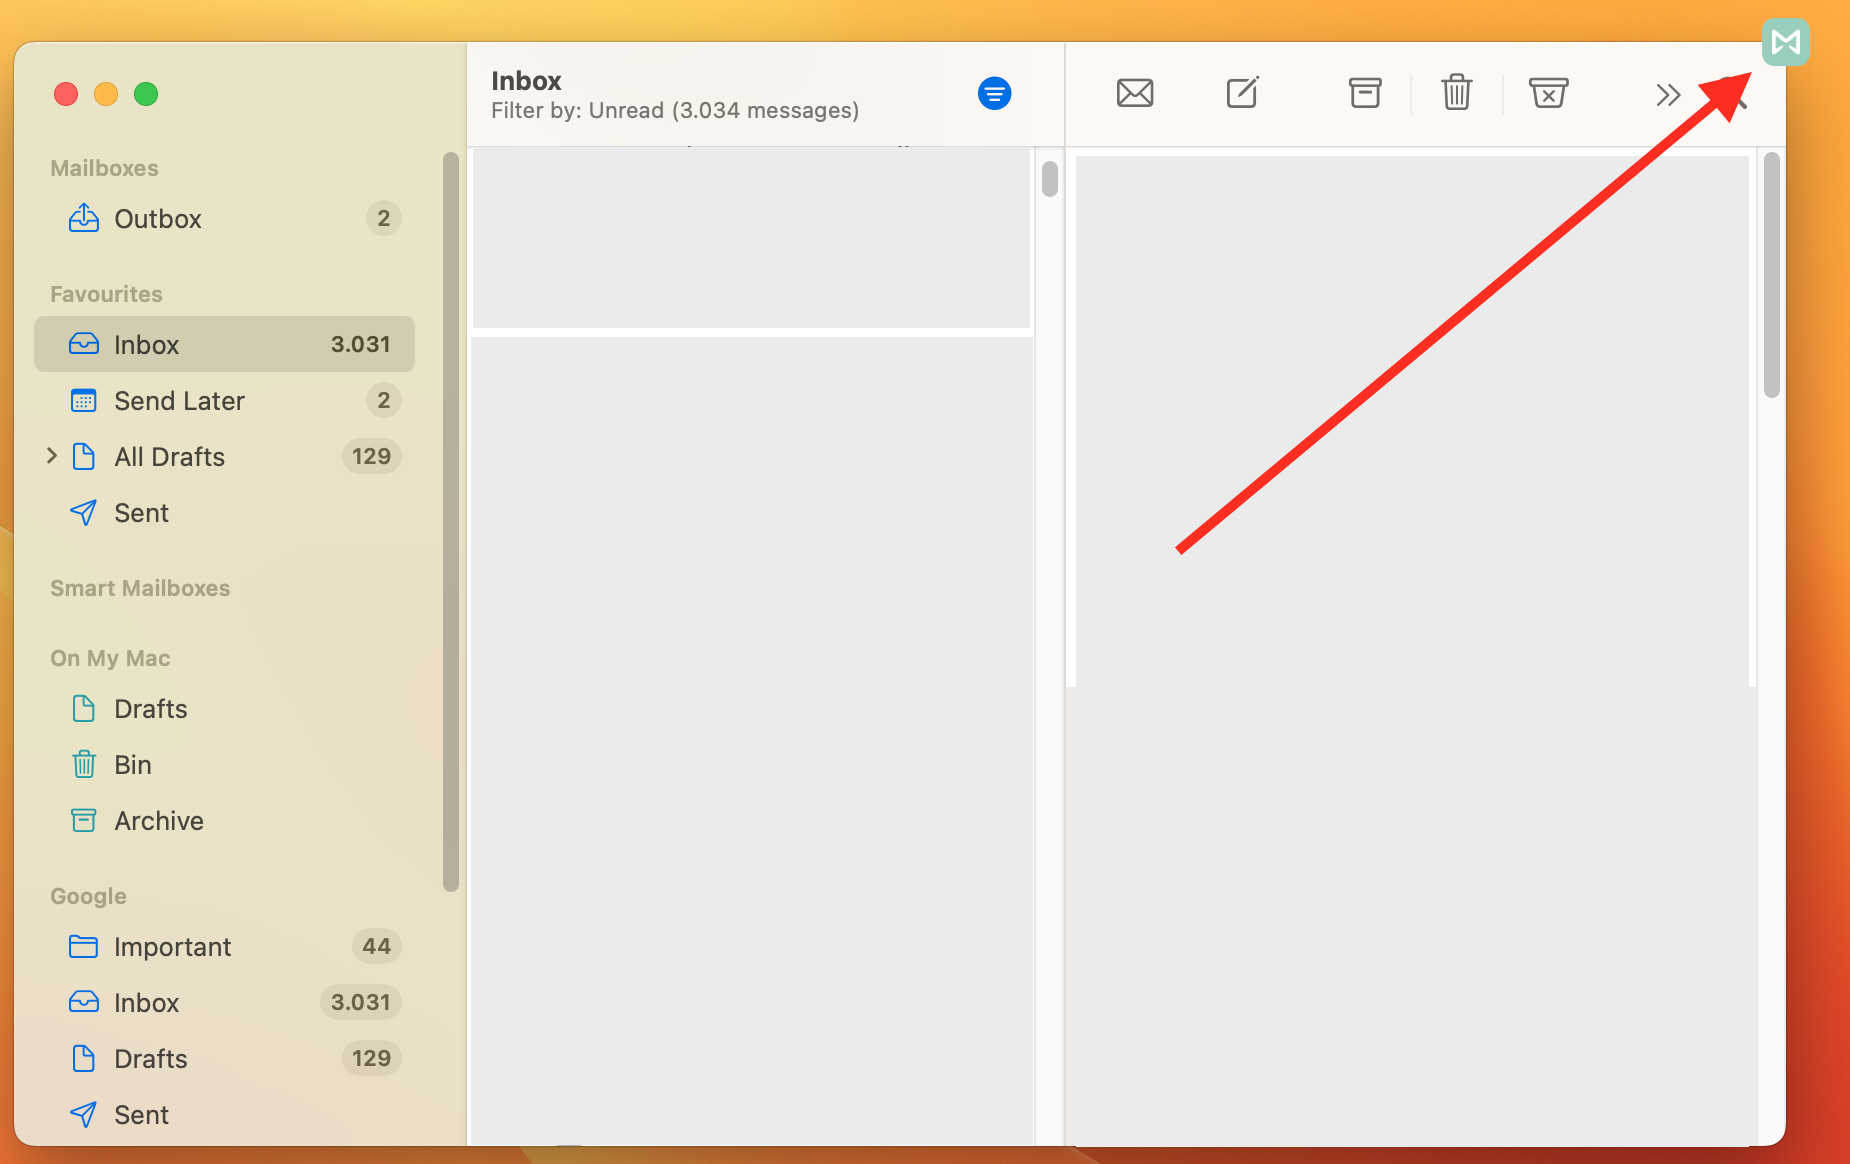
4. Click on the Mailbutler icon to open the Mailbutler Sidebar.
A single checkmark and the information Not yet opened indicate that your email is being tracked but the recipient hasn’t opened it yet.
Two blue double checkmarks and the date and time of the first opening indicate that your email has been read.
If you want to see more detailed tracking information, head to this article to learn how to reveal Tracking Details.
Outlook
1. Make sure you that have Tracking enabled by default. Or enable it manually. For instructions see here.
2. Compose a new email and open the Mailbutler sidebar.
Please note that you need to keep the Mailbutler sidebar open when sending your email in order for Tracking to work.
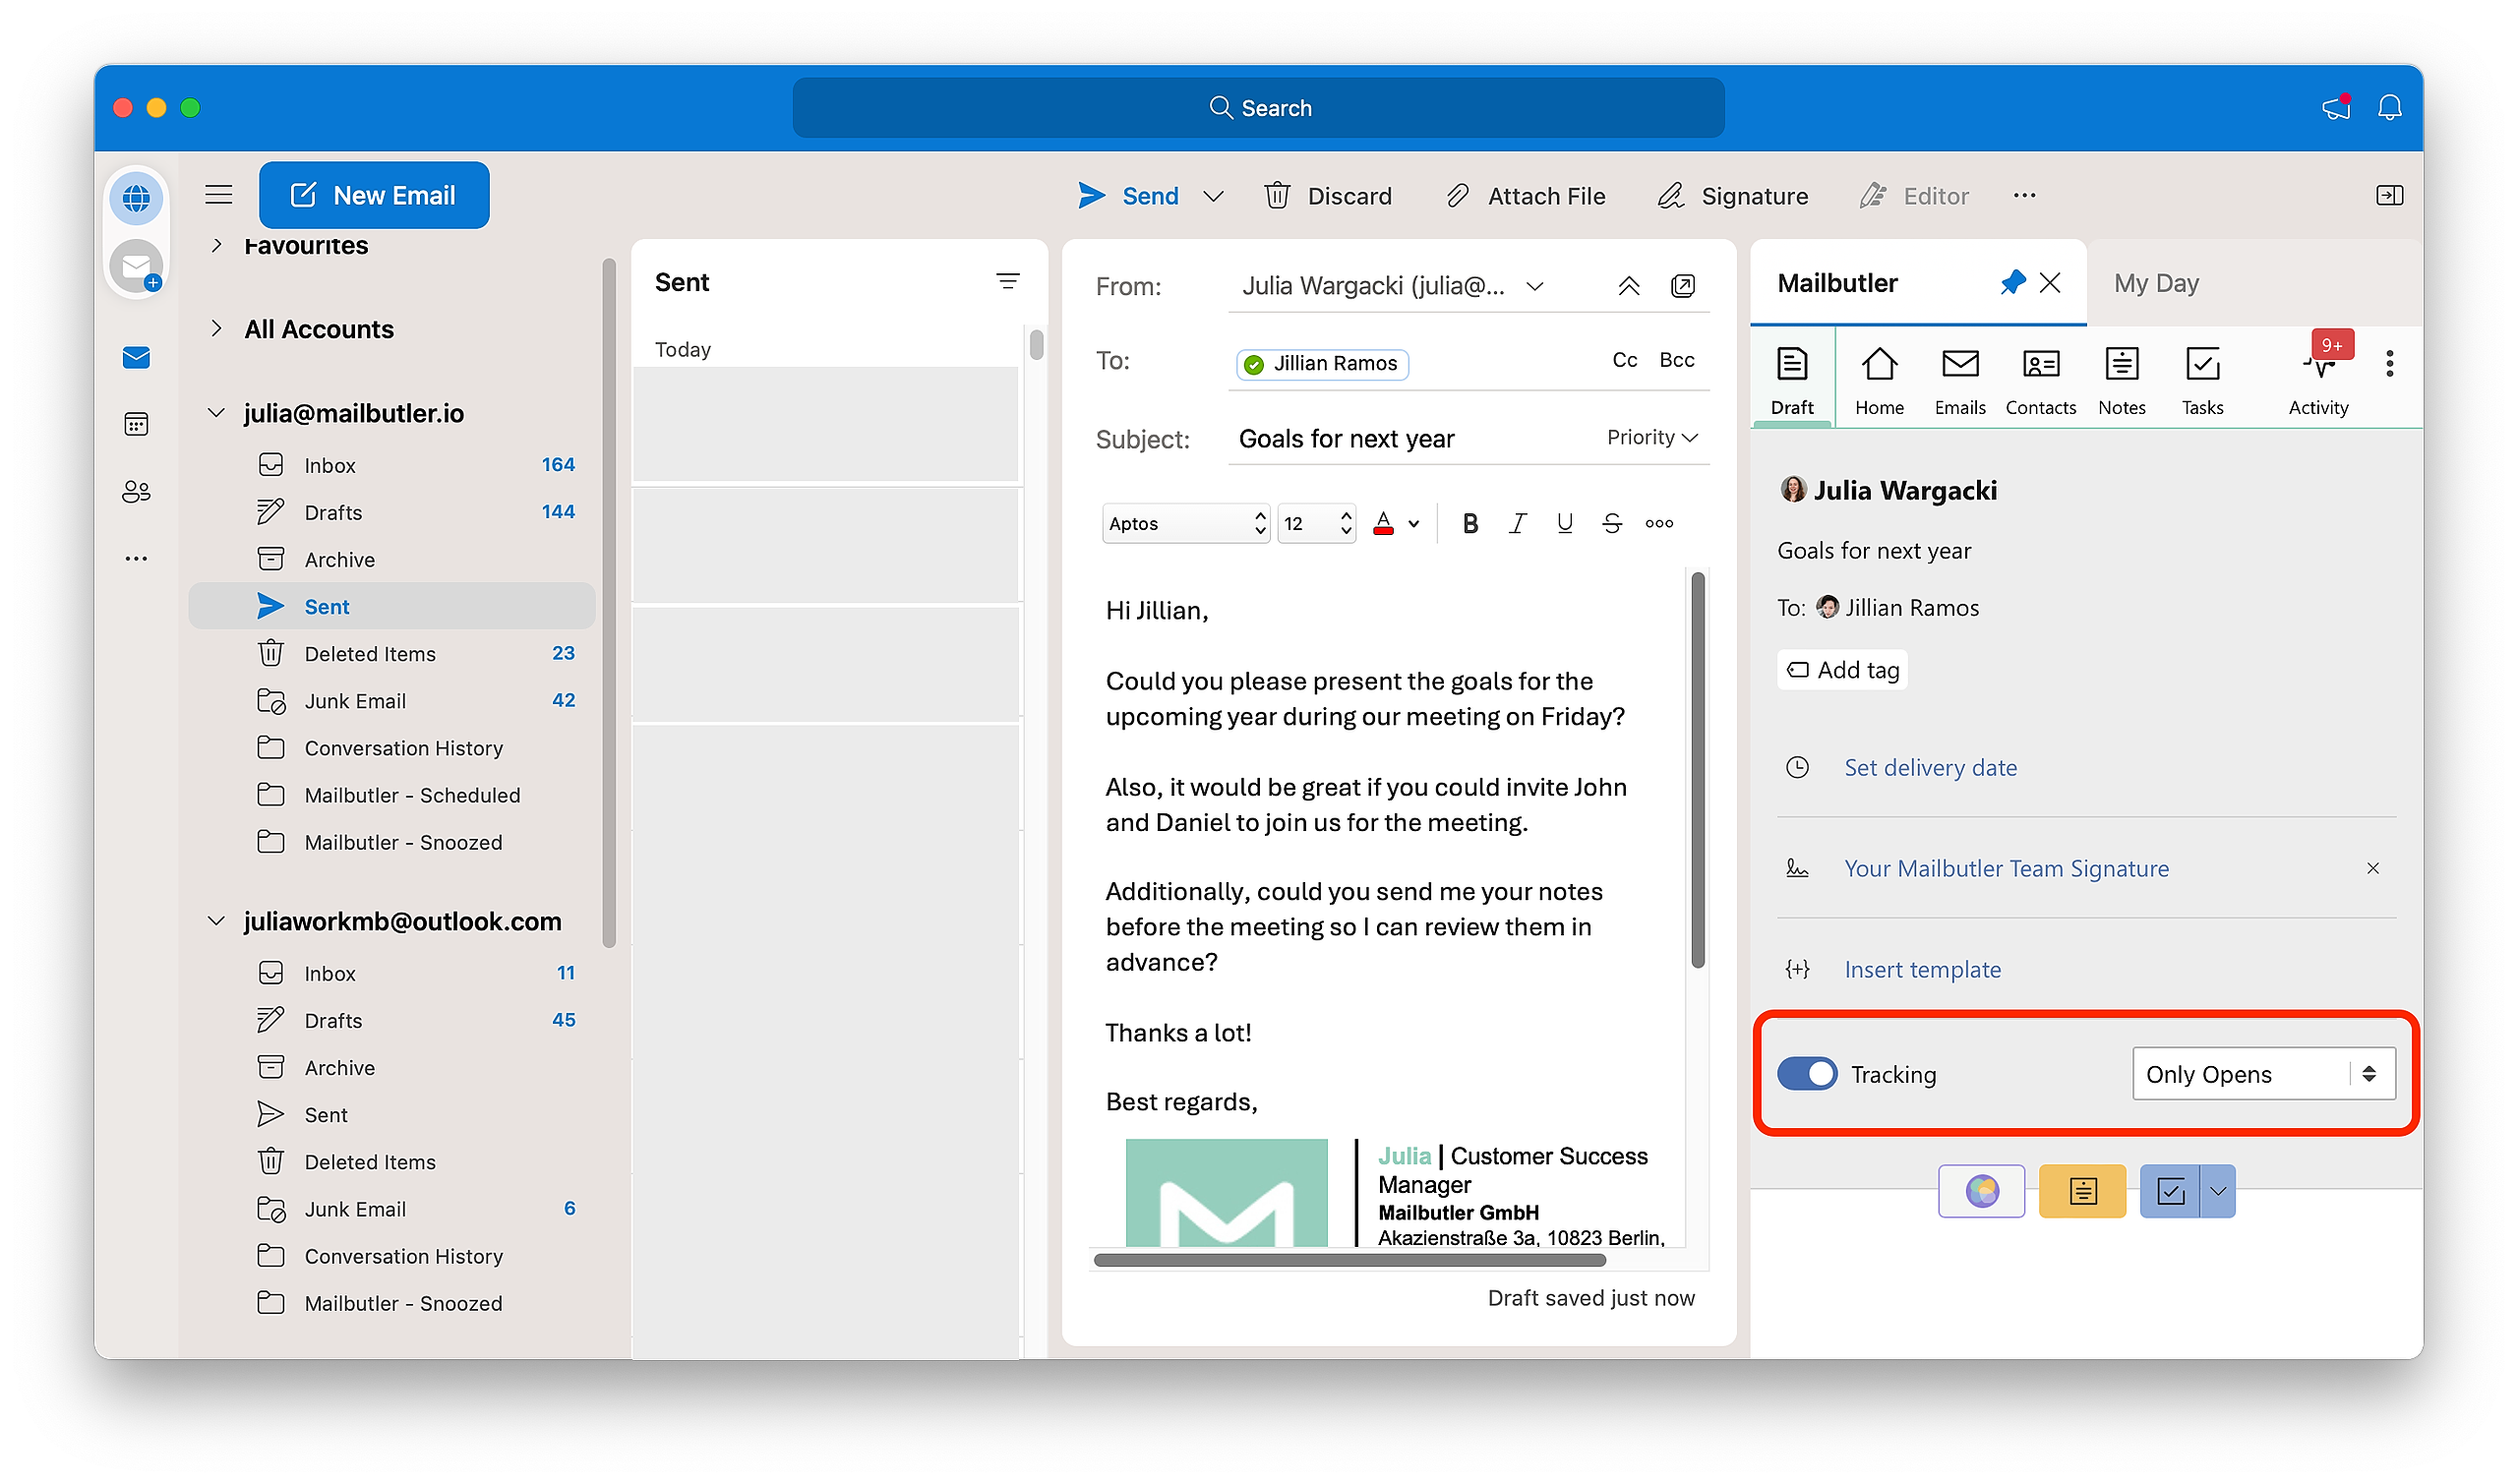
3. Double-check whether Open Tracking is enabled in the sidebar. Depending on which email server you are using, you might have to enable it manually every time you are sending an email - even if it is enabled by default.
4. Send the email. Your email is being tracked.
5. To check whether your email has been opened, go to your sent folder, select the email and open the Mailbutler sidebar.
The information Not yet opened indicates that your email is being tracked but the recipient hasn’t opened it yet.
The date and time of the first opening indicate that your email has been read.
If you want to see more detailed tracking information, head to this article to learn how to reveal Tracking Details.
How do I enable Open Tracking?
Apple Mail
You can either enable Open Tracking by default. Or you can enable Open Tracking manually for particular emails that you want to track.
Enable Open Tracking manually:
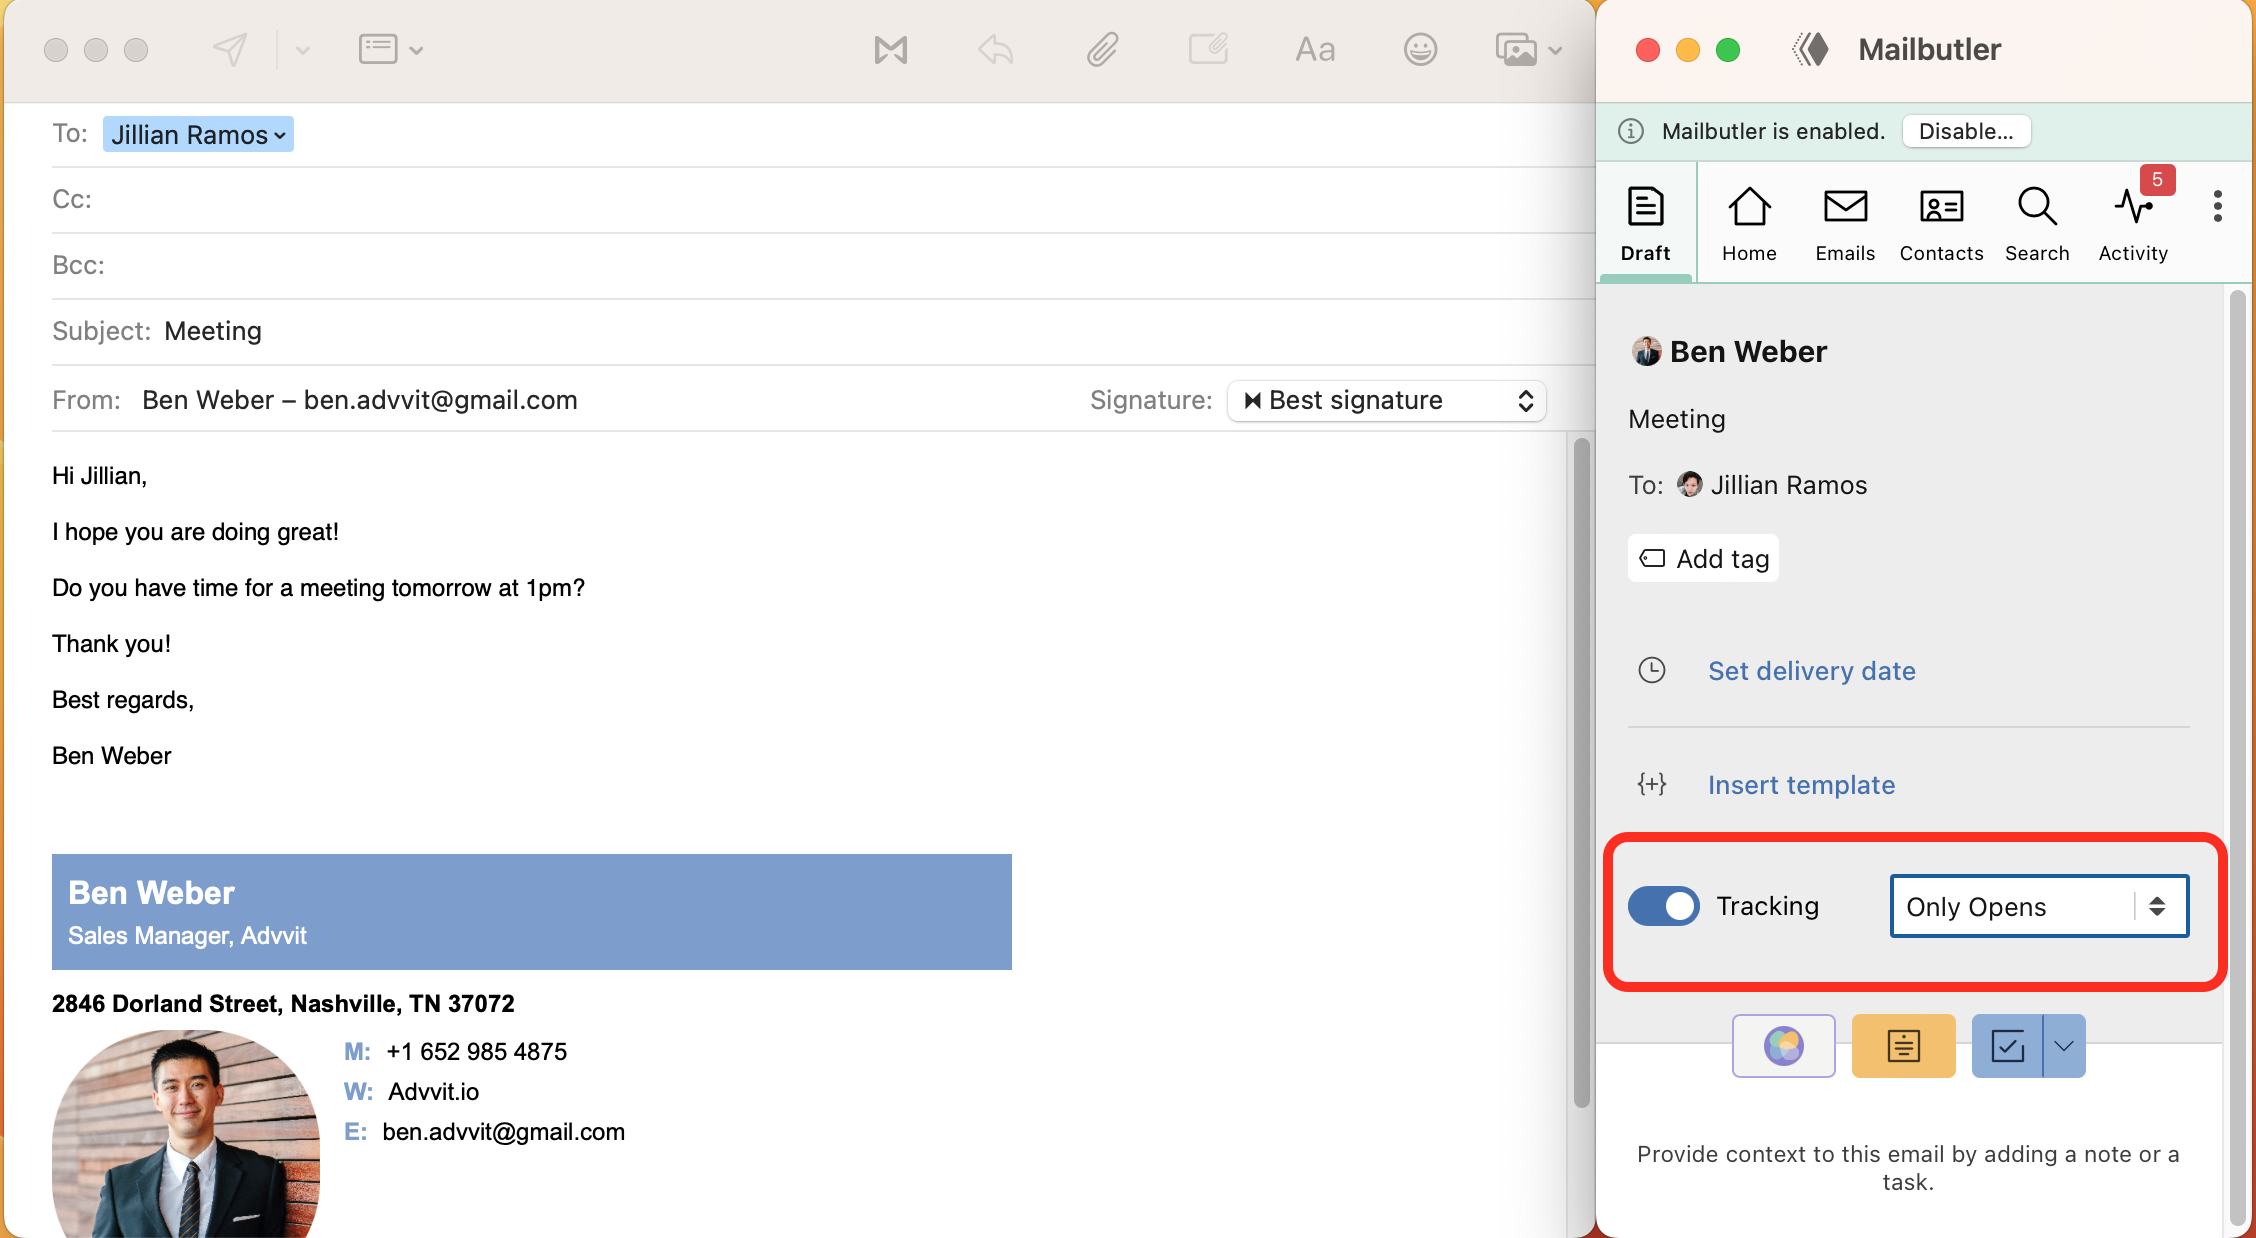
1. To enable Open Tracking manually when composing an email, open the Mailbutler sidebar by clicking on the sidebar icon.
2. Use the toggle button to enable Open Tracking.
Enable Open Tracking by default:
1. Open the Mailbutler sidebar by clicking on the Mailbutler icon.
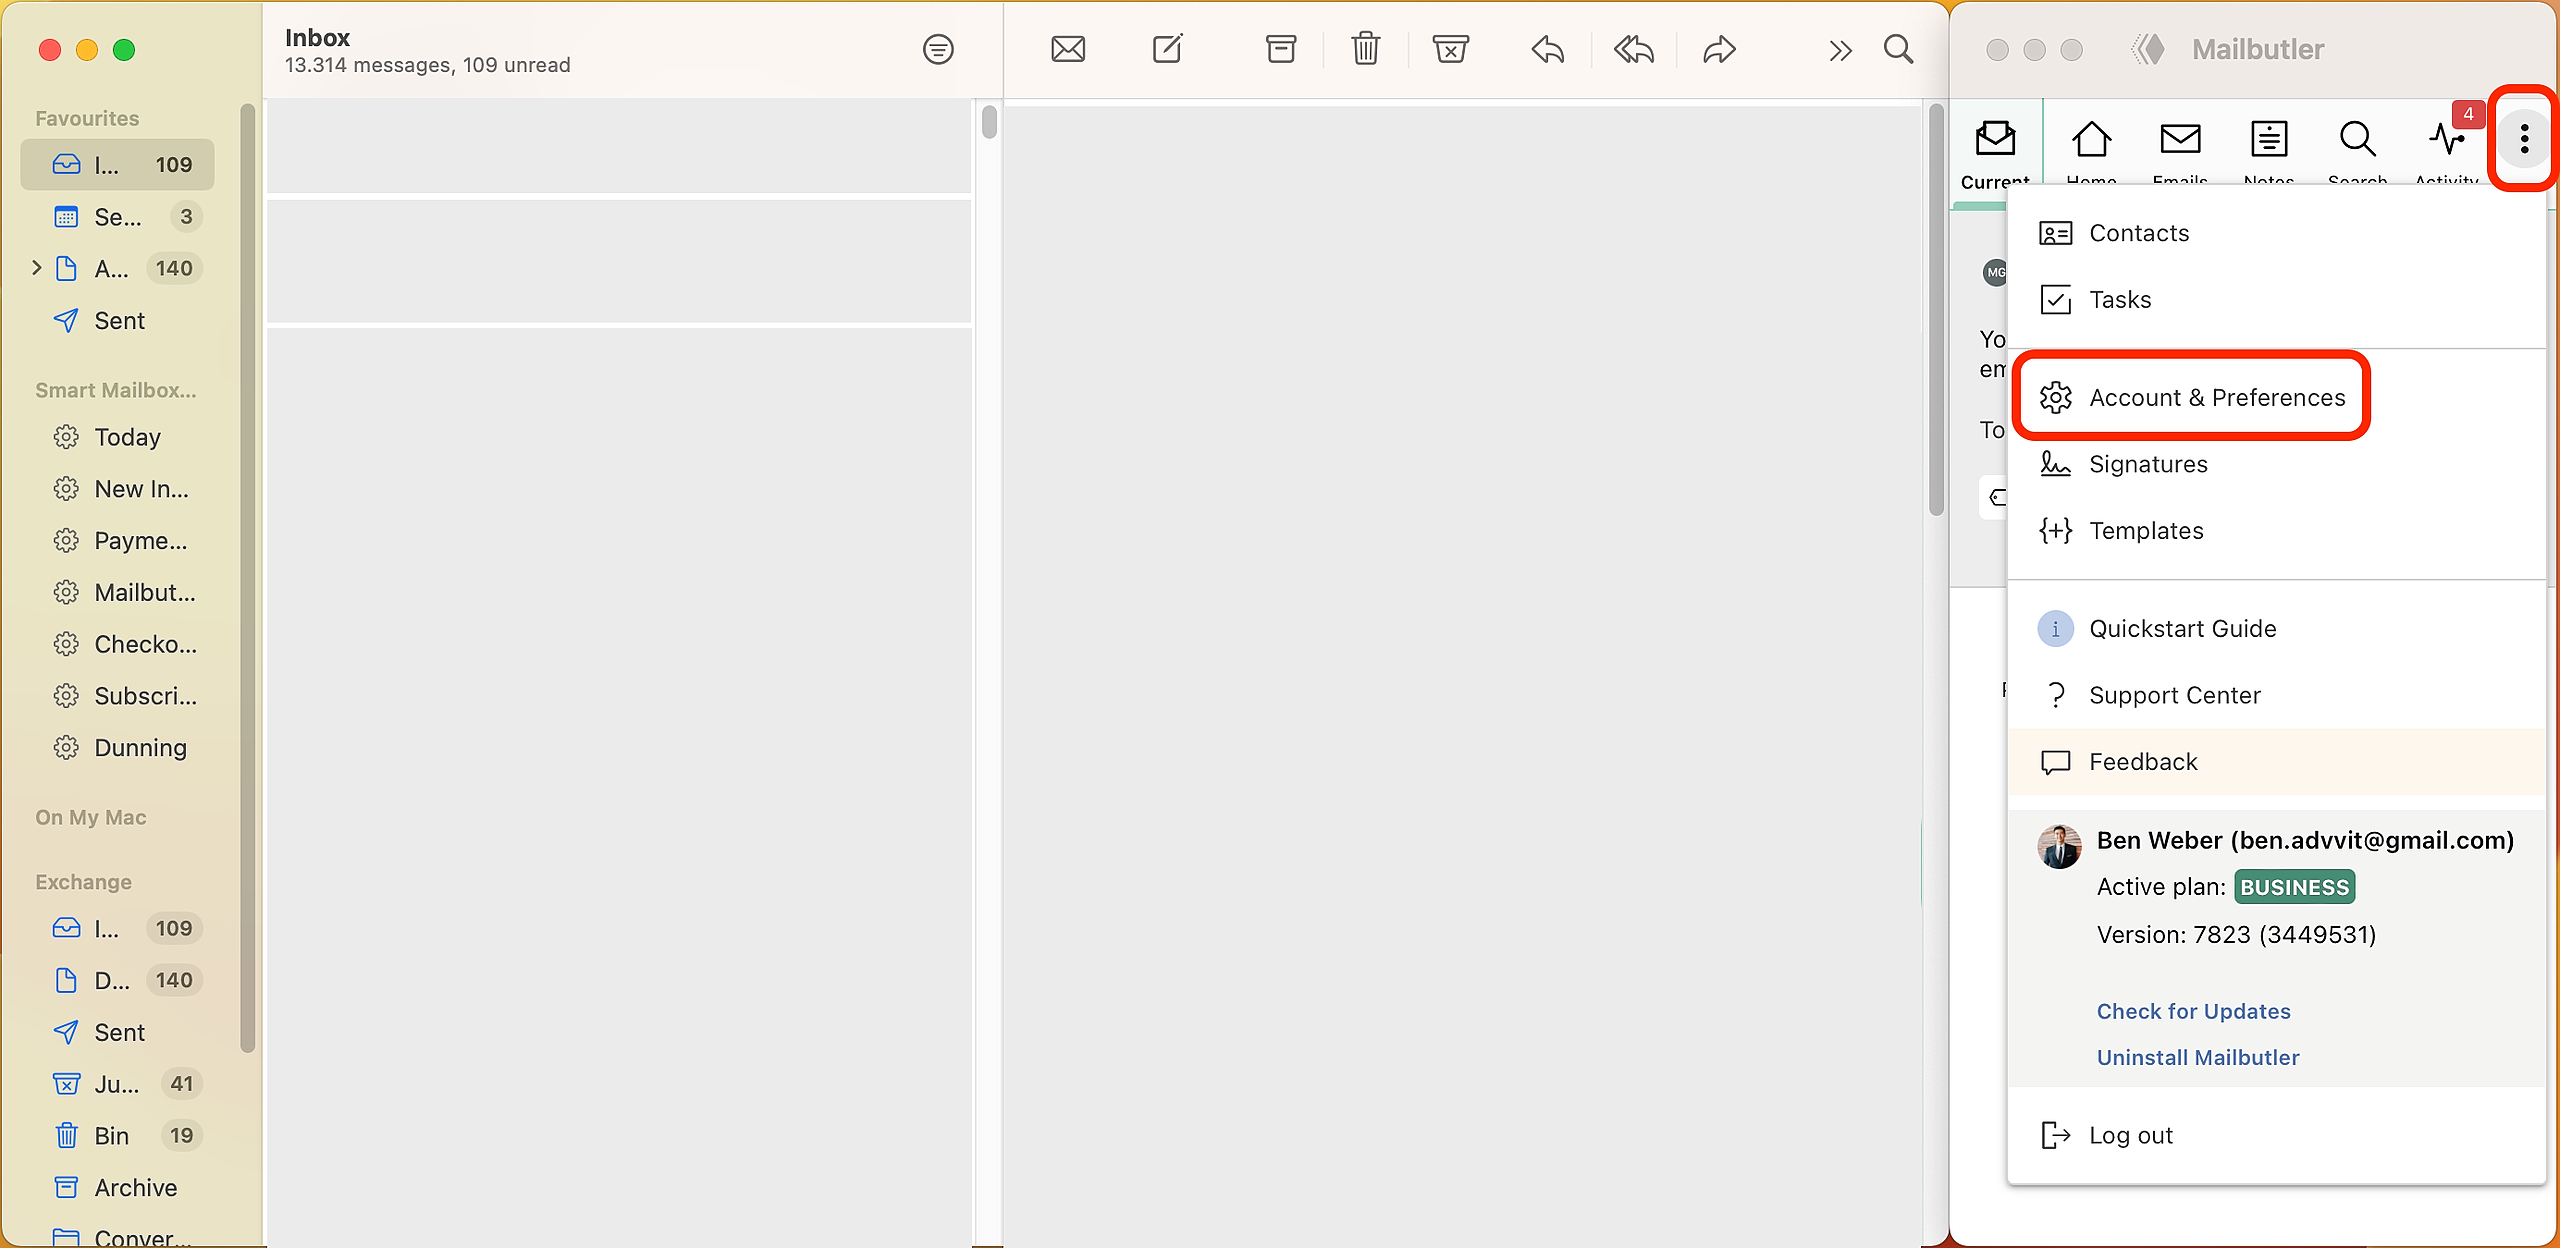
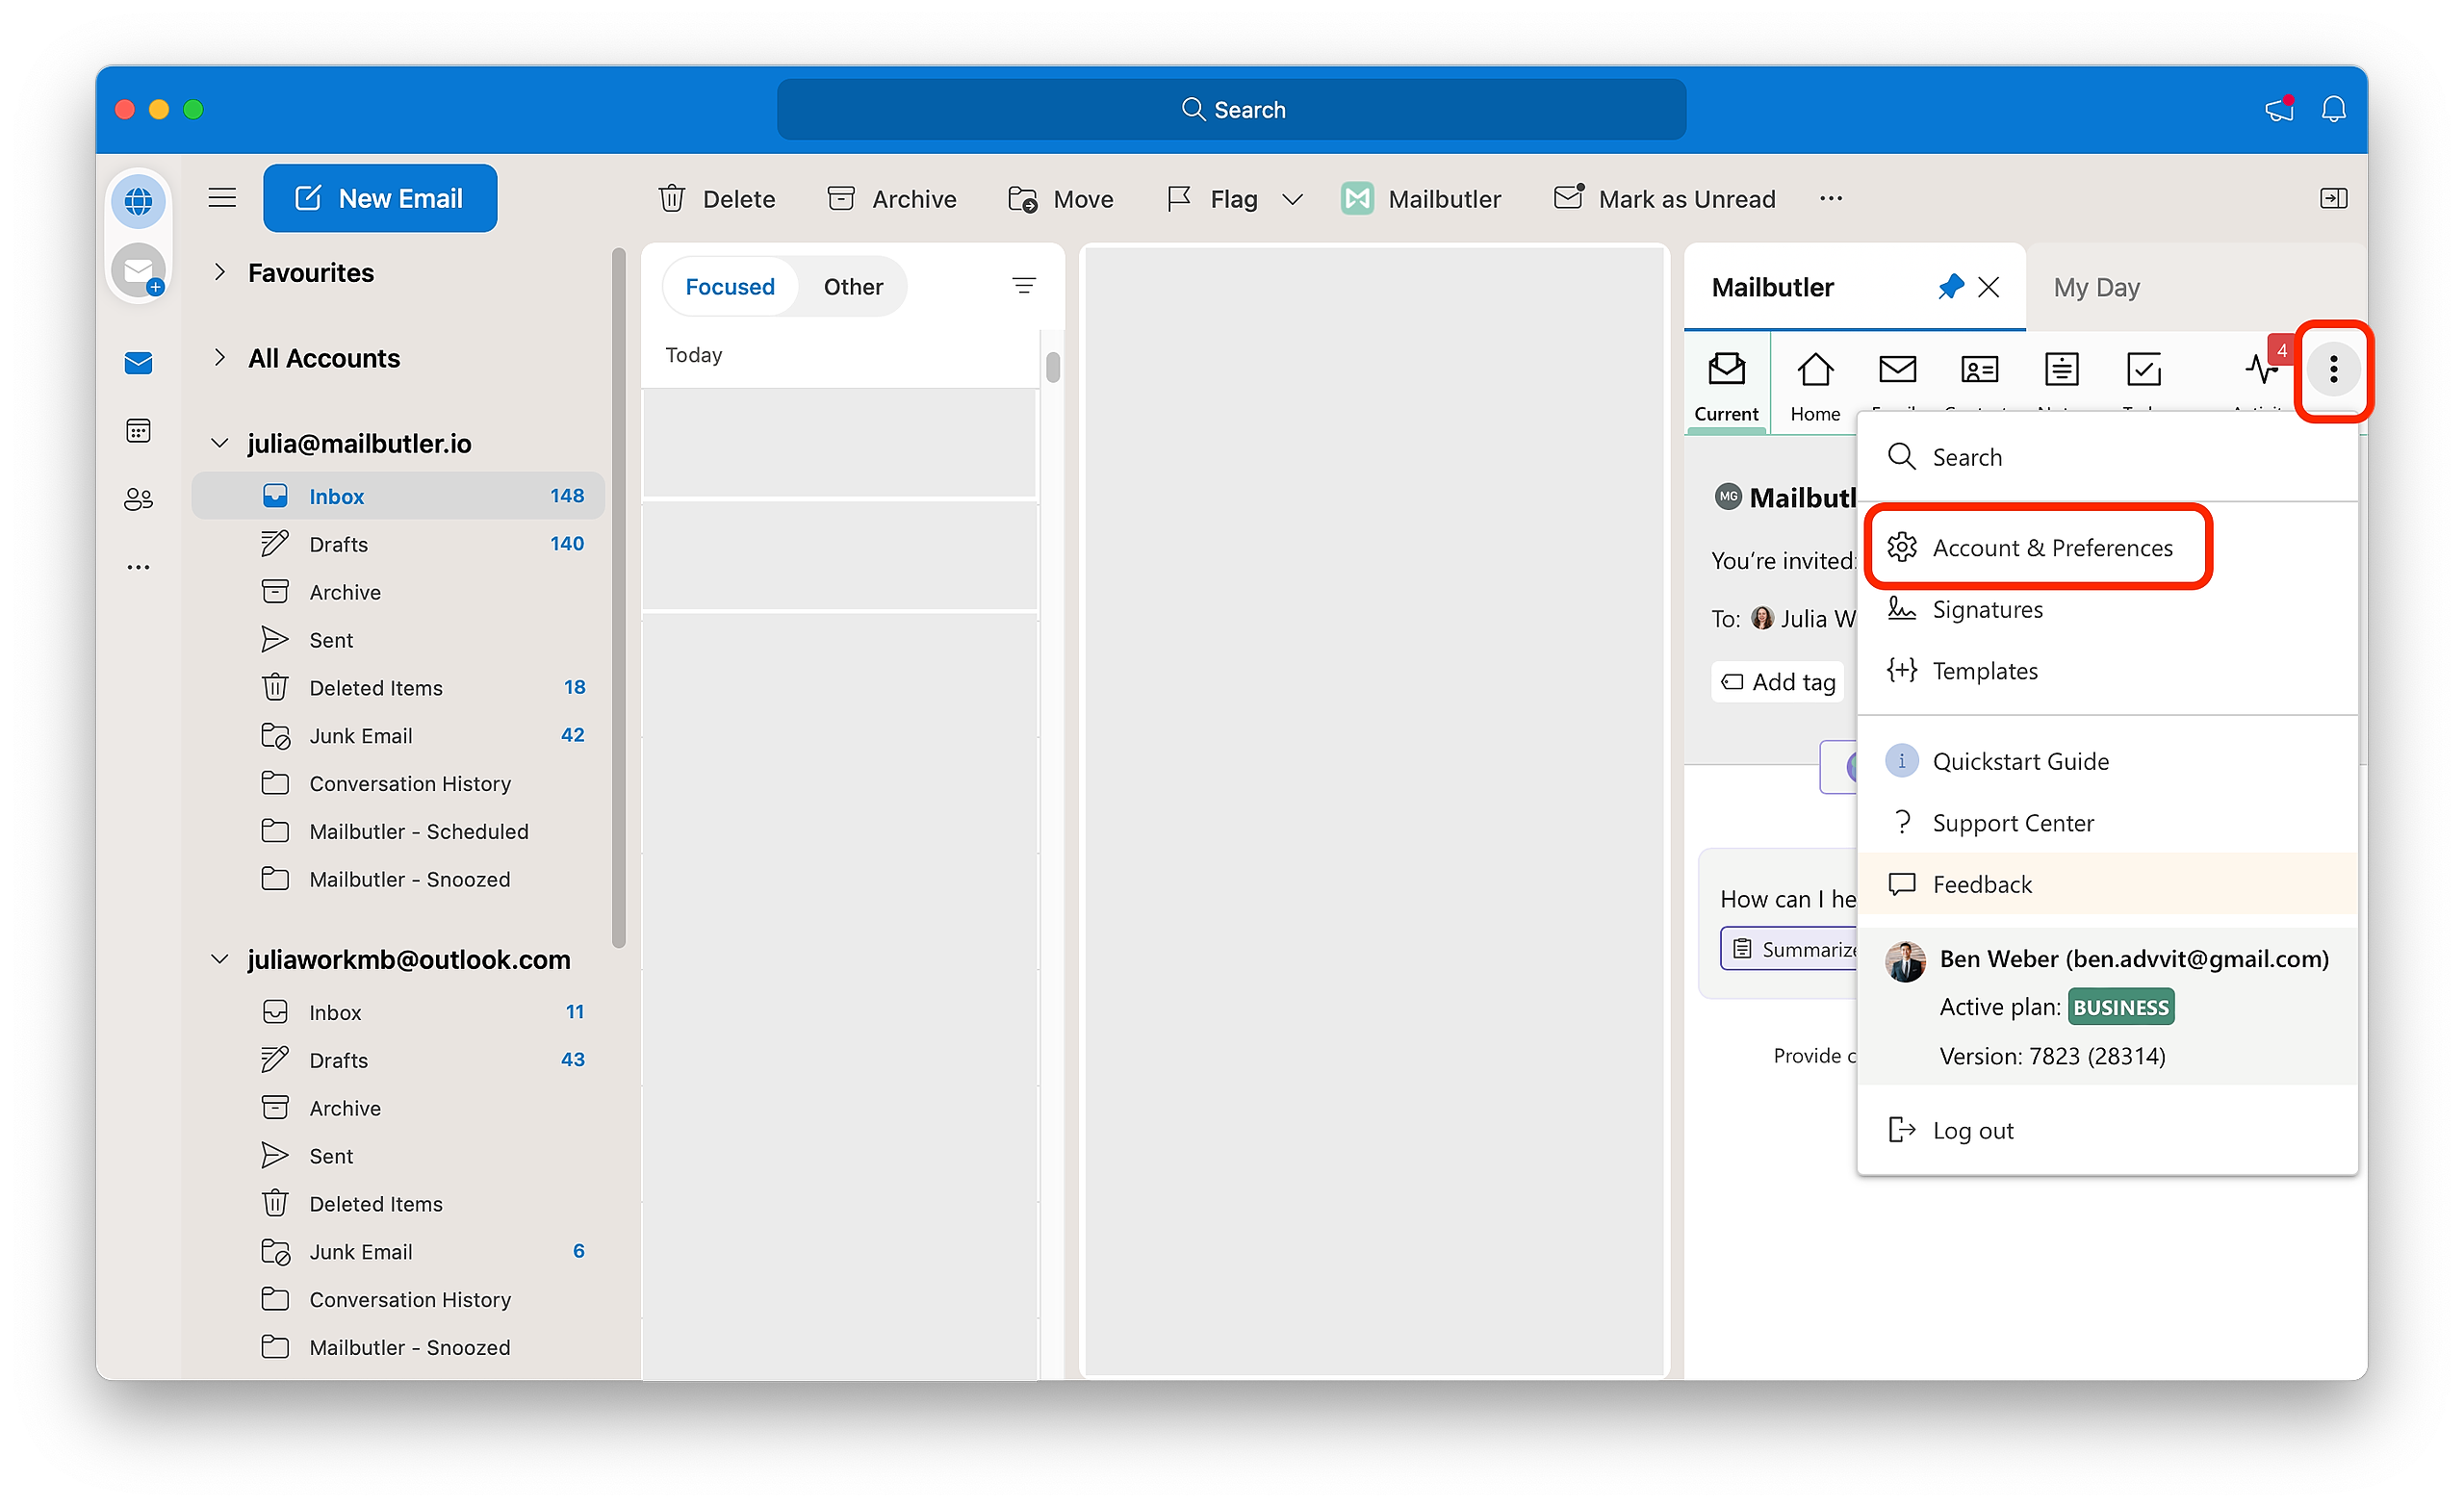
2. In the Mailbutler Sidebar, click the three dots and then Account & Preferences.
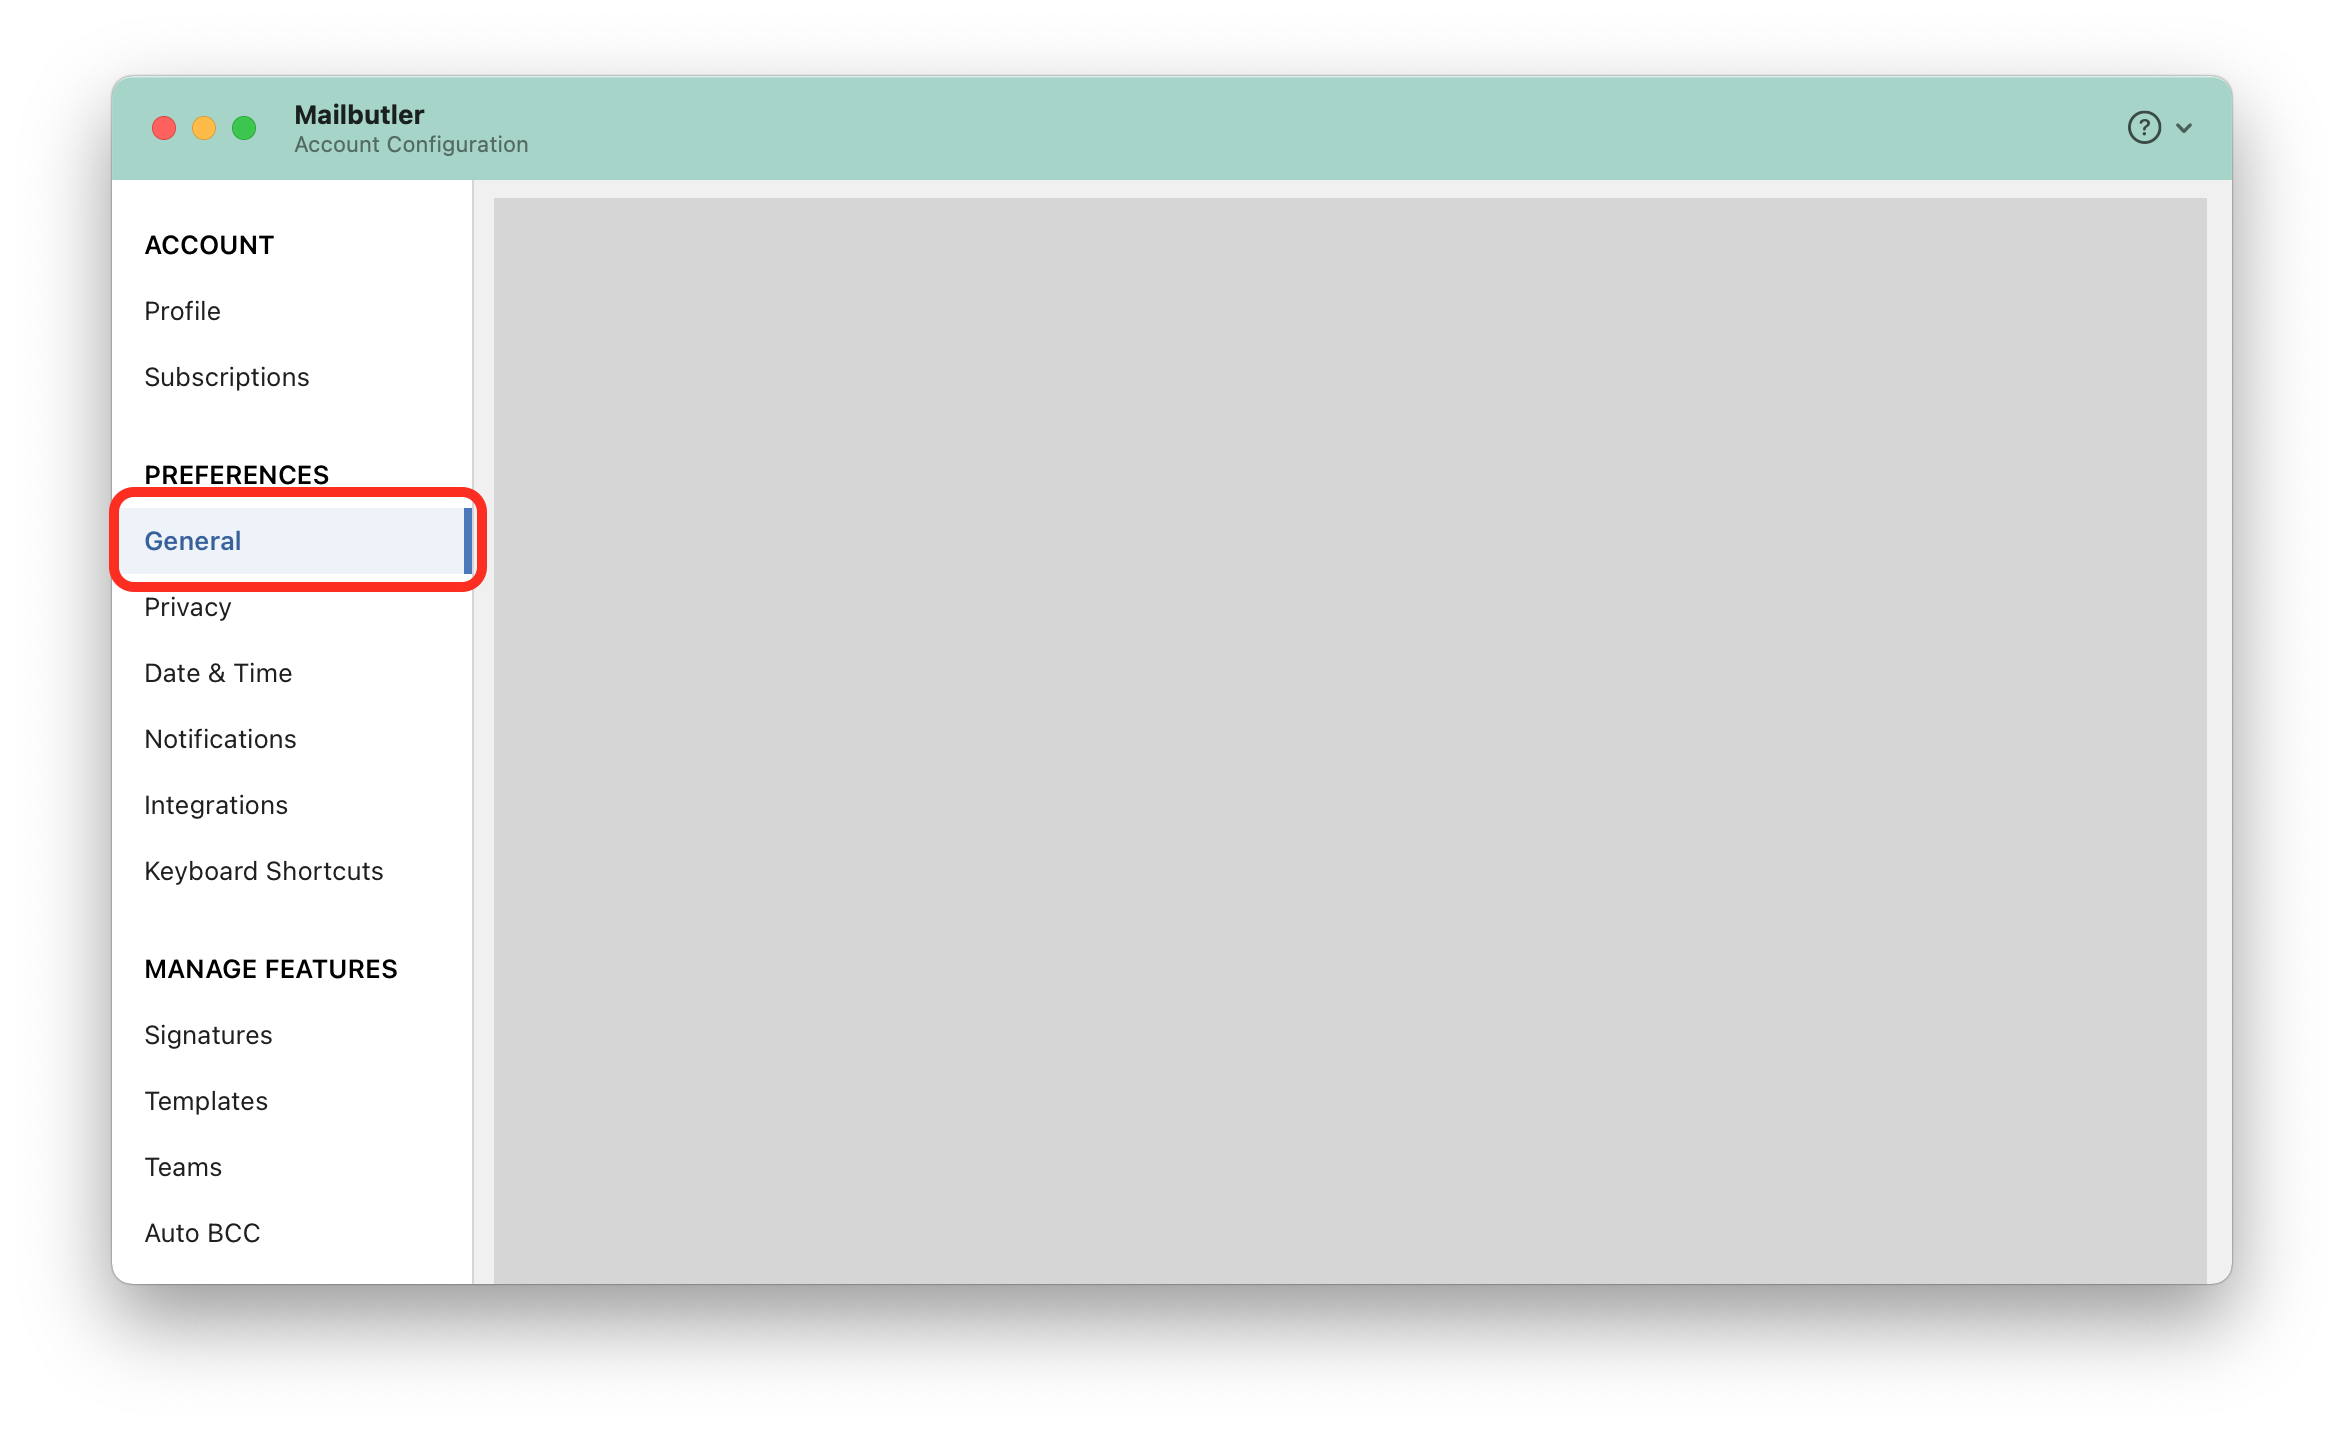
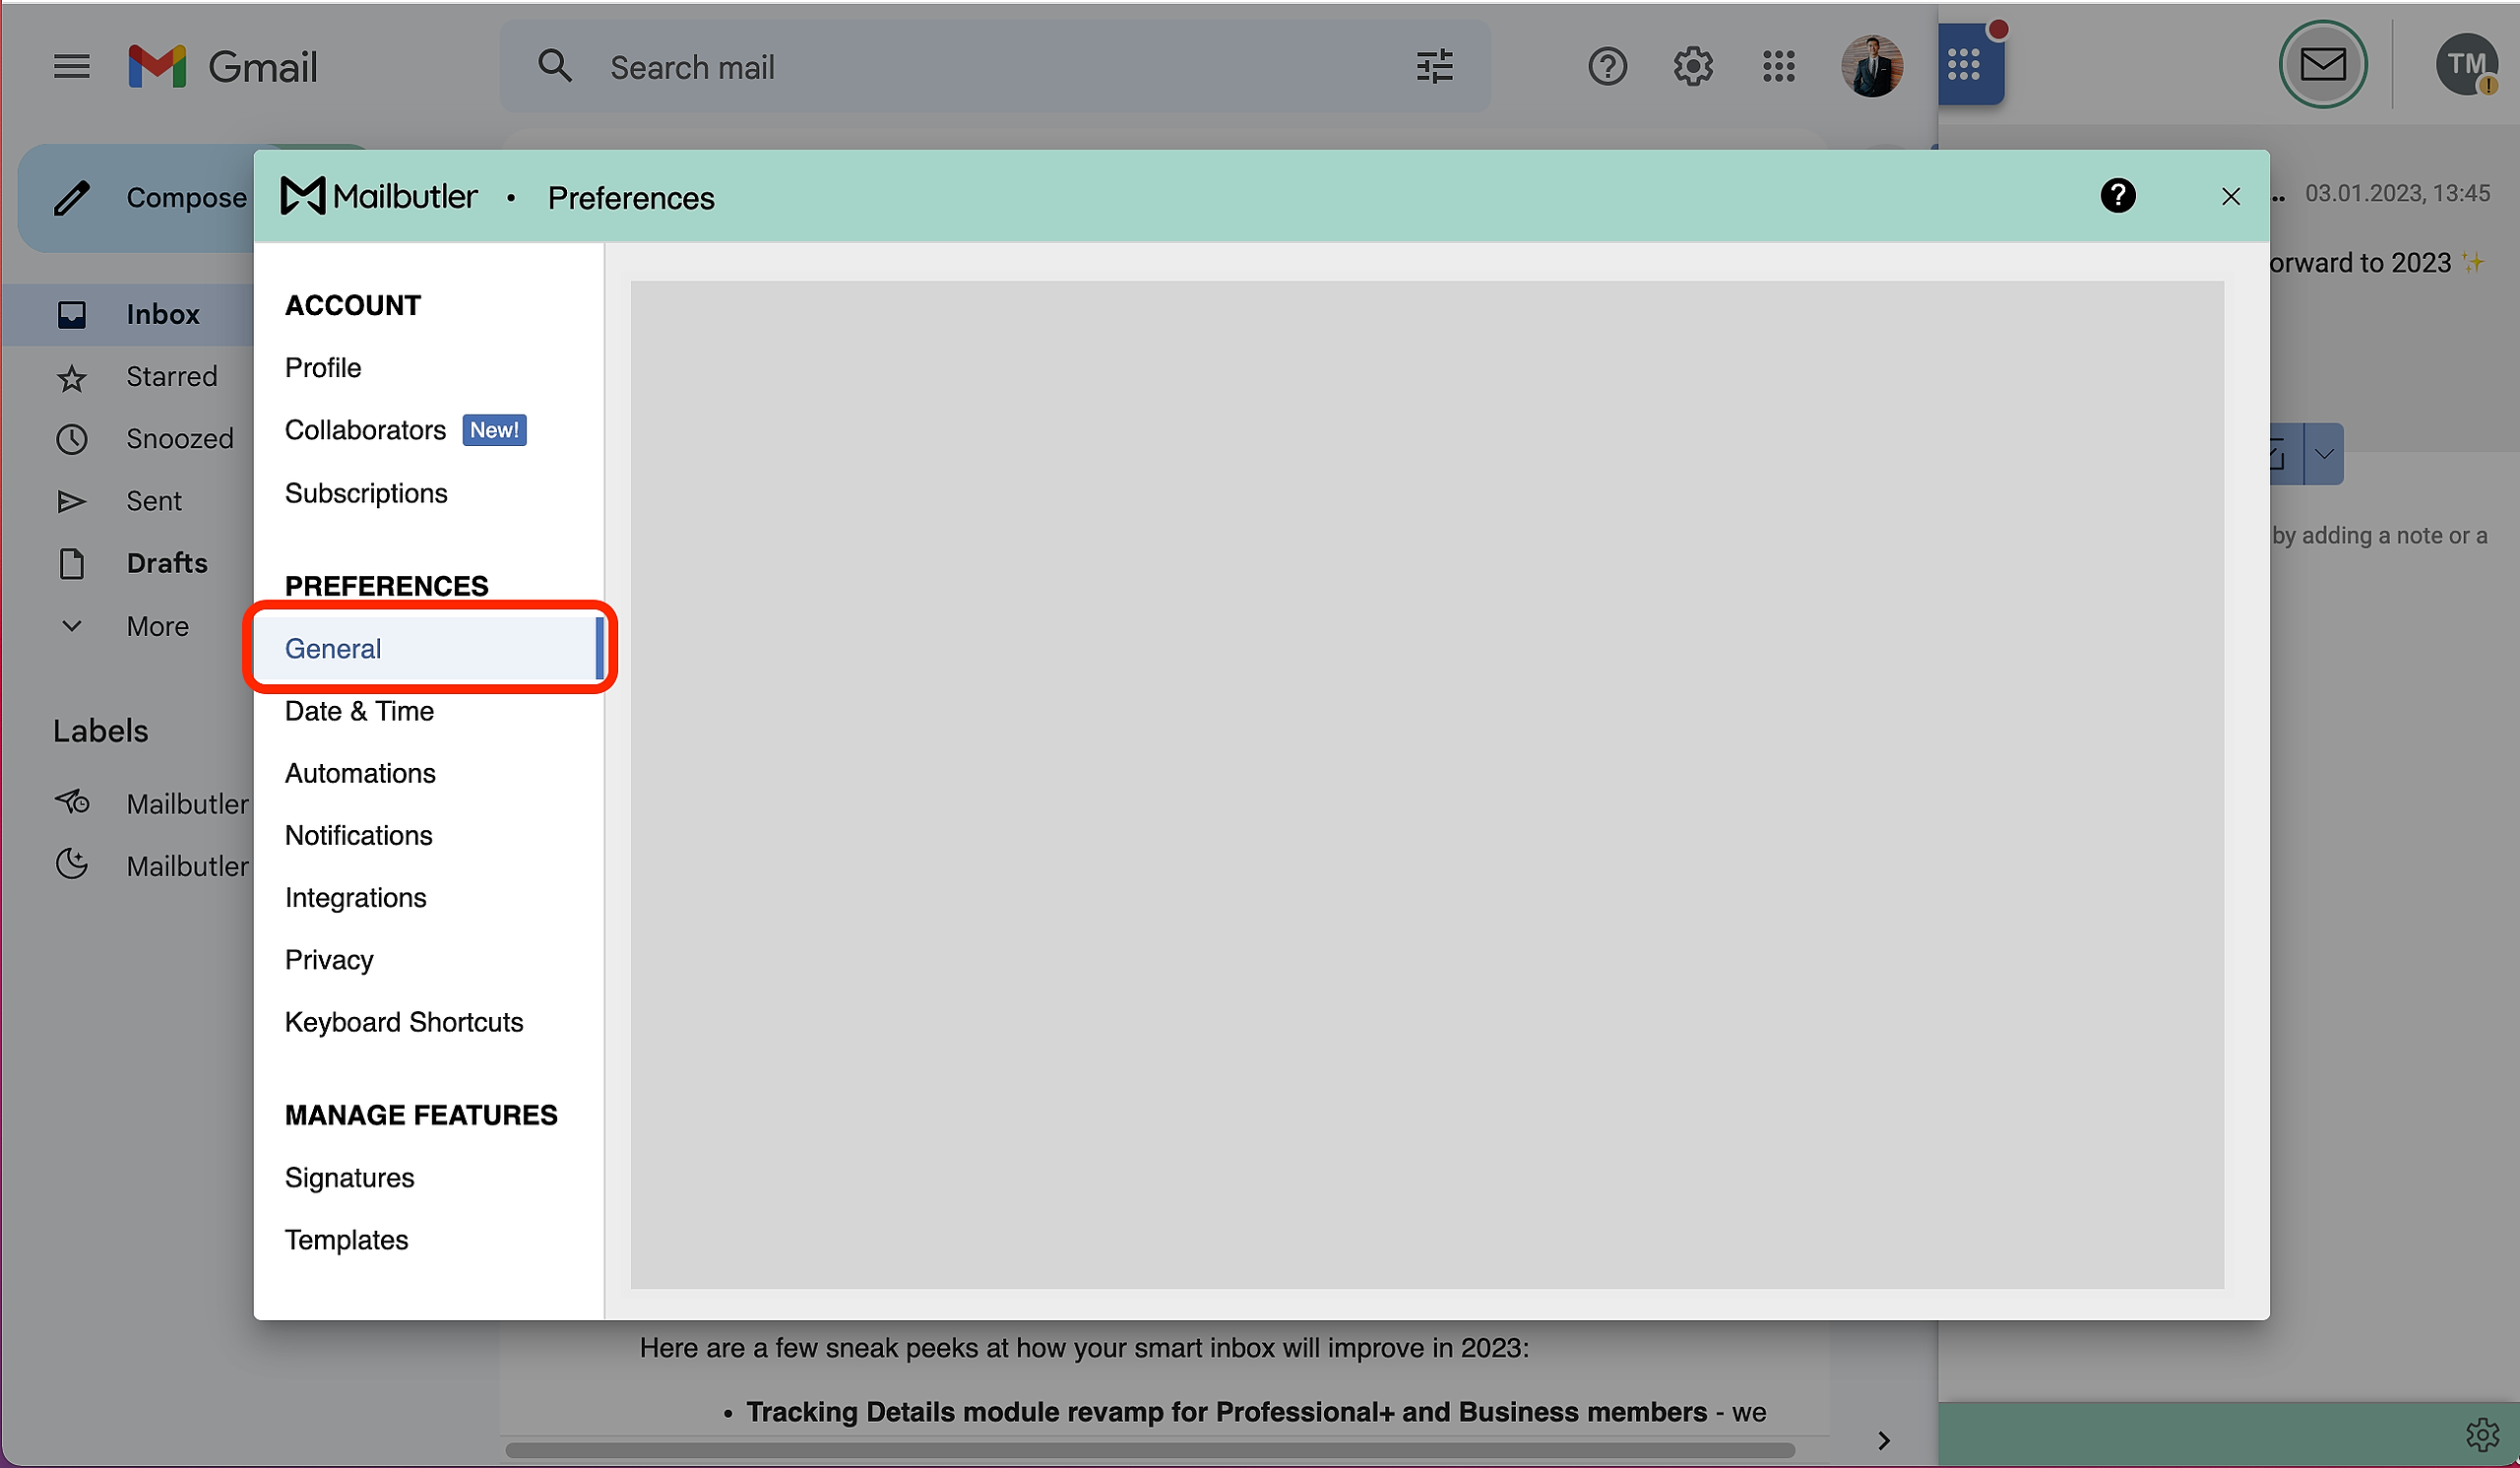
3. A new window will open. Select General under Preferences in the sidebar on the left.
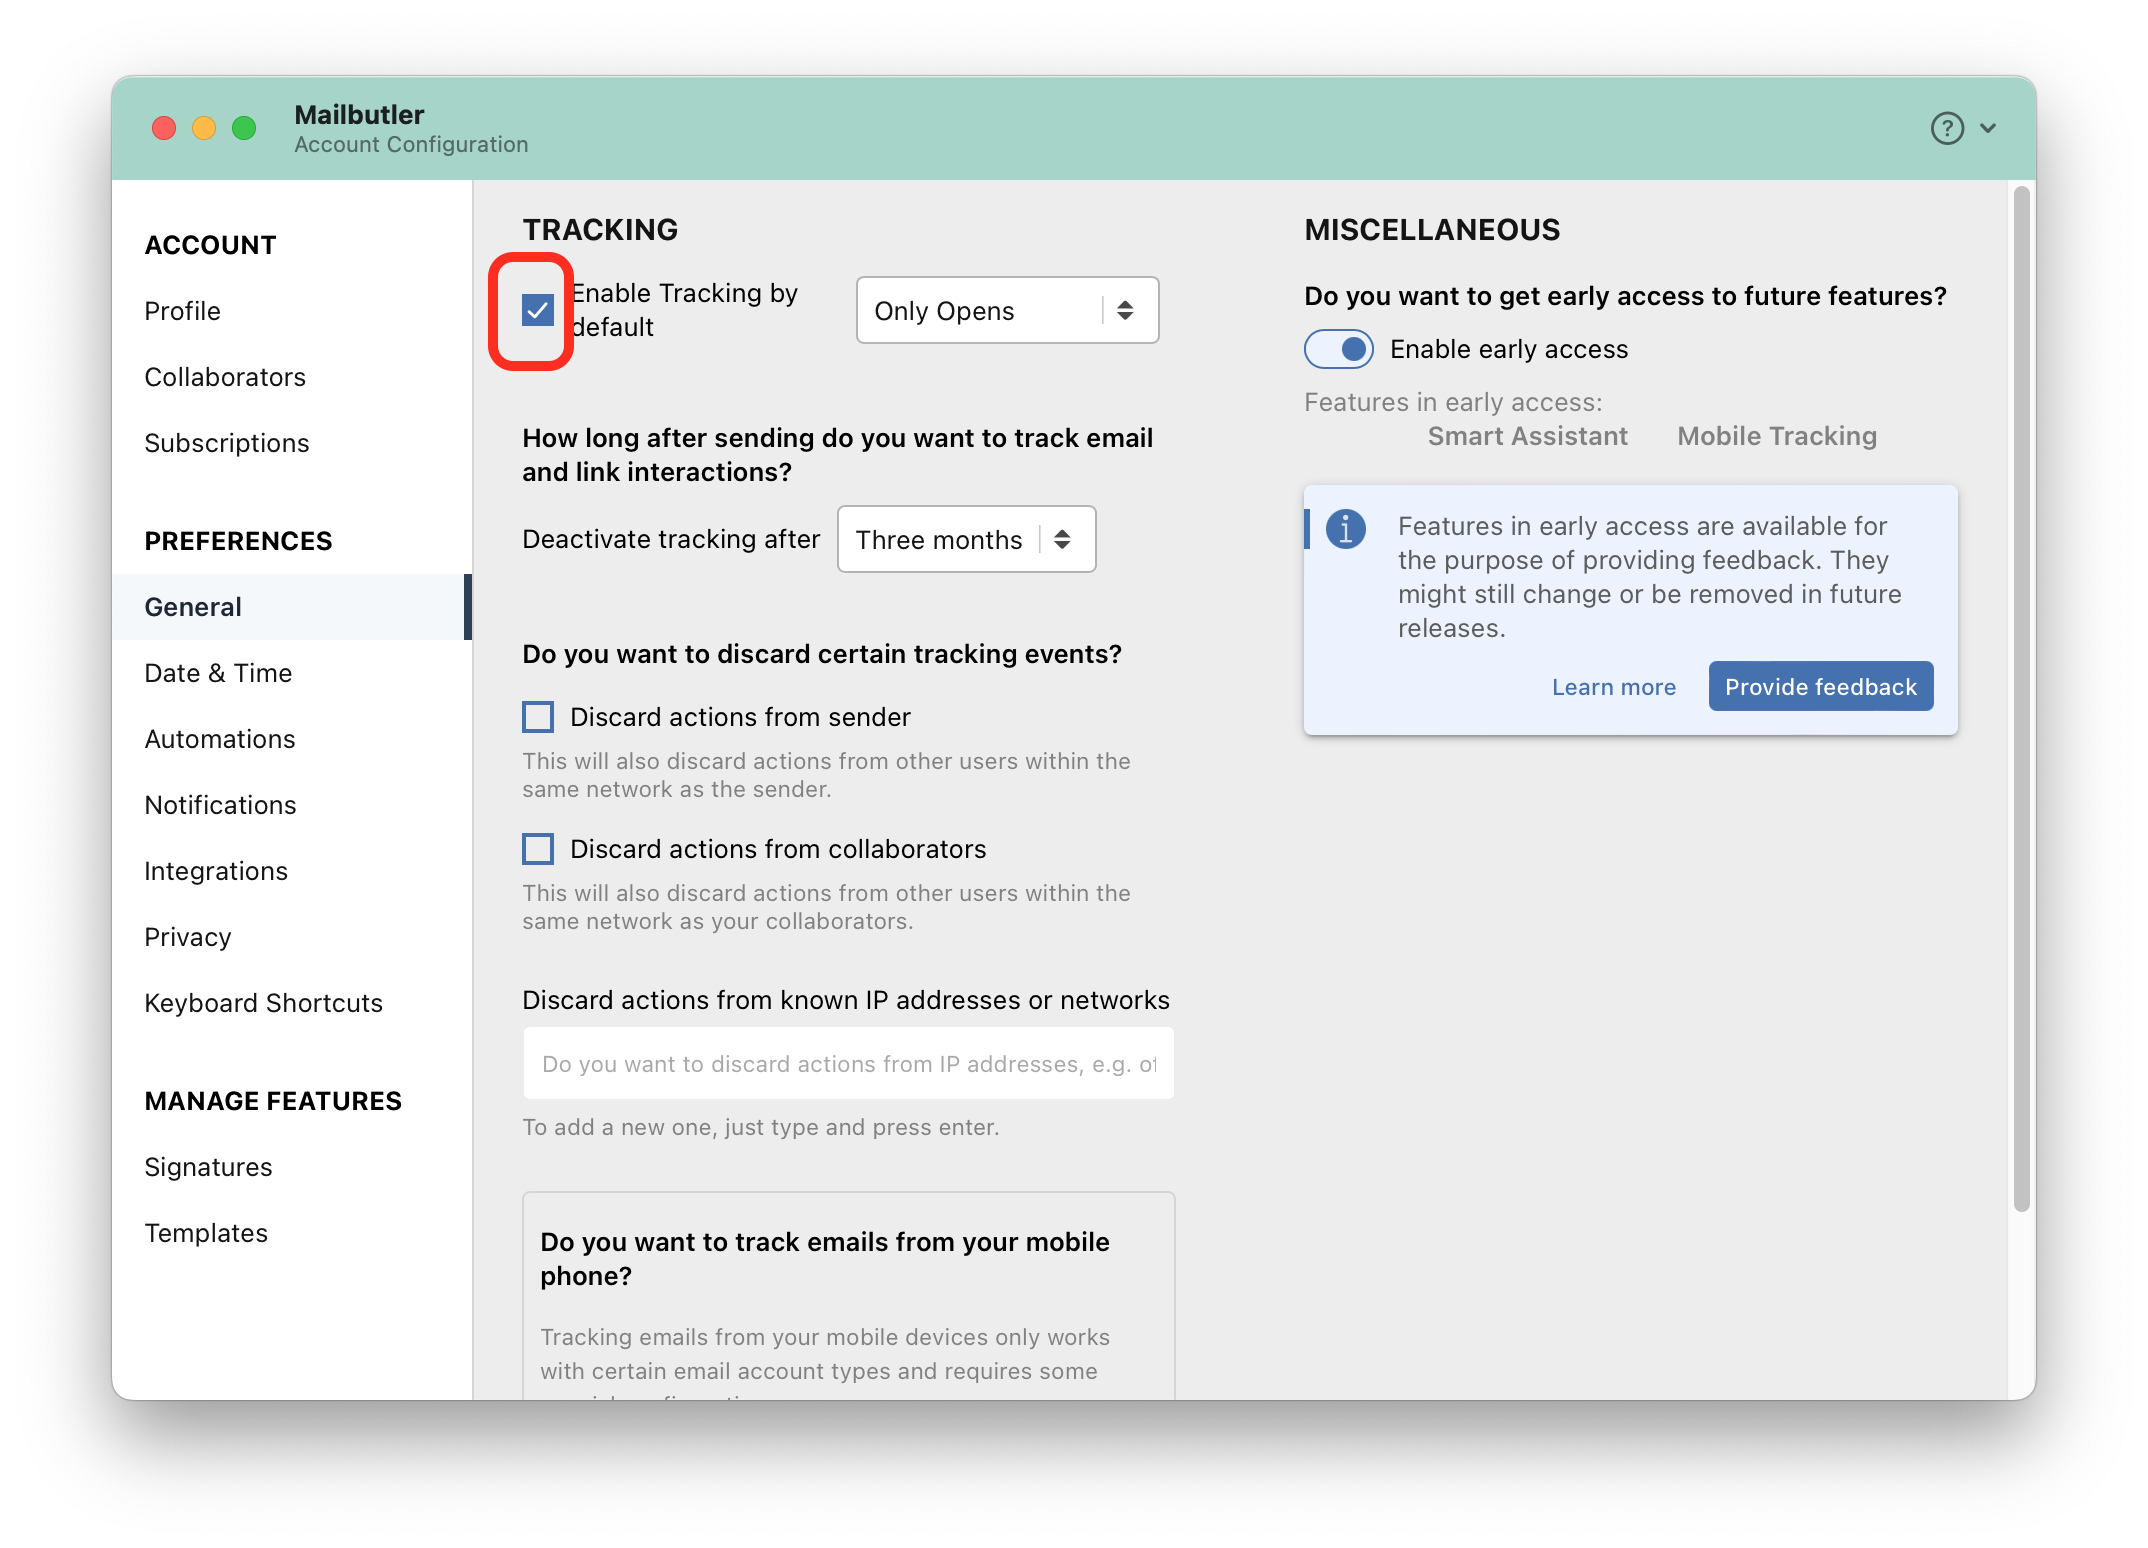
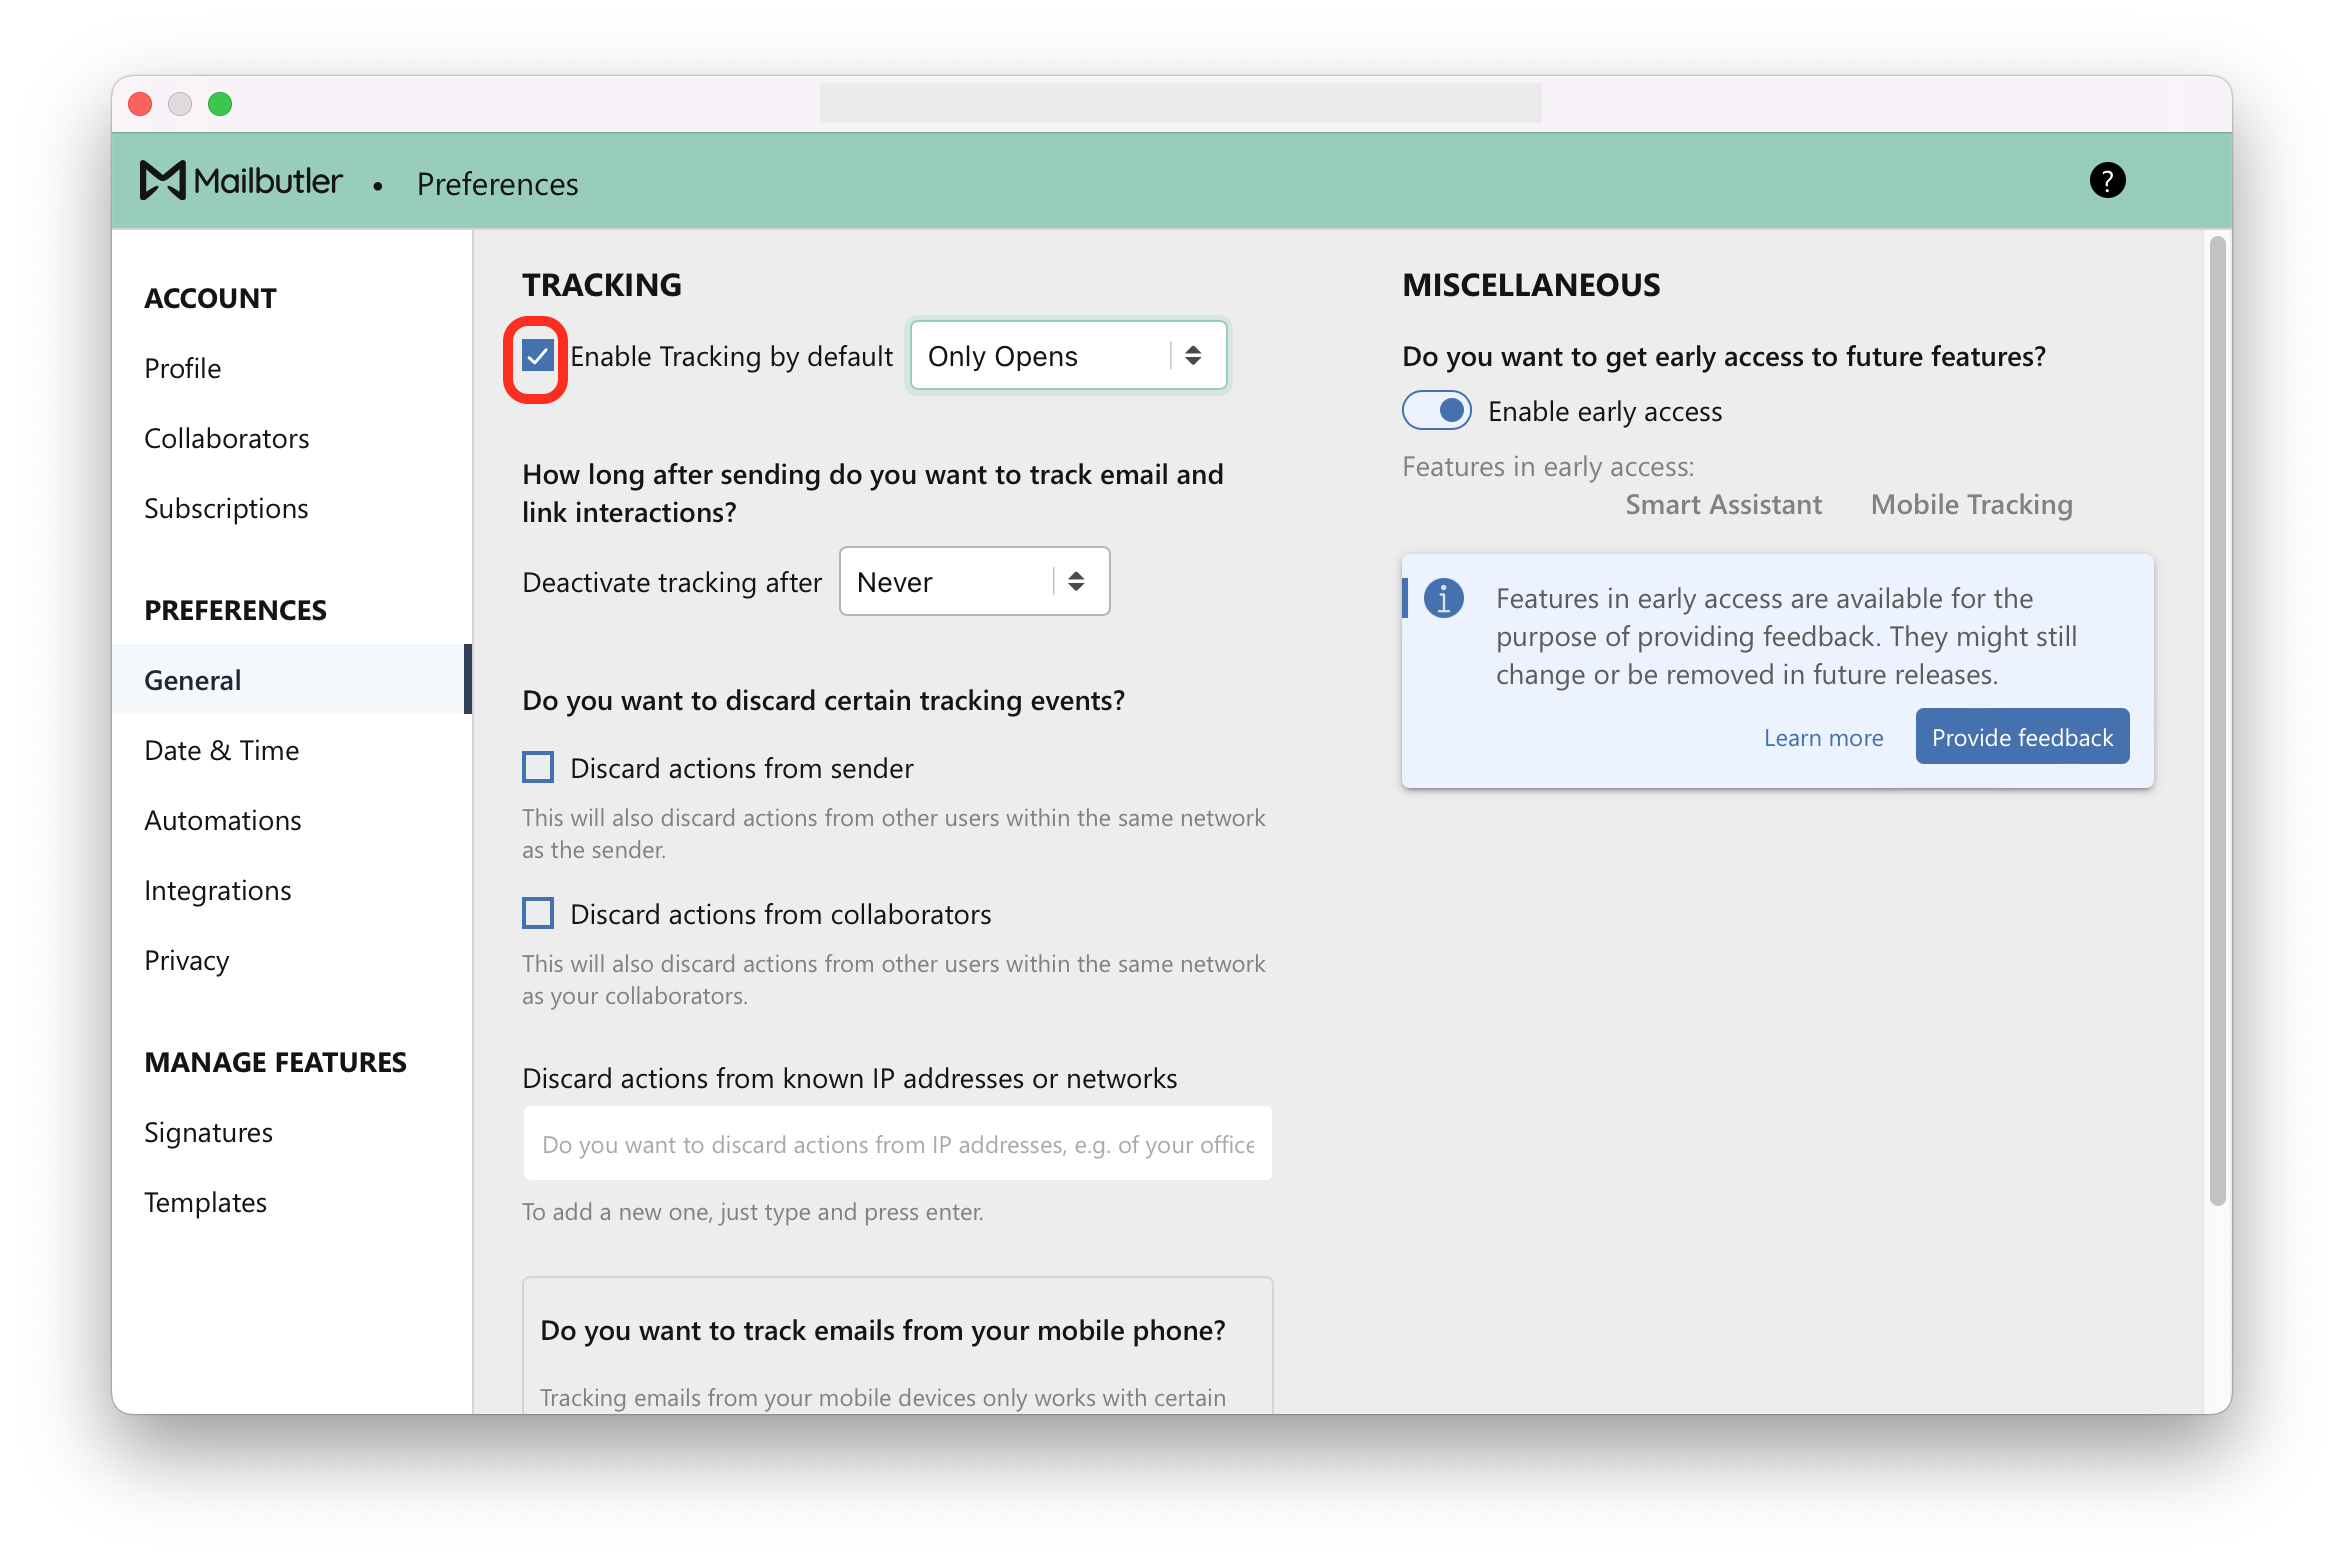
4. Check Enable Tracking by default.
Gmail
You can either enable Open Tracking by default. Or you can enable Open Tracking manually for particular emails that you want to track.
Enable Open Tracking manually:
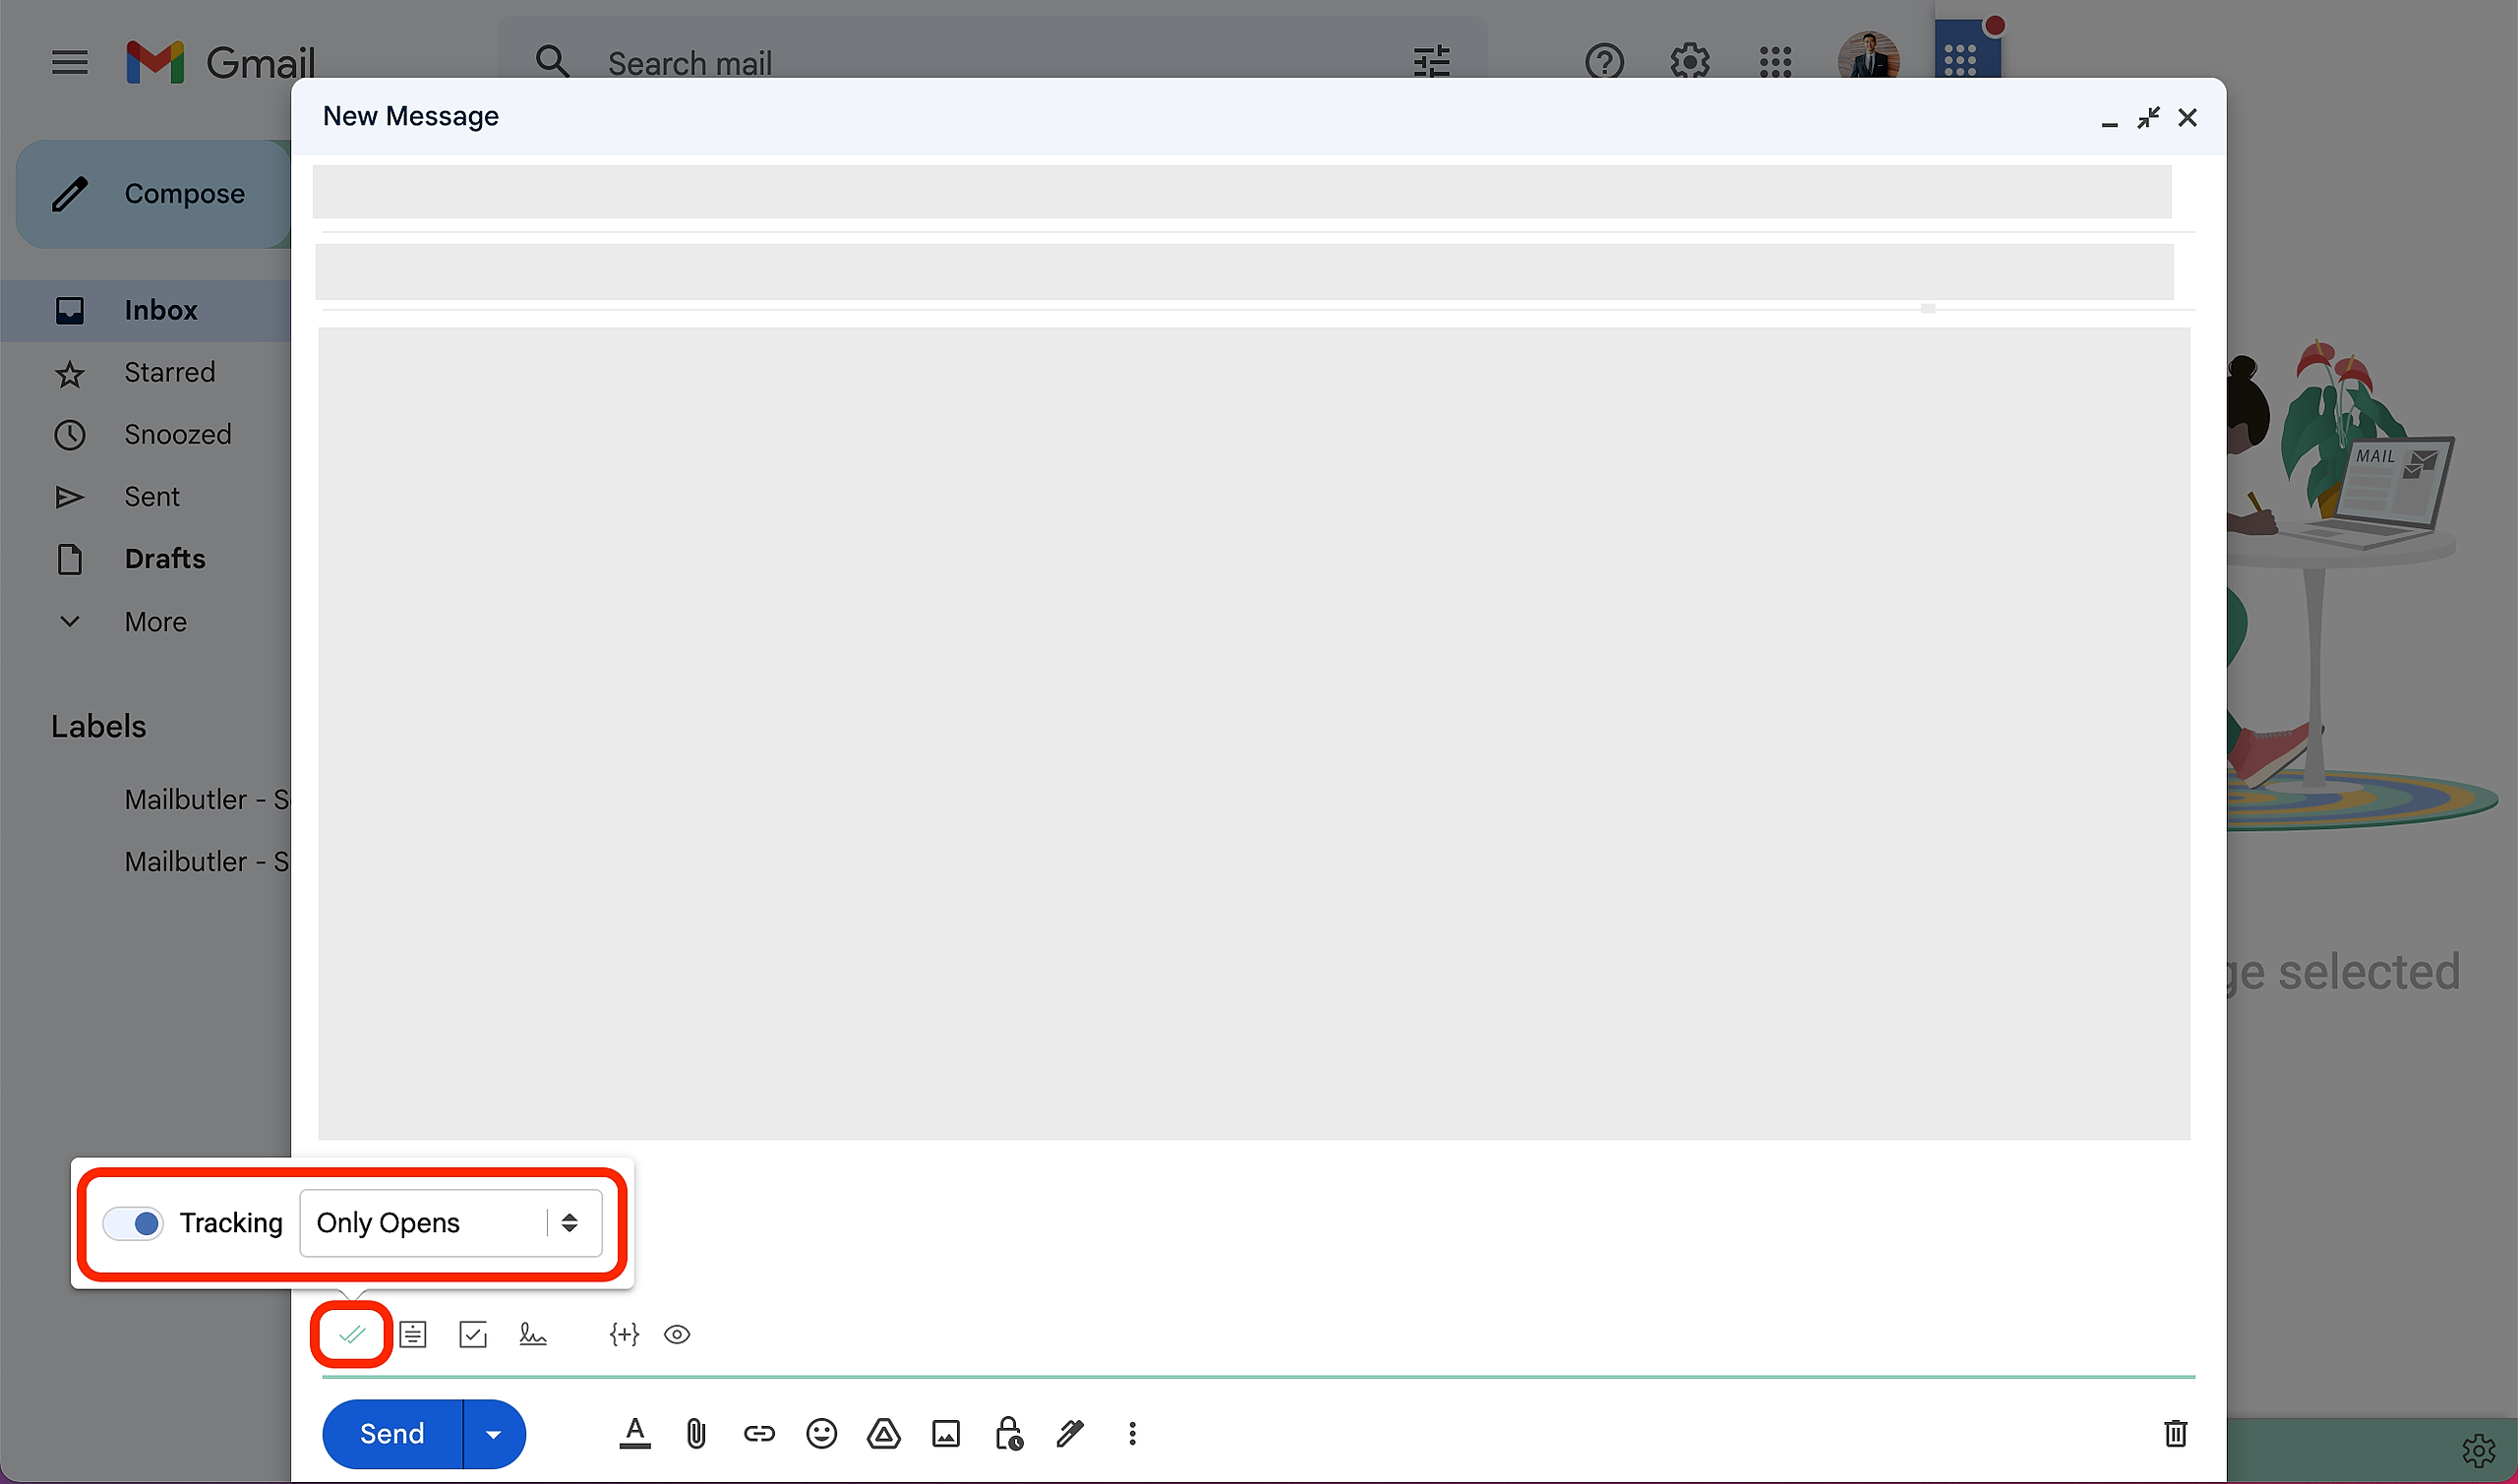
To enable Open Tracking manually, click on the checkmarks icon in the Mailbutler toolbar. Then, switch Open Tracking on using the toggle button.
Enable Open Tracking by default:
1. Click on the Mailbutler icon to open the Mailbutler Sidebar.

2. In the Mailbutler Sidebar, click the three dots and then Account & Preferences.

3. A new window will open. Select General under Preferences in the sidebar on the left.
4. Check Enable Tracking by default.

Outlook
You can either enable Open Tracking by default. Or you can enable Open Tracking manually for particular emails that you want to track.
Enable Open Tracking manually:
To enable Open Tracking manually, start a new email and open the Mailbutler sidebar. Then, use the toggle button in the Mailbutler-sidebar.
Enable Open Tracking by default:
1. Open the Mailbutler Sidebar.
2. In the Mailbutler Sidebar, click the three dots and then Account & Preferences.
3. A new window will open. Select General under Preferences in the sidebar on the left.

4. Check Enable Tracking by default.
How do I turn on Open Tracking notifications?
Mailbutler can send you notifications on your desktop to notify you that your emails have been opened.
Mailbutler's notifications are available for Apple Mail, Gmail and Outlook.com. It is not possible to receive notifications in the Outlook app.
1. Open the Mailbutler sidebar in your email client.
2. In the Mailbutler Sidebar, click the three dots and then Account & Preferences.
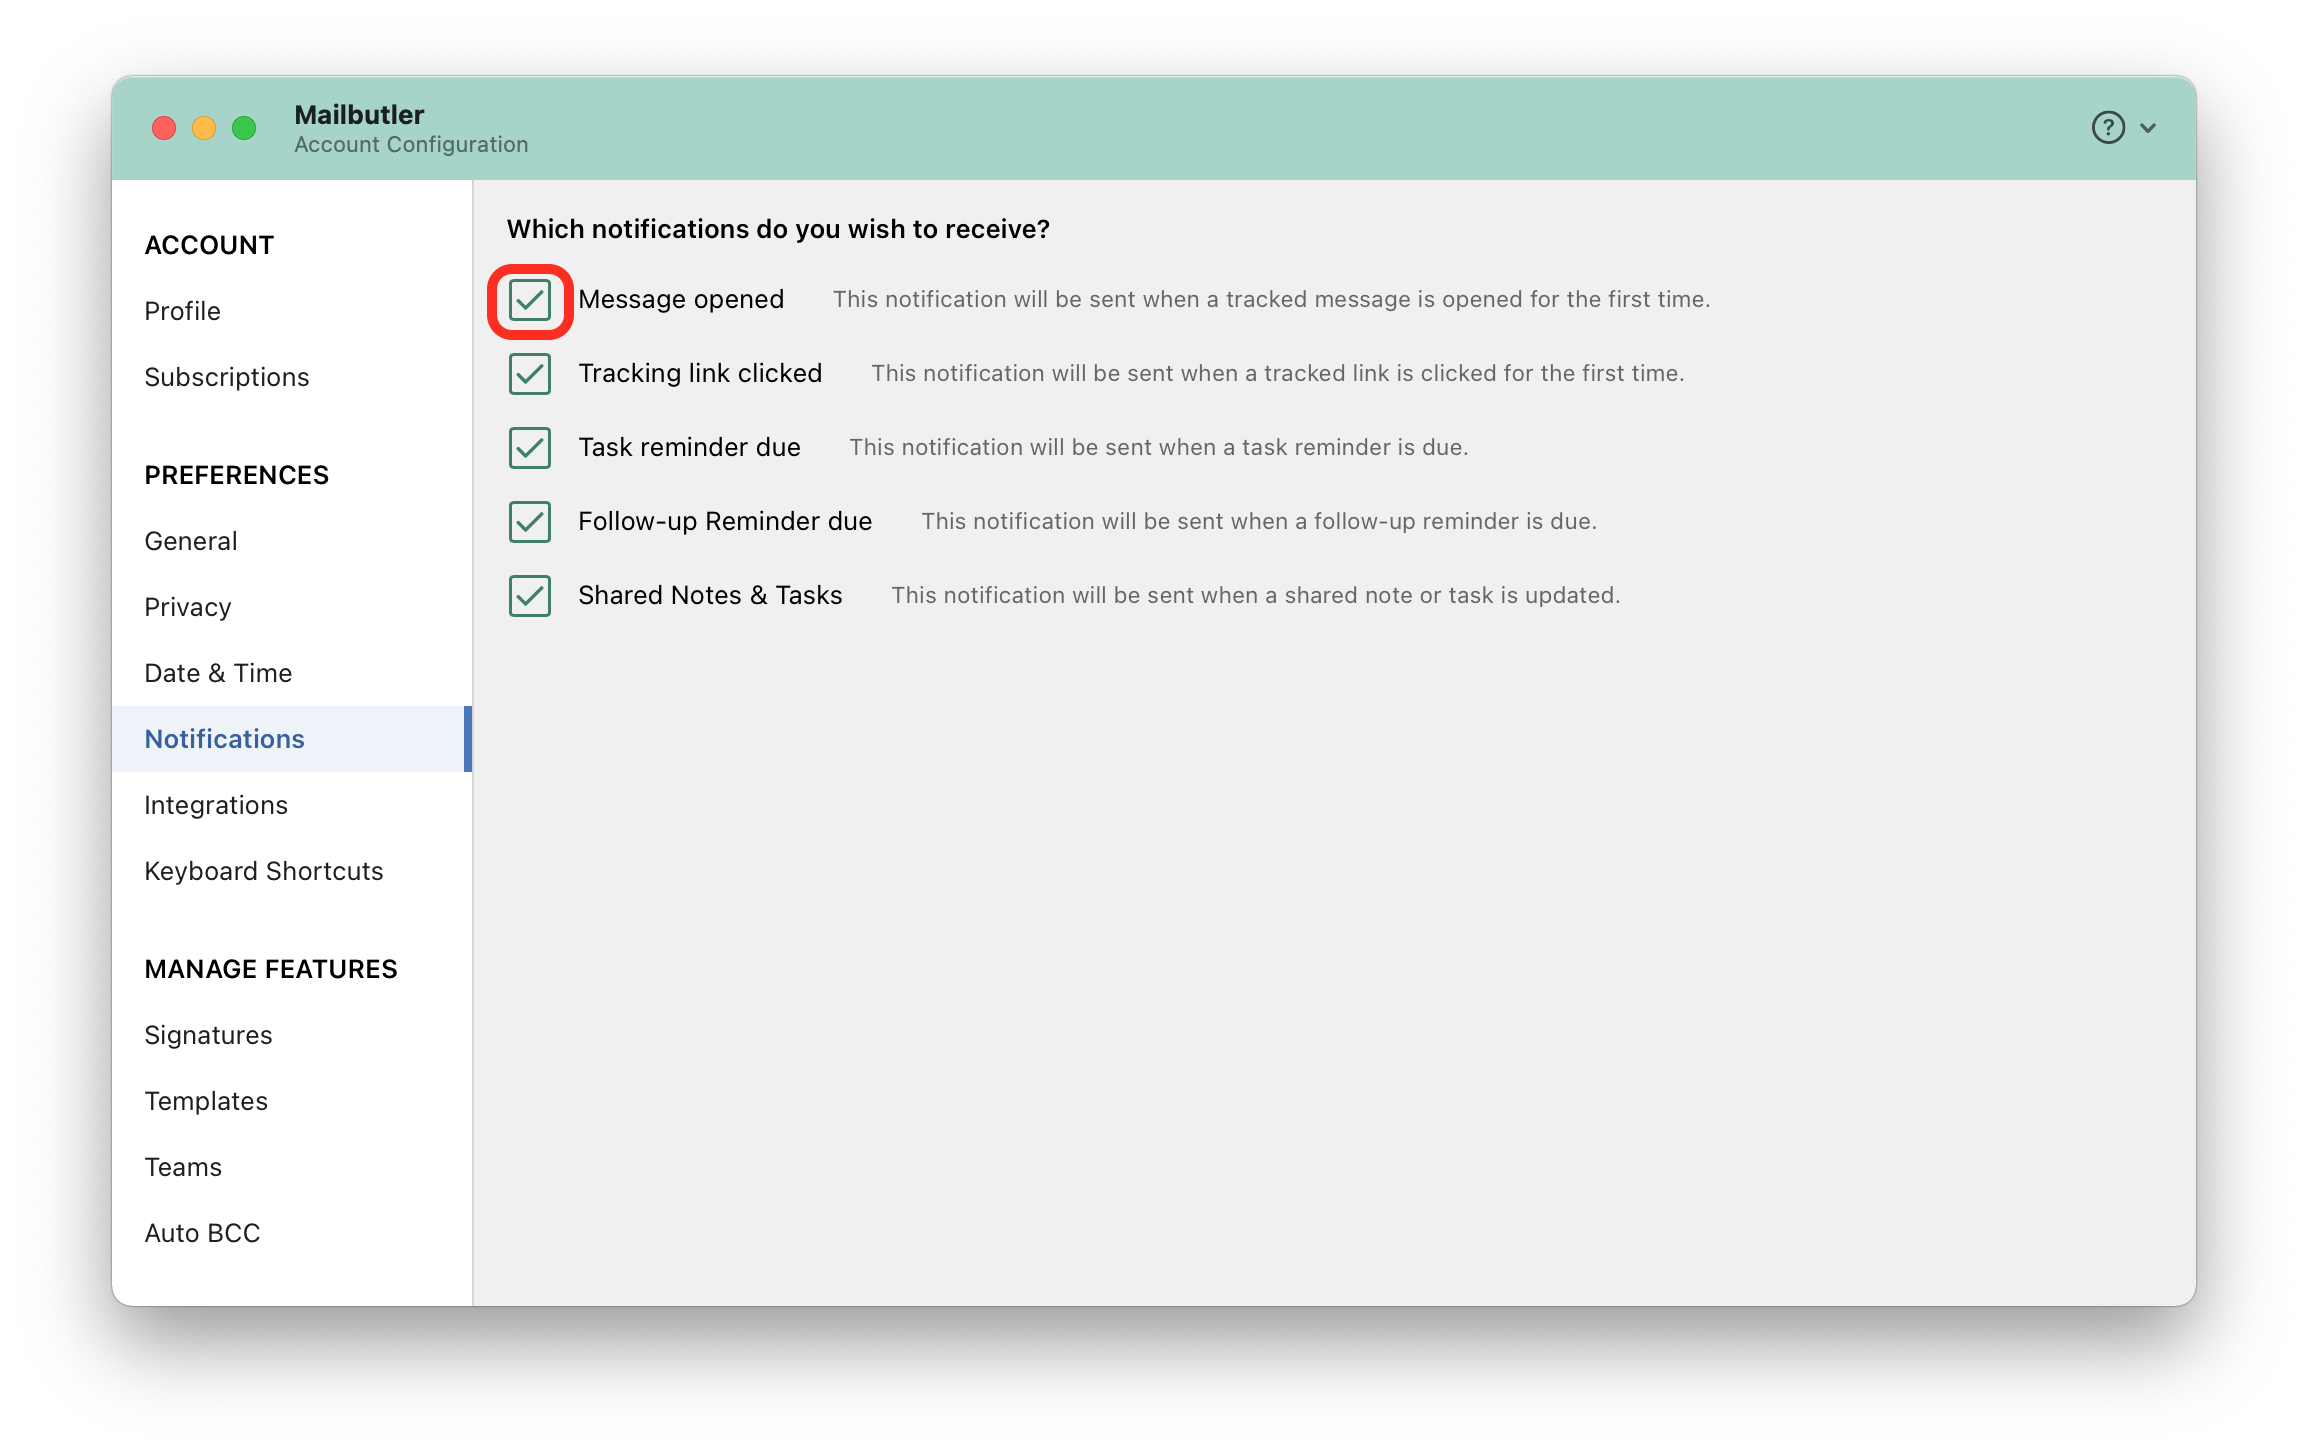
3. A new window will open. Select Notifications under Preferences in the sidebar on the left.

4. Check Message opened.
How do I test Open Tracking?
If you would like to test whether Open Tracking is working correctly, you can send a test email with Tracking enabled to alex@mailbutler.io - Once the email has been opened, the open event should be recorded in your Mailbutler tracking details. This is a simple way to verify that tracking is functioning as expected in your setup.