
How do I register and install Mailbutler?
Apple Mail
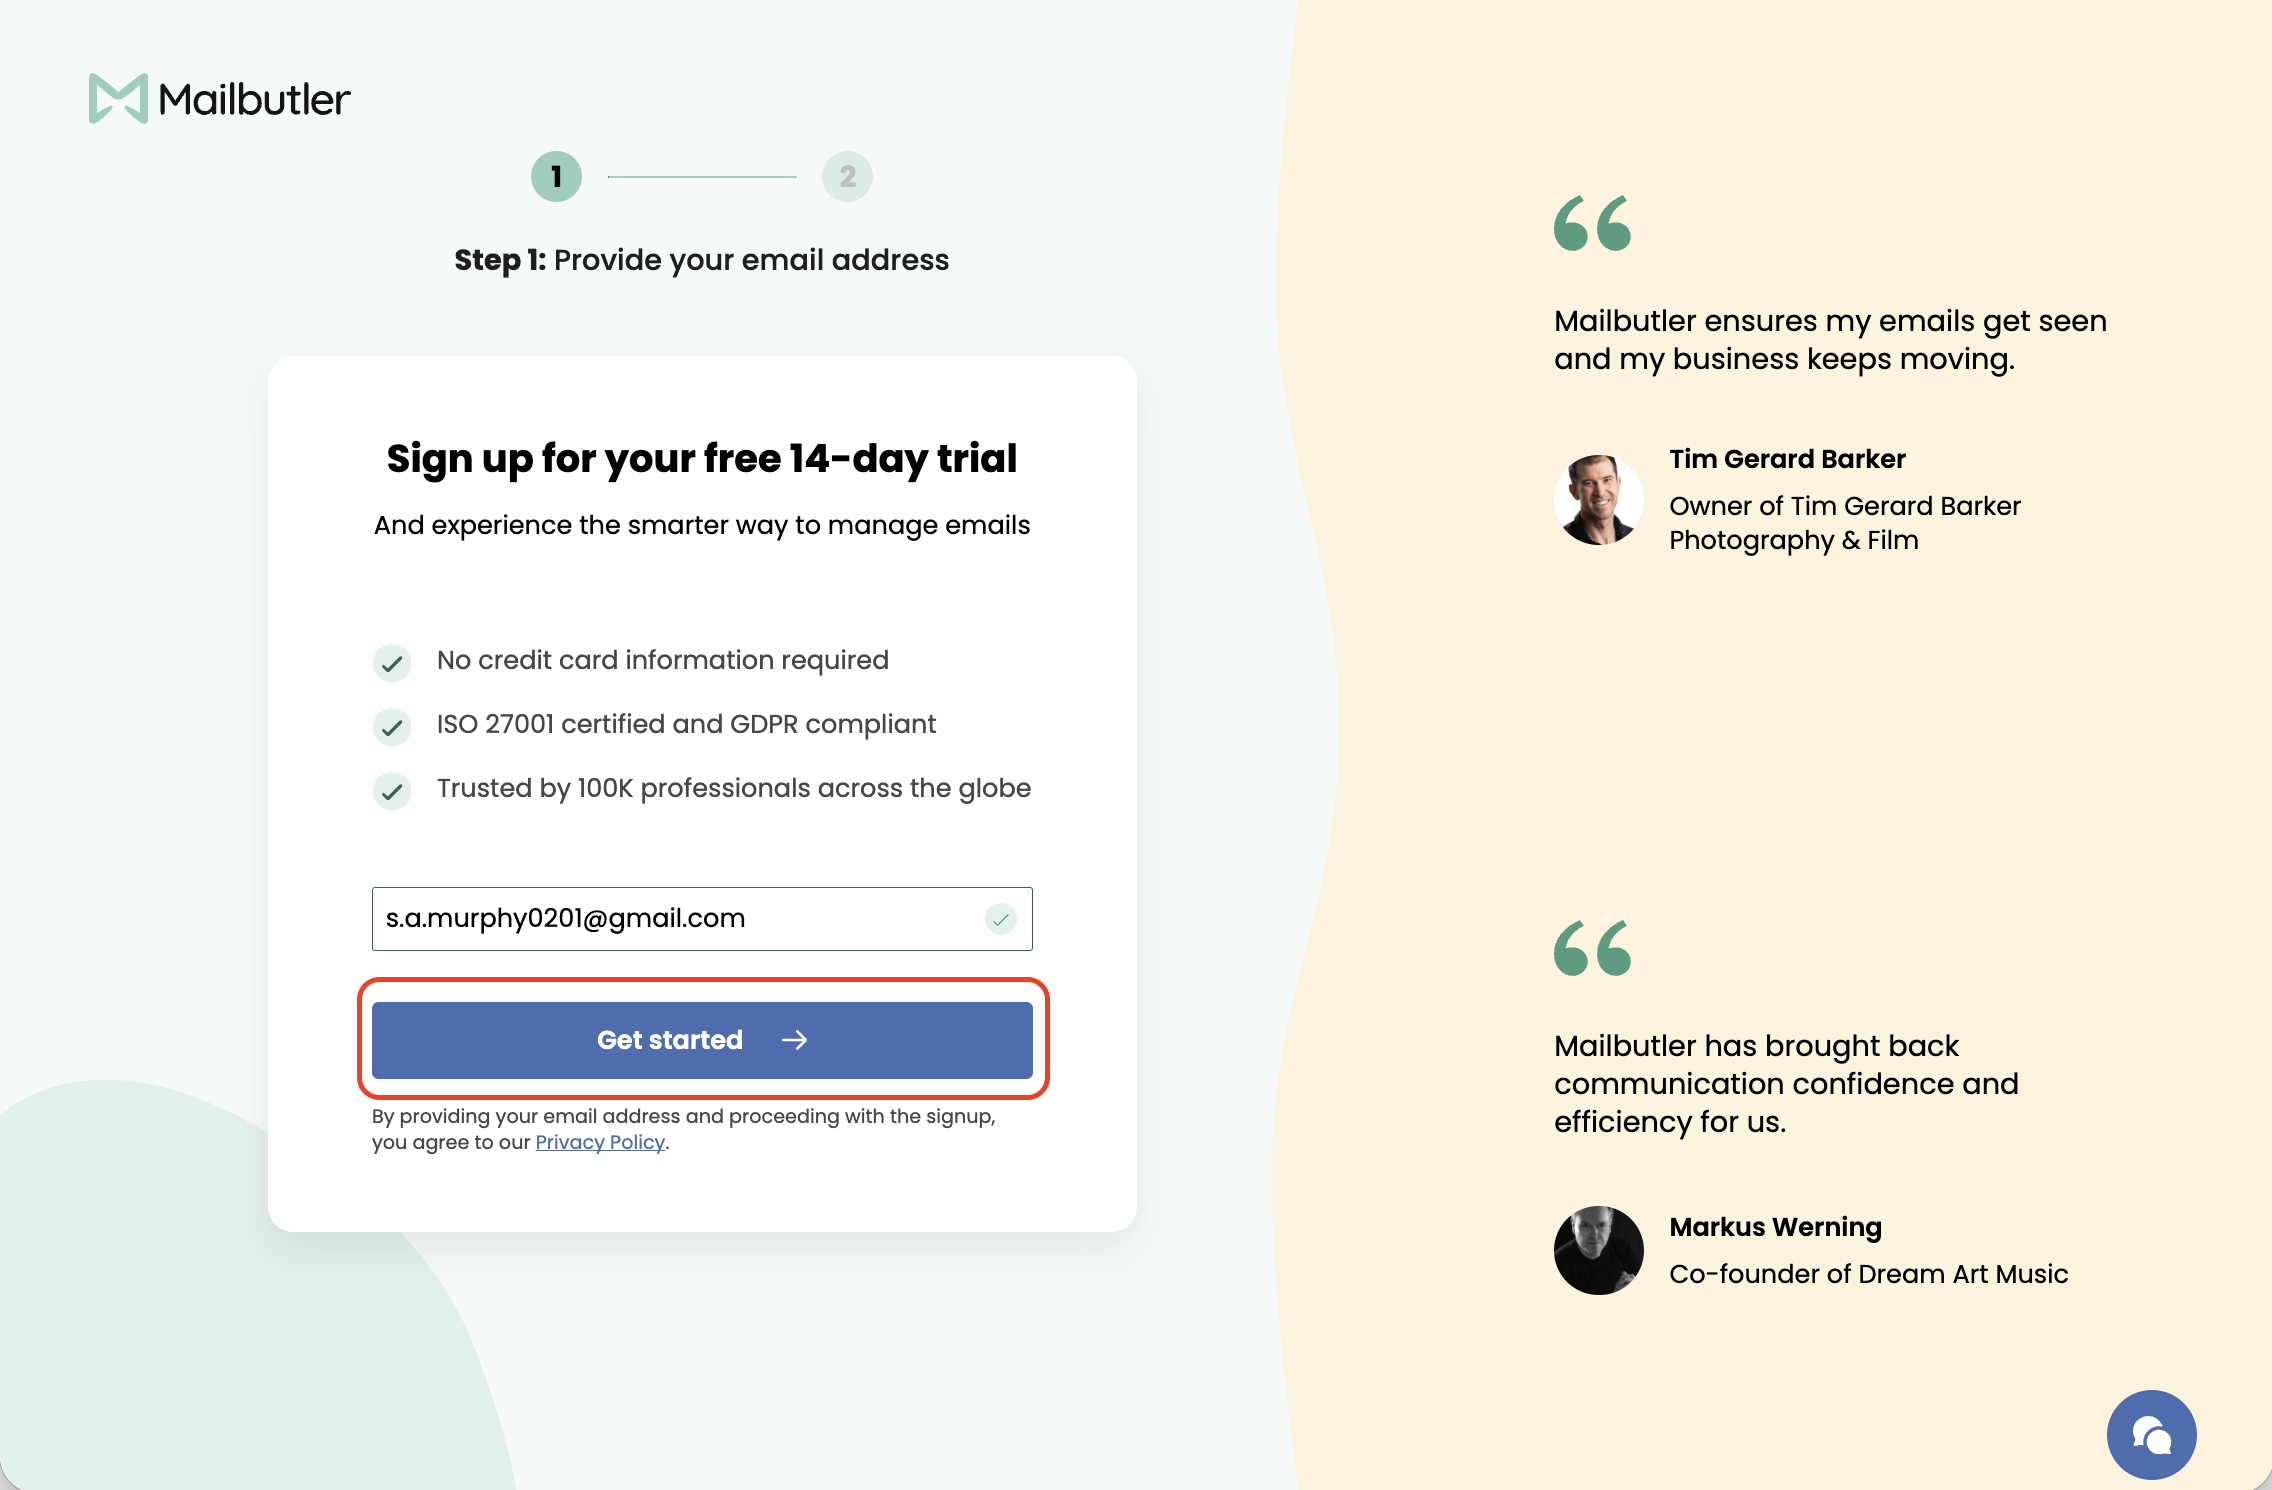
Go to our Get Started page here
Enter the email address you want to use for your Mailbutler account.
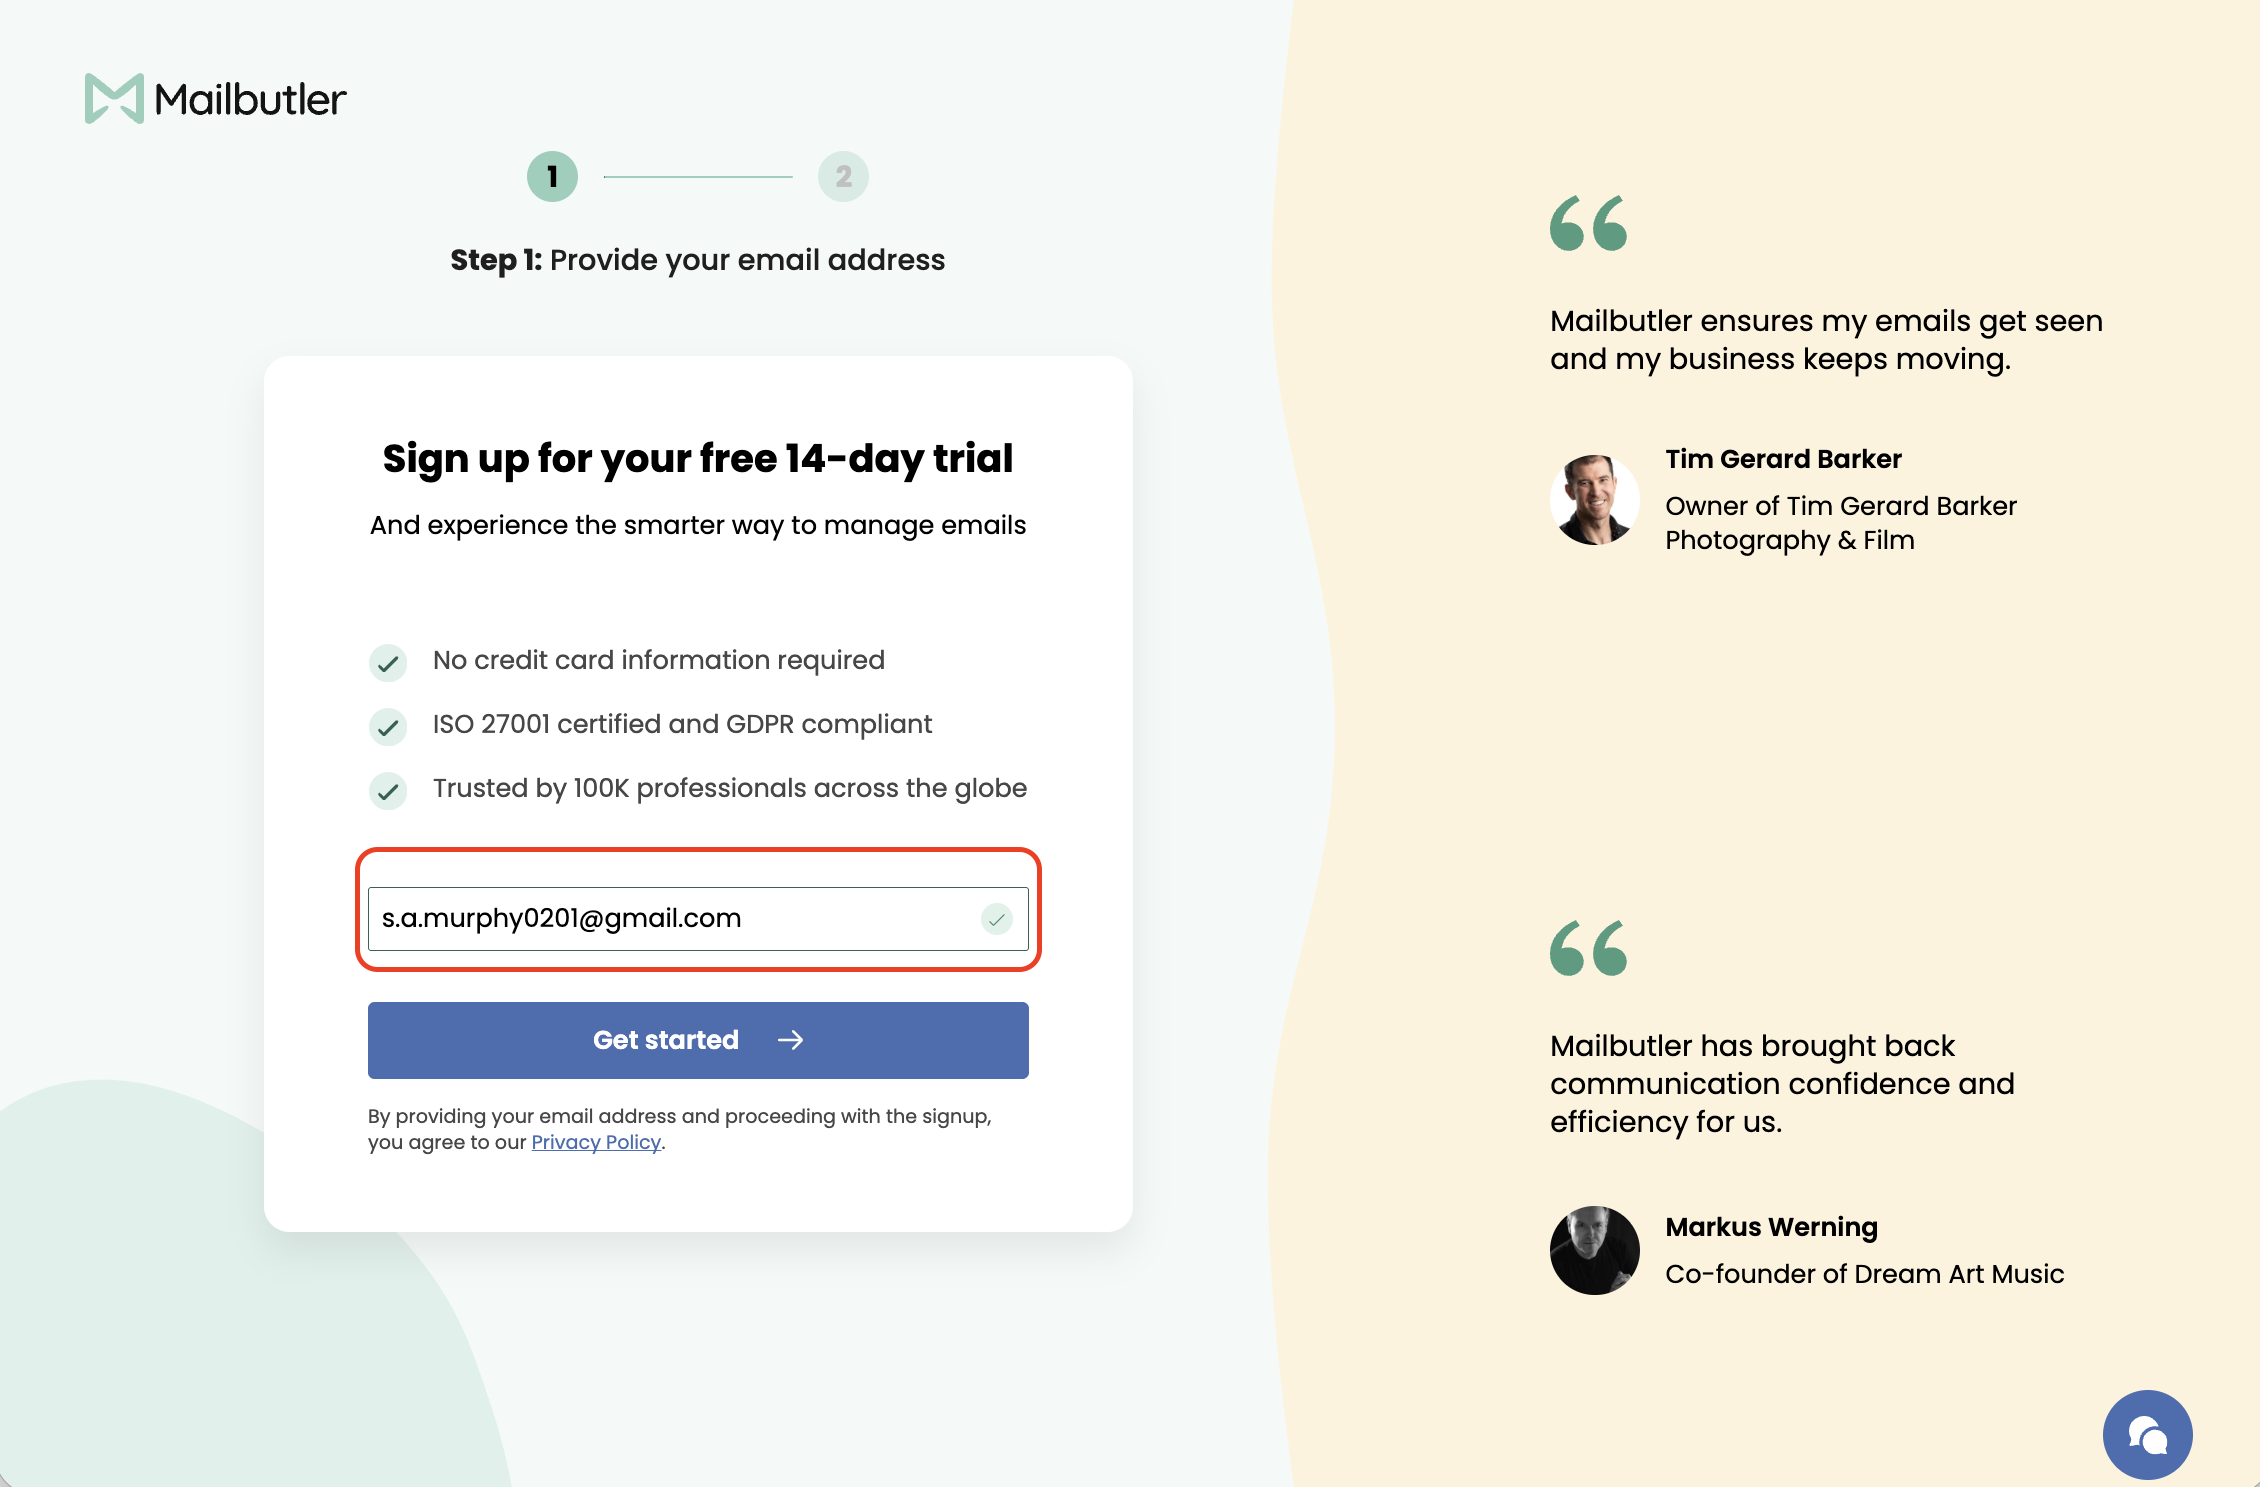
Click Get Started.

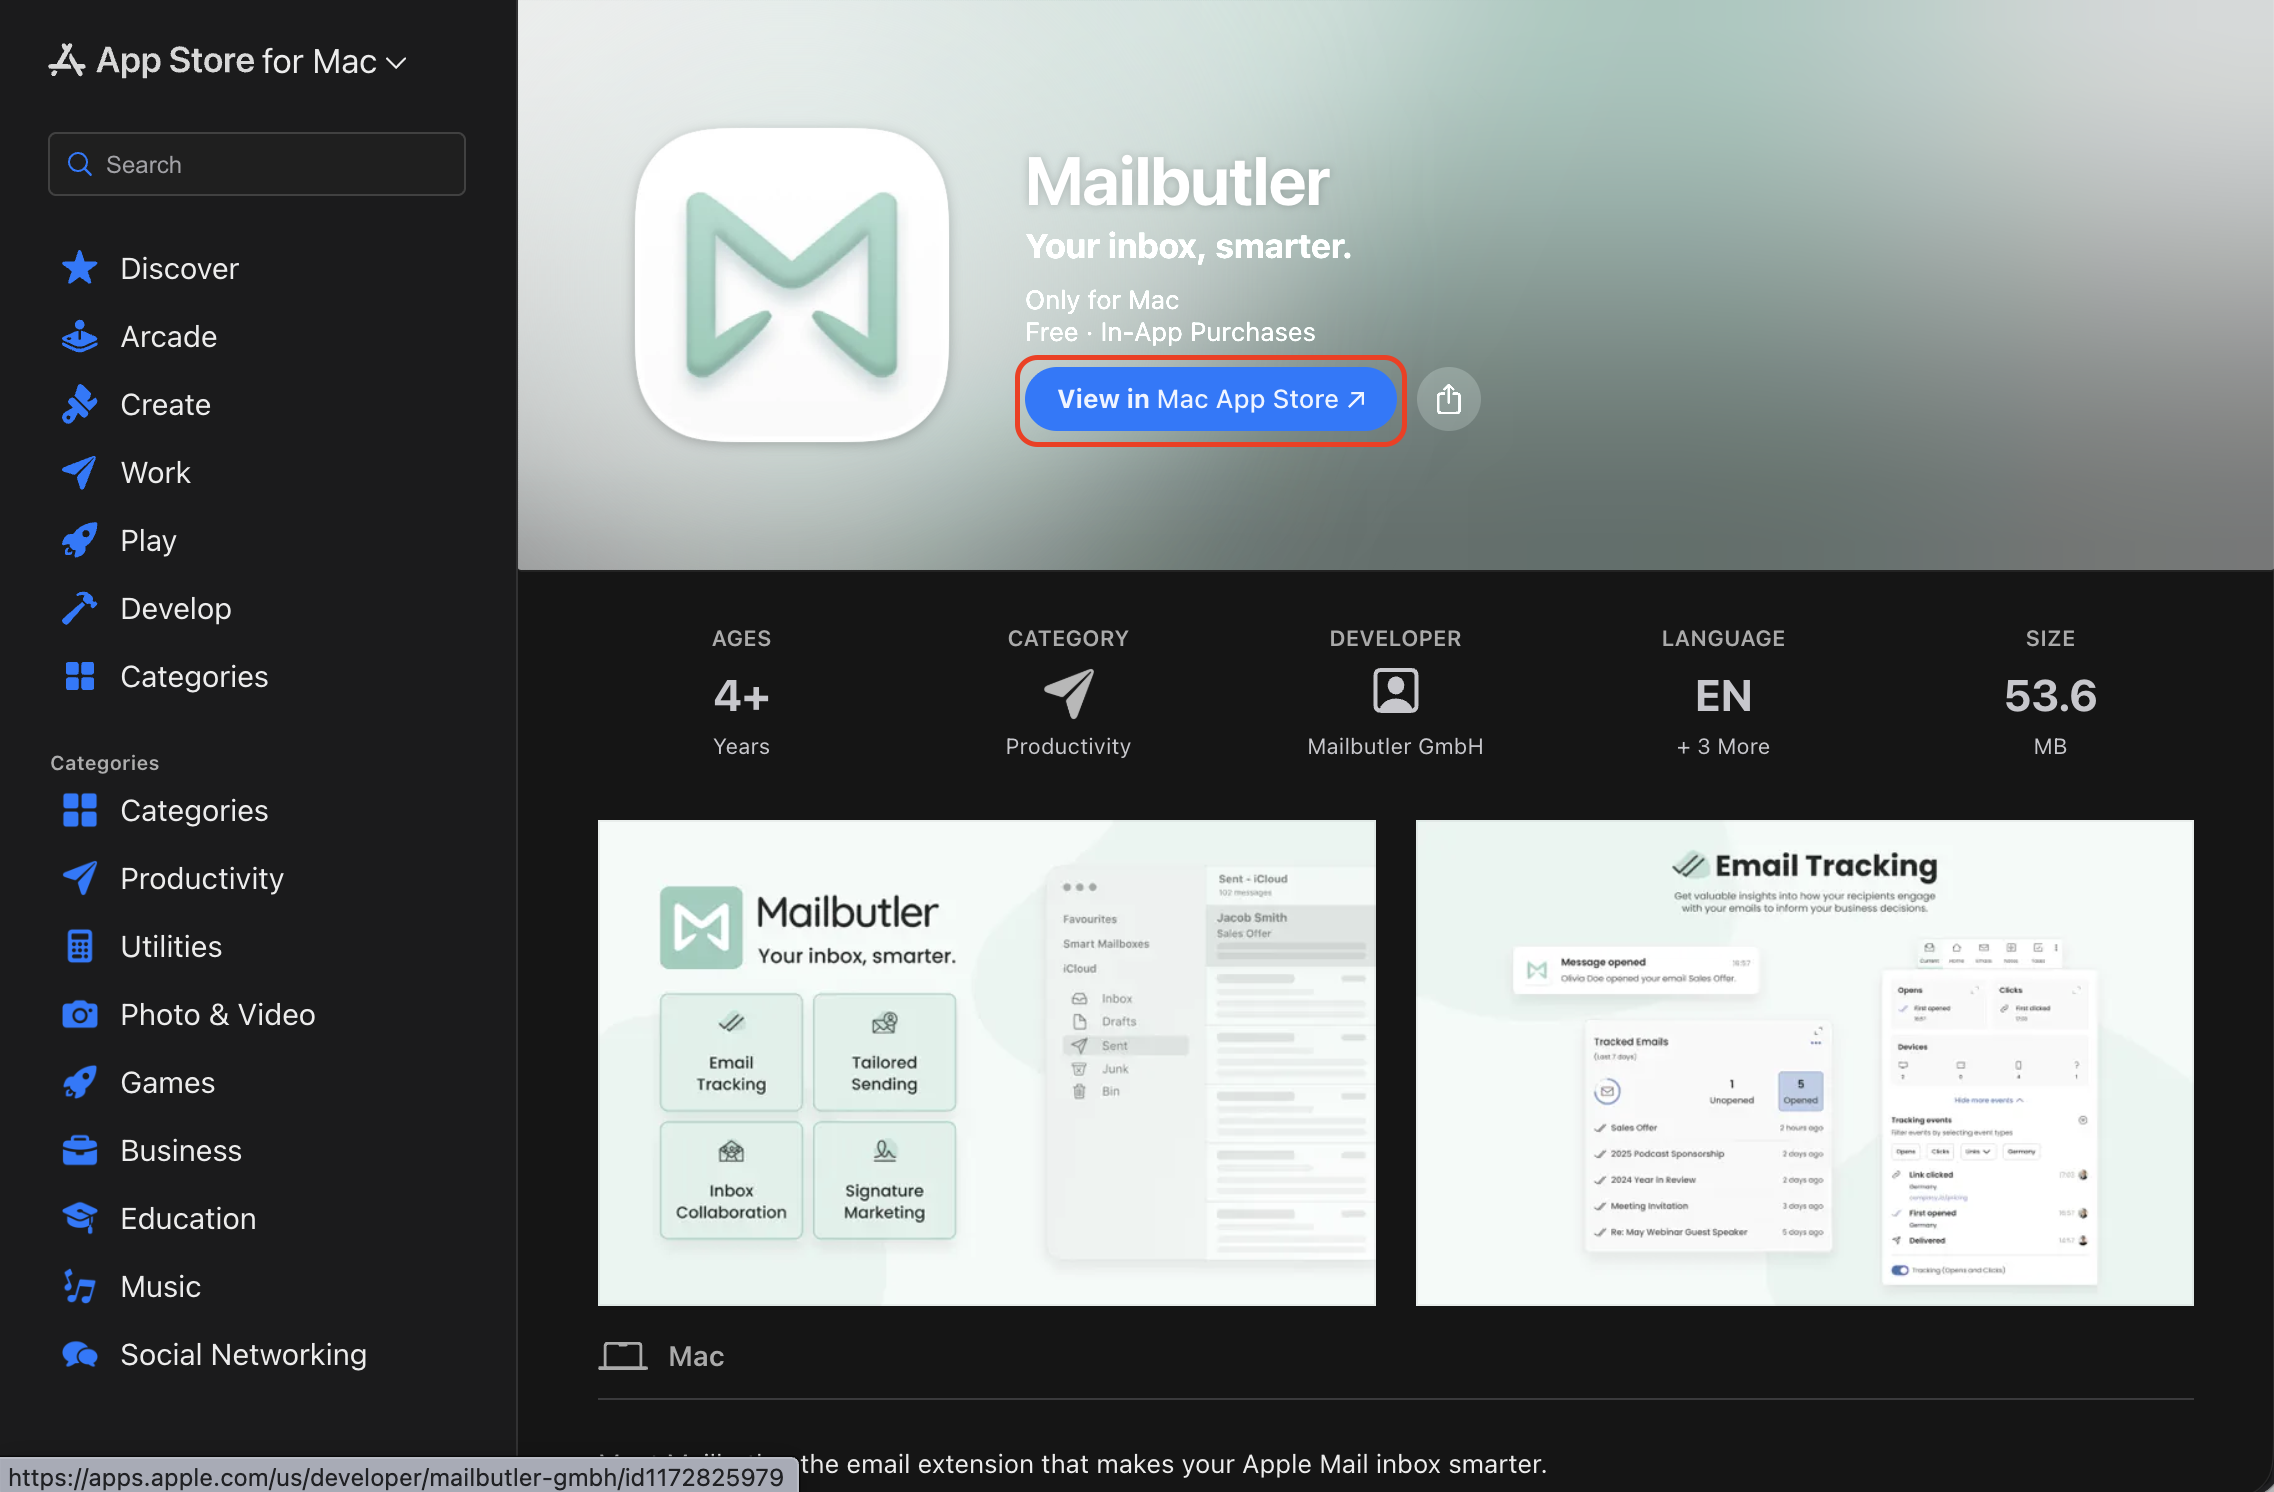
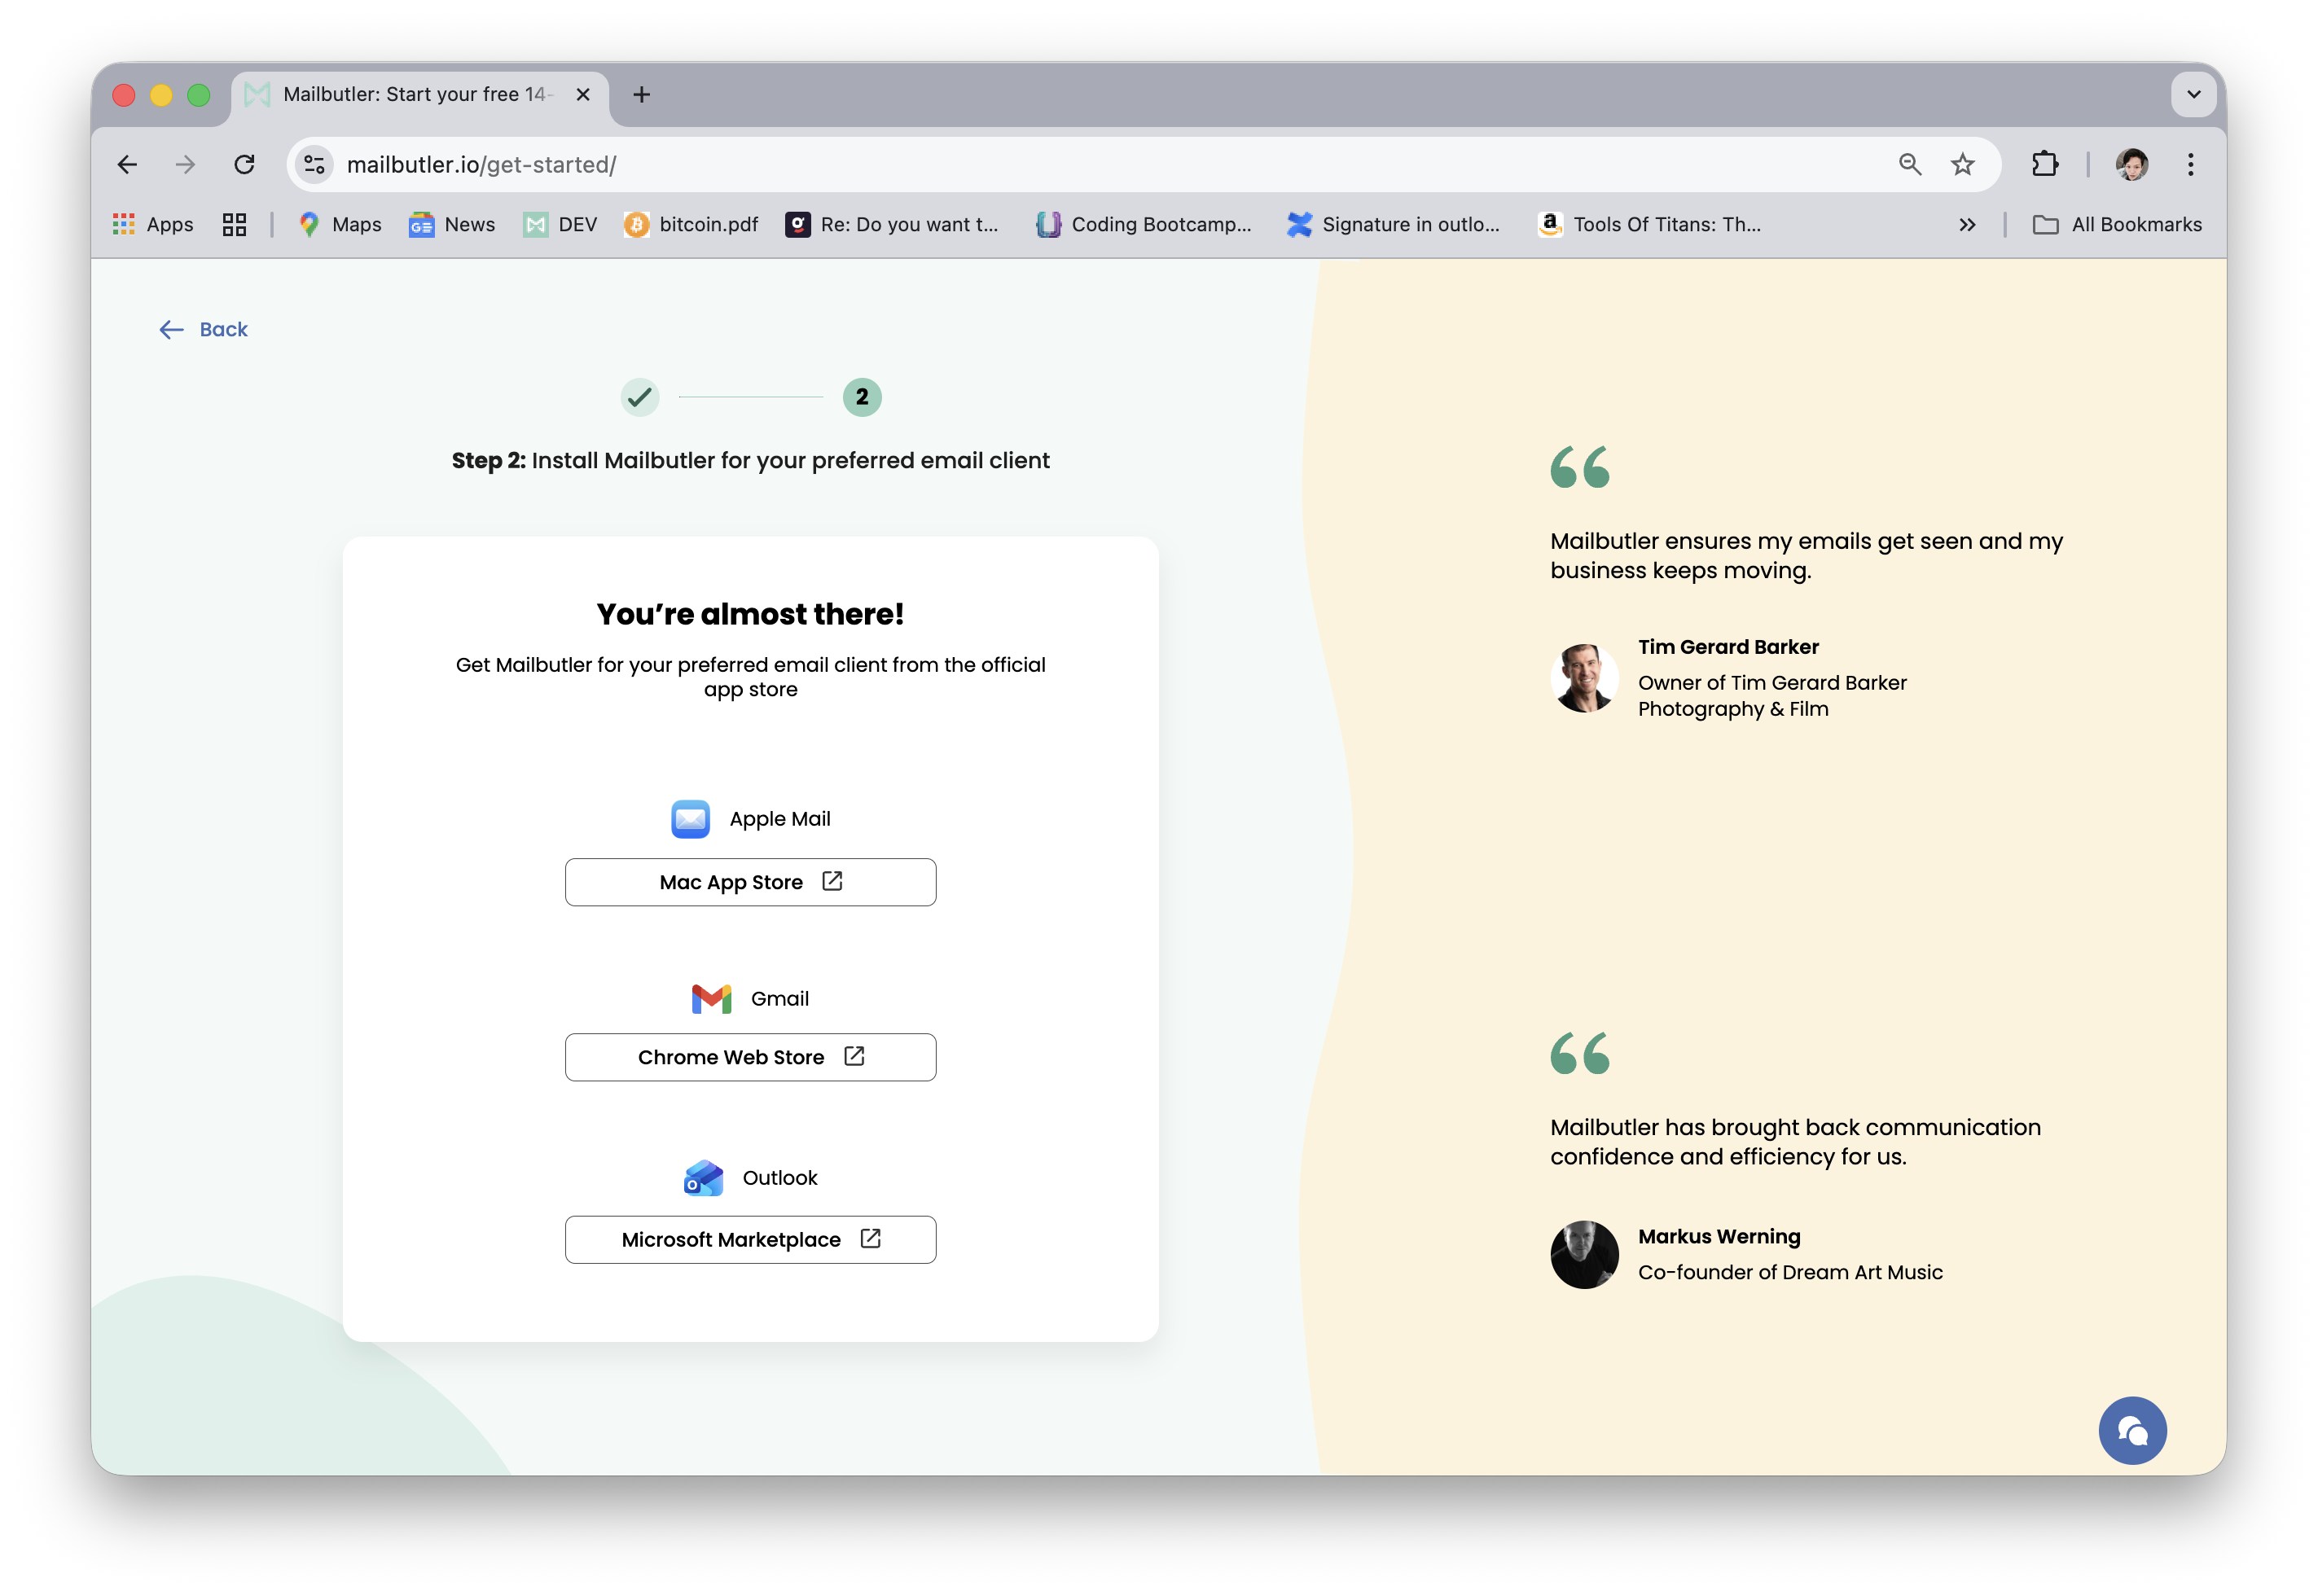
Under Apple Mail, click Mac App Store.

The Mac App Store listing will open in your browser. Click View in Mac App Store
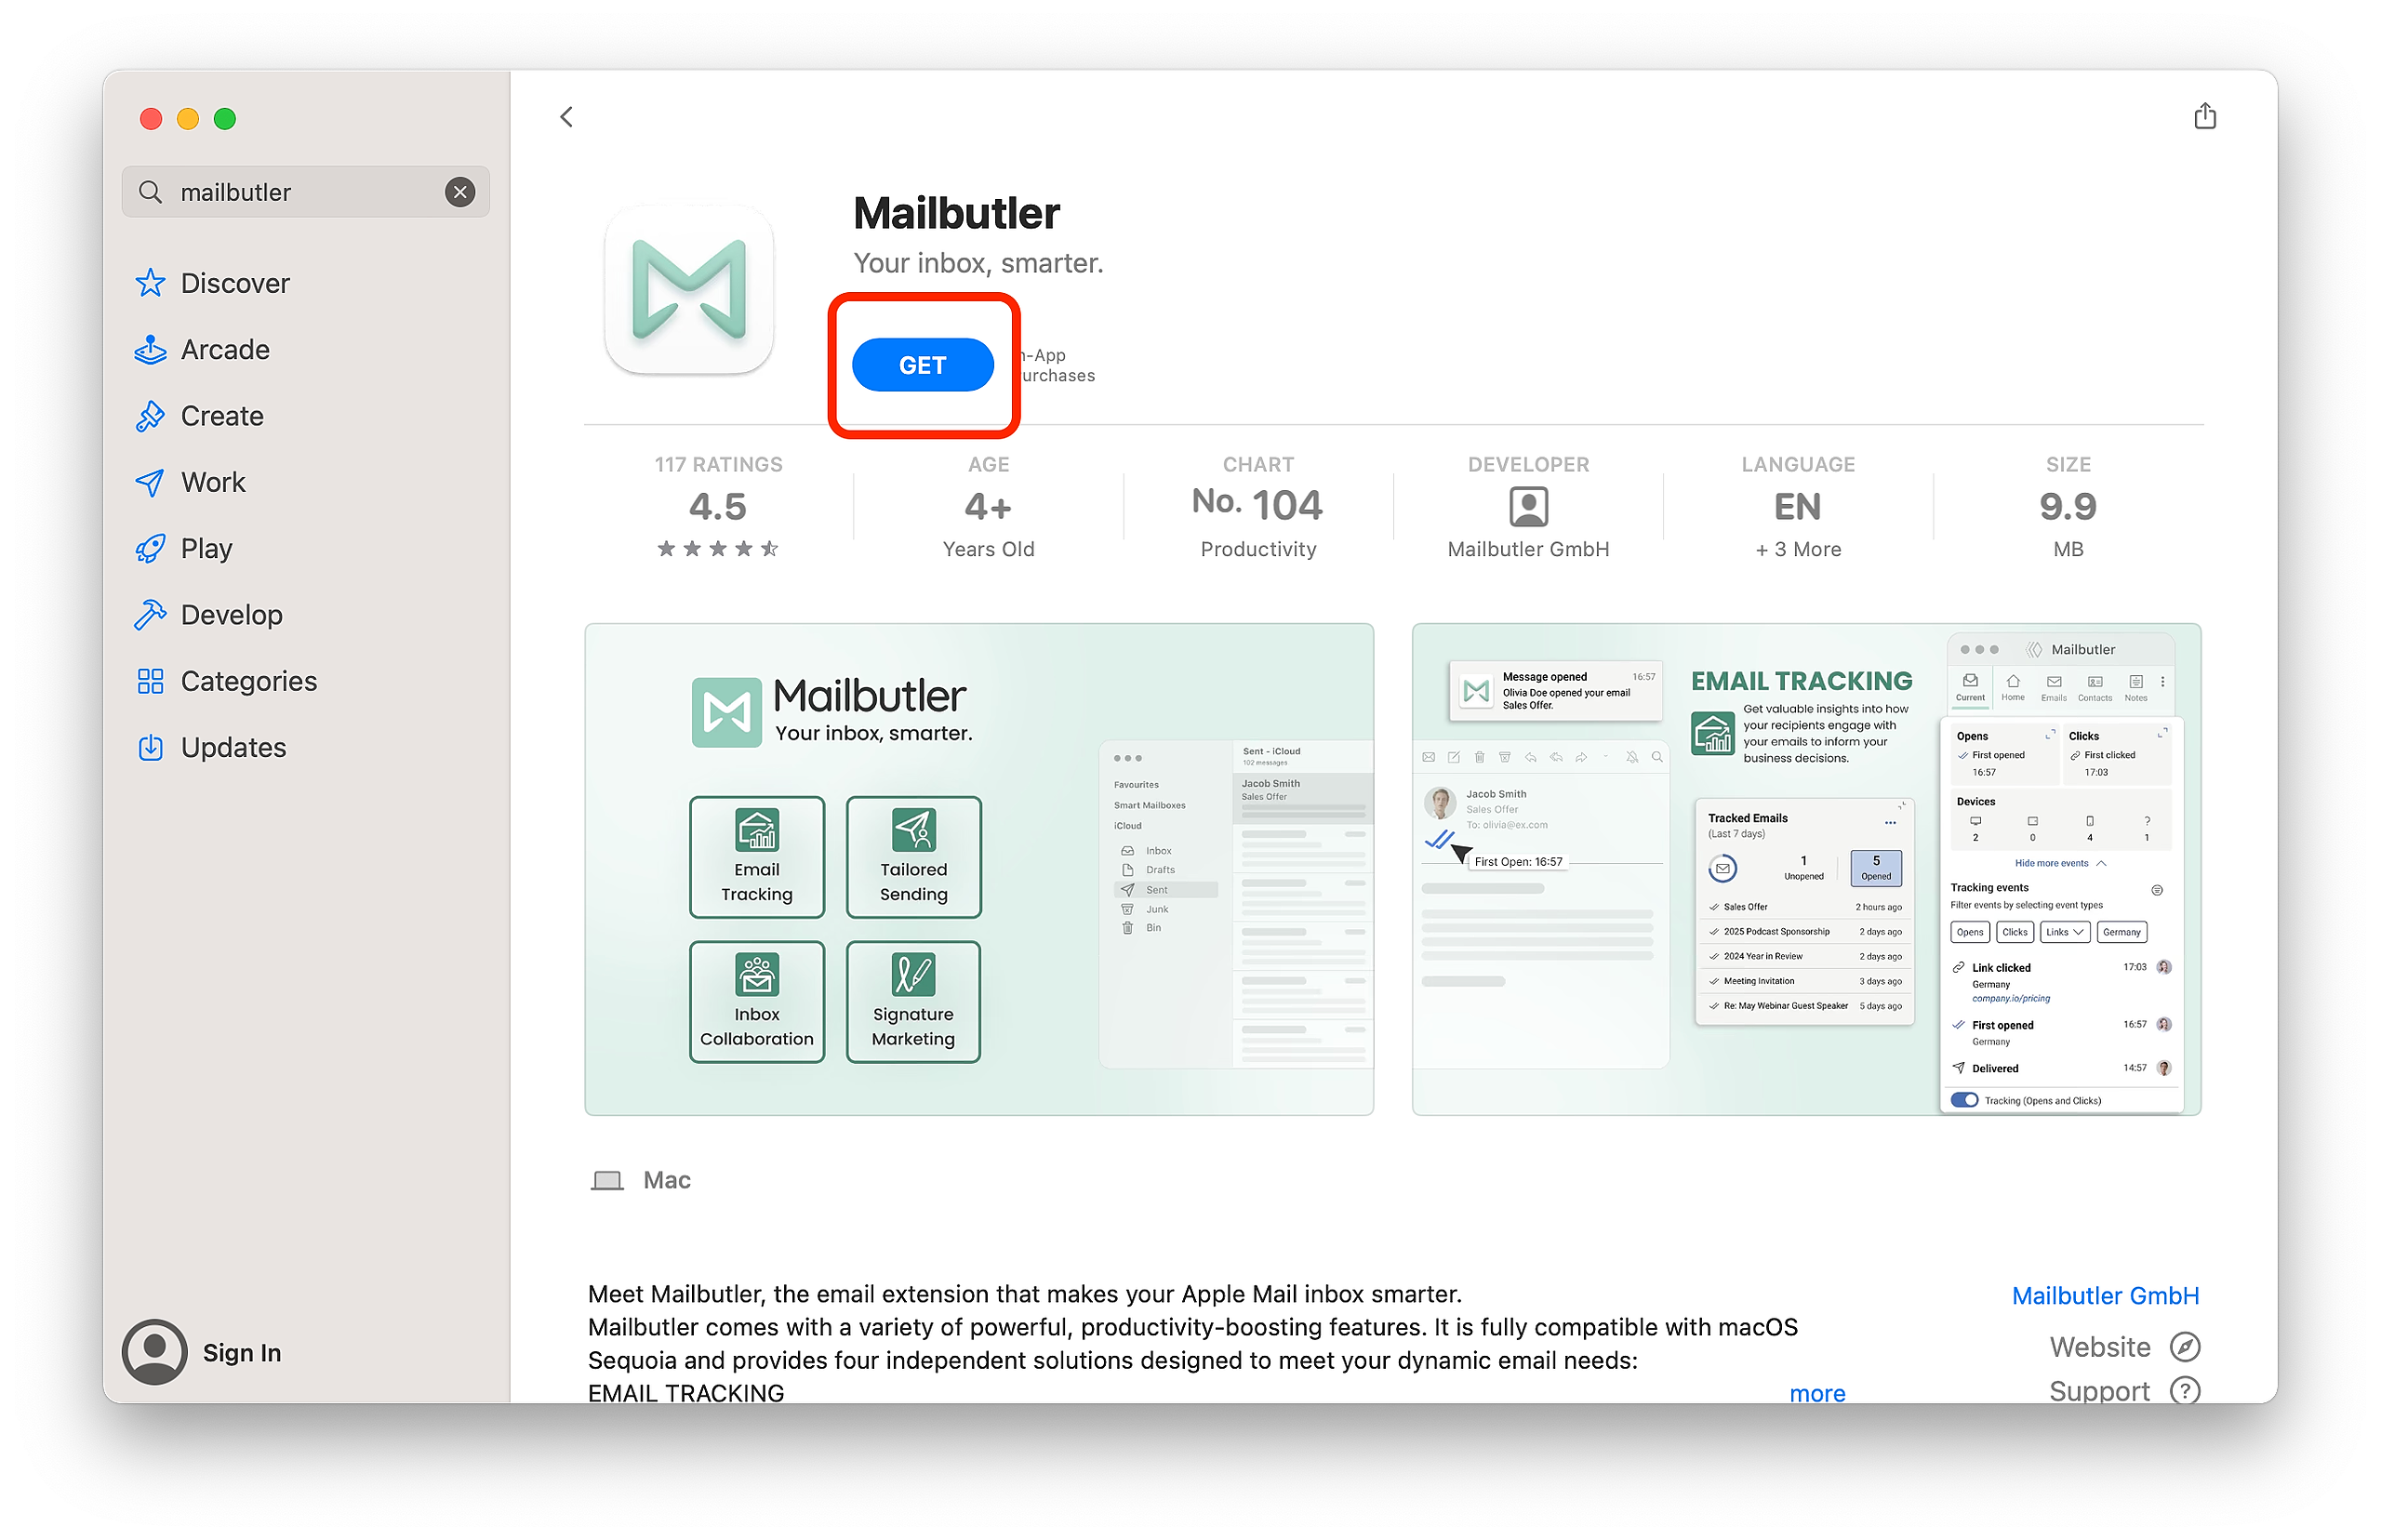
This will bring you to the App Store on your Mac. Click Get.
7. Click Open.
8. Click Install.
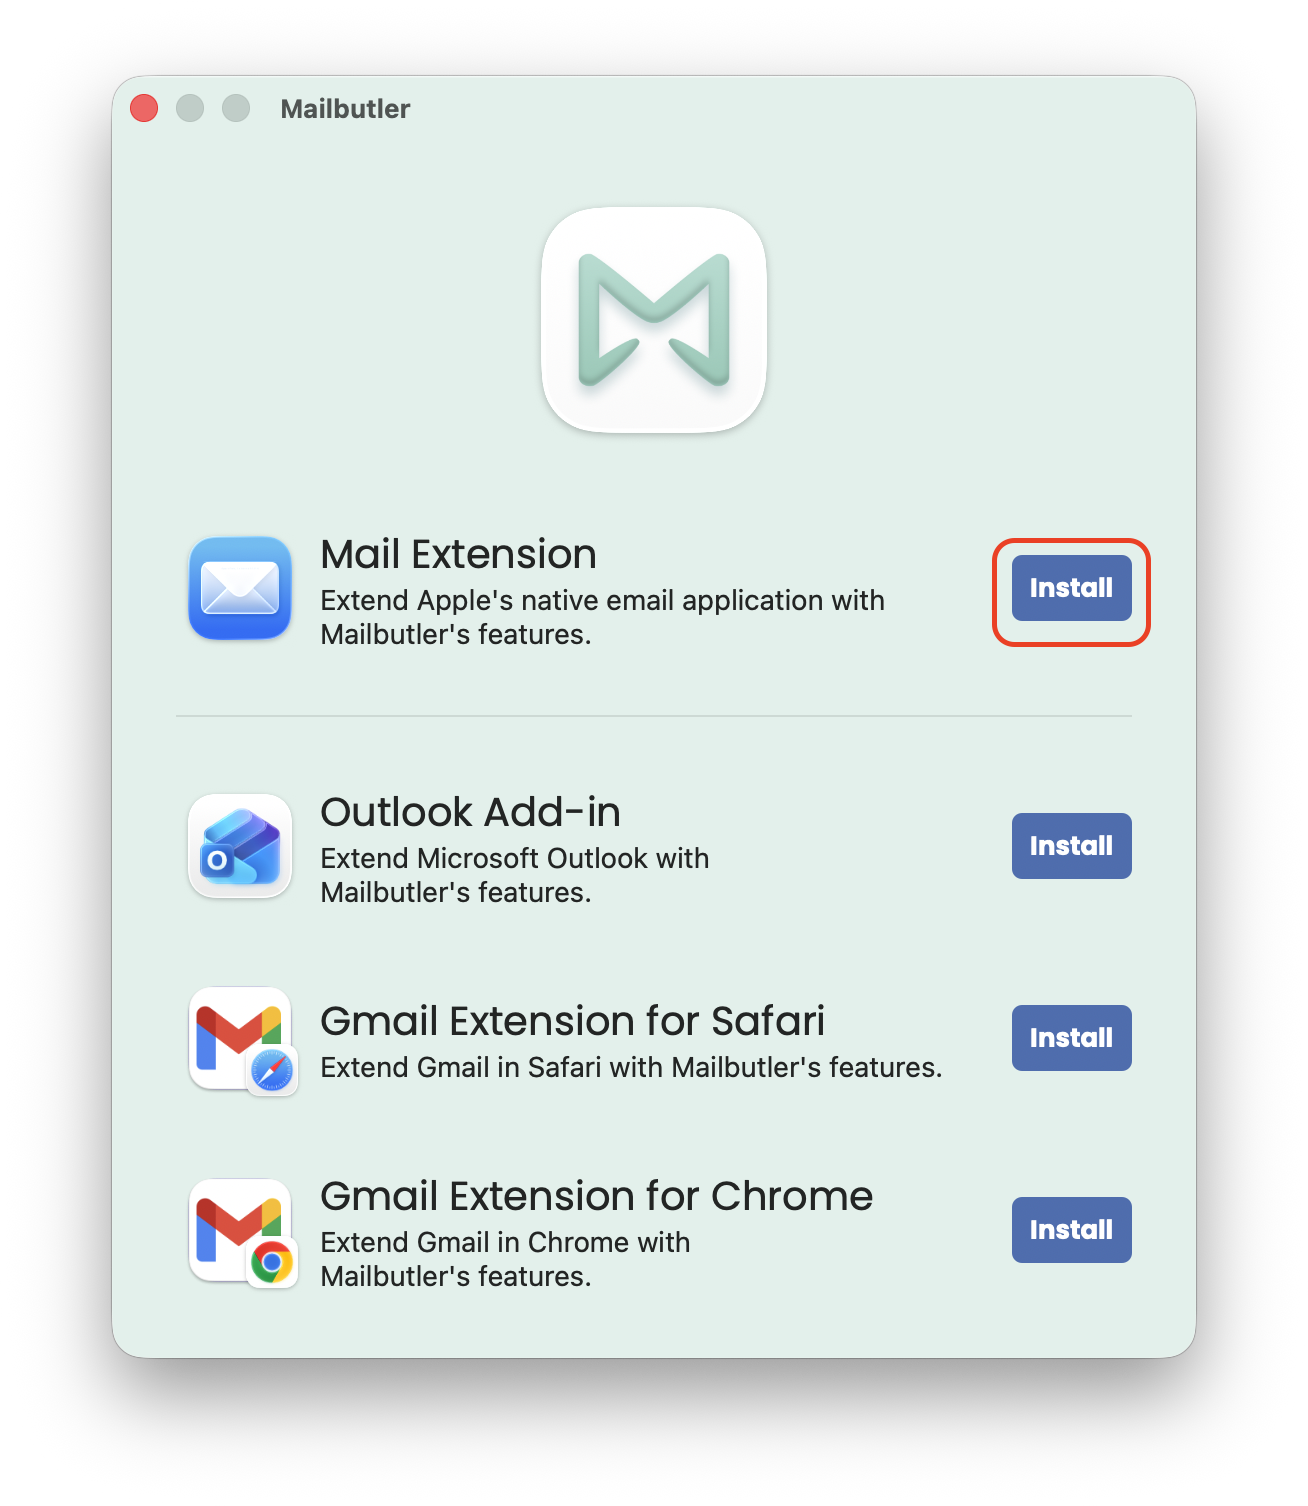
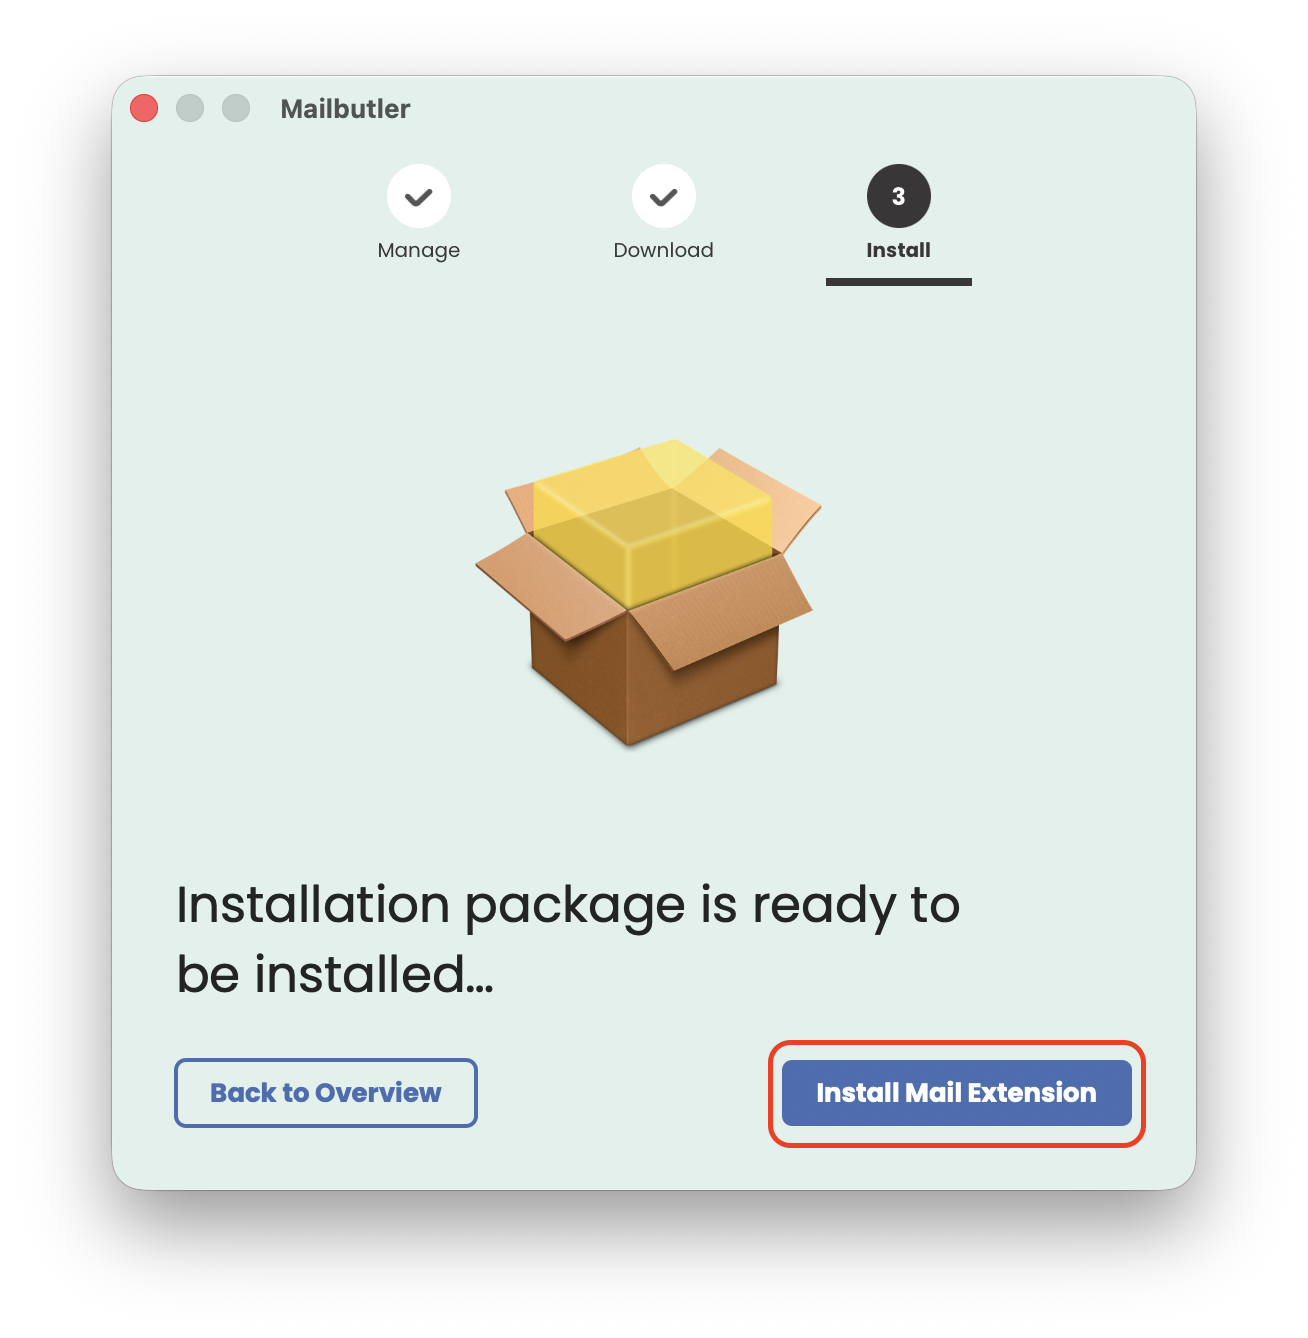
9. Click Install Mail Extension.
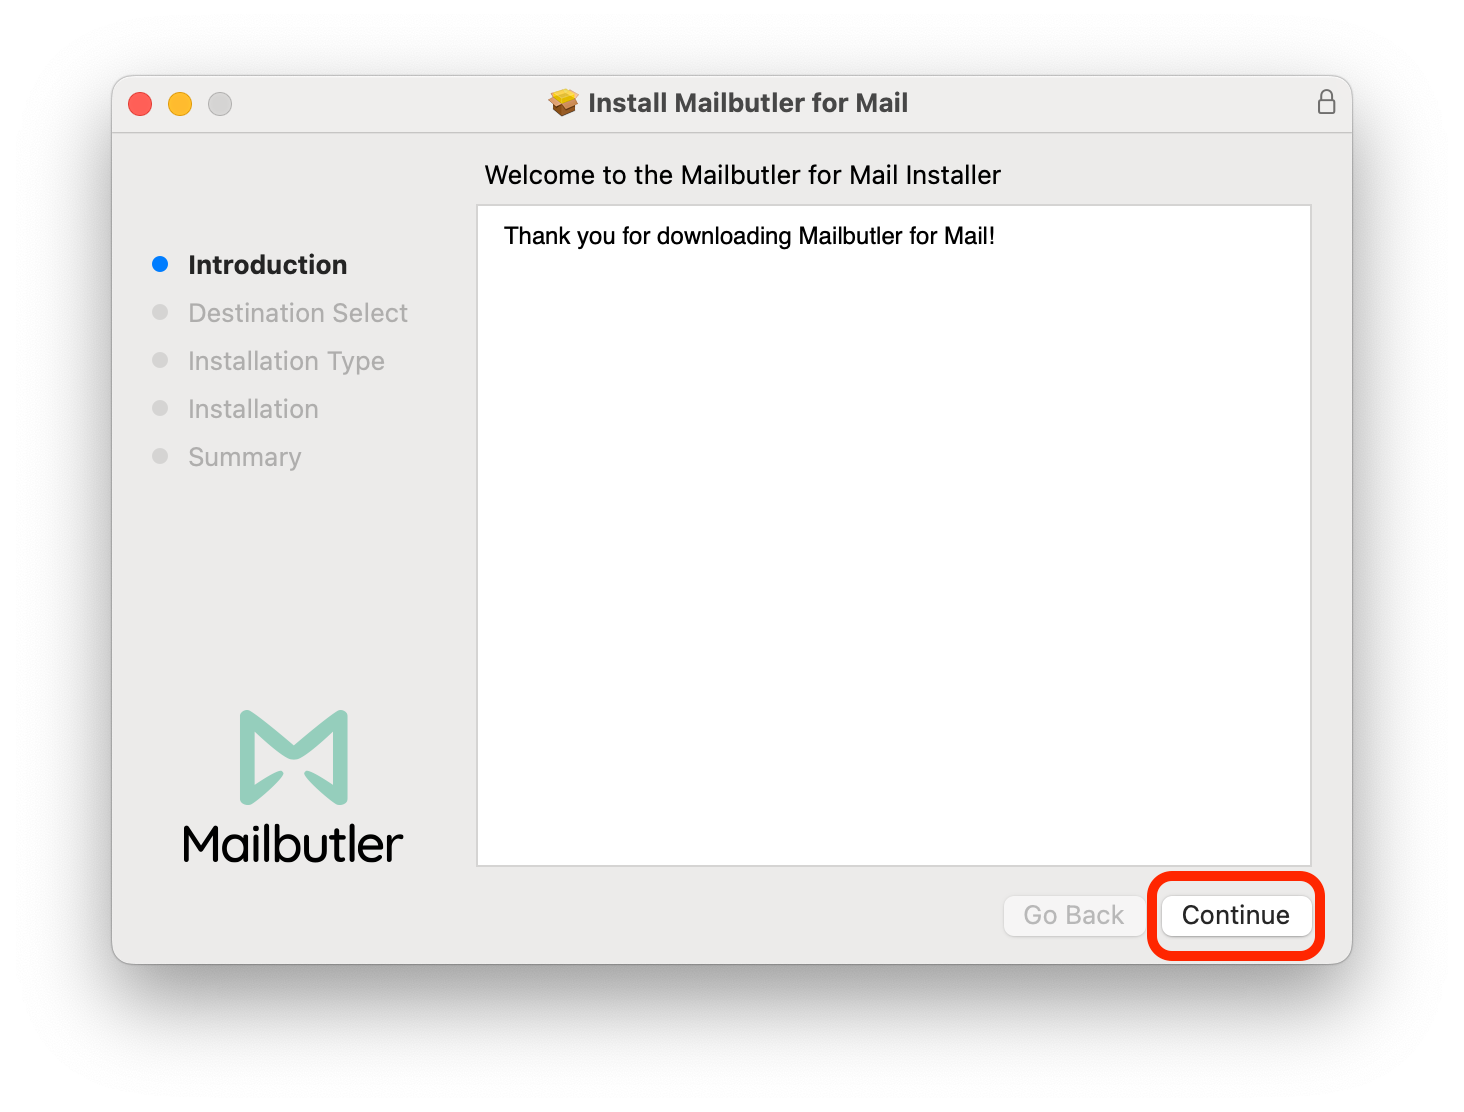
10. The installer window will open. Click Continue.
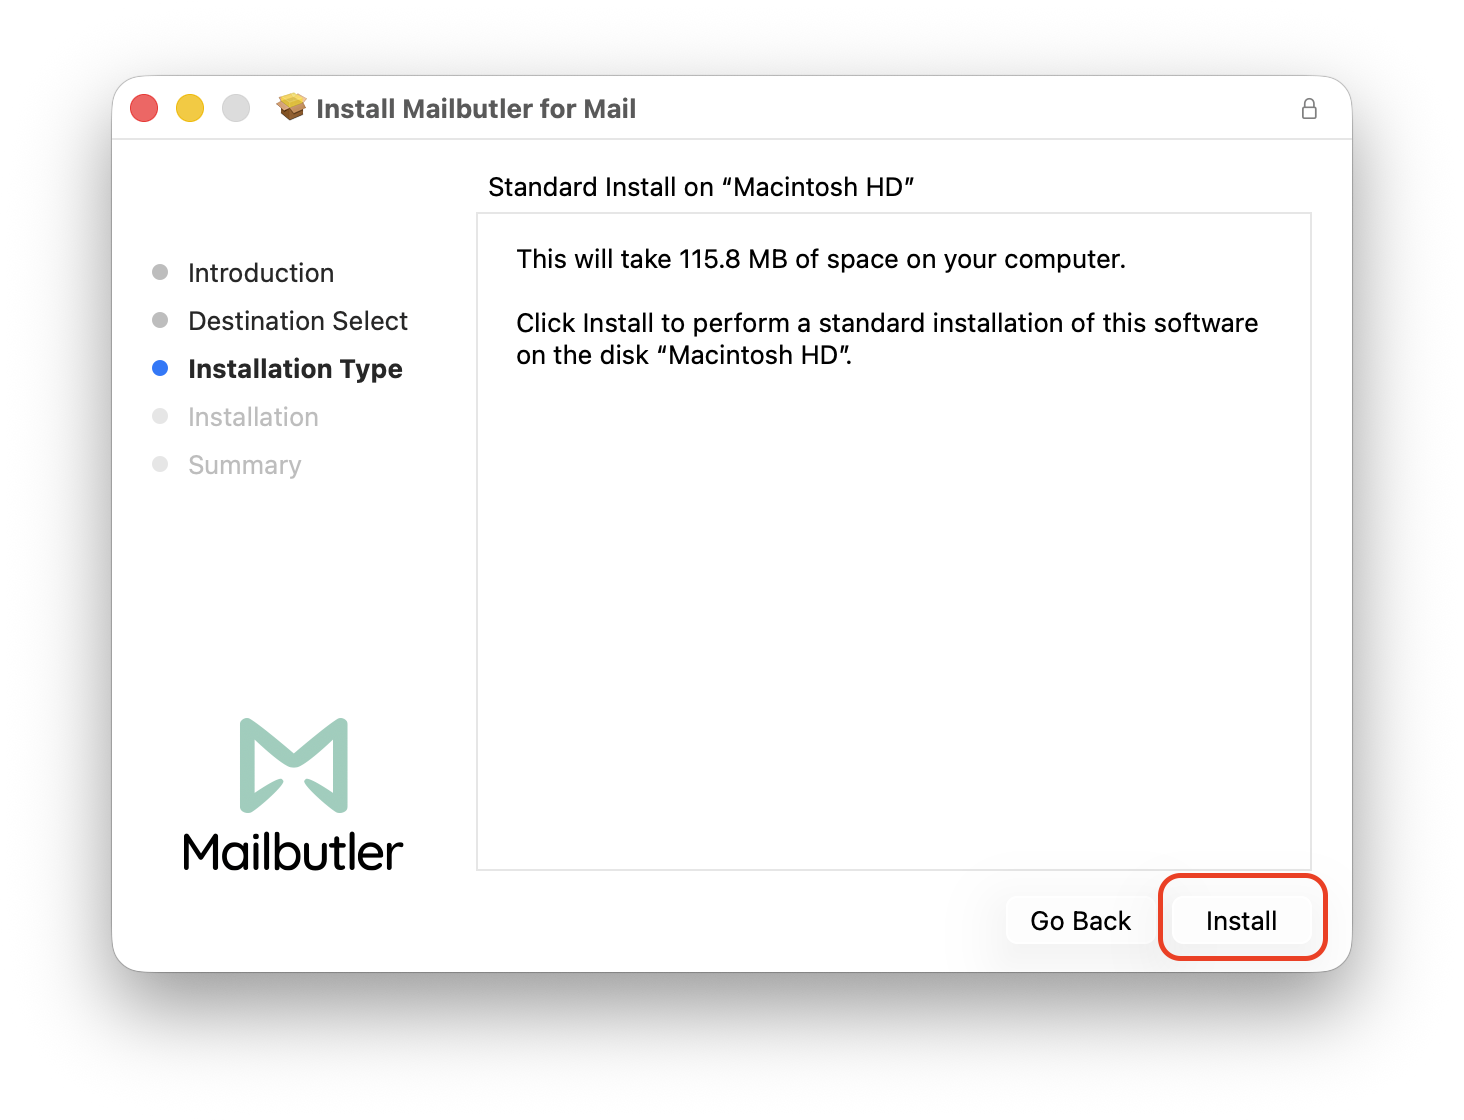
11. Click Install.
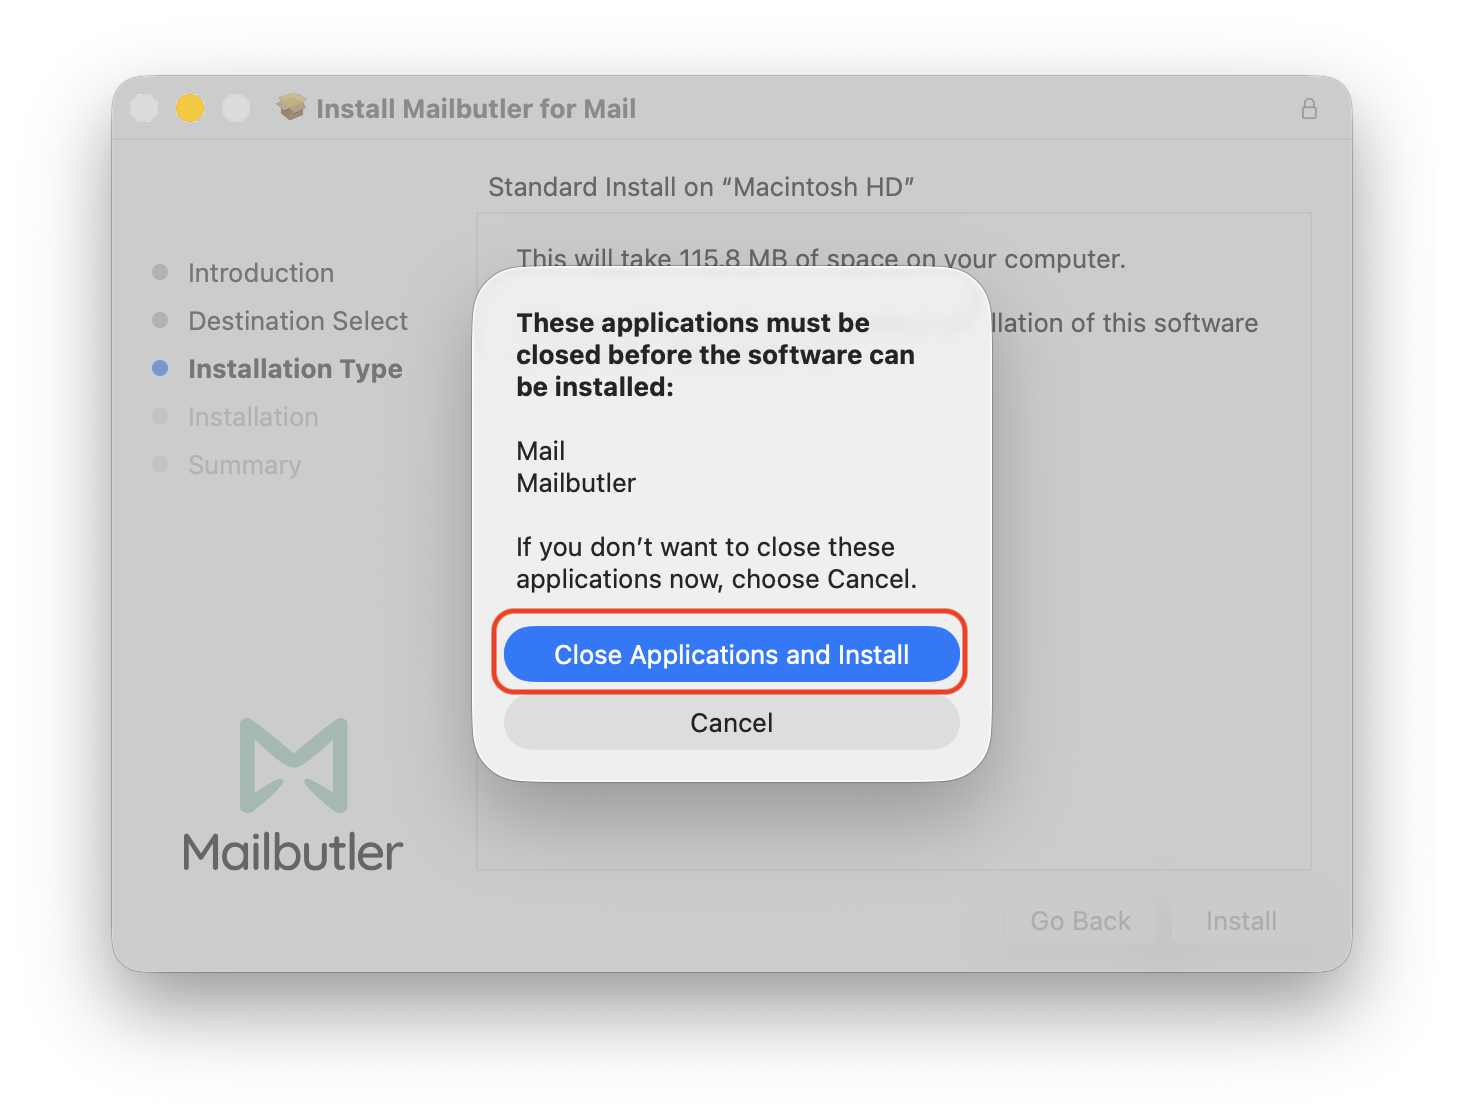
12. Click Close Application and Install.
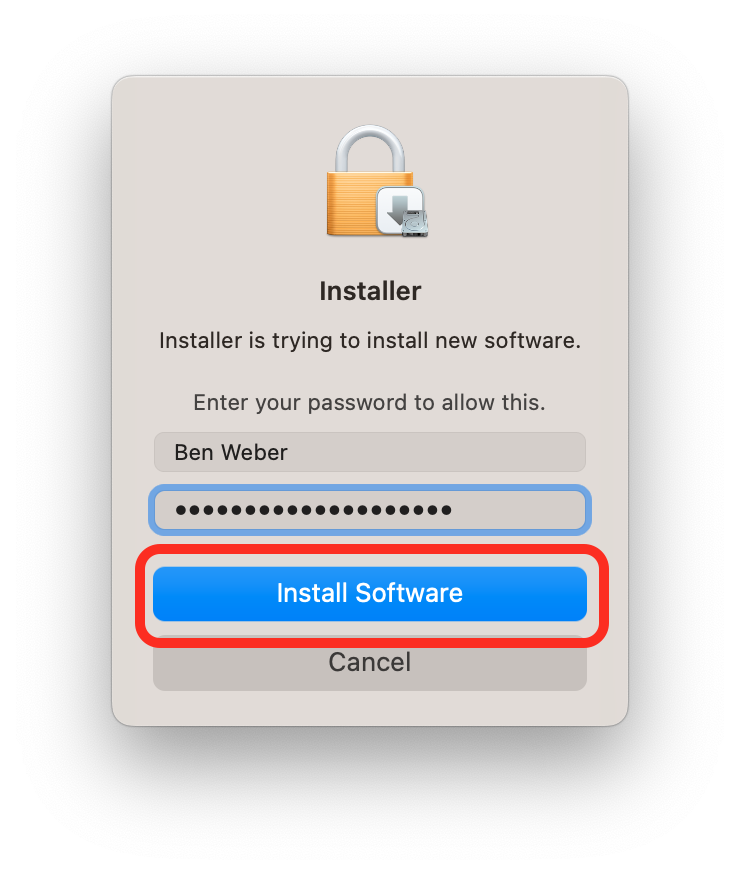
13. Enter your macOS Administrator password and click Install Software.
14. Click OK.

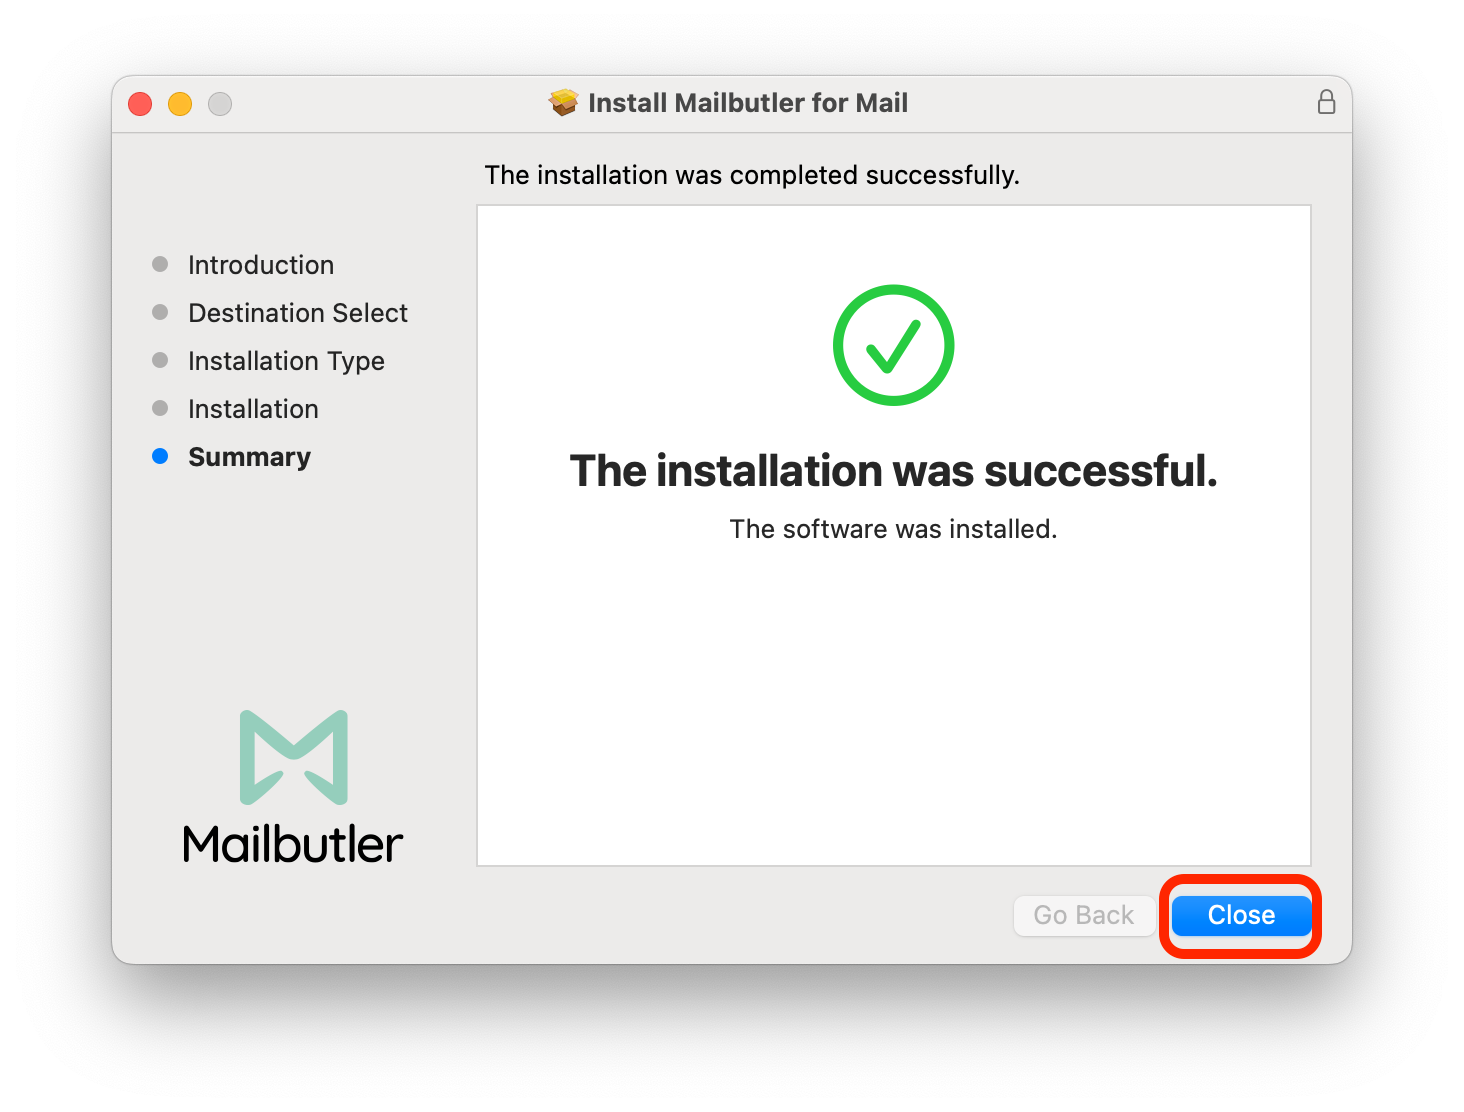
15. After the installation has finished, click Close.
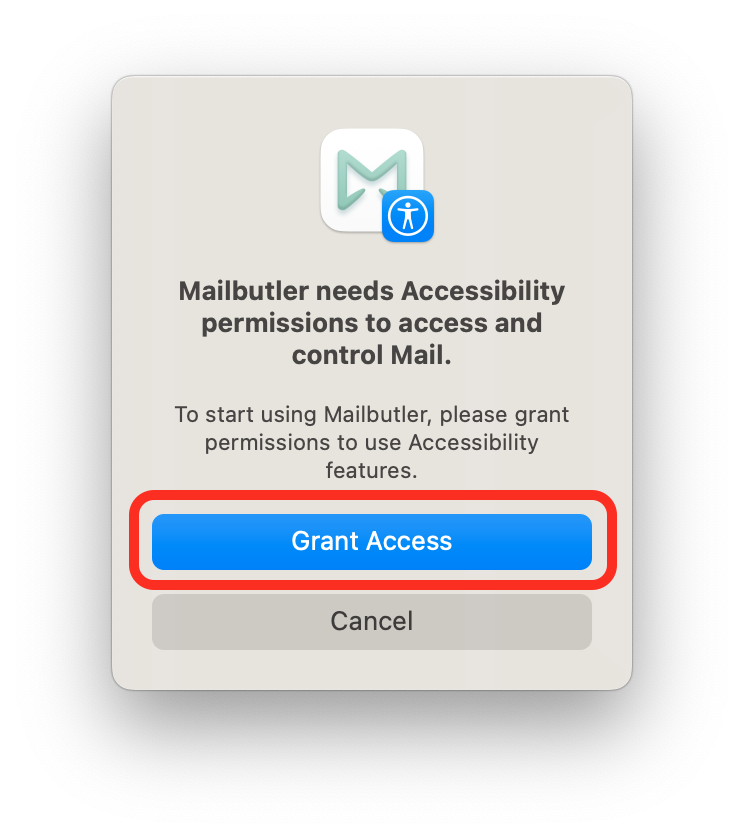
16. A new window will appear. Click Grant Access.
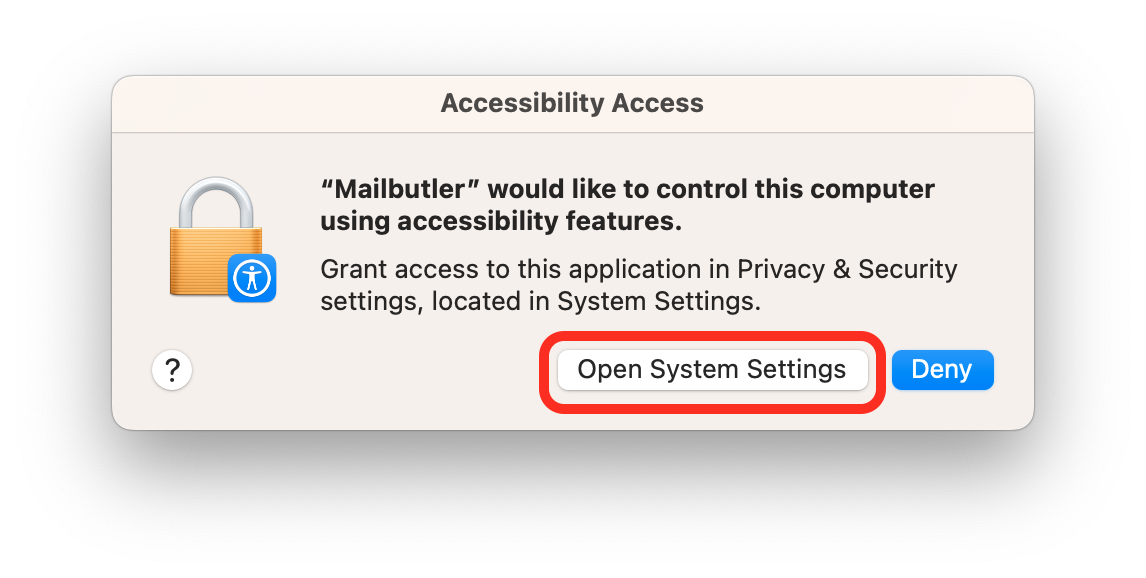
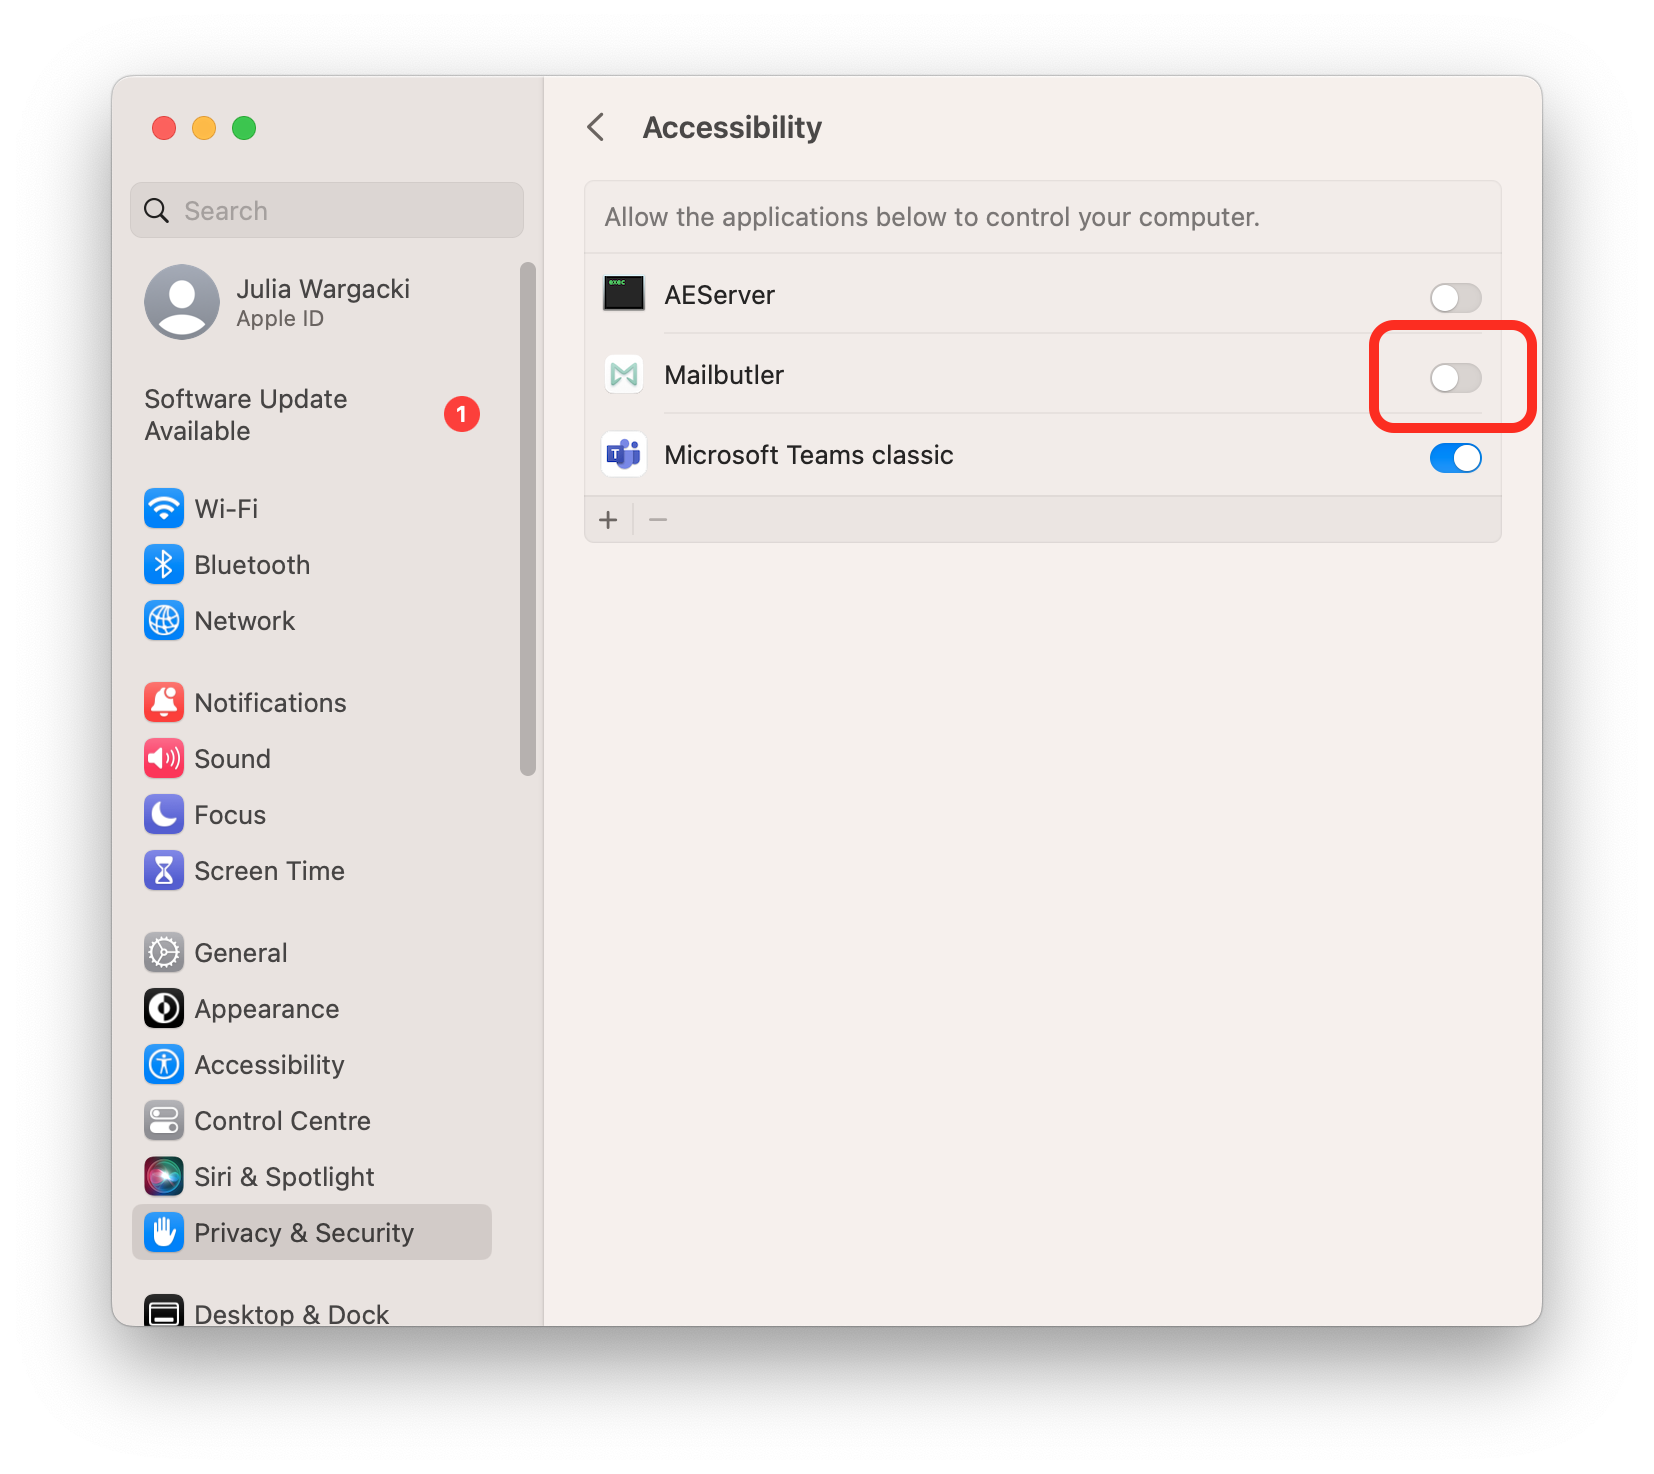
17. Click Open System Settings.
18. Use the toggle button to enable Mailbutler.
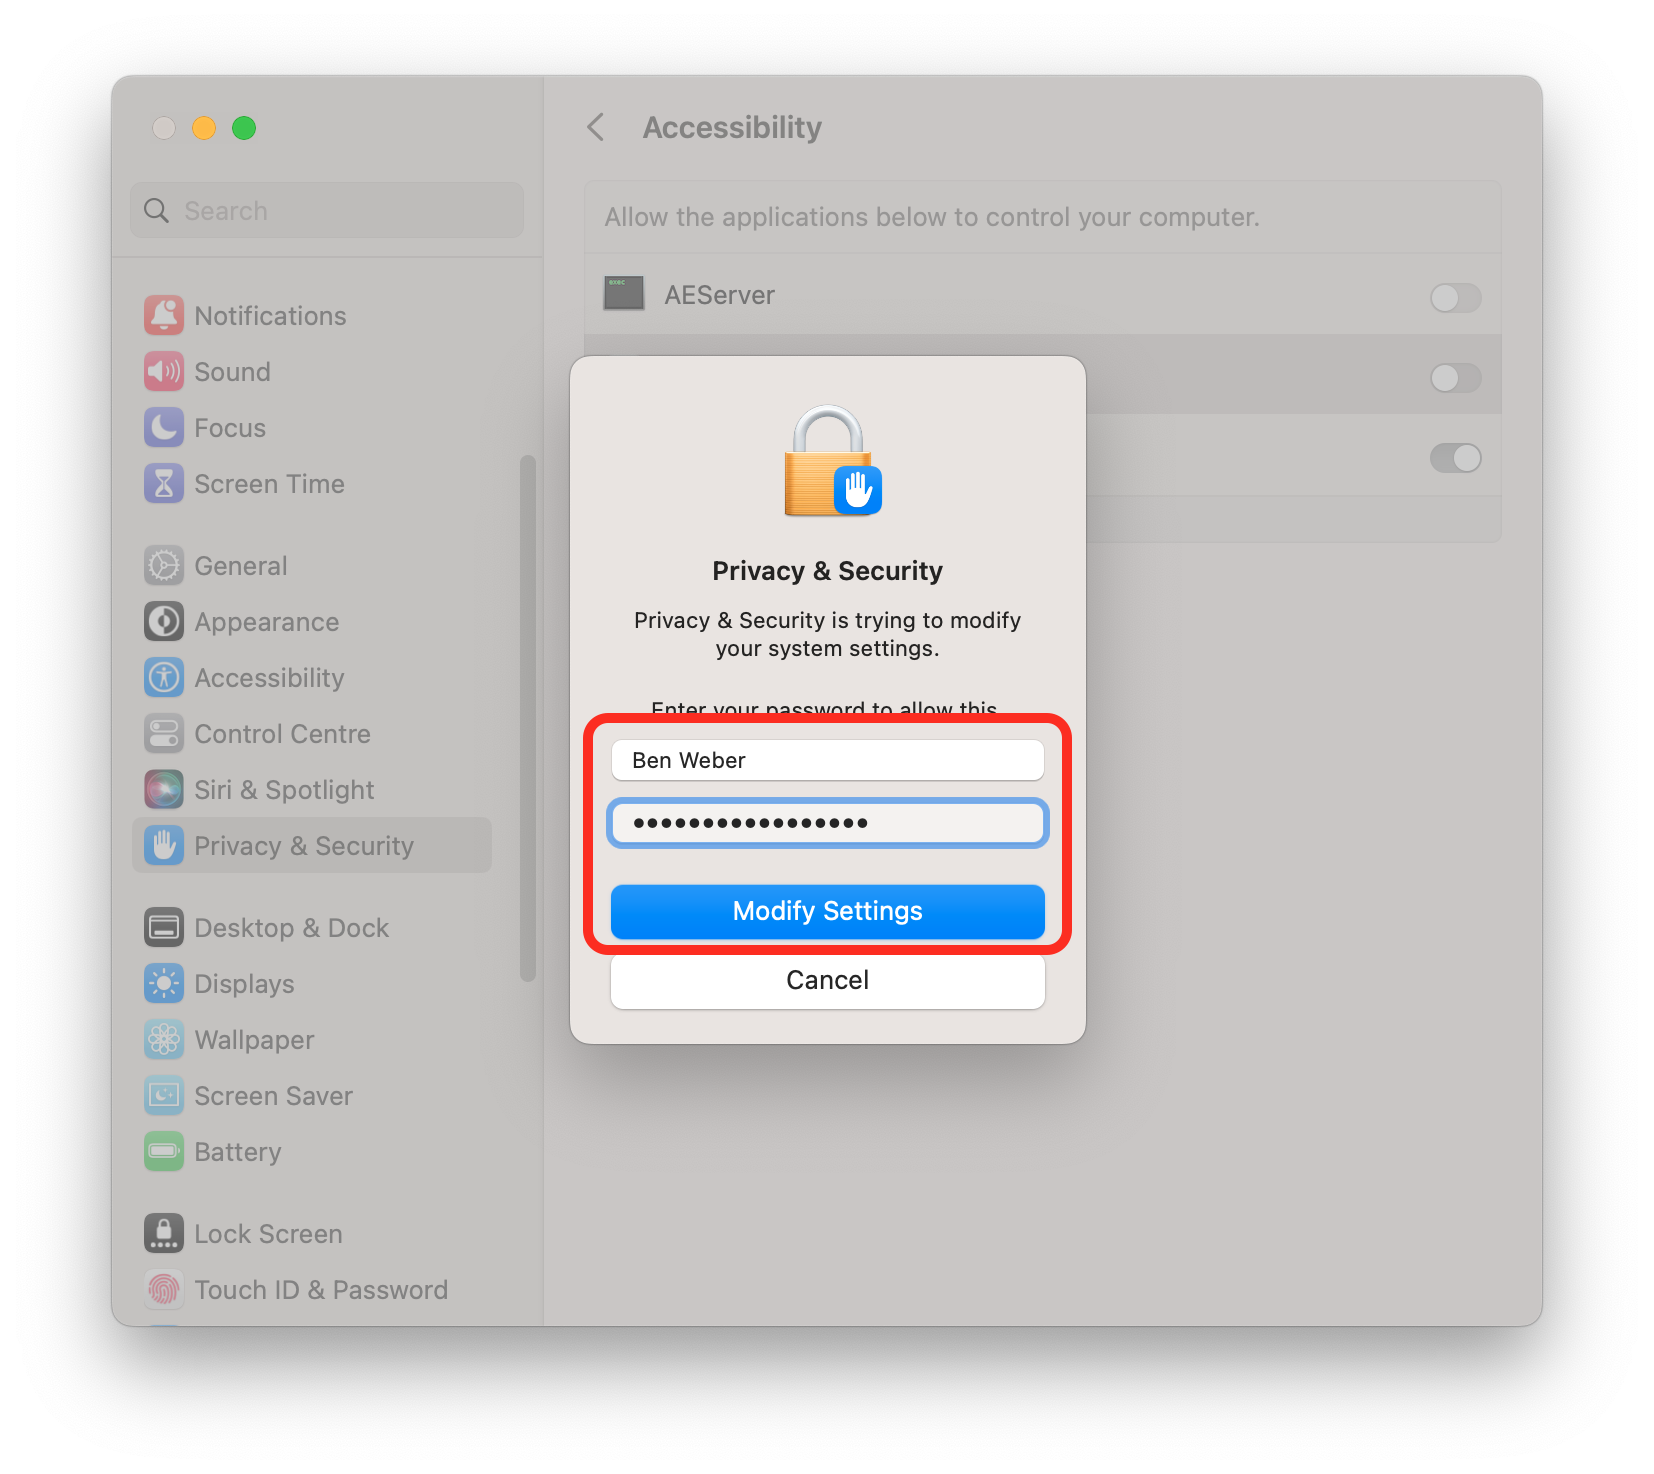
16. Enter your macOS Administrator password and click Modify Settings.
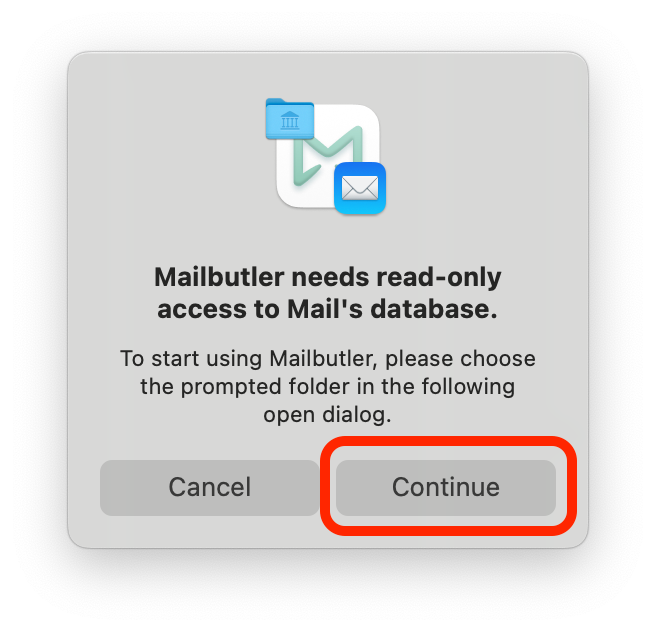
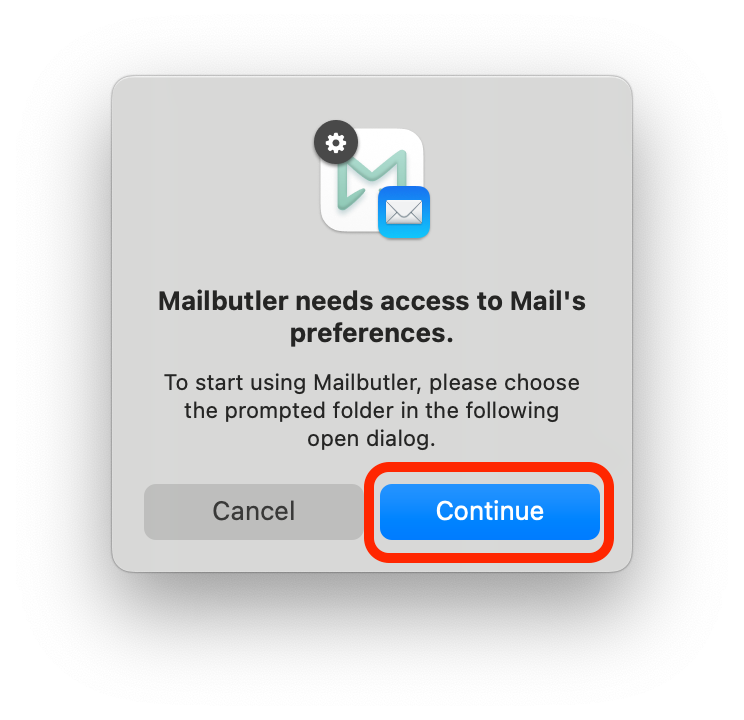
19. A new window will appear. Click Continue.
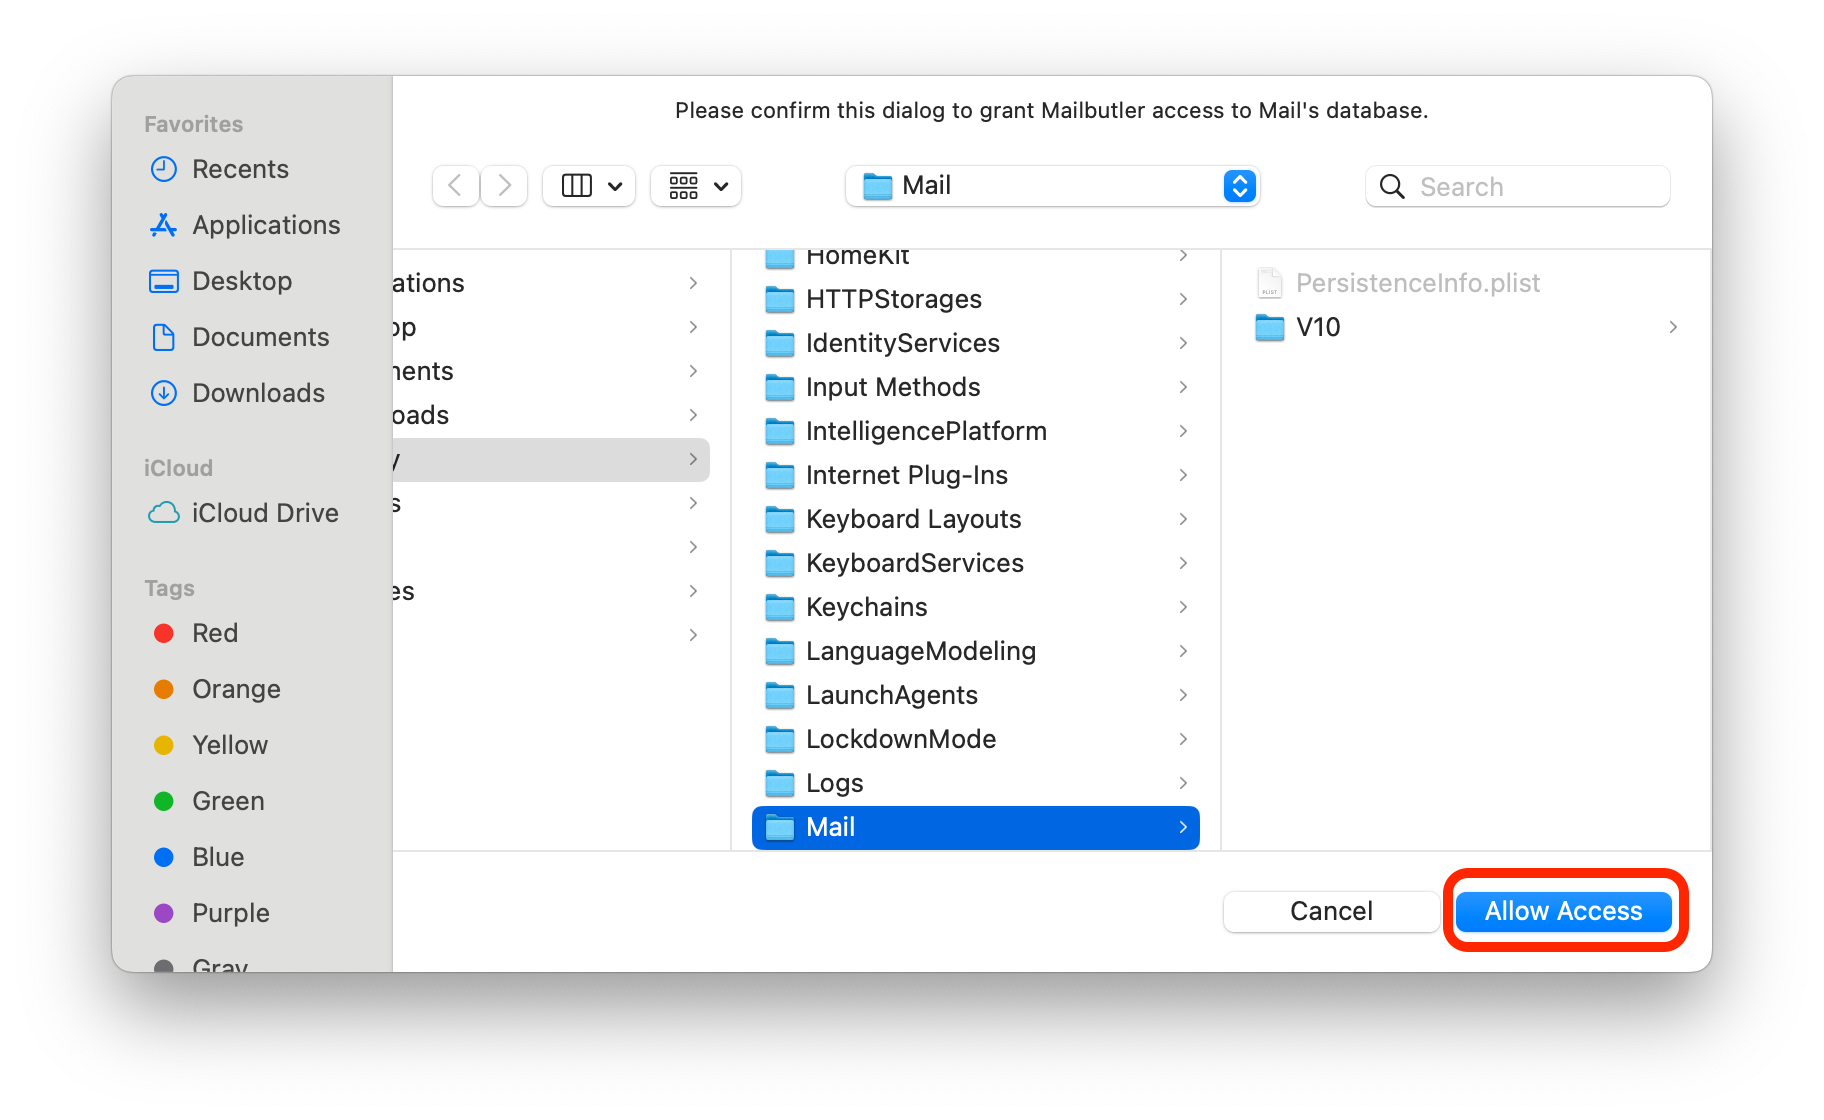
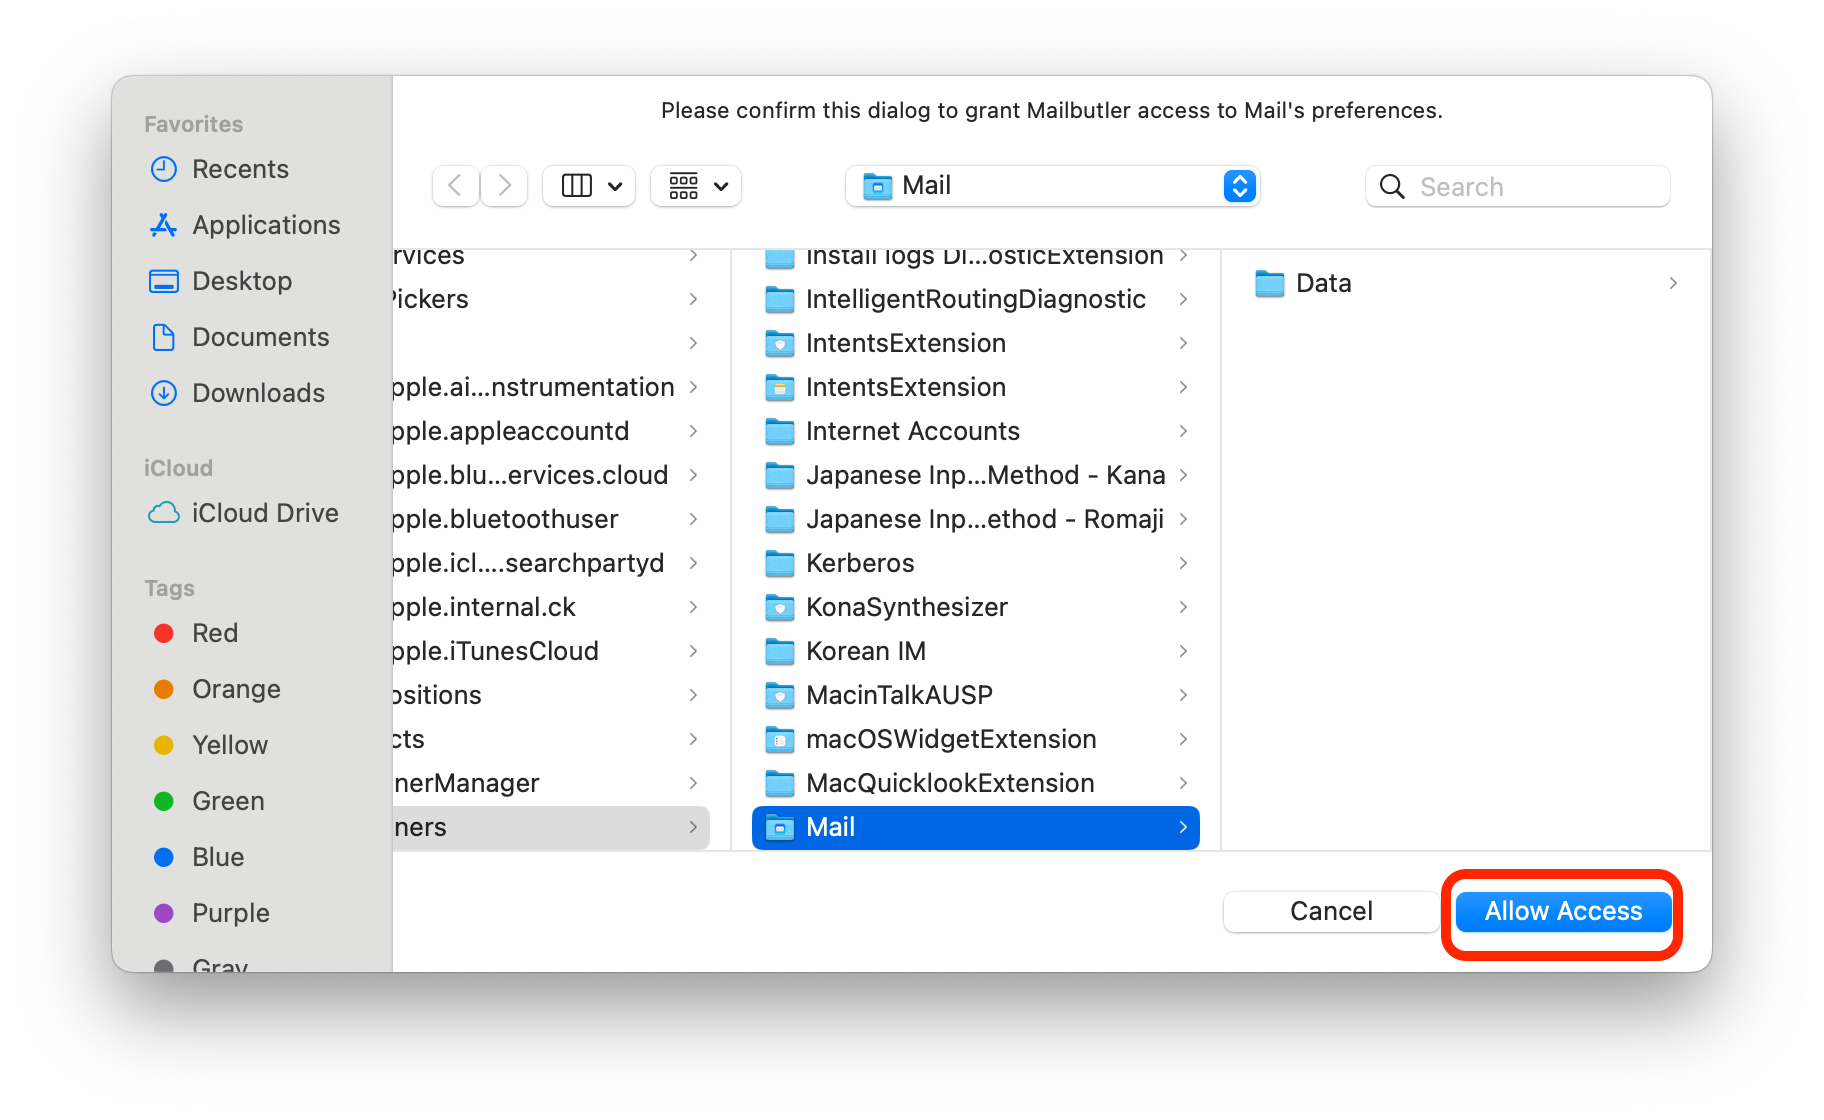
20. Click Allow Access.
21. A new window will appear. Click Continue.
22. Click Allow Access.
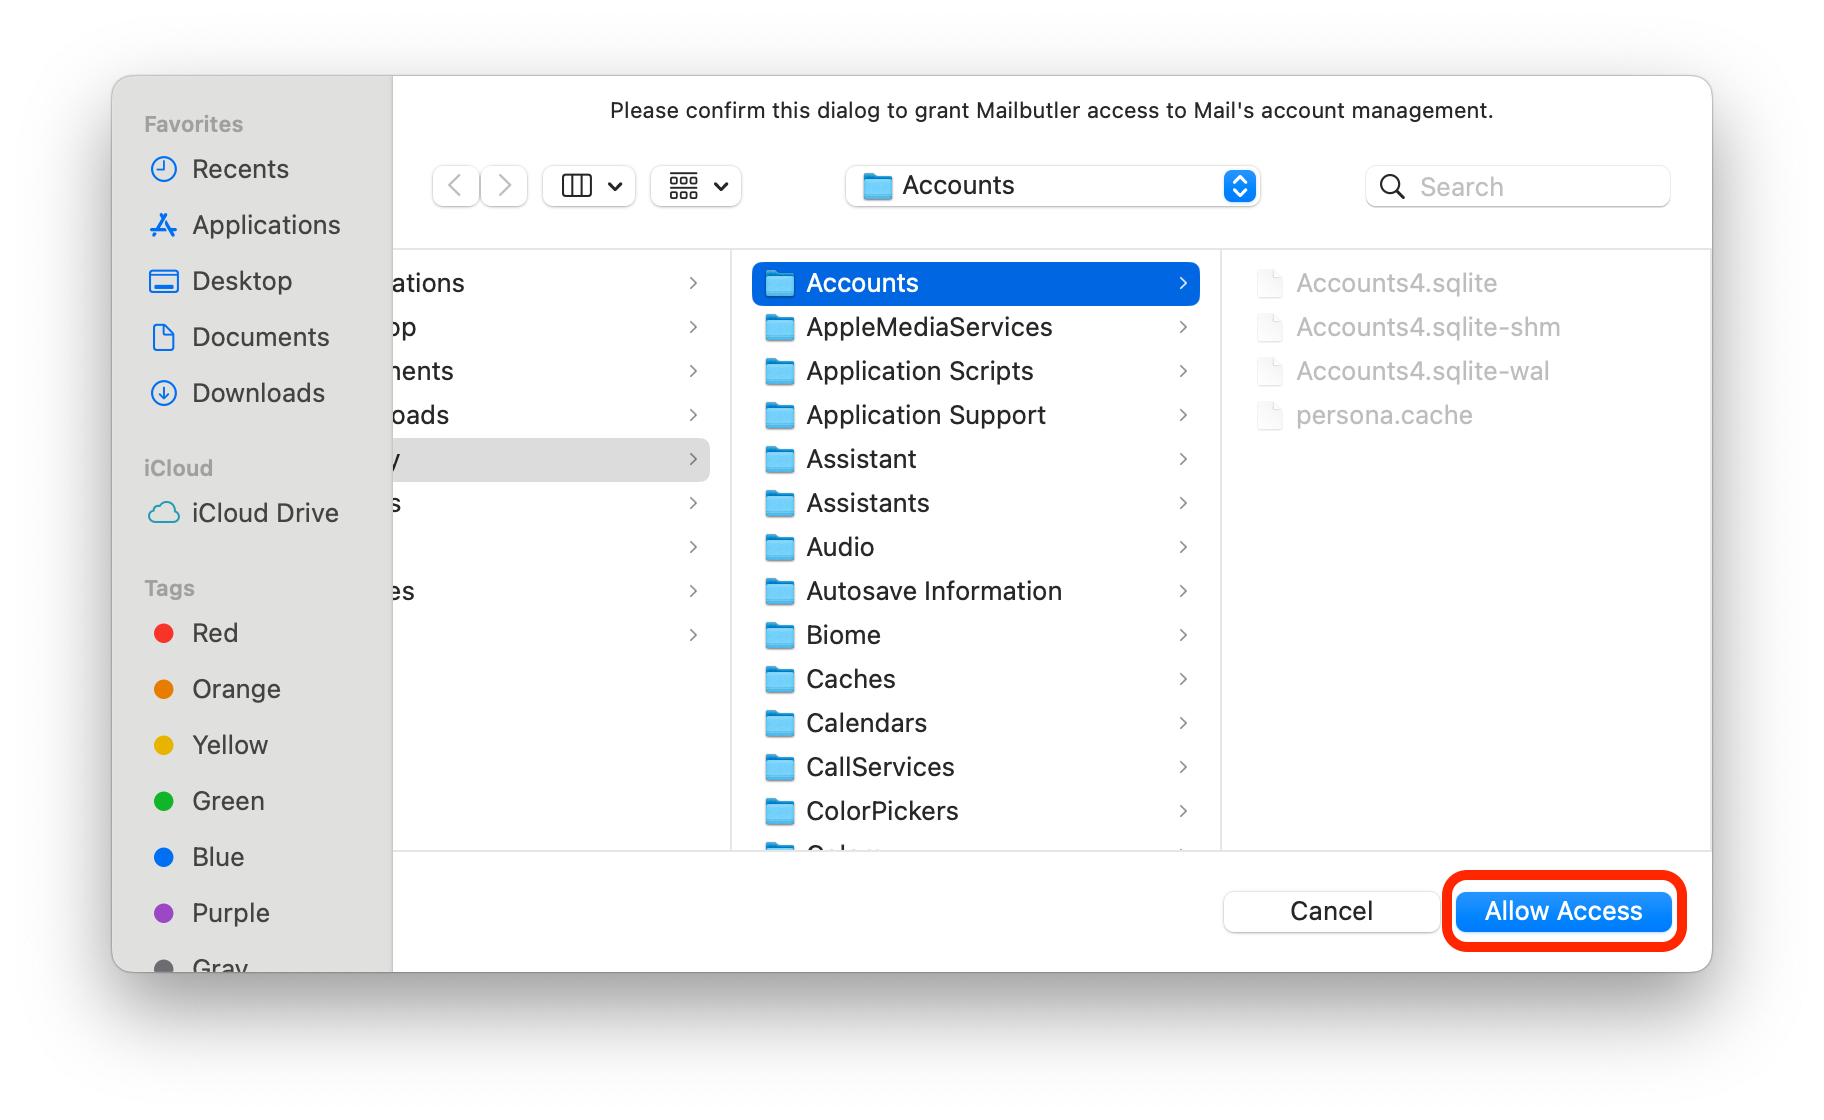
23. A new window will appear. Click Continue.

24. Click Allow Access.
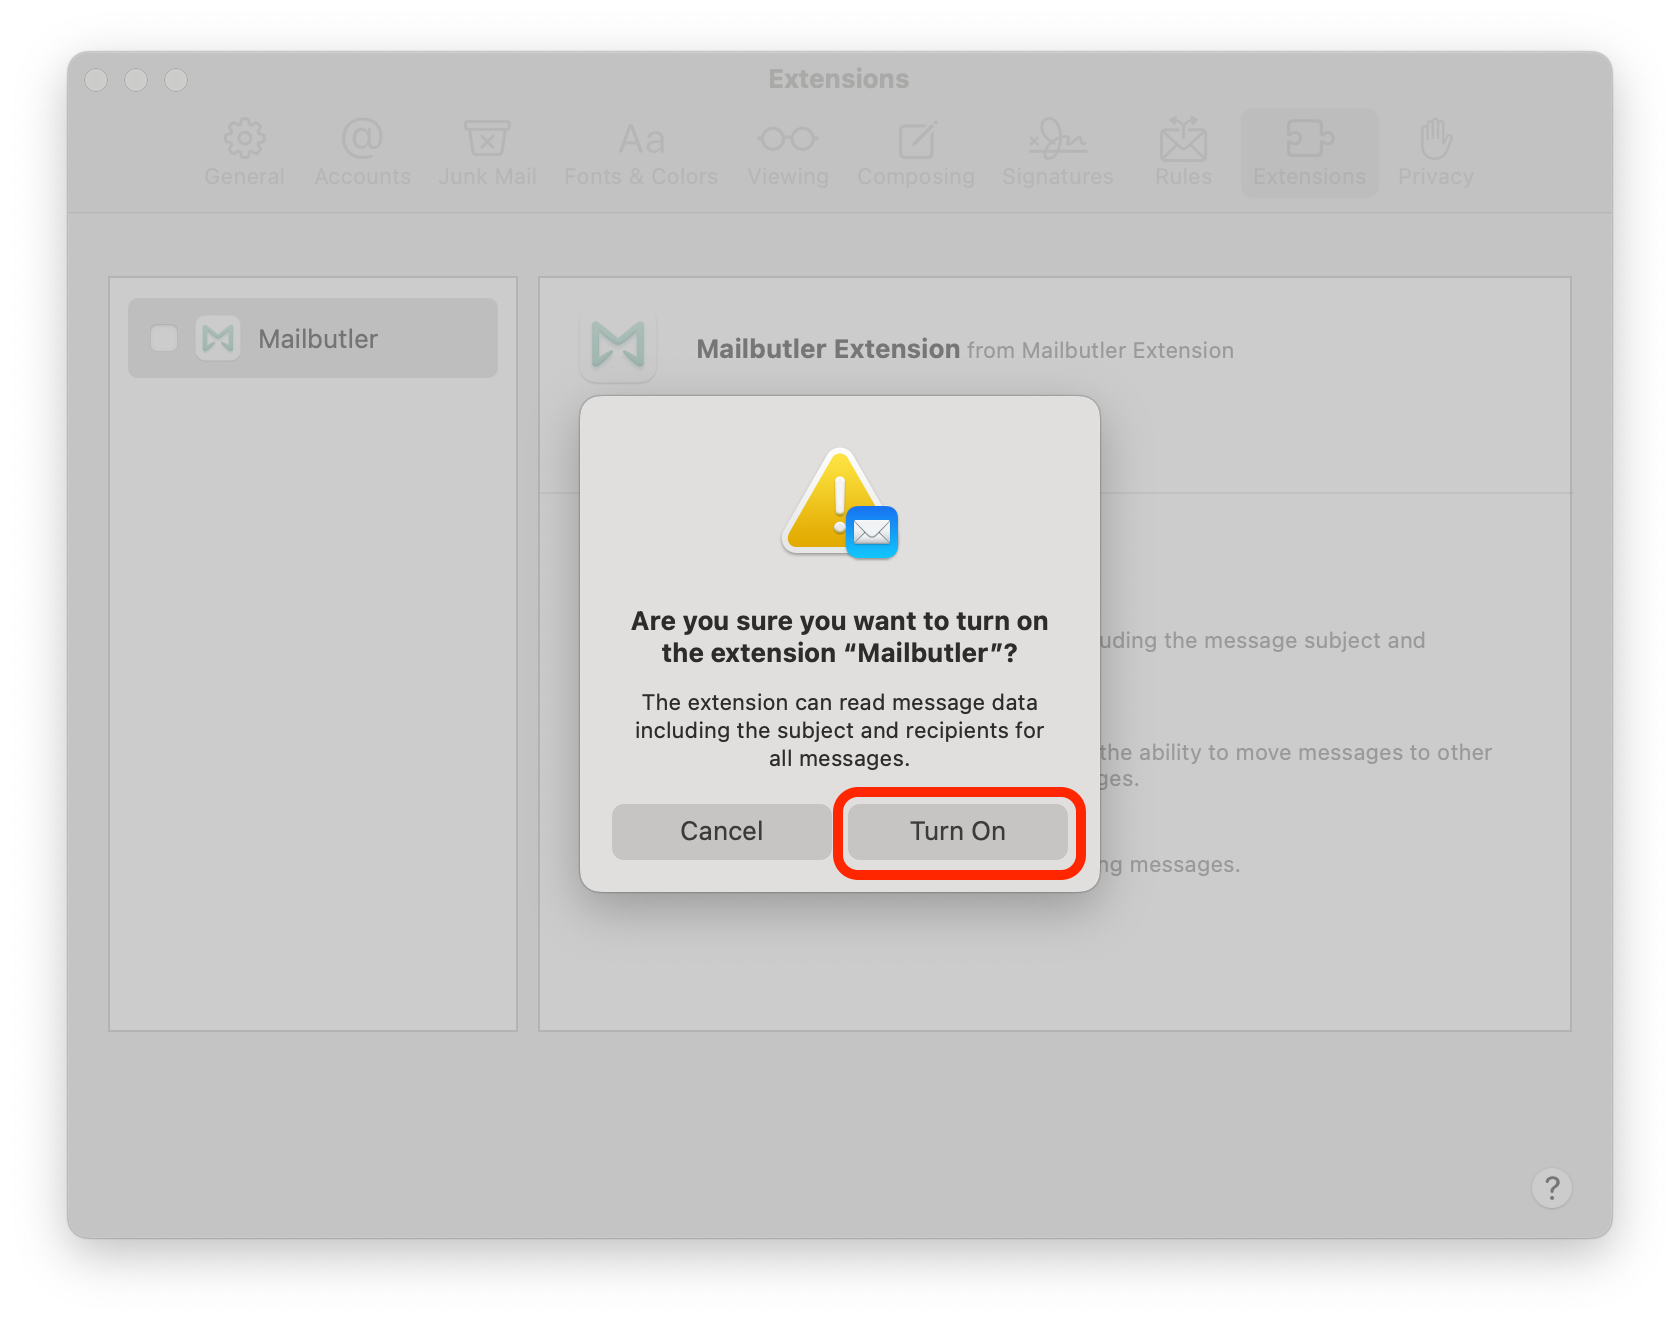
25. You will see the below window.
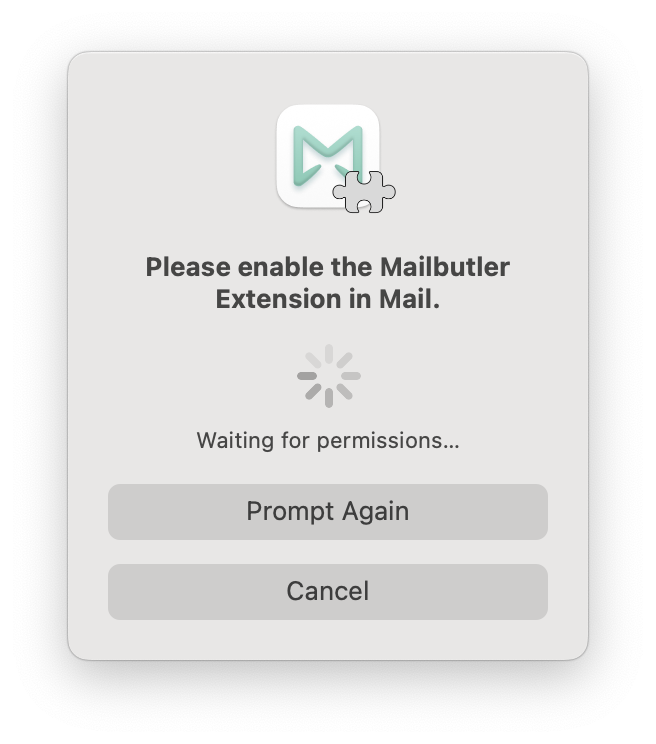
26. Click Turn On to enable Mailbutler as an Extension in your Mail app.
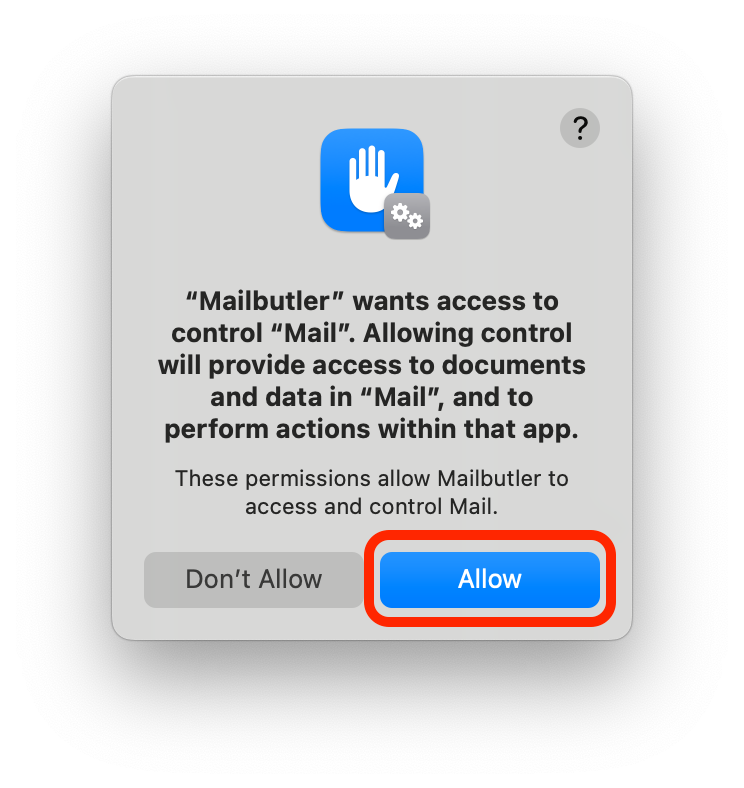
27. A new window will appear. Click Allow.
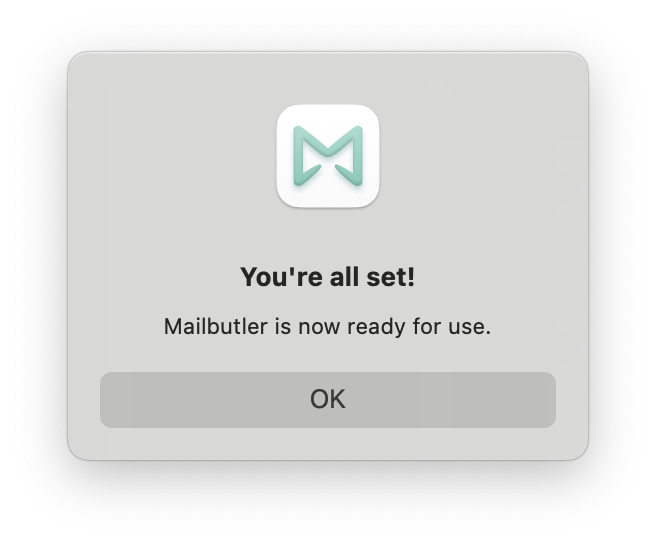
28. You will see the window below that confirms that the installation was successful.
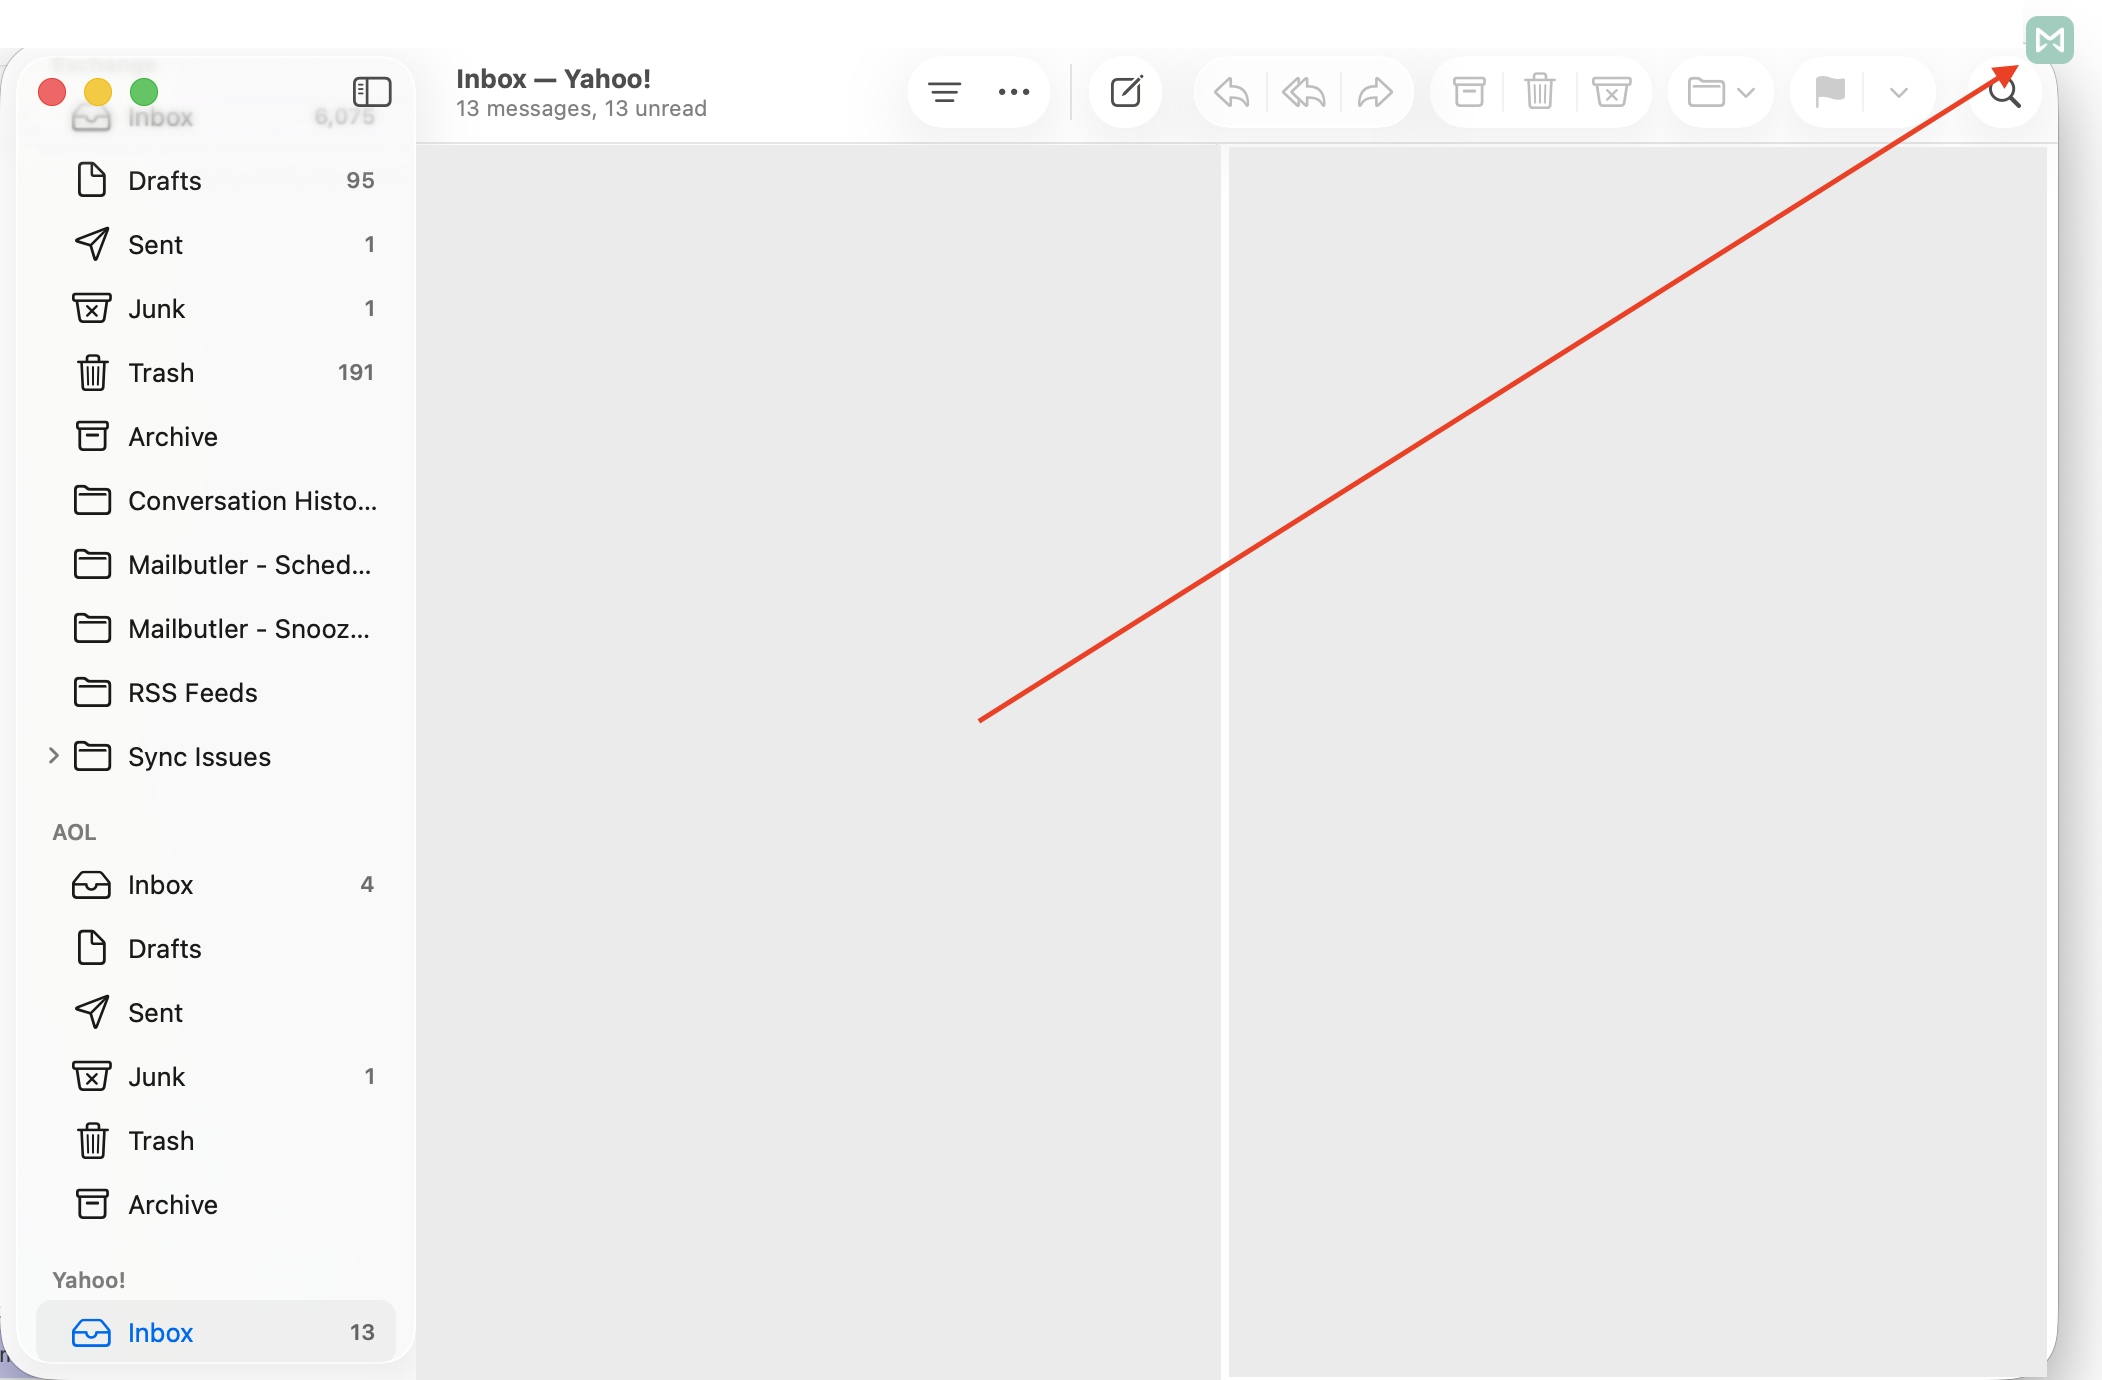
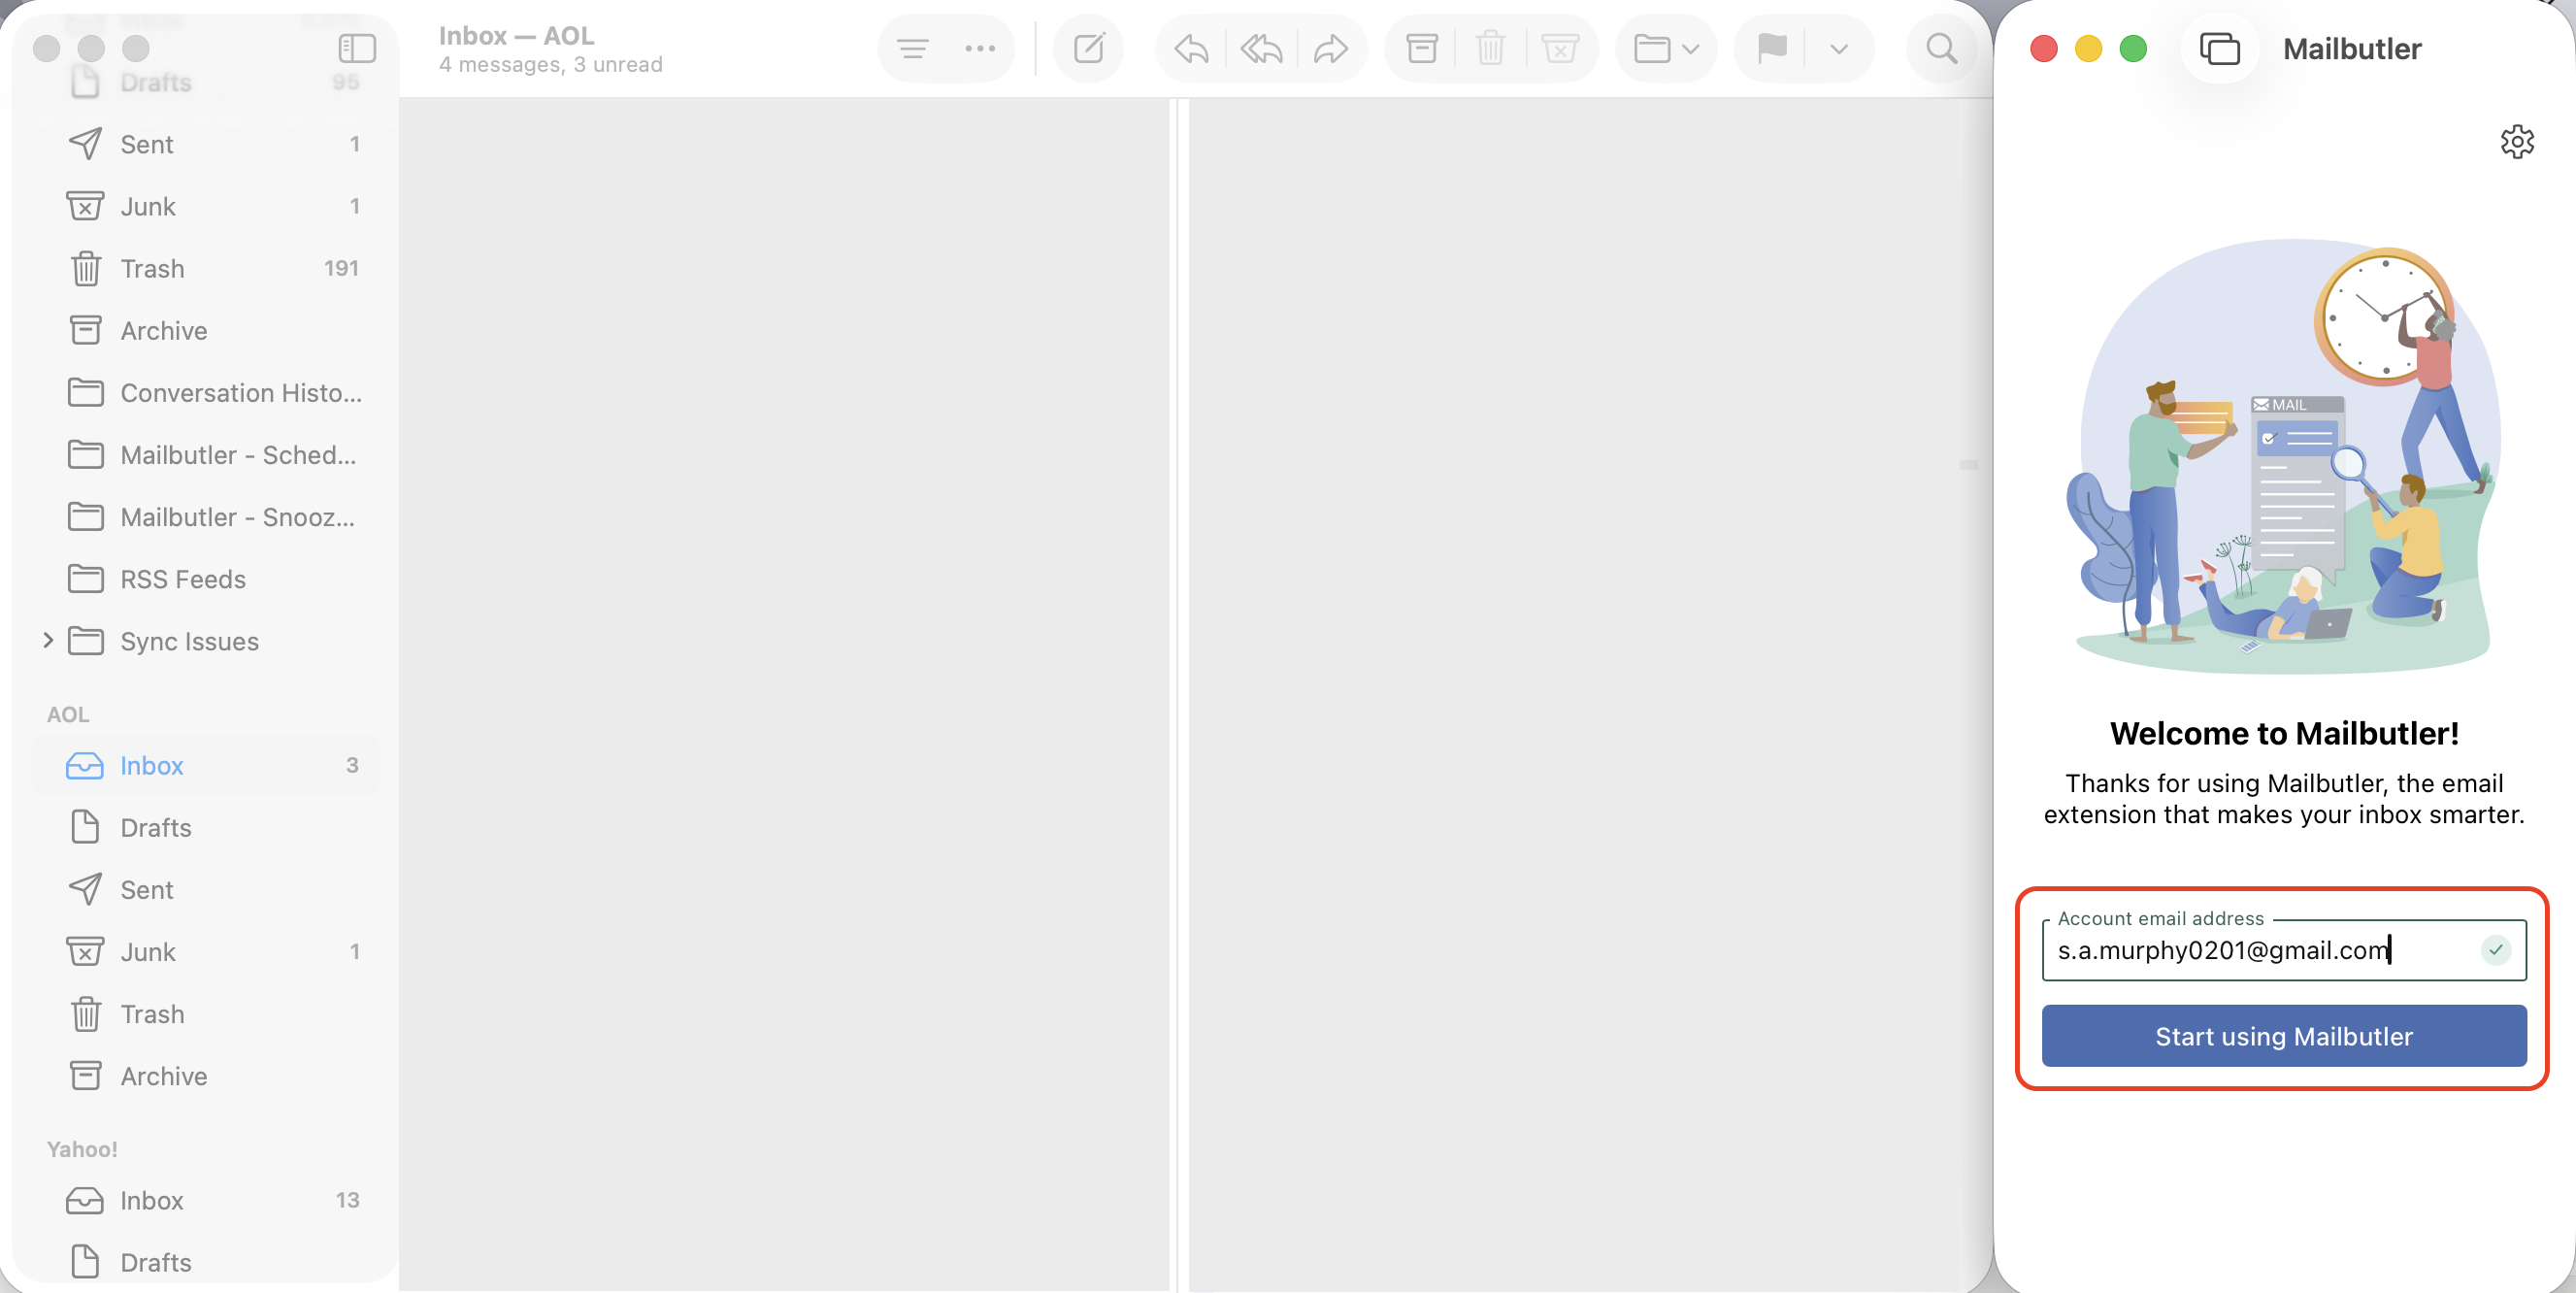
29. Open Apple Mail.
30. The Mailbutler sidebar should be automatically opened. In case it is not, click on the Mailbutler icon to open the Mailbutler sidebar.
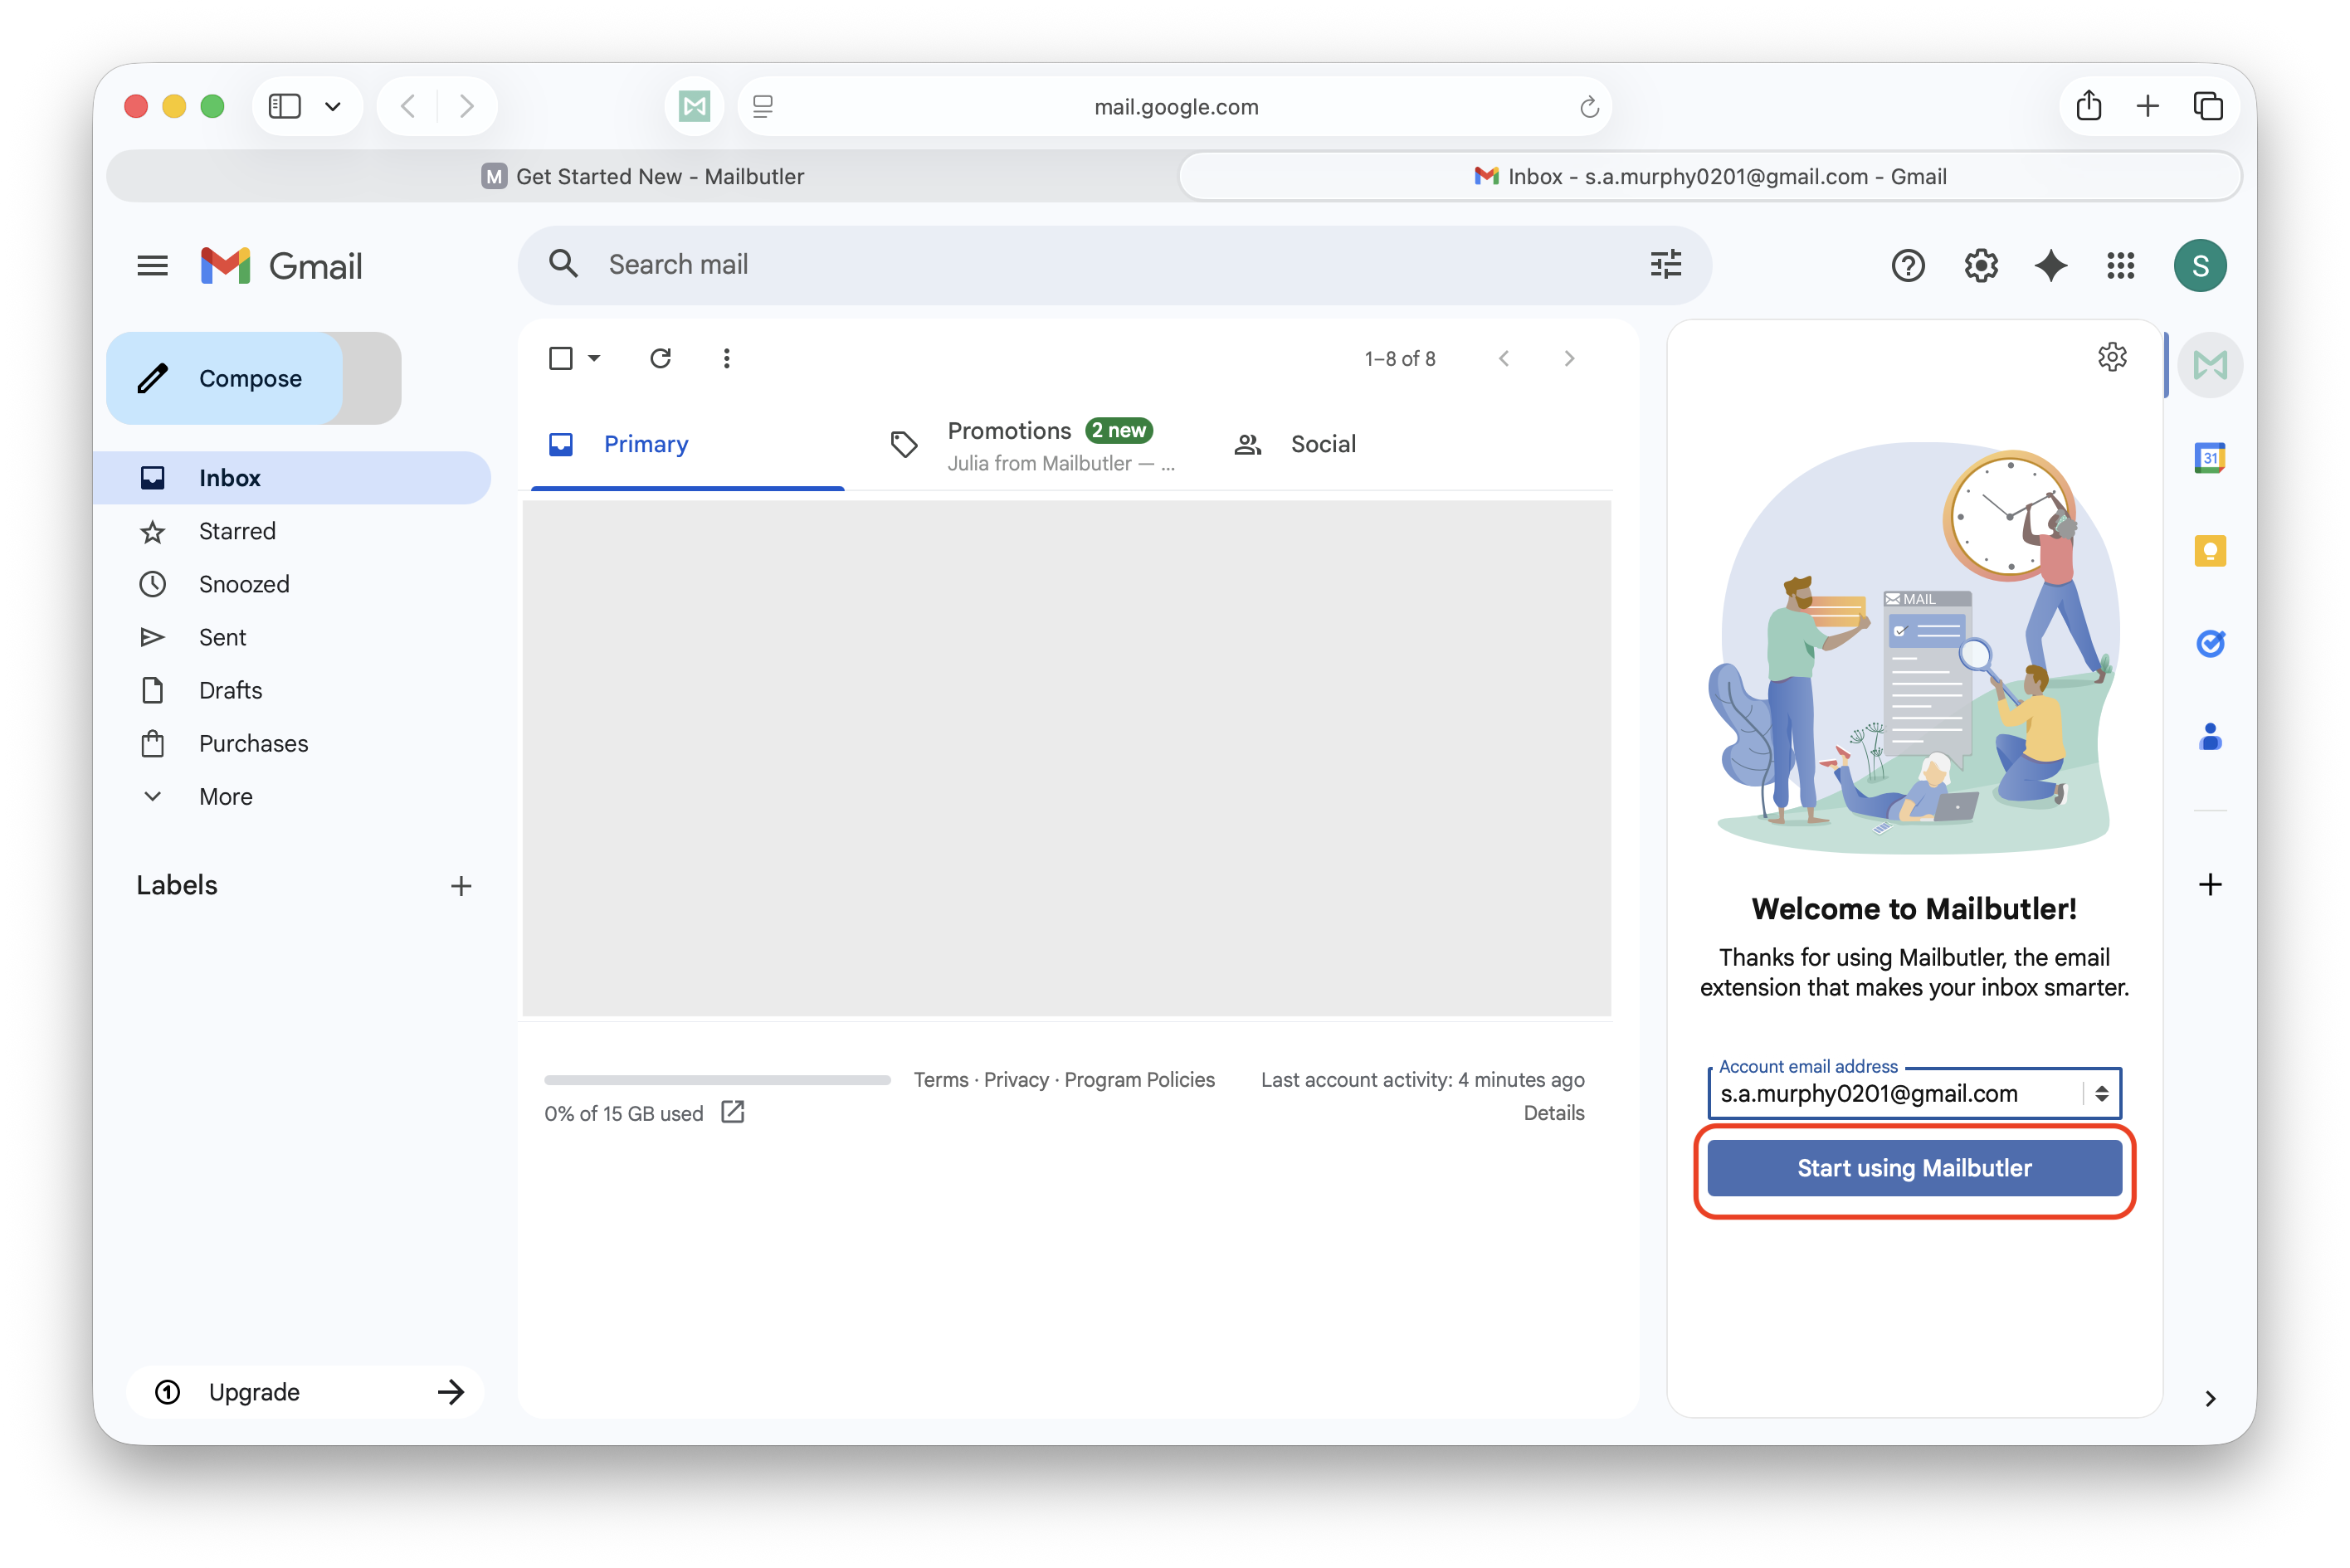
31. Enter your email address and click Start using Mailbutler.
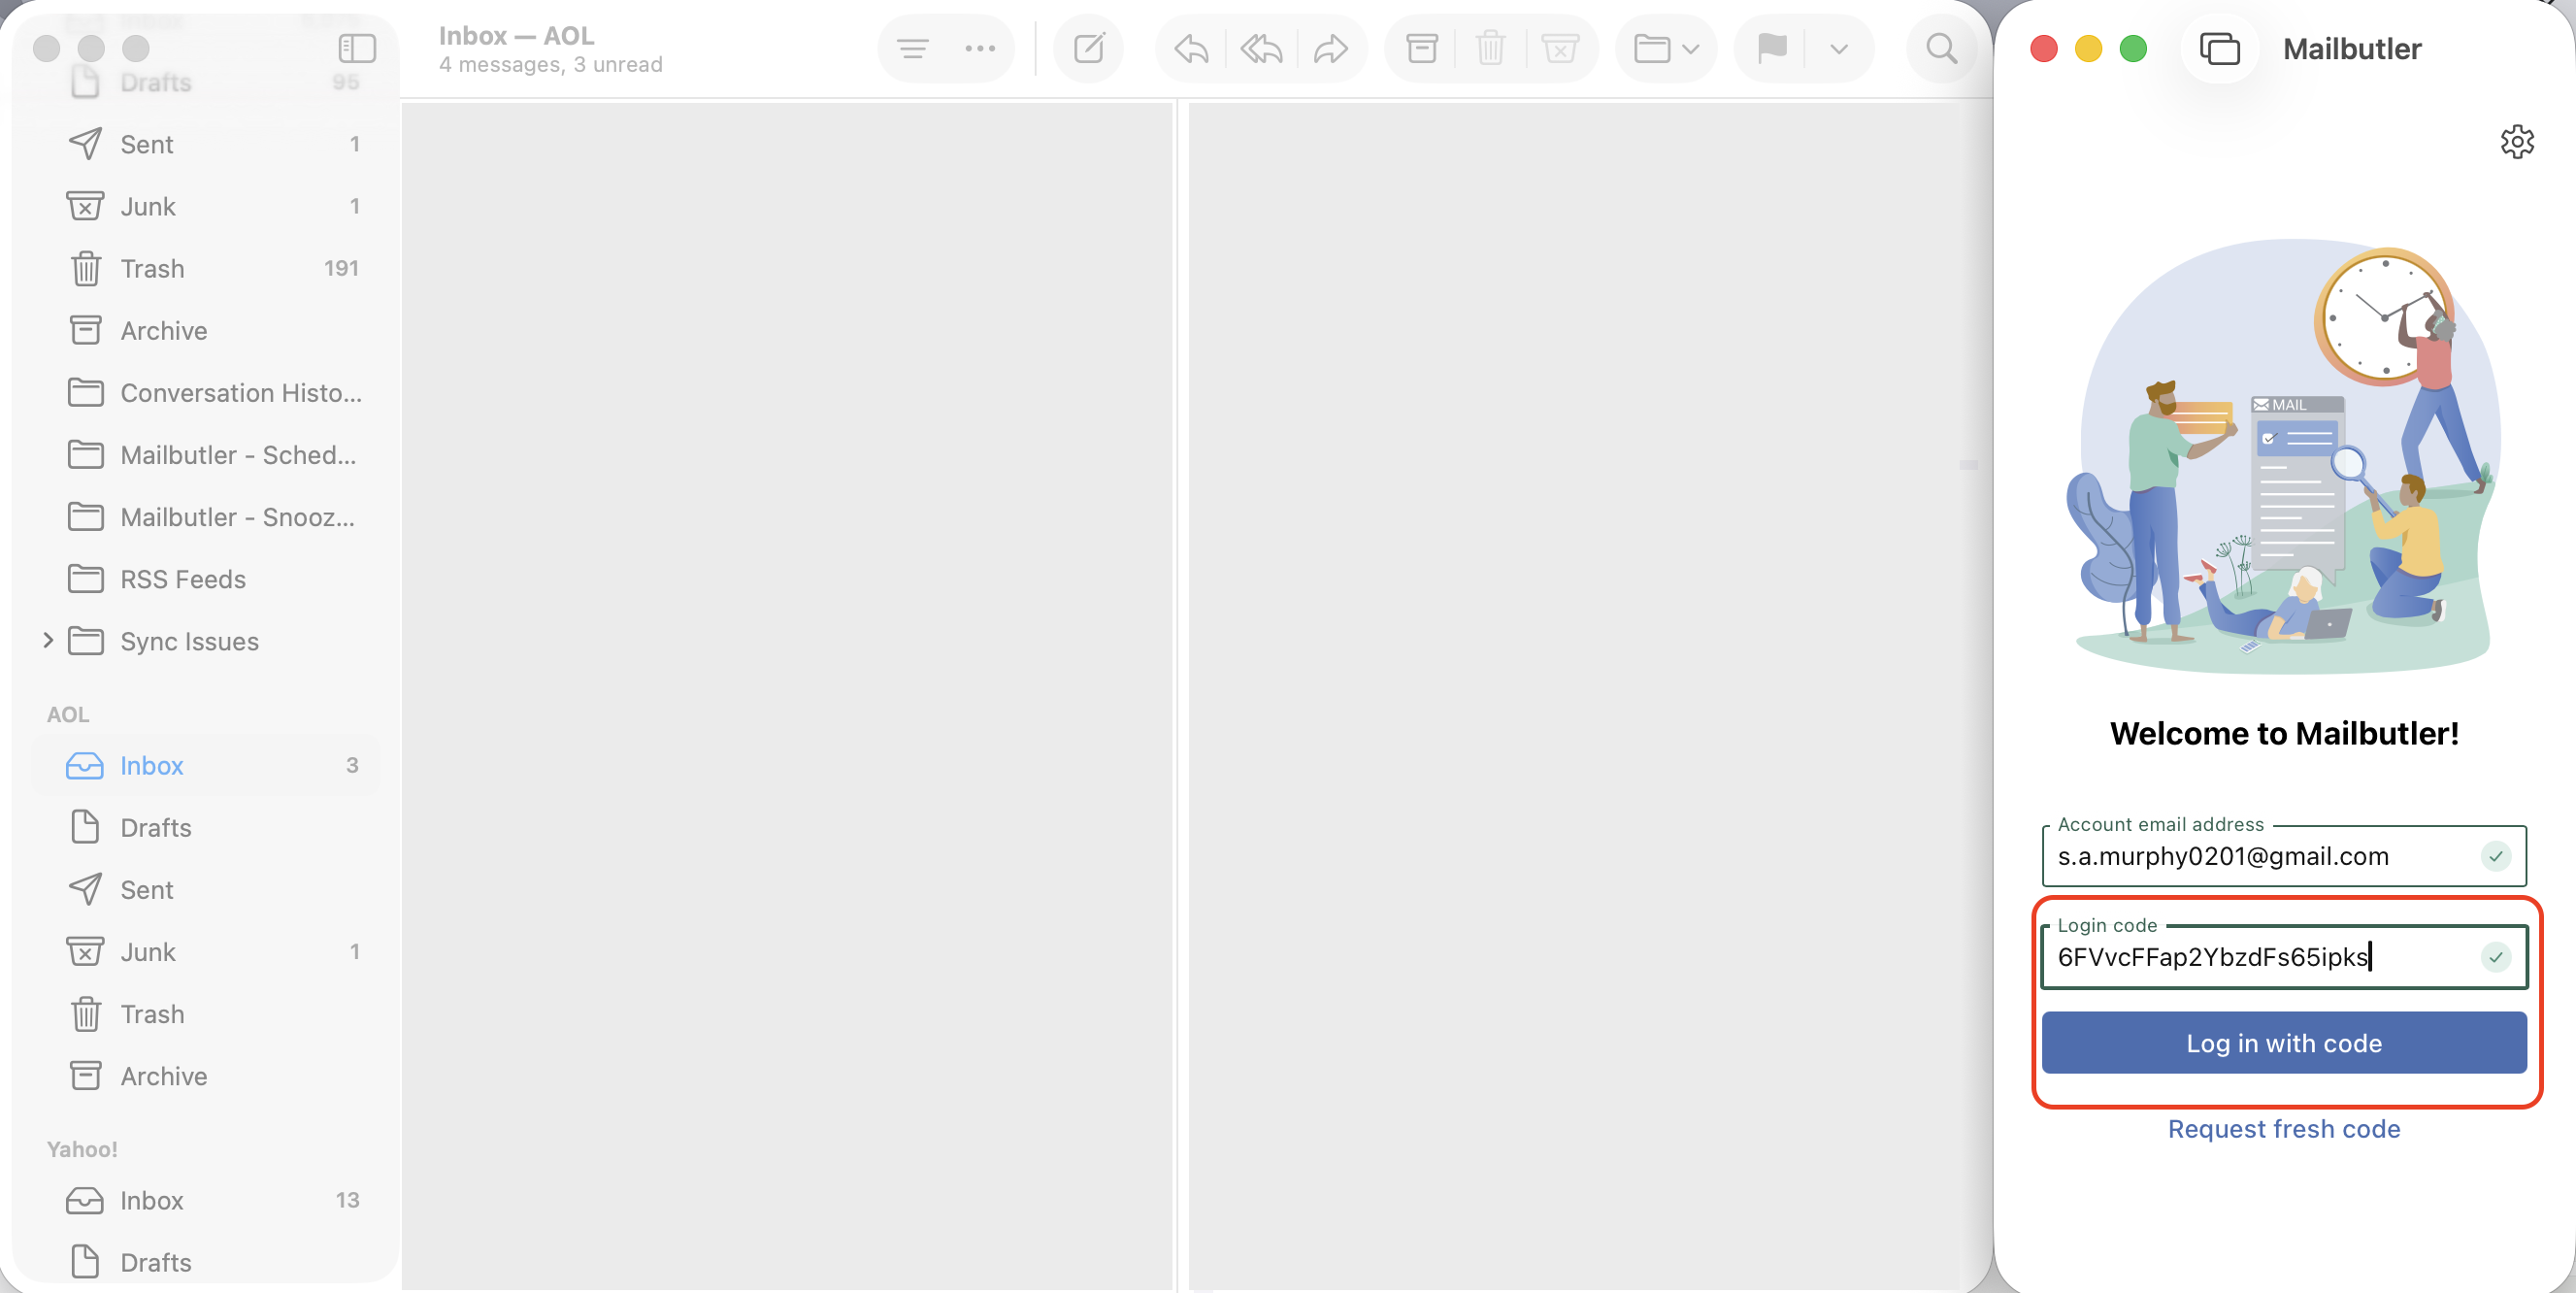
32. You will receive an email with a registration code. Enter the registration code in the field and click Log in with code.
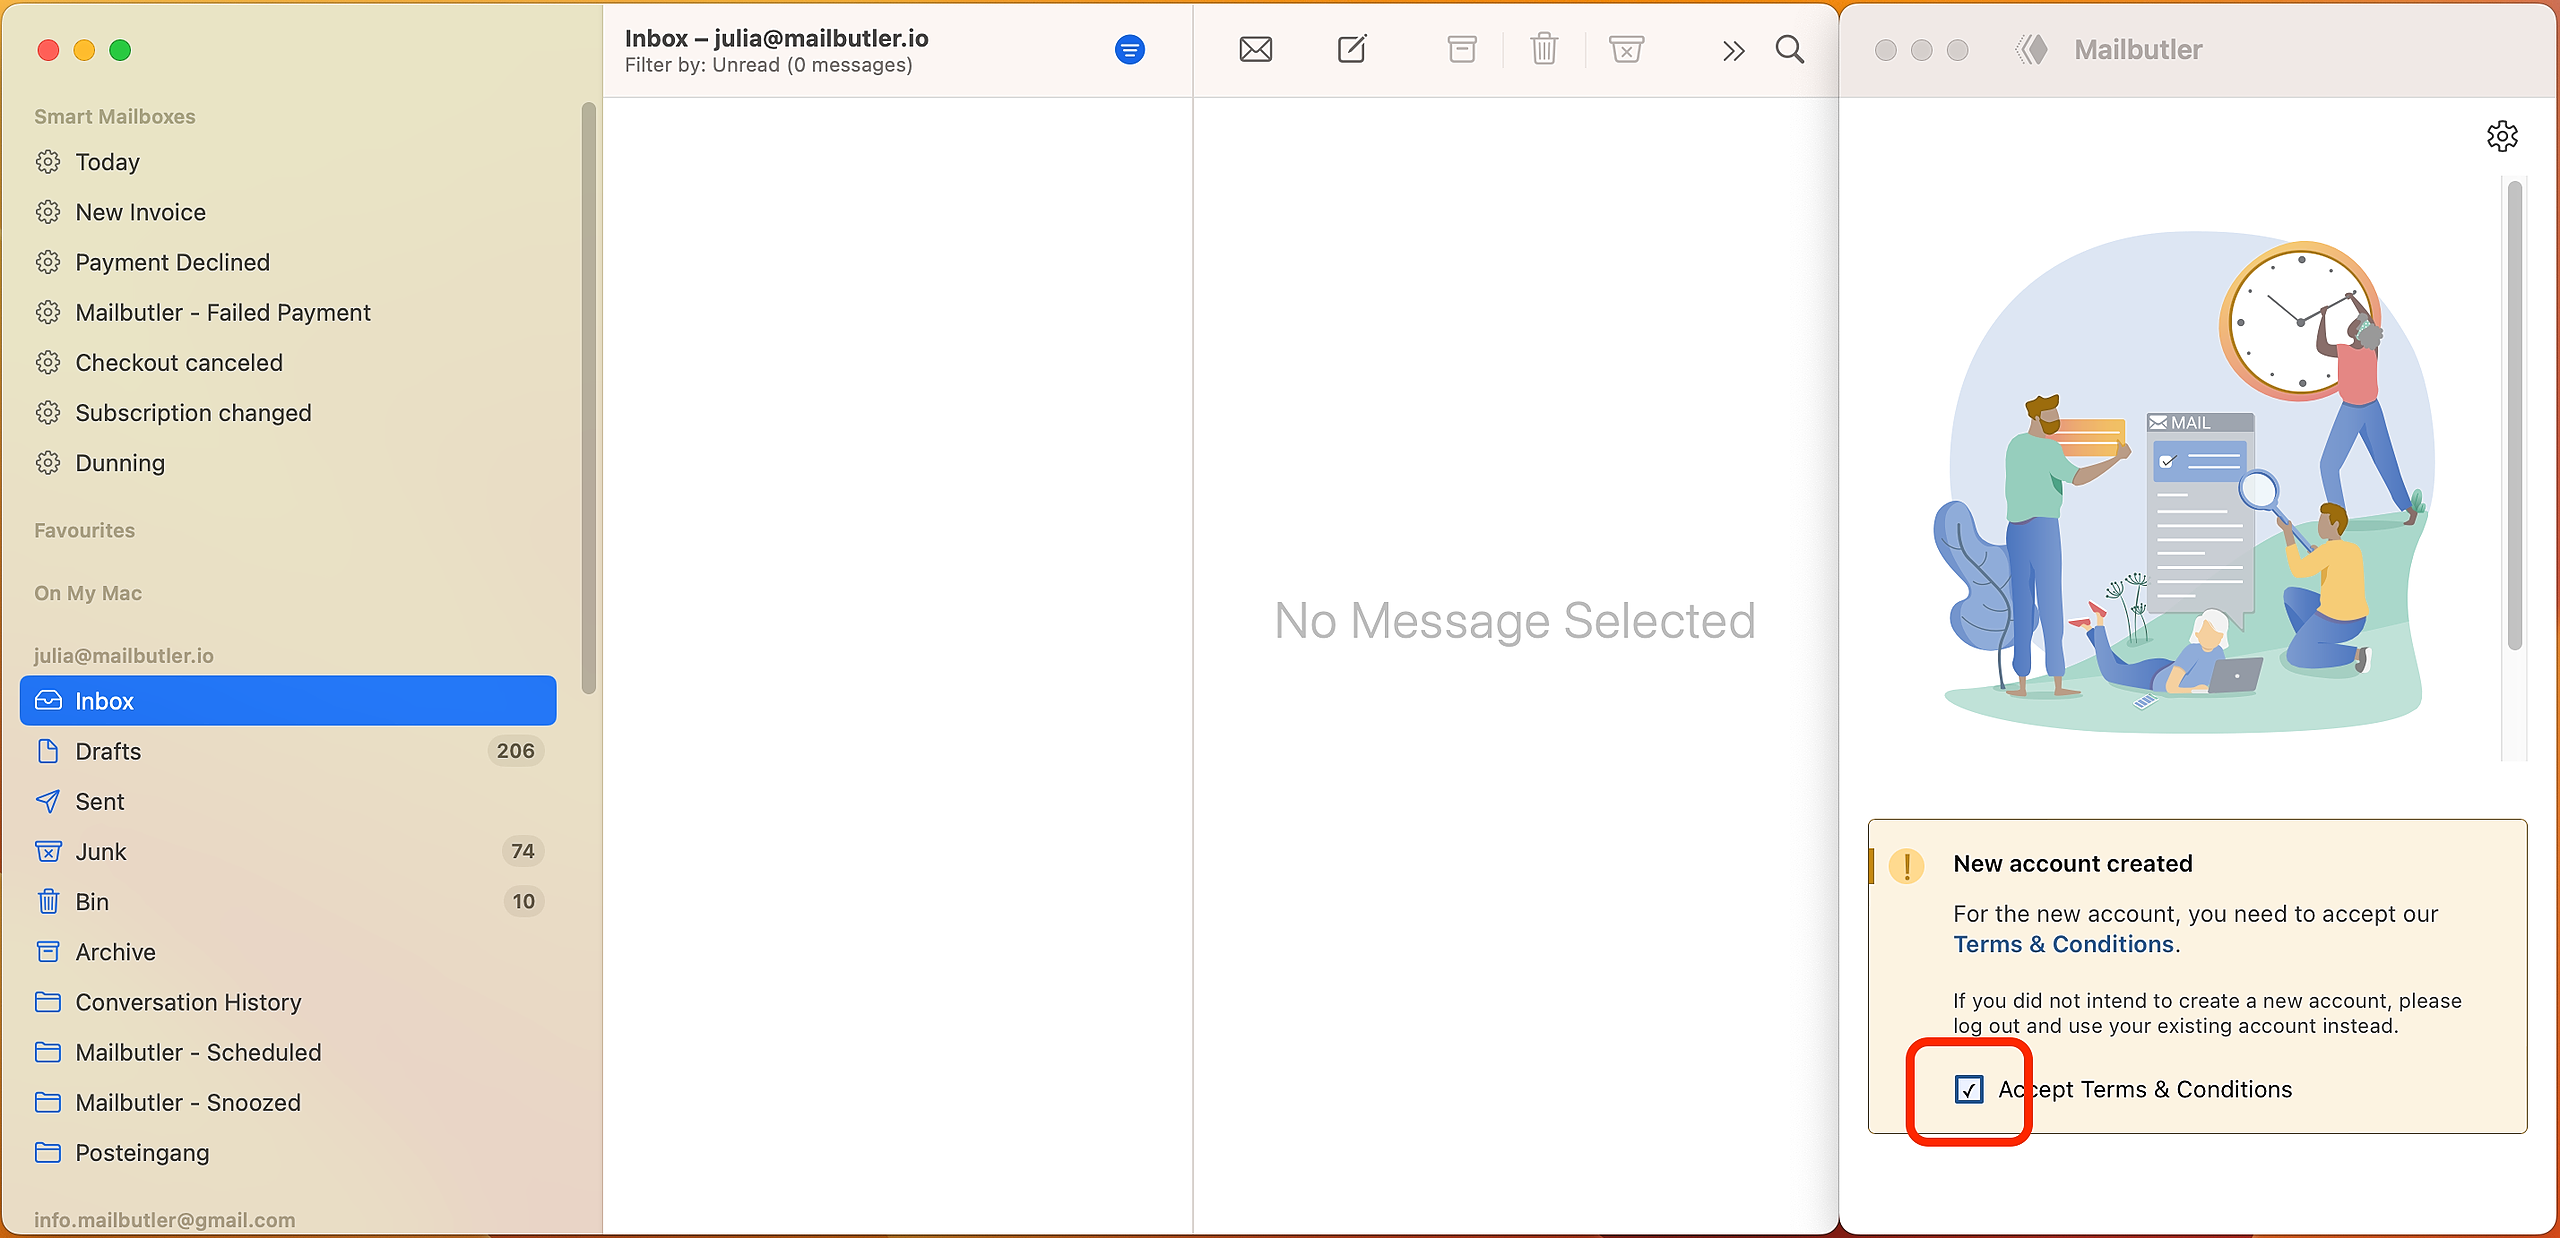
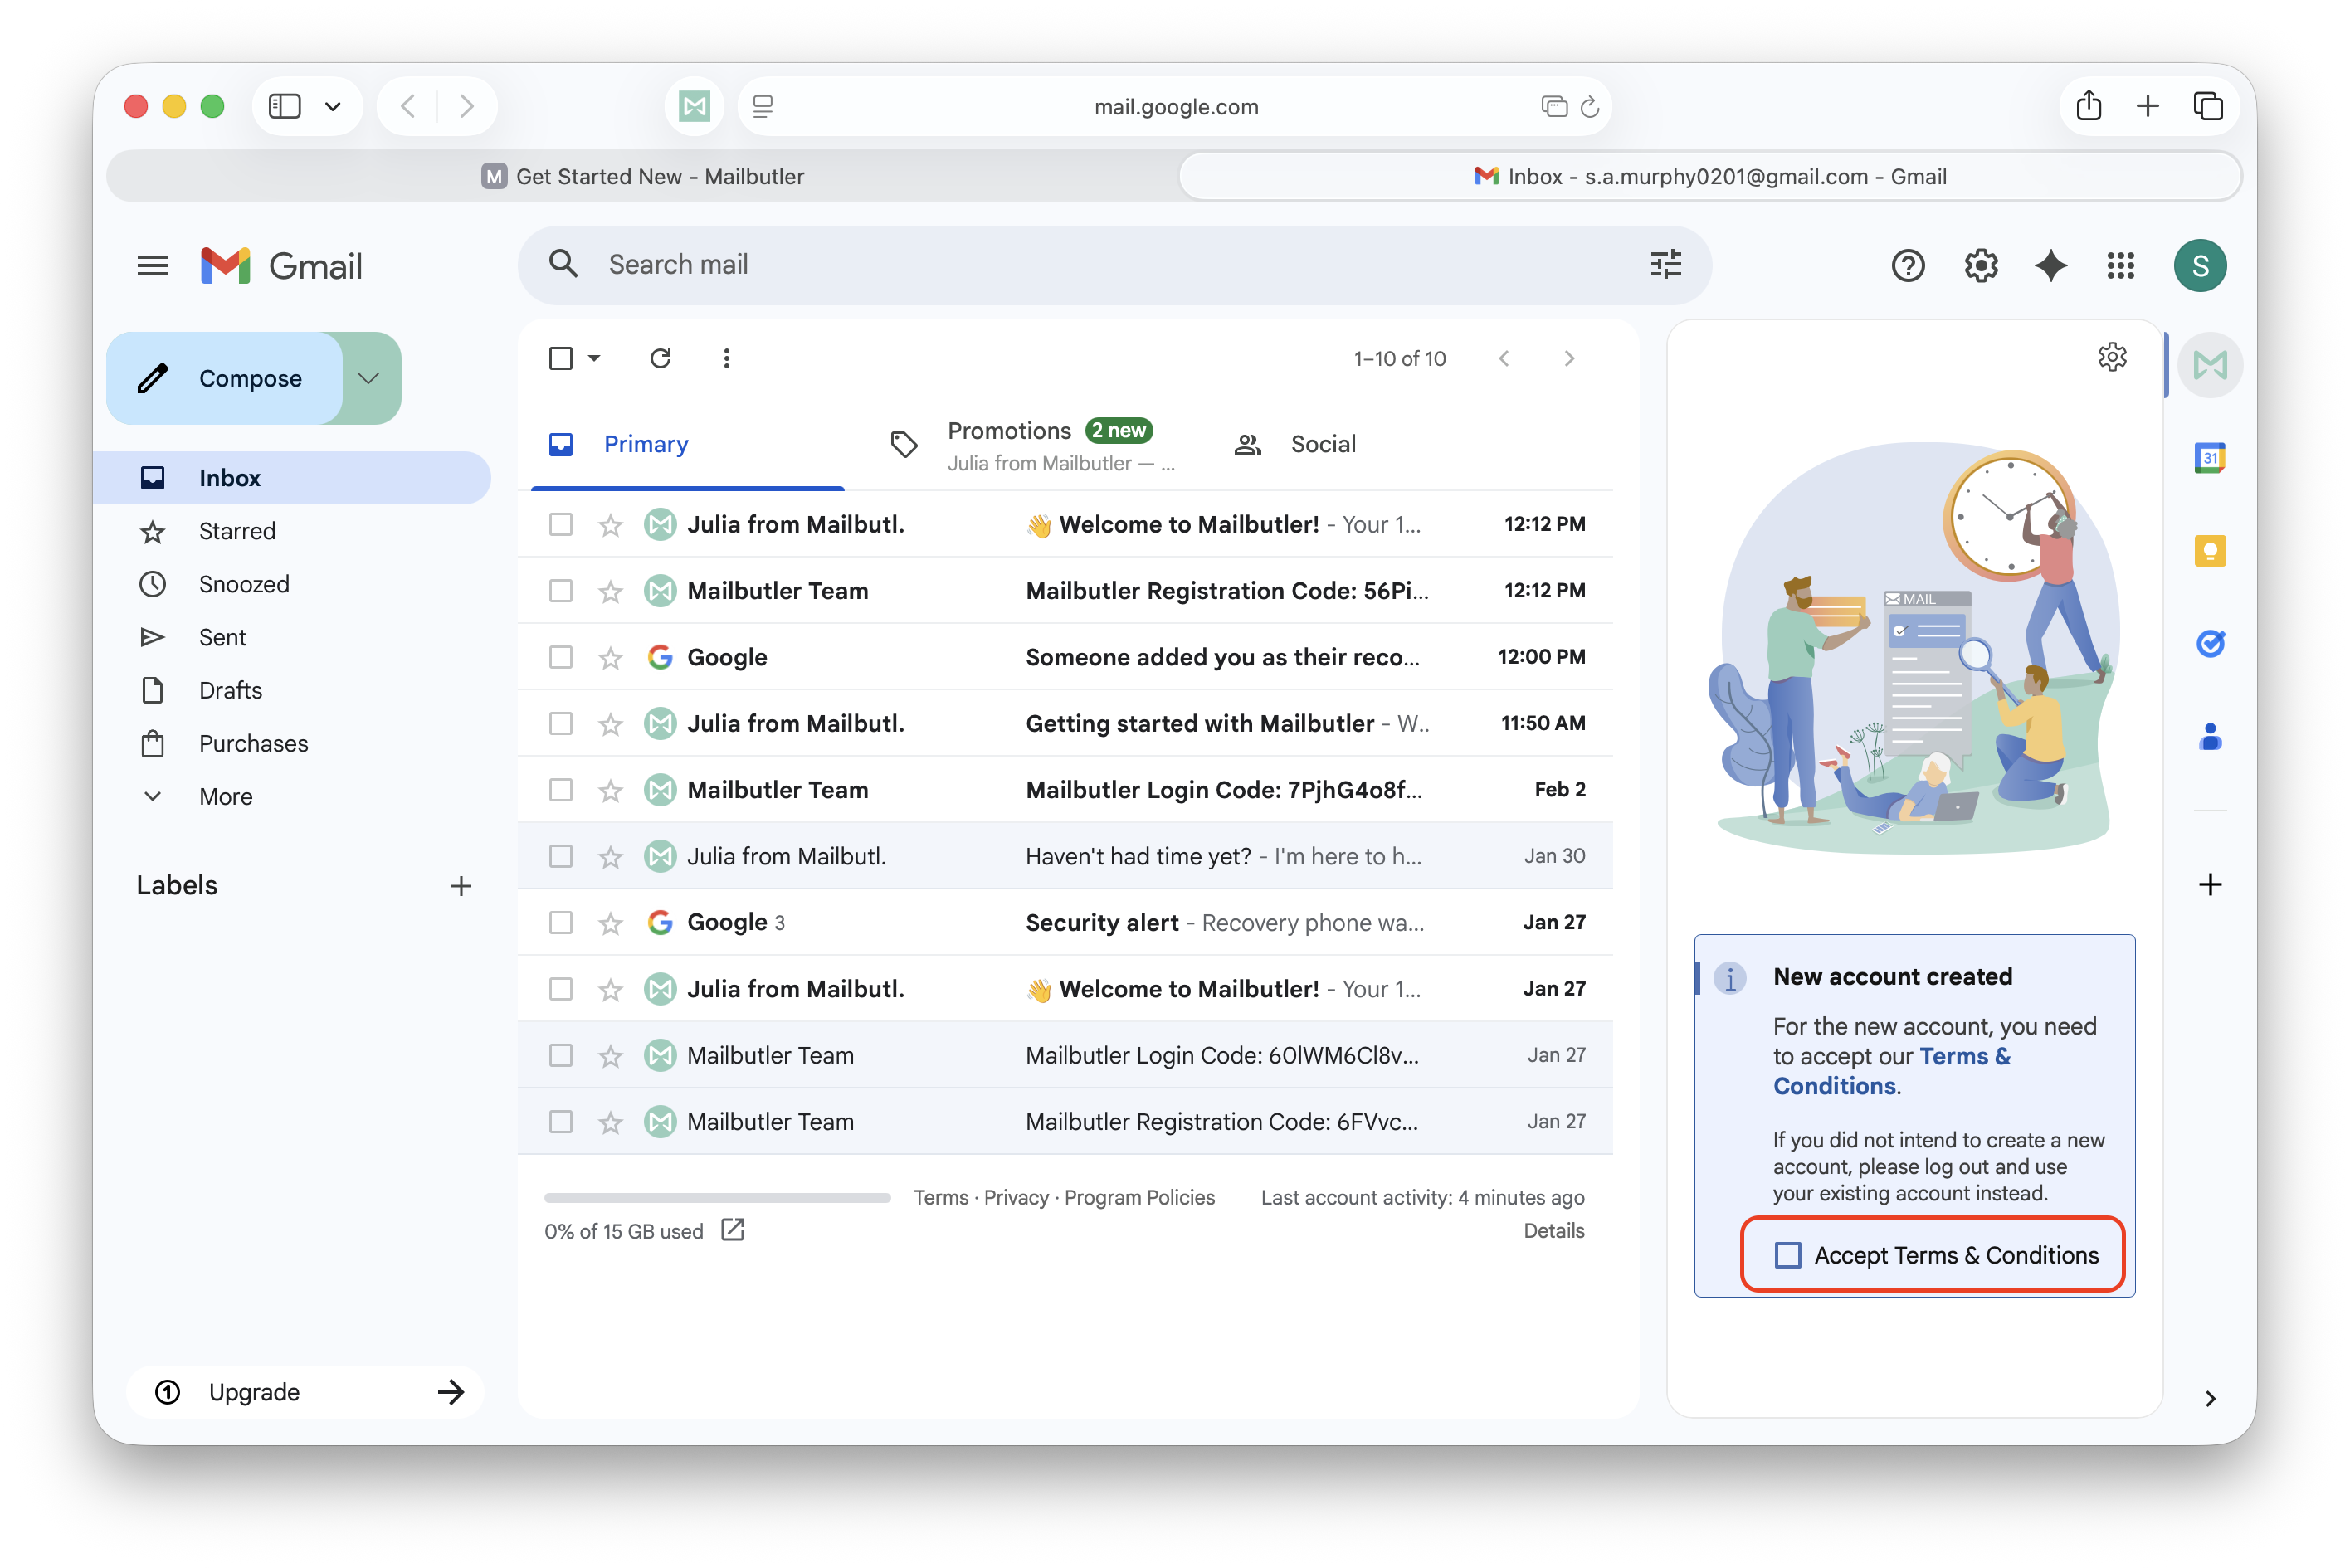
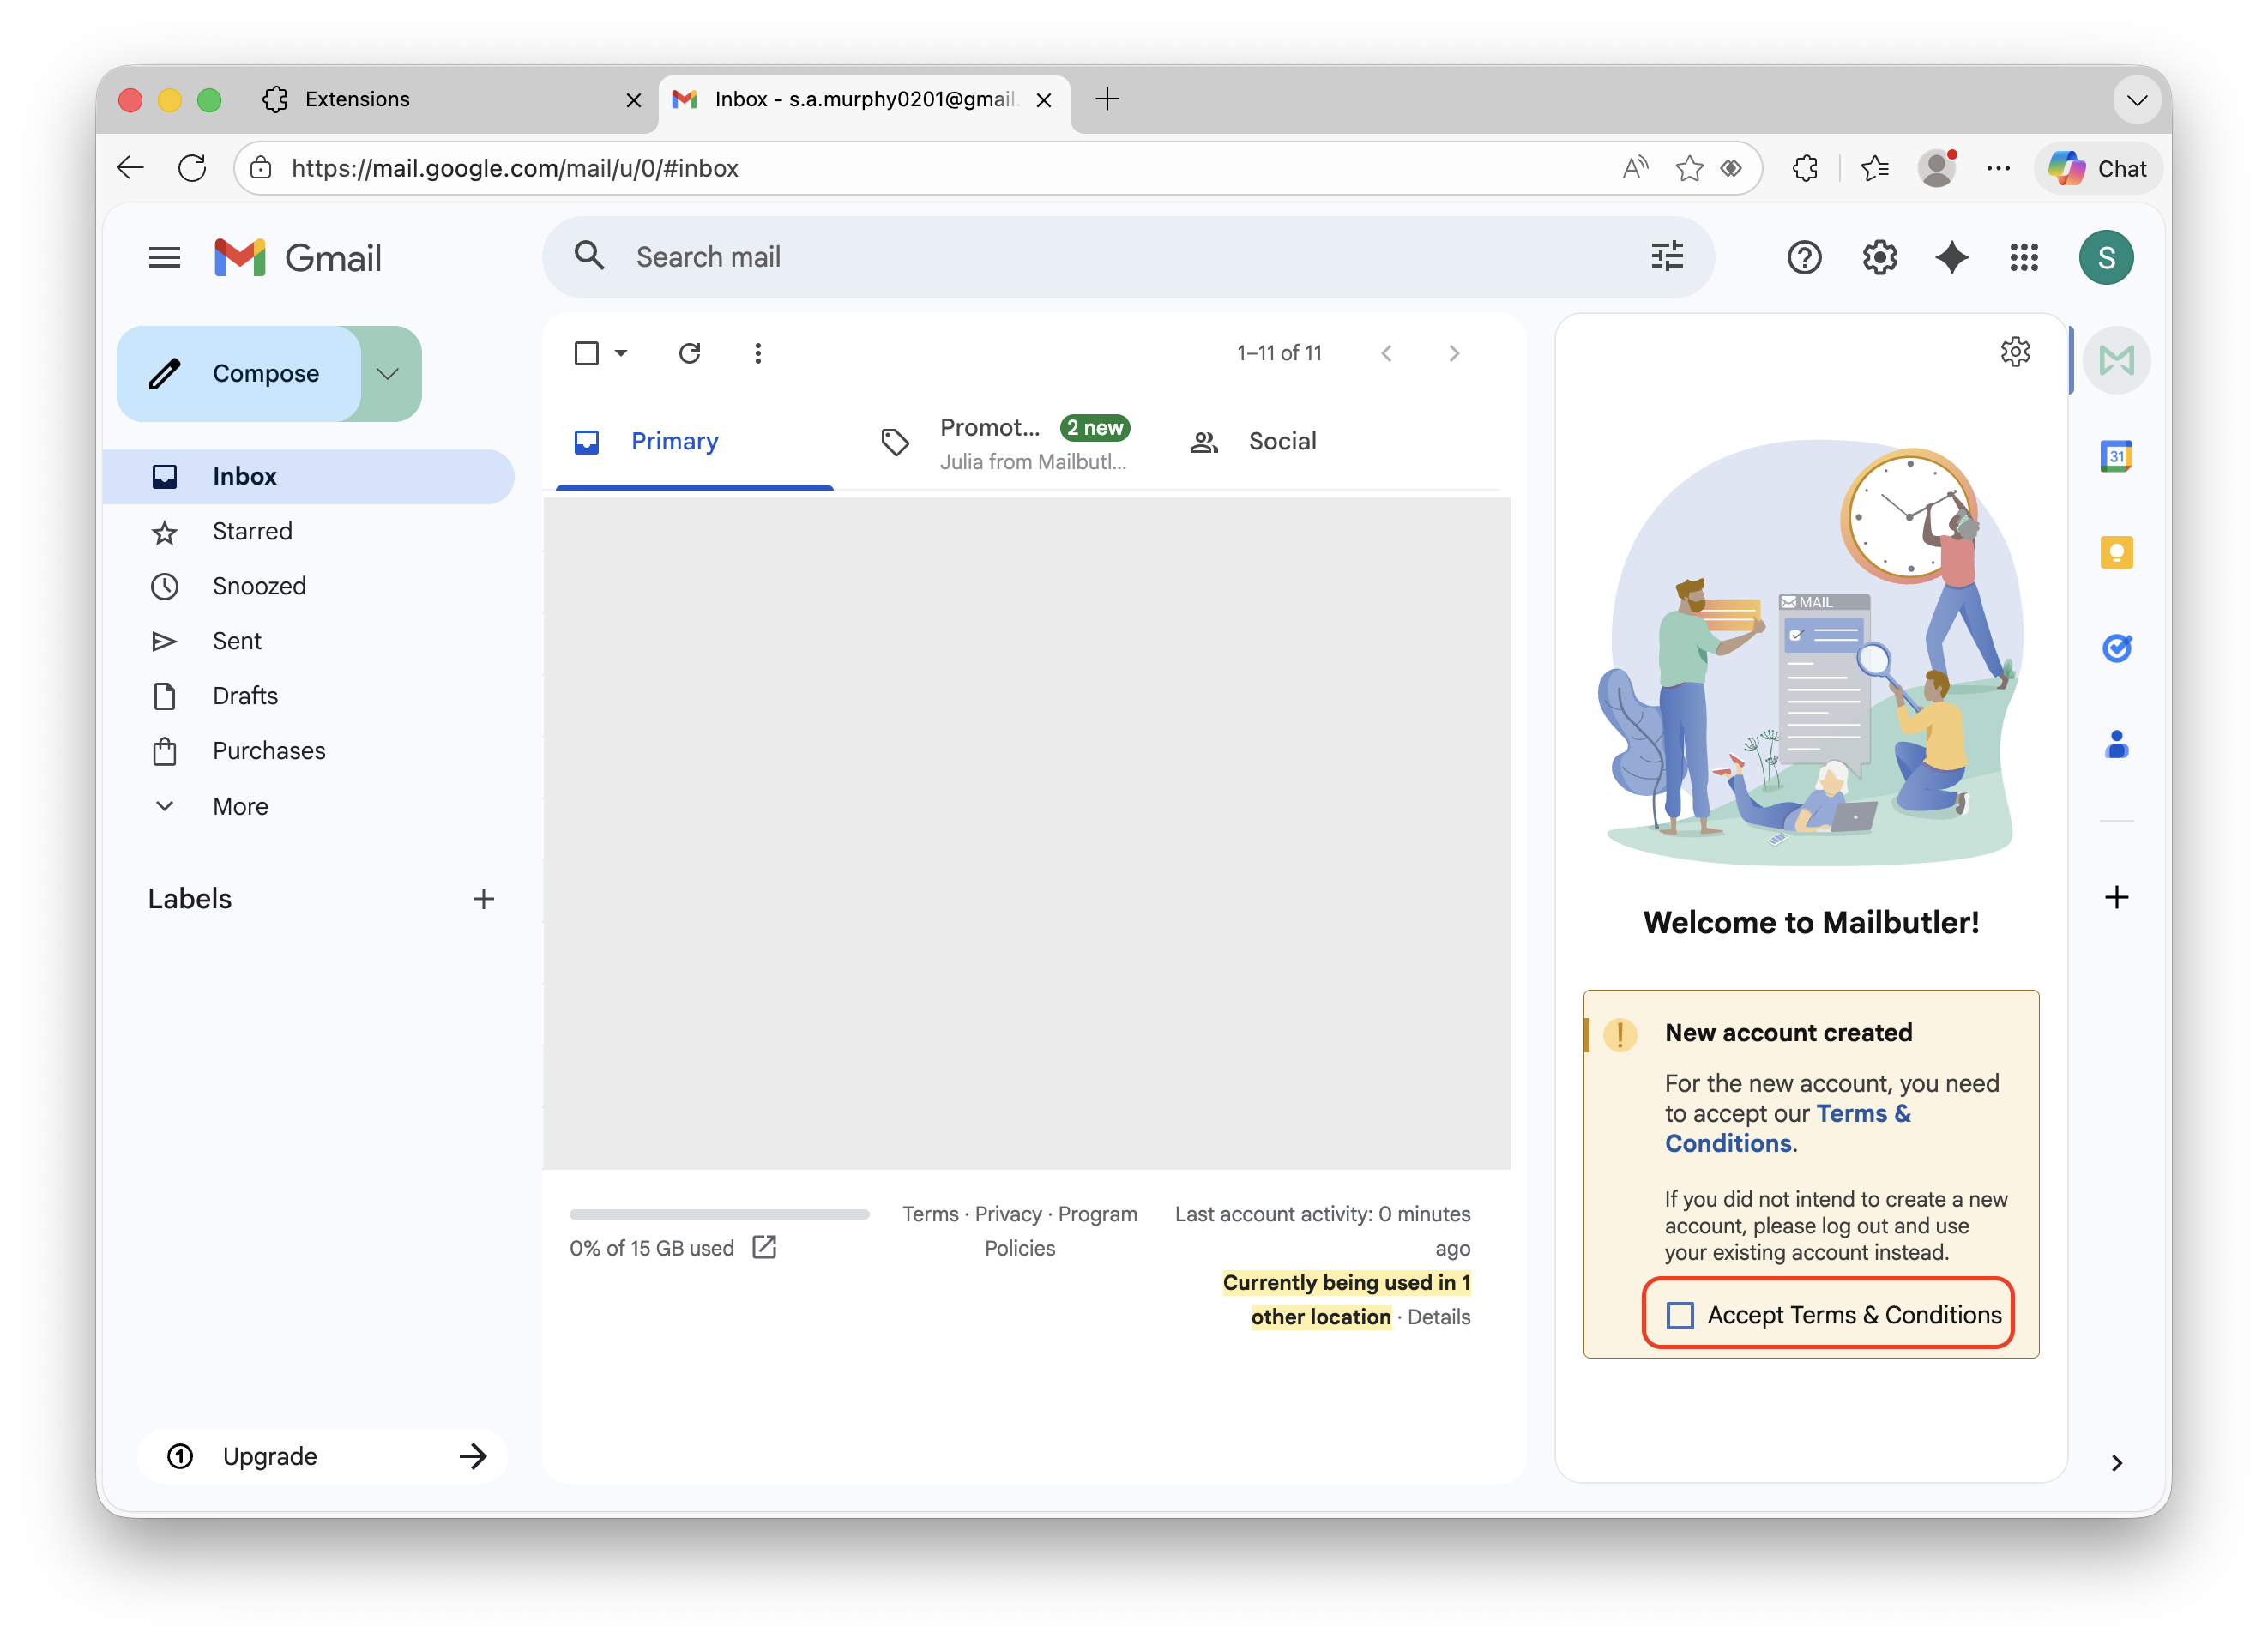
33. Tick the box next to Accept Terms & Conditions.
34. Select to have the Mailbutler Sidebar attached to your Mail window or detached from your Mail window by default by clicking on the attach button.
33. Select to have the Mailbutler Sidebar opened or closed by default.
To close the sidebar, click the close button:
To open the sidebar, click the Mailbutler button:

34. Now you will need to authorize your email account(s) to make Mailbutler's features fully work for you. For detailed instructions on how to authorize your email account(s), please head to this article.
If you encounter any issues, please reach out to us at support@mailbutler.io.
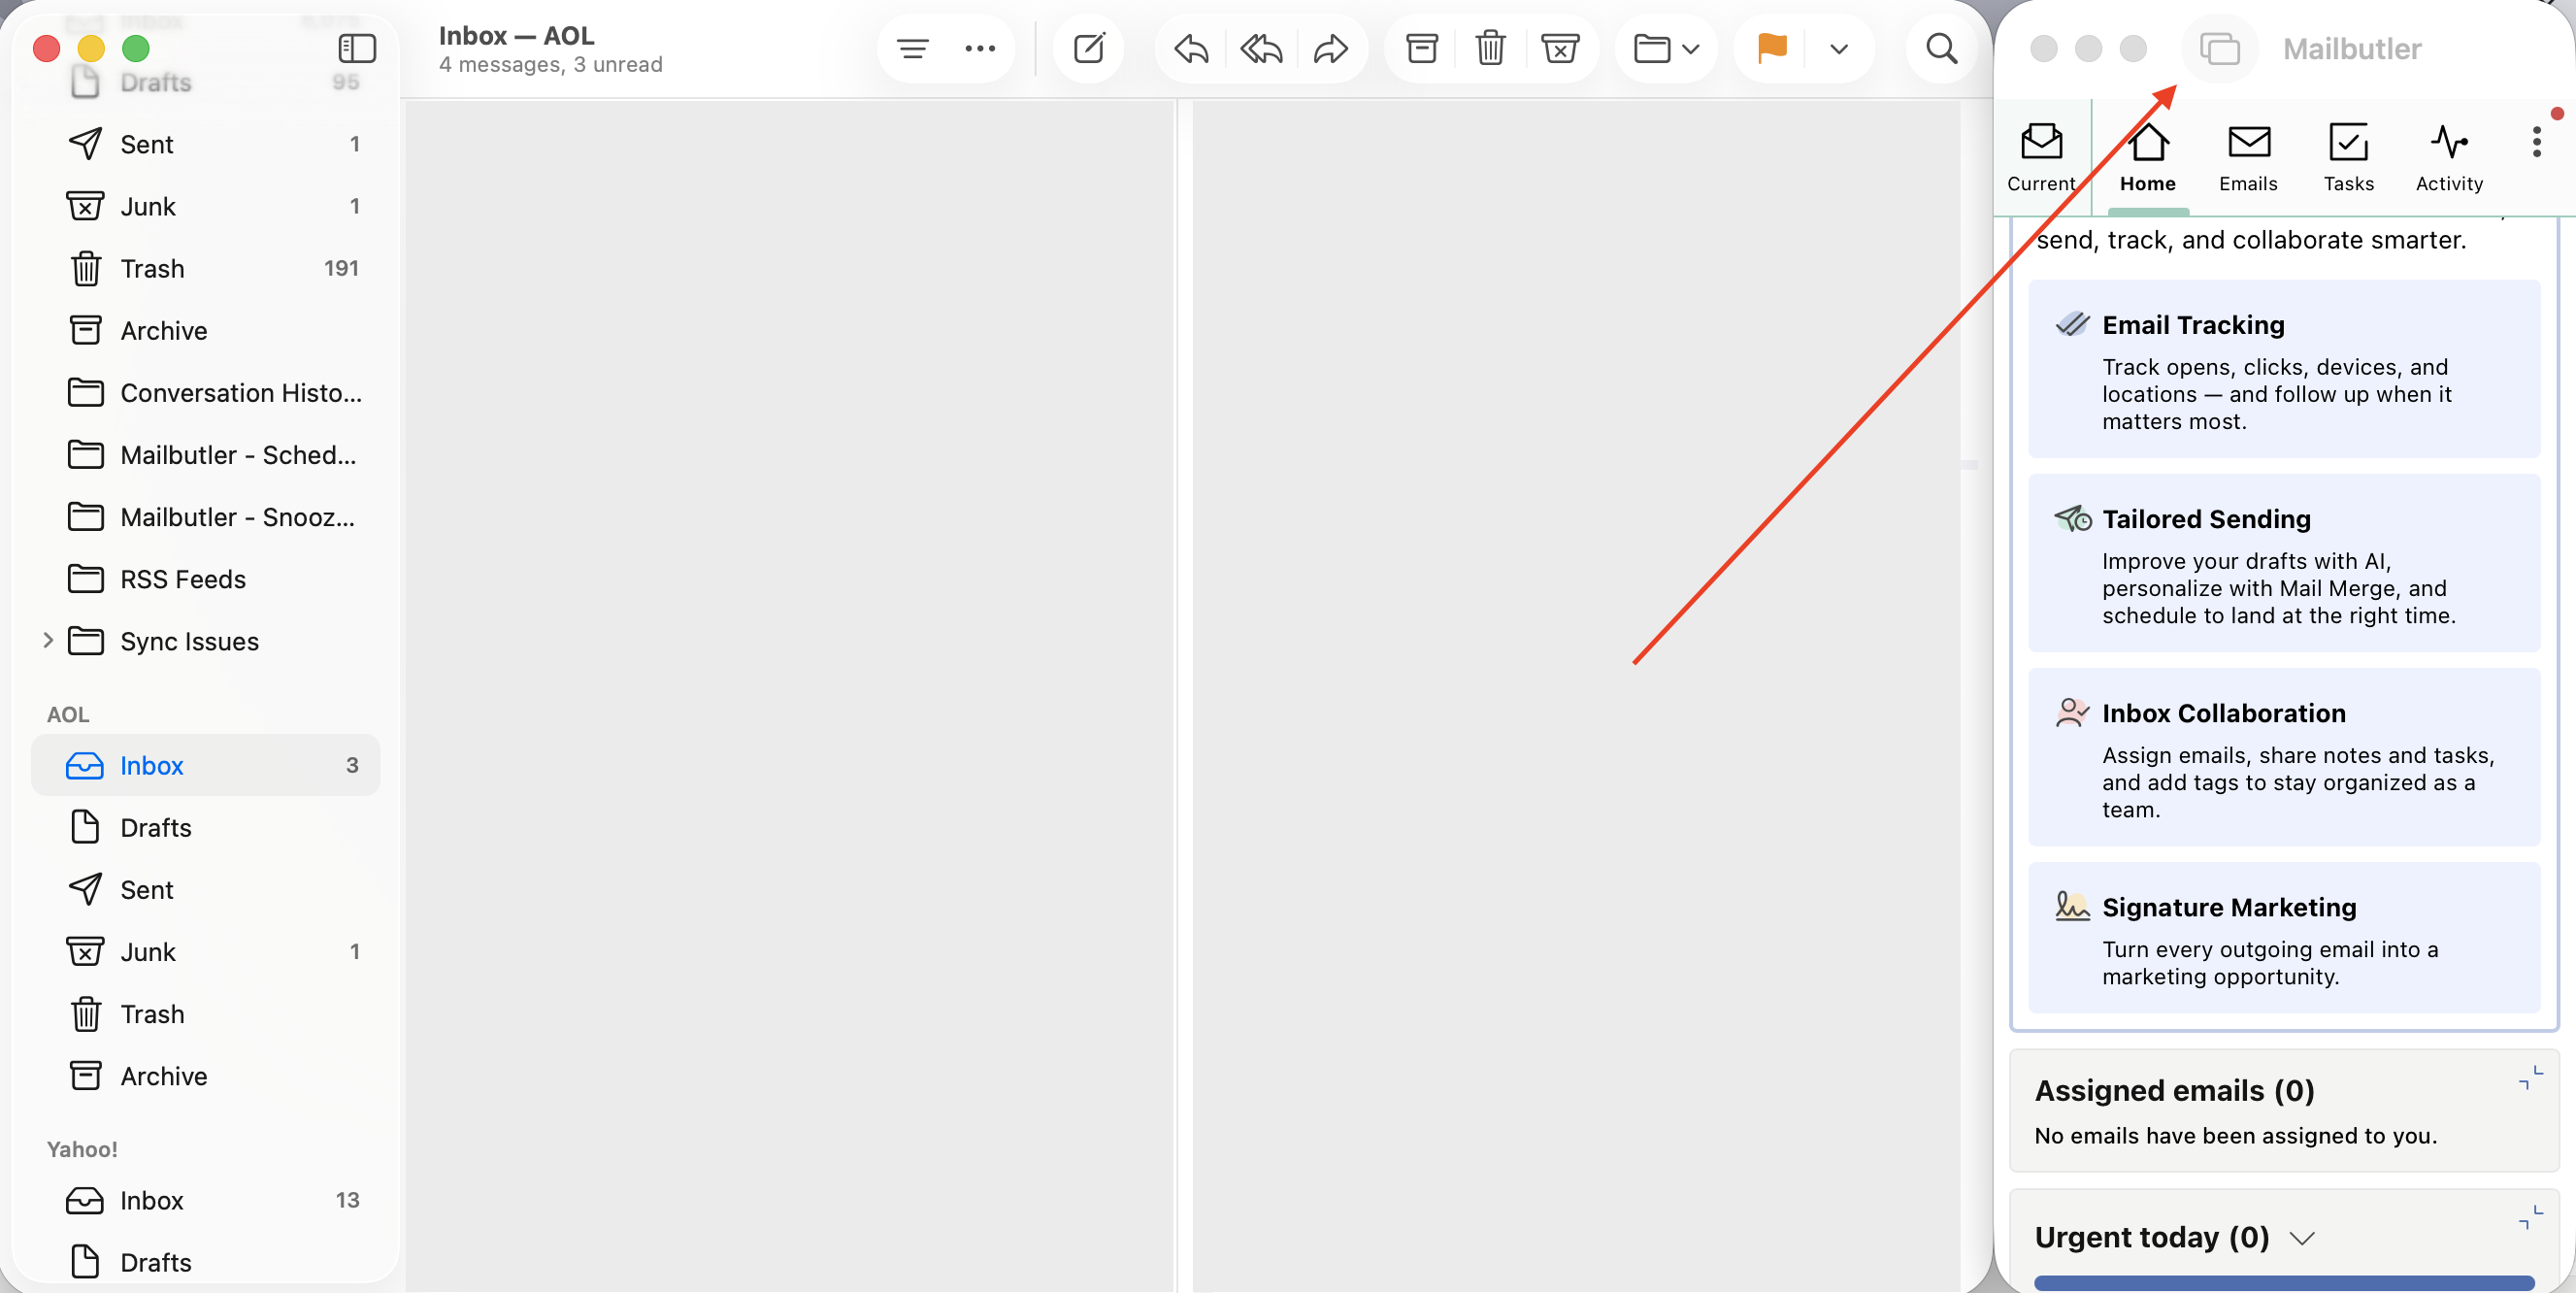
You are all set and you can now start using Mailbutler's features in Apple Mail!
Gmail (Chrome)
Go to our Get Started page here
Enter the email address you want to use for your Mailbutler account.

Click Get Started.
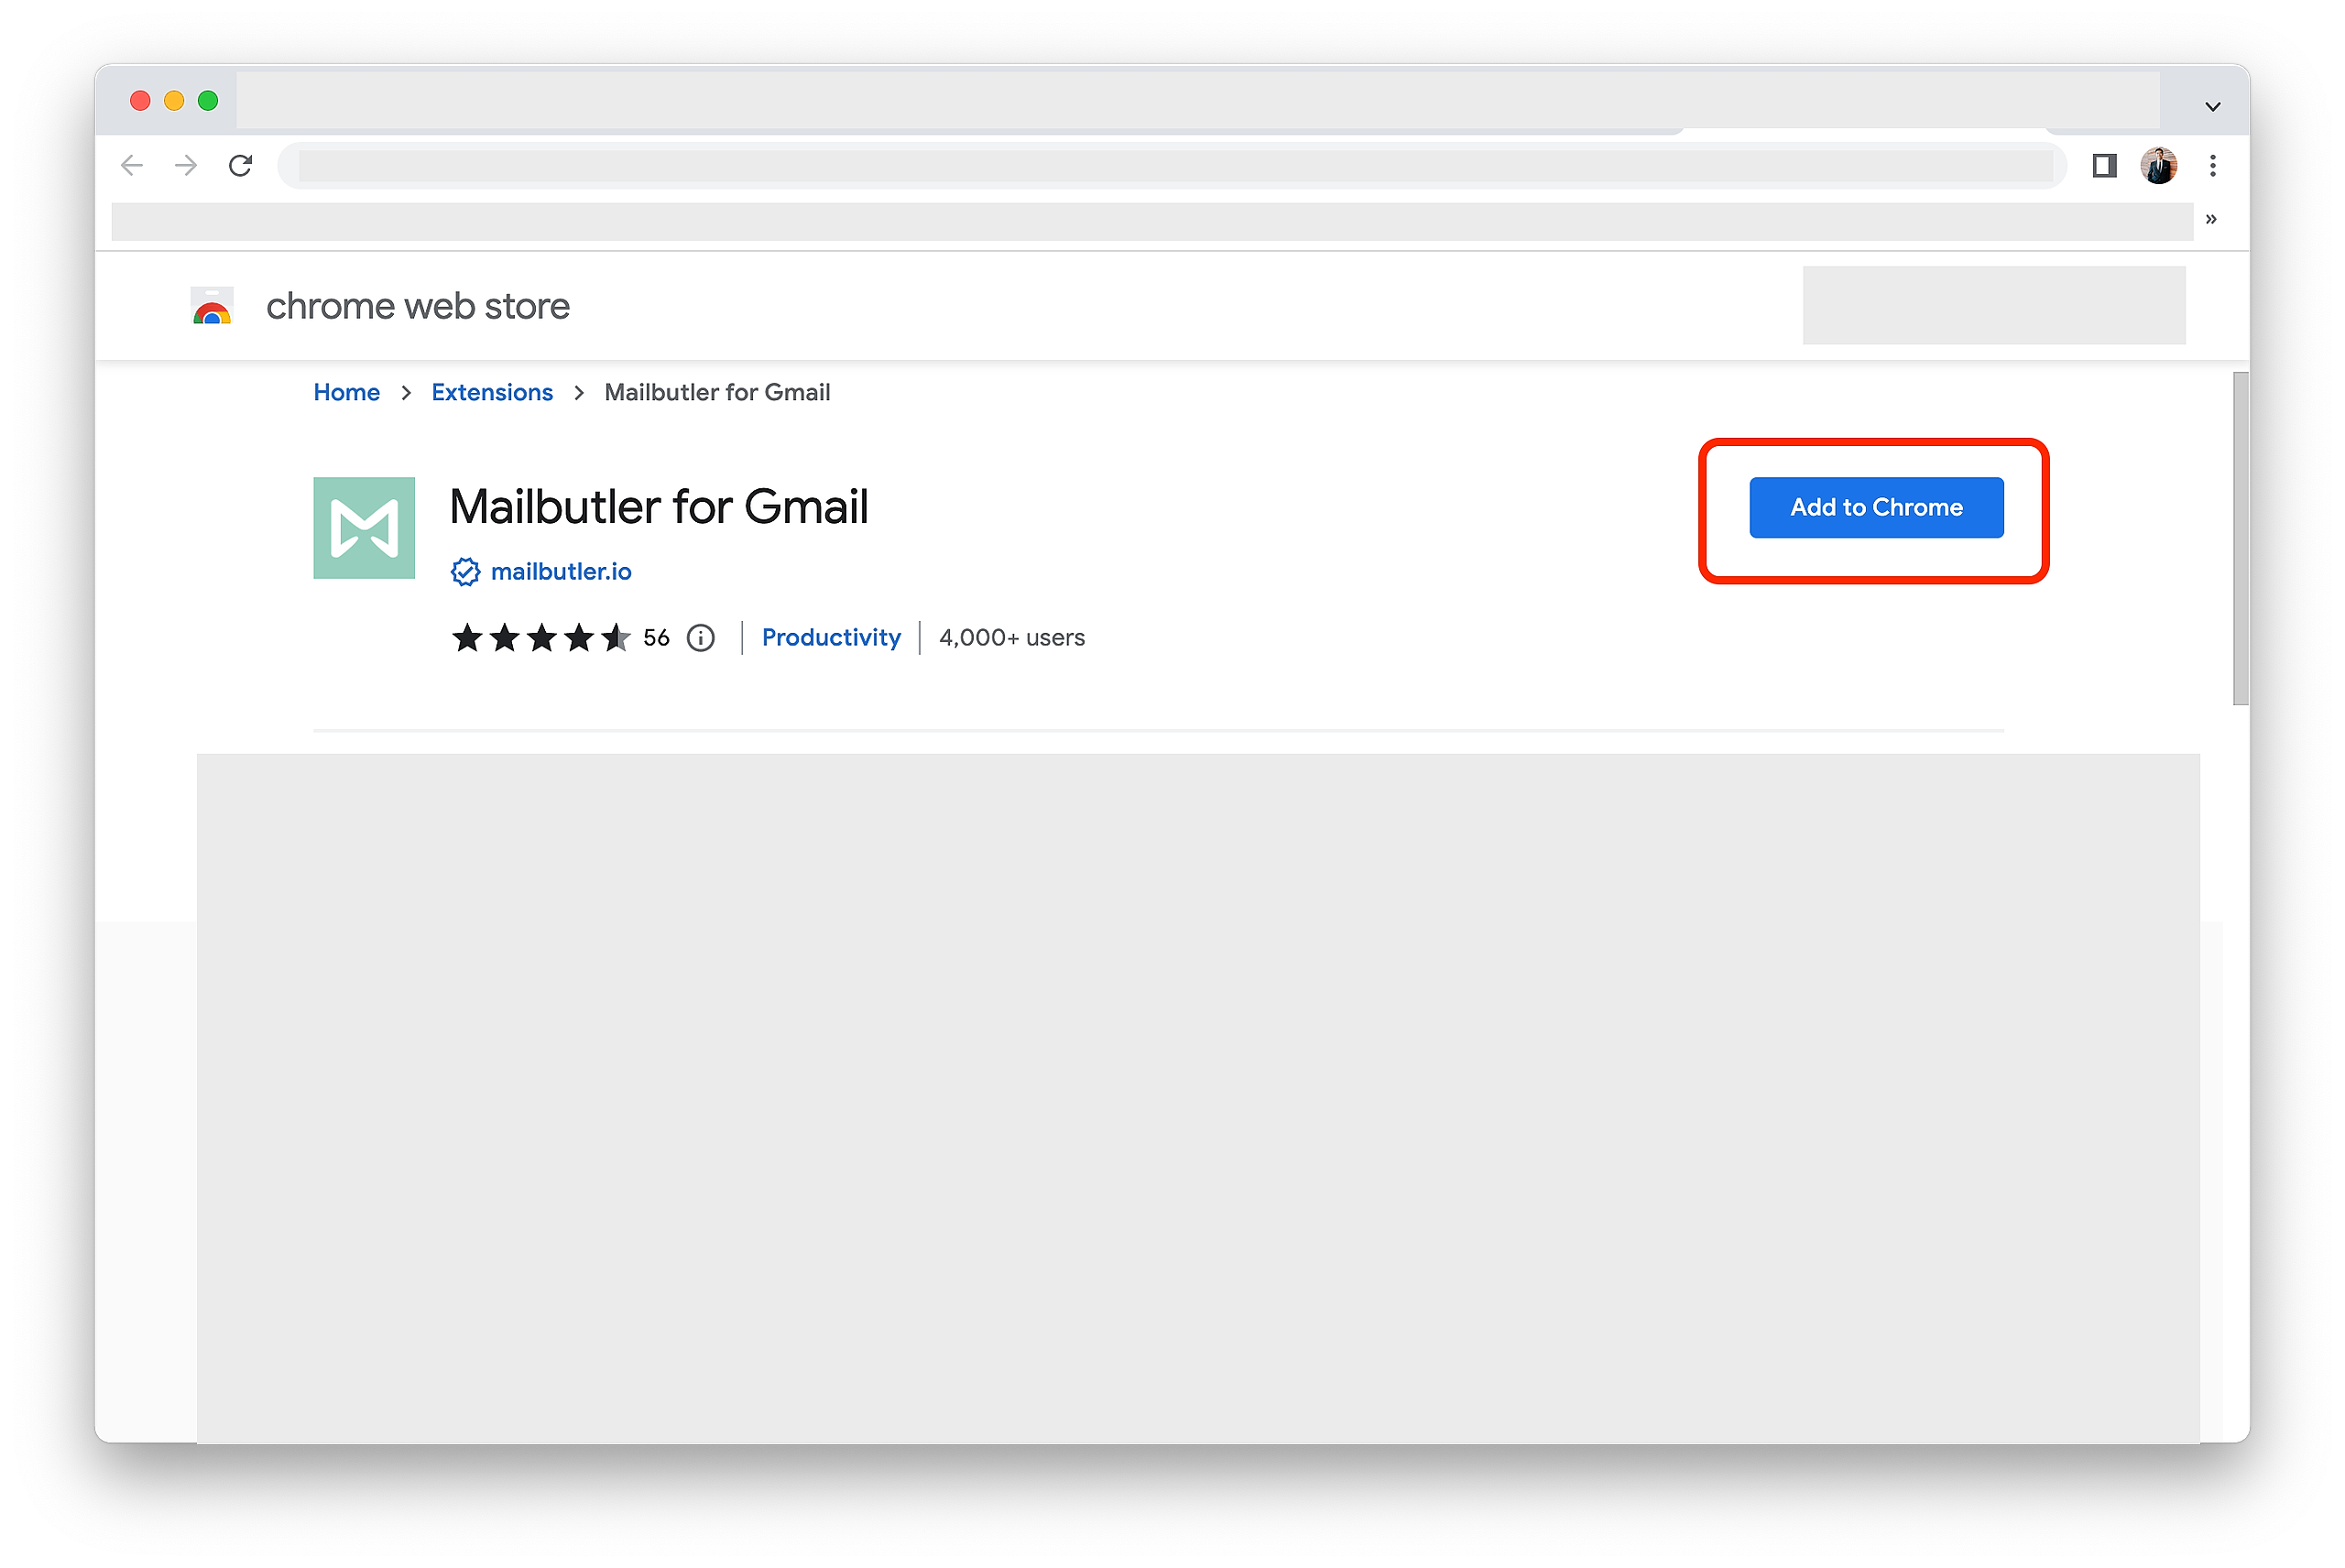
Under Gmail, click Chrome Web Store.
The Chrome Web Store will open in a new window.
Click Add to Chrome.
Click Add Extension.

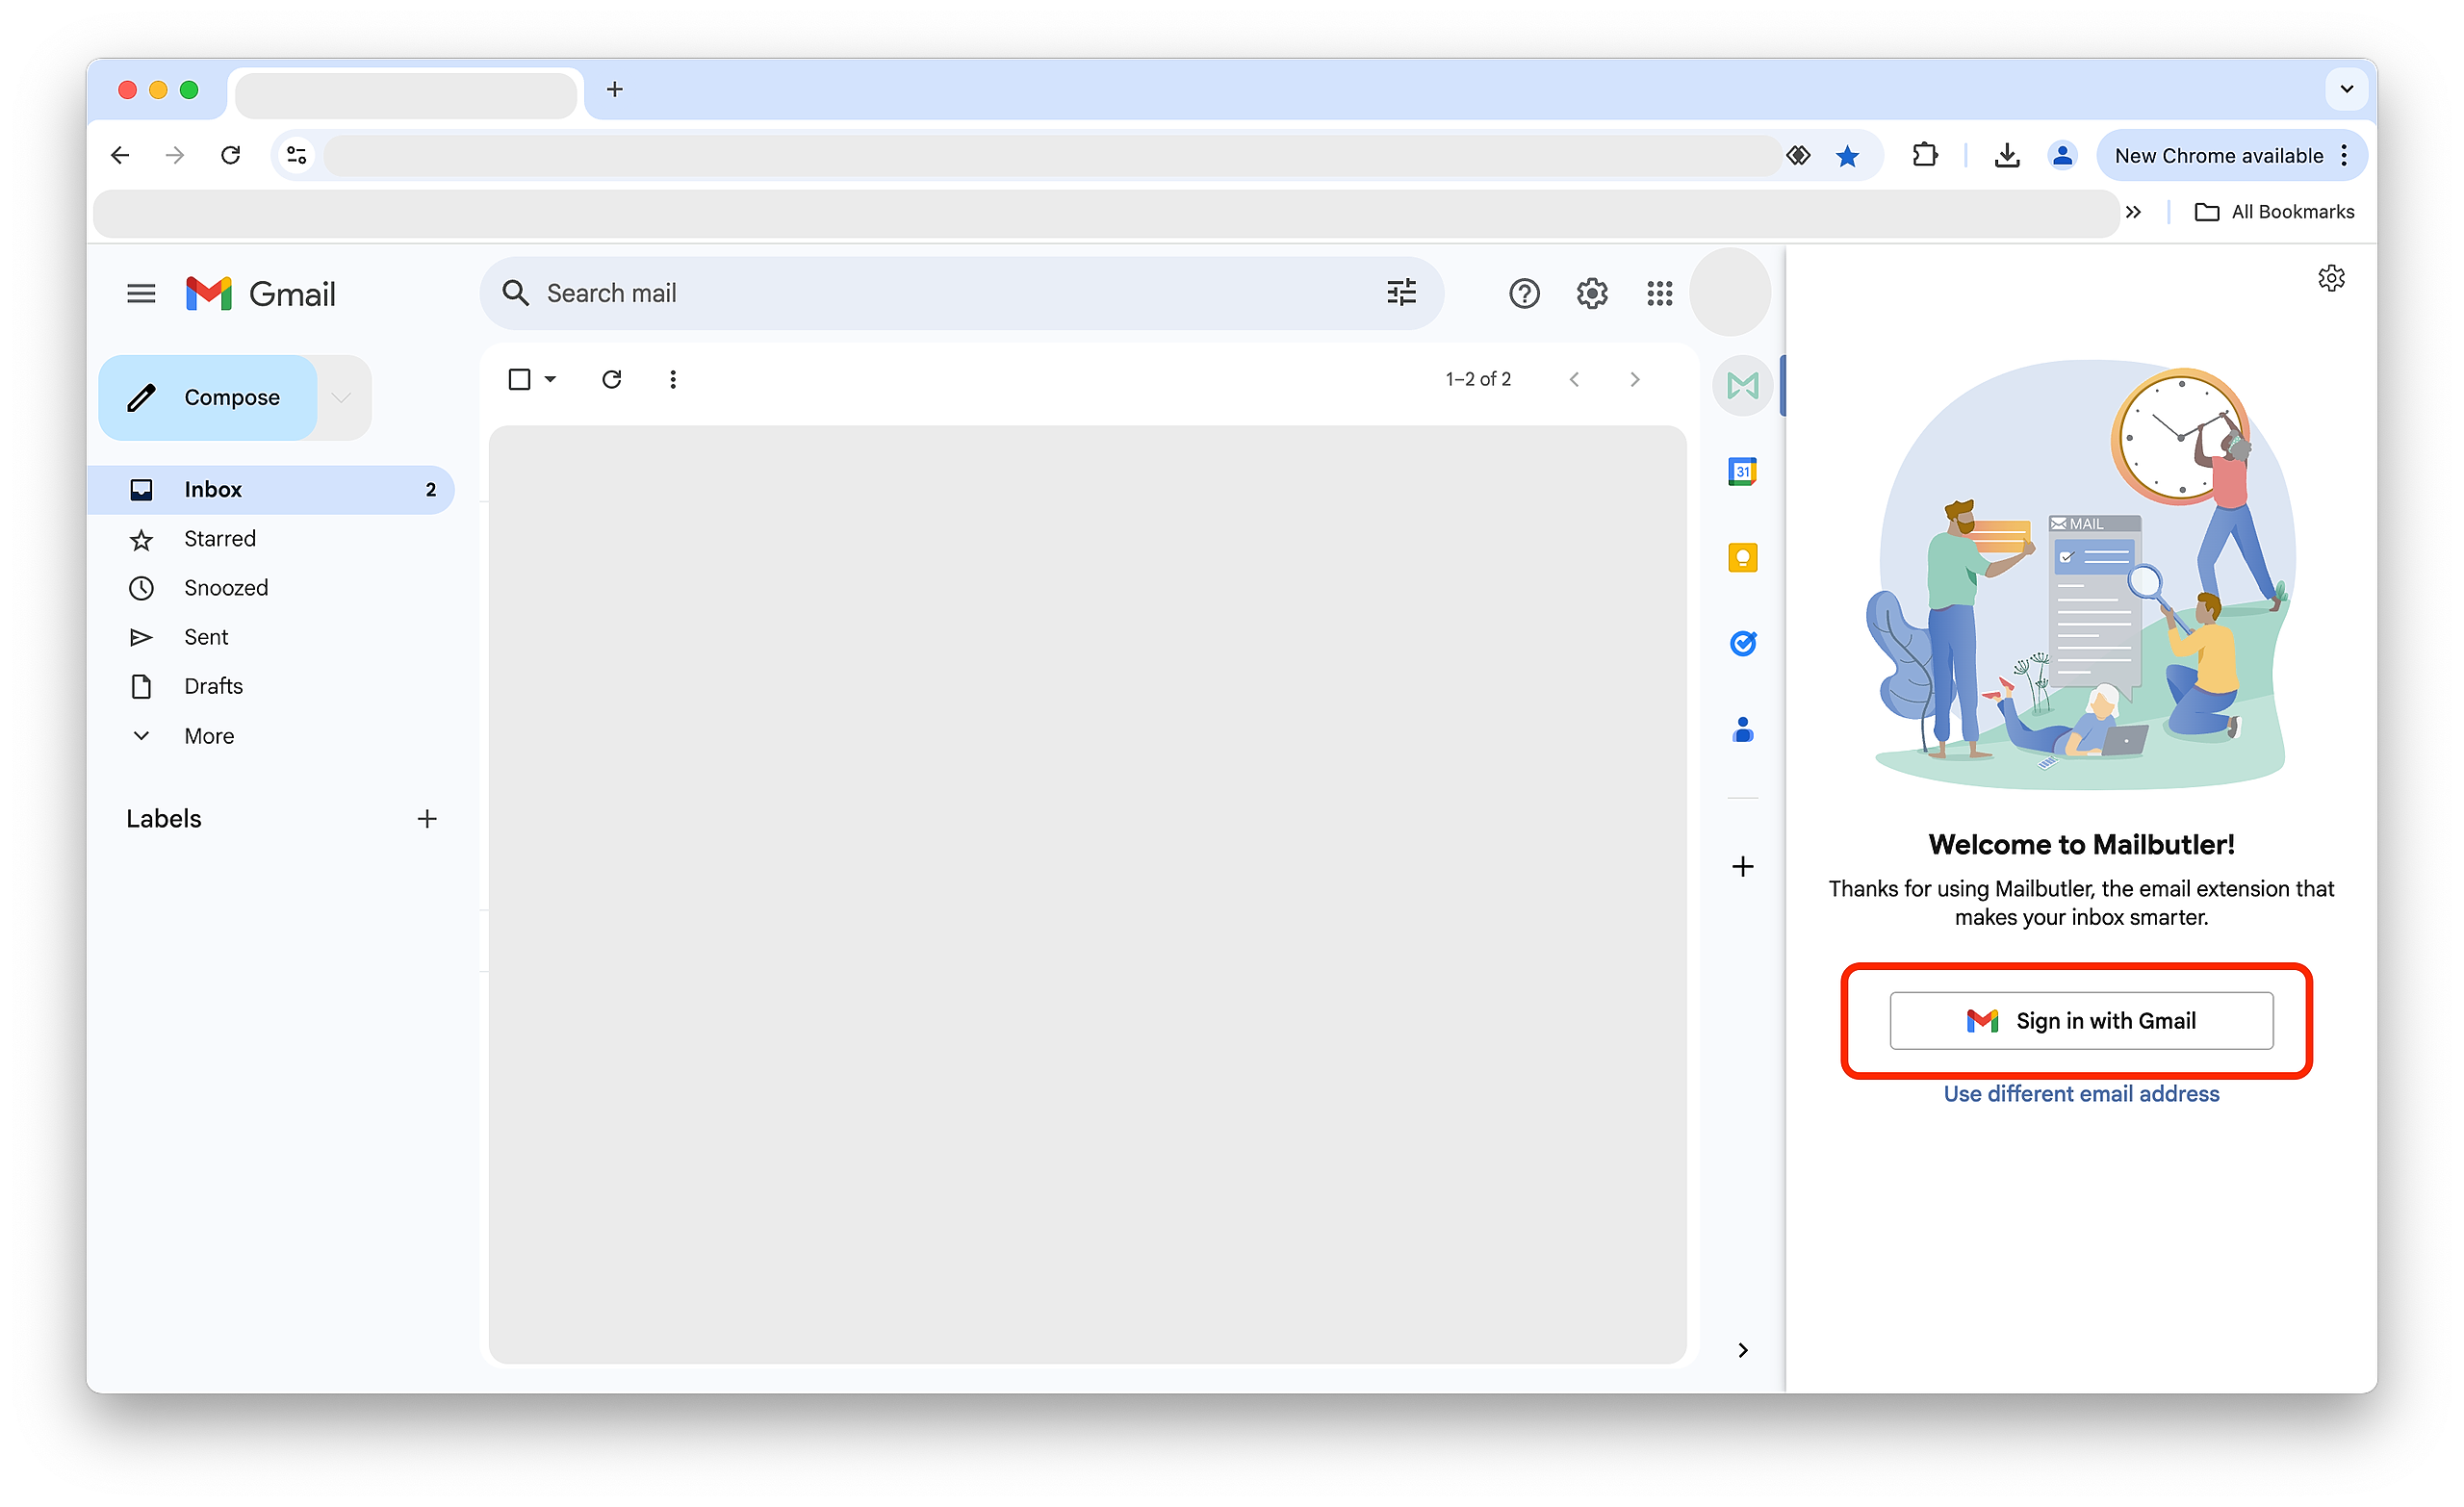
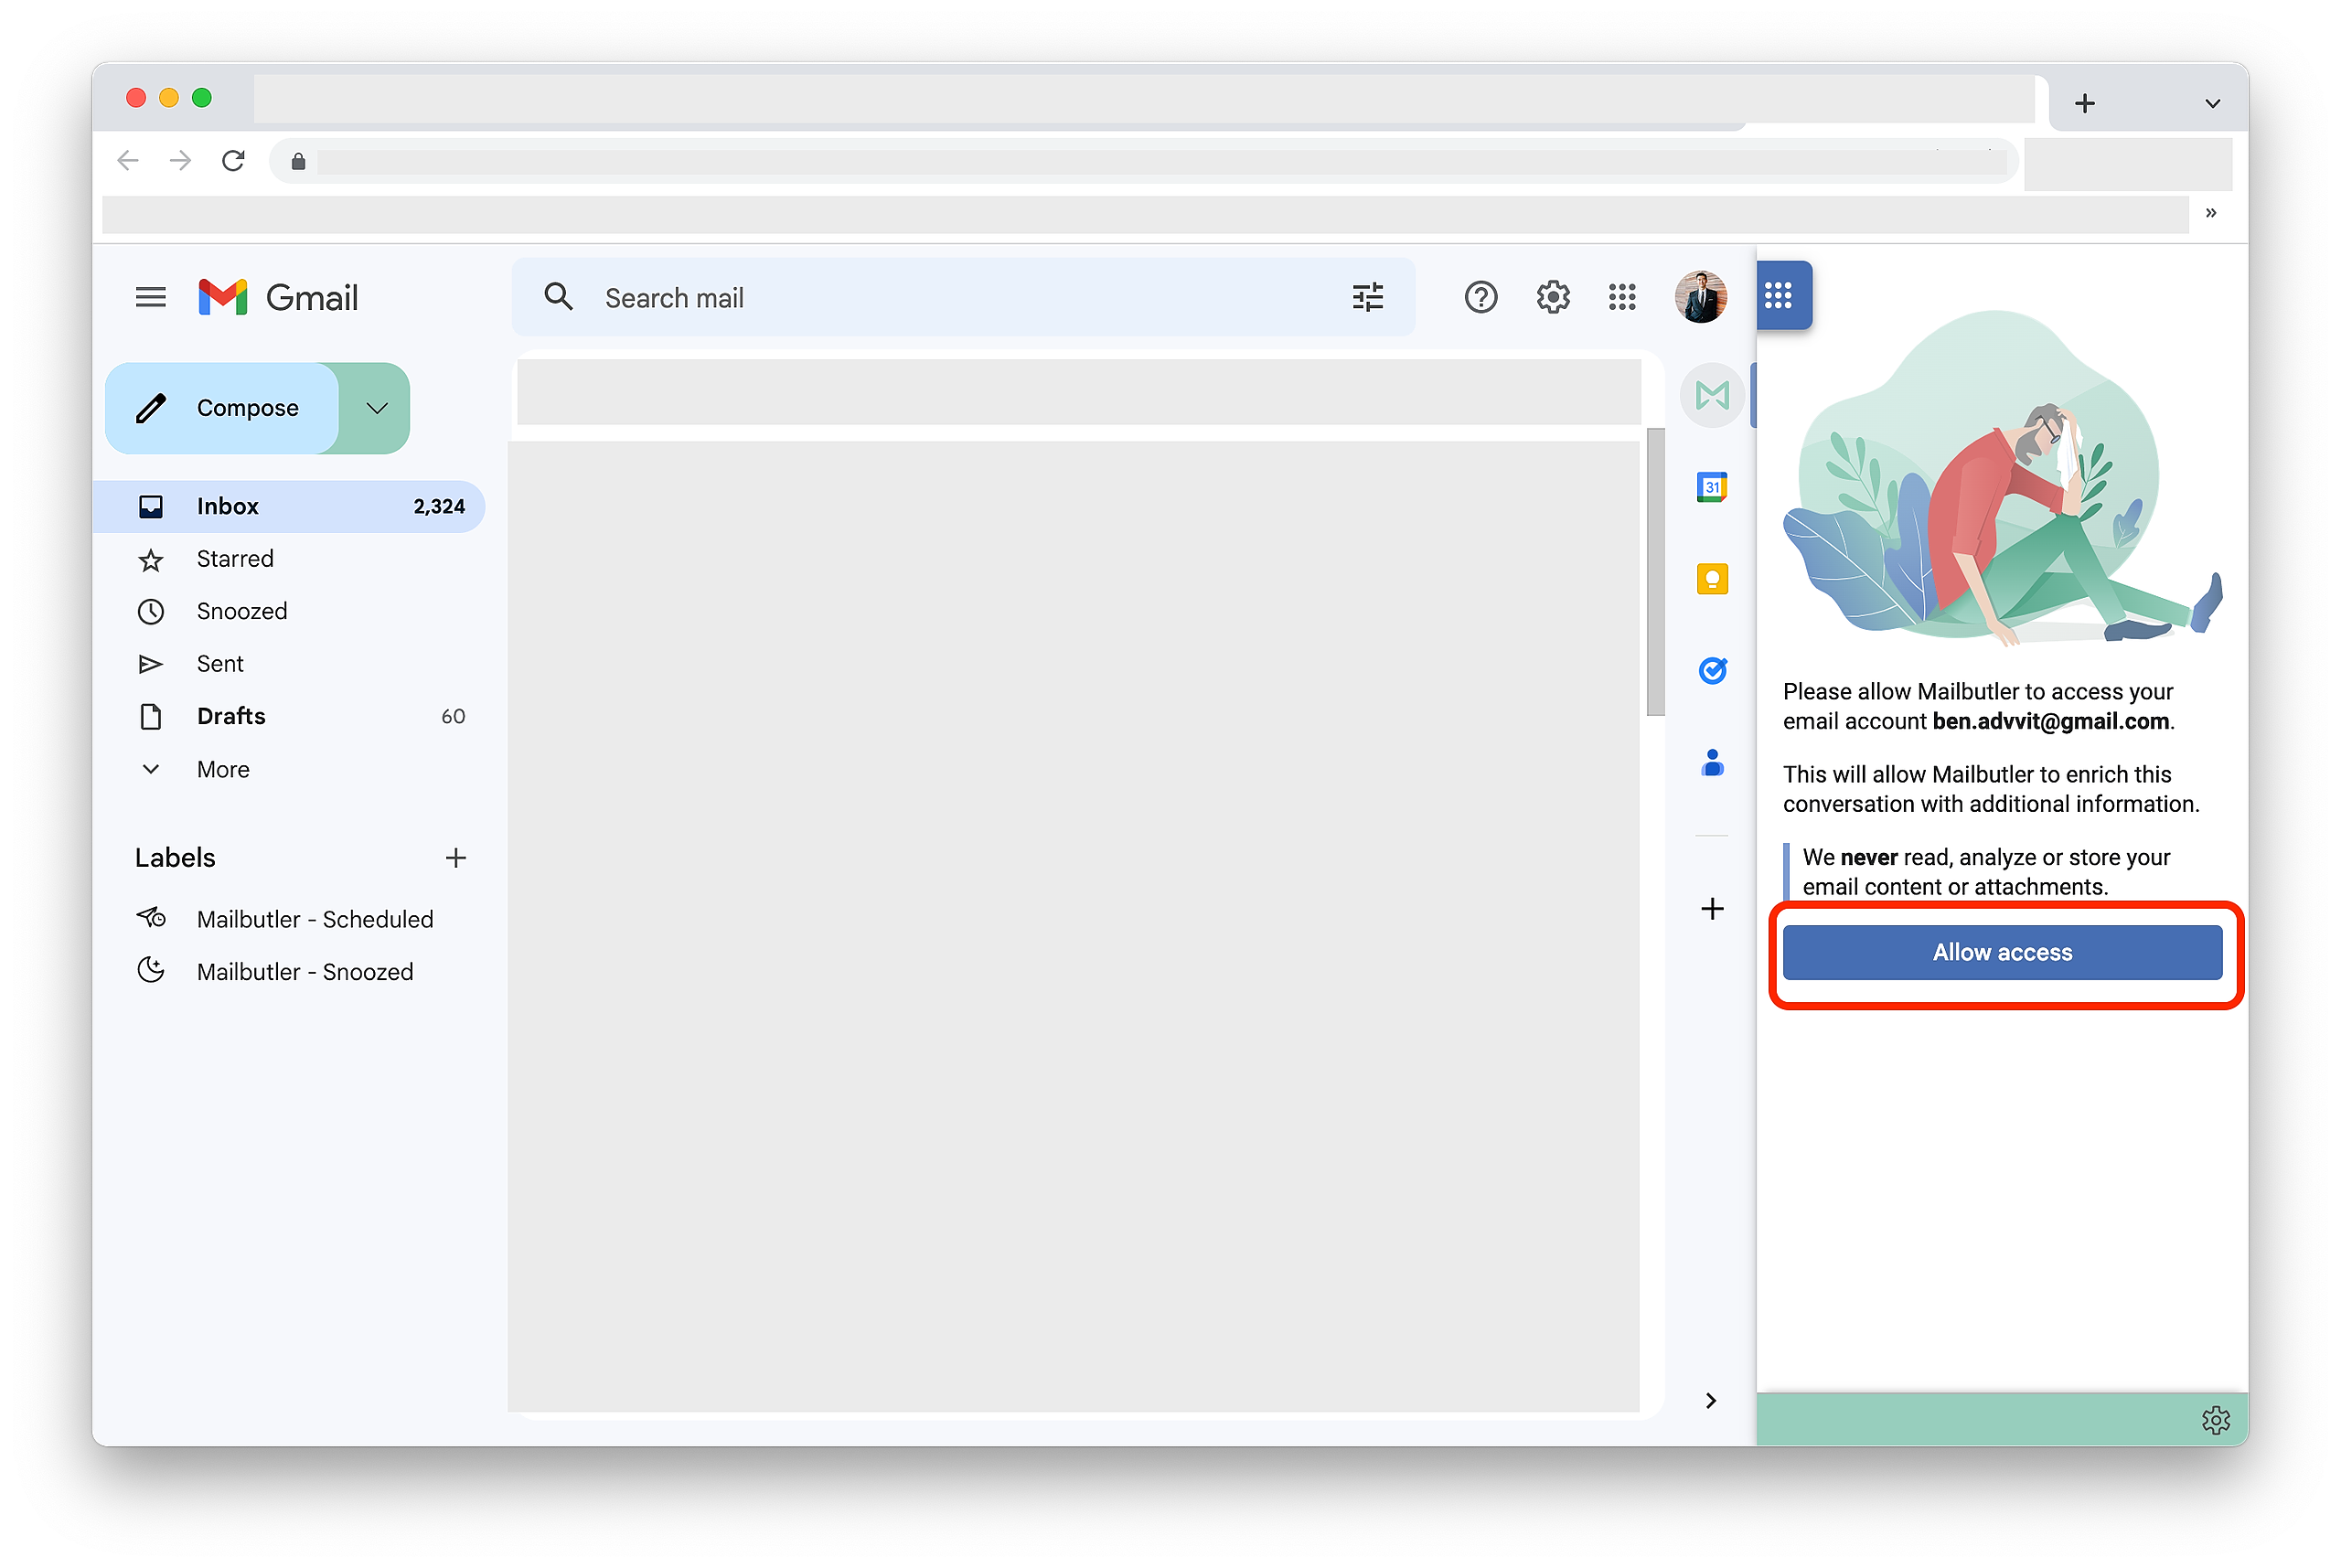
You will be redirected to Gmail and the Mailbutler sidebar will open.
Click Sign in with Gmail.
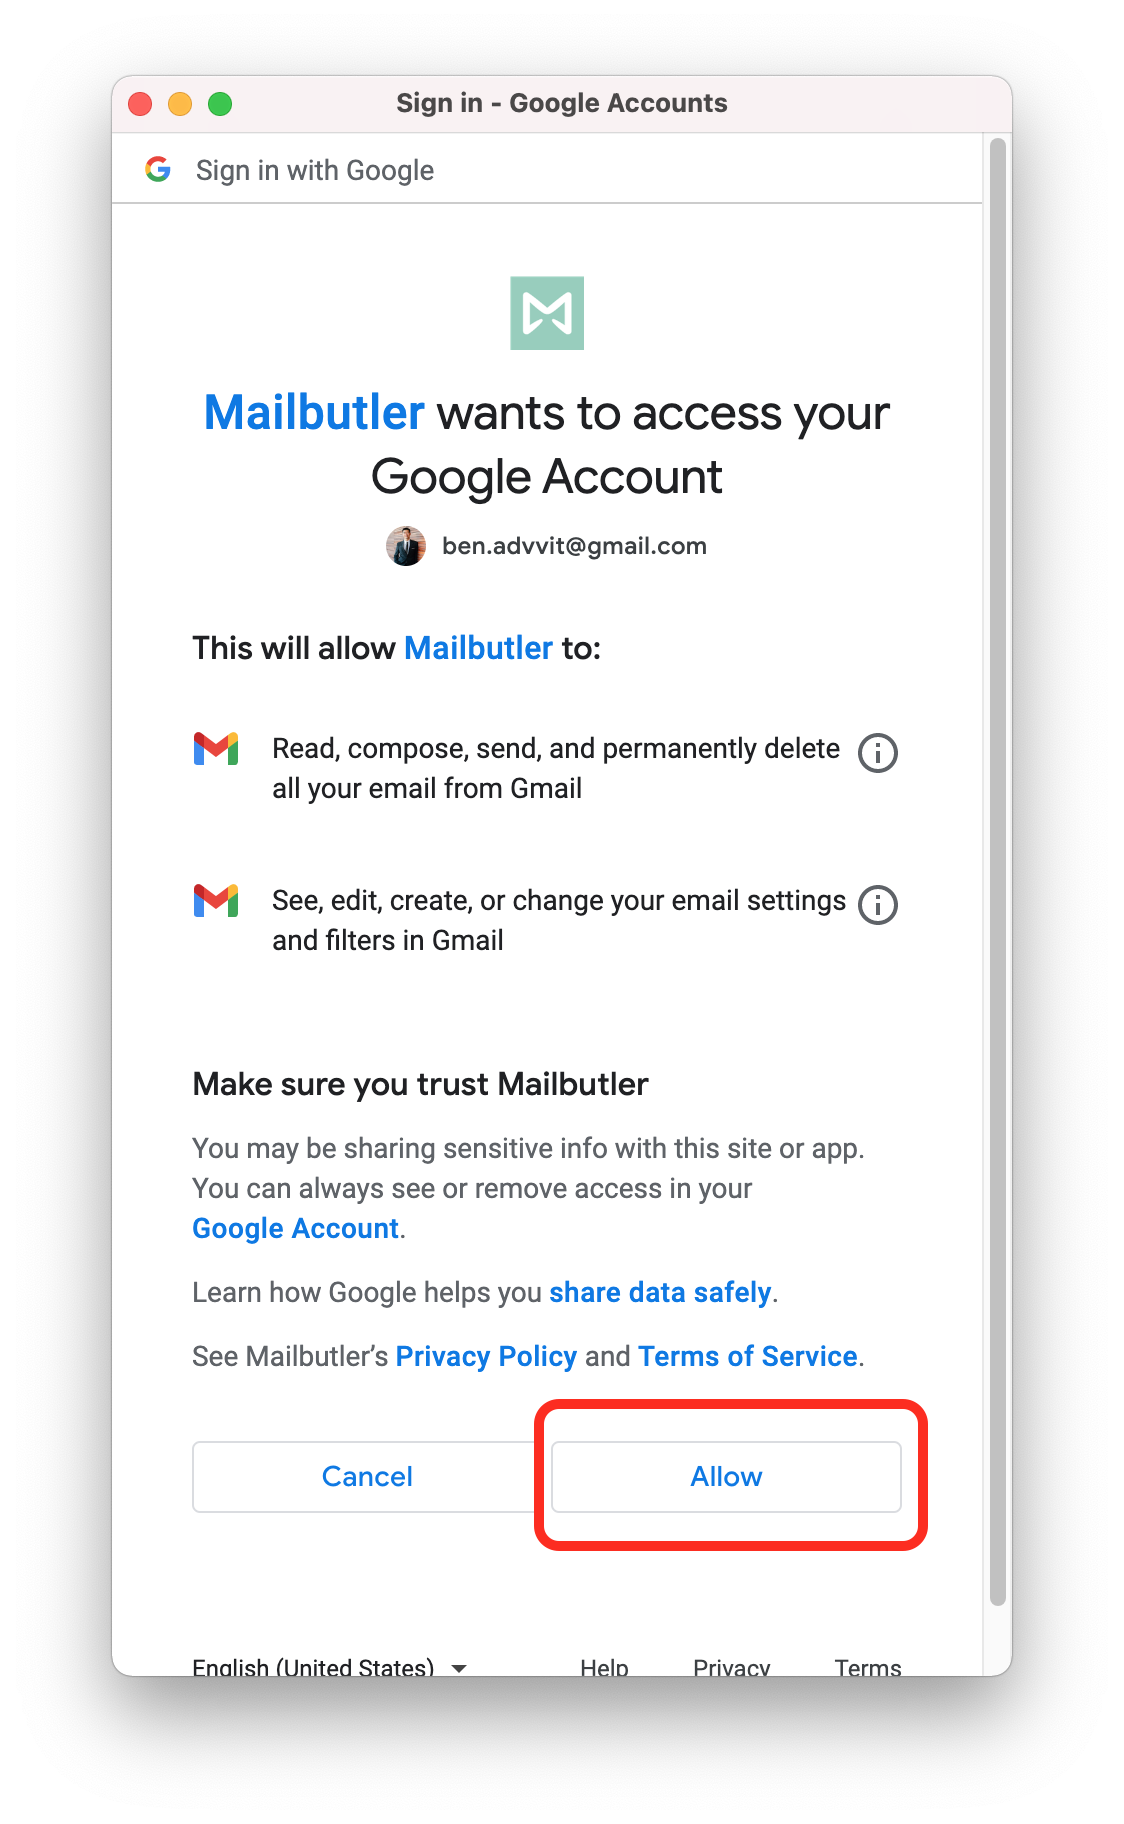
Select the Gmail account that you want to register with.
Click Continue.


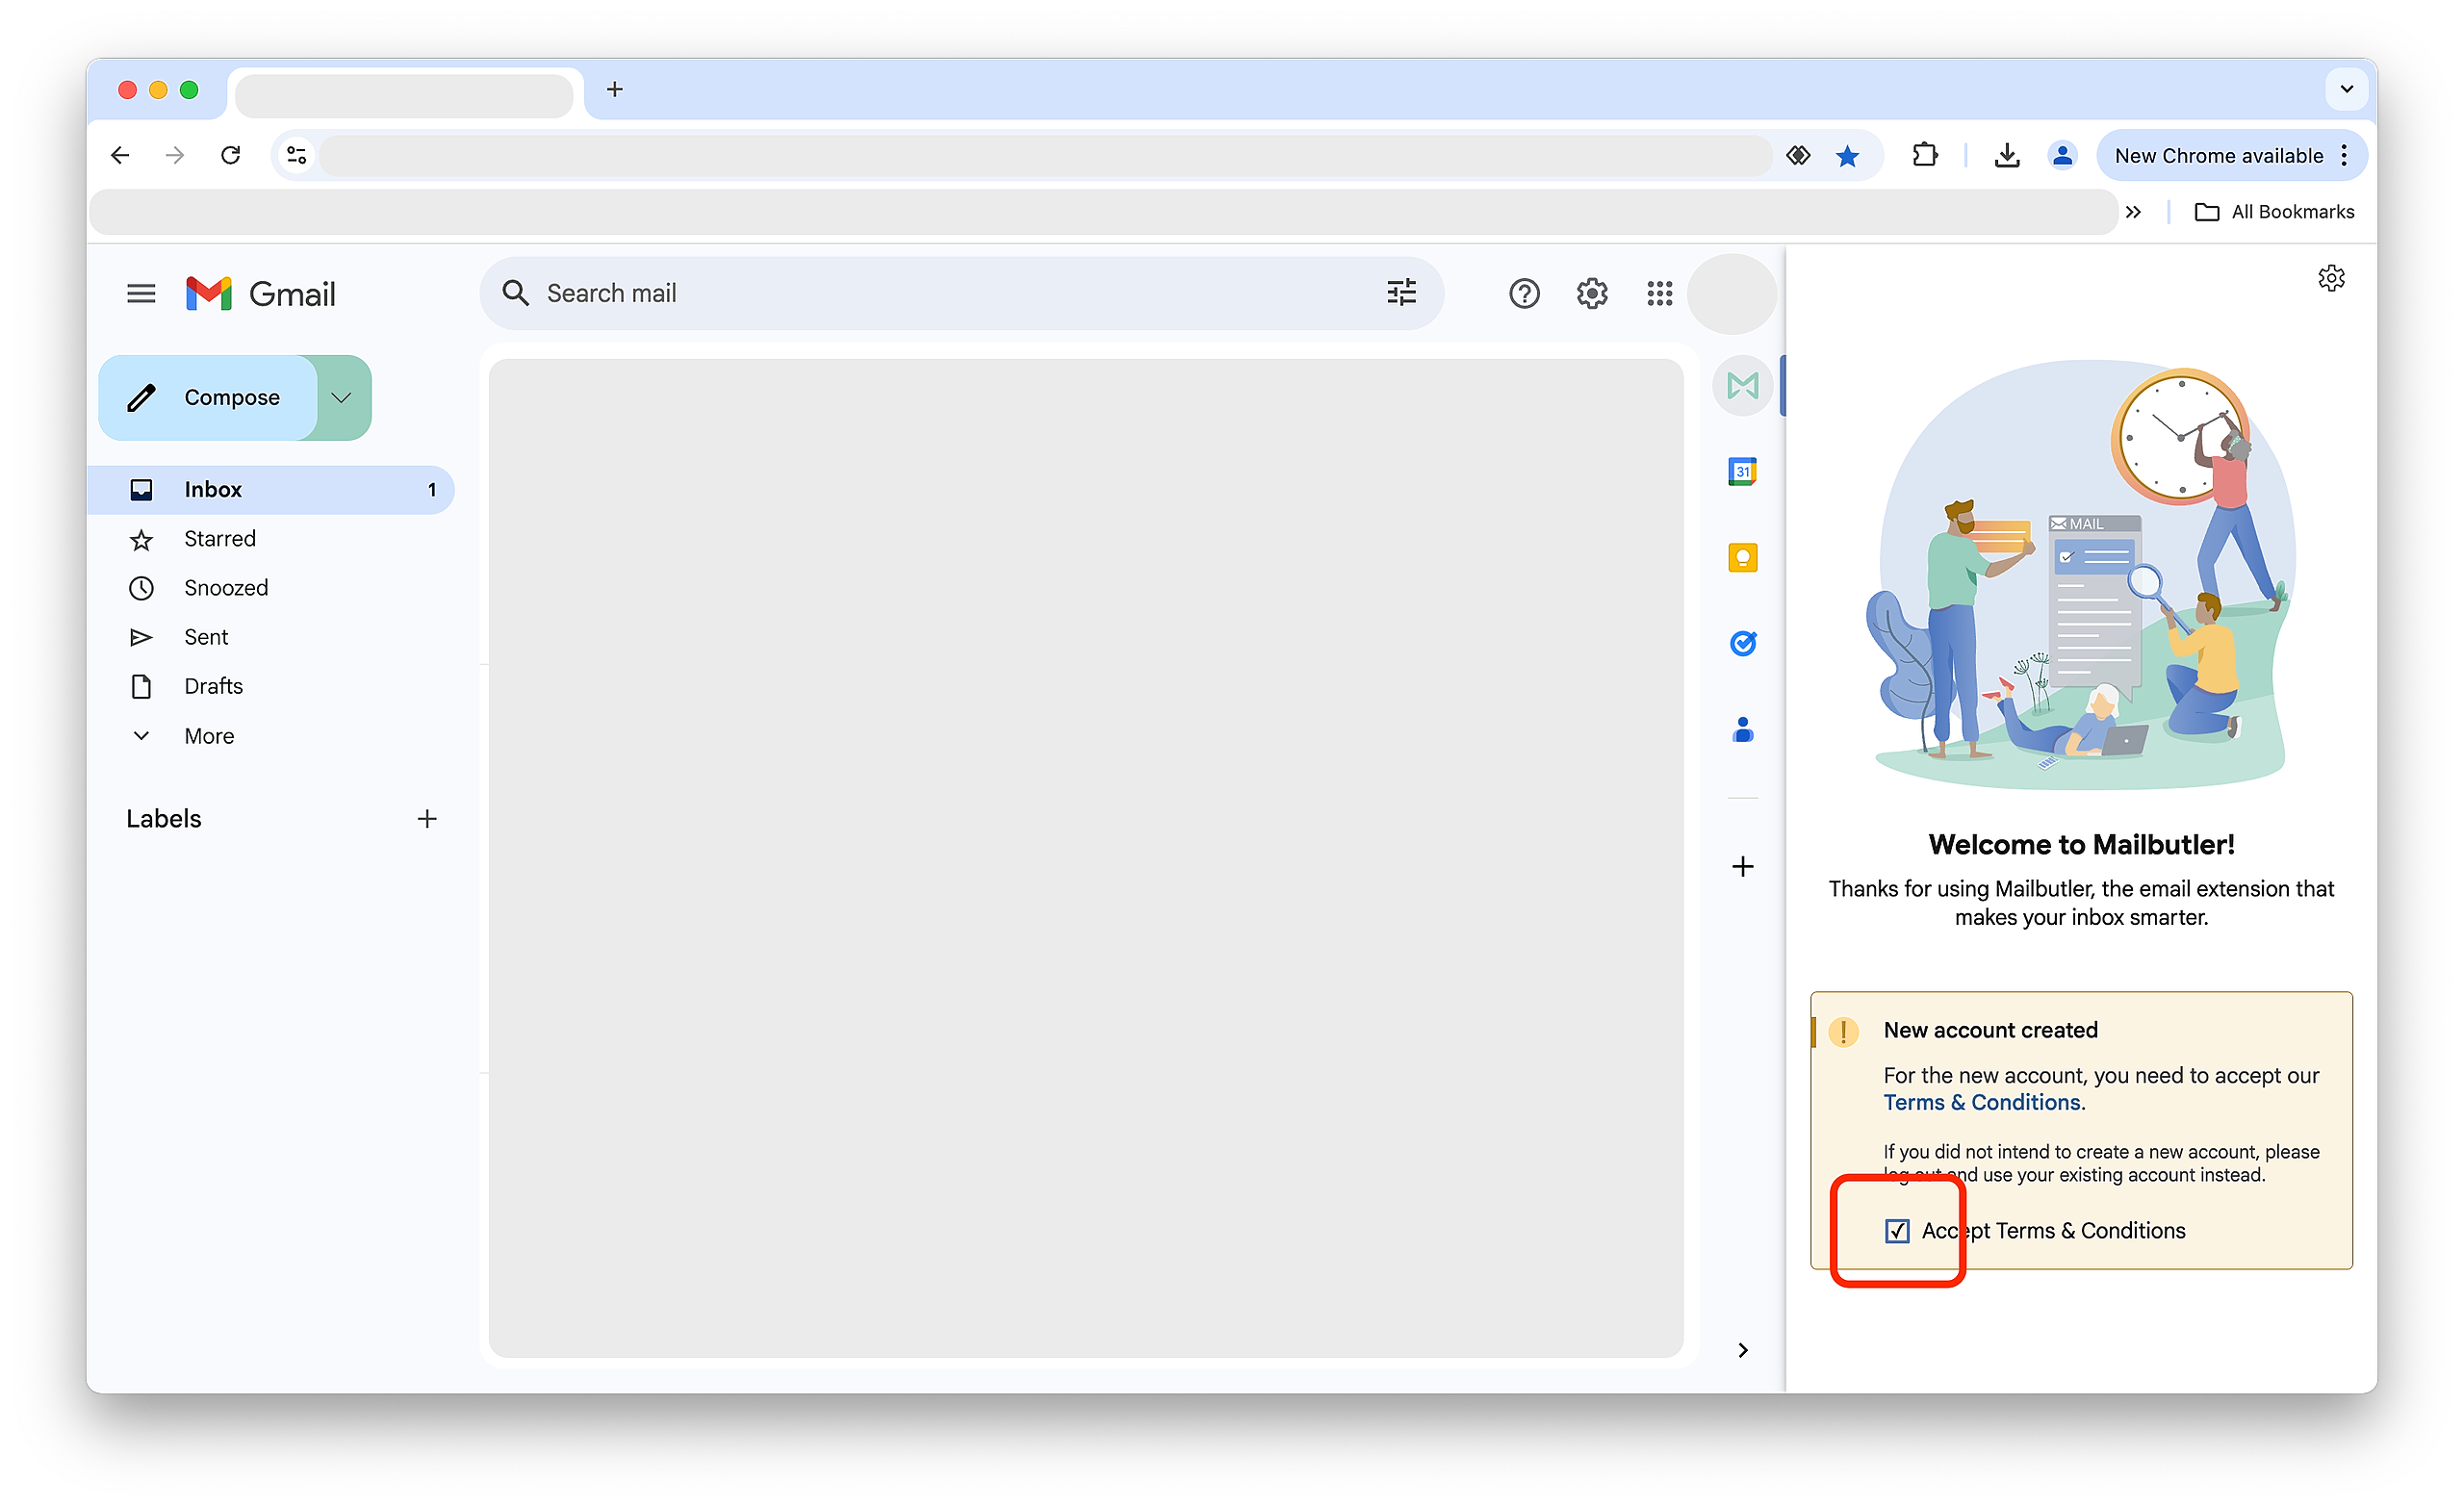
12. Tick the box next to Accept Terms & Conditions
13. Click Allow access.
14. Log in with your Google account and click Allow.
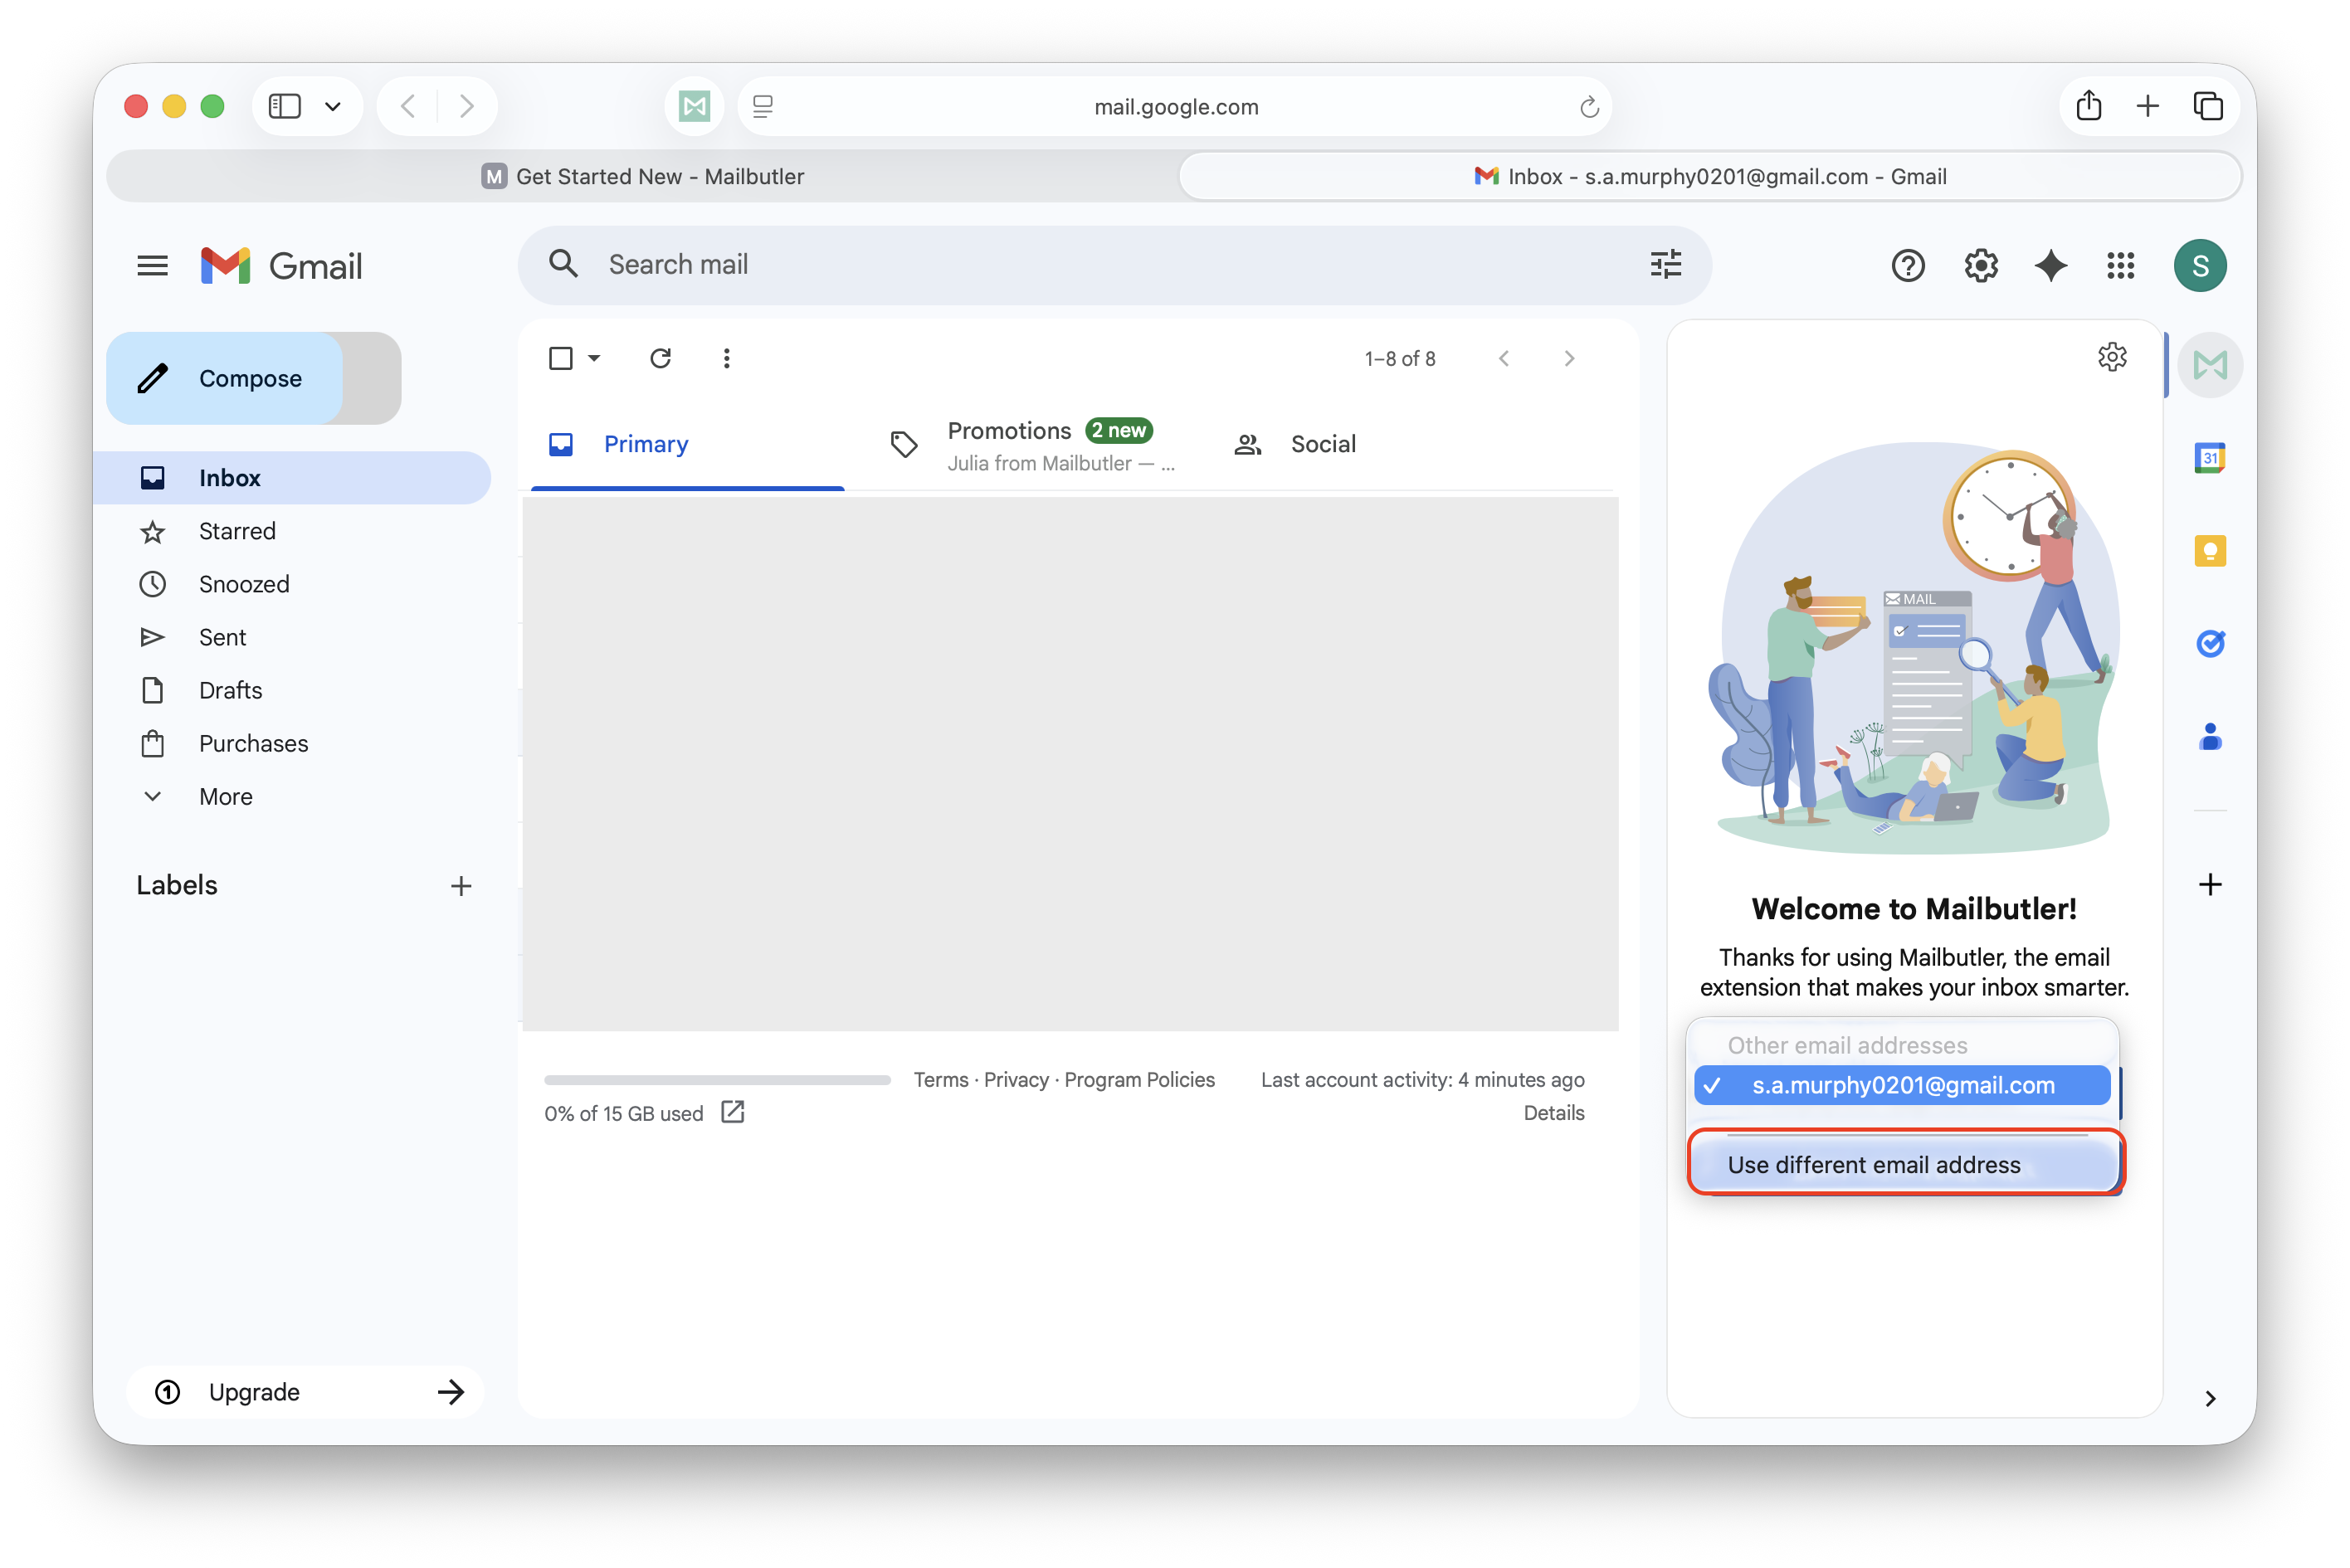
Alternatively, to register a Mailbutler account with a non-Gmail email address, click Use different email address.

You are all set and you can now start using Mailbutler's features in Gmail!
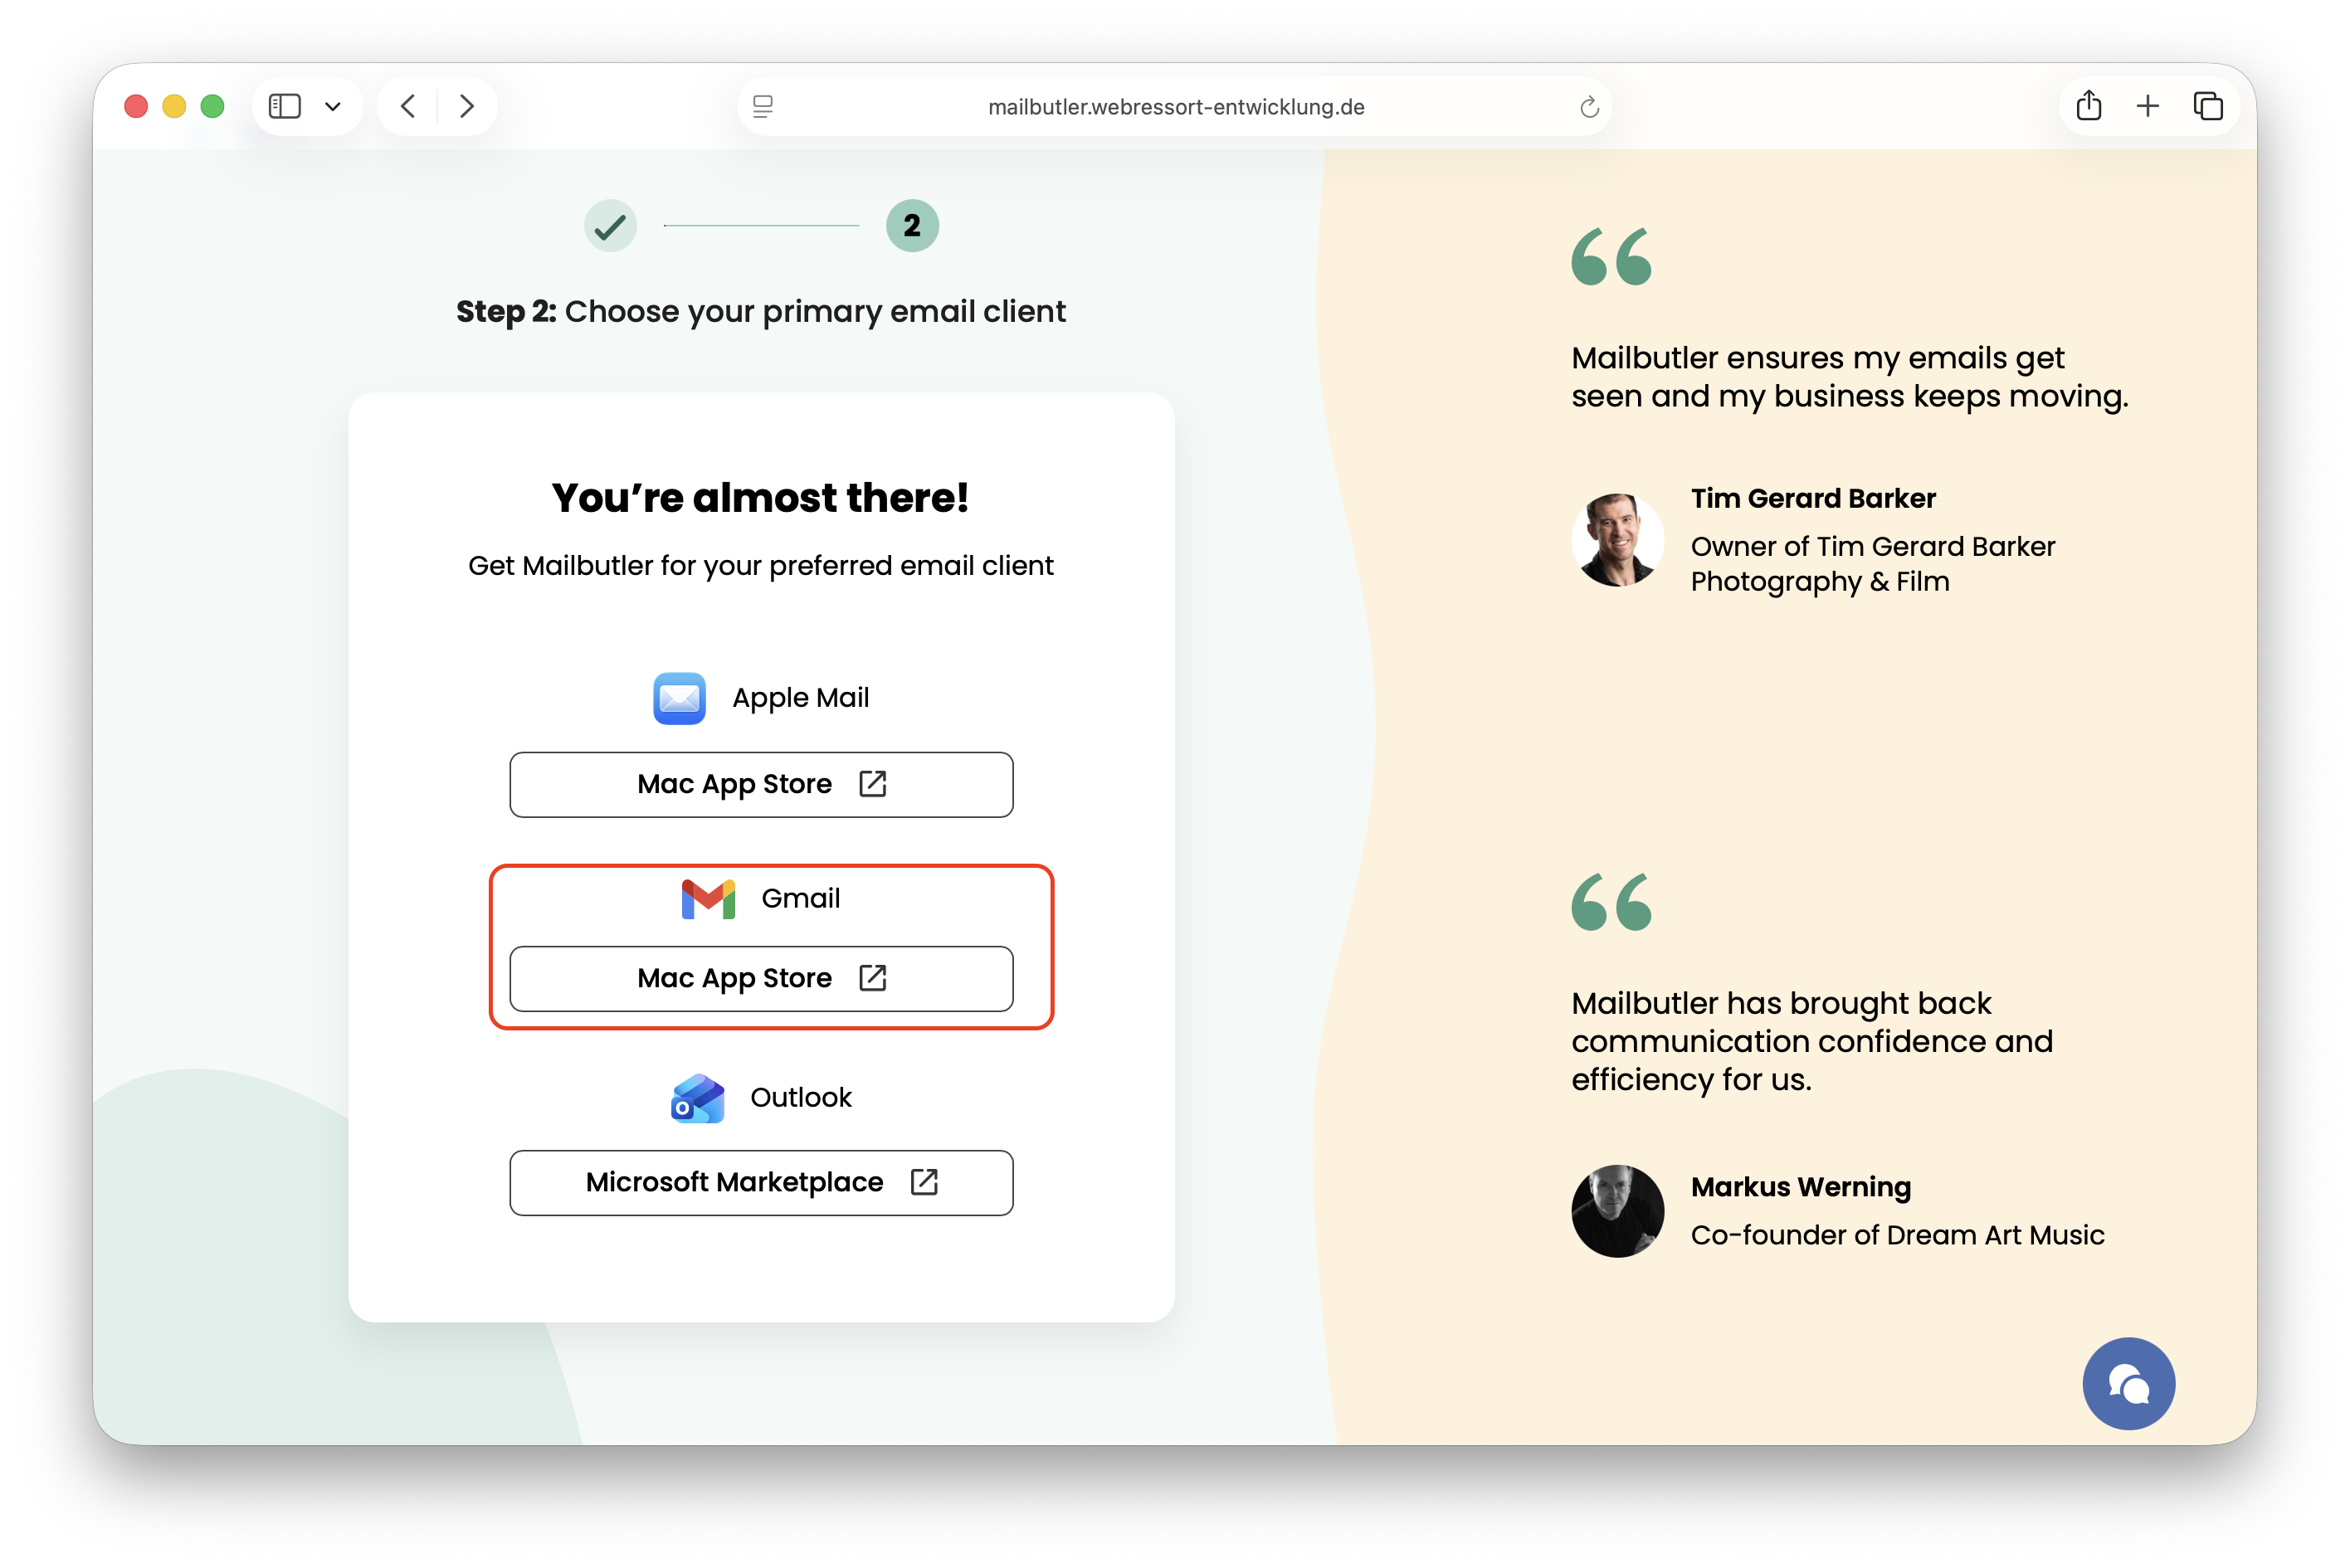
Gmail (Safari)
Go to our Get Started page here
Enter the email address you want to use for your Mailbutler account.
Click Get Started.
Under Gmail, click Mac App Store.
This will bringt you to the App Store on your Mac. Click Get.
7. Click Open.
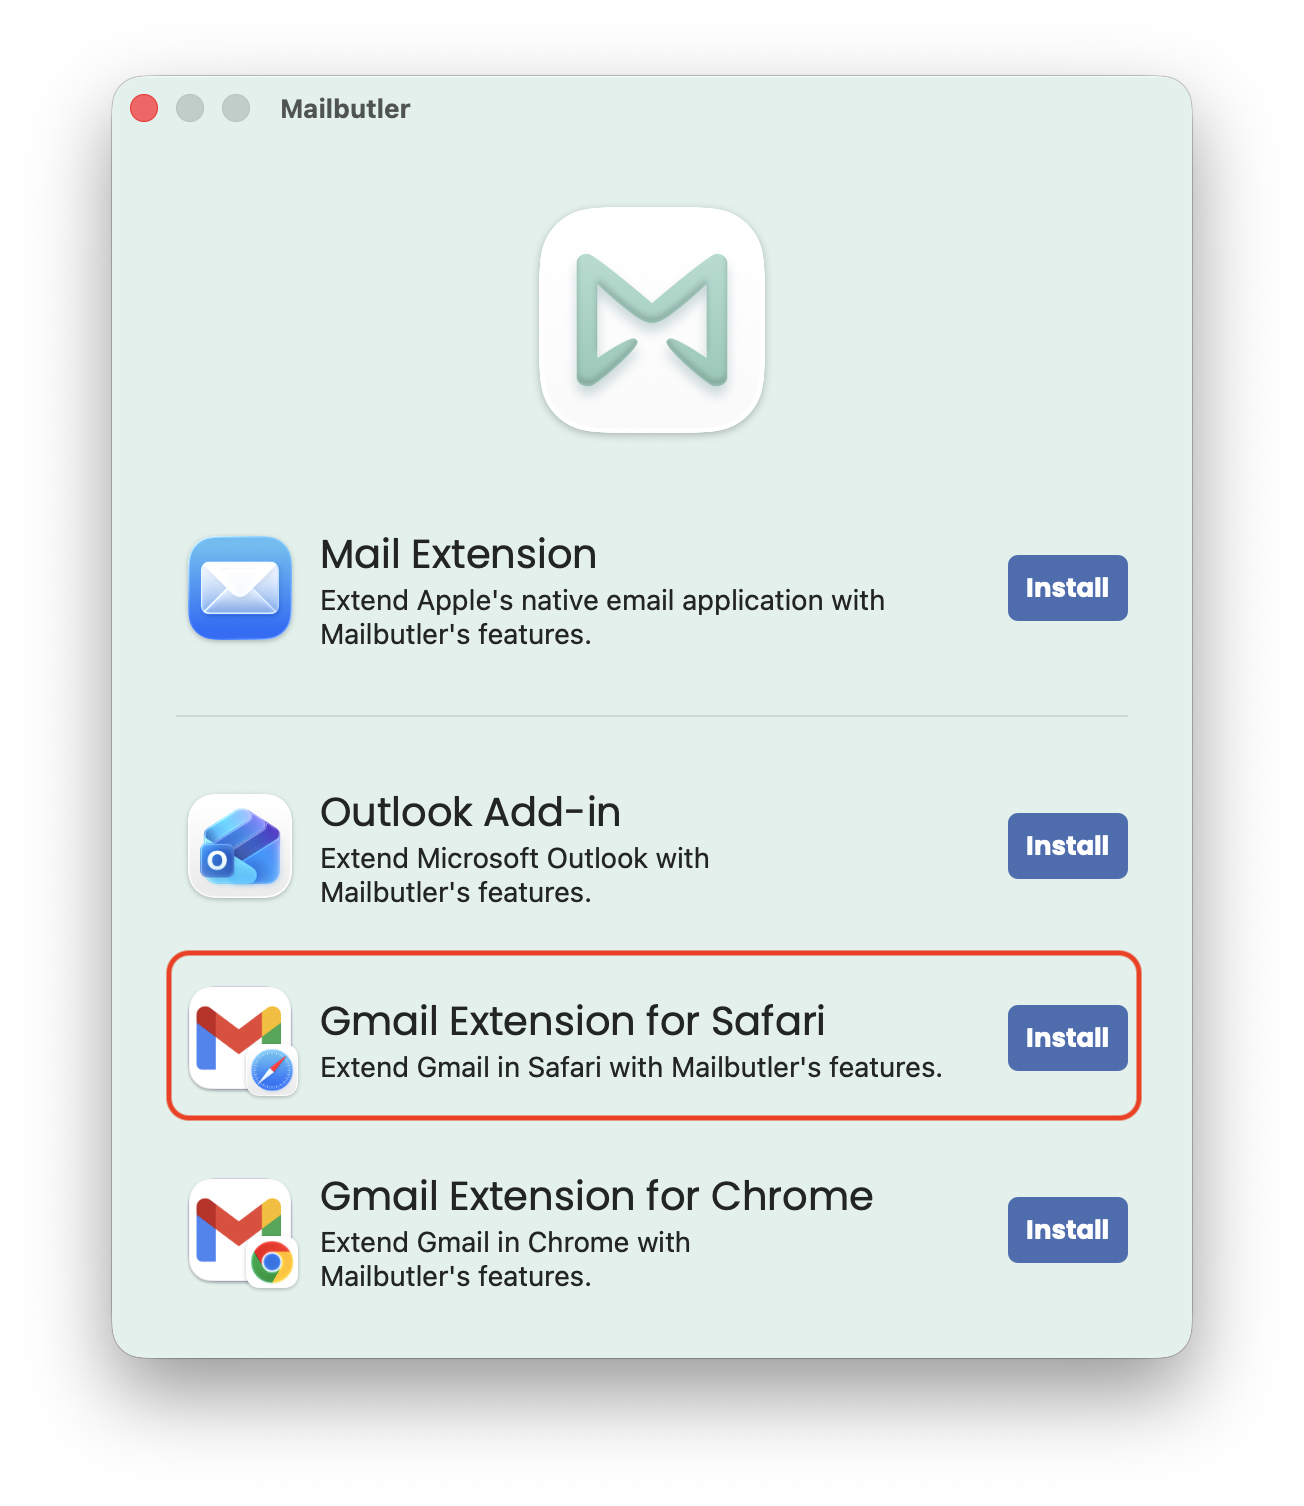
Click Install in line with Gmail Extension for Safari
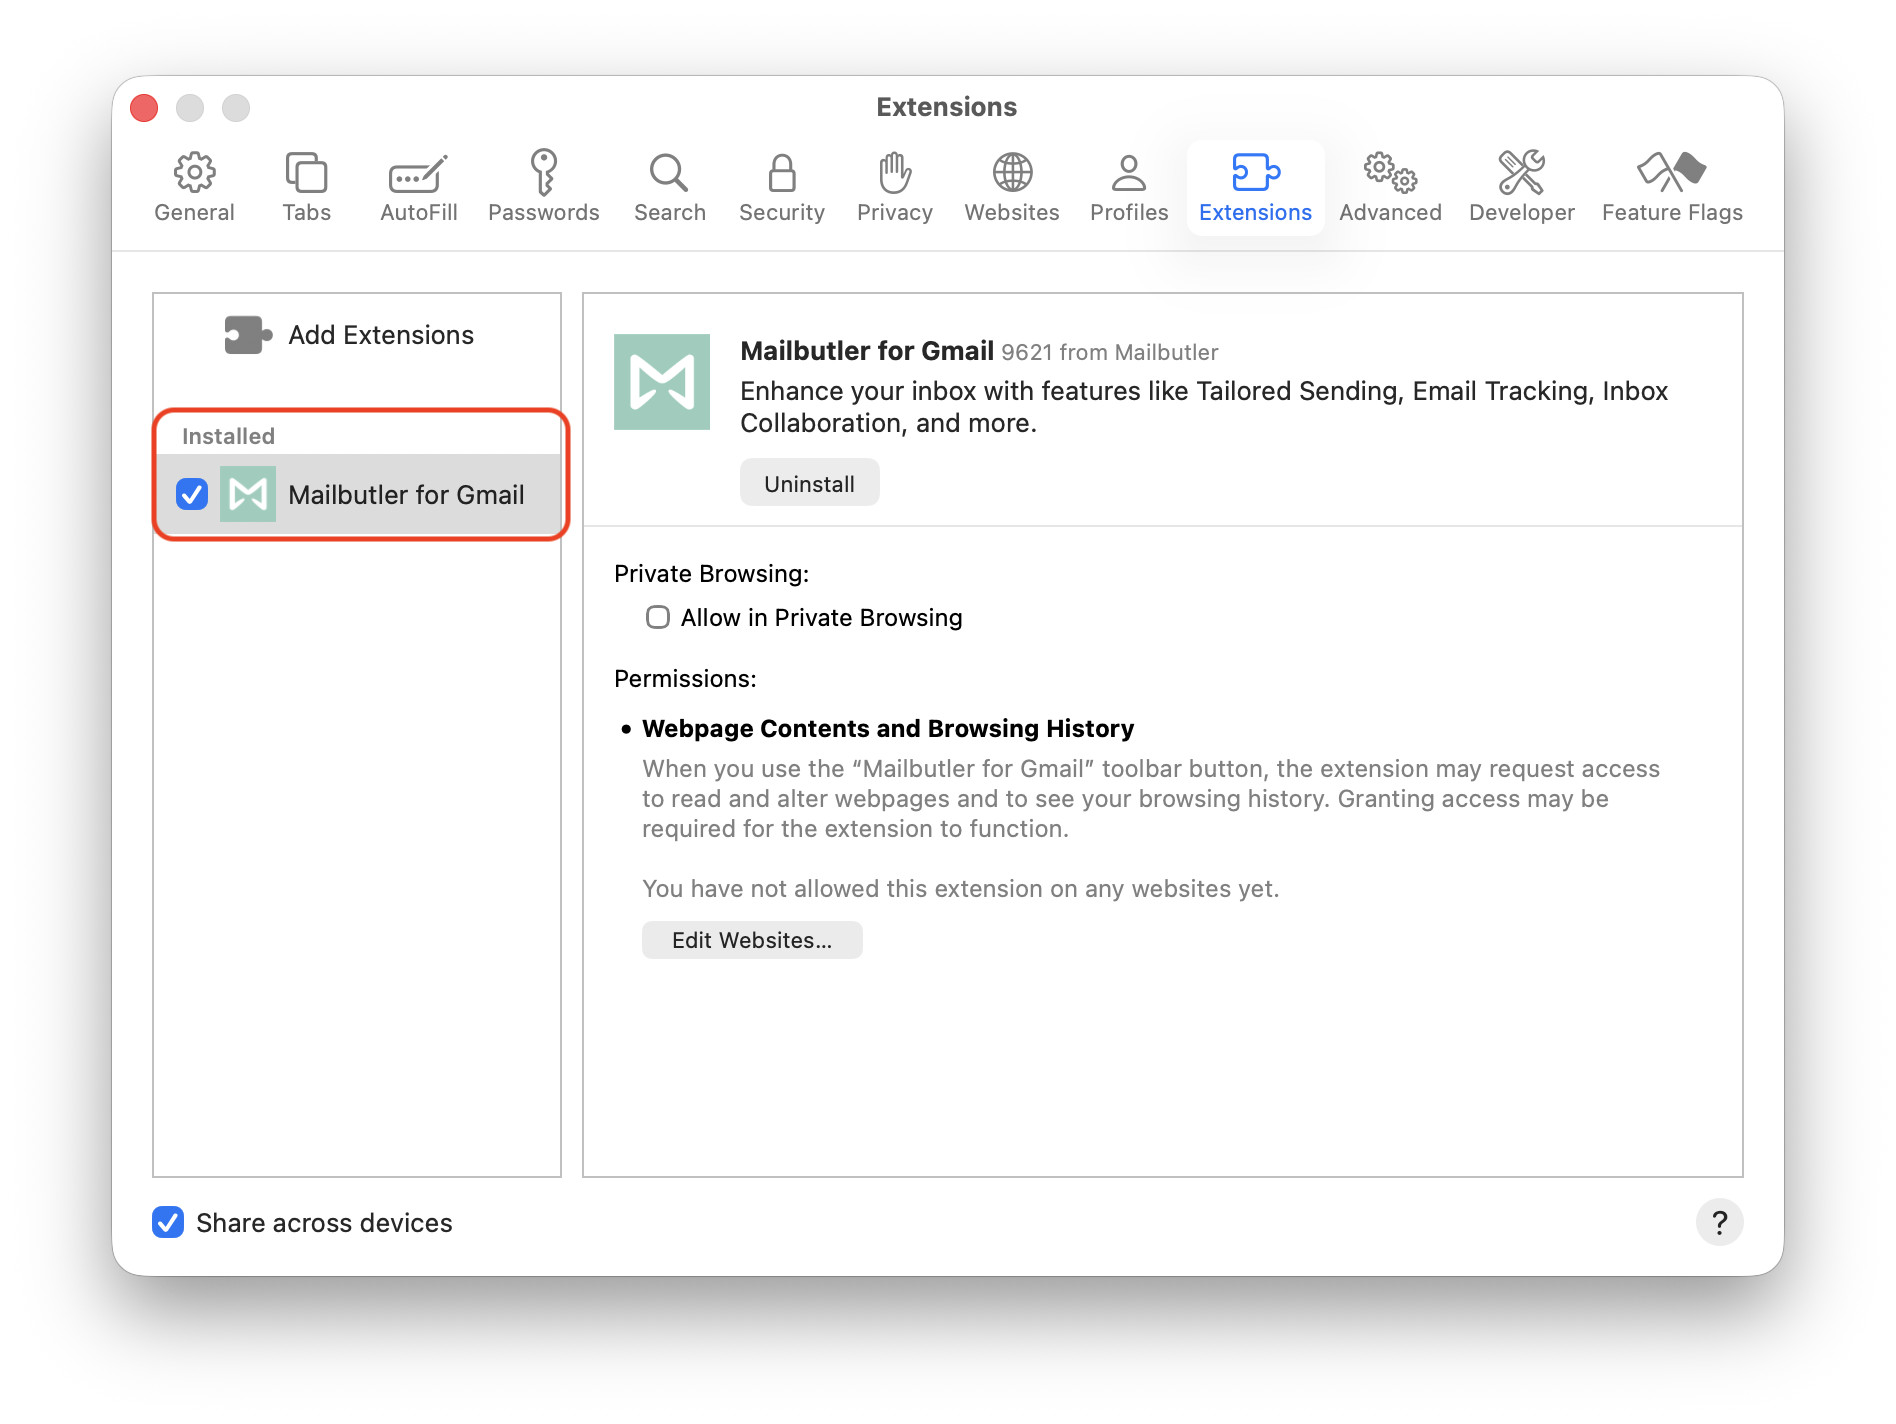
This will open Safari’s Extensions settings. In the left sidebar (under Installed), tick the box next to Mailbutler for Gmail to enable it.
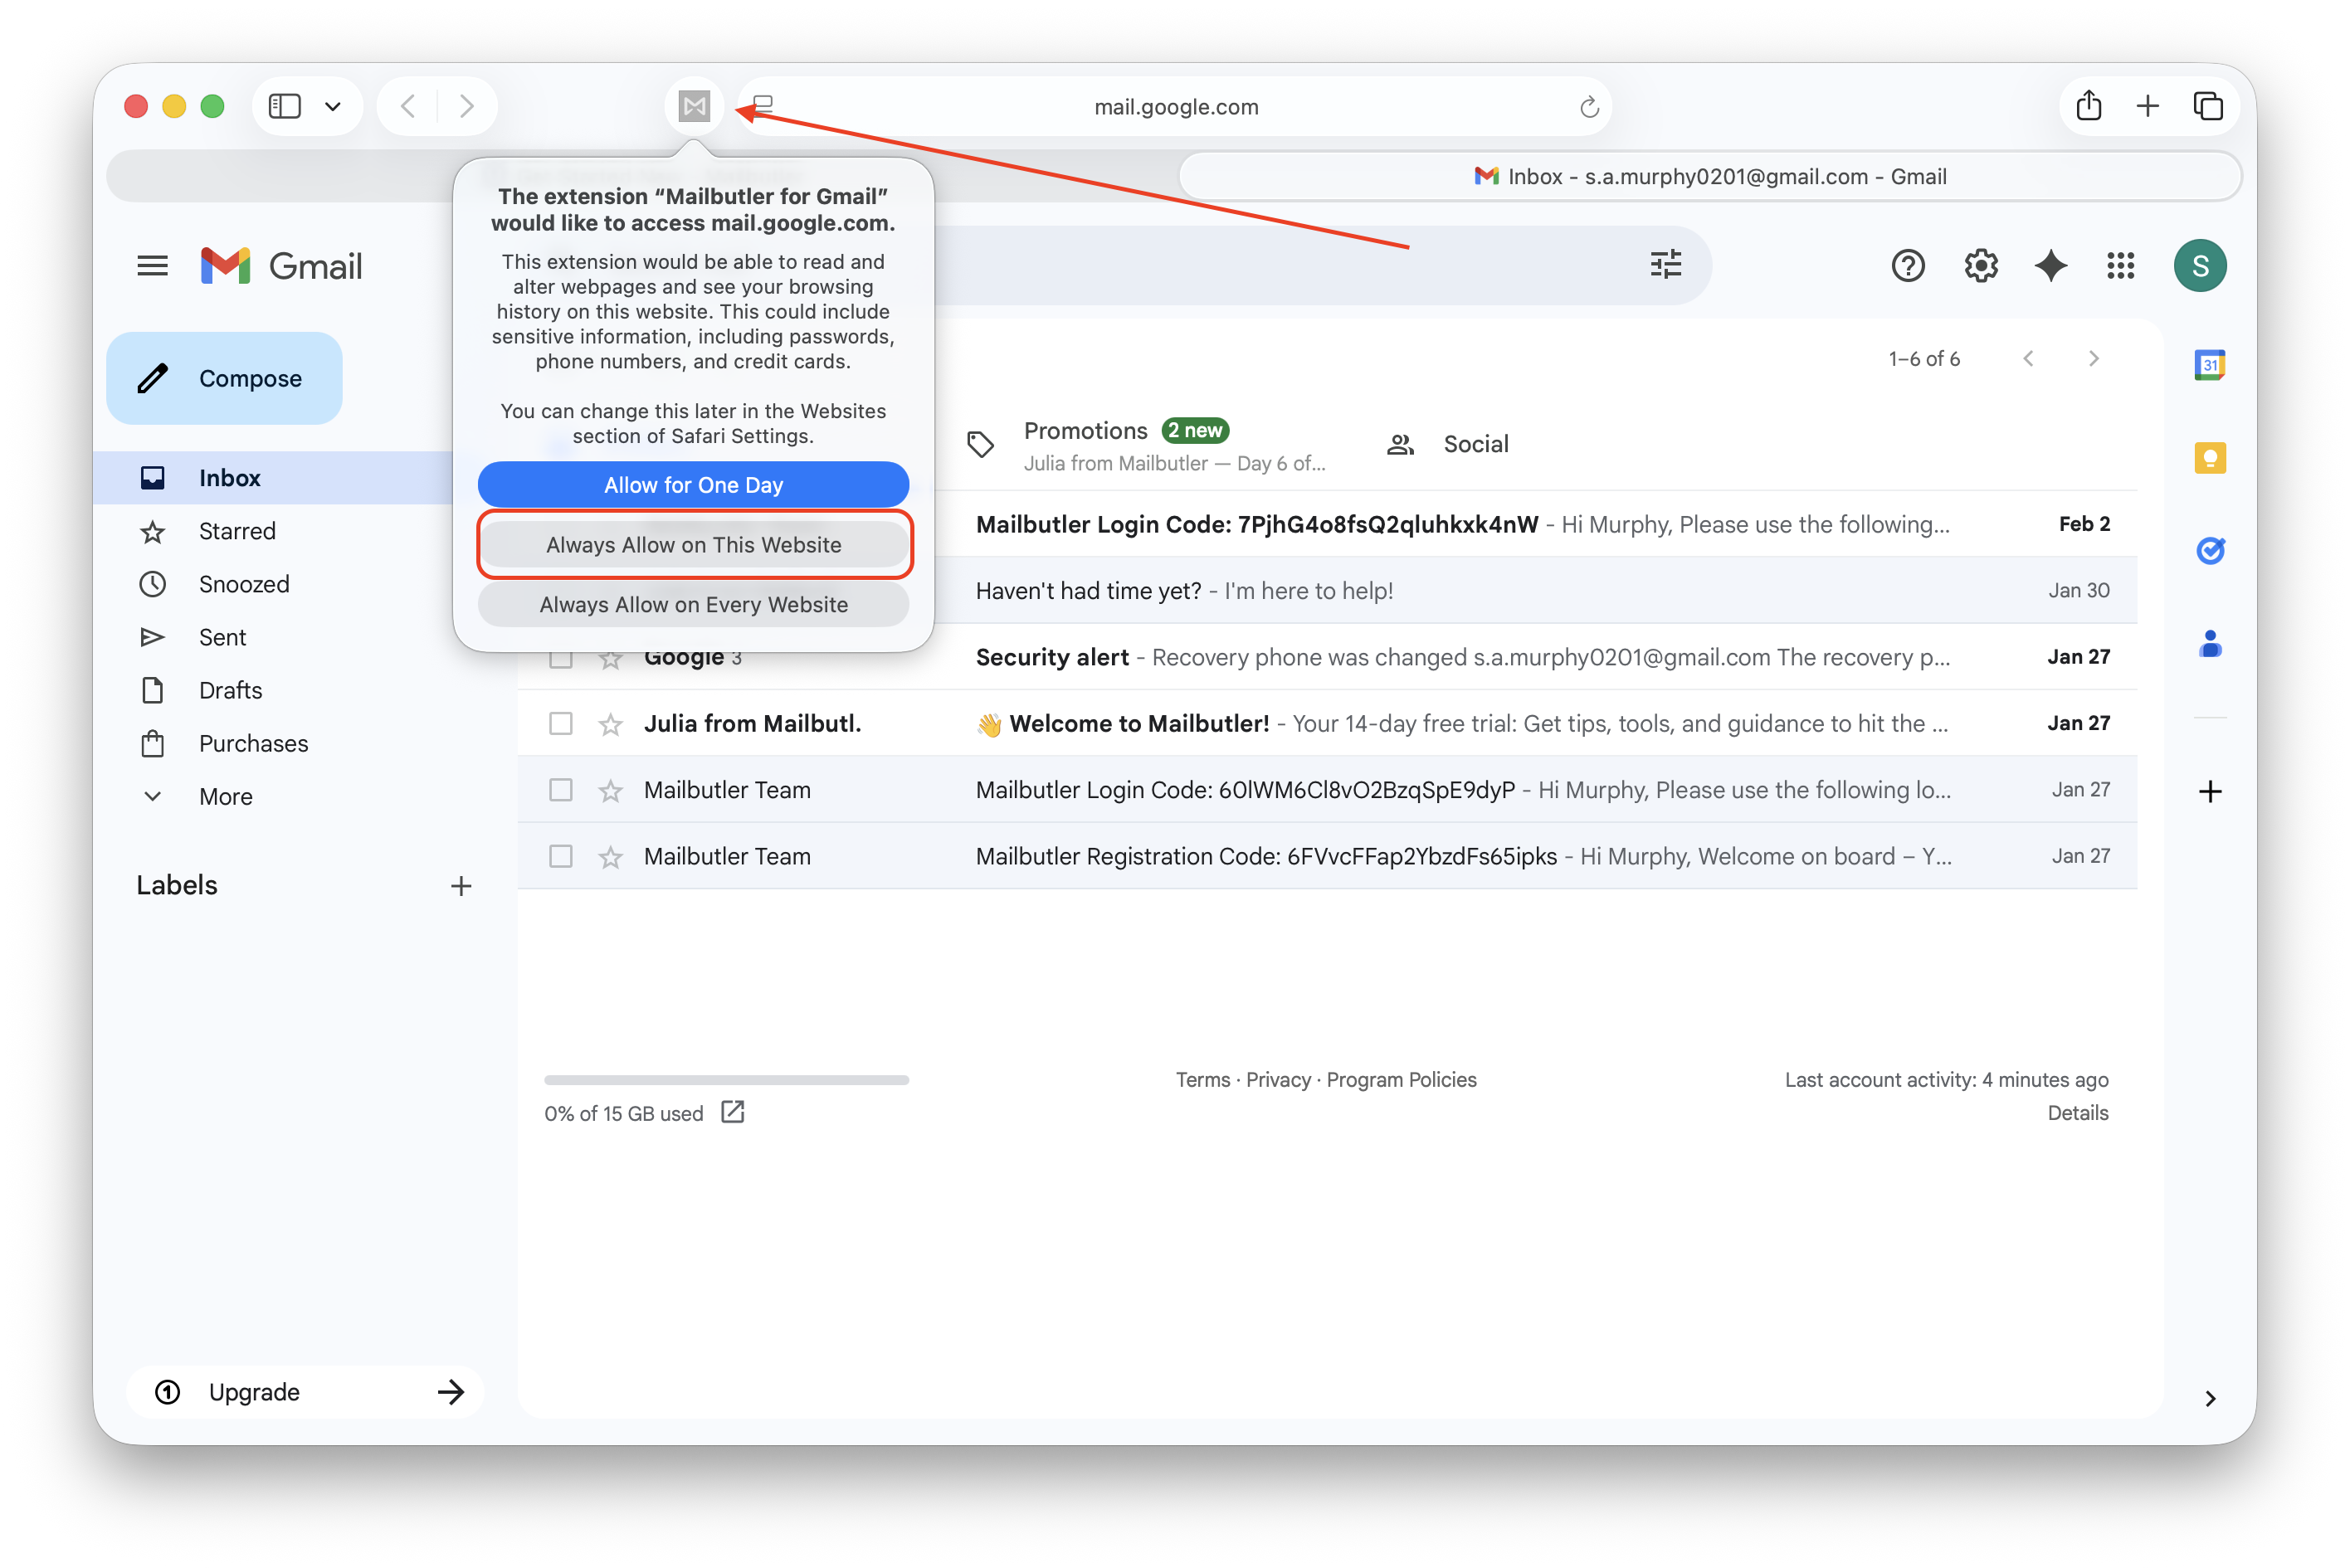
Gmail will open automatically in Safari. Click the Mailbutler extension icon in the Safari toolbar, then select Always Allow on This Website to grant Mailbutler access to Gmail web app.
The Mailbutler sidebar should open automatically. If not, click the Mailbutler icon in Gmail’s side panel to open it.
Click Start using Mailbutler to sign in and complete your Mailbutler account setup.
Alternatively, to register a Mailbutler account with a non-Gmail email address, click Use different email address.
Select the checkbox labeled “Accept Terms & Conditions” to proceed.
You are all set and you can now start using Mailbutler's features in Gmail!
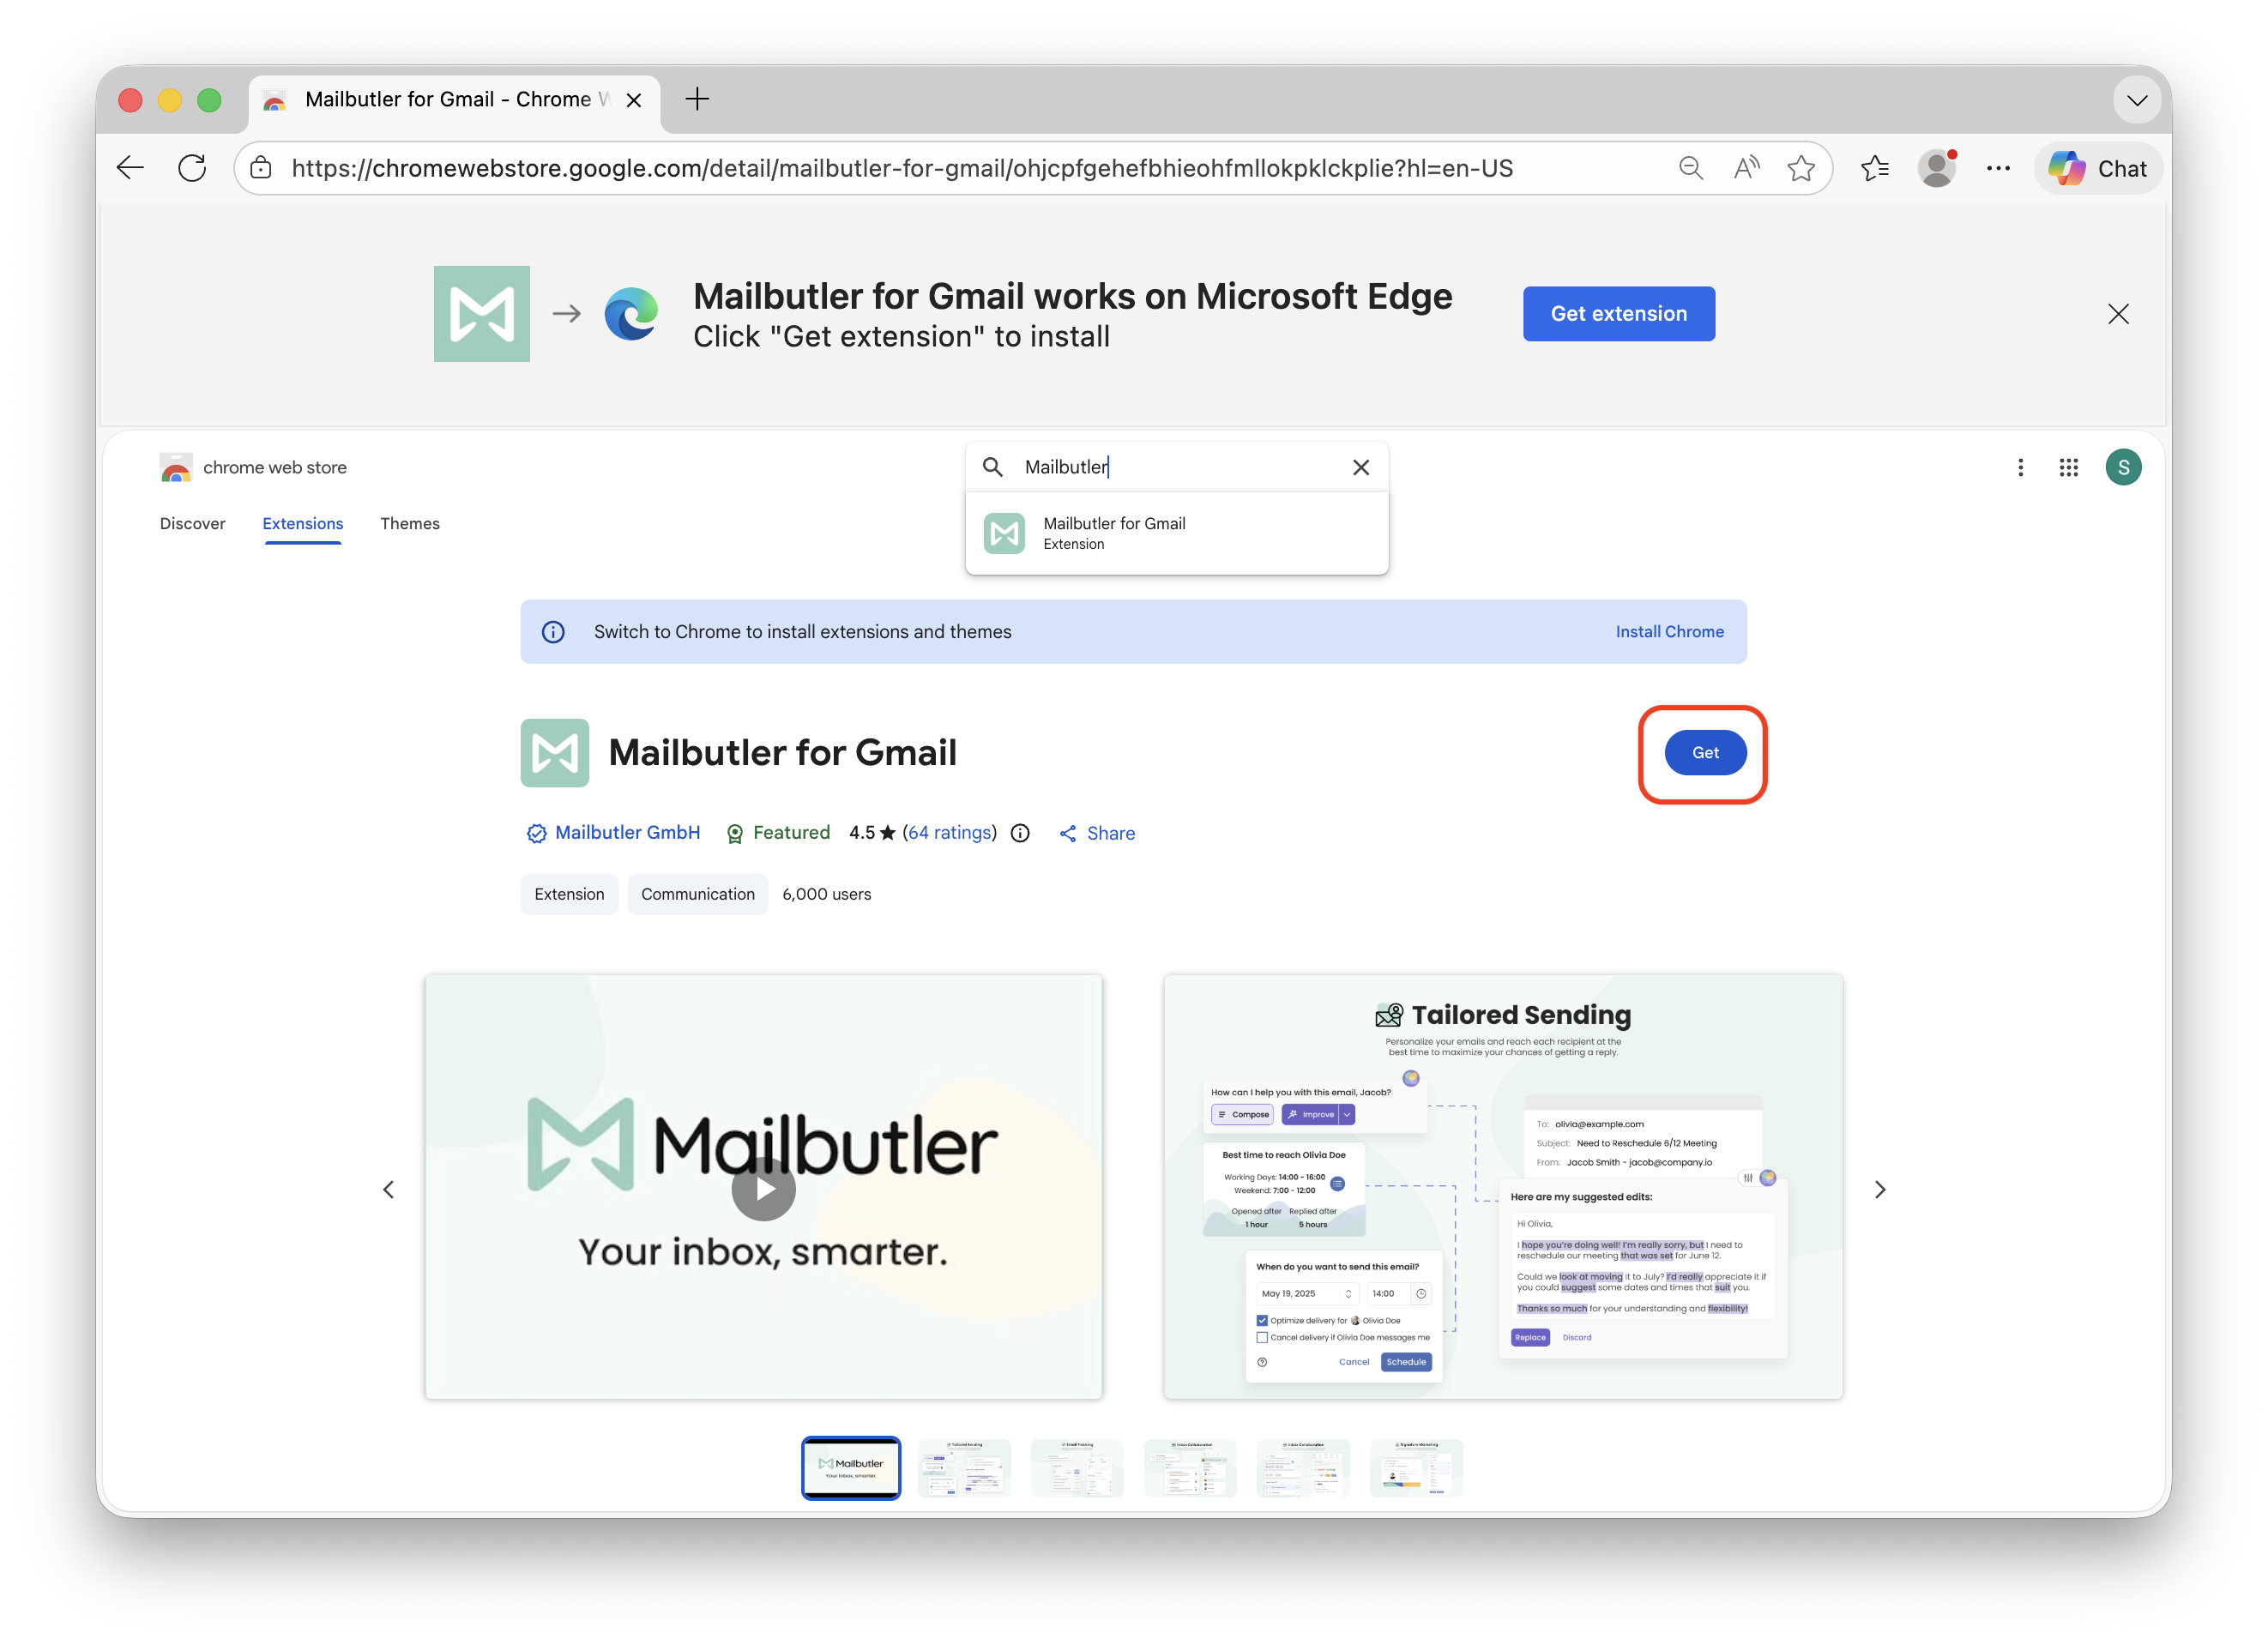
Gmail (Edge)
Go to our Get Started page here
Enter the email address you want to use for your Mailbutler account.
Click Get Started.
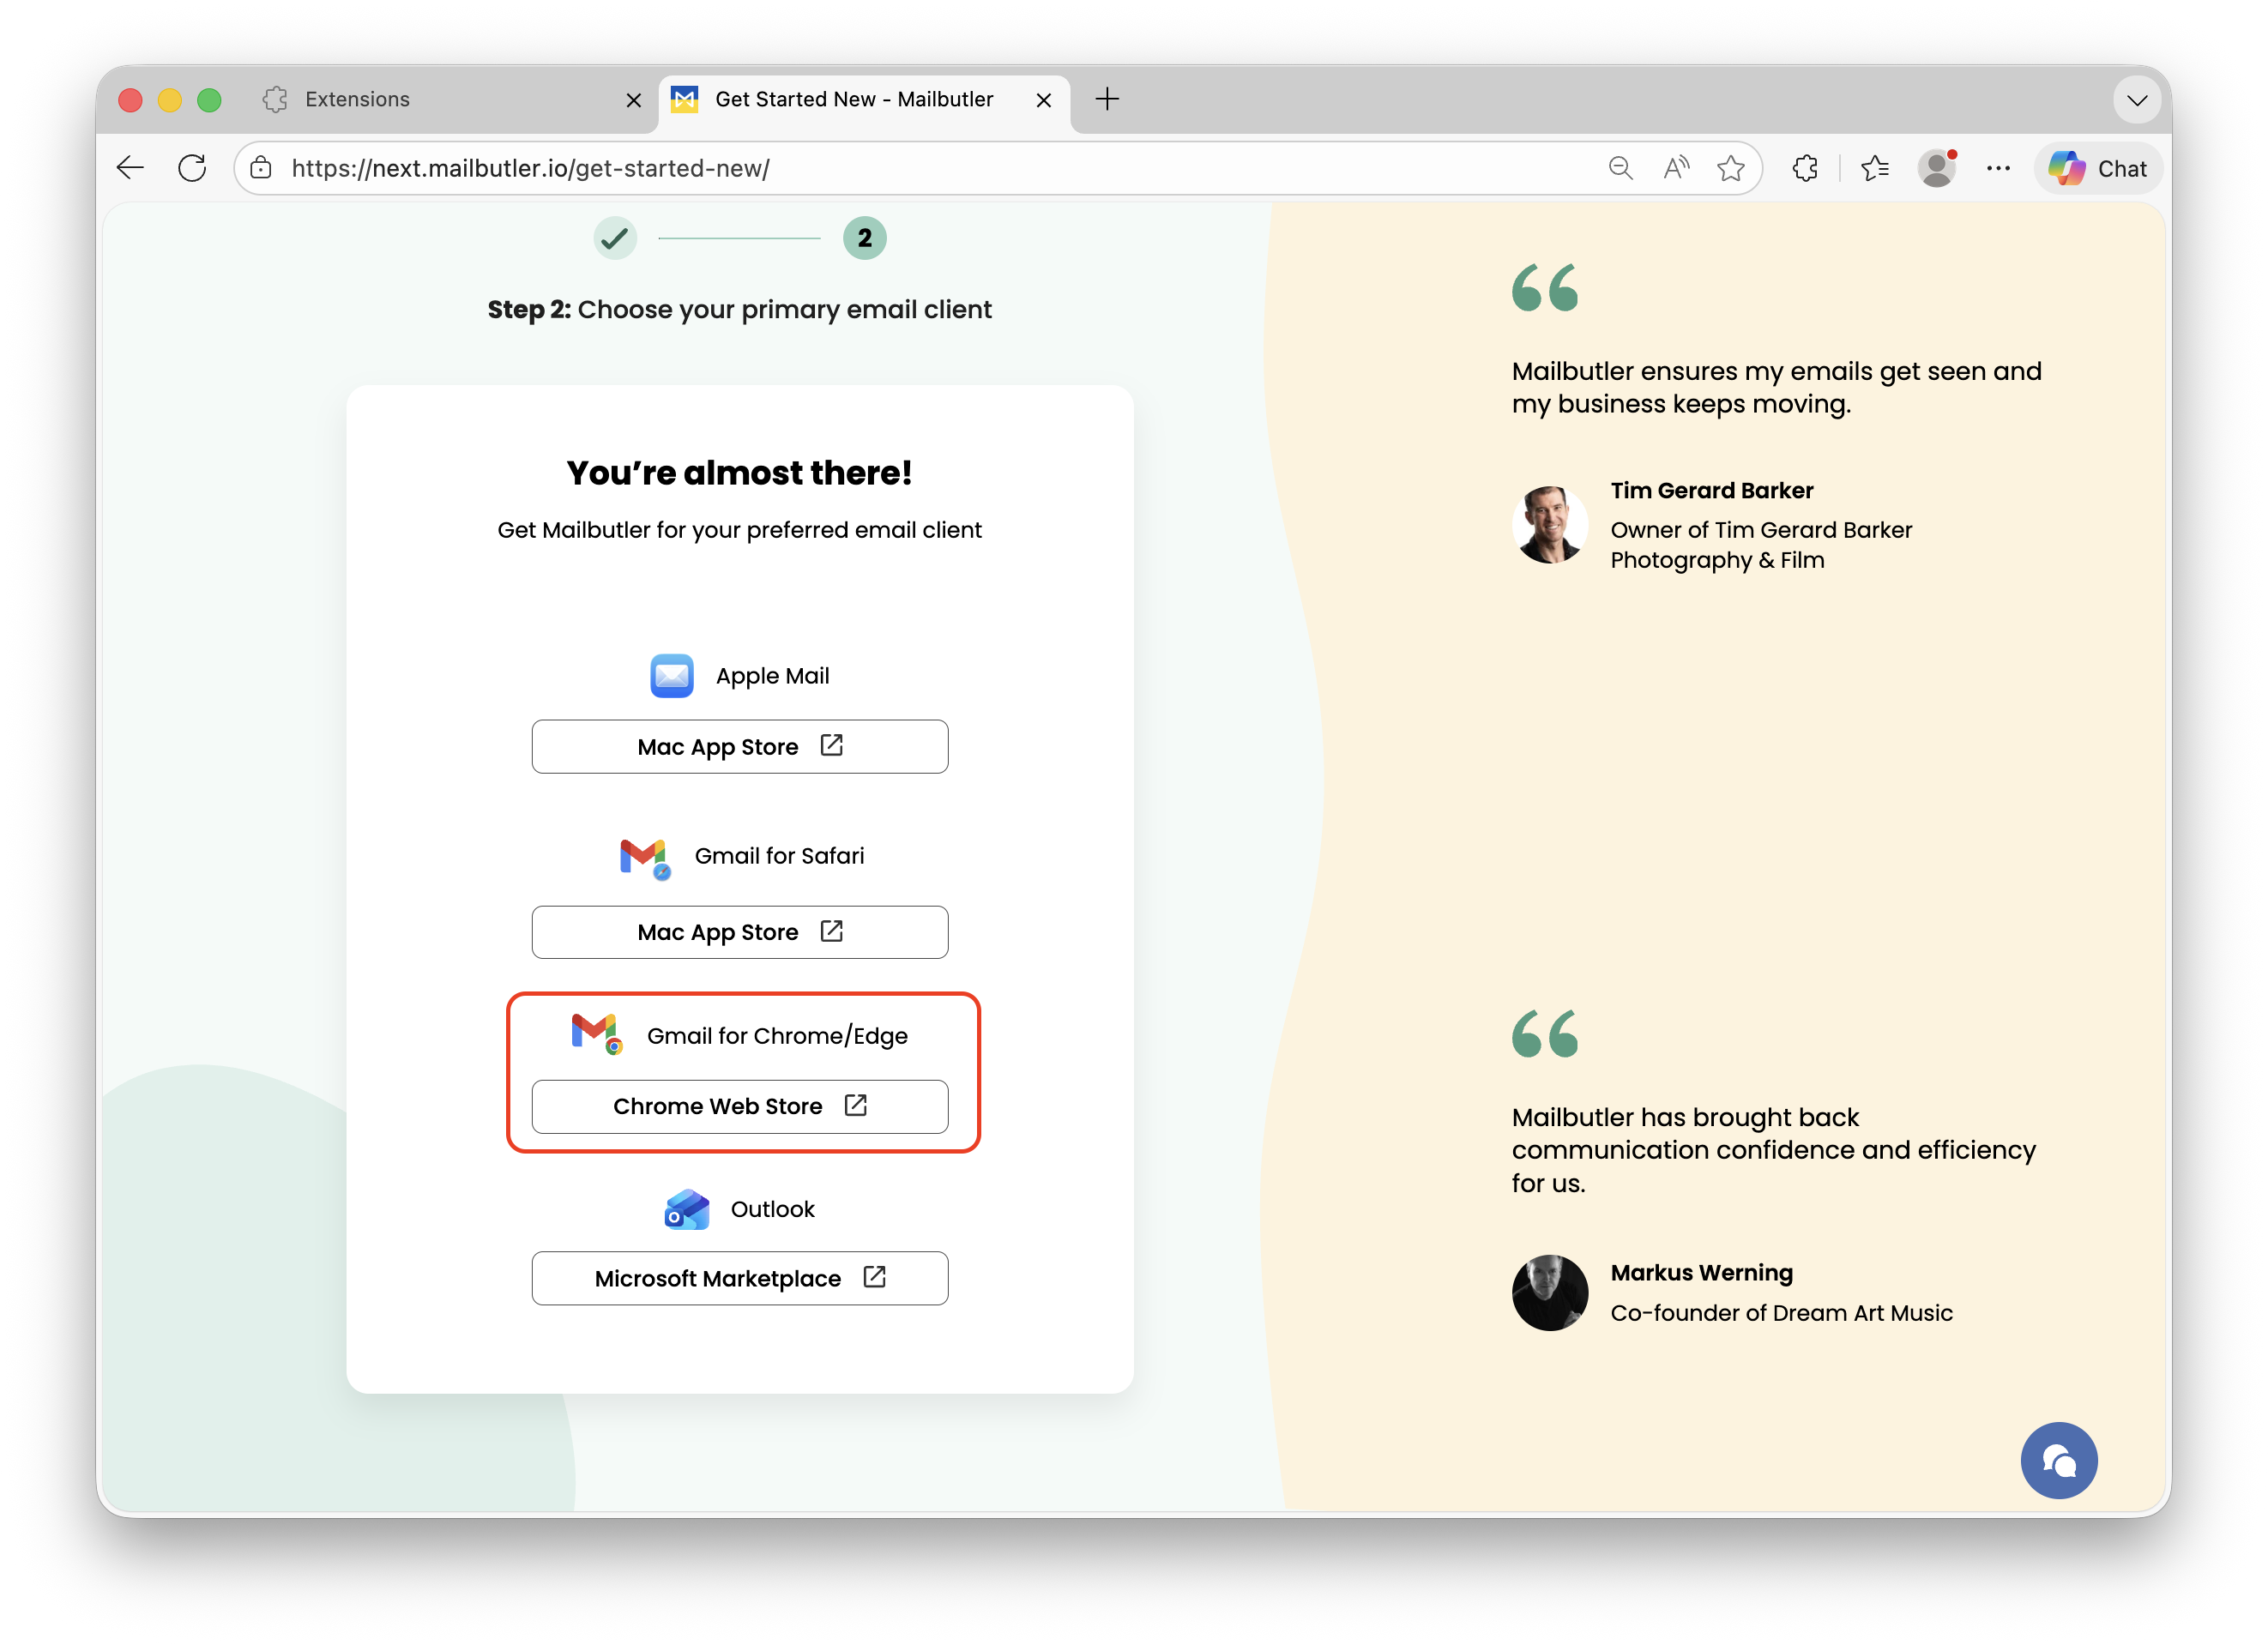
Under Gmail, click Gmail for Chrome/Edge
Click Get button.
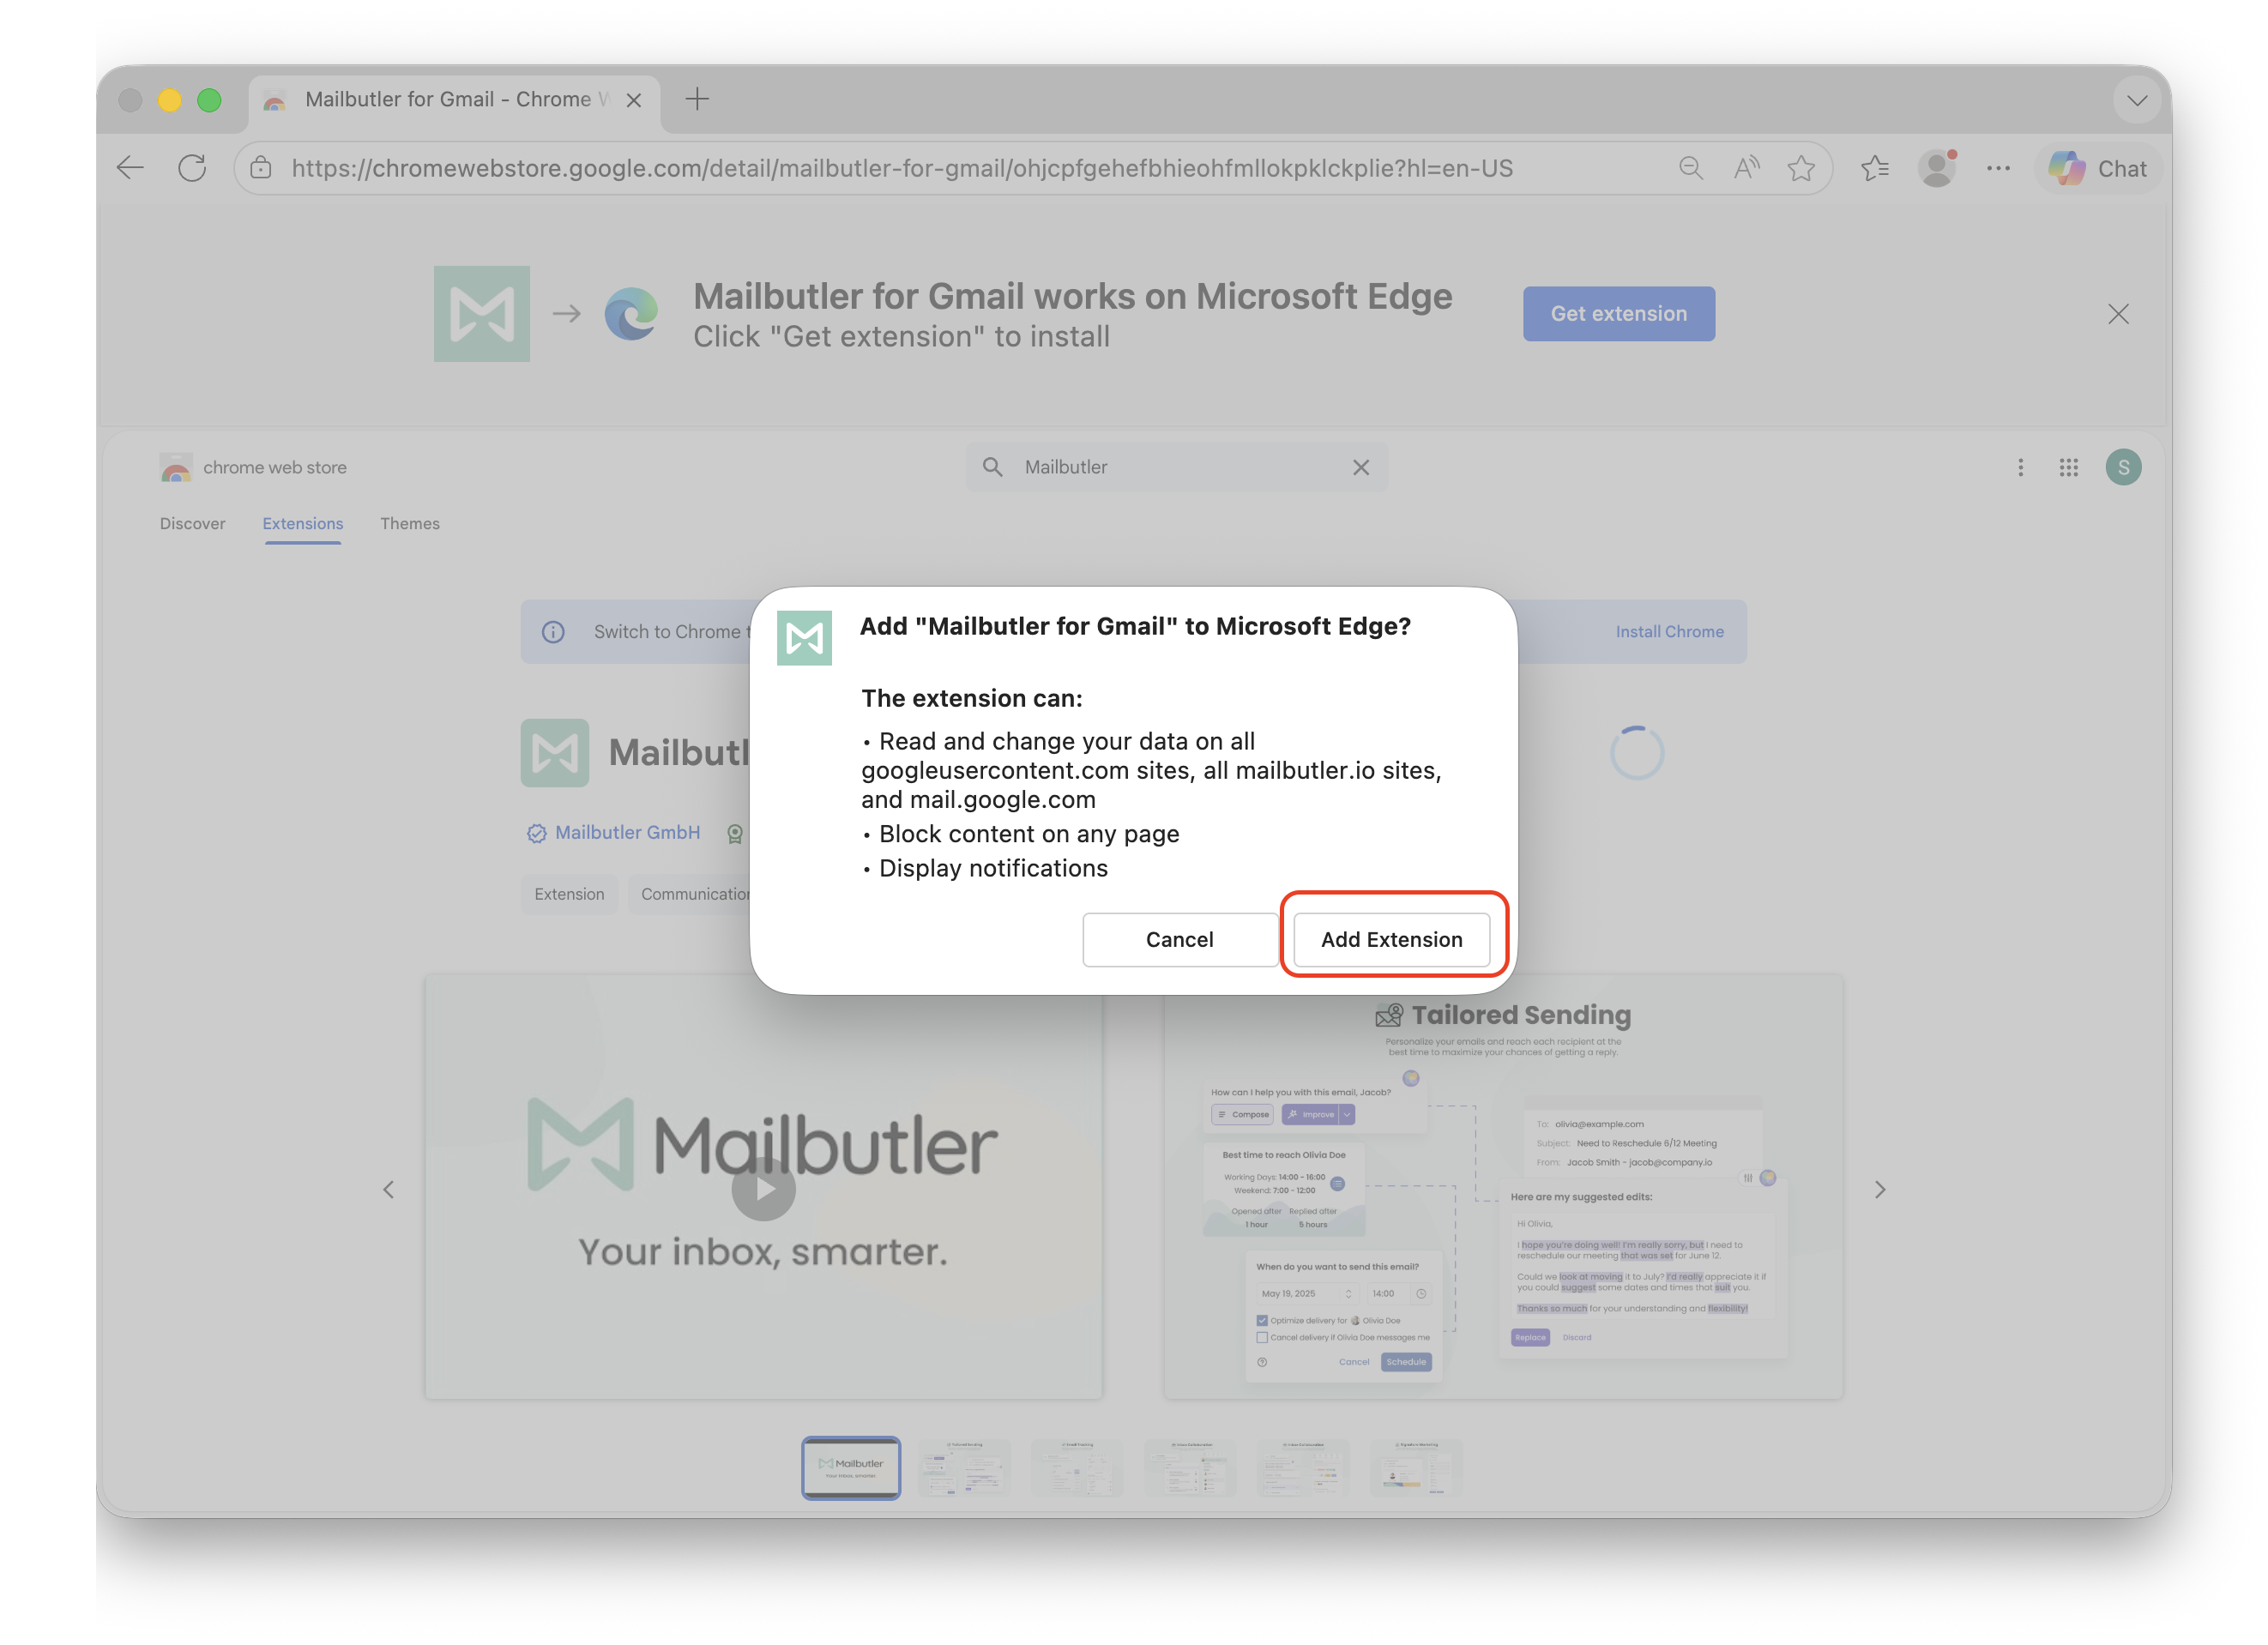
Select "Add Extension"
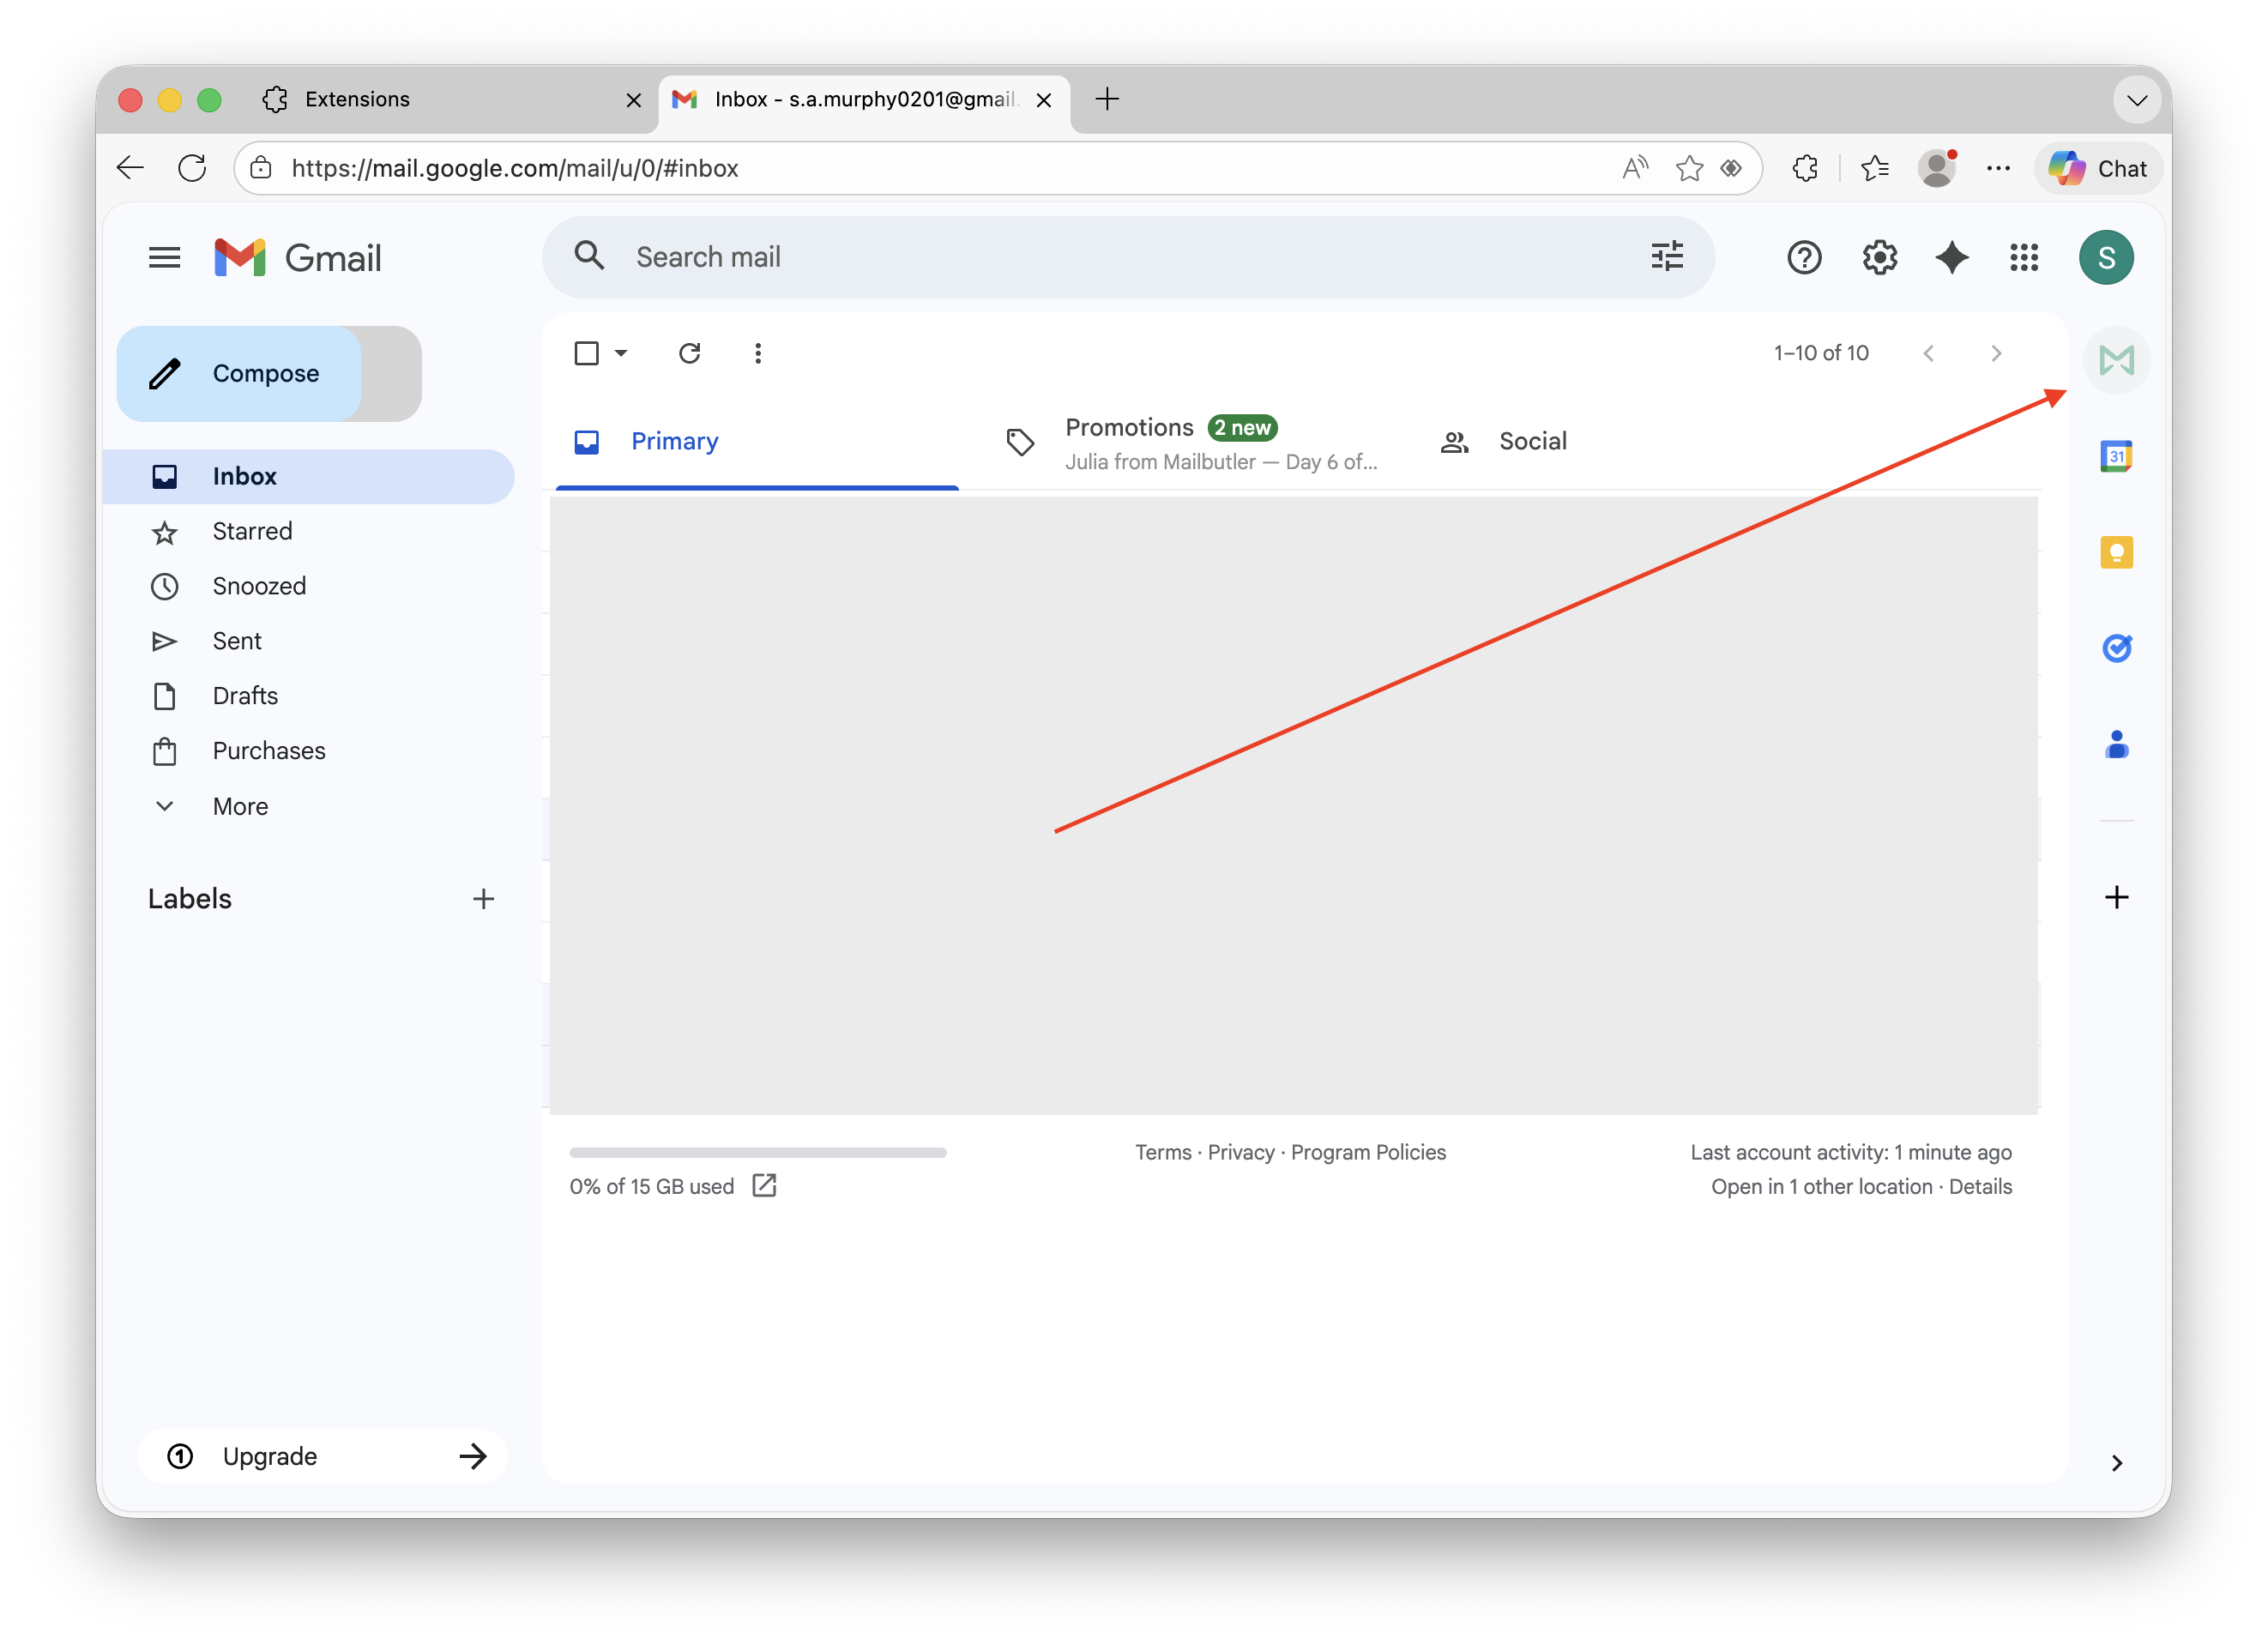
Gmail will open automatically in Edge.
The Mailbutler sidebar should open automatically. If not, click the Mailbutler icon in Gmail’s side panel to open it.
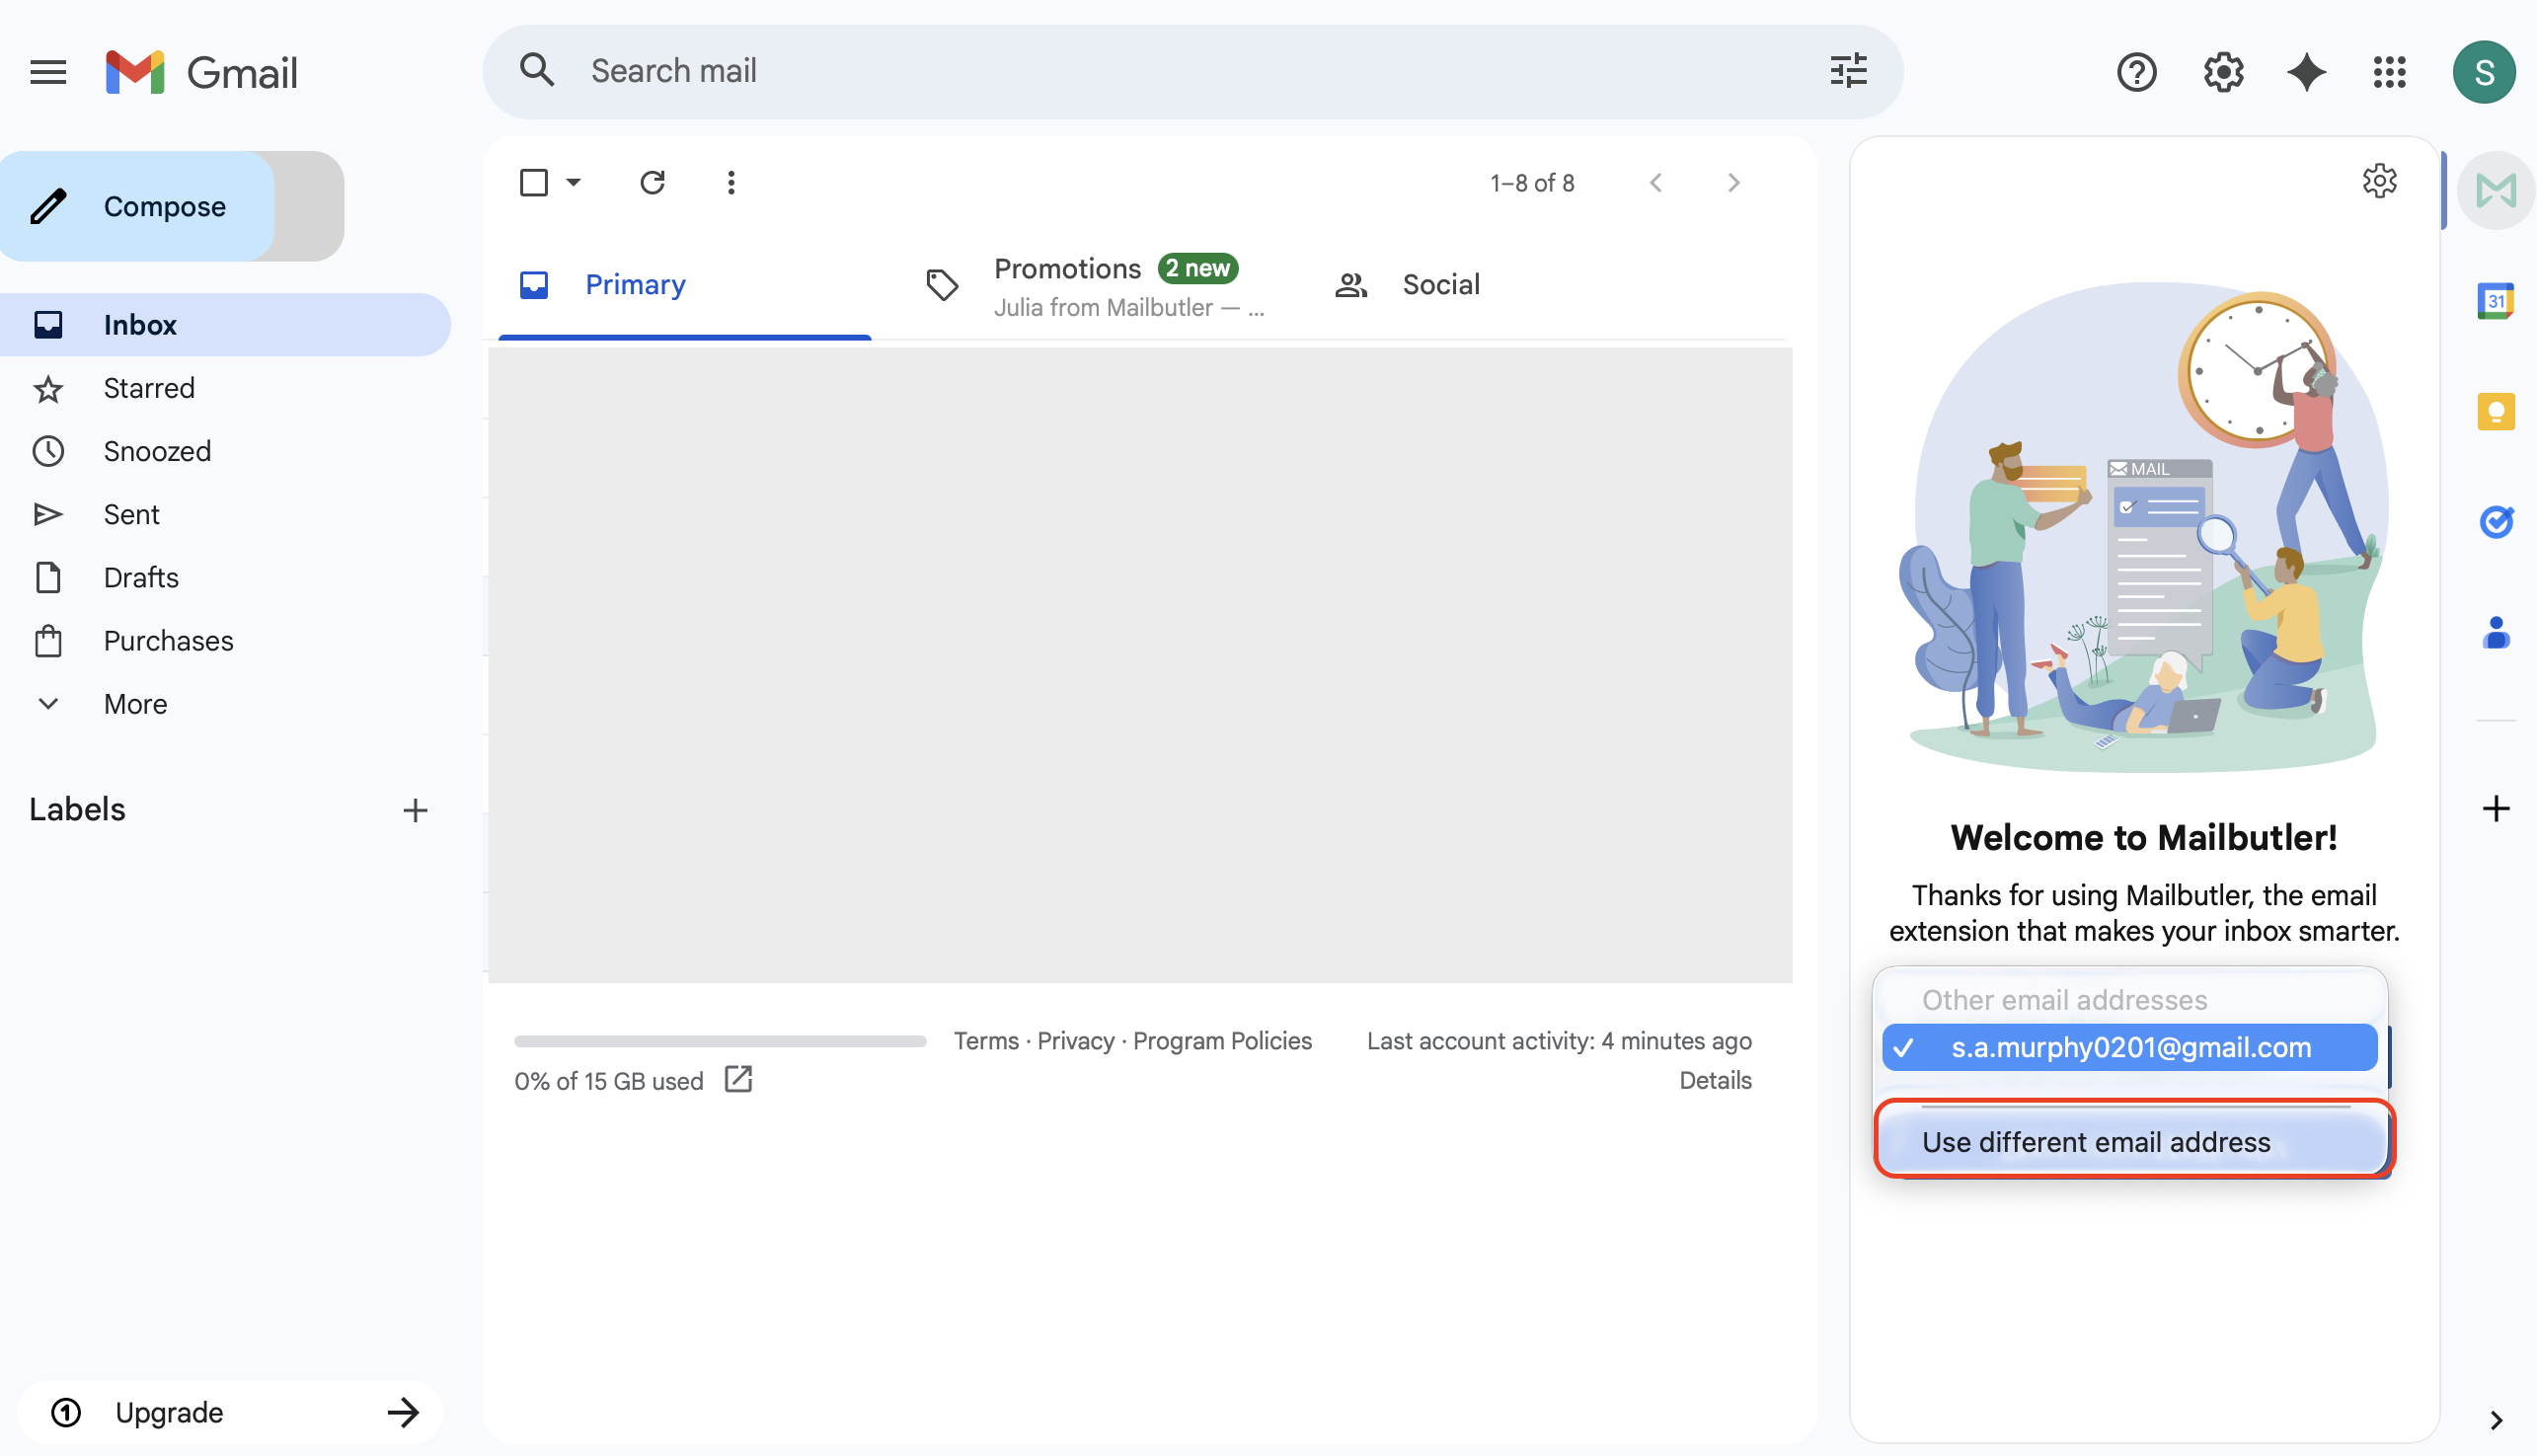
Click Start using Mailbutler to sign in and complete your Mailbutler account setup.
Alternatively, to register a Mailbutler account with a non-Gmail email address, click Use different email address.
Select the checkbox labeled “Accept Terms & Conditions” to proceed.
You are all set and you can now start using Mailbutler's features in Gmail!
Outlook app (Mac)
To make sure that Mailbutler is compatible with your Outlook setup, please see here.
Go to our Get Started page here
Enter the email address you want to use for your Mailbutler account.
Click Get Started.
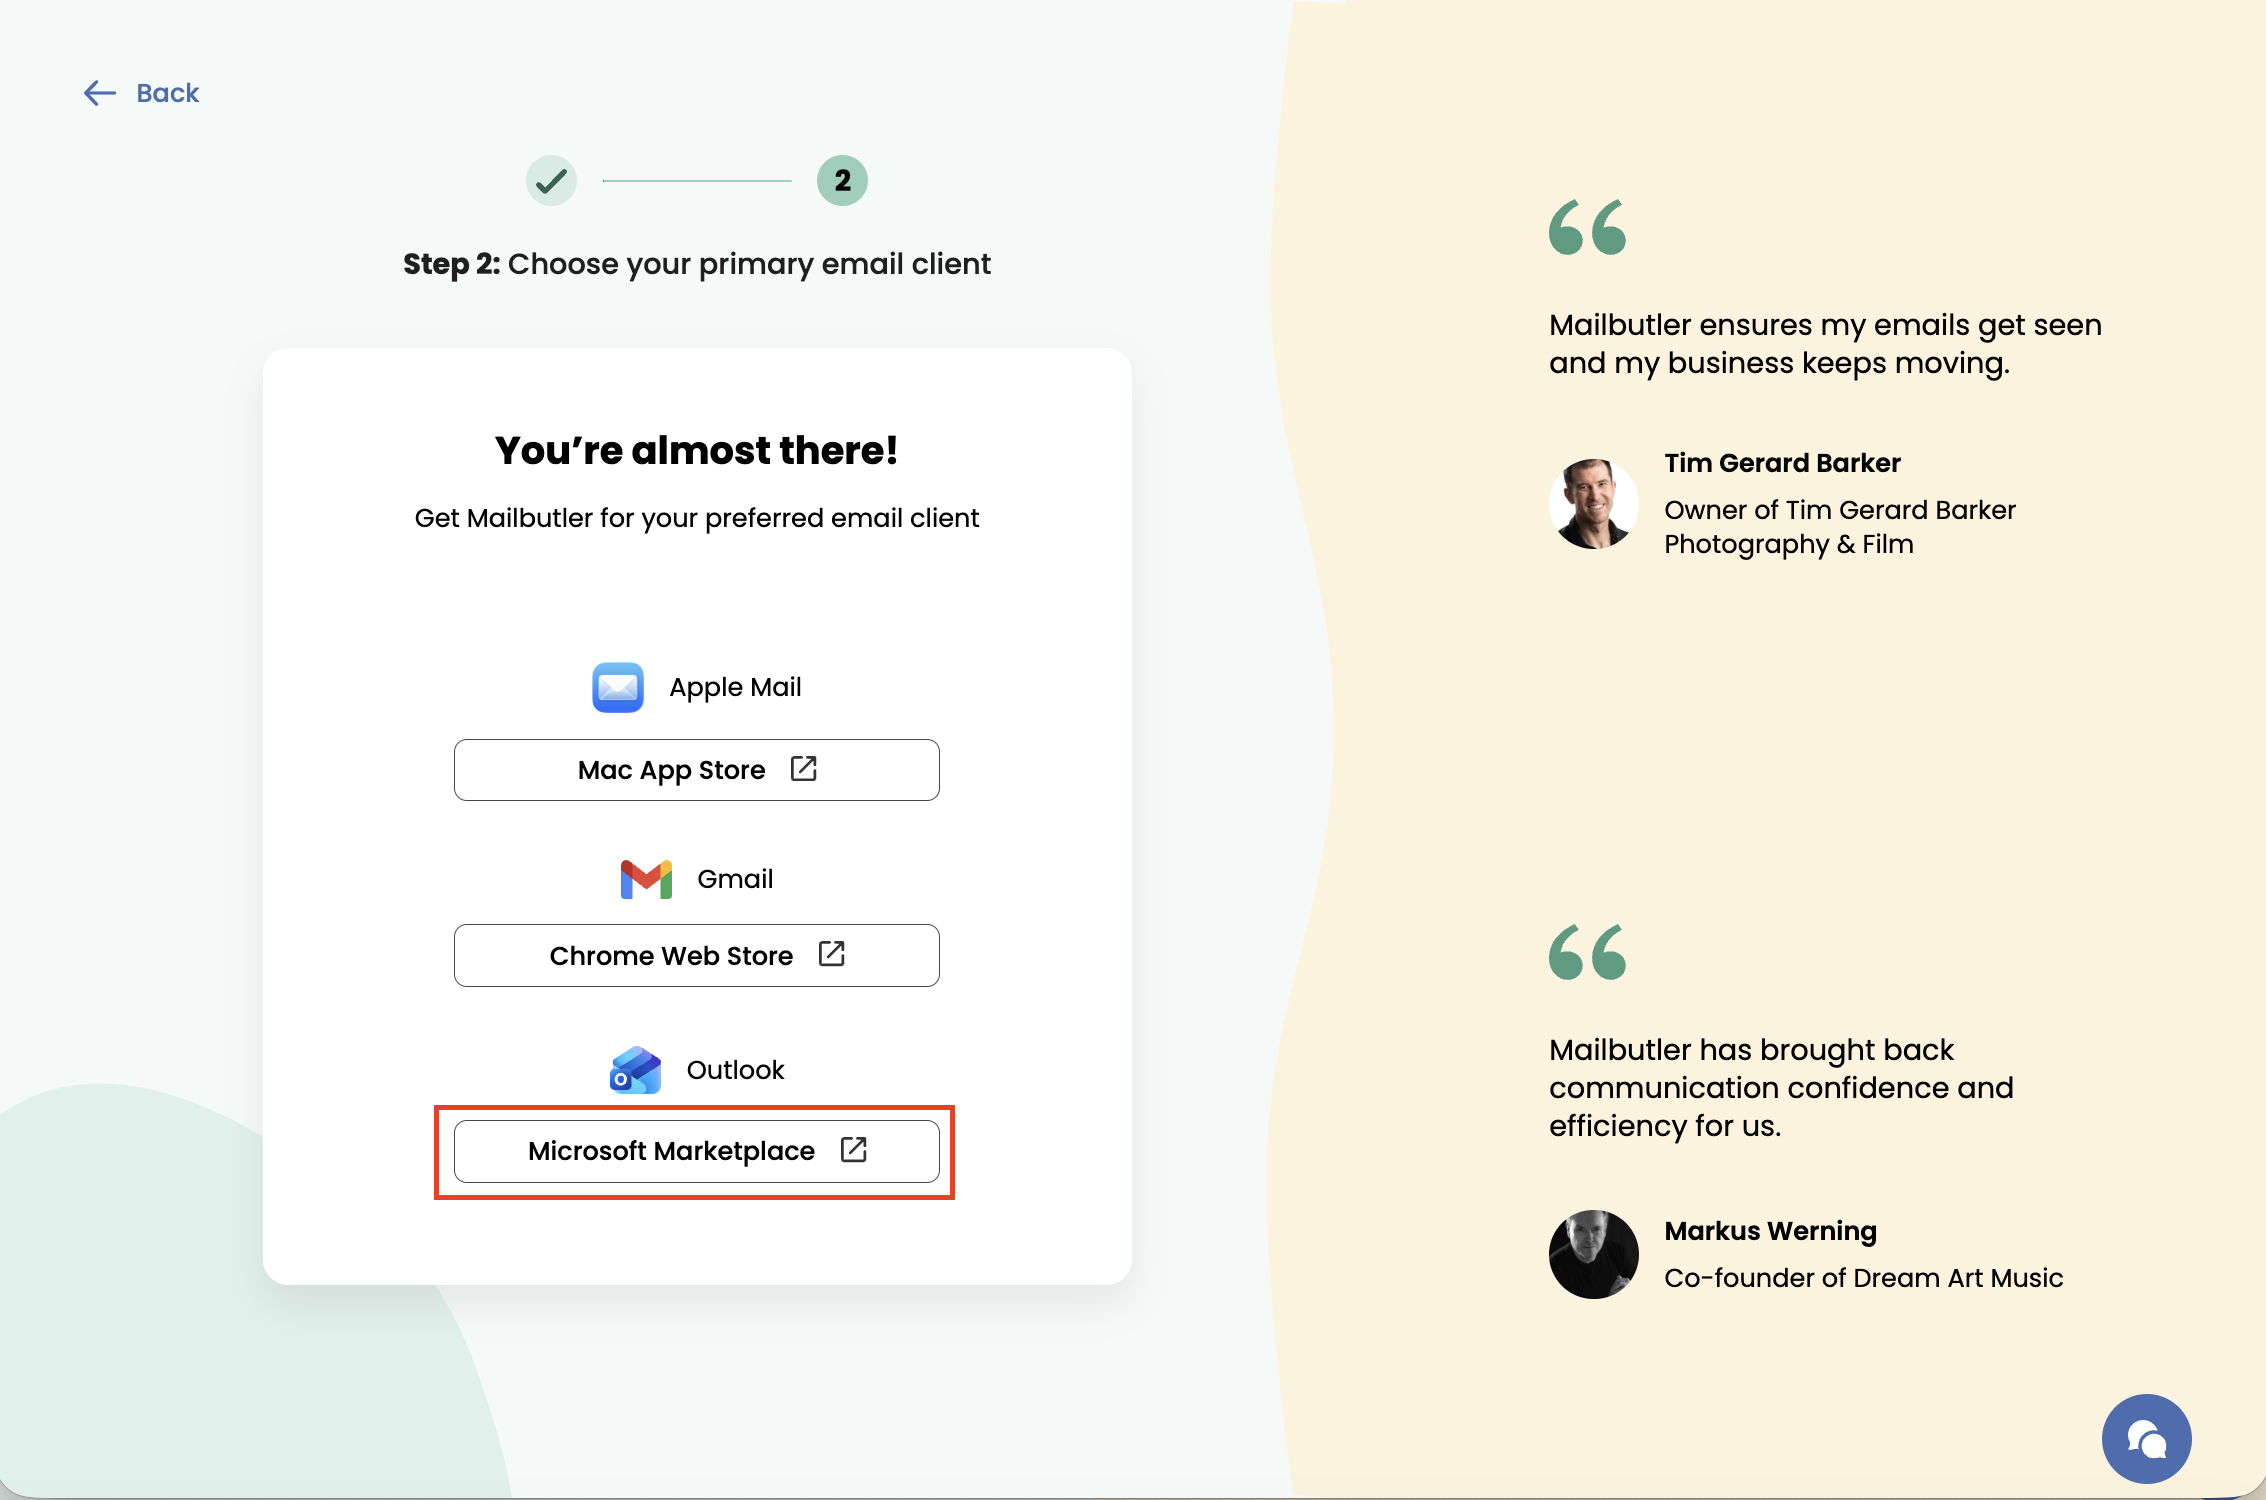
Under Outlook, click Microsoft Marketplace.
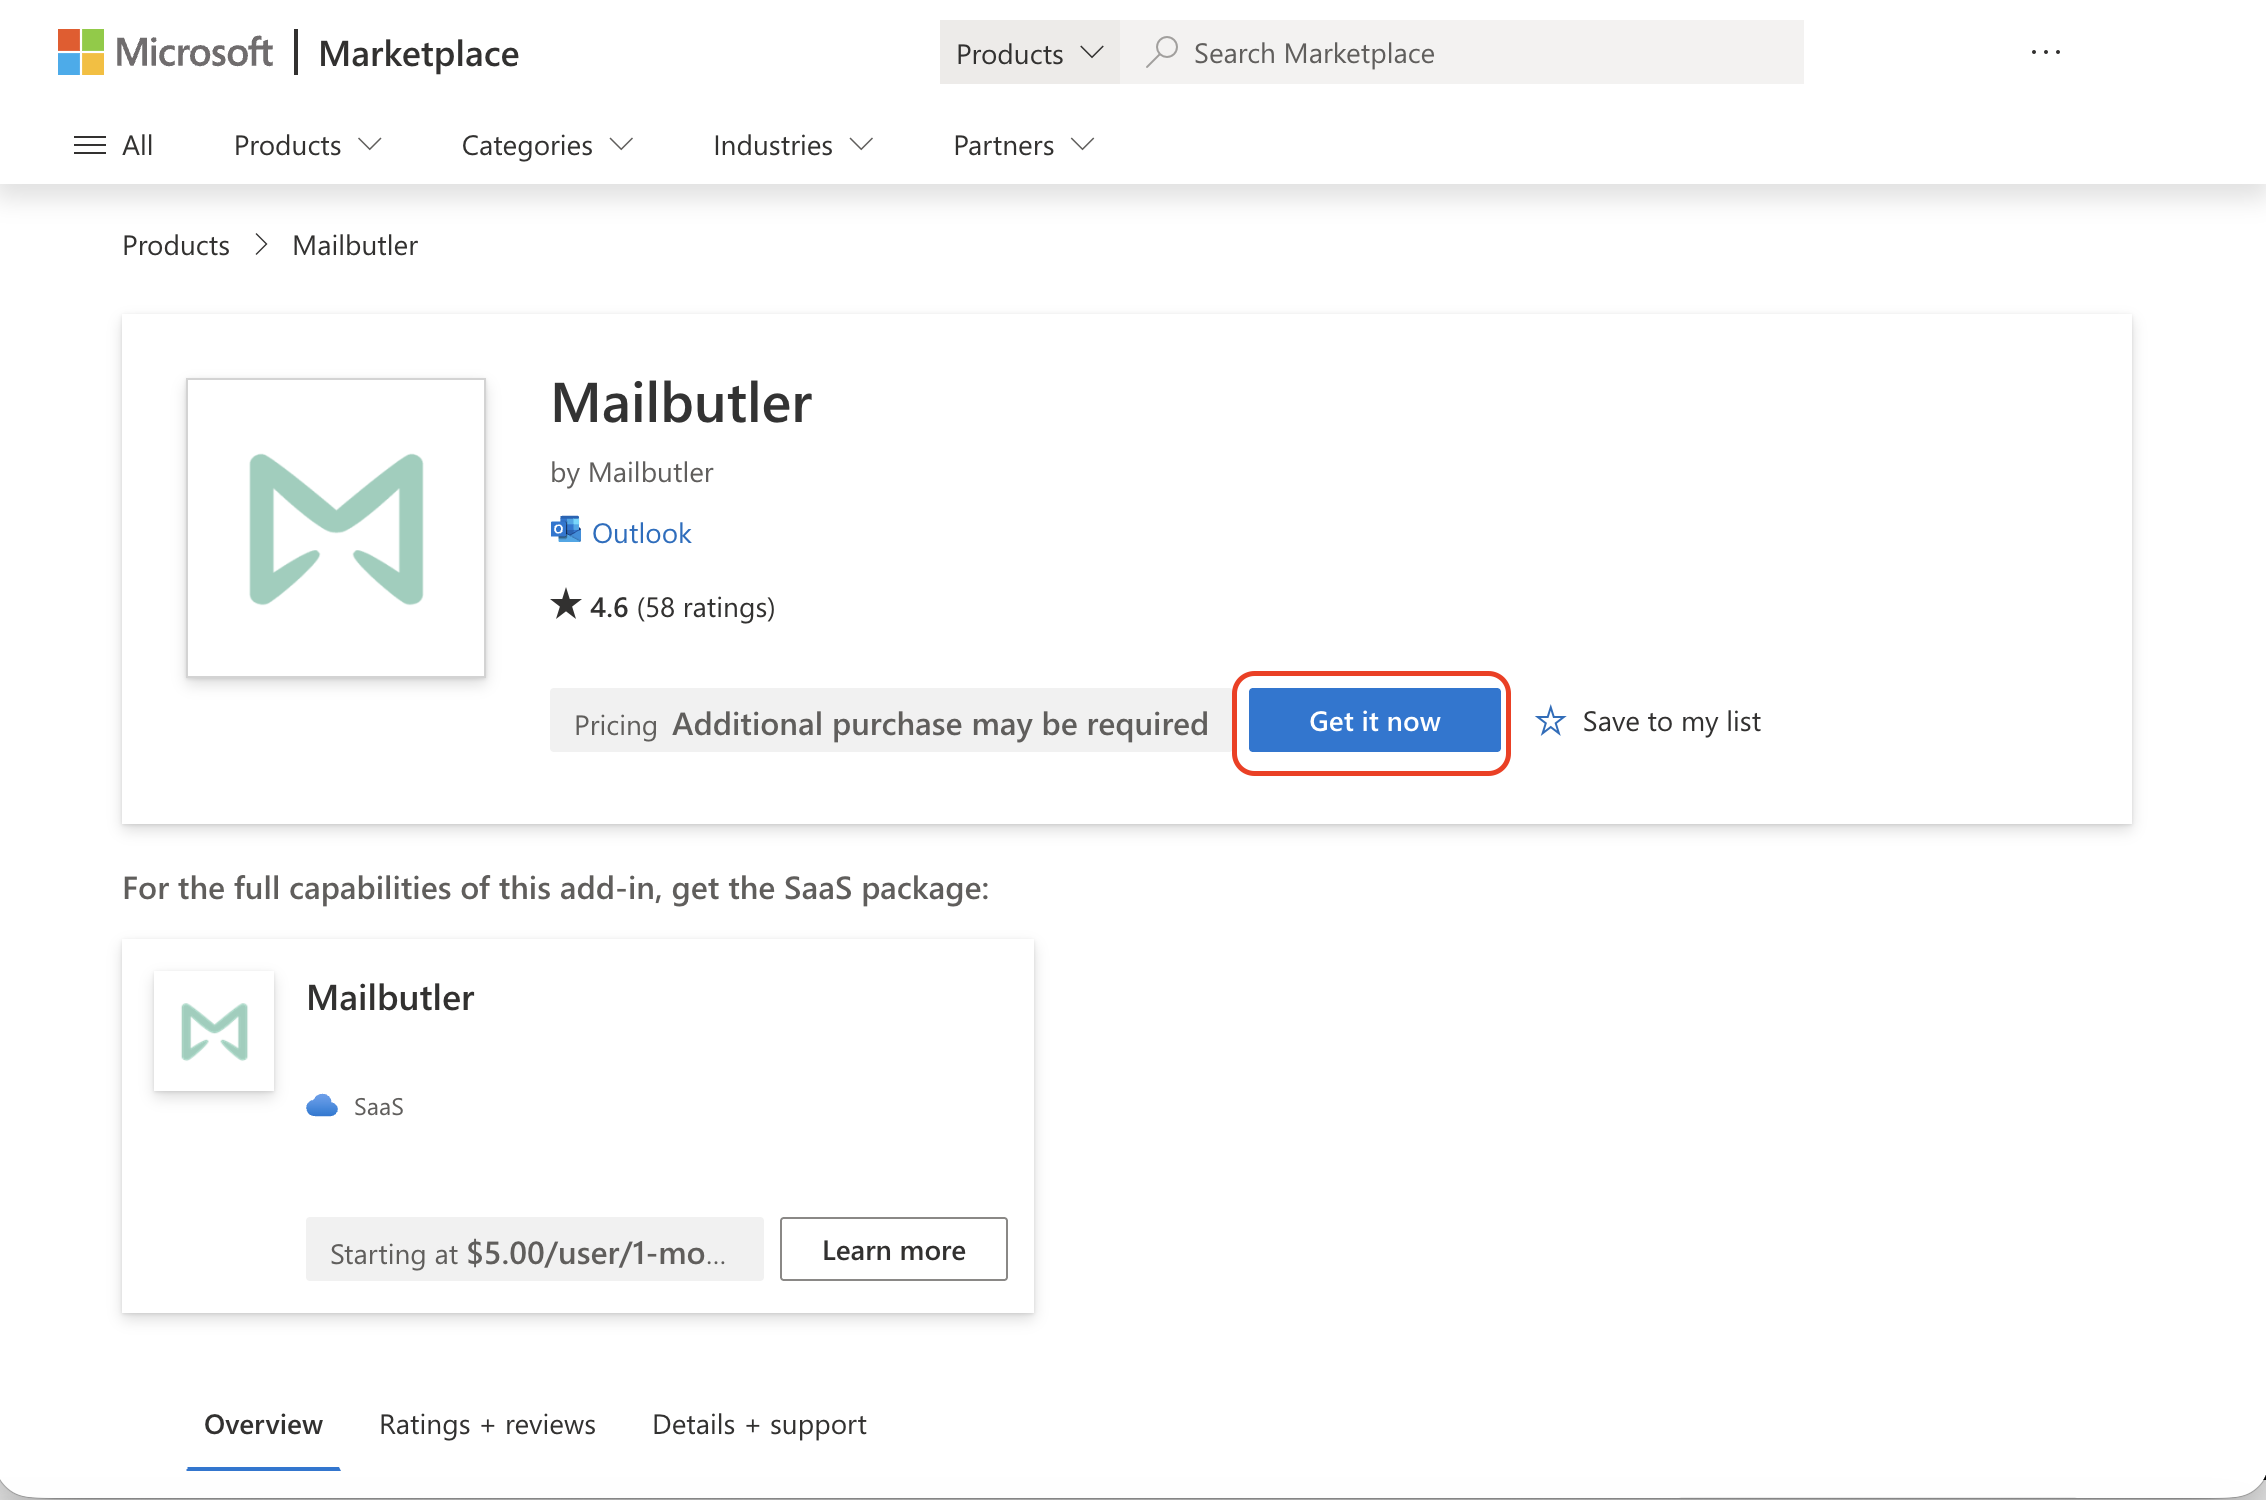
The Microsoft Marketplace Store will open in a new window.
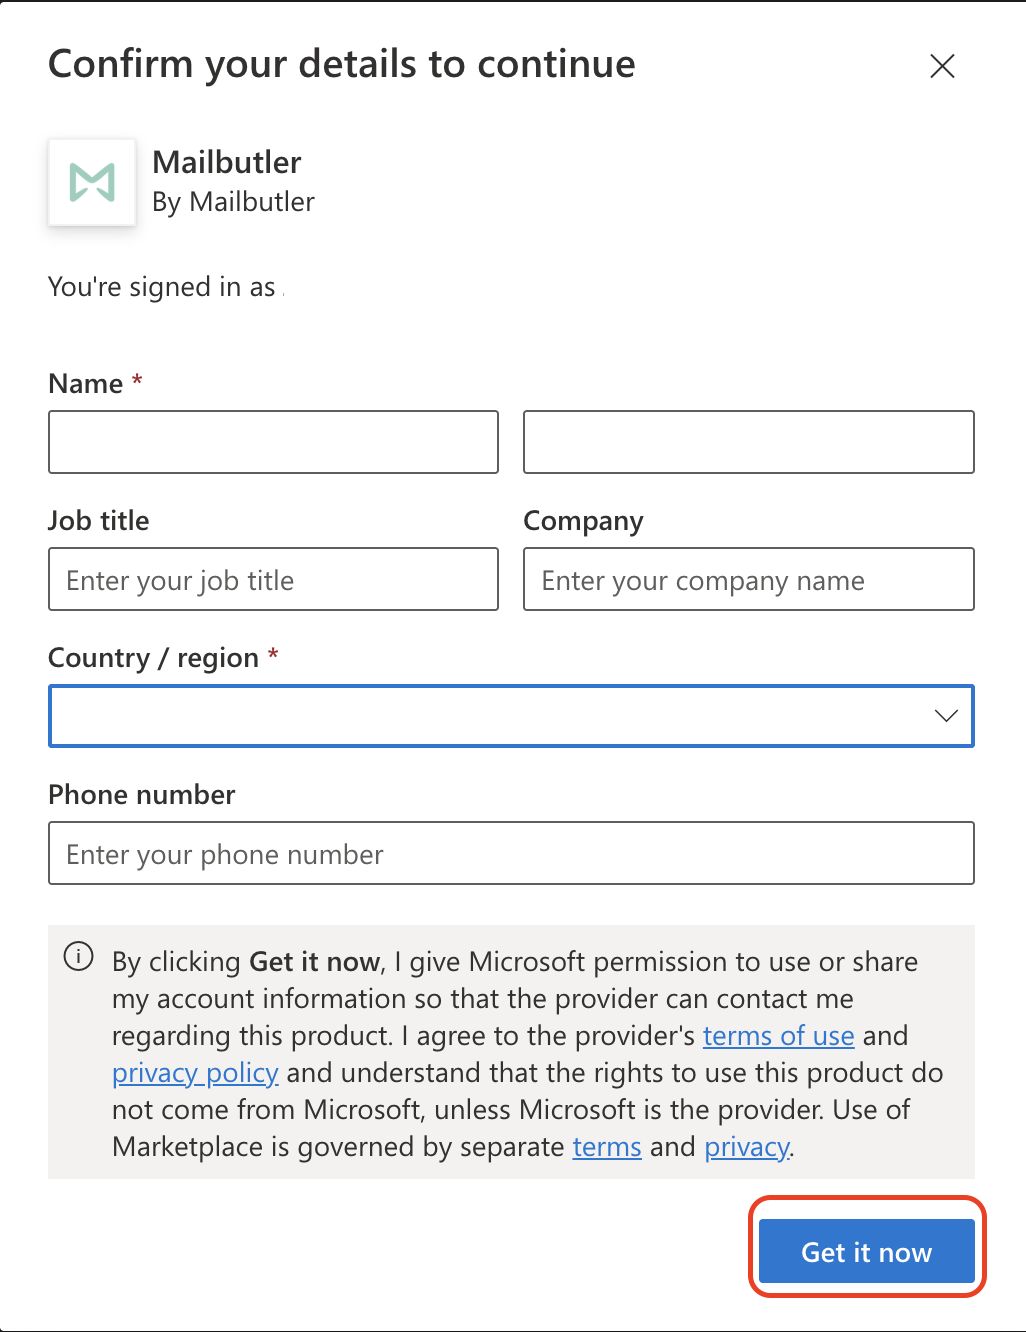
Click Get it now

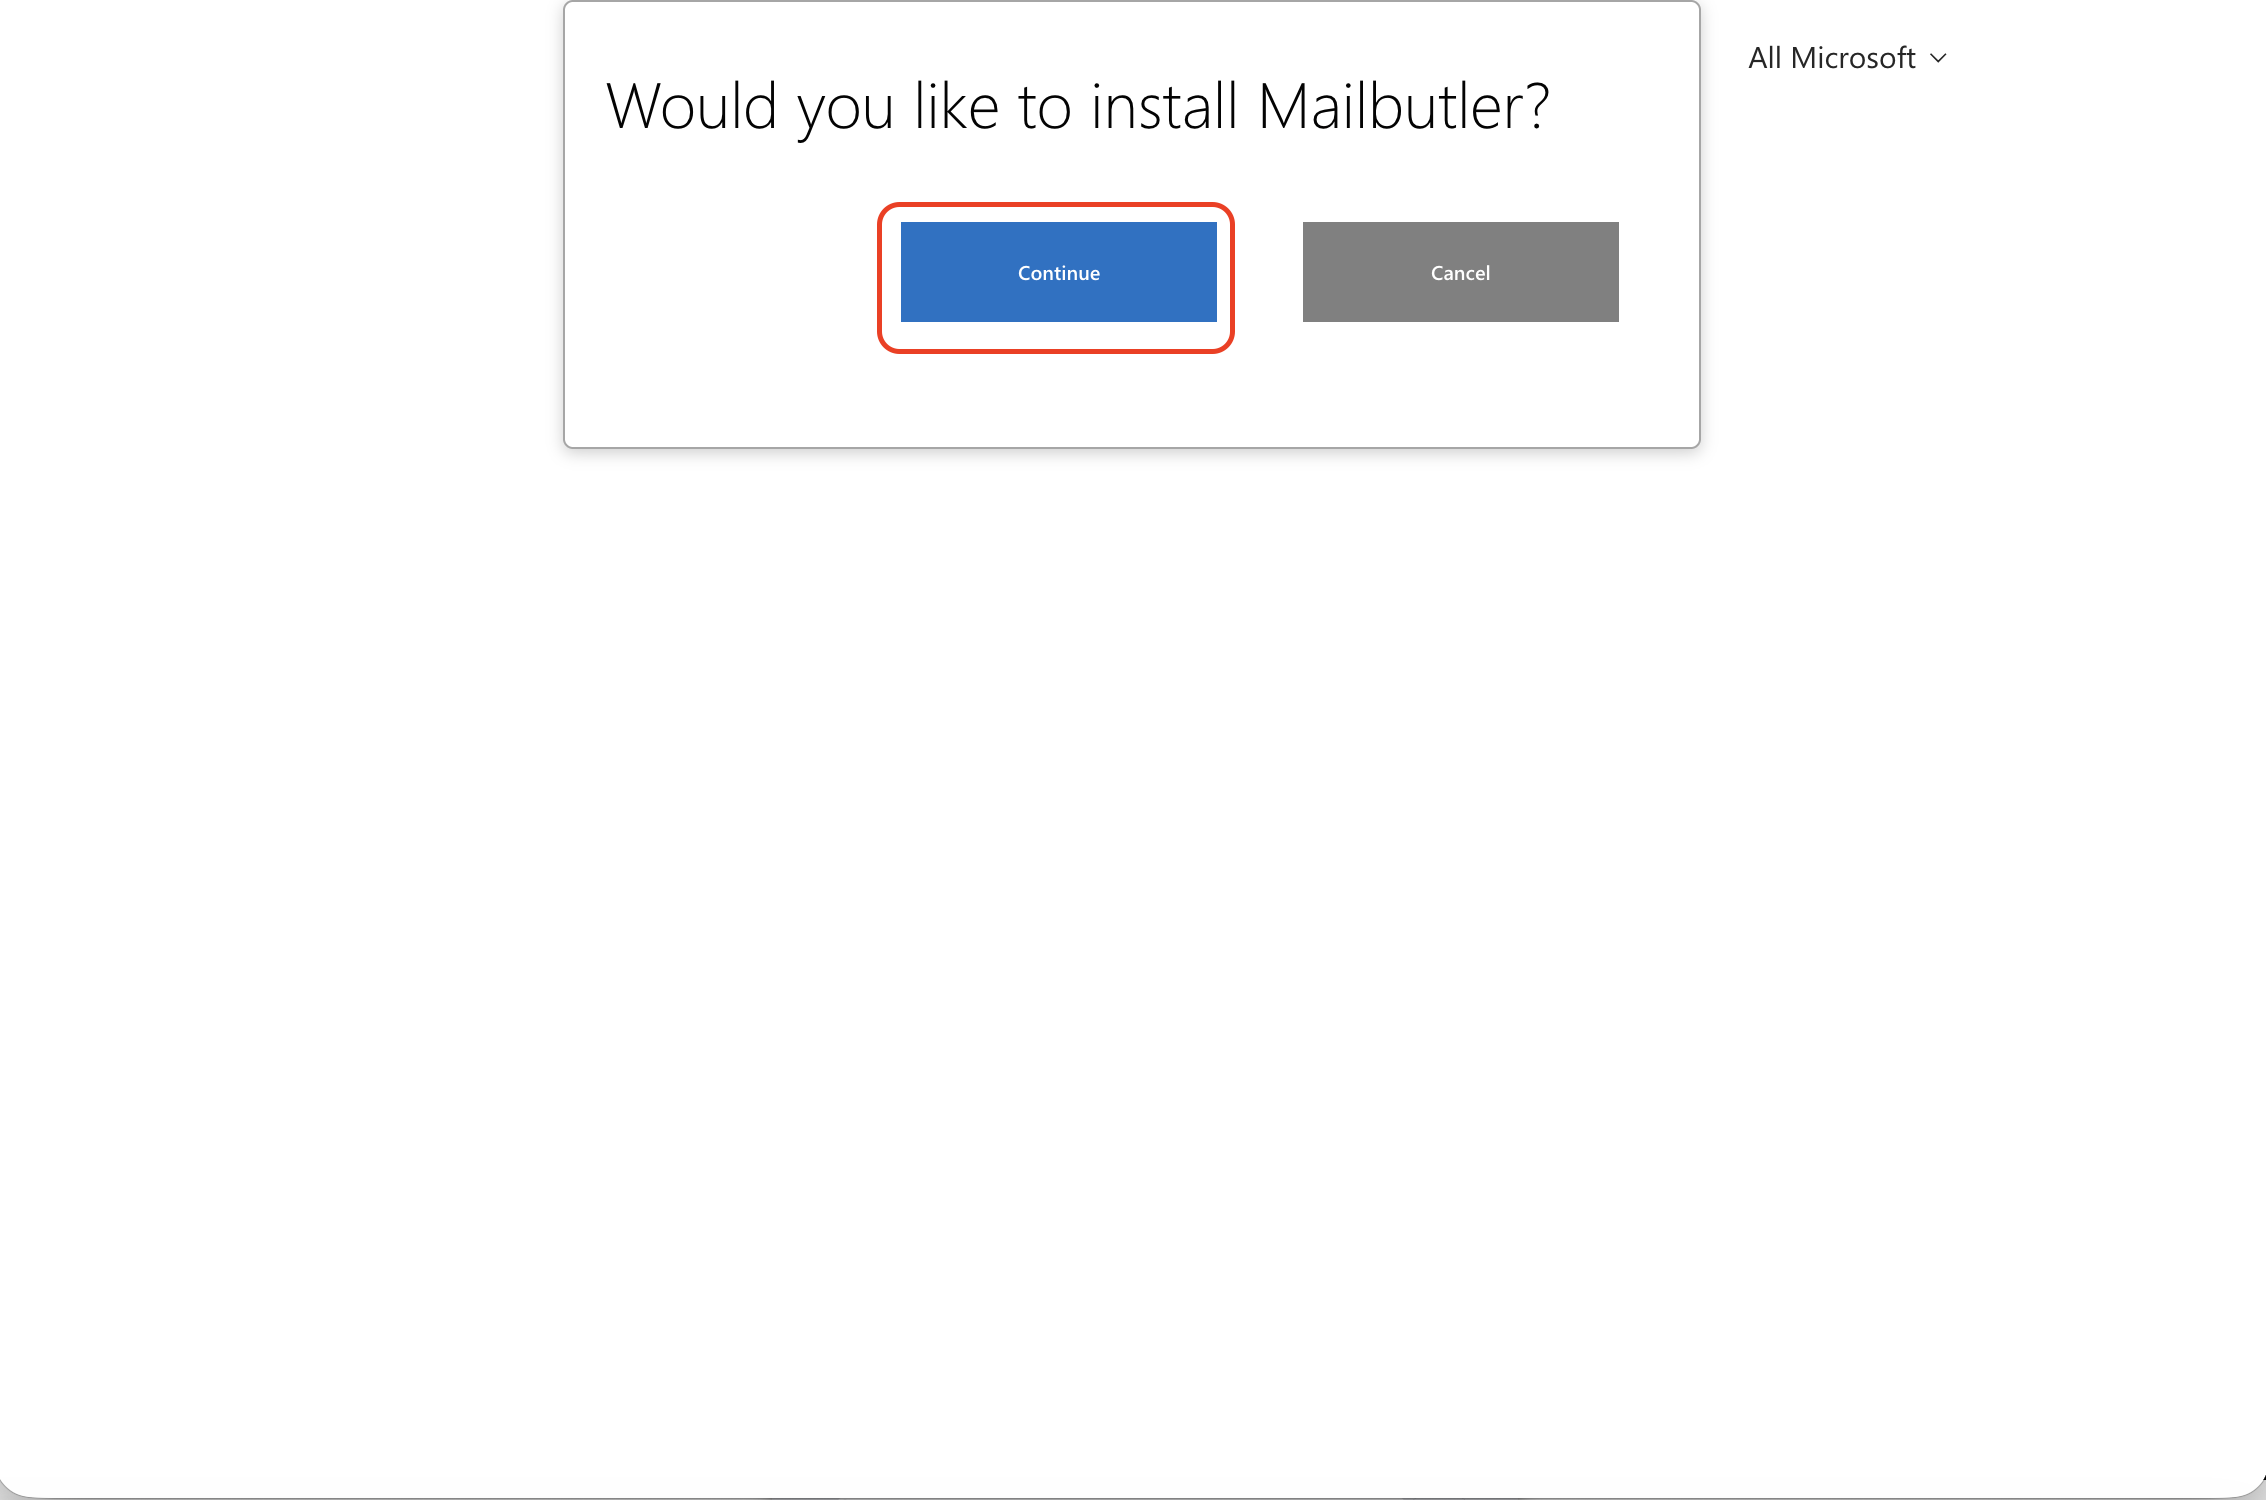
Click Continue.
You should receive a confirmation that Mailbutler was successfully added to your email account.
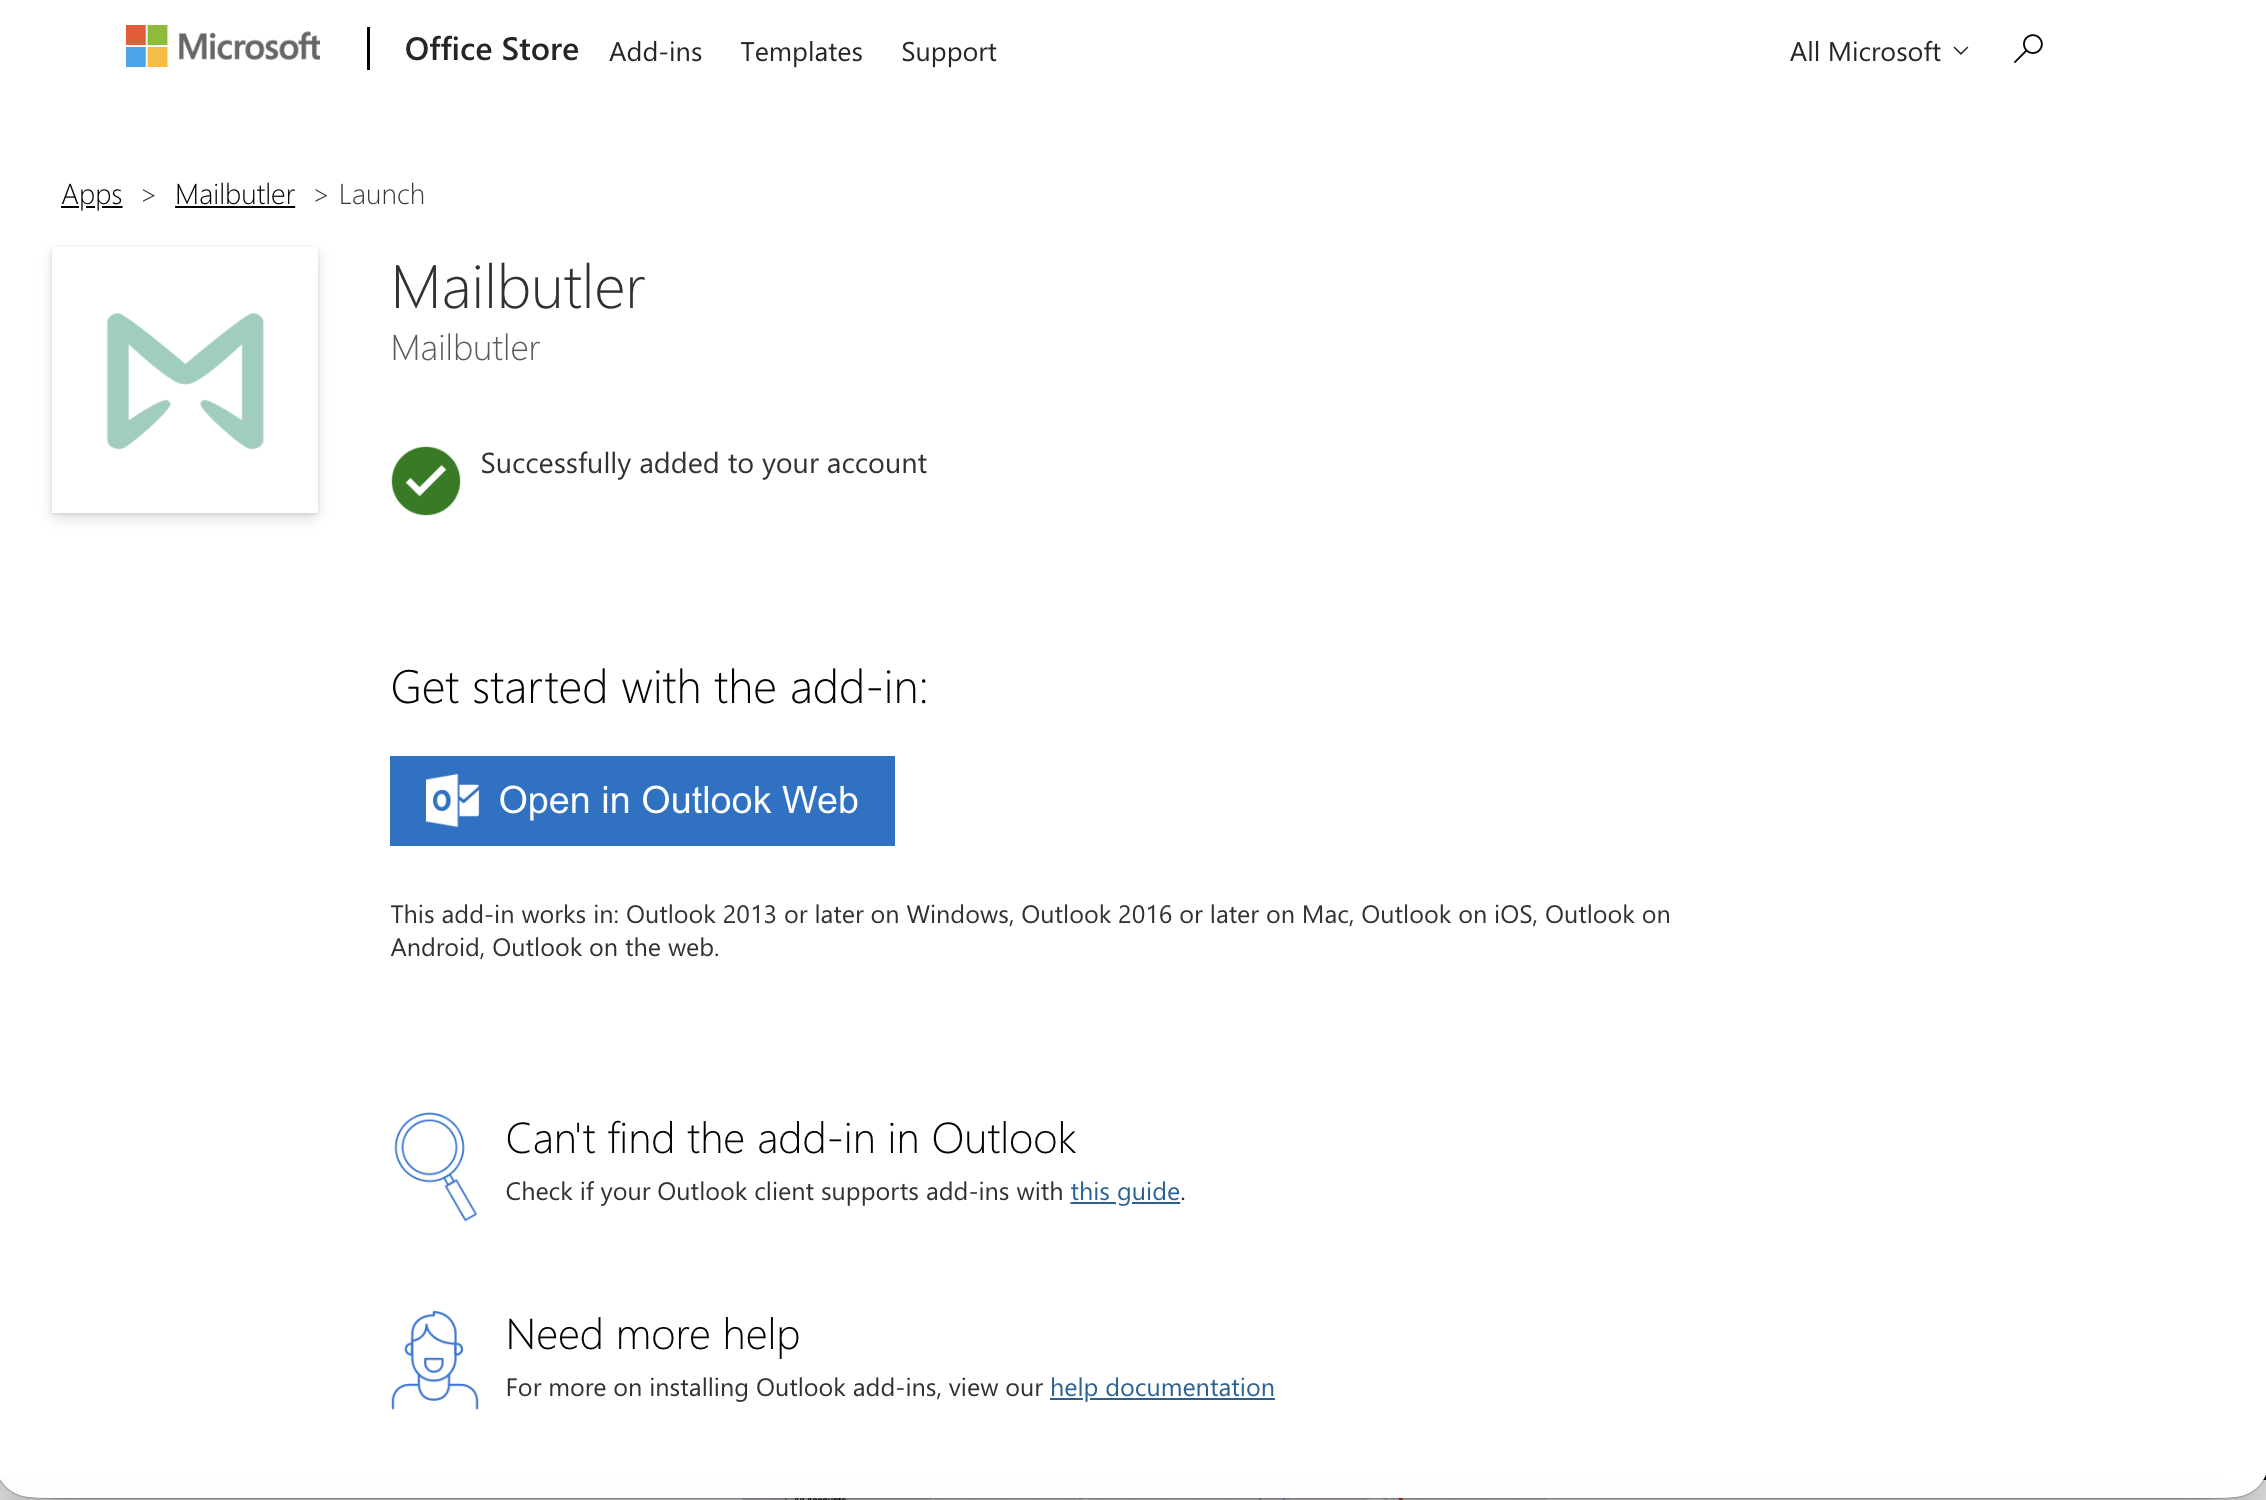
Note: It might take a few minutes for Mailbutler to appear in Outlook after installation. If you don’t see it yet, please wait a moment and restart Outlook, then check again.
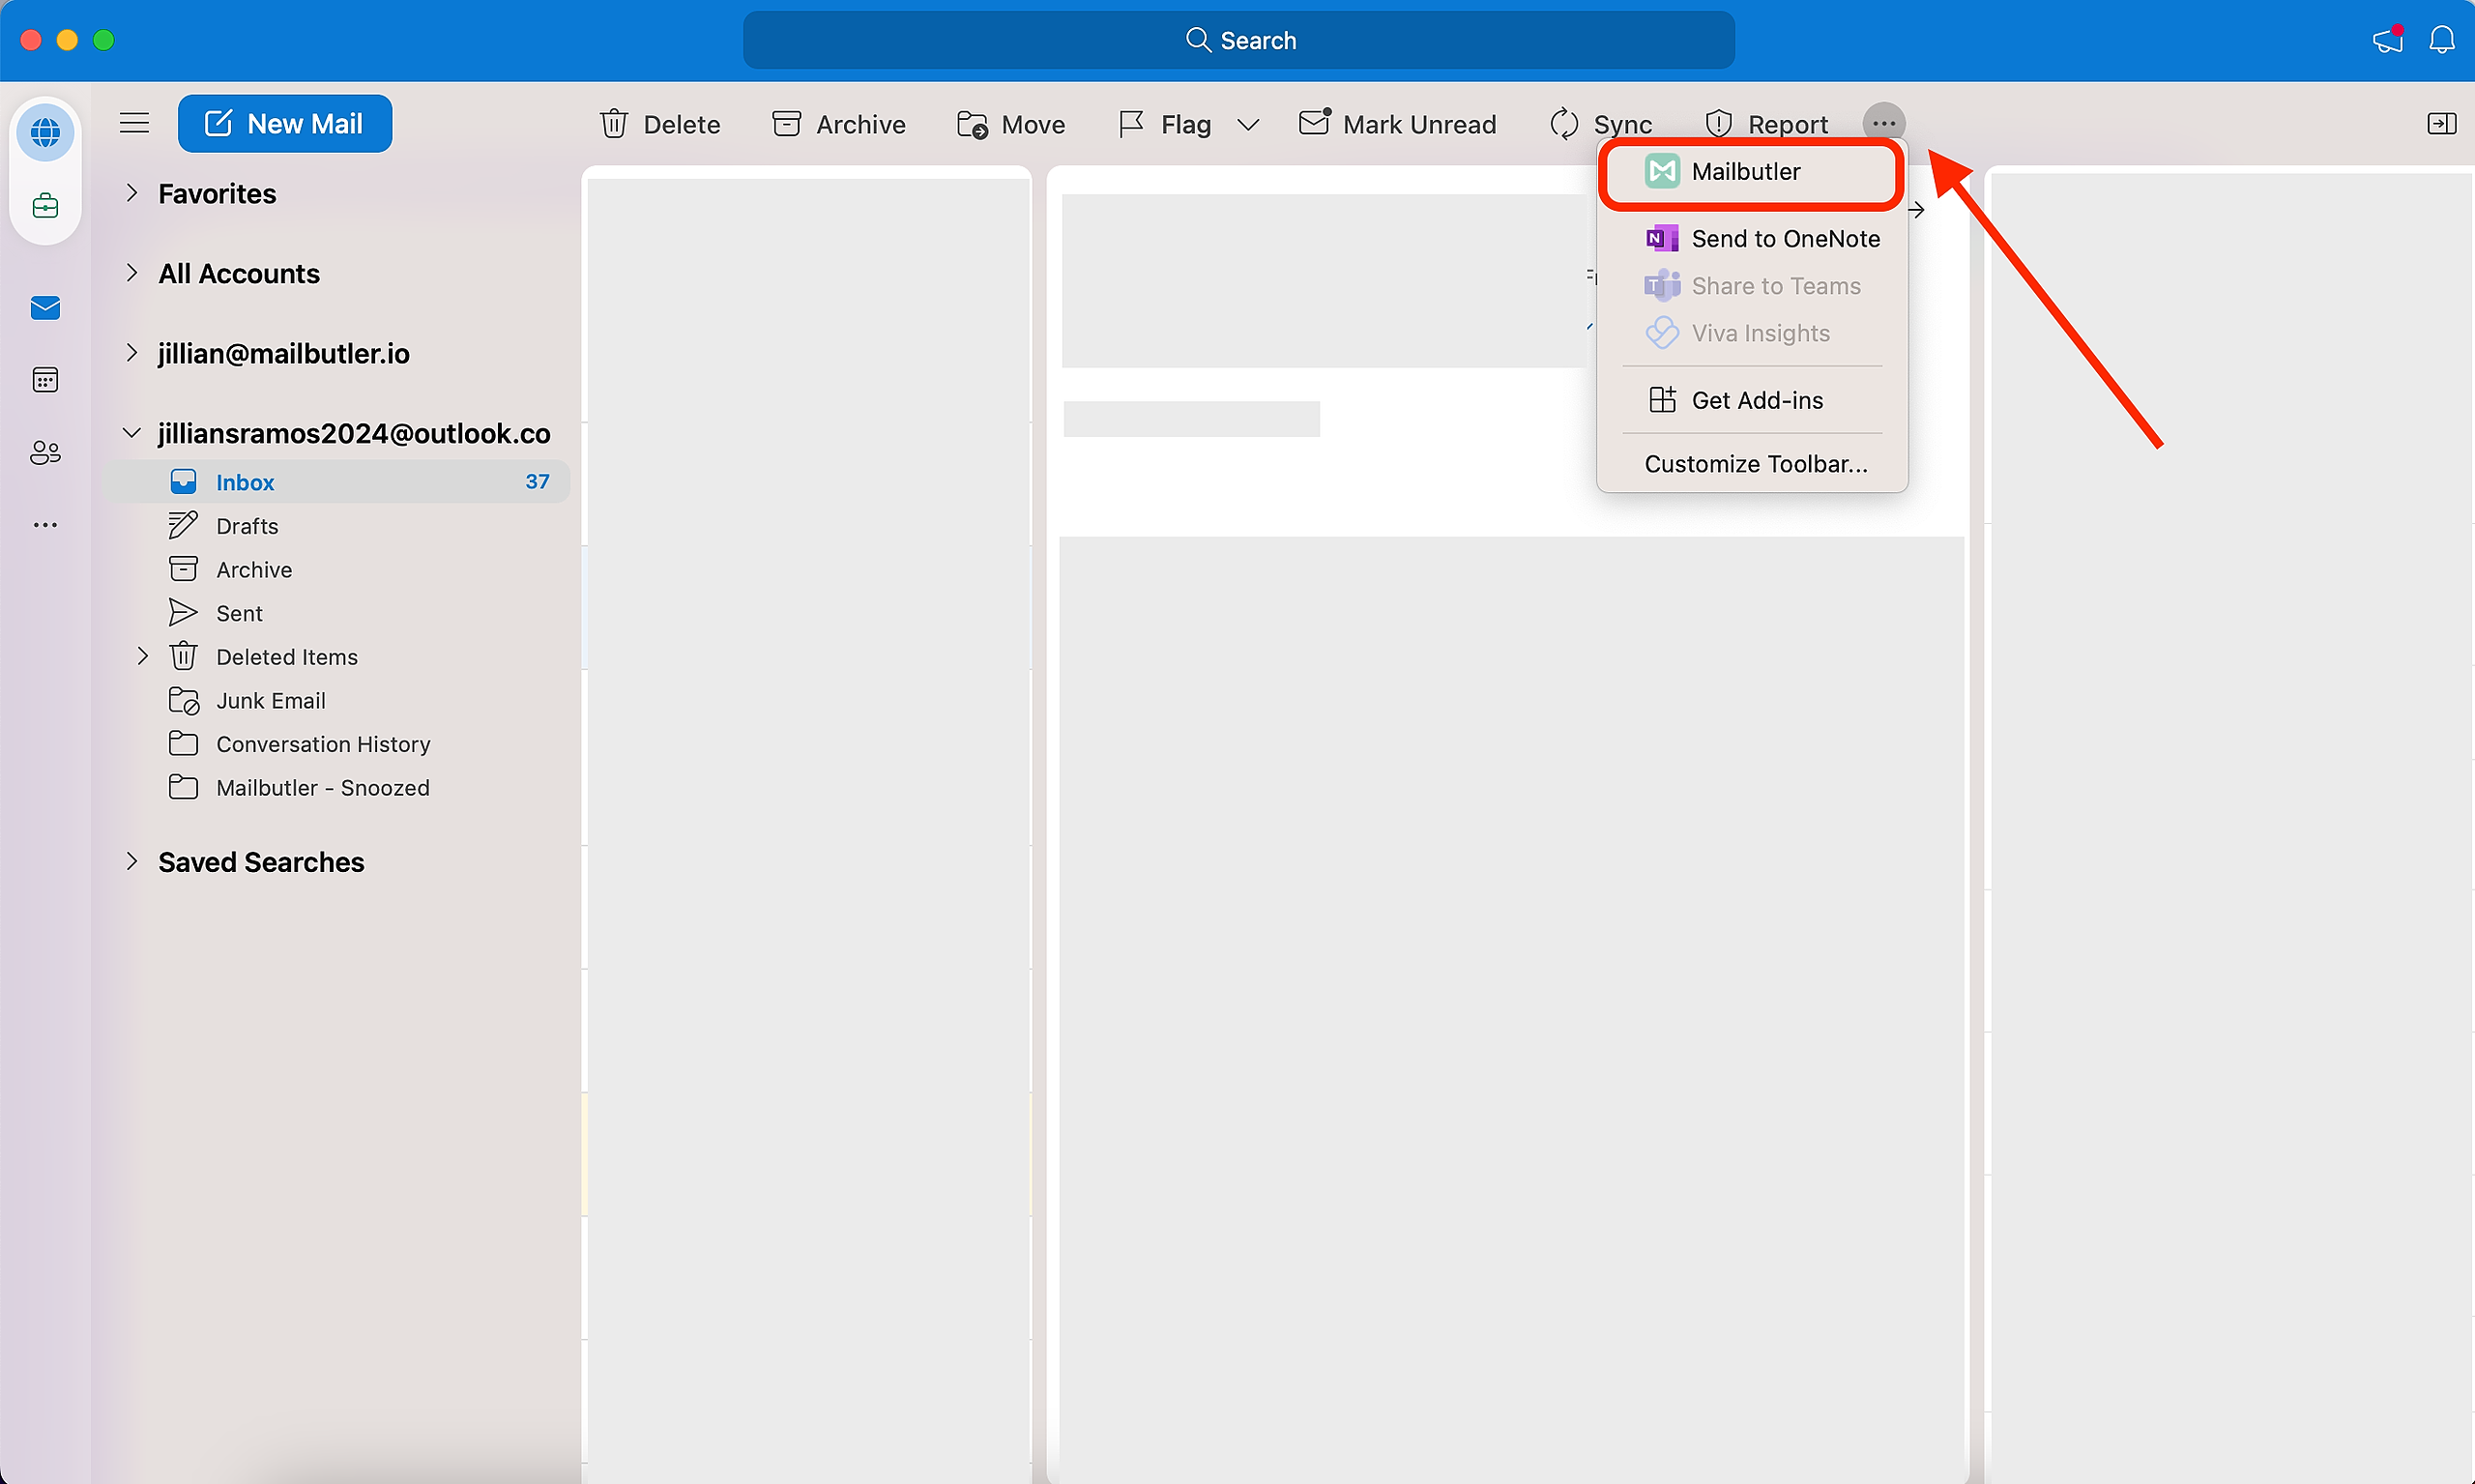
7. To ensure Mailbutler that has been installed, click the three dots. You should see Mailbutler listed in the menu.
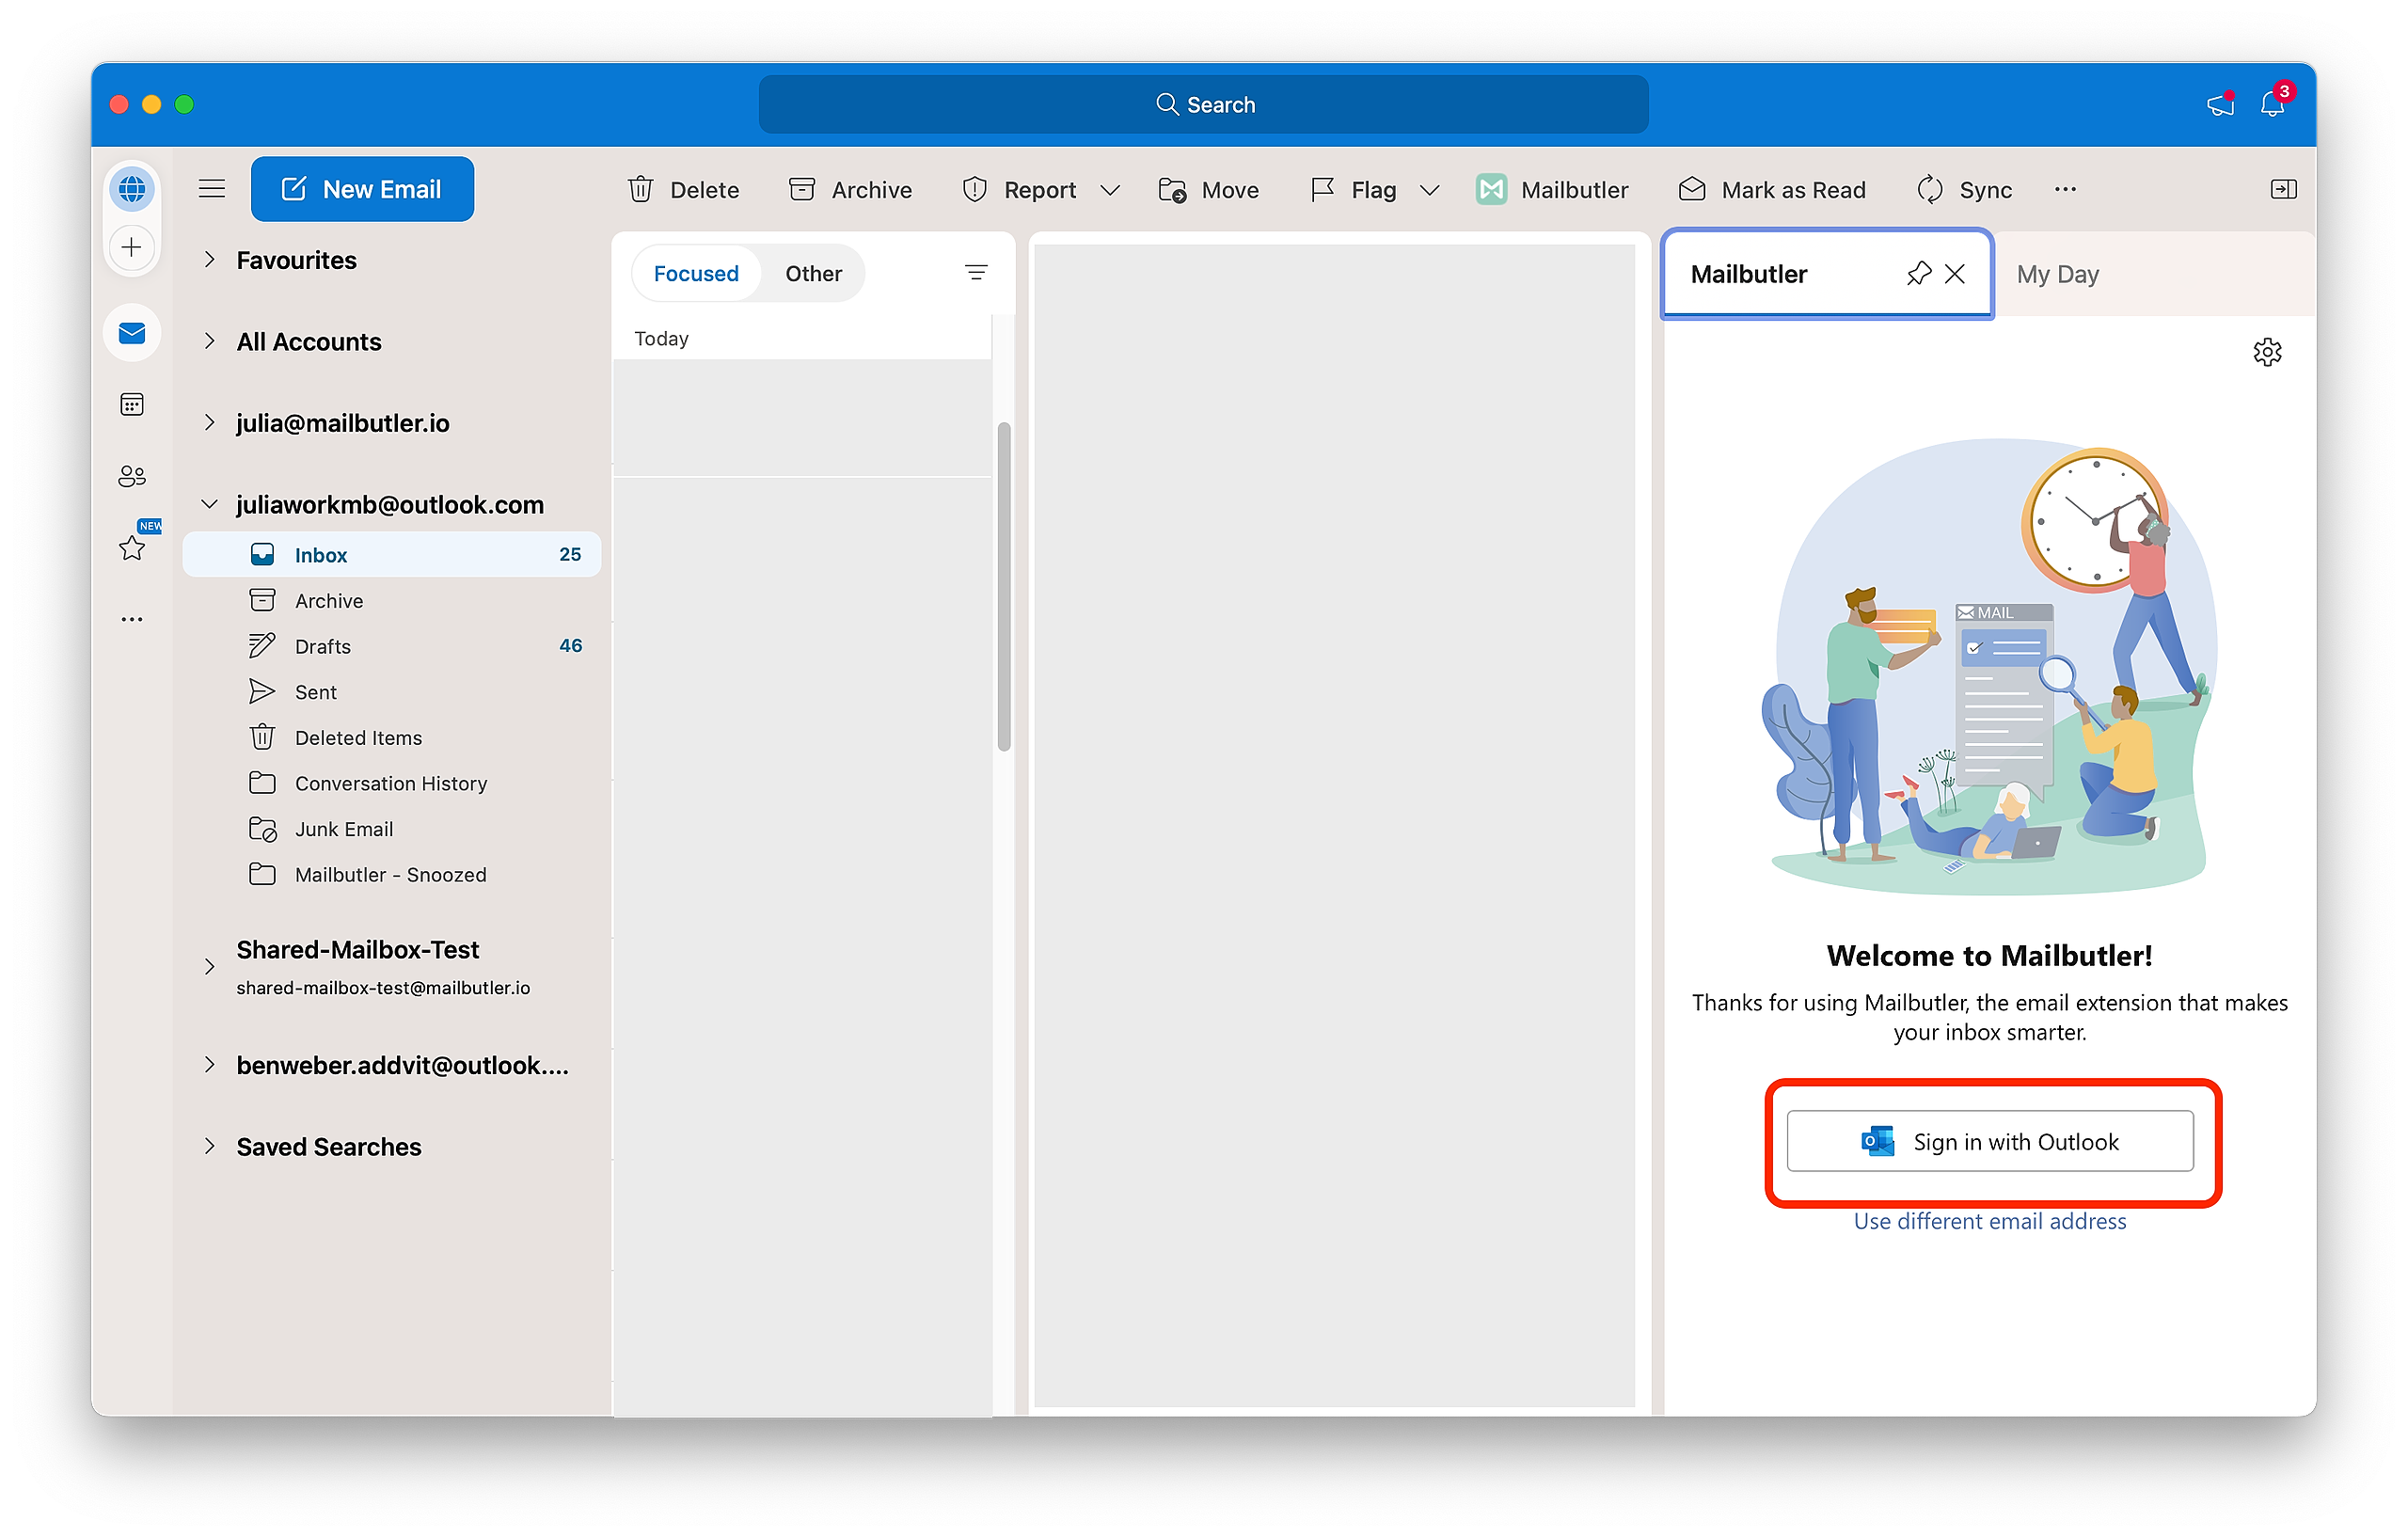
8. Open the Mailbutler sidebar.
(If you have successfully installed Mailbutler, but you cannot find the option to open the Mailbutler sidebar, please contact support@mailbutler.io.)
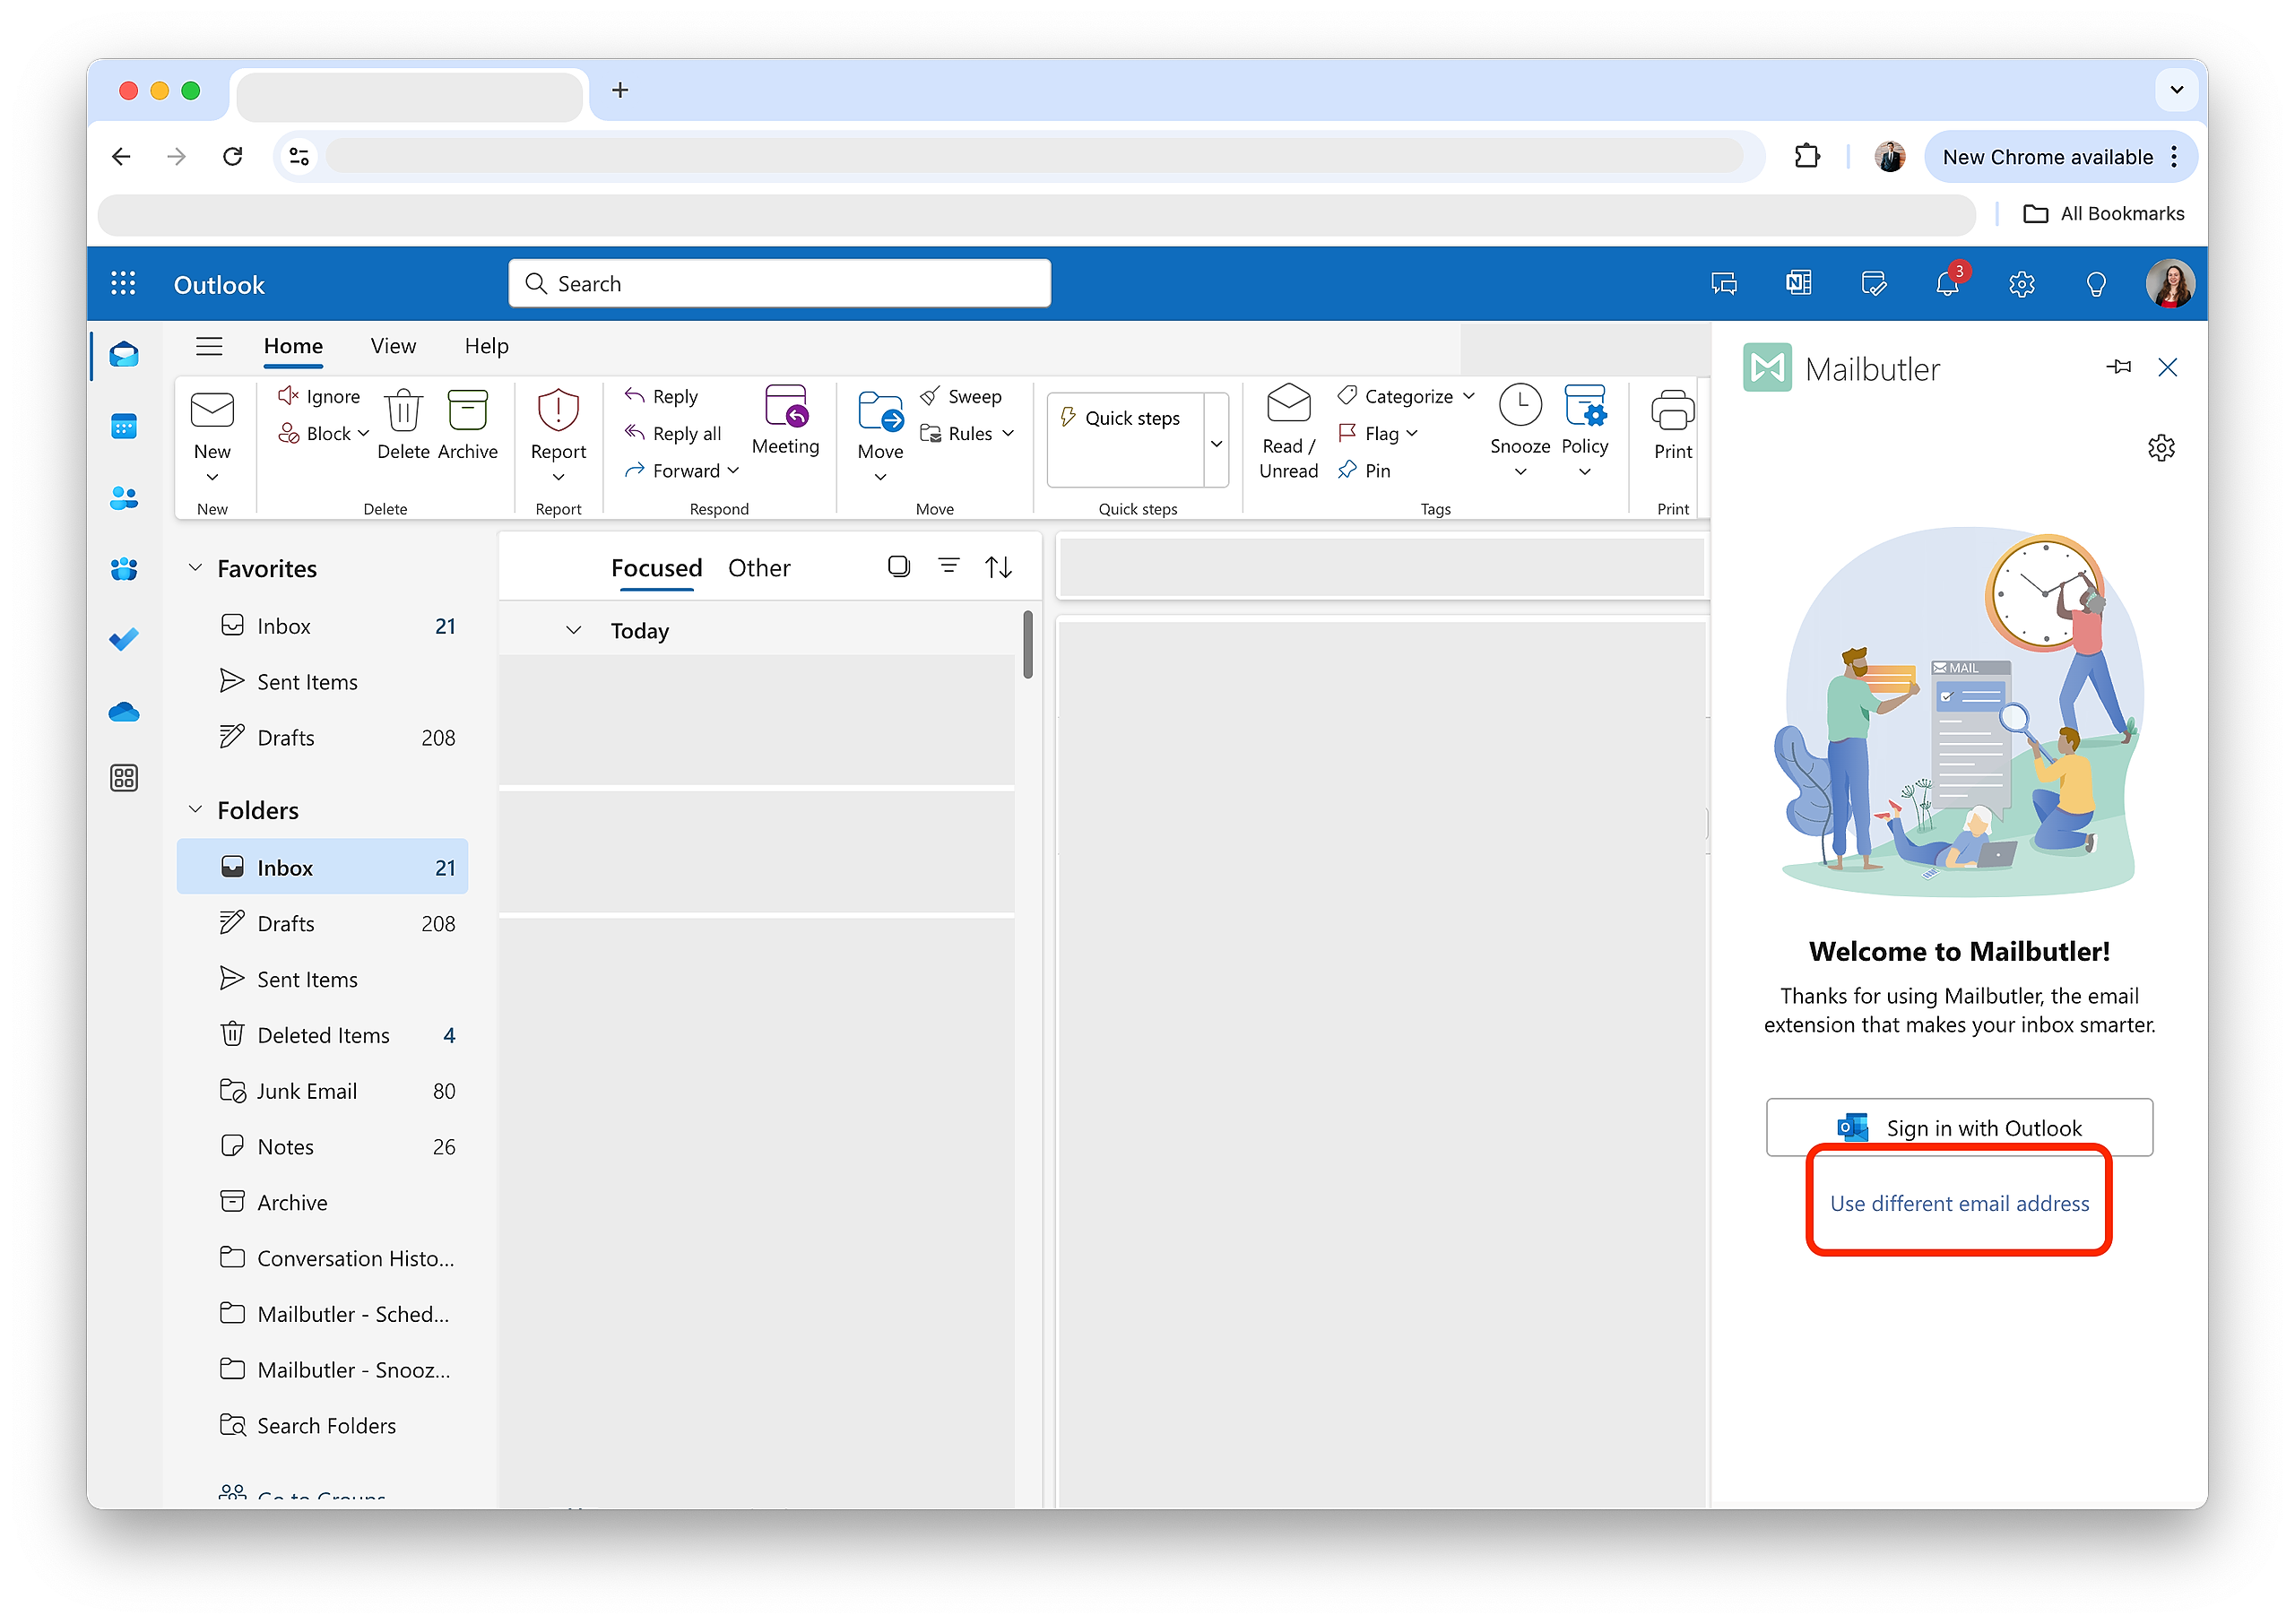
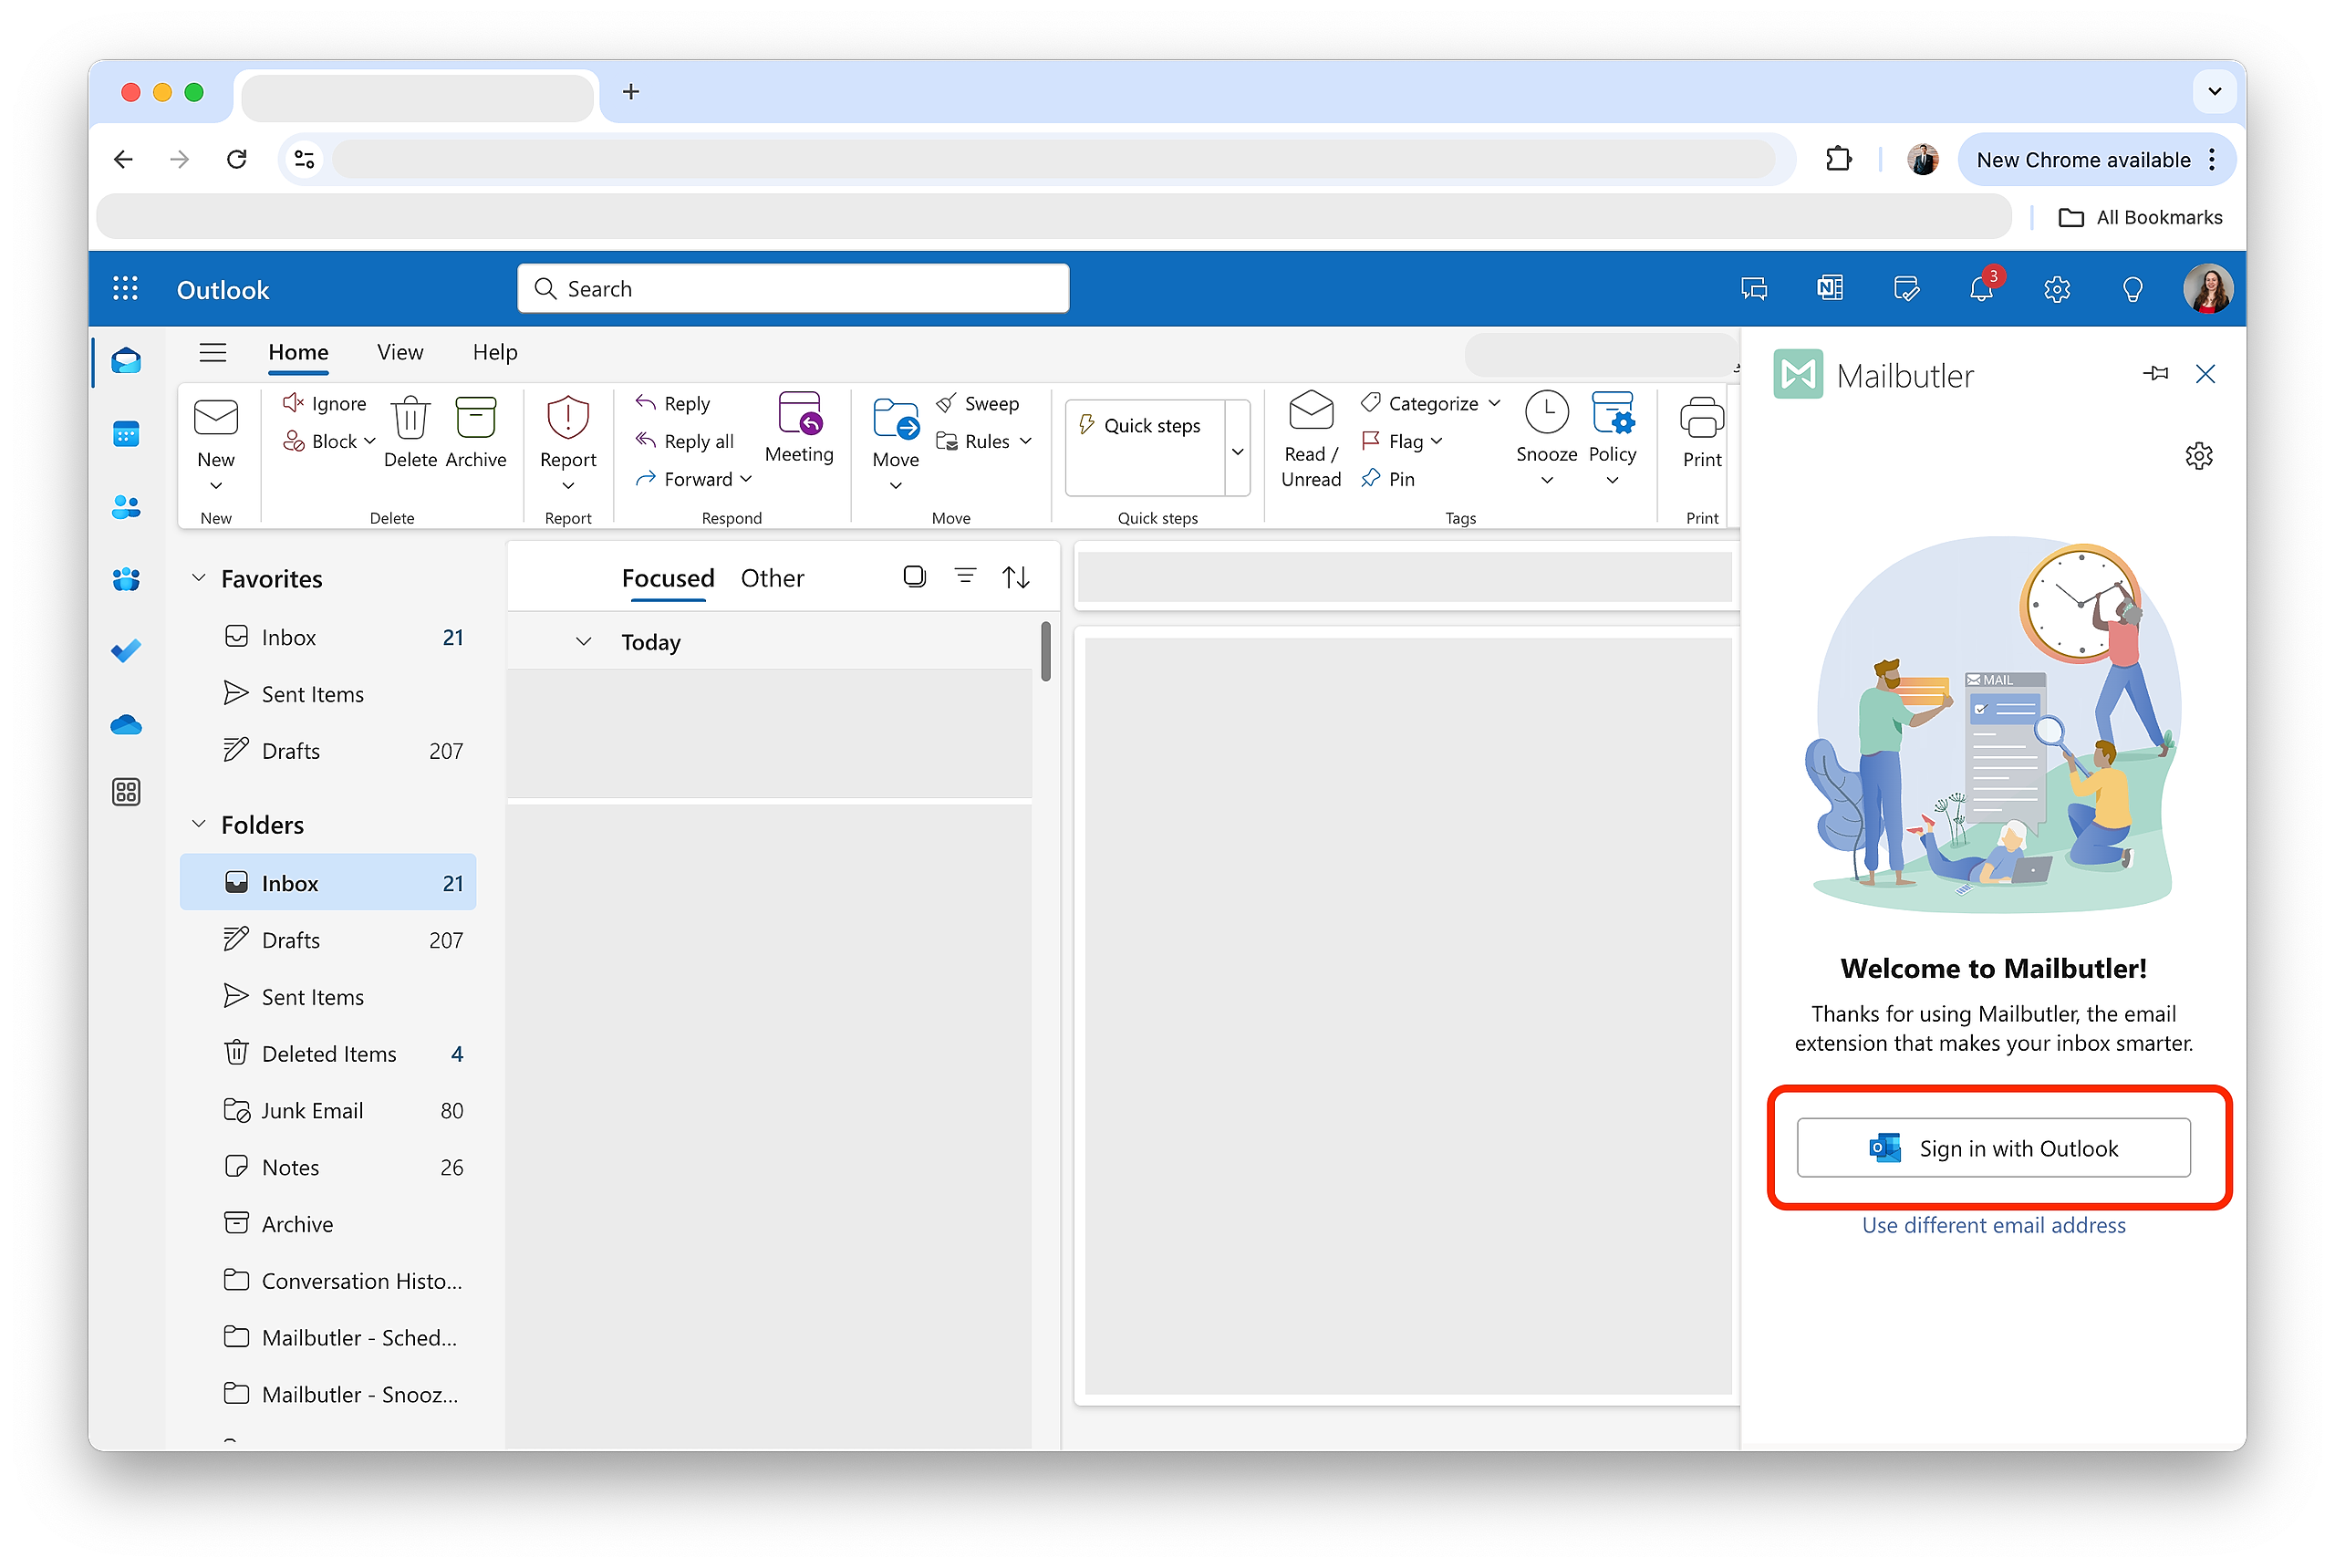
9. Click Sign in with Outlook.
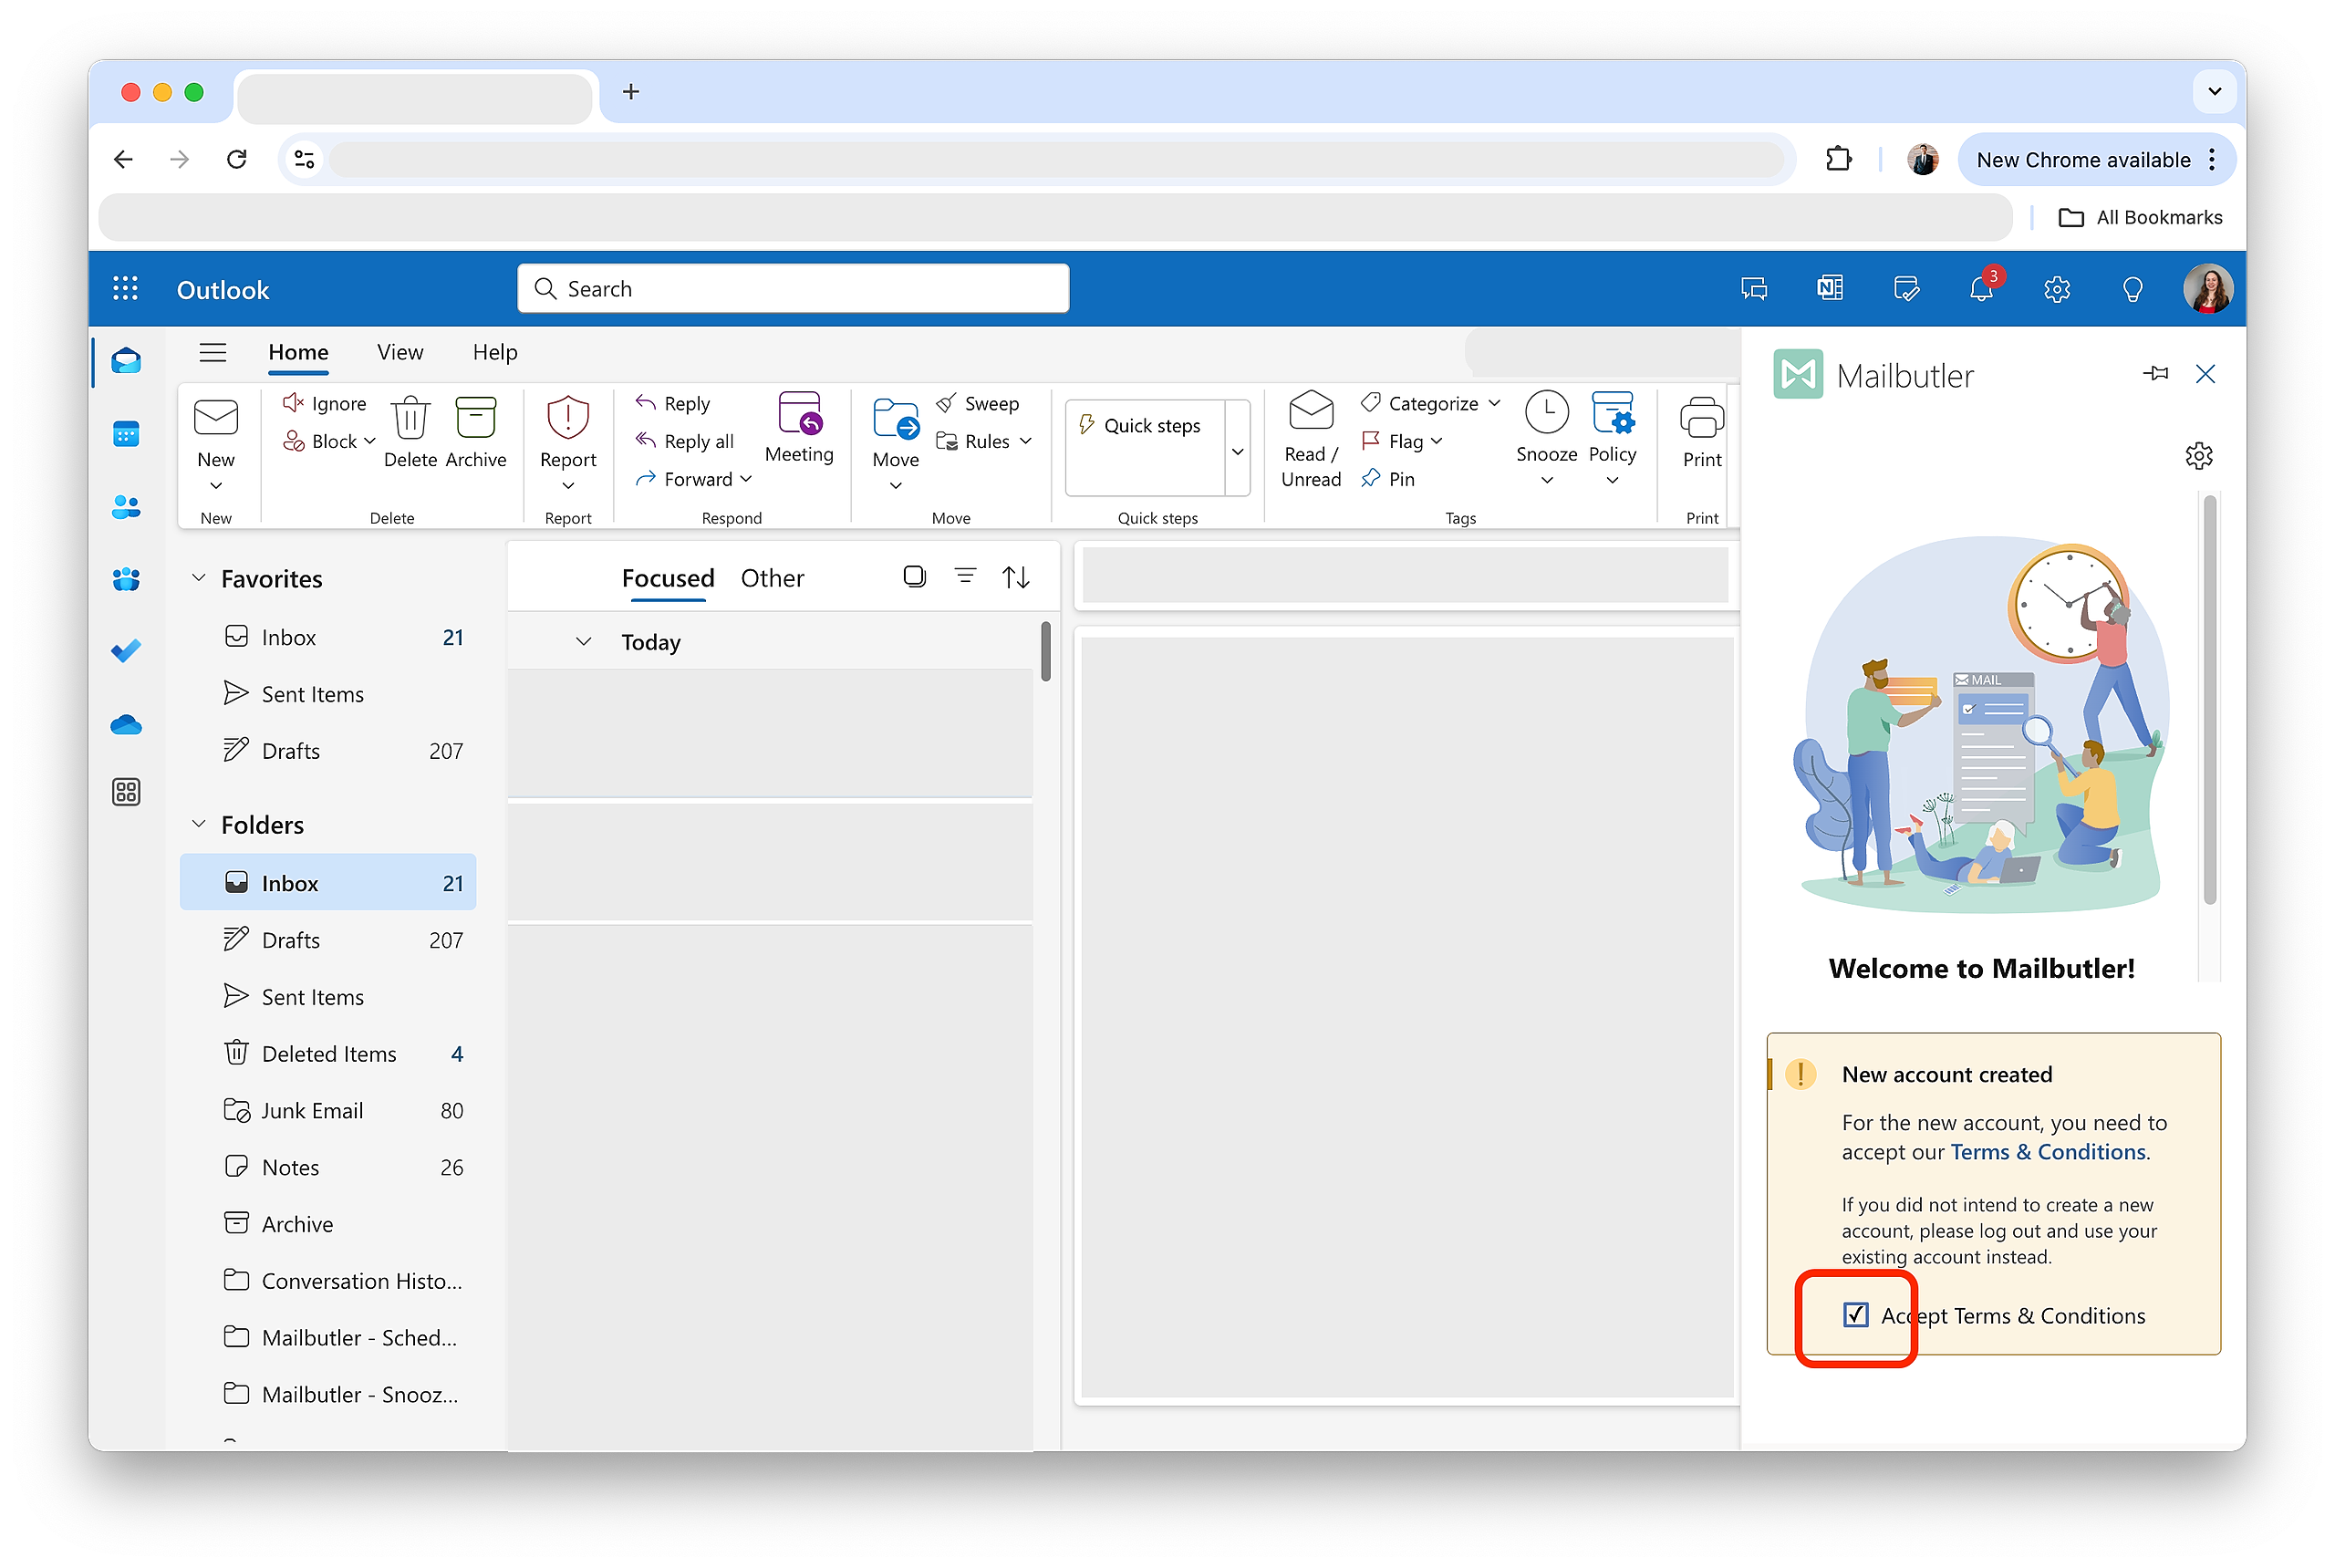
10. Tick the box next to Accept Terms & Conditions.
Alternatively, to register a Mailbutler account with a non-Outlook email address, click Use different email address.
11. Follow the instructions in this article to pin the Mailbutler button as well as the Mailbutler sidebar, so they are always there, easy for you to access.
You are all set and can now start using Mailbutler's features in Outlook!


Note: Once you have installed Mailbutler for Outlook, it is added to your account and will be available for every version of Outlook that supports add-ins (Outlook for Windows, Outlook for Mac, and outlook.com). You do not have to install the add-in separately for each version.
Outlook app (Windows)
To make sure that Mailbutler is compatible with your Outlook setup, please see here.
Go to our Get Started page here
Enter the email address you want to use for your Mailbutler account.
Click Get Started.
Under Outlook, click Microsoft Marketplace.
The Microsoft Marketplace Store will open in a new window.
Click Get it now
Click Continue.
You should receive a confirmation that Mailbutler was successfully added to your email account.

Note: It might take a few minutes for Mailbutler to appear in Outlook after installation. If you don’t see it yet, please wait a moment and restart Outlook, then check again.
7. After a few minutes, you should be able to find Mailbutler in Apps. Open any email, click Apps, and select Mailbutler. Open the Mailbutler sidebar.

(If you have successfully installed Mailbutler, but you cannot find the option to open the Mailbutler sidebar, please contact support@mailbutler.io.)
8. Click Sign in with Outlook.

9. Tick the box next to Accept Terms & Conditions.

Alternatively, to register a Mailbutler account with a non-Outlook email address, click Use different email address.
10. Follow the instructions in this article to pin the Mailbutler button as well as the Mailbutler sidebar, so they are always there, easy for you to access.
You are all set and can now start using Mailbutler's features in Outlook!
Note: Once you have installed Mailbutler for Outlook, it is added to your account and will be available for every version of Outlook that supports add-ins (Outlook for Windows, Outlook for Mac, and outlook.com). You do not have to install the add-in separately for each version.
Outlook.office.com
To make sure that Mailbutler is compatible with your Outlook setup, please see here.
Go to our Get Started page here
Enter the email address you want to use for your Mailbutler account.
Click Get Started.
Under Outlook, click Microsoft Marketplace.
The Microsoft Marketplace Store will open in a new window.
Click Get it now.
Click Continue.
You should receive a confirmation that Mailbutler was successfully added to your email account.
Note: It might take a few minutes for Mailbutler to appear in Outlook after installation. If you don’t see it yet, please wait a moment and restart Outlook, then check again.
7. After a few minutes, you should be able to find Mailbutler in Apps. Open any email, click Apps, and select Mailbutler. Open the Mailbutler sidebar.
(If you have successfully installed Mailbutler, but you cannot find the option to open the Mailbutler sidebar, please contact support@mailbutler.io.)
8. Click Sign in with Outlook.
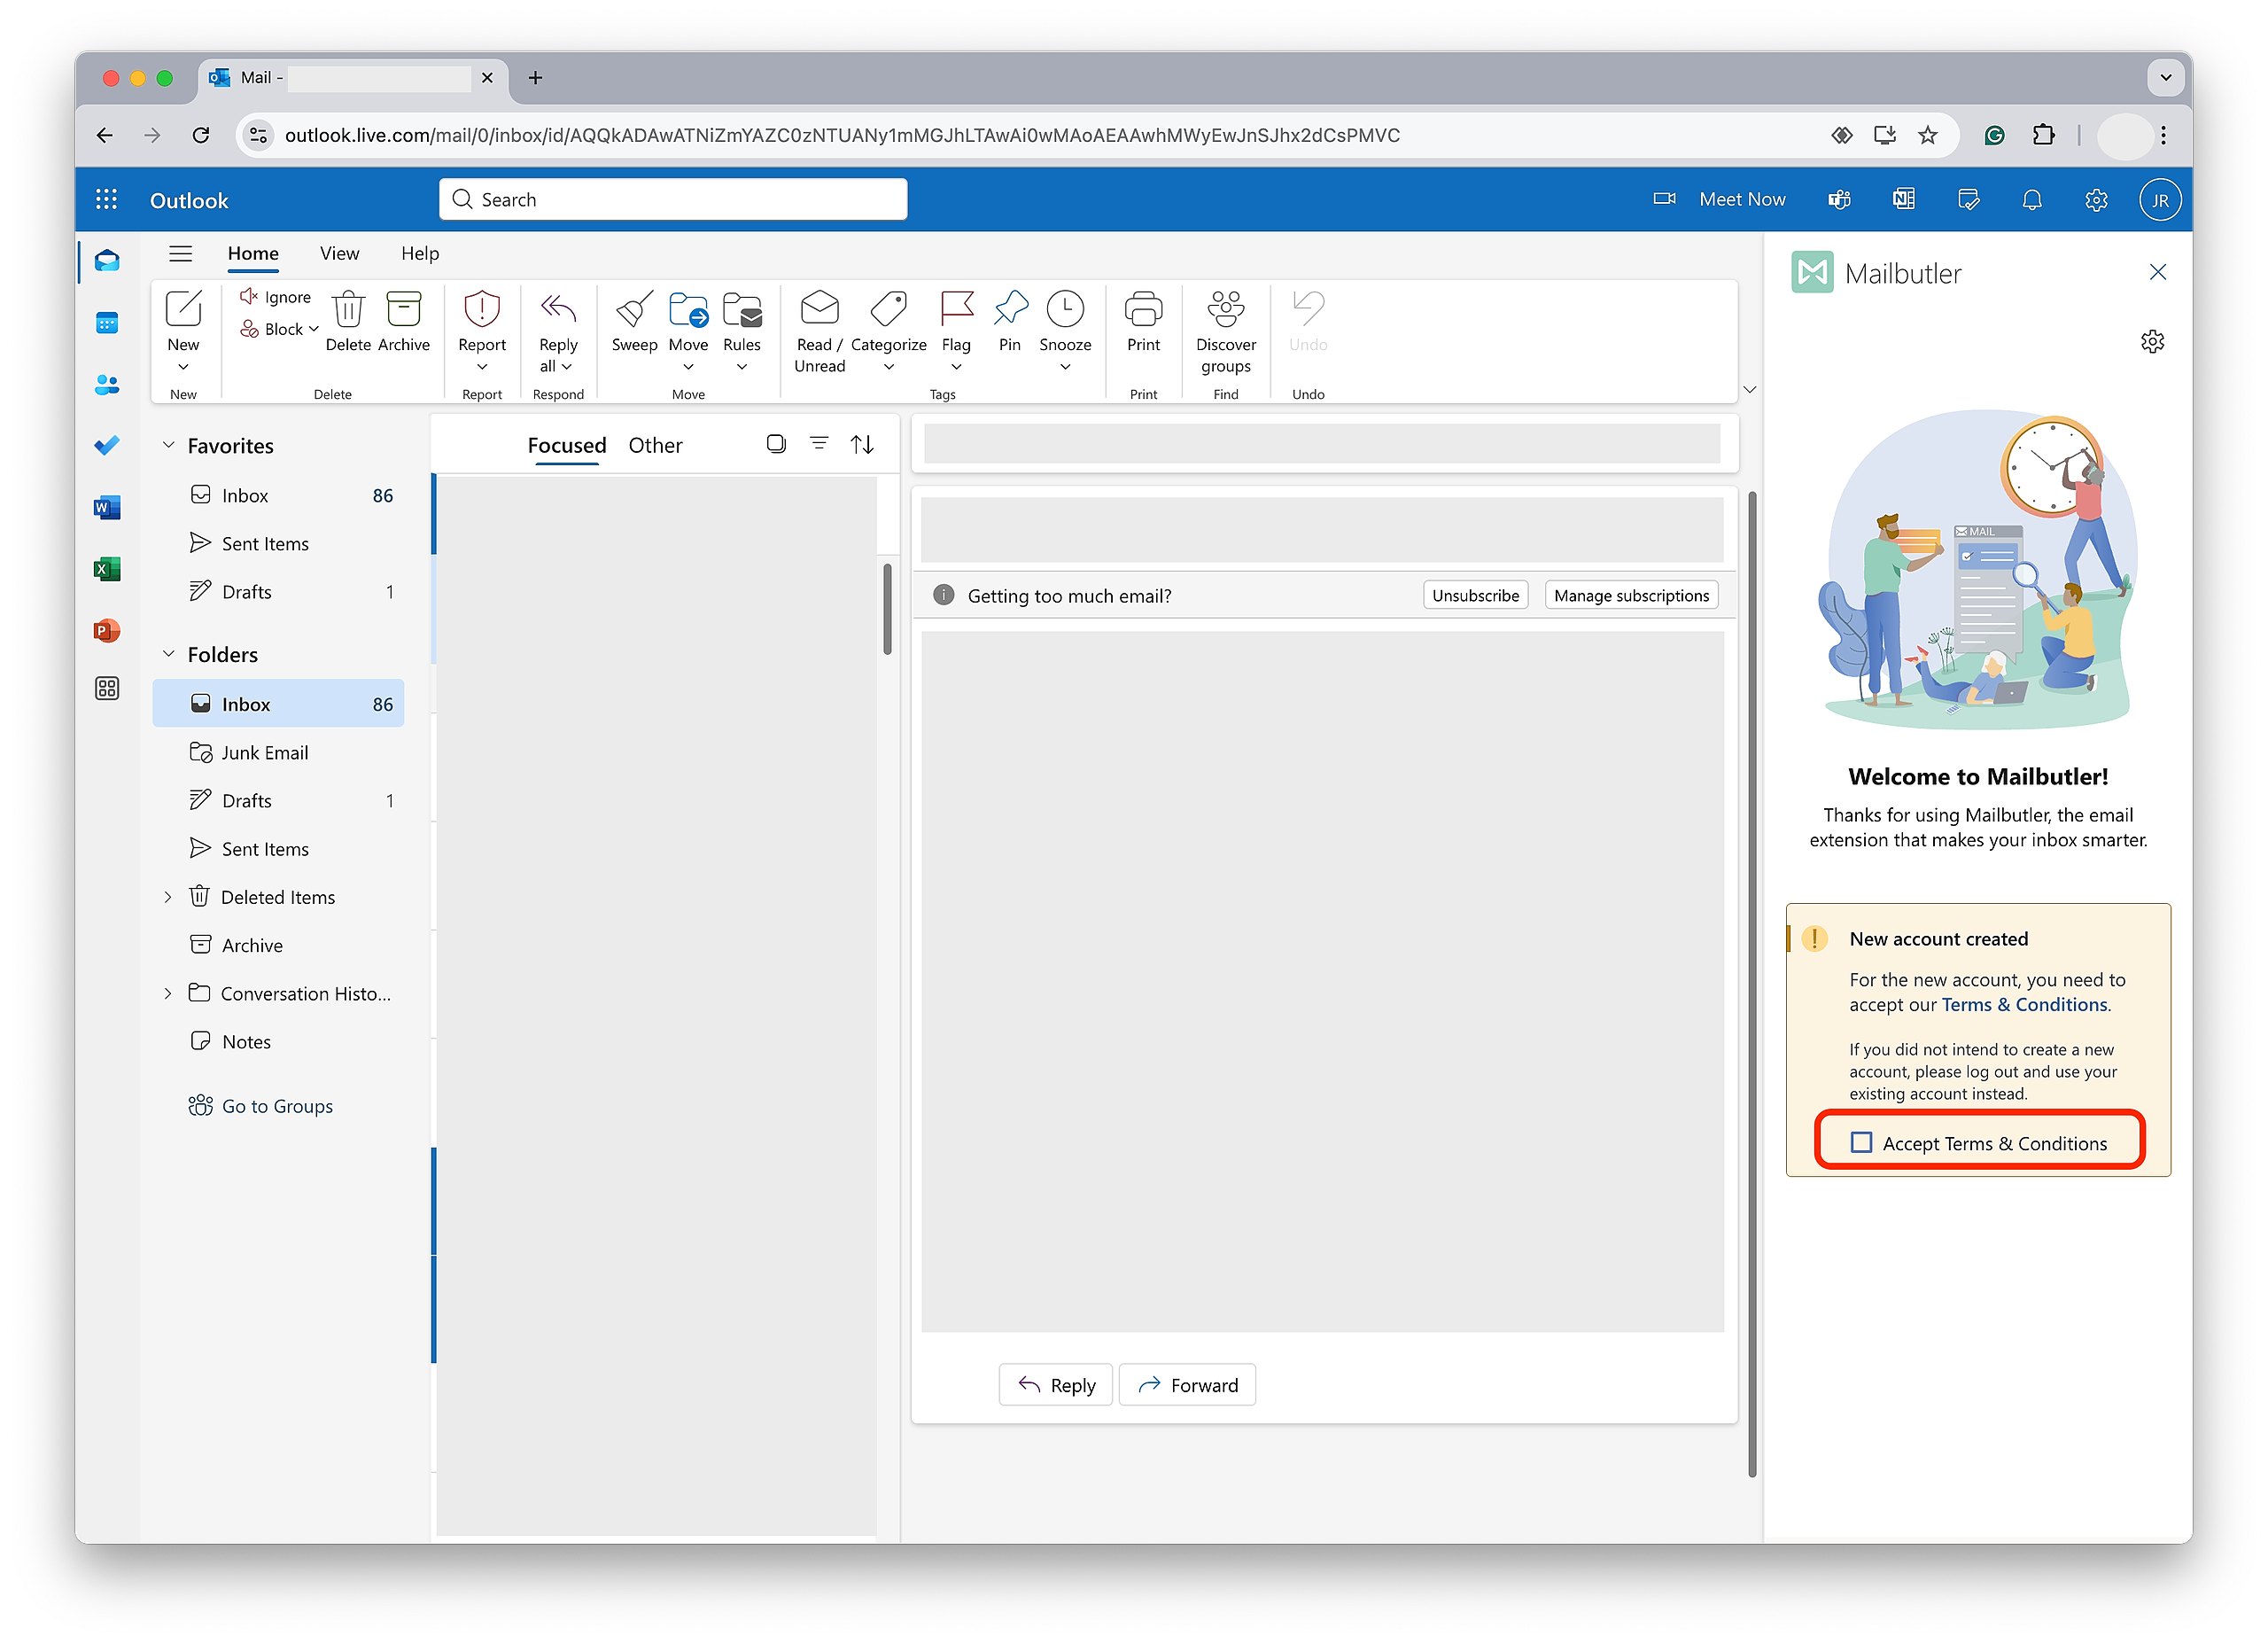
9. Tick the box next to Accept Terms & Conditions.
Alternatively, to register a Mailbutler account with a non-Outlook email address, click Use different email address.

Outlook.live.com
To make sure that Mailbutler is compatible with your Outlook setup, please see here.
Go to our Get Started page here
Enter the email address you want to use for your Mailbutler account.
Click Get Started.
Under Outlook, click Microsoft Marketplace.
The Microsoft Marketplace Store will open in a new window.
Click Get it now
Click Continue.
You should receive a confirmation that Mailbutler was successfully added to your email account.
Note: It might take a few minutes for Mailbutler to appear in Outlook after installation. If you don’t see it yet, please wait a moment and restart Outlook, then check again.
7. After a few minutes, you should be able to find Mailbutler in Apps. Open any email, click Apps, and select Mailbutler. Open the Mailbutler sidebar.

(If you have successfully installed Mailbutler, but you cannot find the option to open the Mailbutler sidebar, please contact support@mailbutler.io.)
9. Click Sign in with Outlook.

10. Tick the box next to Accept Terms & Conditions.
Alternatively, to register a Mailbutler account with a non-Outlook email address, click Use different email address.

11. Follow the instructions in this article to pin the Mailbutler button as well as the Mailbutler sidebar, so they are always there, easy for you to access.
You are all set and can now start using Mailbutler's features in Outlook!
Note: Once you have installed Mailbutler for Outlook, it is added to your account and will be available for every version of Outlook that supports add-ins (Outlook for Windows, Outlook for Mac, and outlook.com). You do not have to install the add-in separately for each version.
Mobile App
The Mailbutler mobiles app is a companion app. It will only work if you have also installed Mailbutler for your email client on your computer.
Go here to download Mailbutler for your email client on your computer and to register for a Mailbutler account. See the detailed installation instructions here.
Go to the Mailbutler download page in the App Store (for iOS) or the Mailbutler download page in the Google Play Store (for Android) and follow the installation instructions provided by the store page.
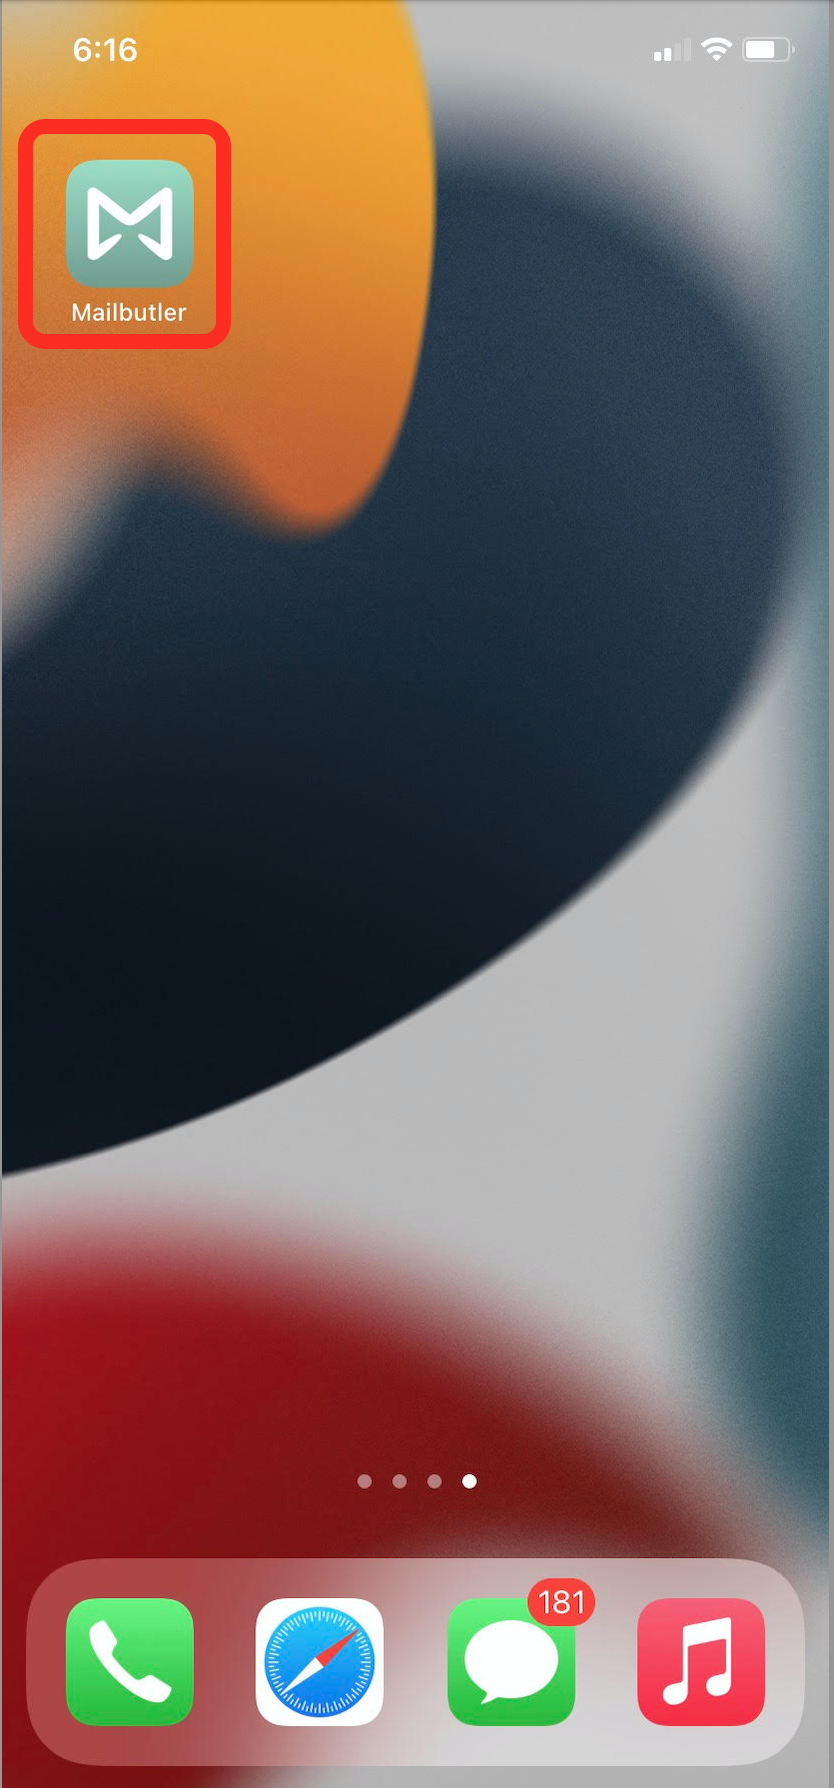
Open the Mailbutler mobile app.
4. Log in to your Mailbutler account.

You are all set and you can now start using Mailbutler's features on the Mobile app!
How do I download Mailbutler if I'm already registered?
If you have already registered for a Mailbutler account, and you want to
- reinstall Mailbutler
- install Mailbutler on a second computer
- install Mailbutler for another email client
then please download the latest Mailbutler version from the below link:
