
How do I add a Task?
Apple Mail
1. Go to an email in your inbox or sent folder.
2. Move the pointer over the Apple Mail's message header and click the Task button.
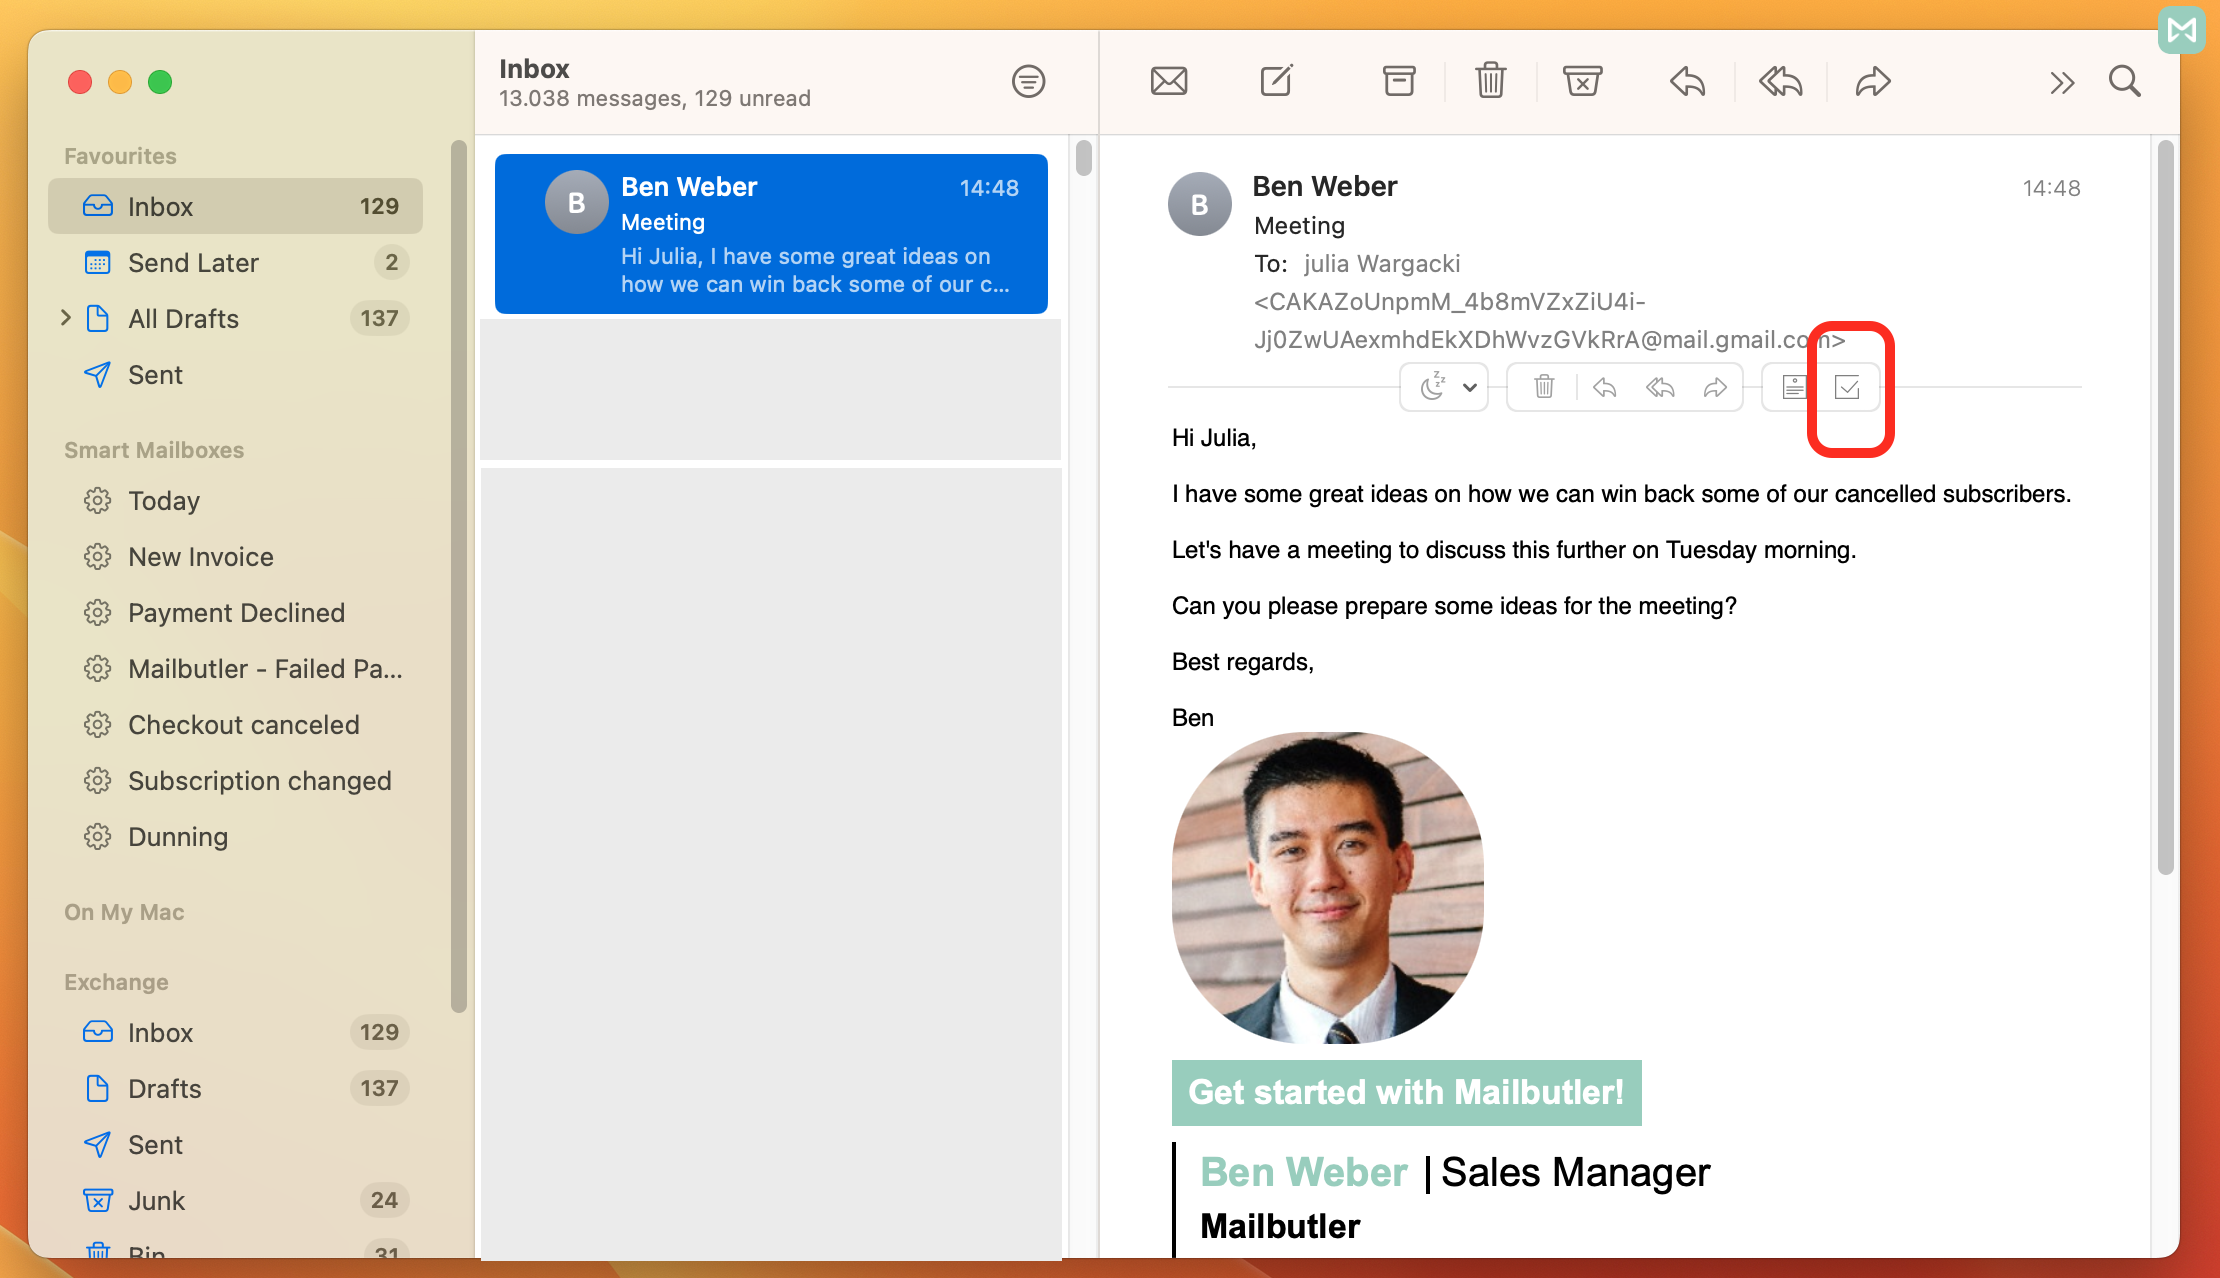
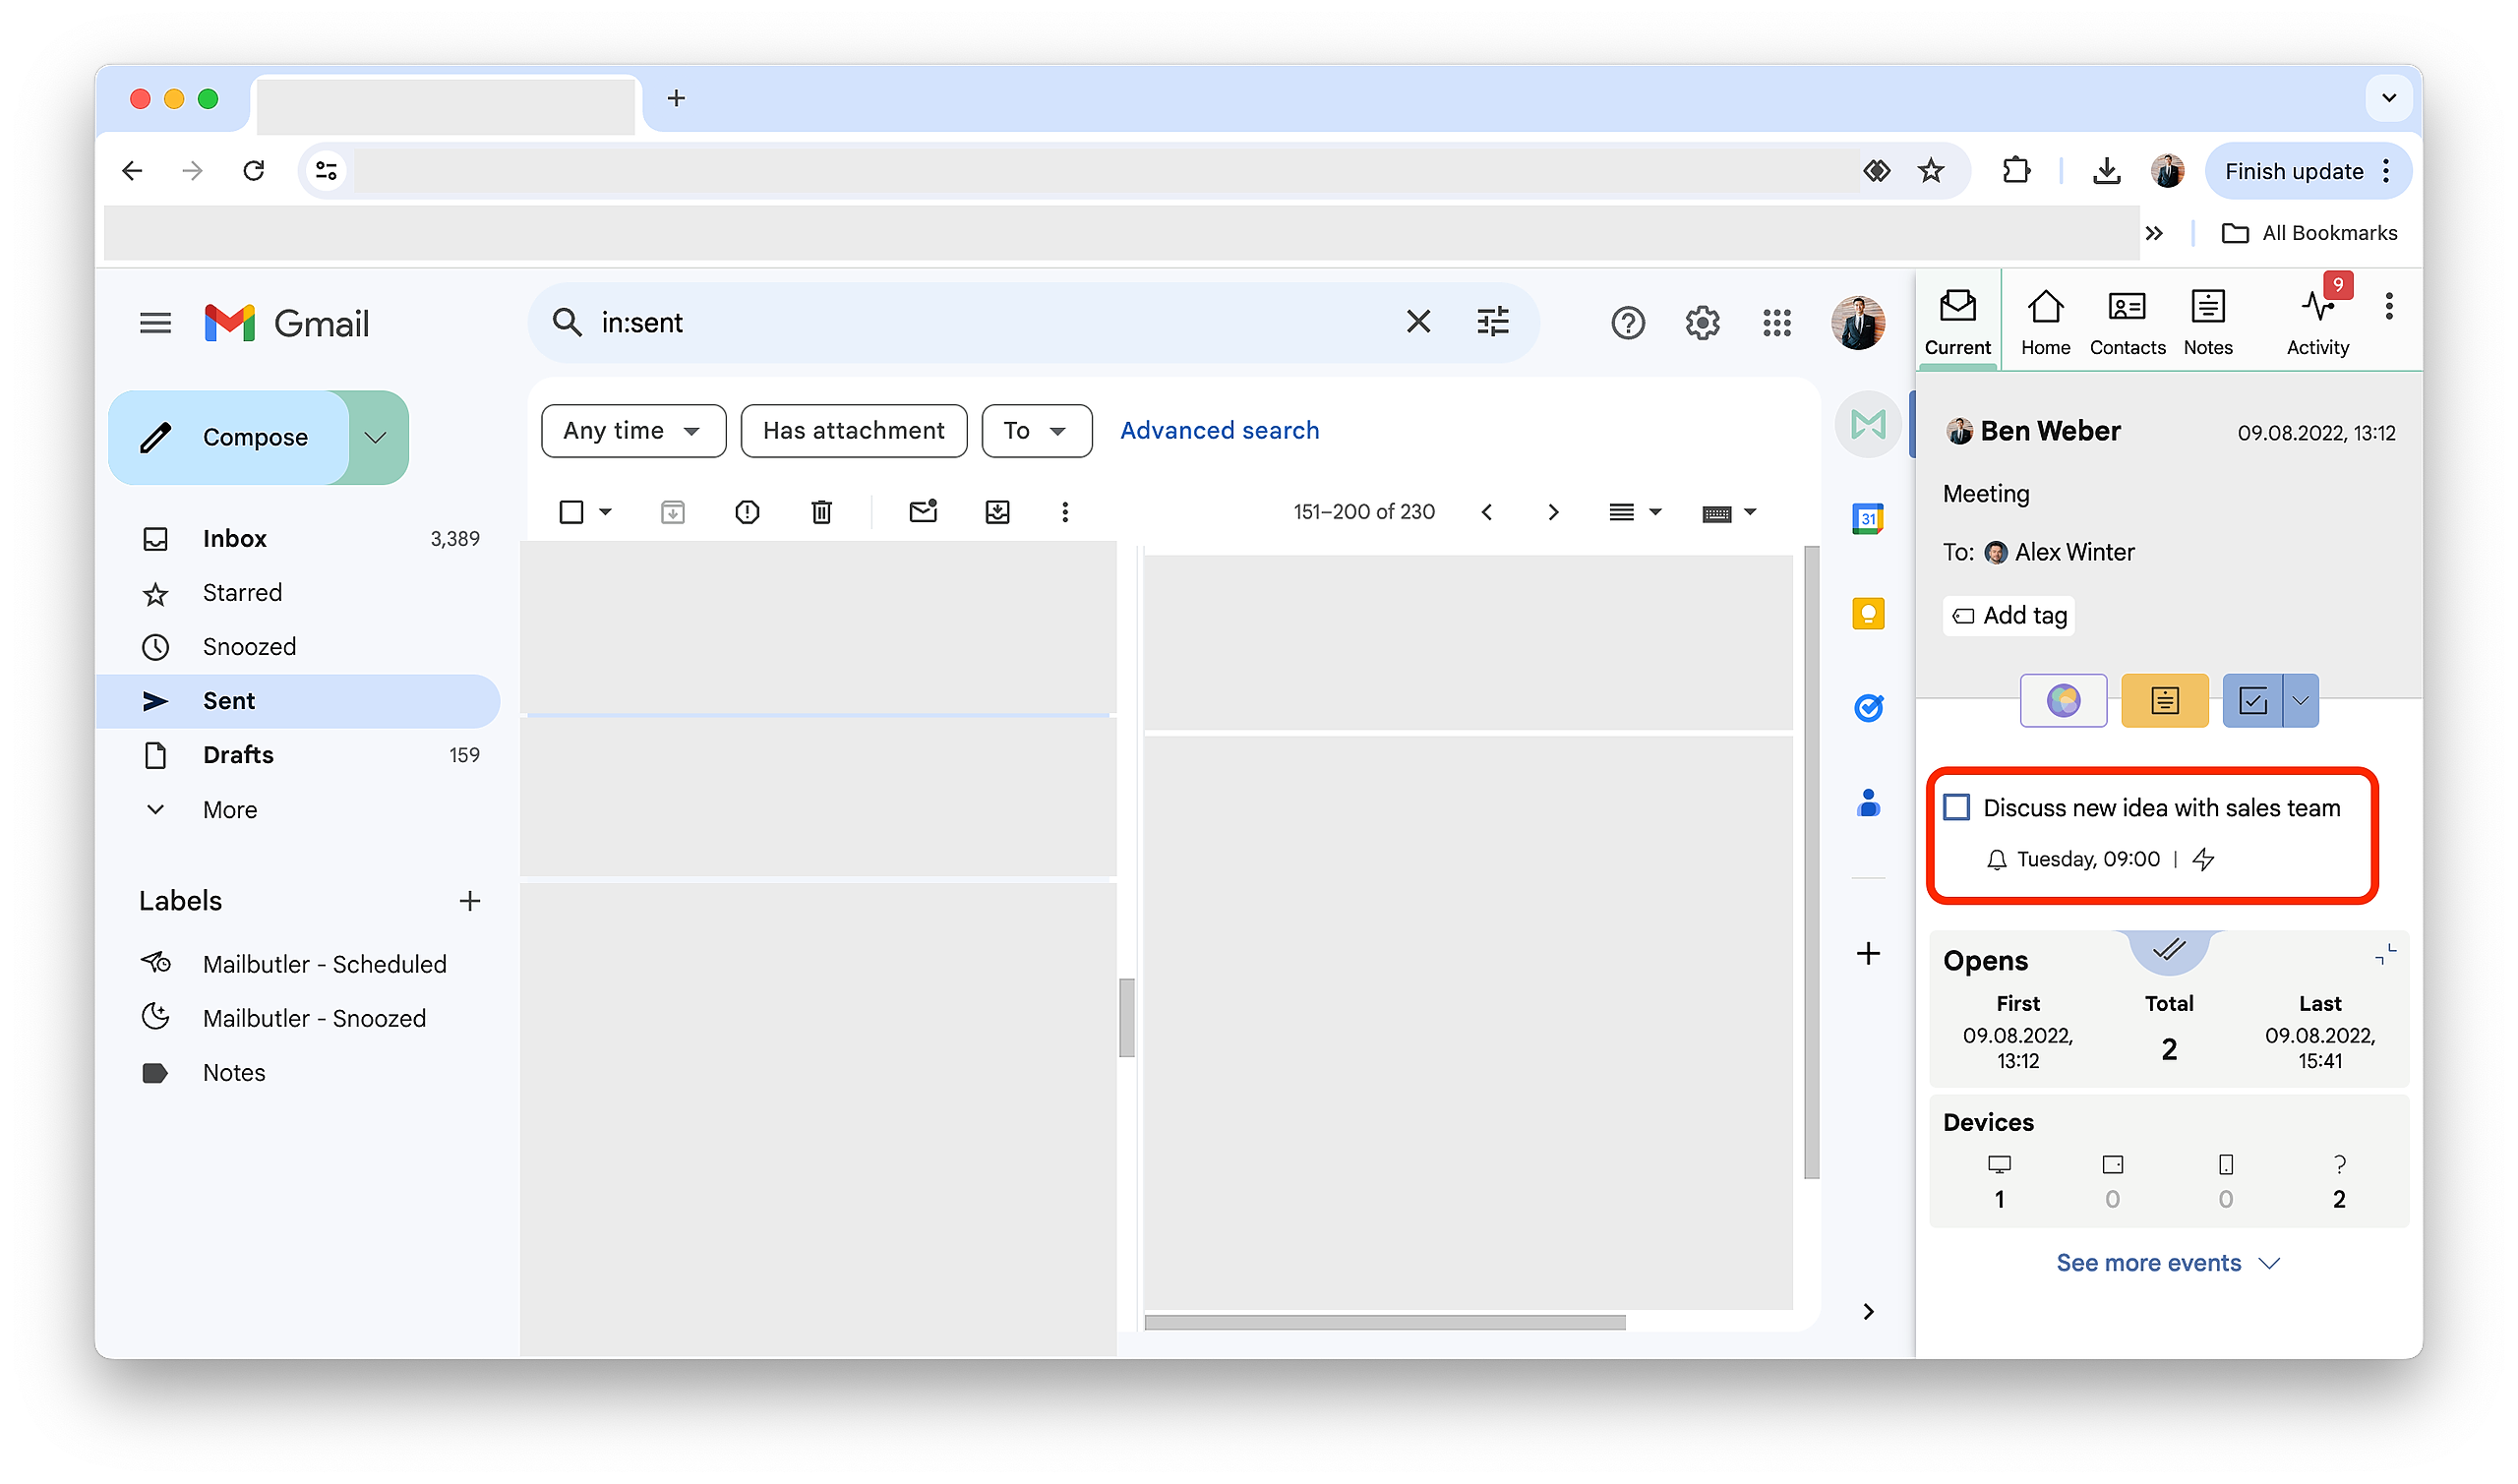
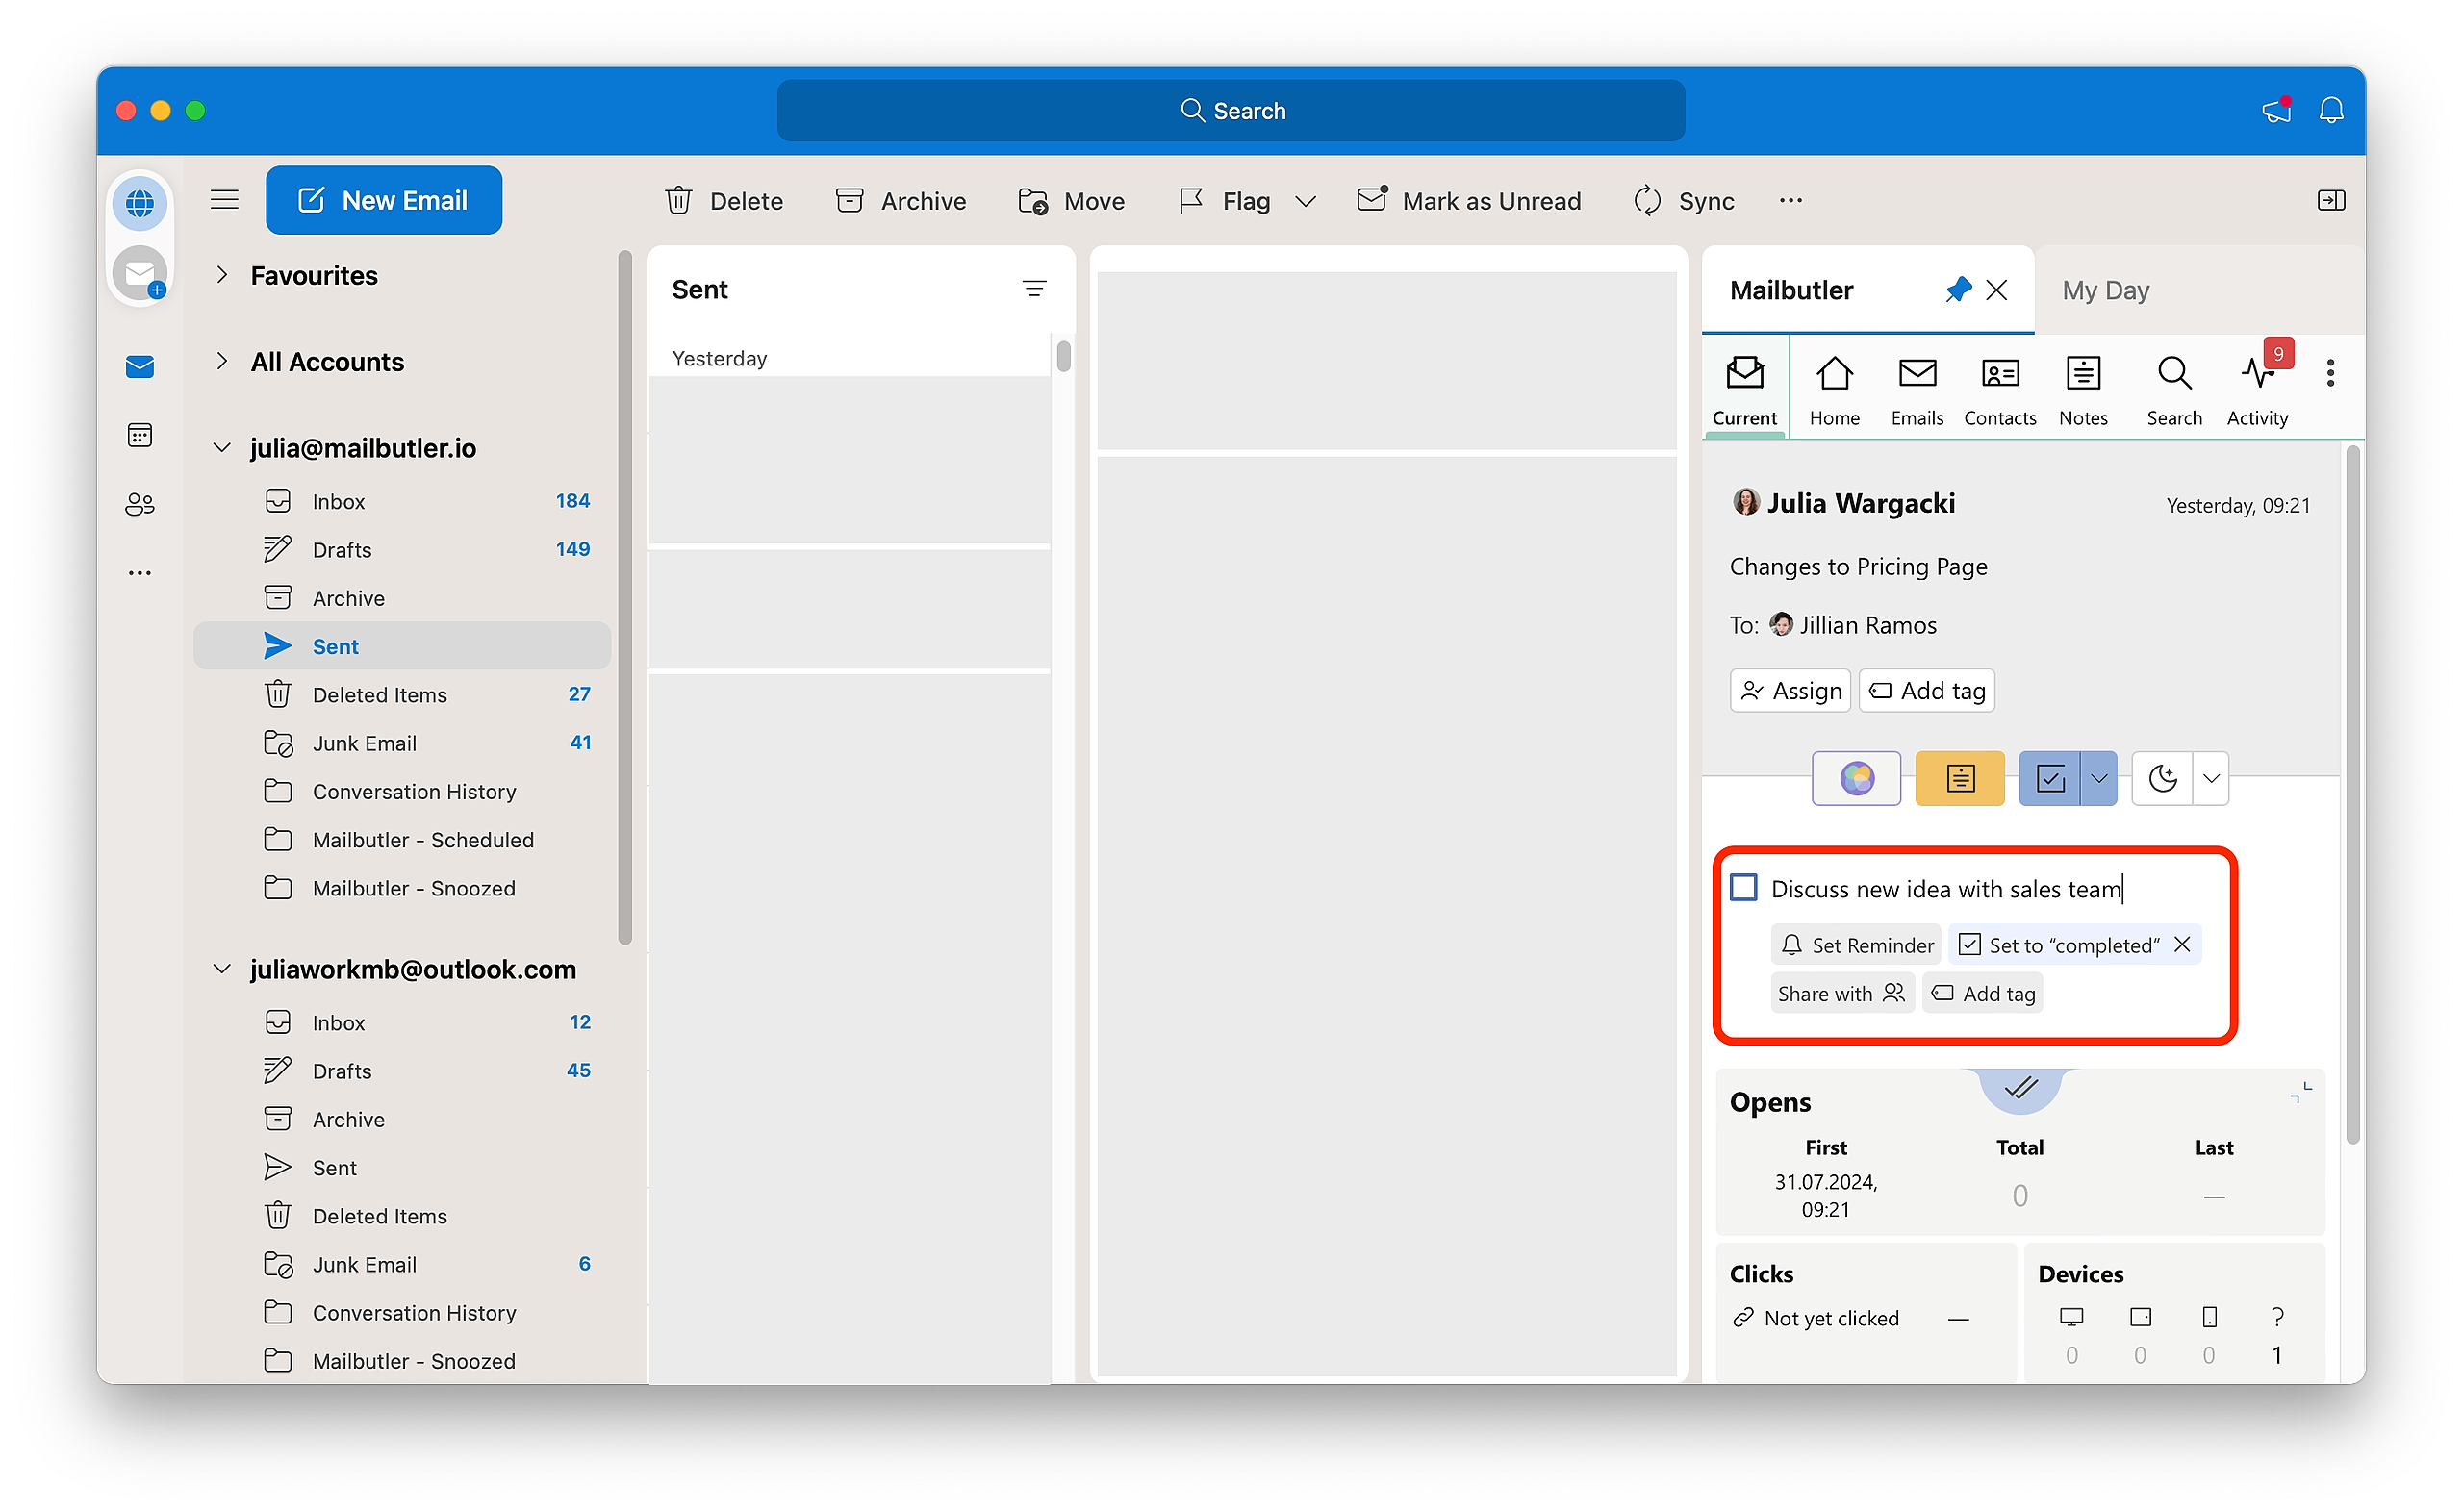
3. The Mailbutler sidebar will open. Write your Task. It will be saved automatically.
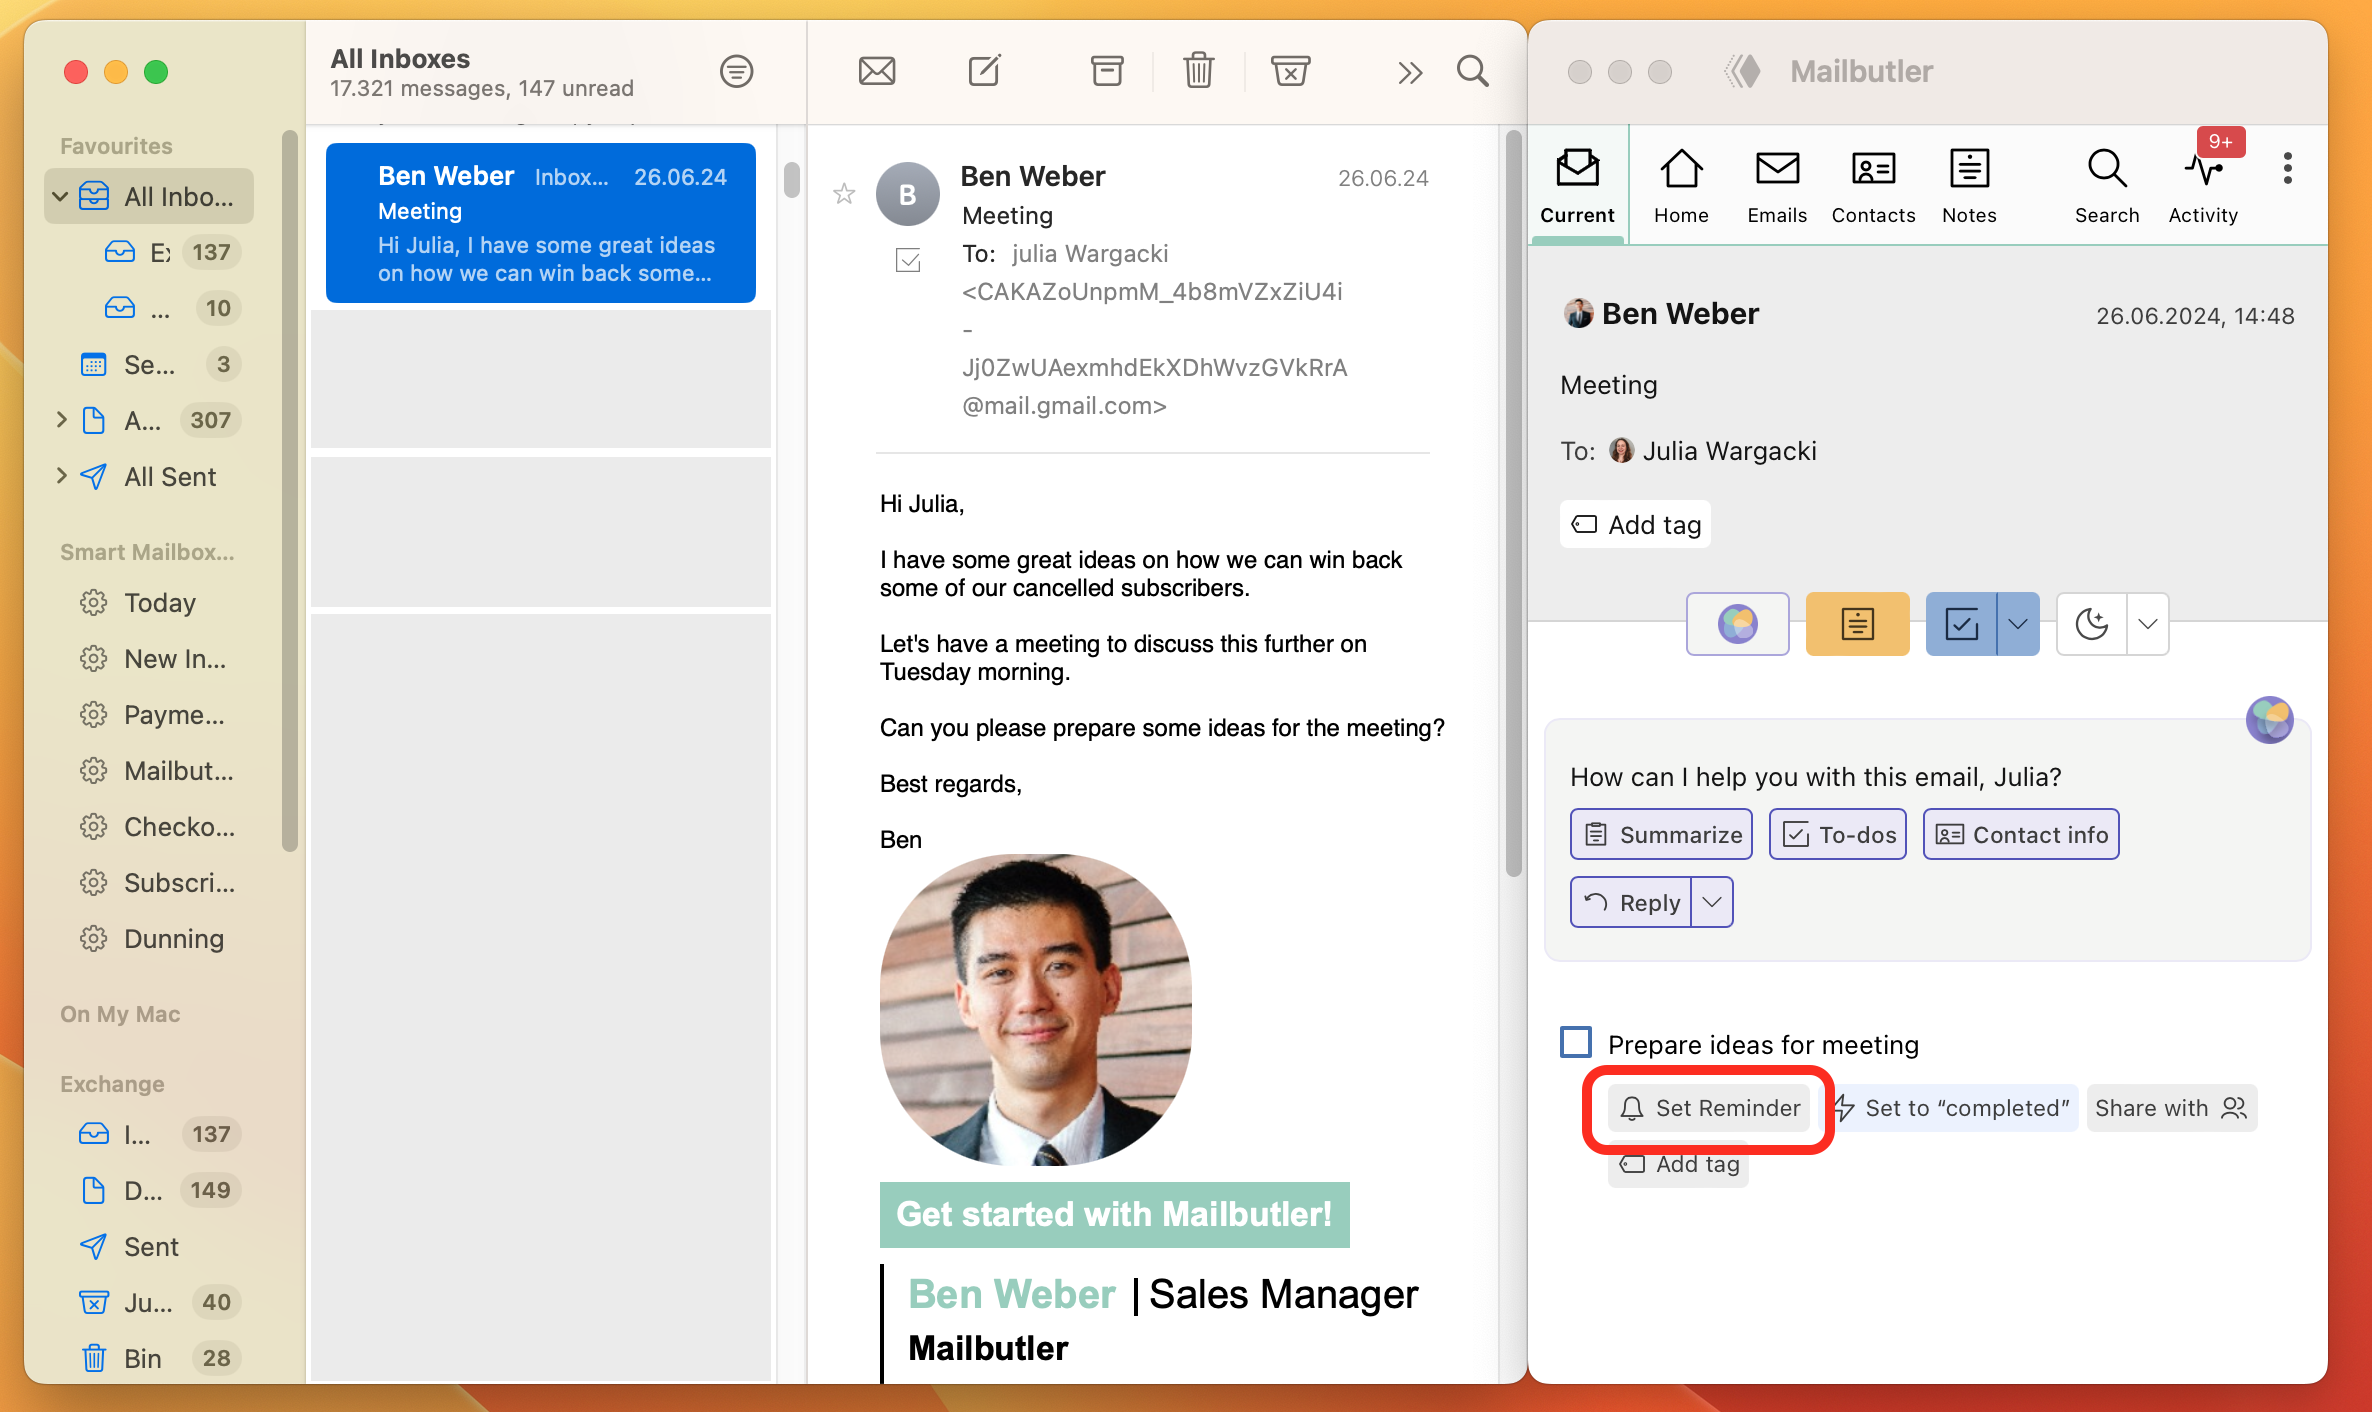
4. To receive a notification on your desktop when your Task is due, click Set Reminder to add a reminder to your Task.
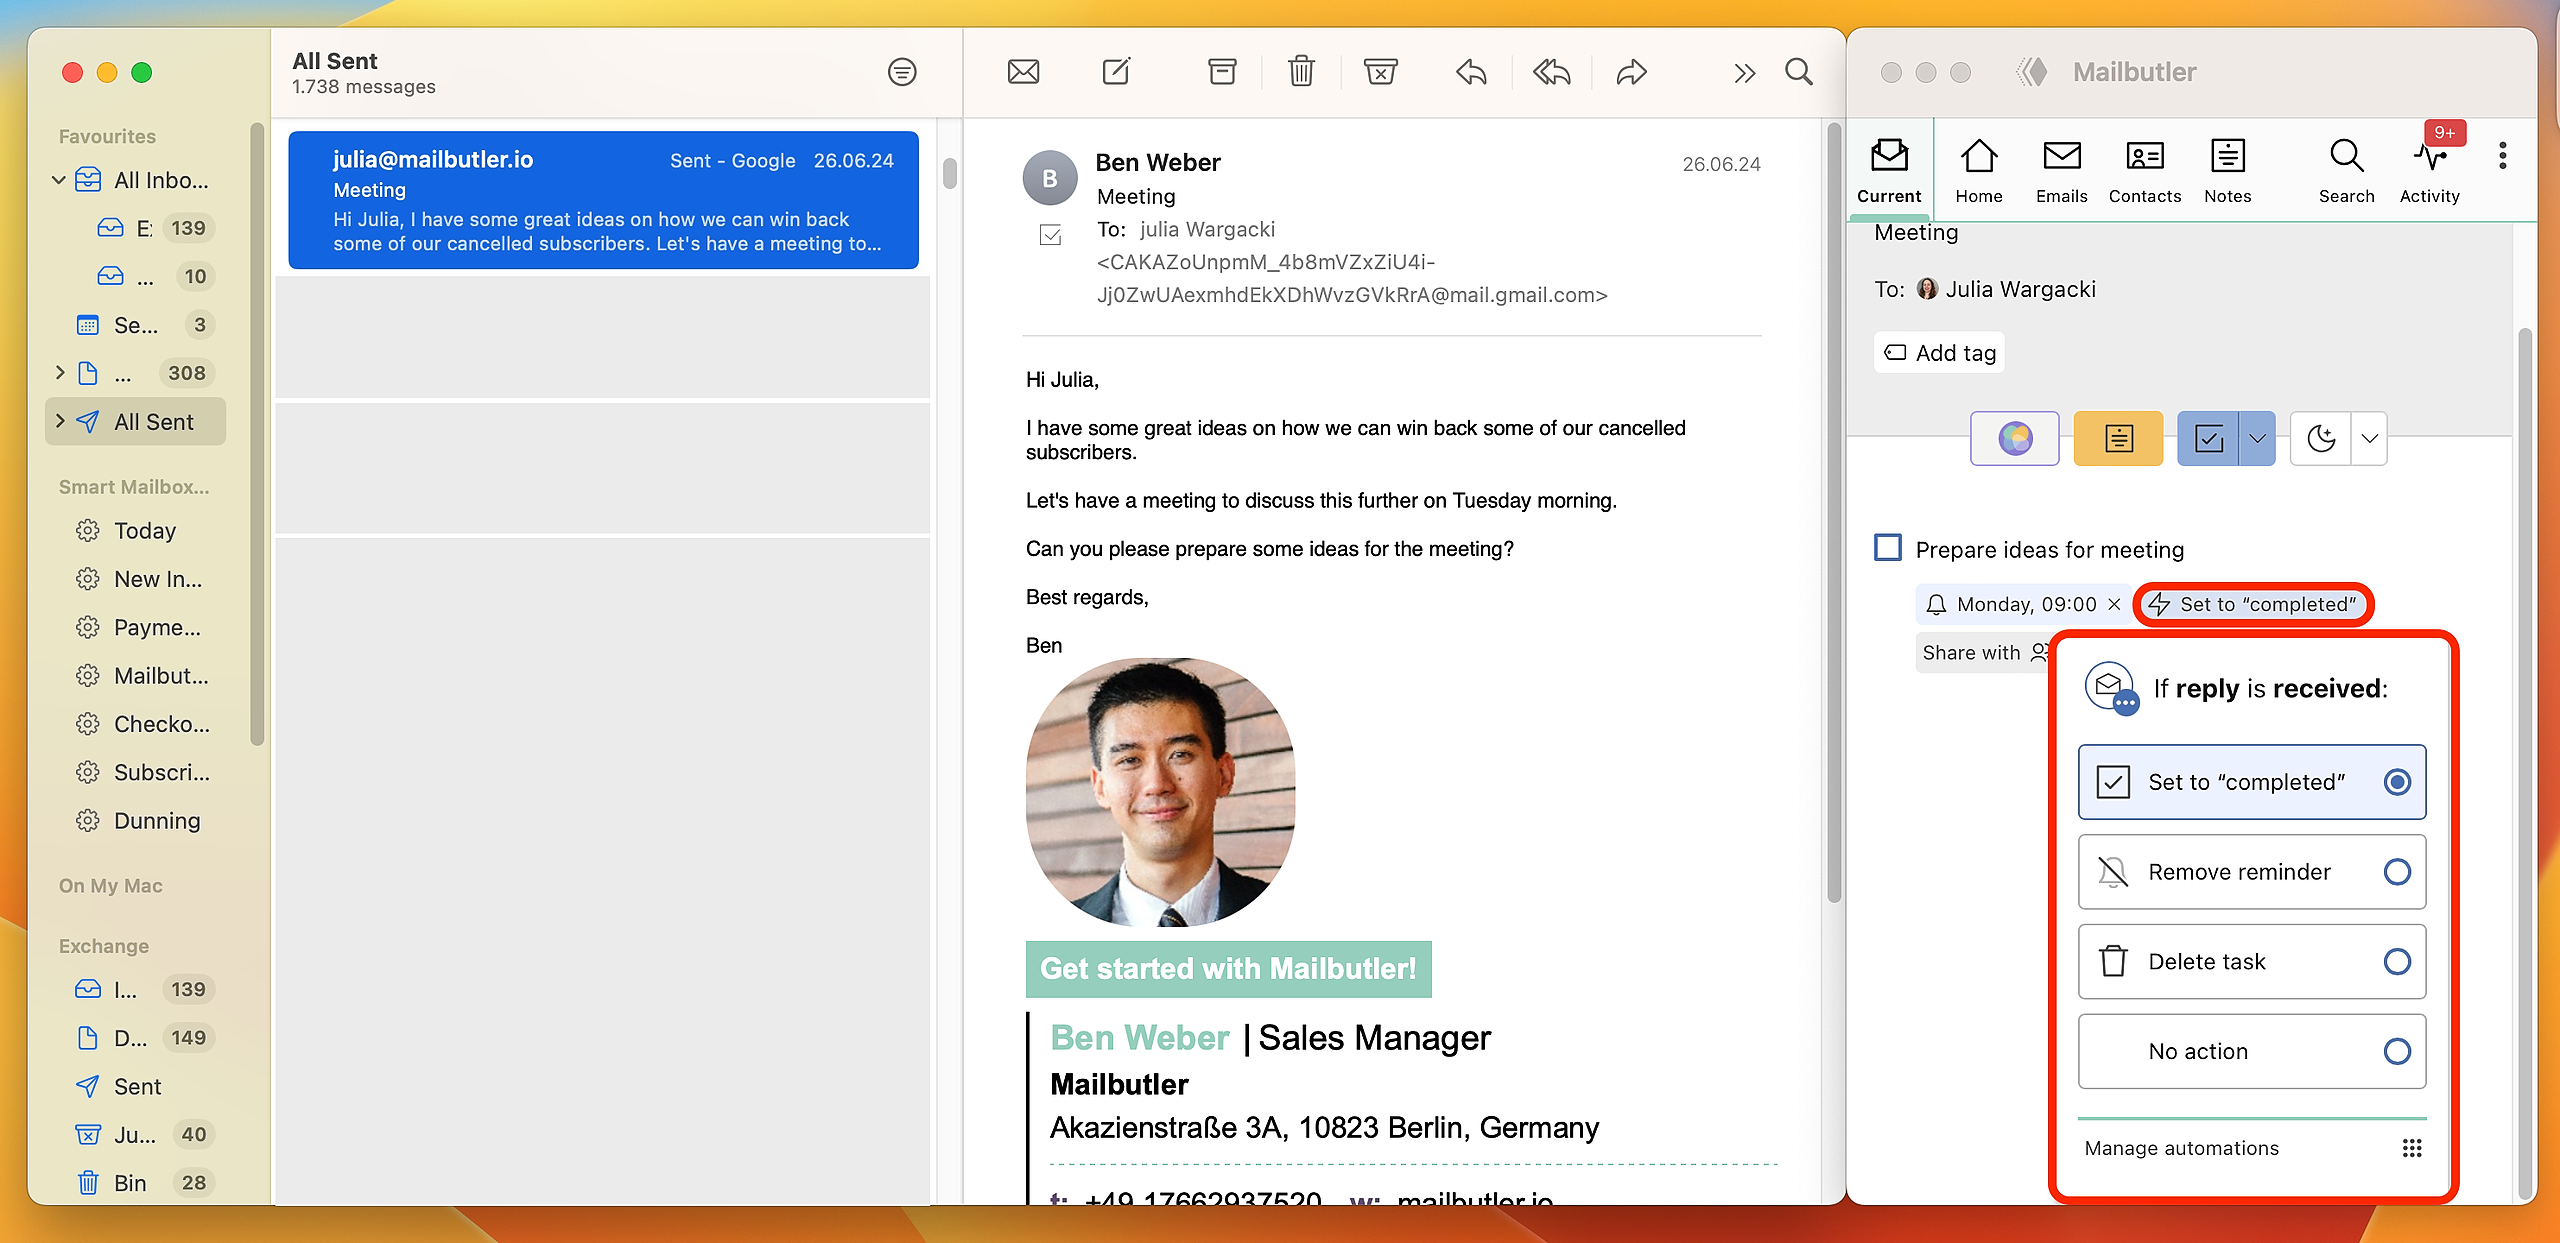
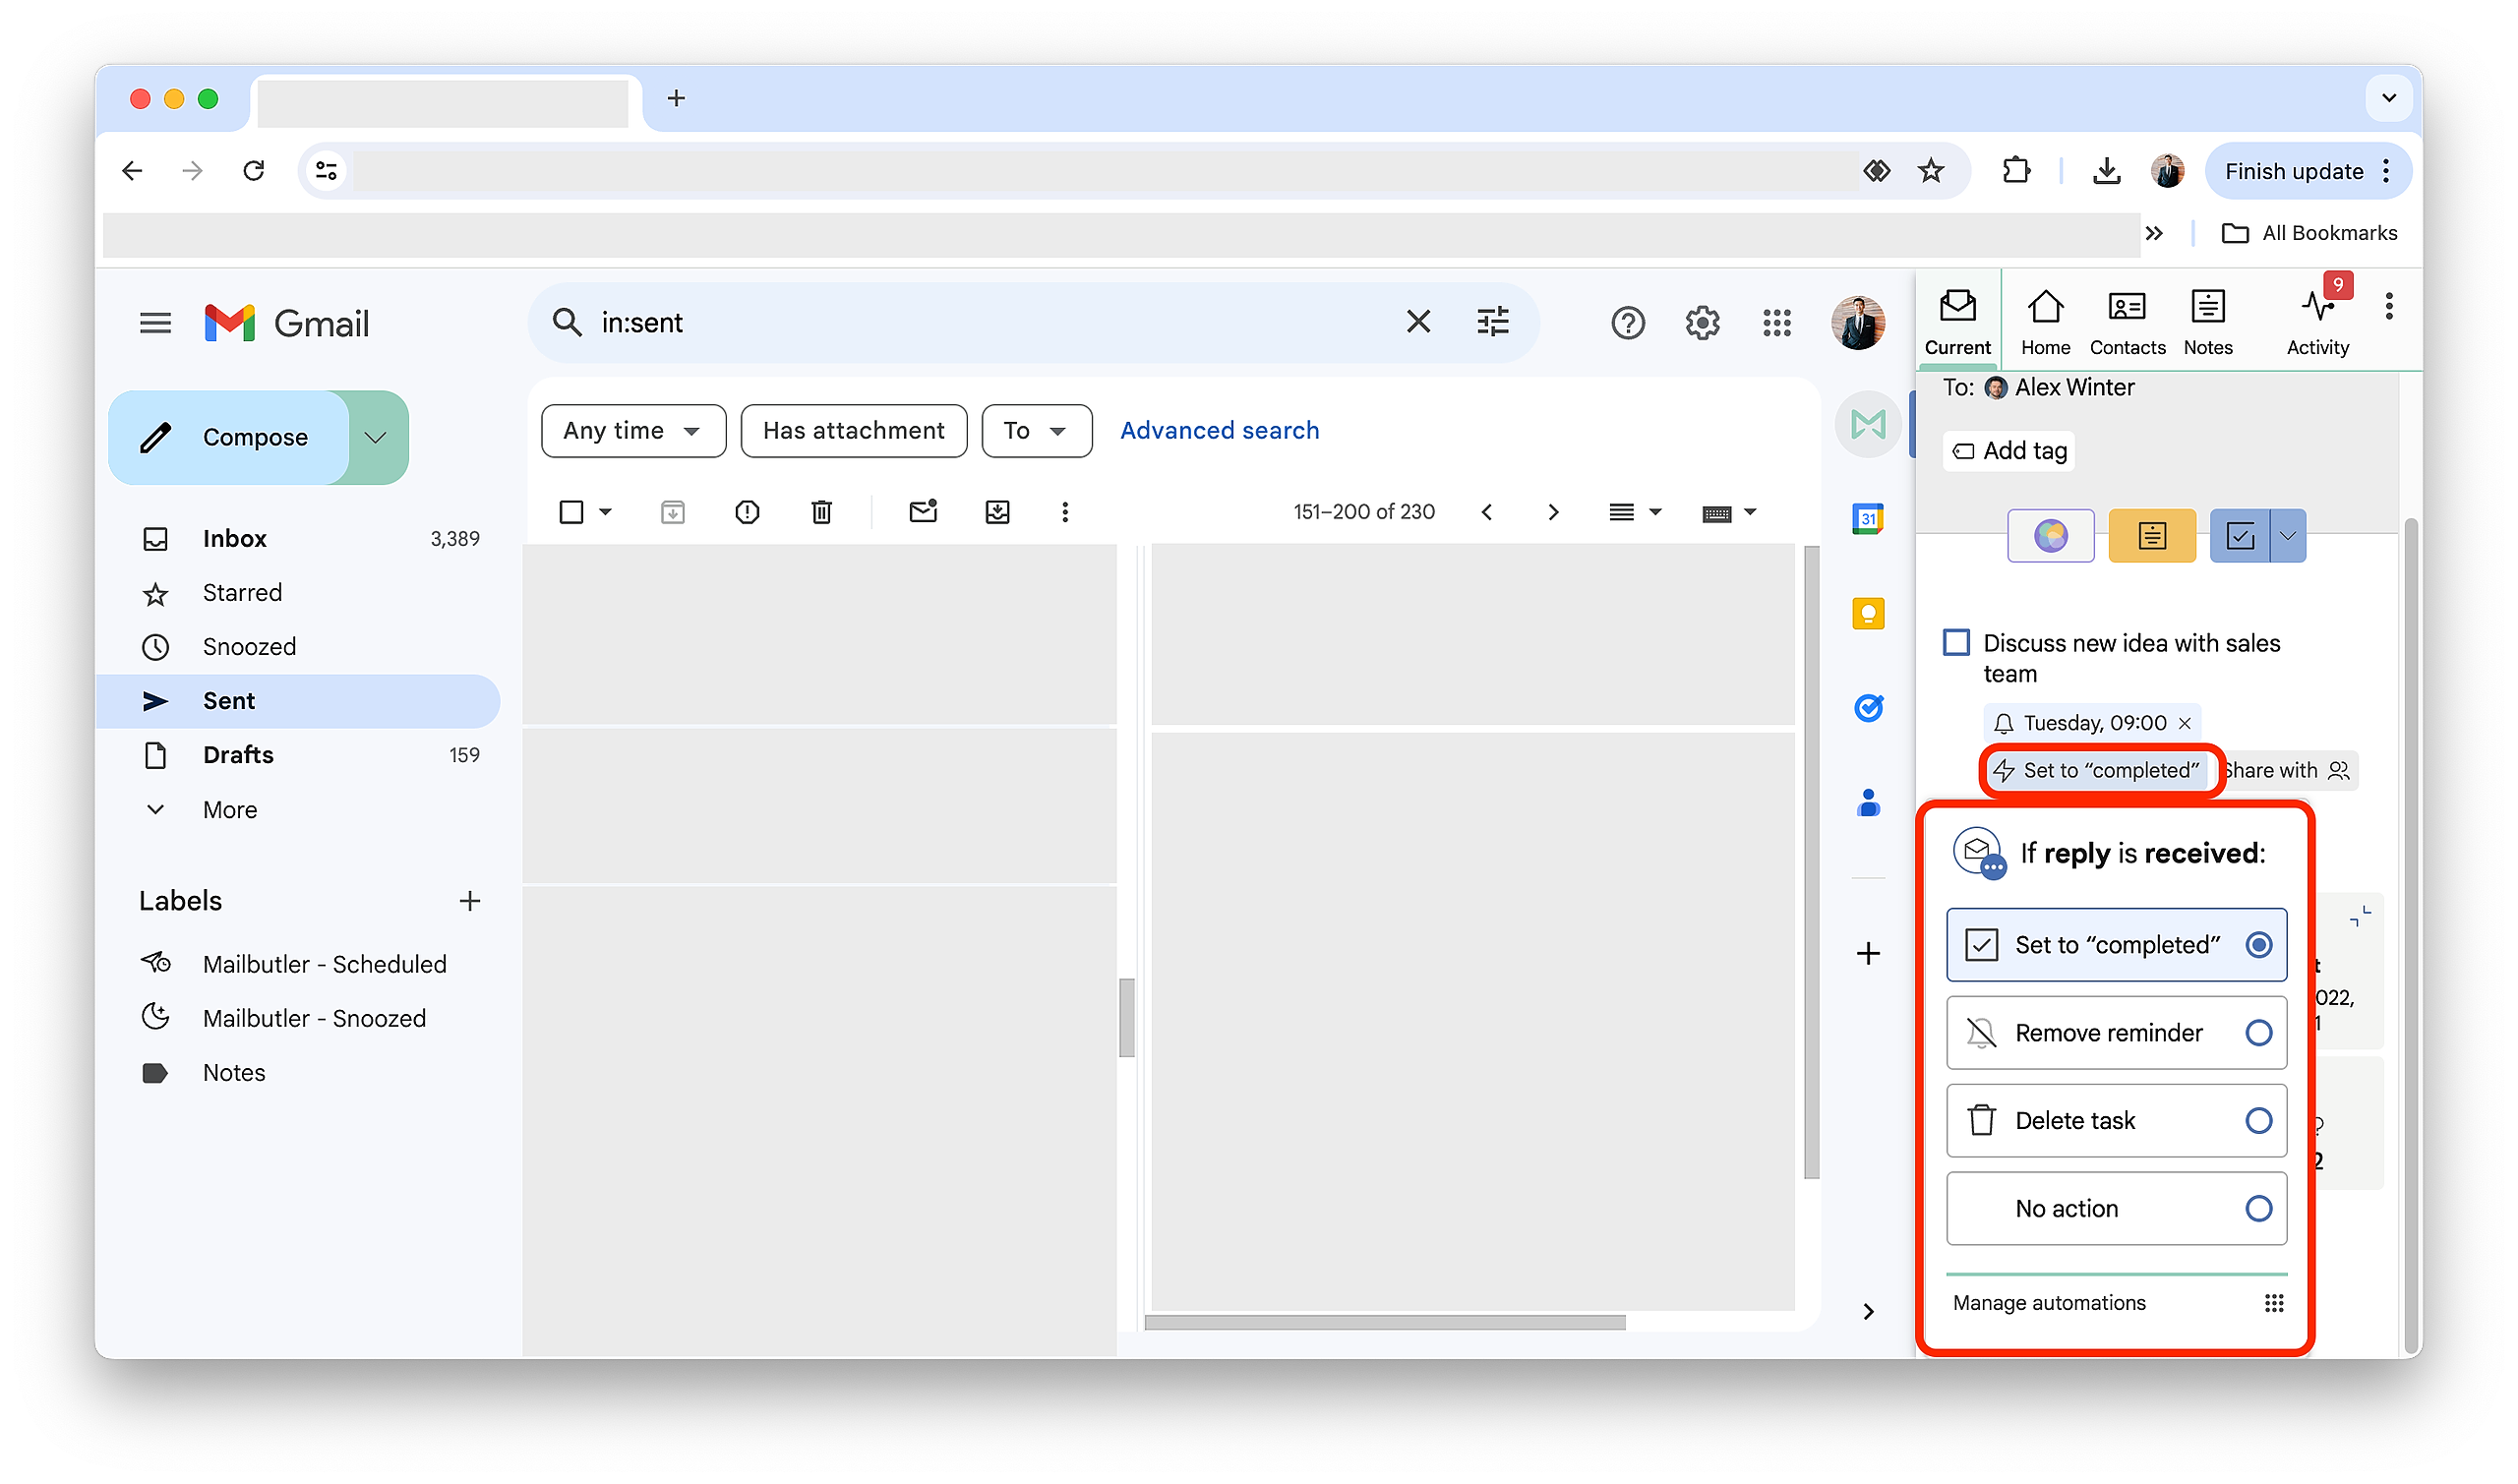
5. You can set default automations for your Tasks under Automations in your Mailbutler Preferences. If you want to set an automation for your Task, different from the default one, click on the automations button (flash icon) and choose what you would like to happen to your Task when your recipient has replied to you.
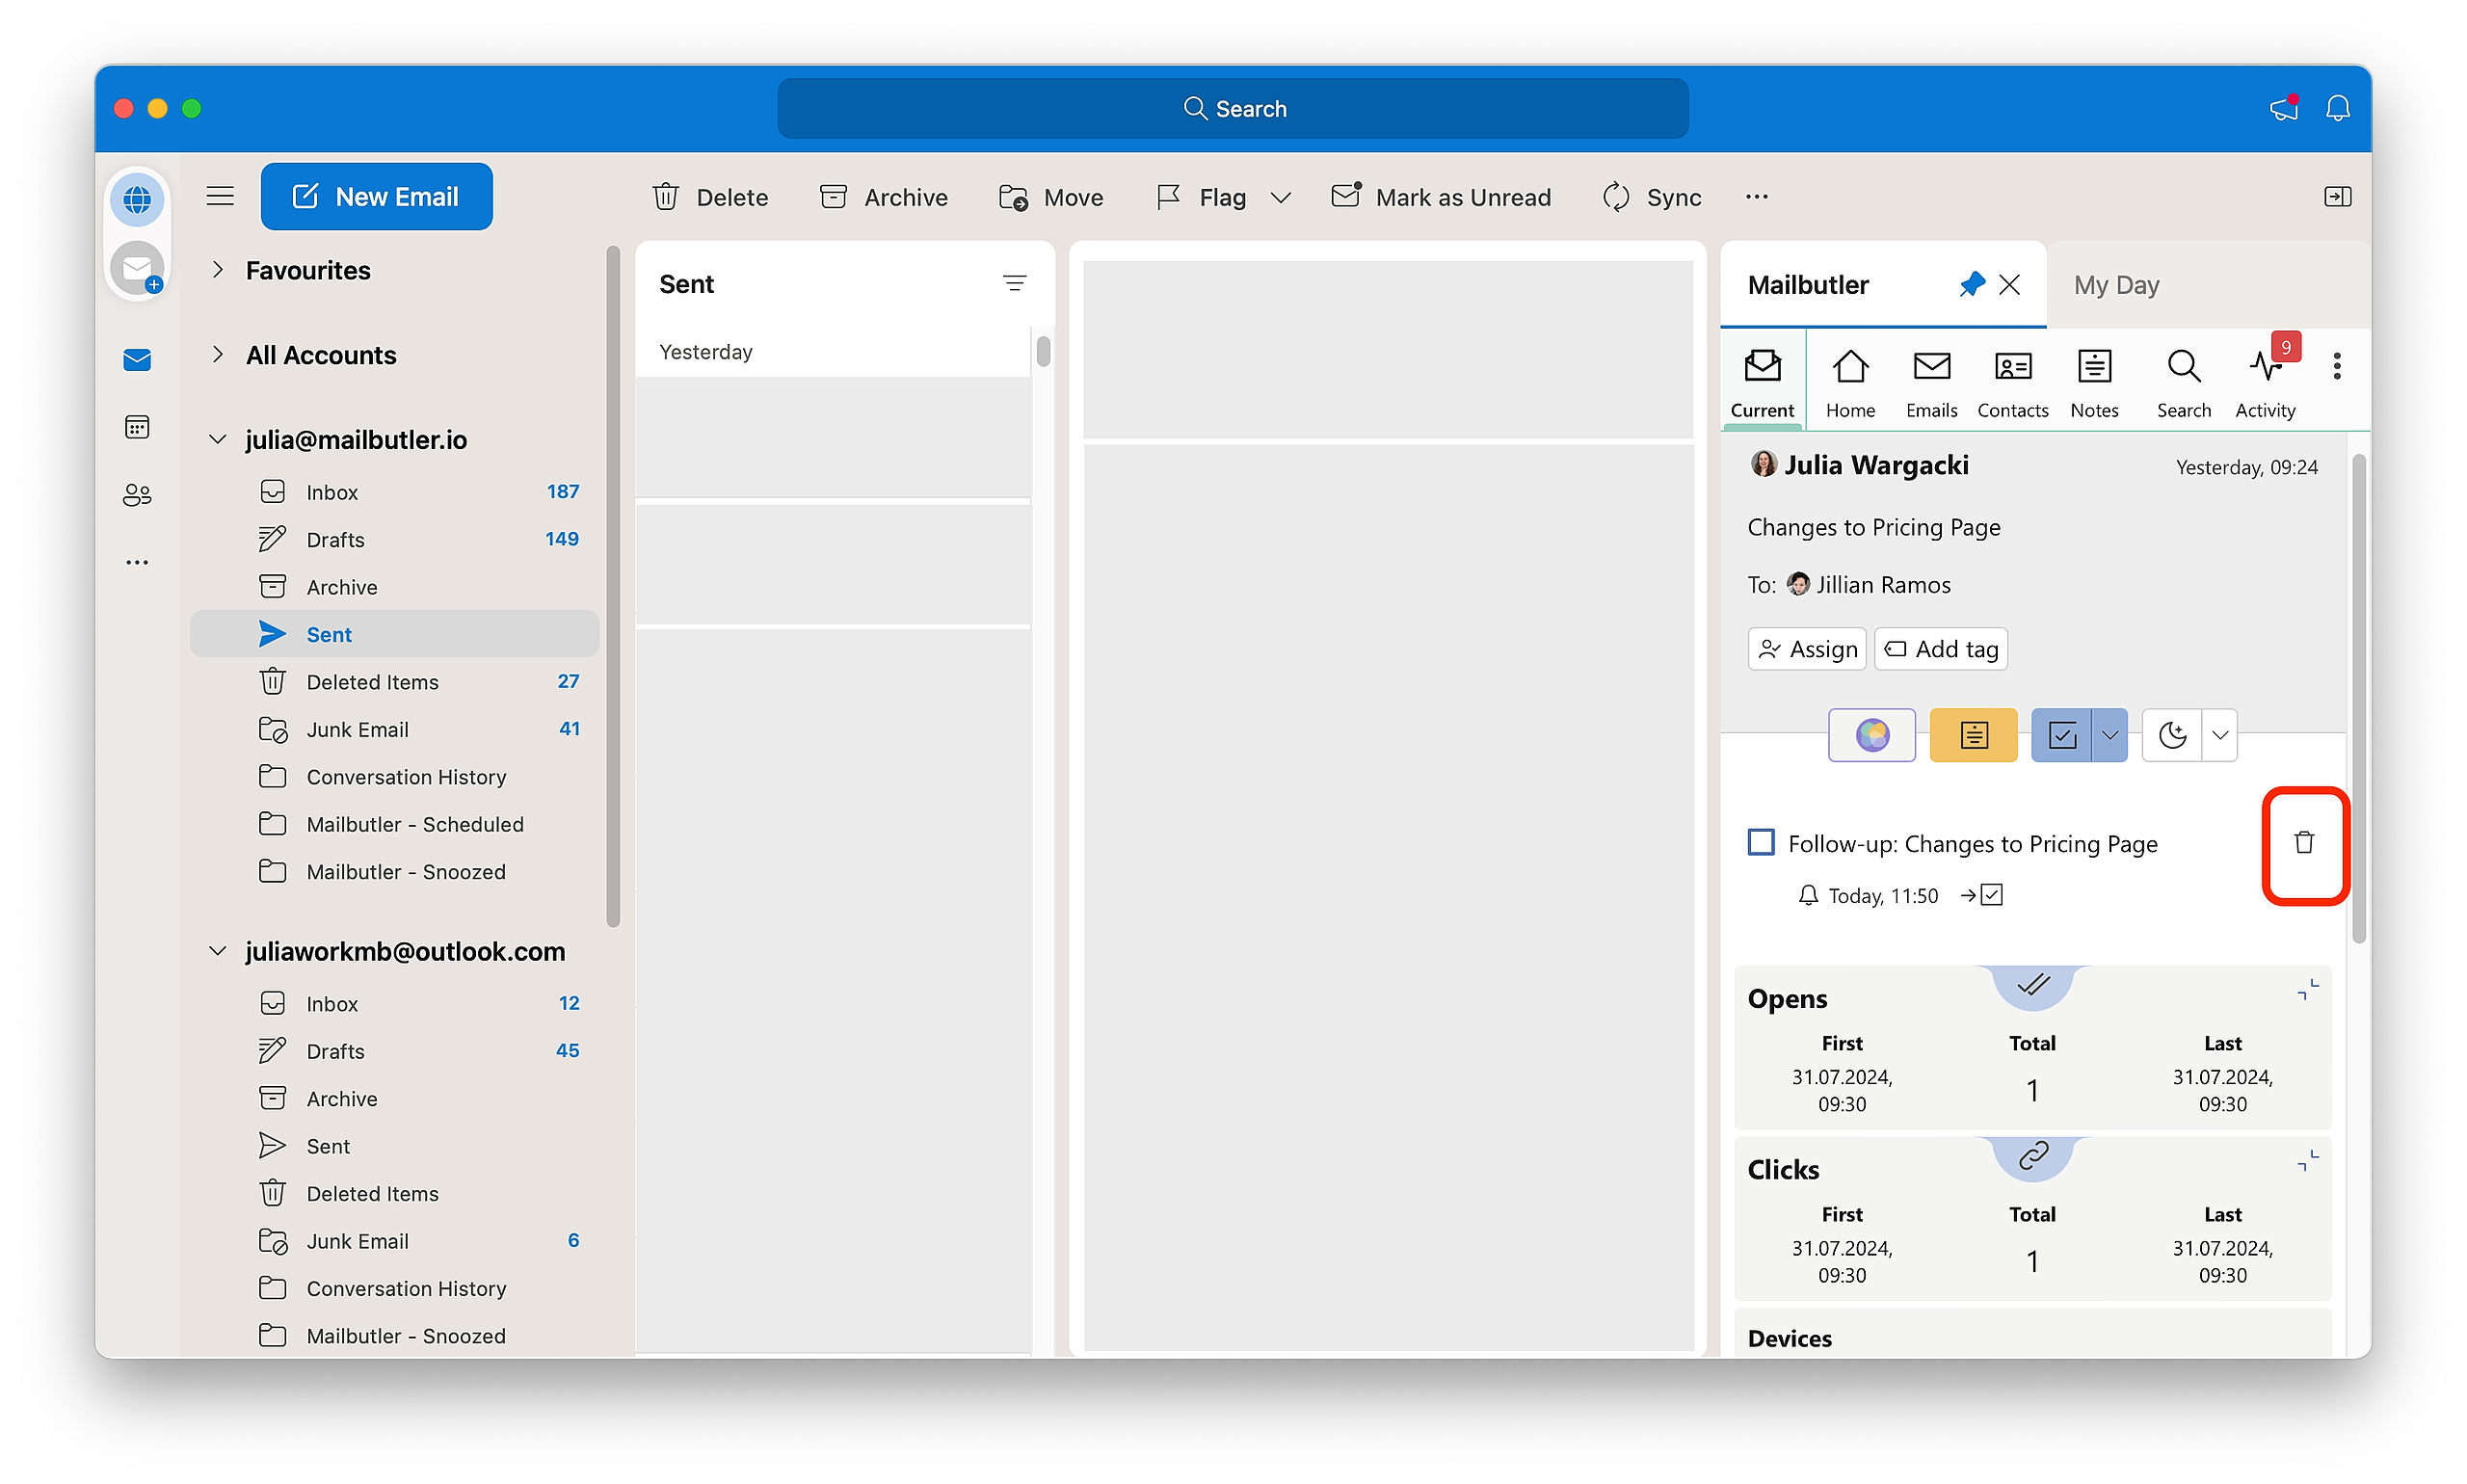
6. Your Task is now set.
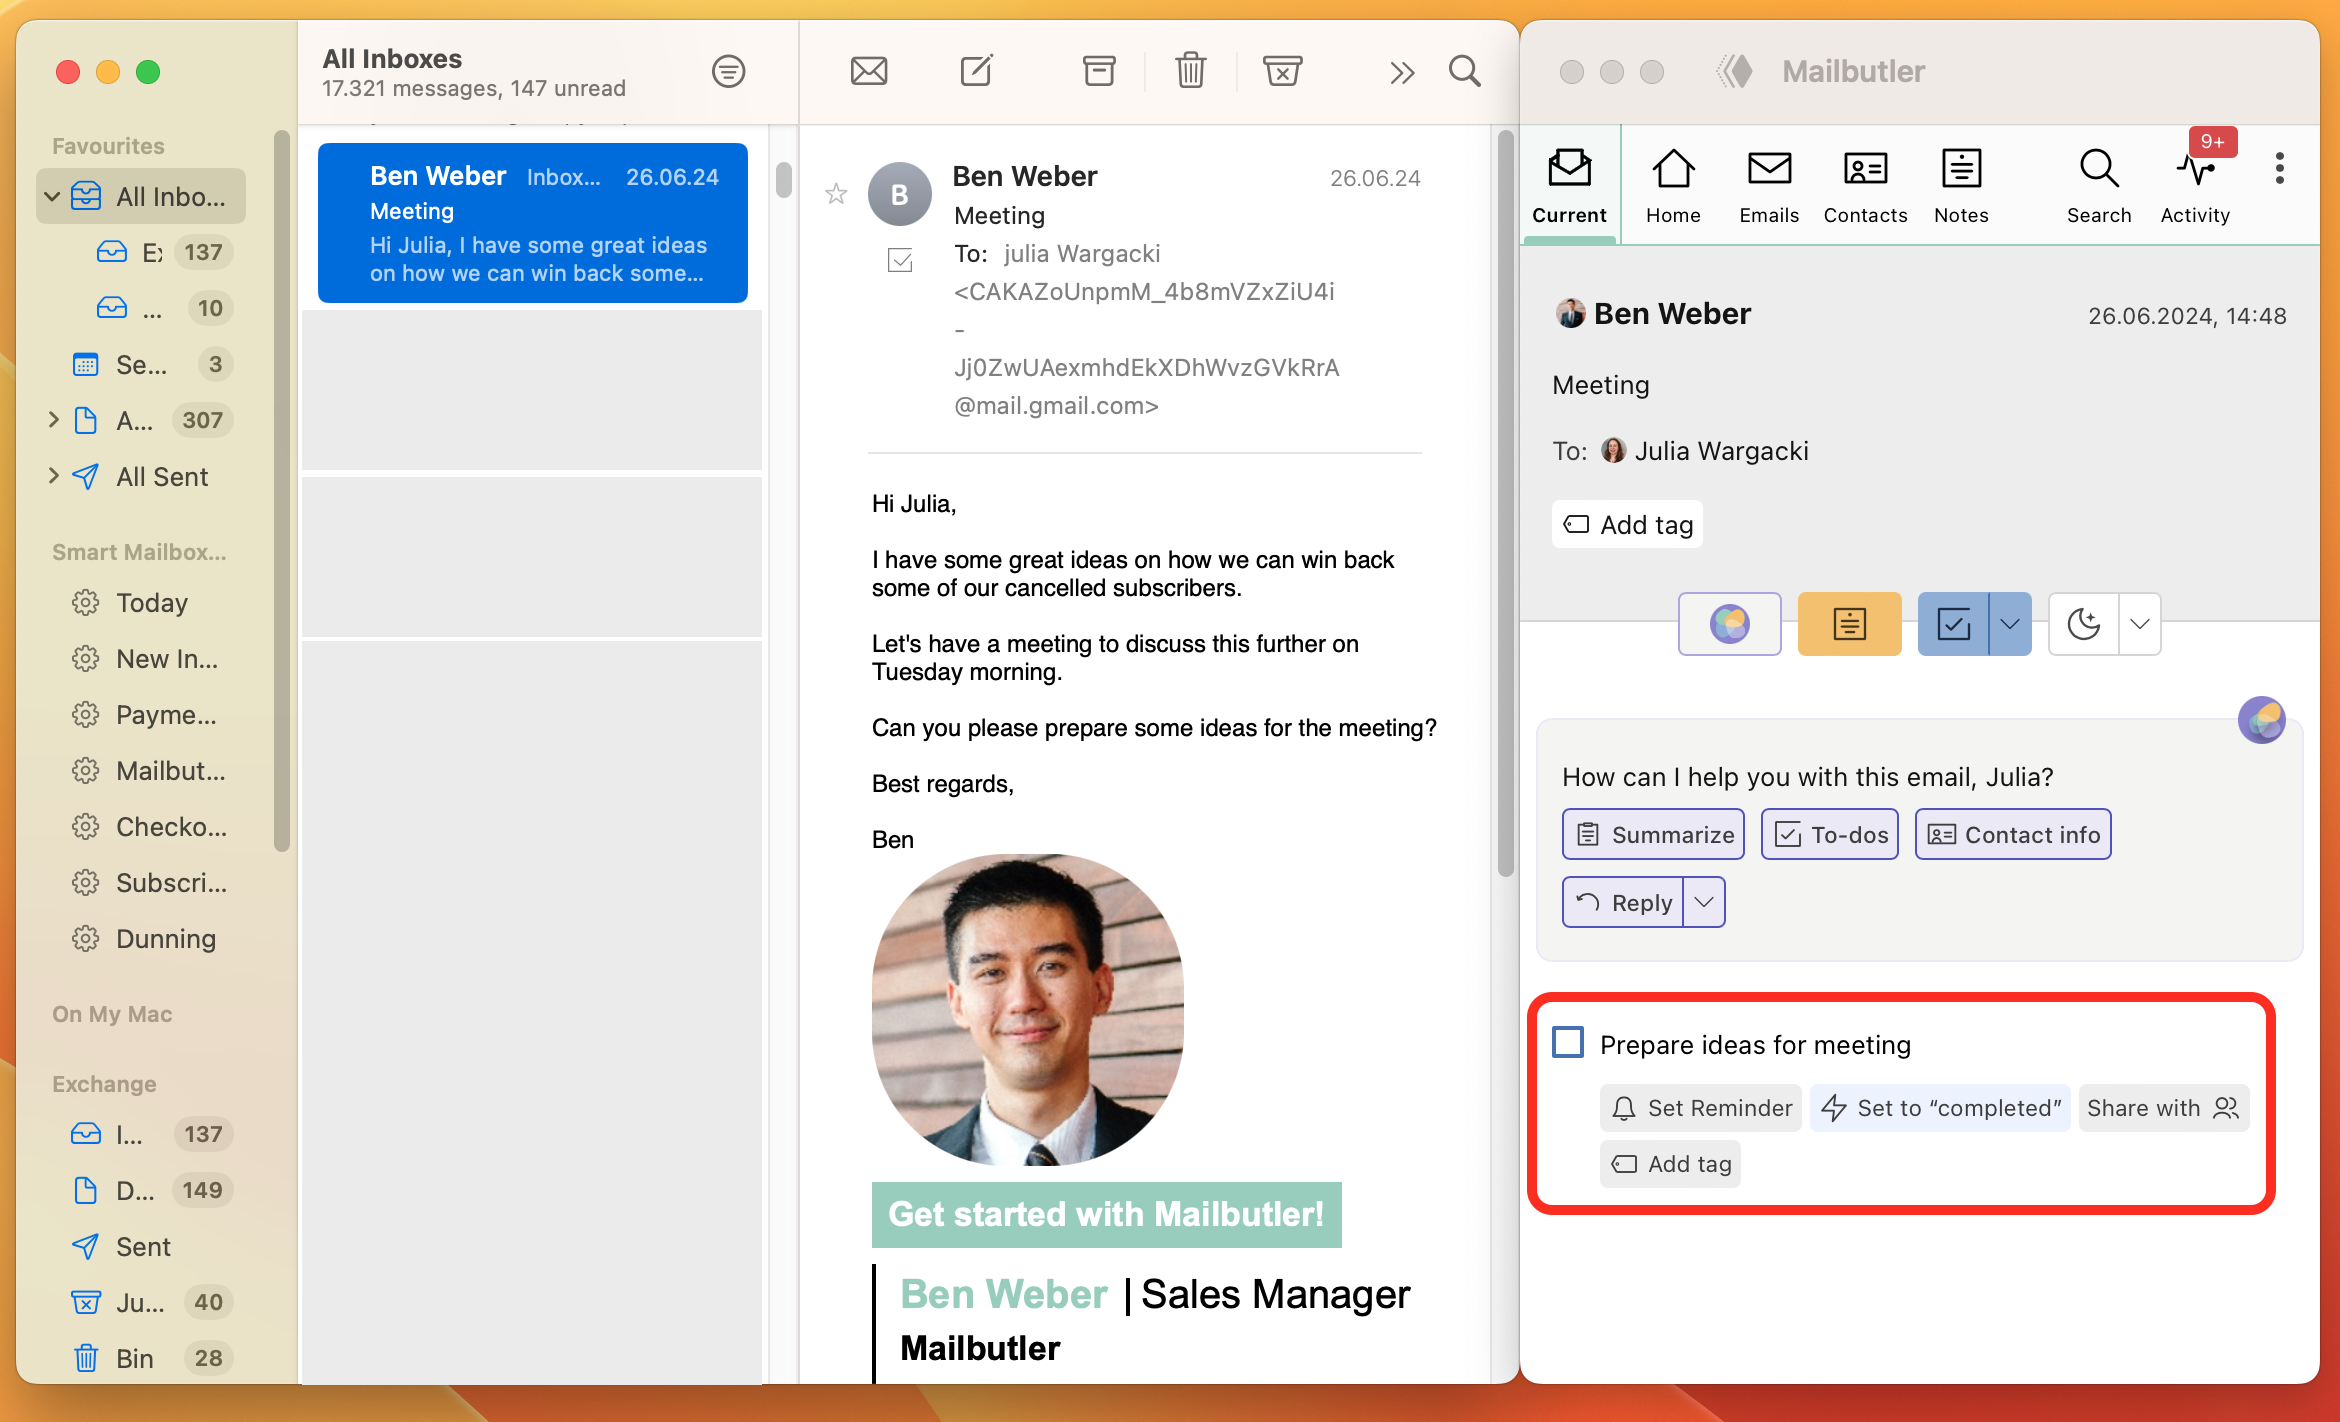
7. OR you can also add Tasks to emails by opening the Mailbutler Sidebar manually. You can do this for emails in your inbox, sent folder and when composing a new email.
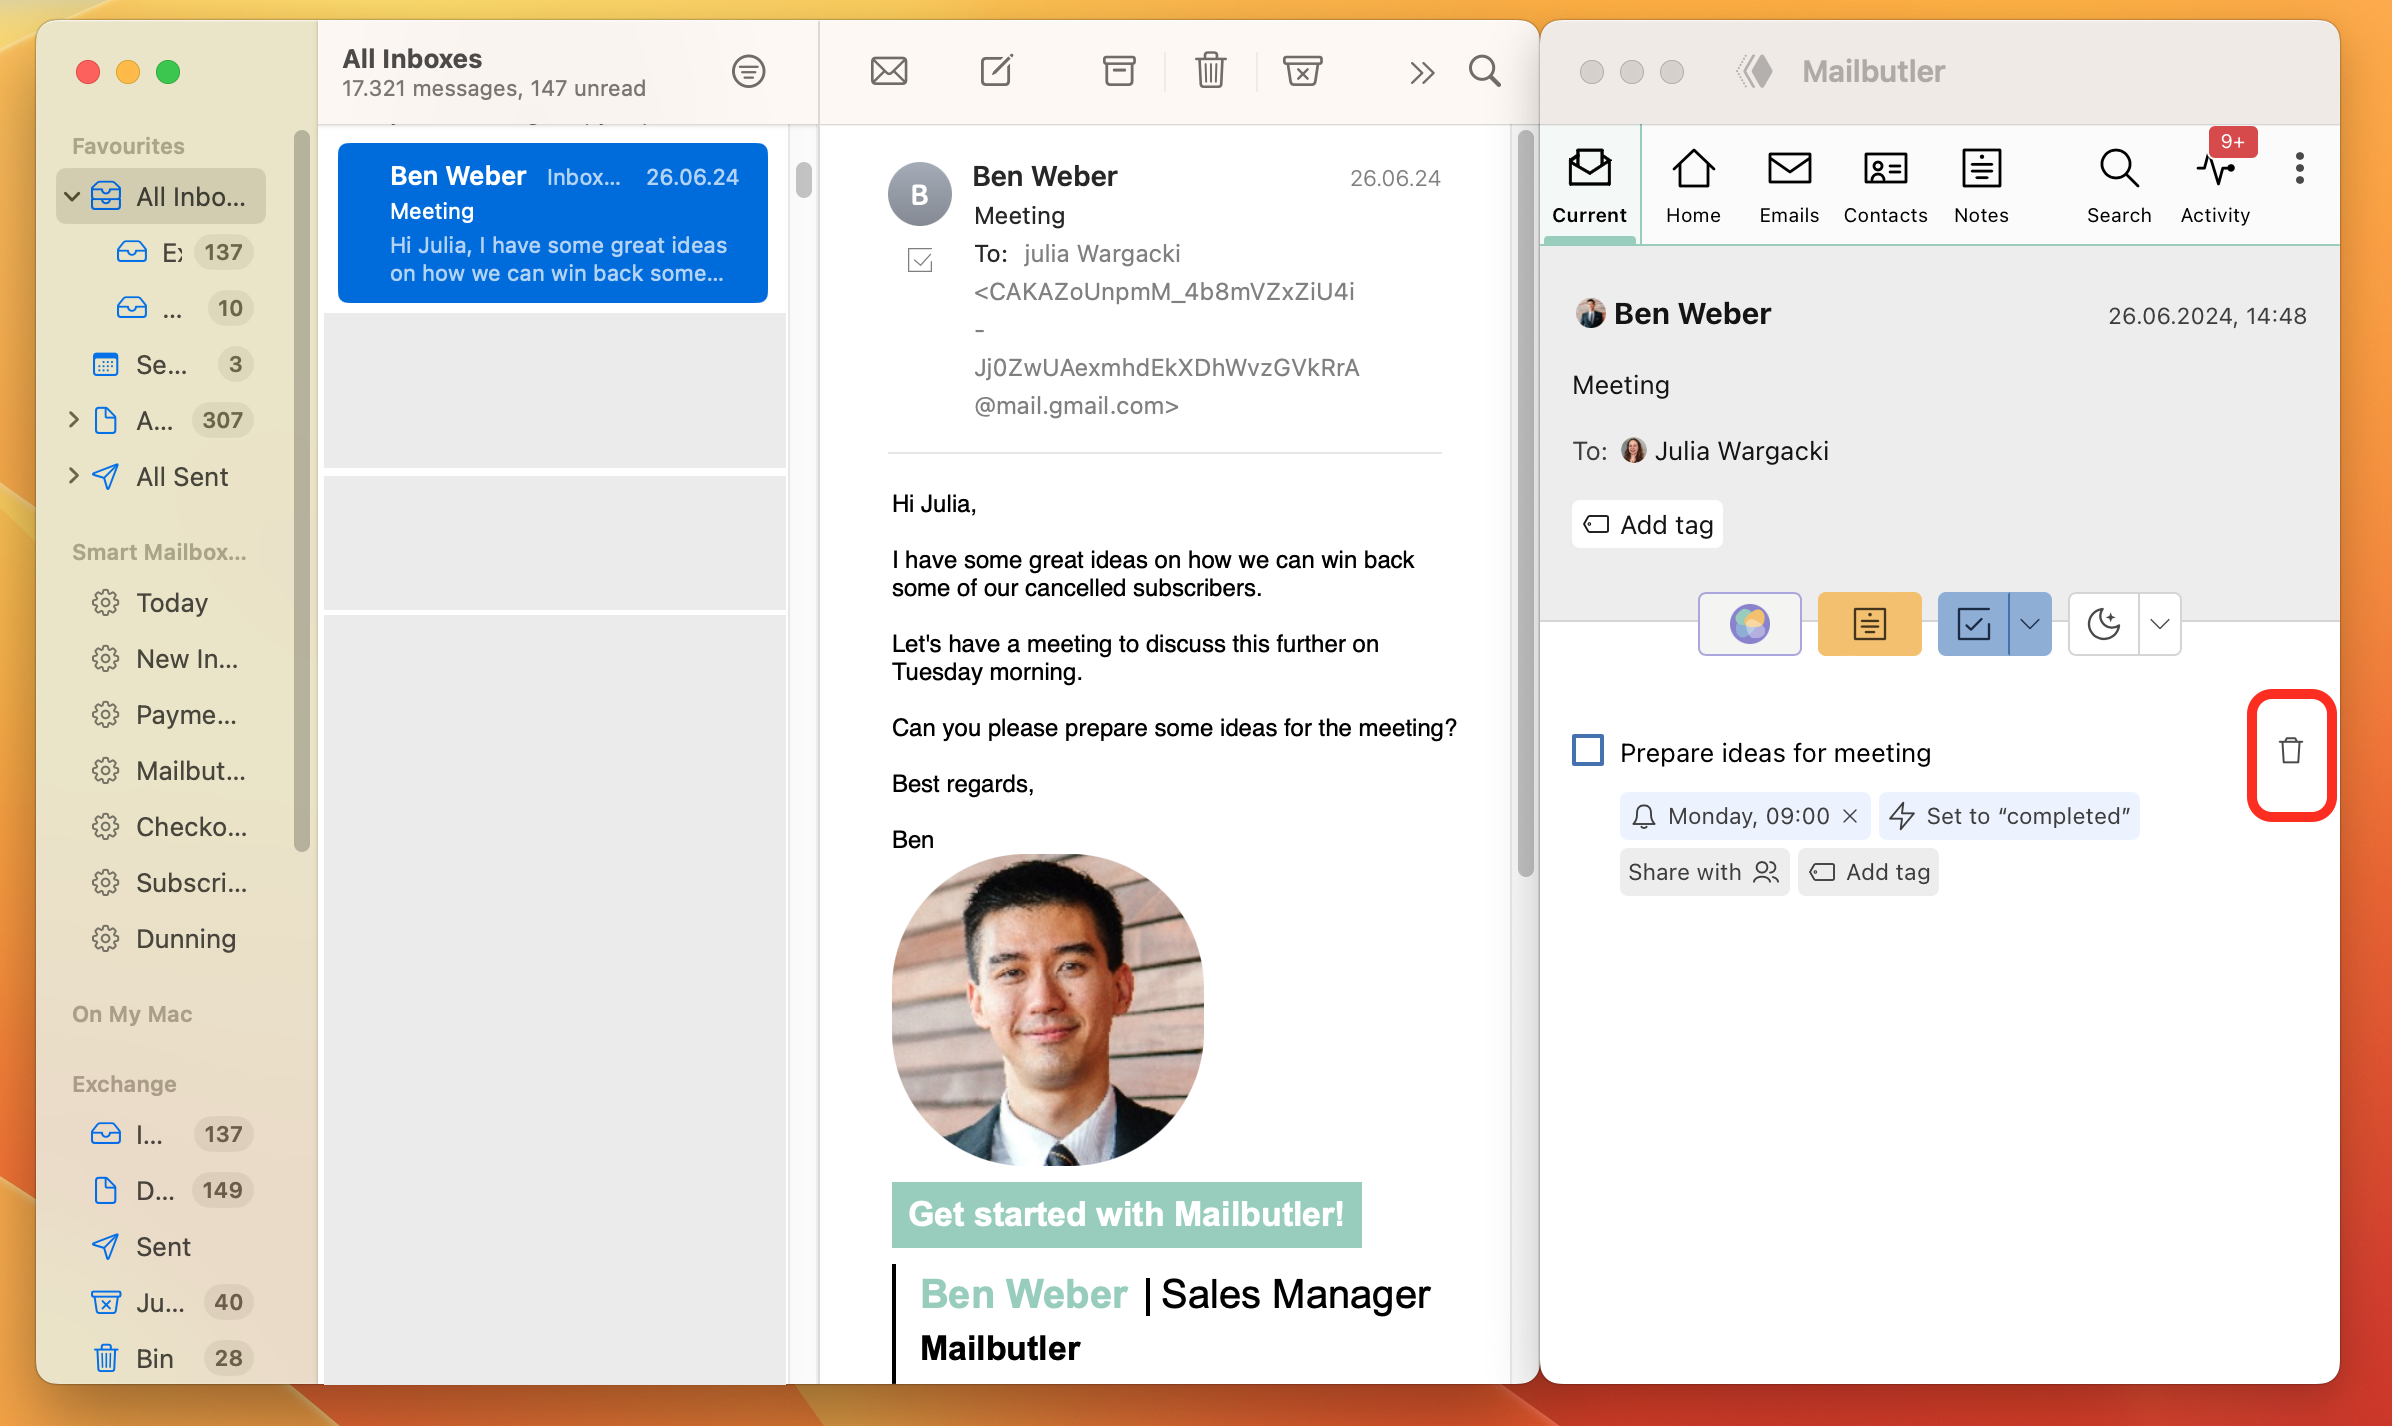
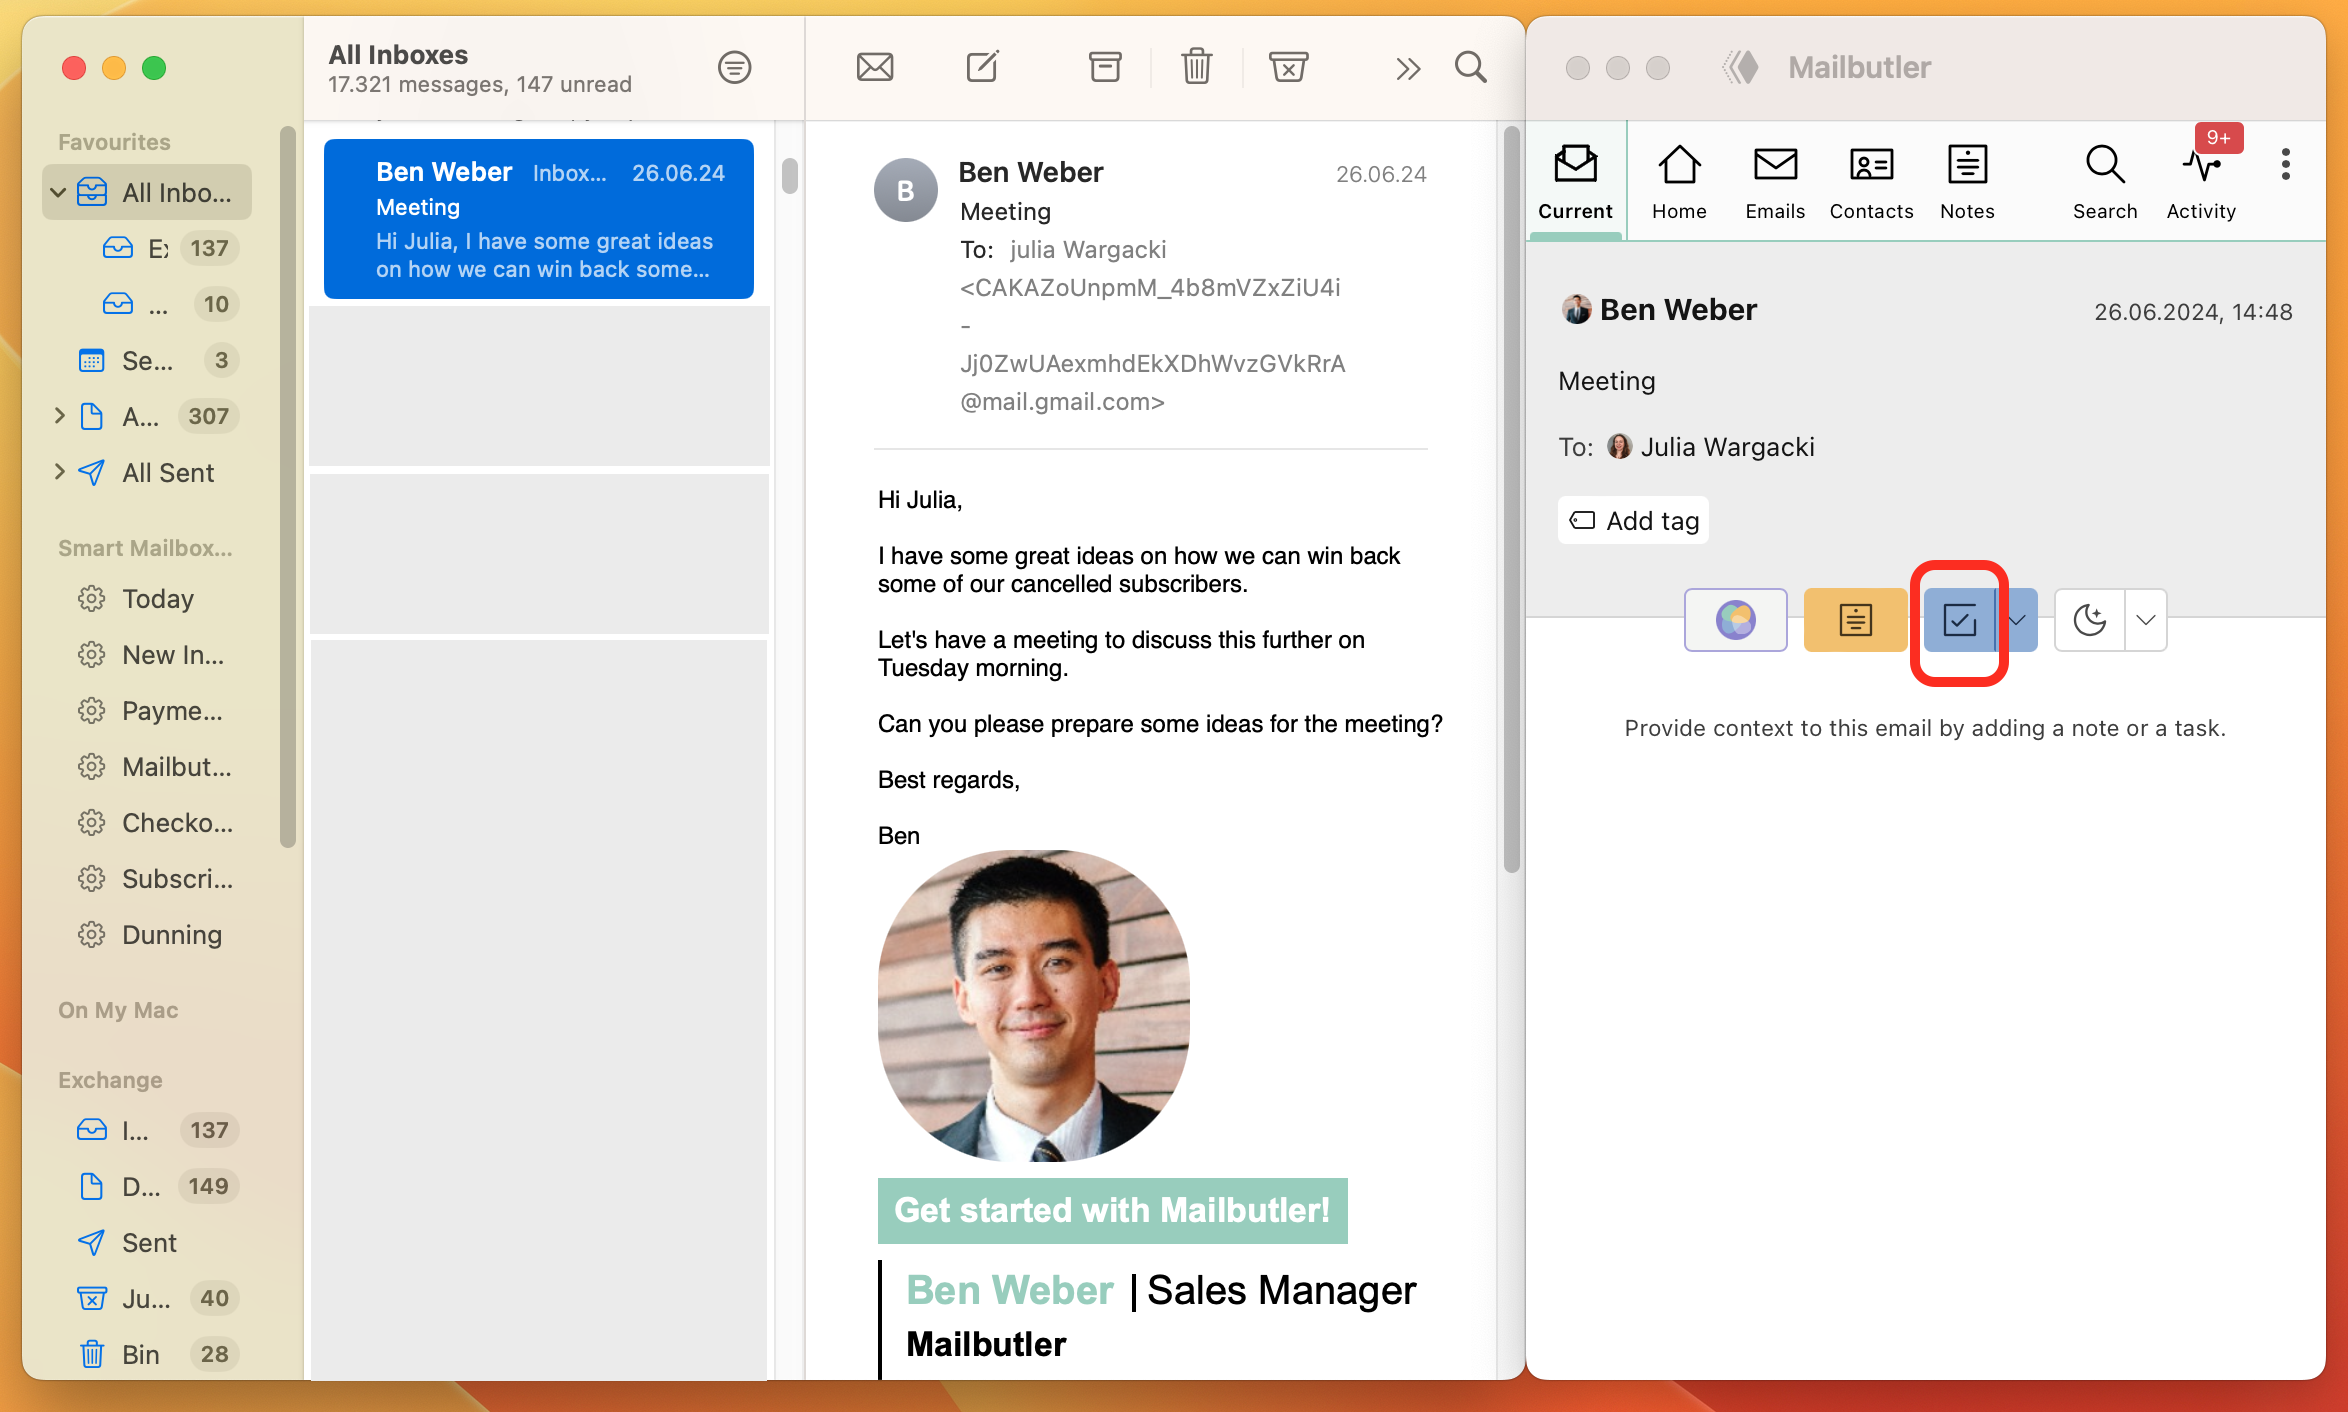
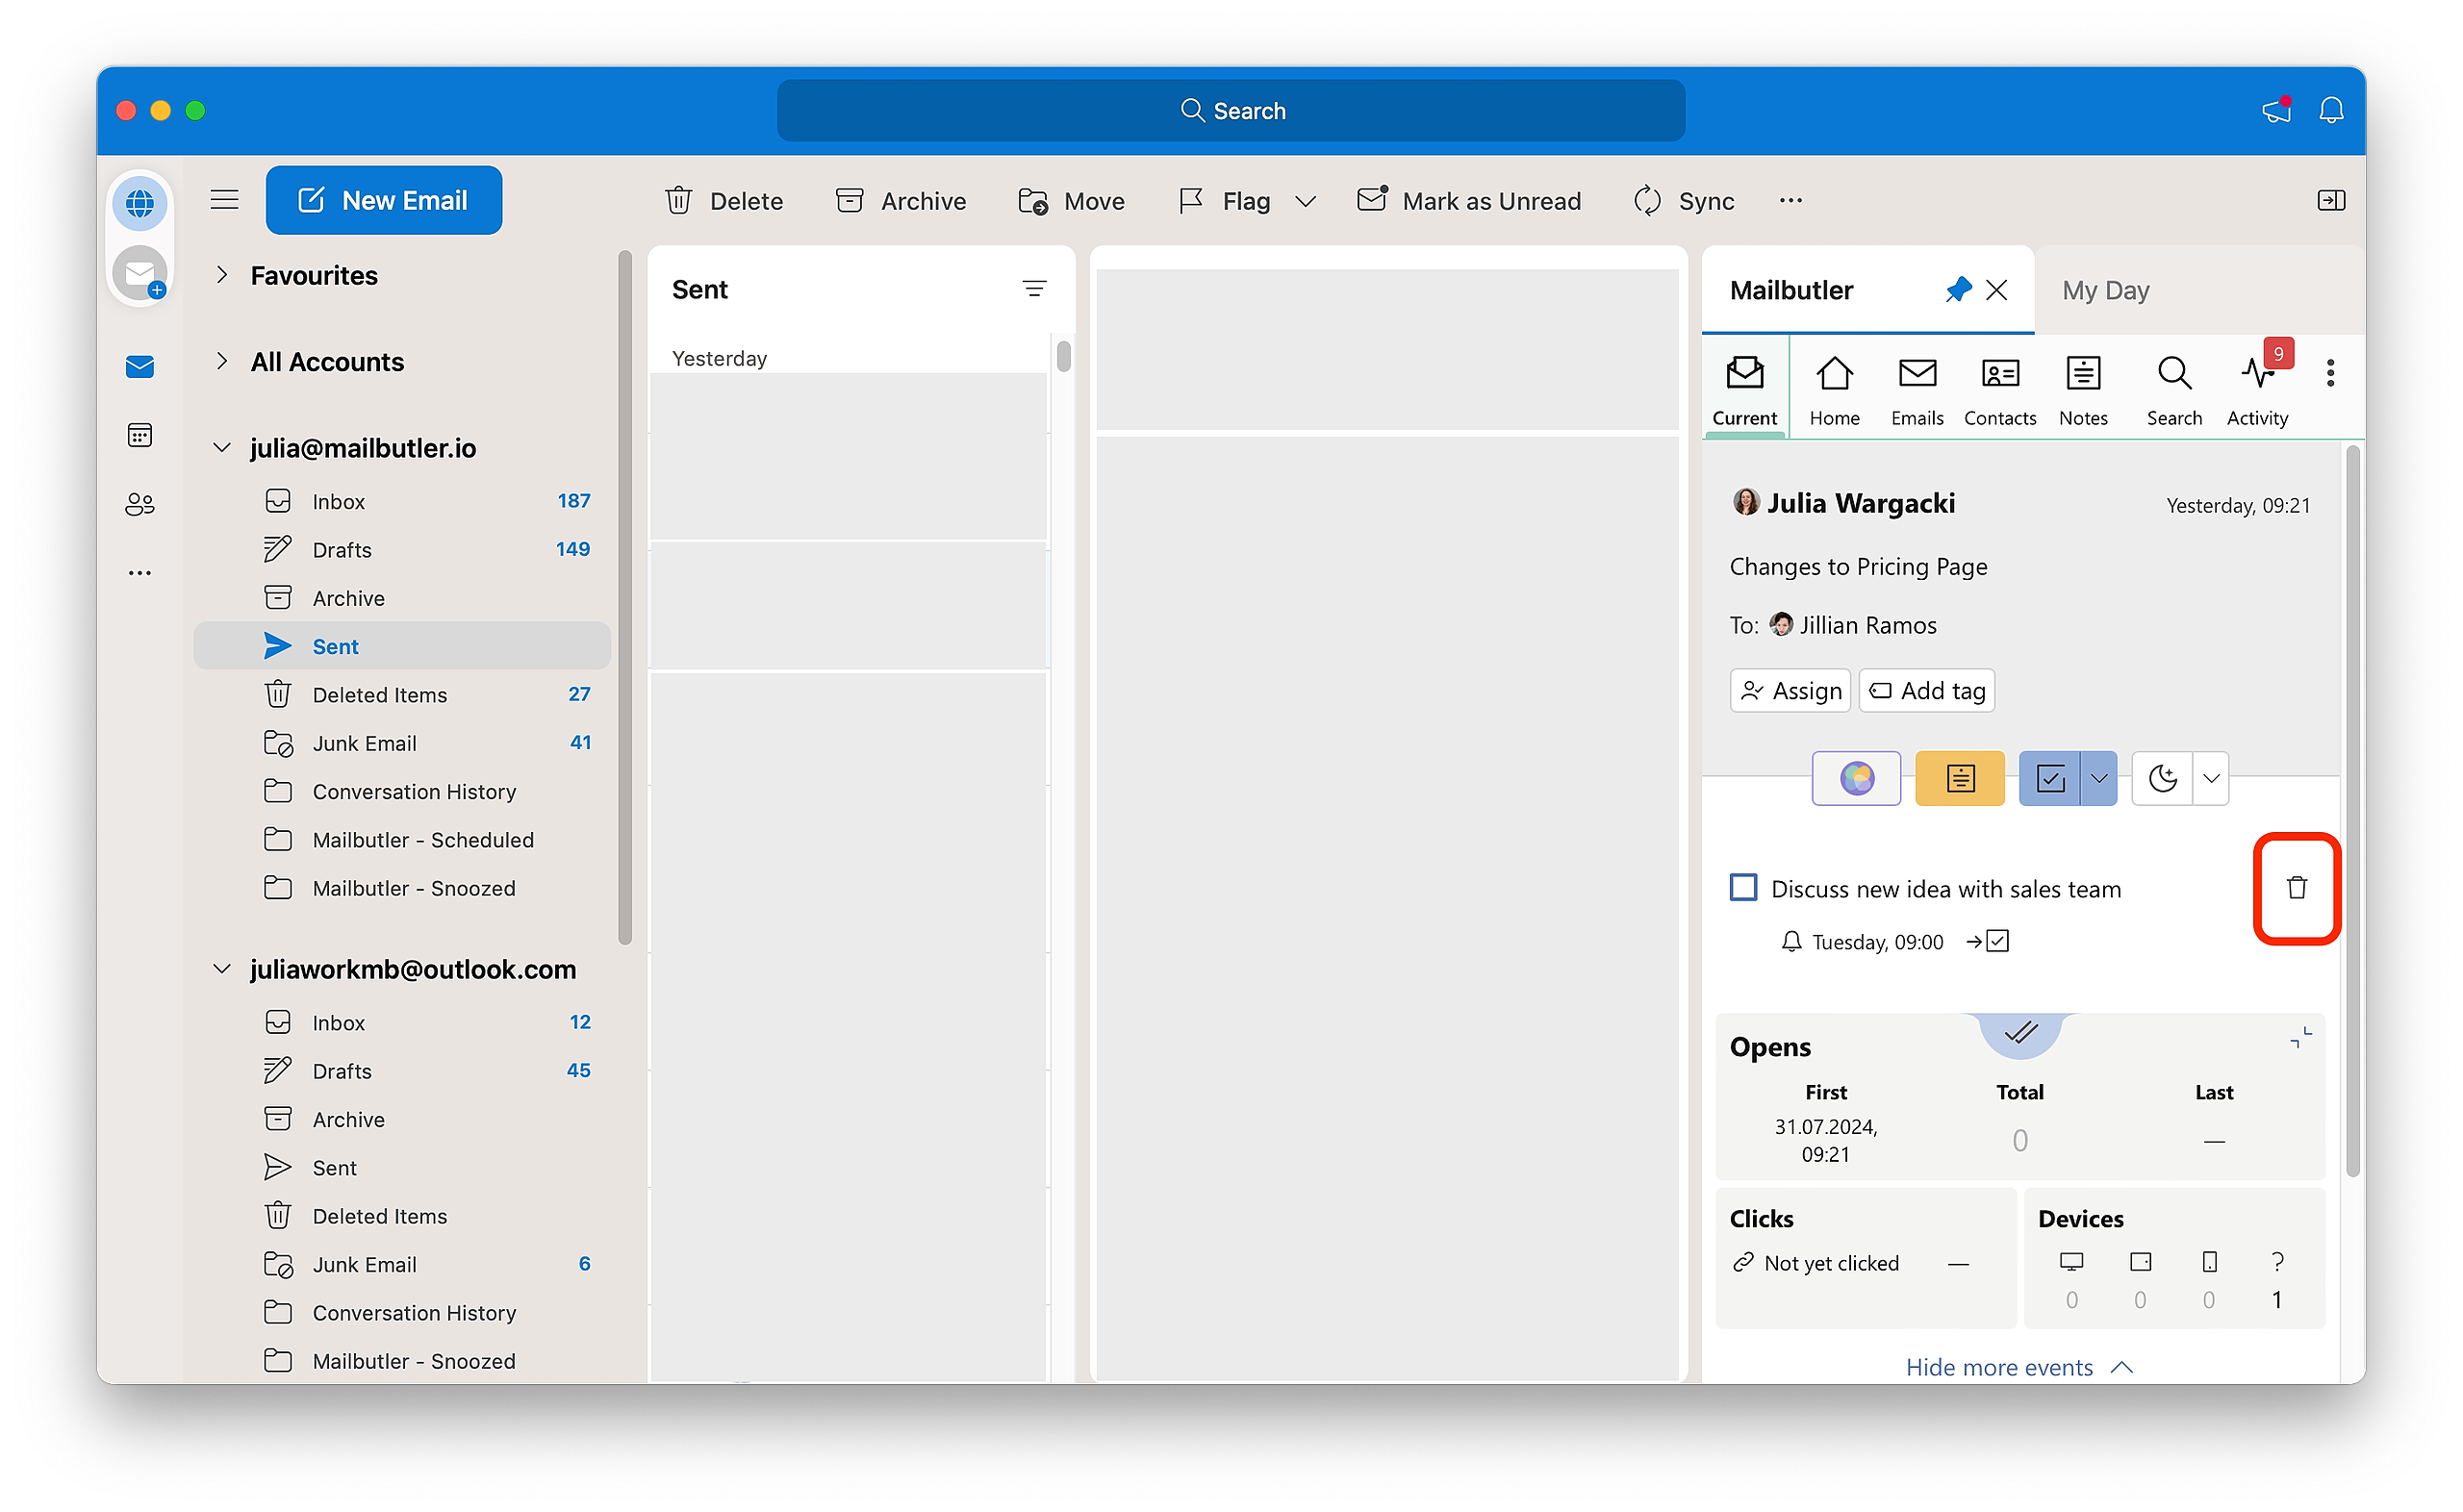
8. Open the Mailbutler Sidebar by clicking on the Mailbutler icon.9. Click on the Task button in the Mailbutler Sidebar.10. Write your Task. It will be saved automatically.11. To delete your Task, hover over it to display the bin icon and click it.
Gmail
1. Go to an existing email.
2. Click on the Mailbutler icon to open the Mailbutler Sidebar.

3. Click on the Task button in the Mailbutler Sidebar.
4. Write your Task. It will be saved automatically.

5. To receive a notification on your desktop when your Task is due, click Set Reminder to add a reminder to your Task.
6. You can set default automations for your Tasks under Automations in your Mailbutler Preferences. If you want to set an automation for your Task, different from the default one, click on the automations button (flash icon) and choose what you would like to happen to your Task when your recipient has replied to you.
7. Your task is now set.

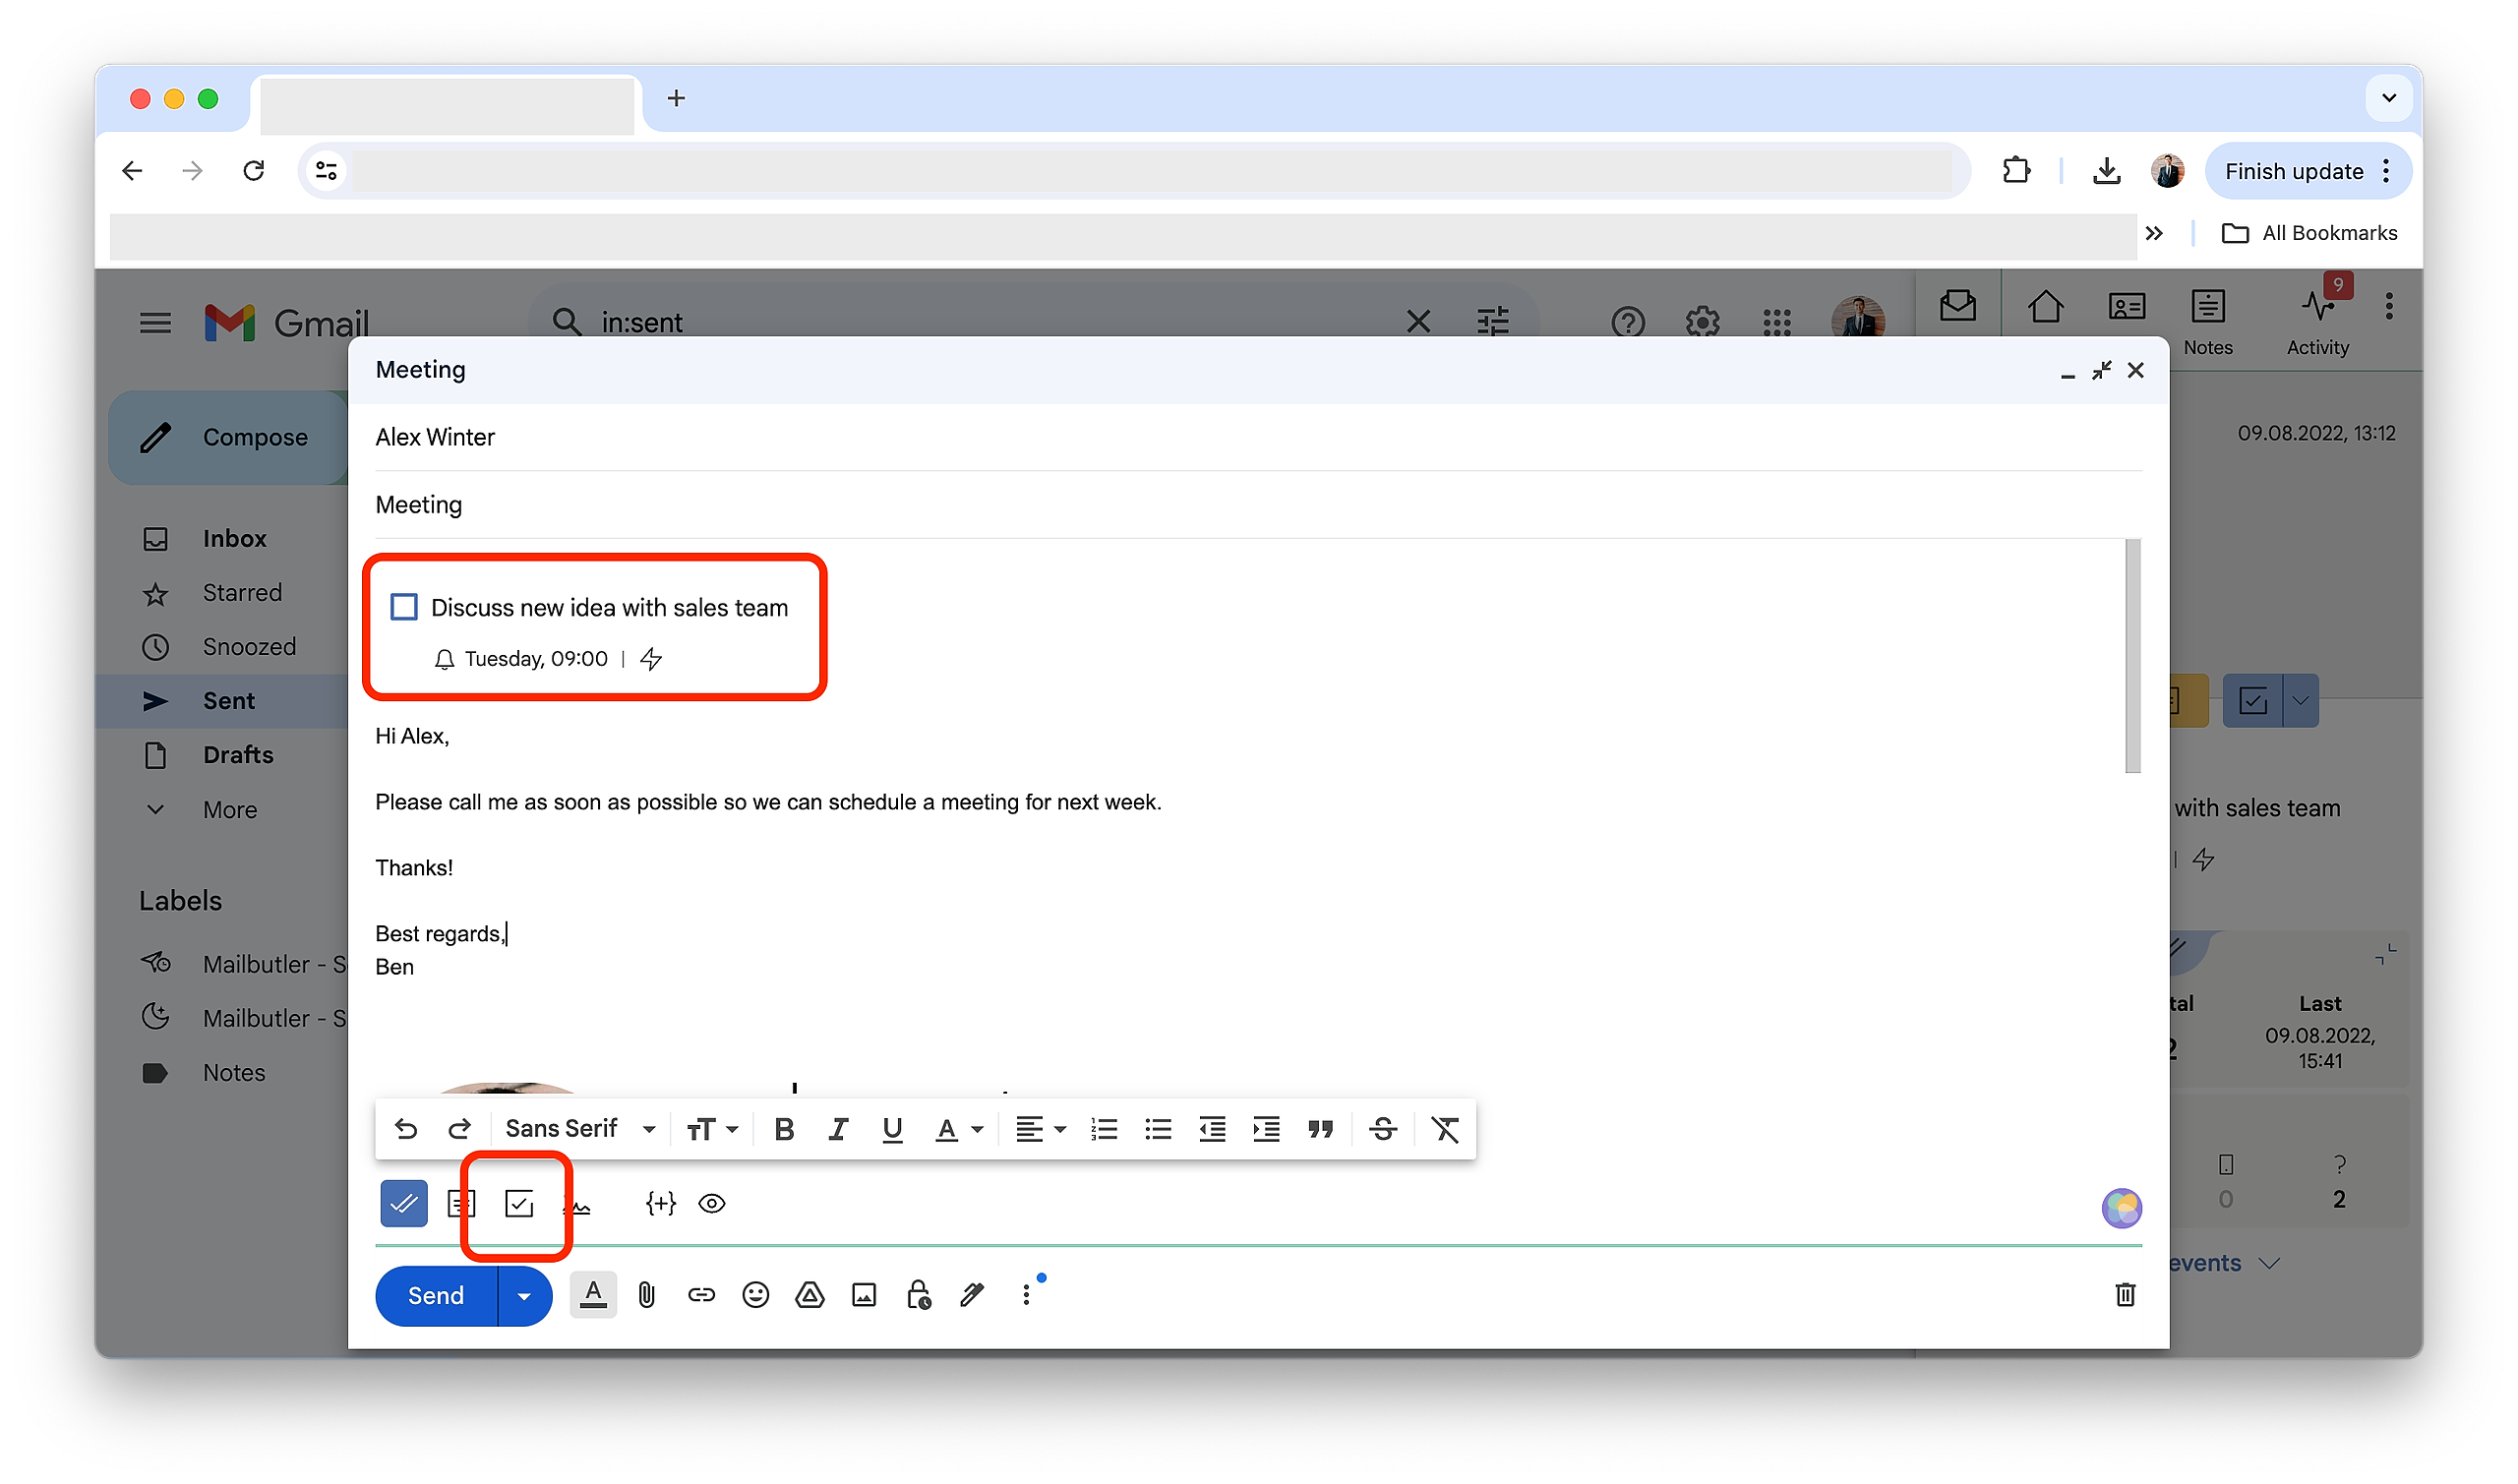
8. To add a Task when composing a new email, click on the Task icon at the bottom of the compose view. Then, write your Task. It will be saved automatically.
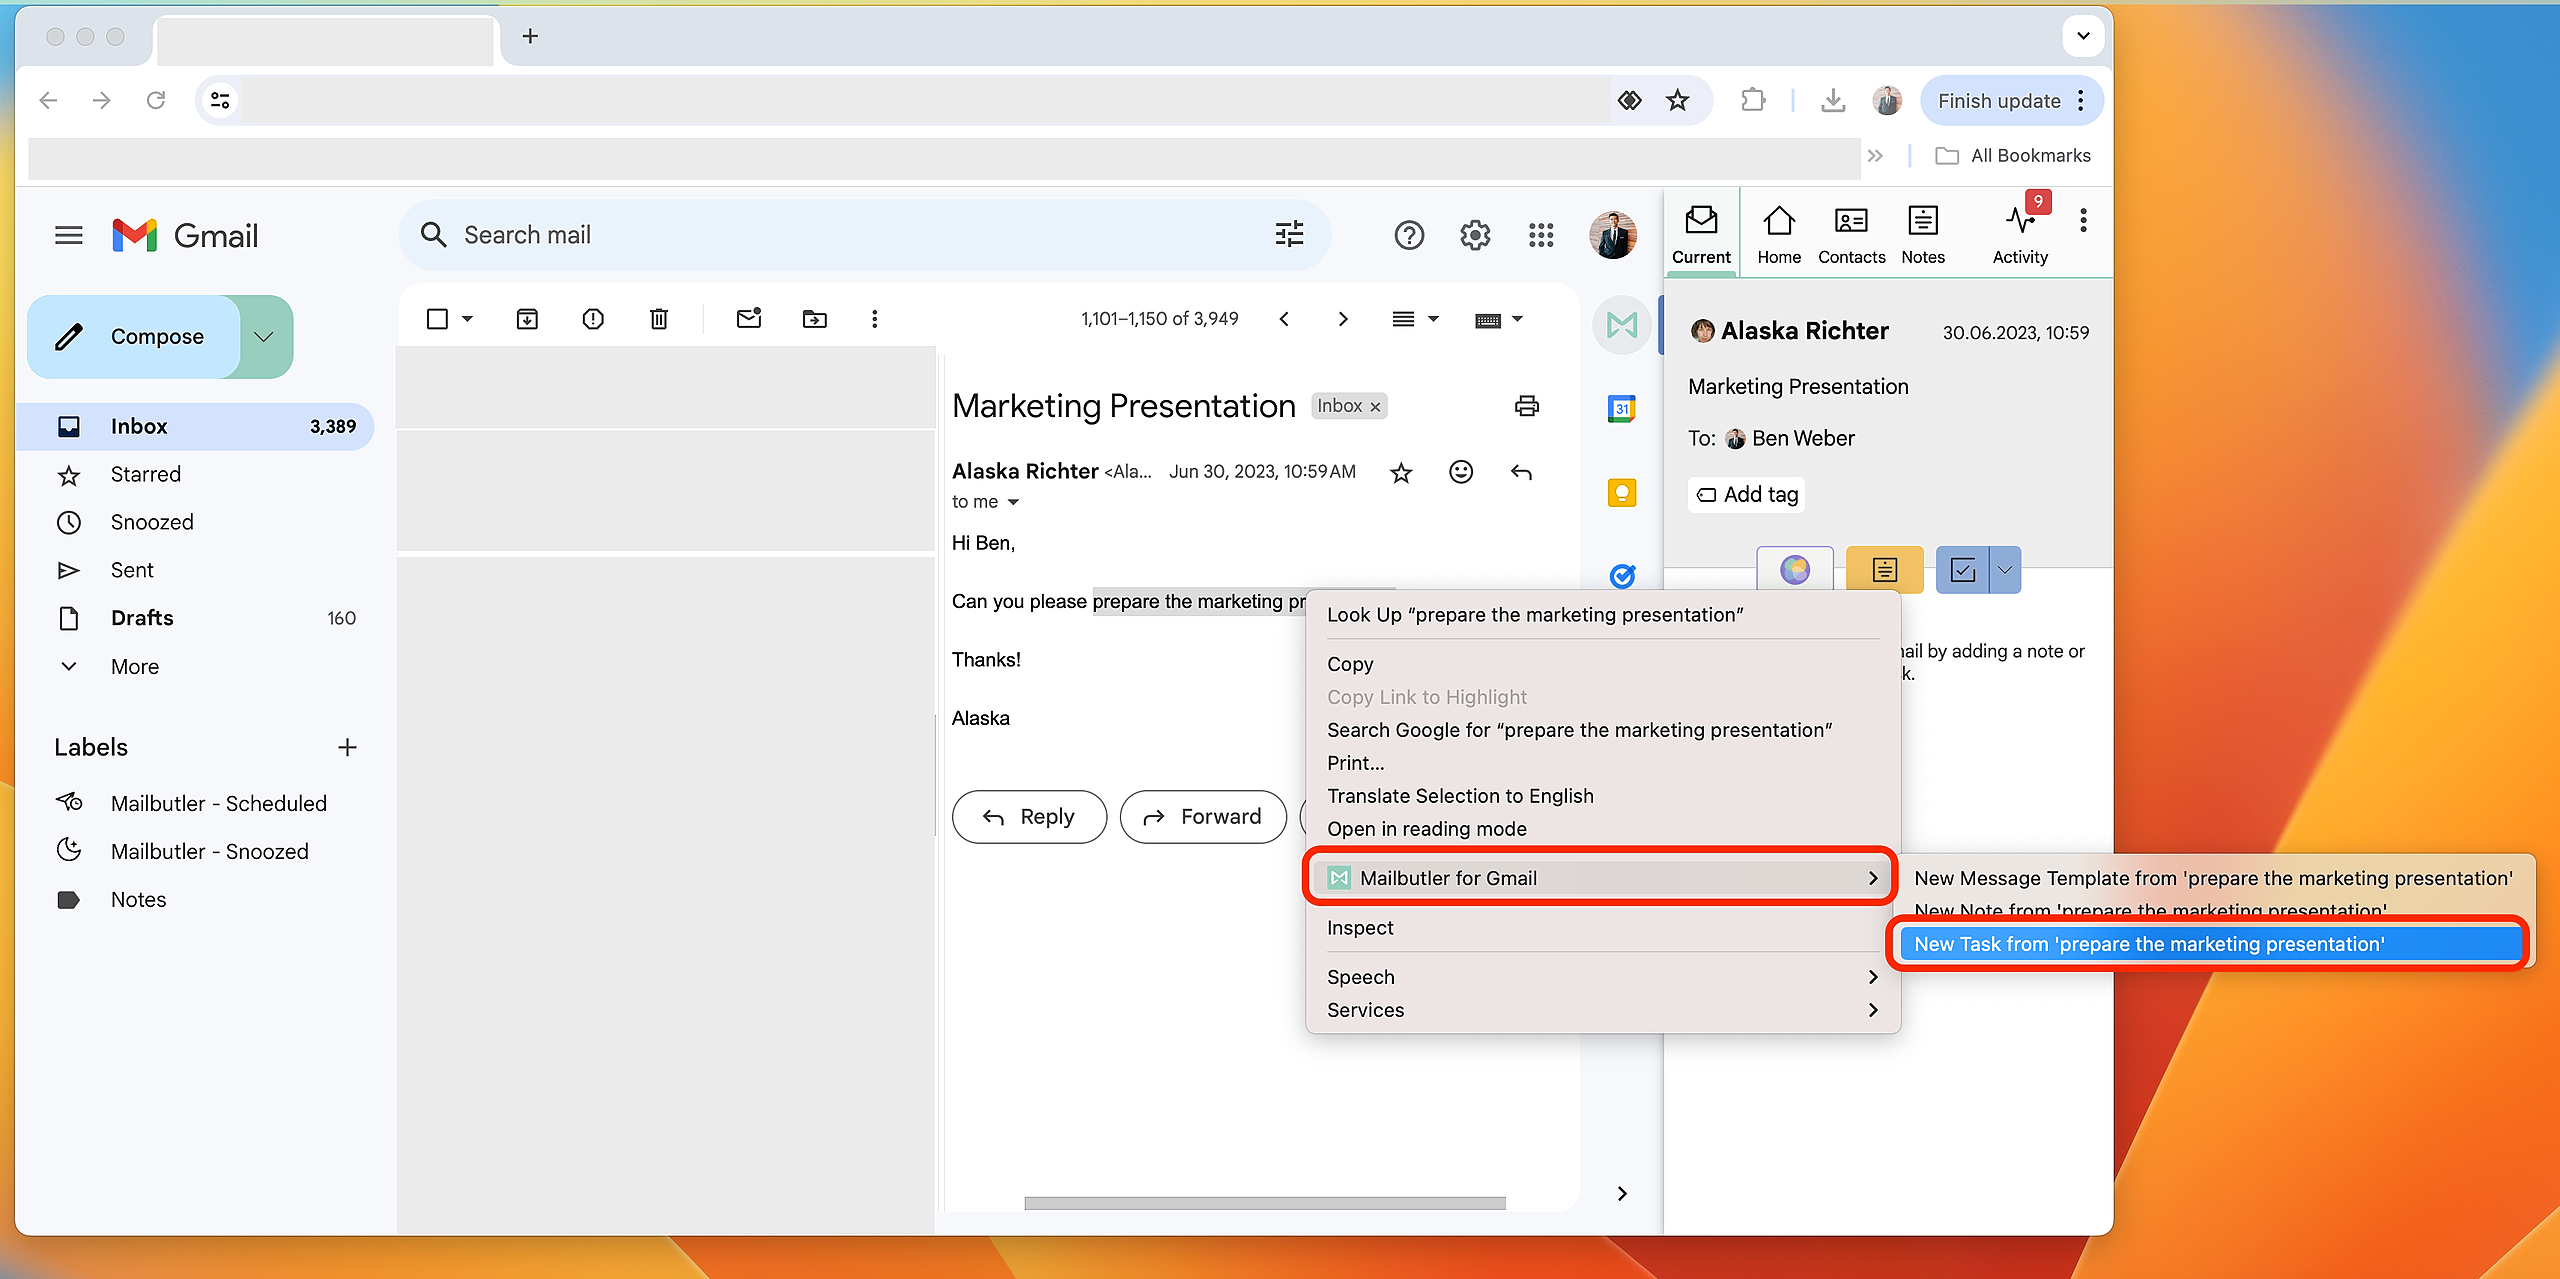
7. You can also create a Task from text in your email. To do that, highlight the text that you would like to save as a Task, right-click on the highlighted text, hover over Mailbutler for Gmail and then click New Task from...
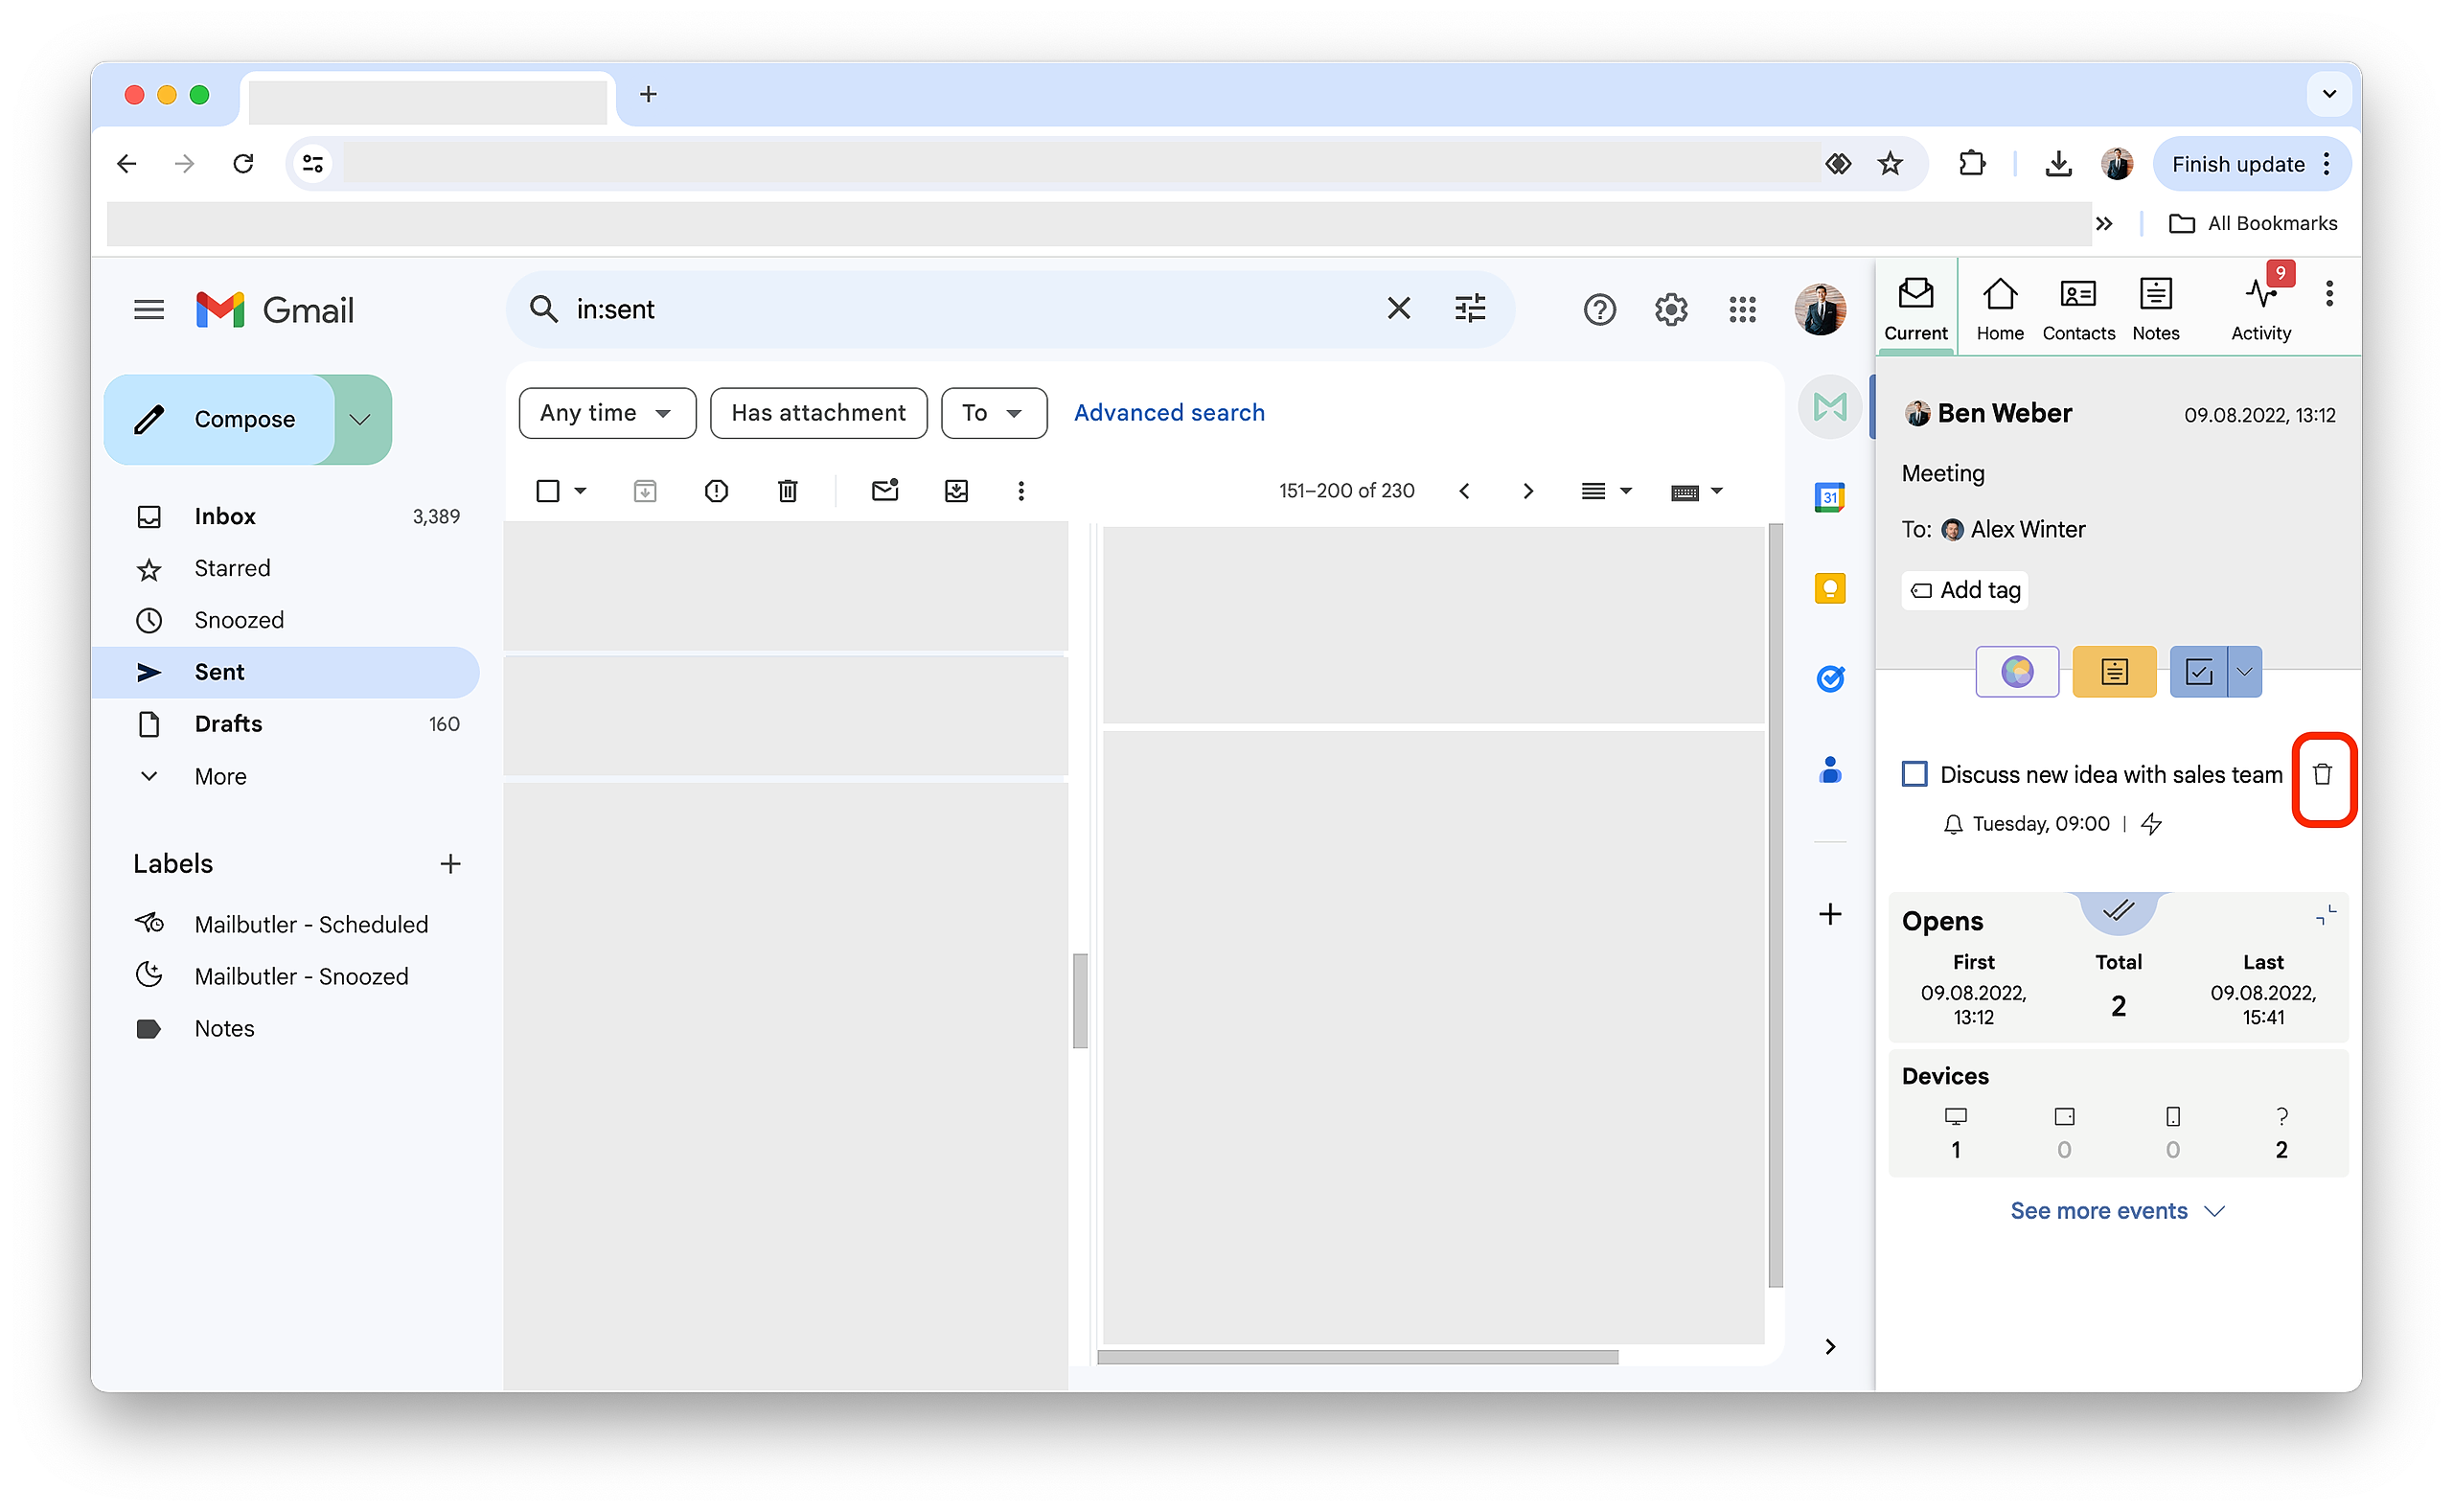
10. To delete a Task, hover over it to display the bin icon and click it.
Outlook
1. Go to an existing email, or start composing a new one.
2. Open the Mailbutler Sidebar.
3. Click on the Task button in the Mailbutler Sidebar.
4. Write your Task. It will be saved automatically.
5. To receive a notification on your desktop when your Task is due, click Set Reminder to add a reminder to your Task.

6. You can set default automations for your Tasks under Automations in your Mailbutler Preferences. If you want to set an automation for your Task, different from the default one, click on the automations button (flash icon) and choose what you would like to happen to your Task when your recipient has replied to you.
7. Your task is now set.
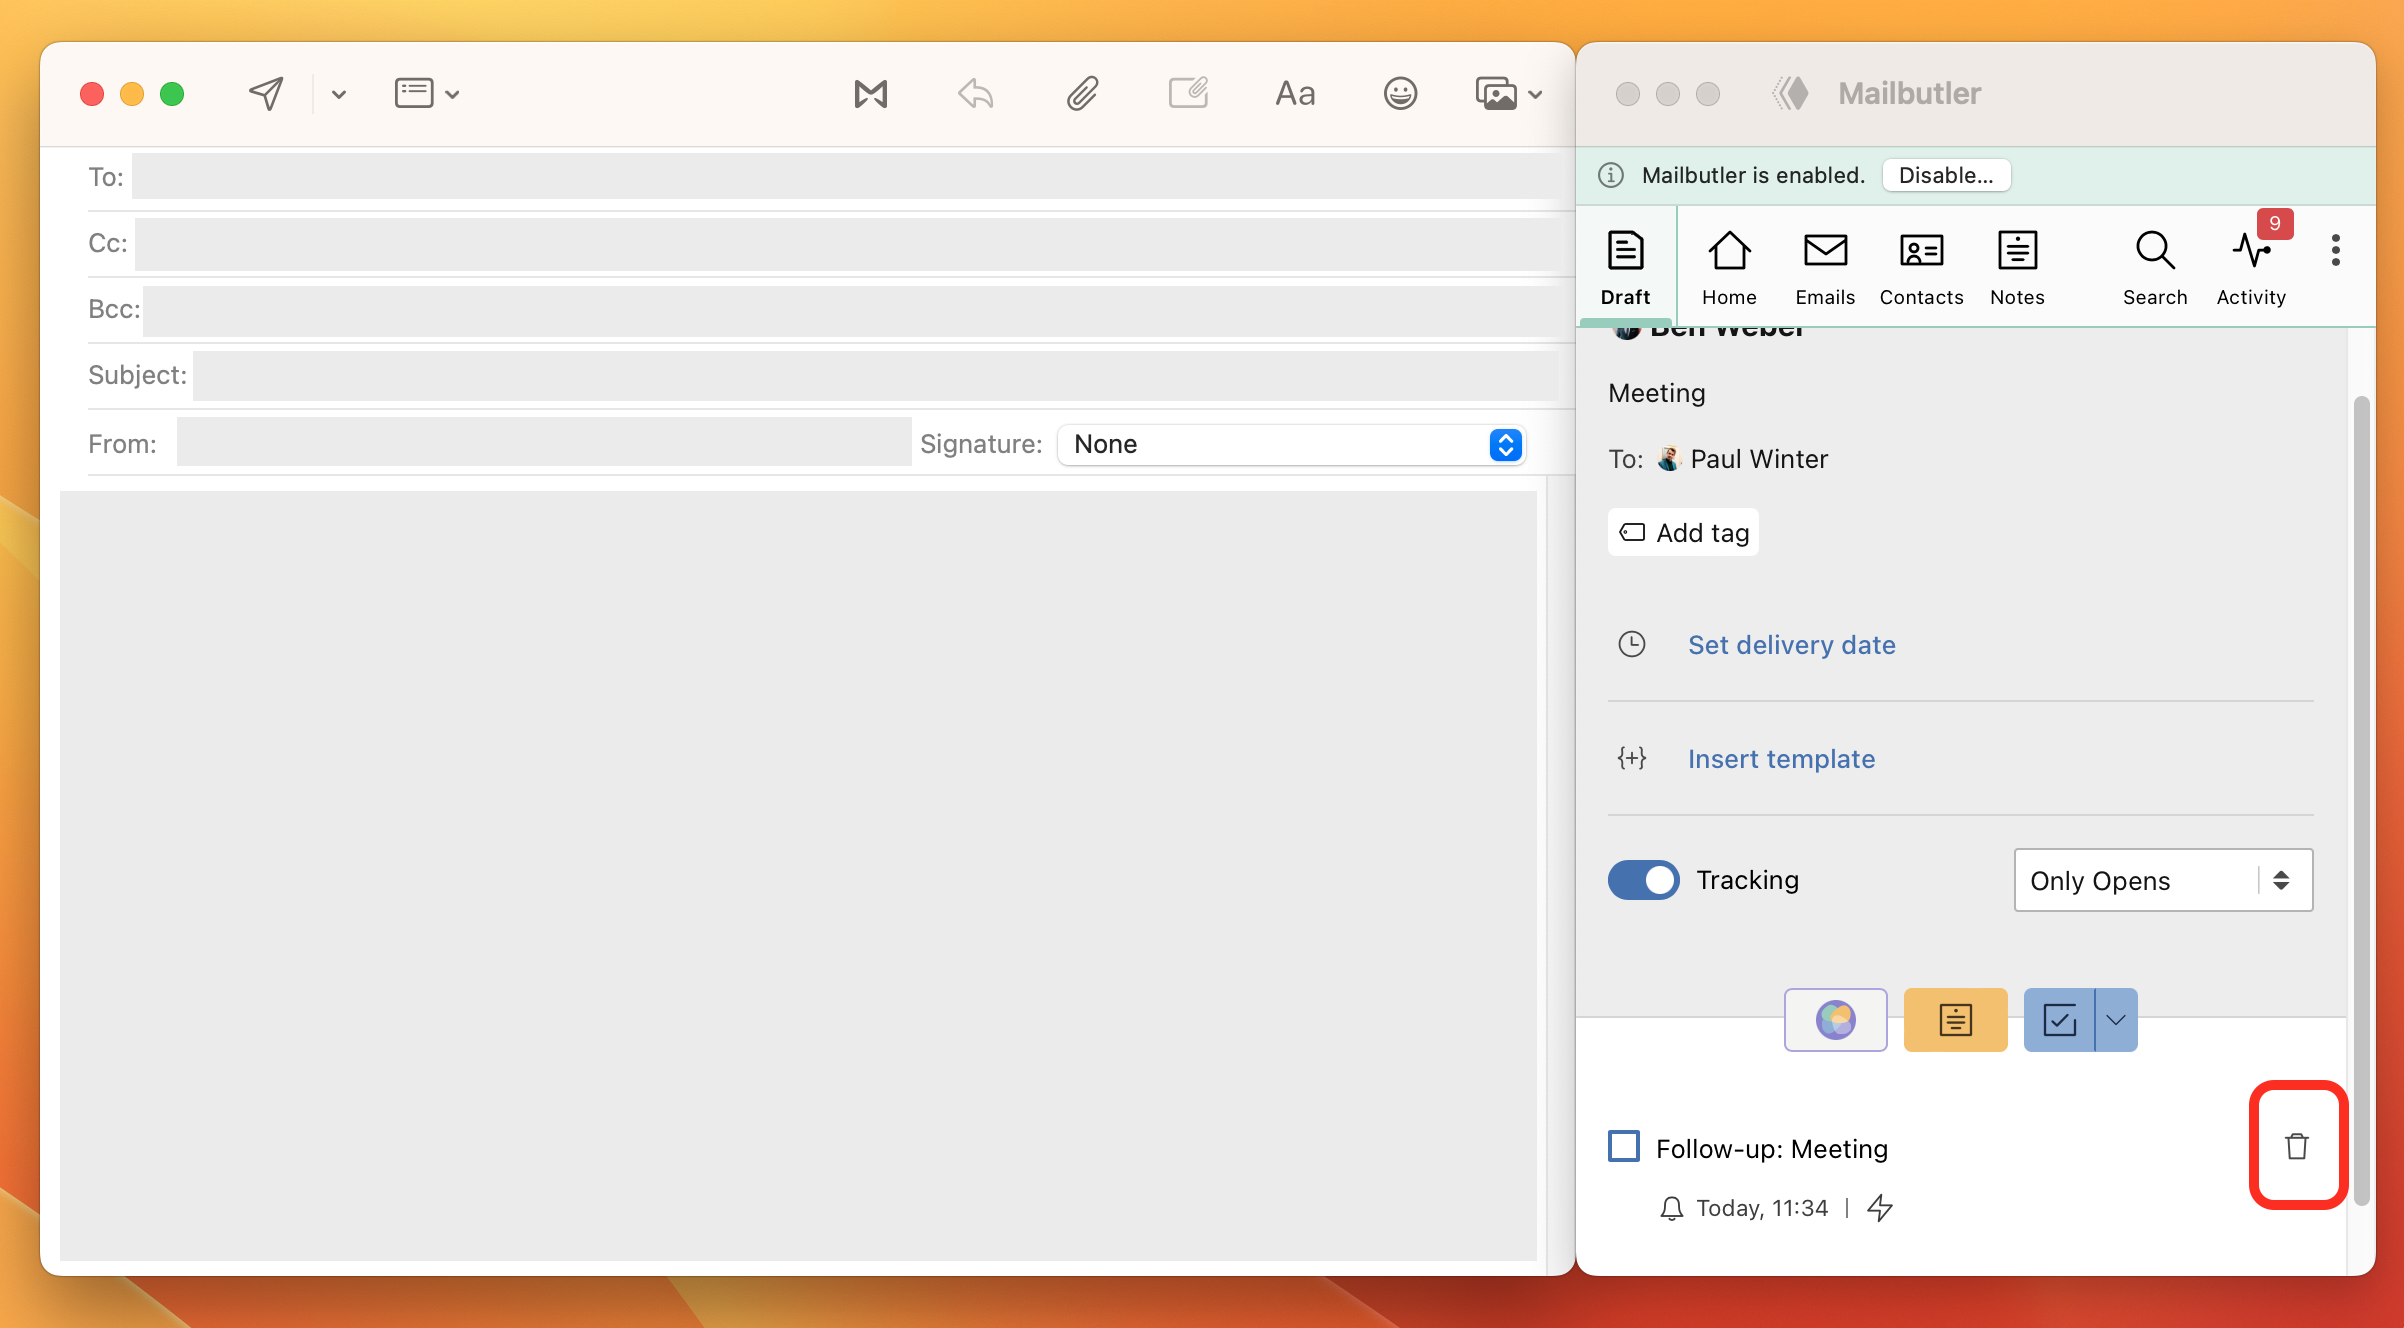
8. To delete a Task, hover over it to display the bin icon and click it.

Mobile App
1. Open the Mailbutler Mobile App and go to the Emails tab.
2. Open the email that you want to add a Task to.
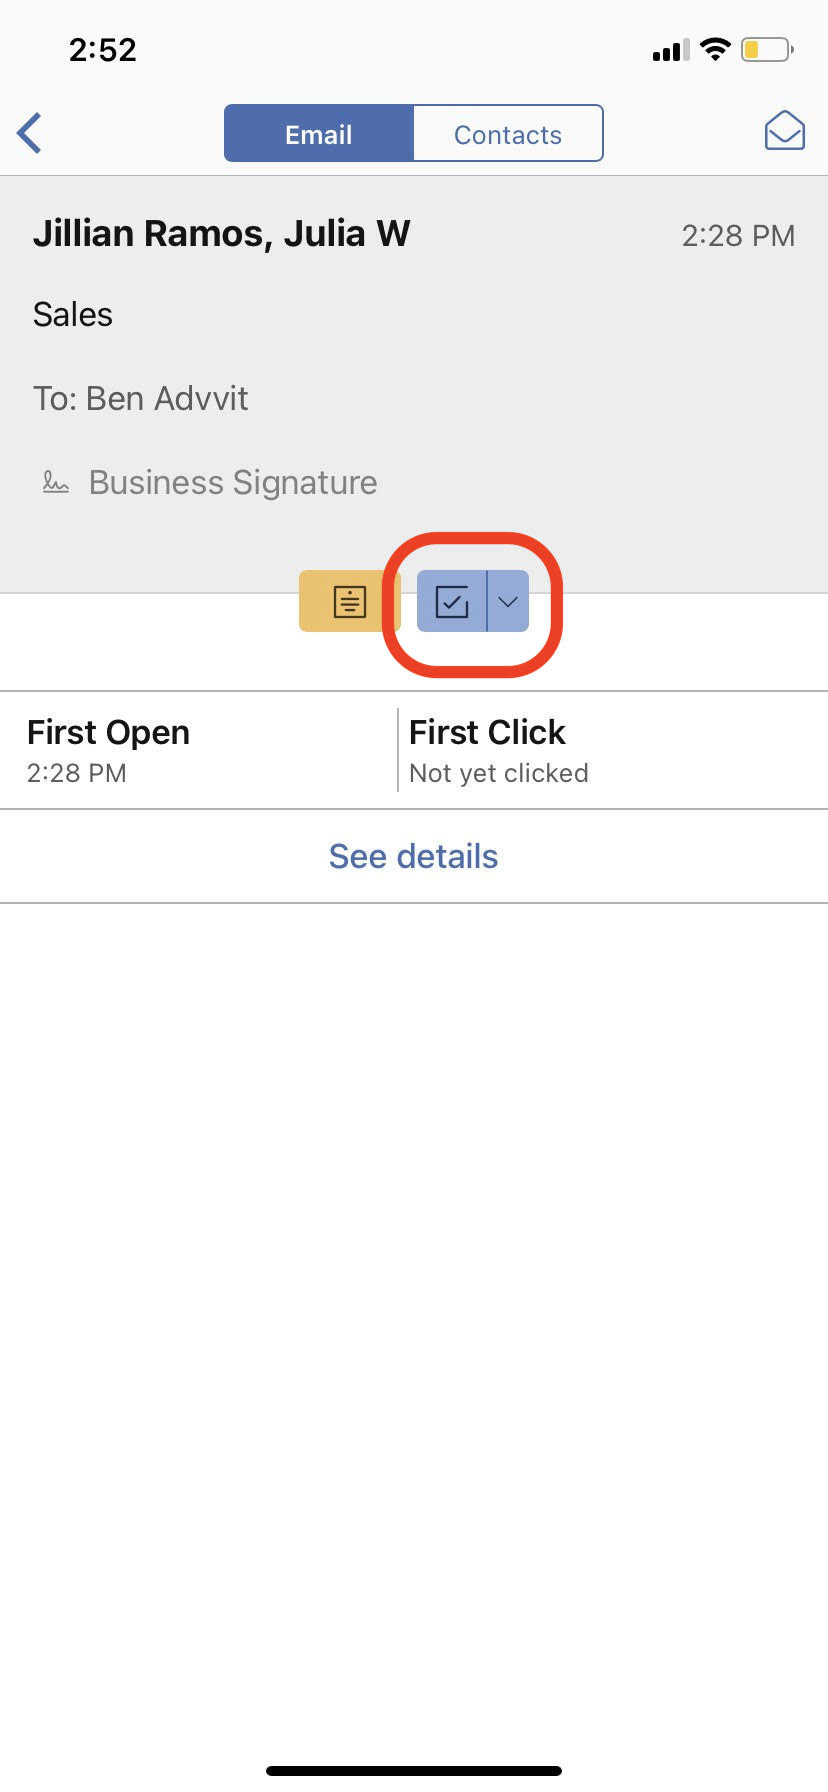
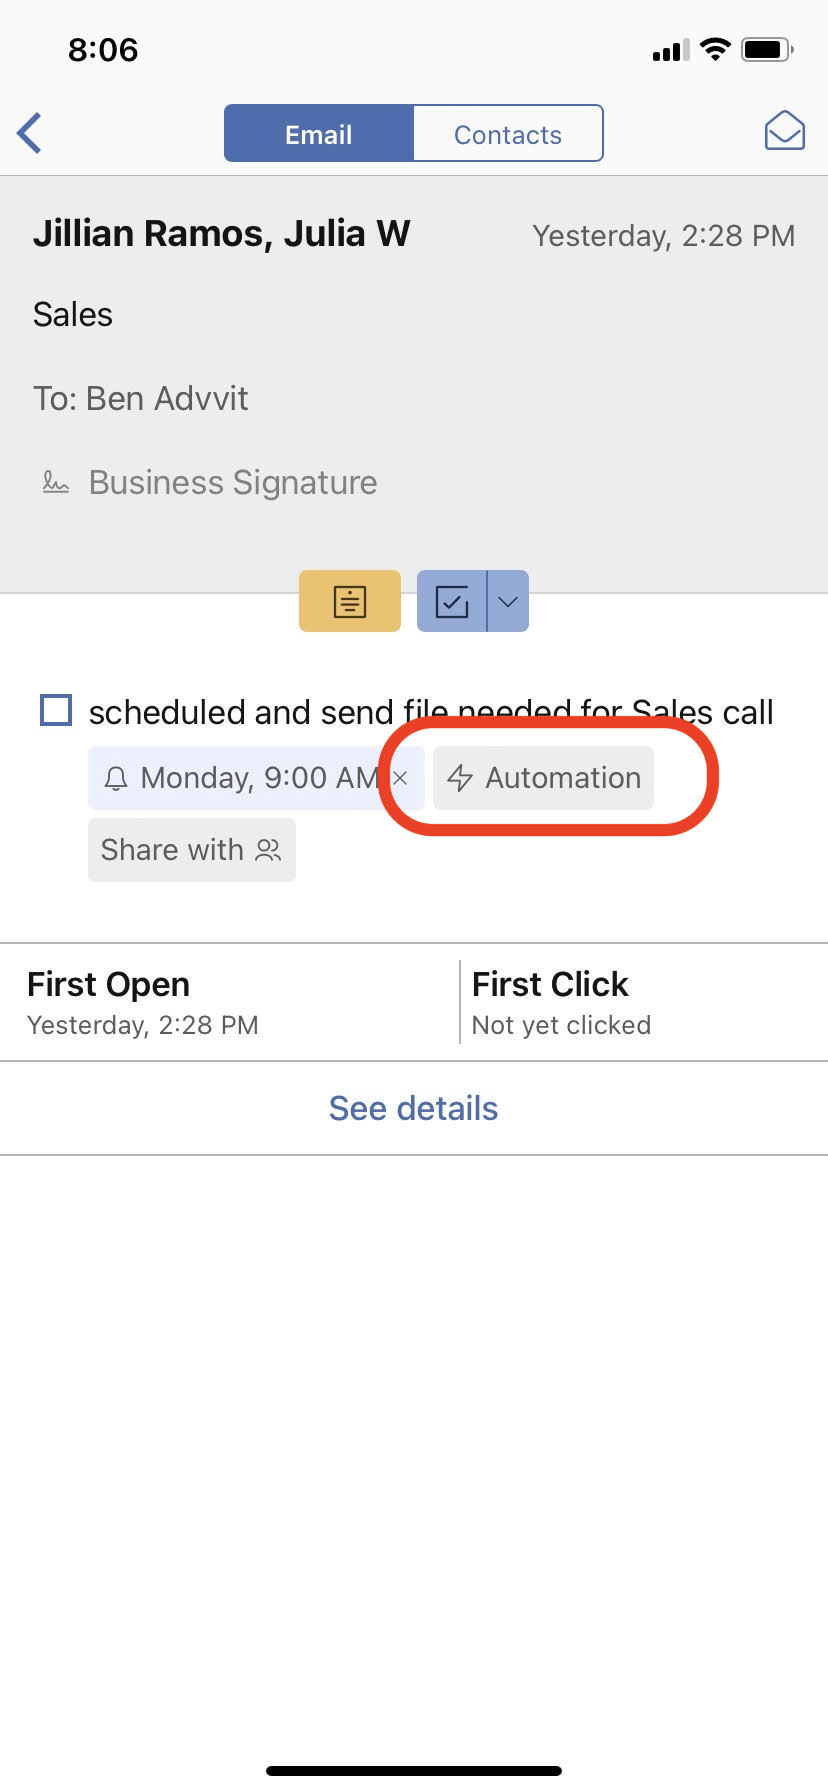
3. Click on the Task button and then on Add Task.
4. Write your Task. It will be saved automatically.
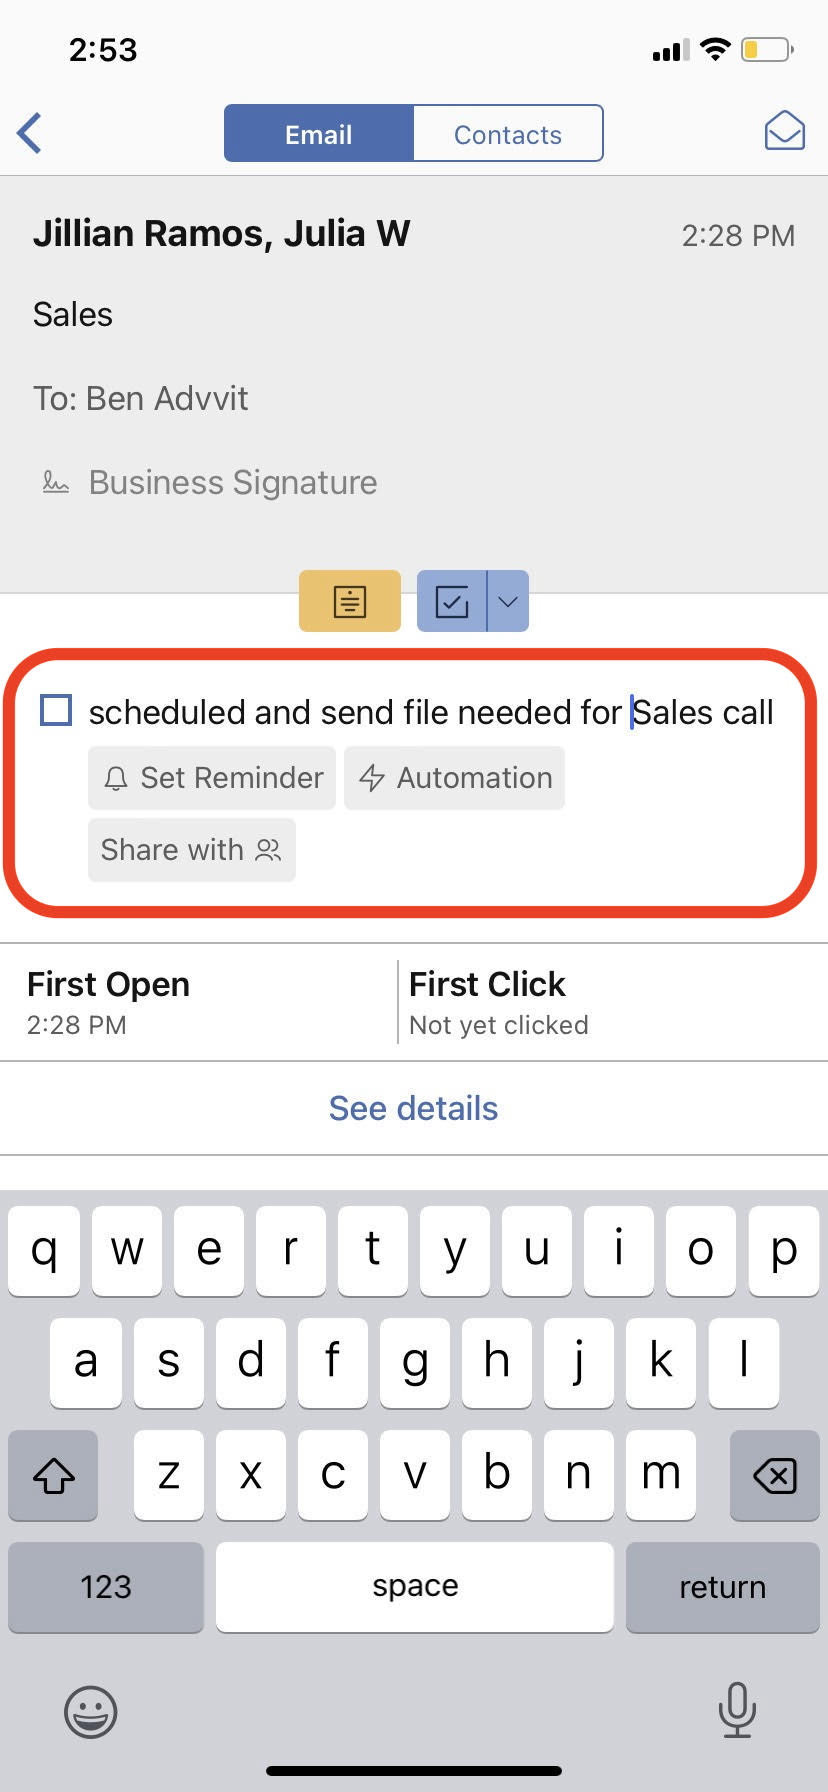
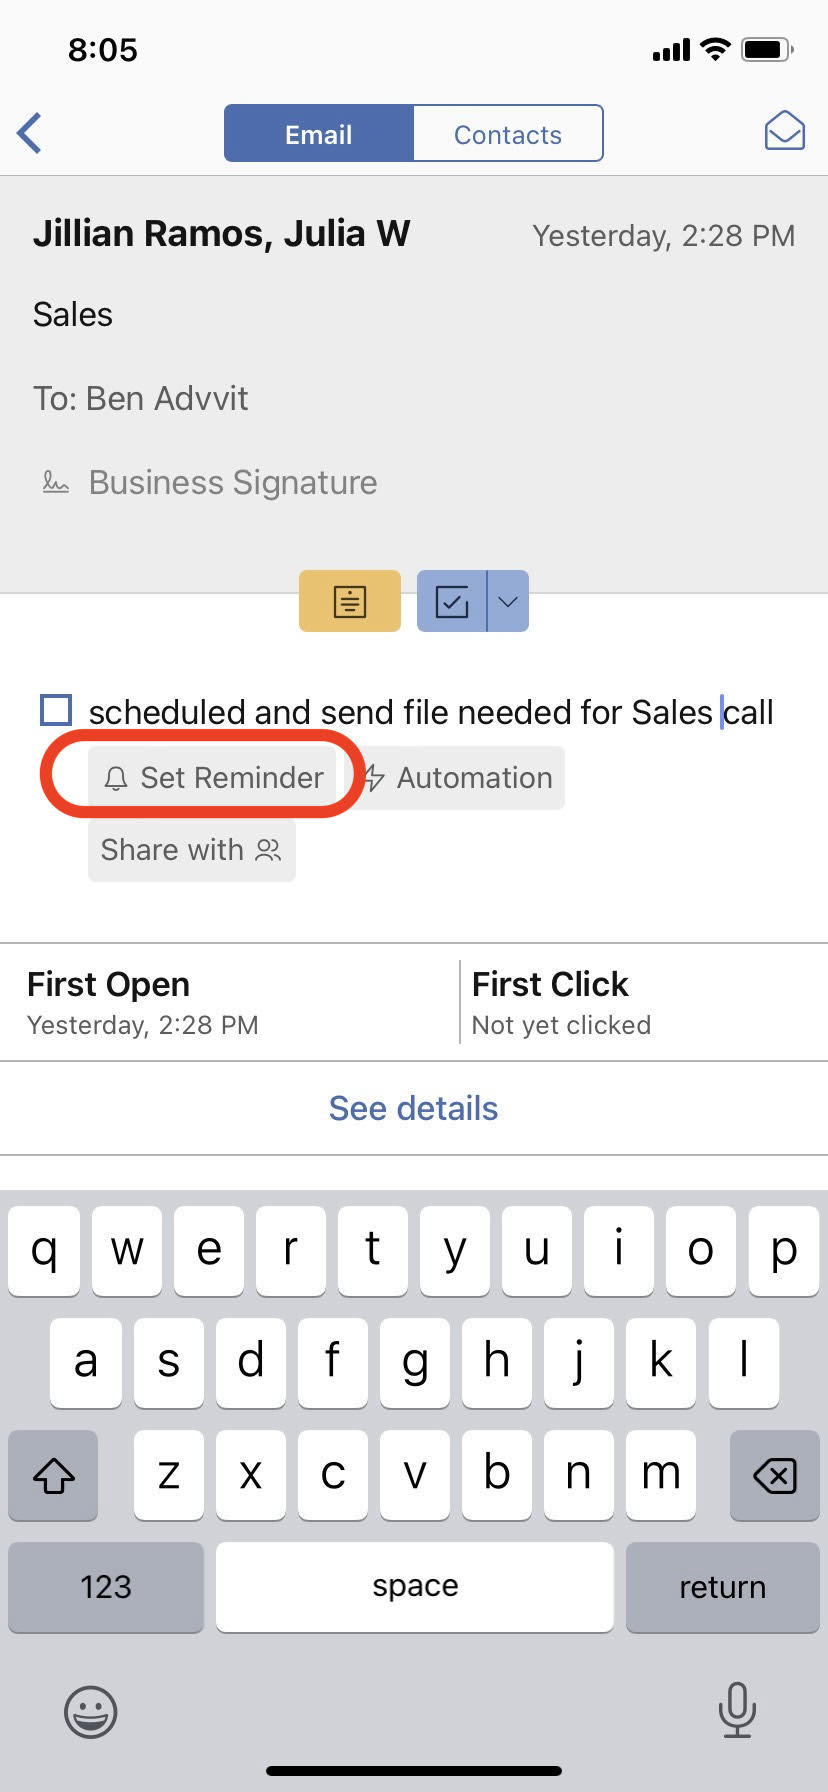
5. To receive a notification on your desktop when your Task is due, click Set Reminder to add a reminder to your Task.
6. You can set default automations for your Tasks under Automations in your Mailbutler Preferences. If you want to set an automation for your Task, different from the default one, click on the automations button (flash icon) and choose what you would like to happen to your Task when your recipient has replied to you.
7. Your task is now set.
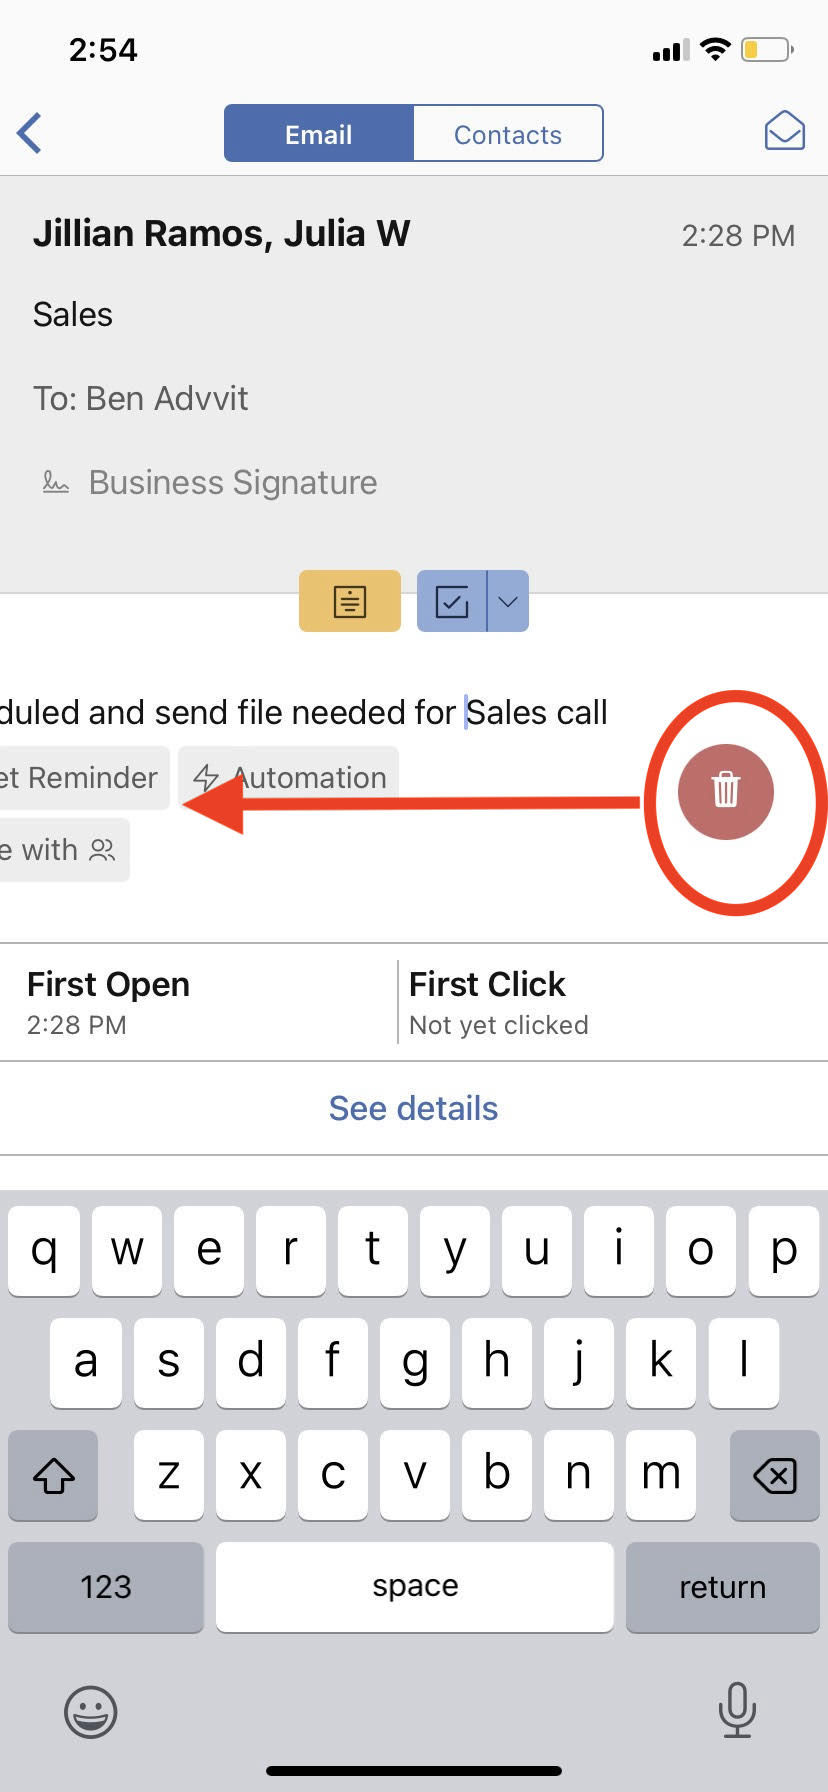
8. To delete your Task, swipe the task to the left.

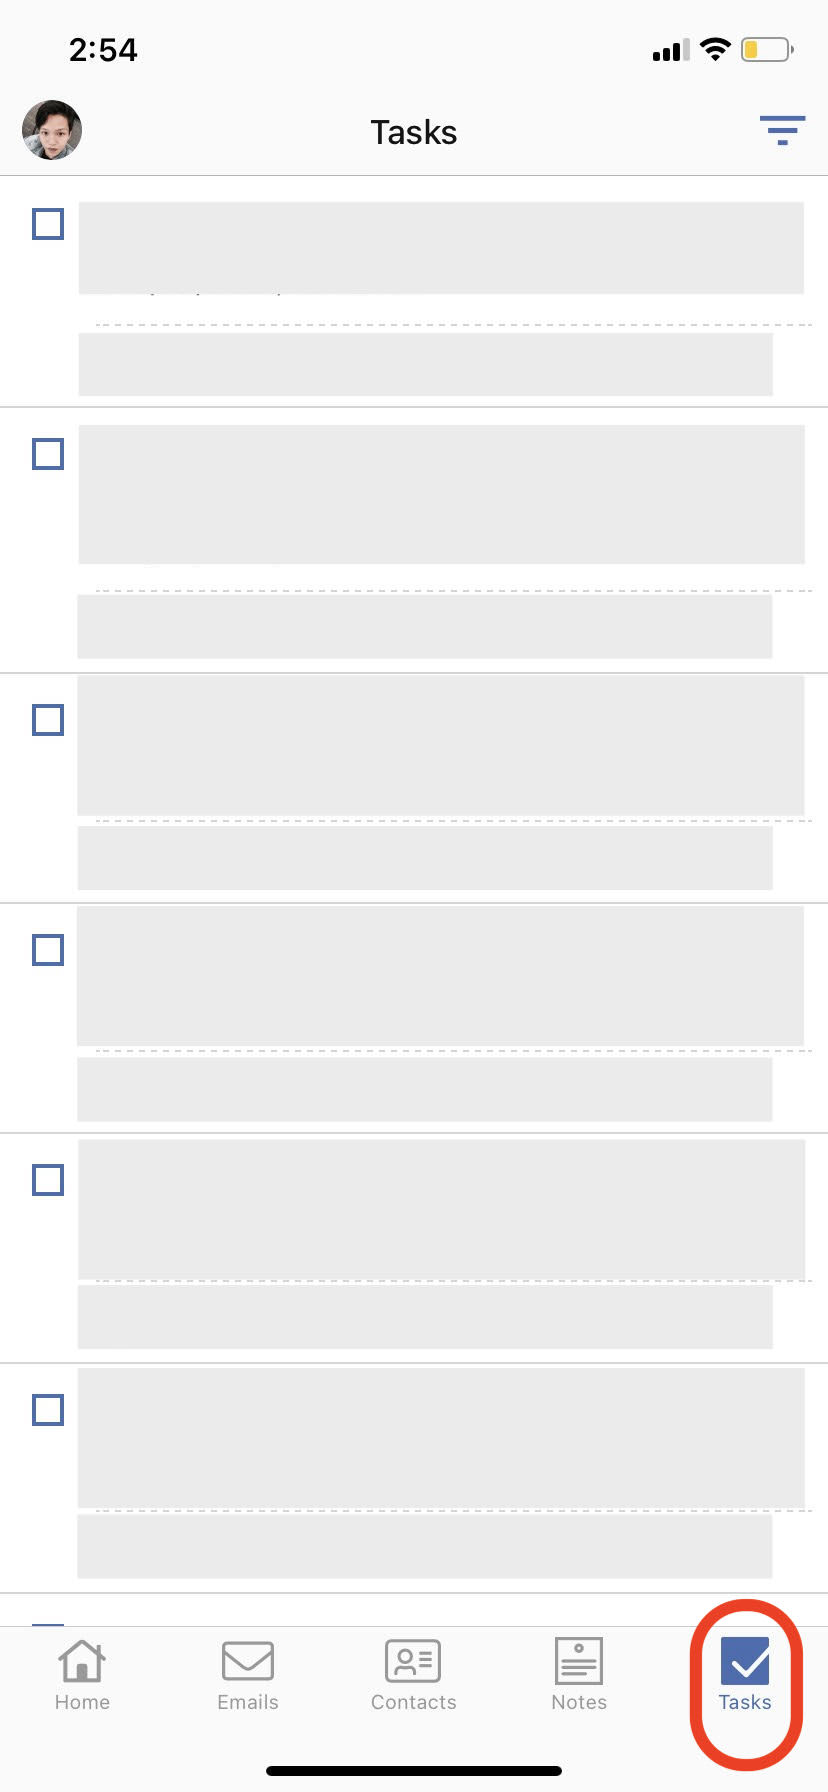
9. To manage your Tasks, go to the Tasks tab.
How do I add a QuickTask?
Apple Mail
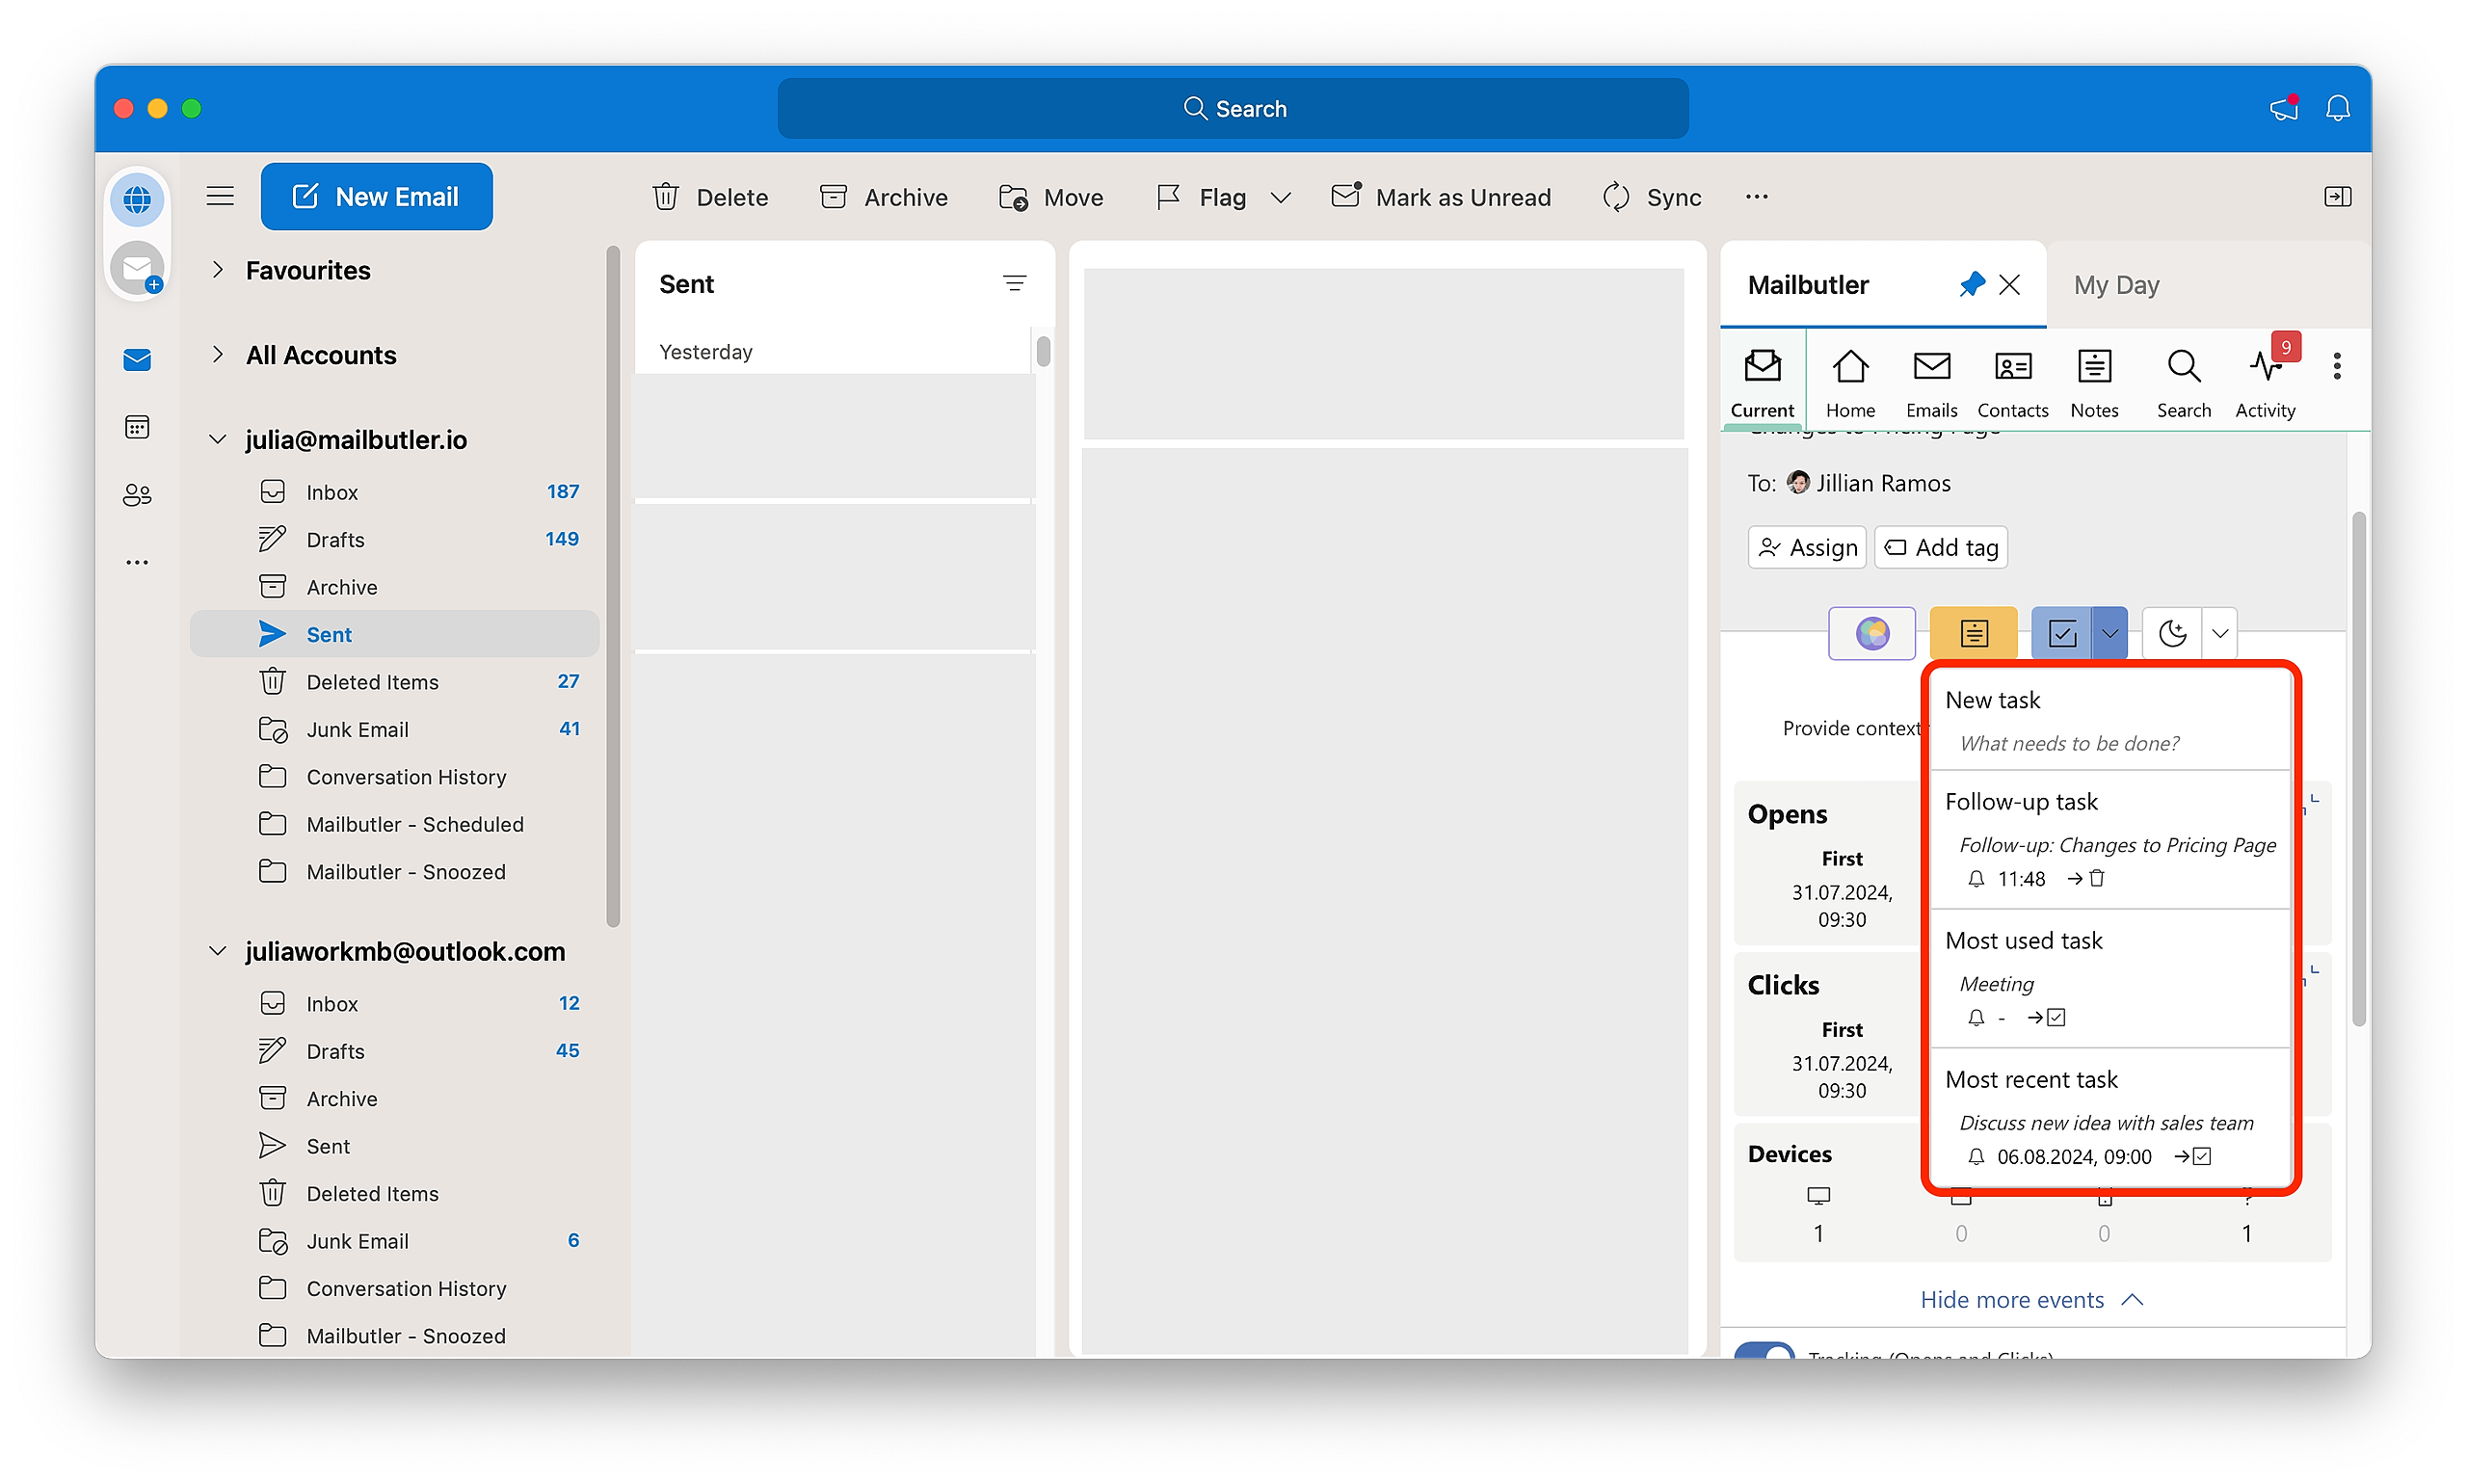
You have the option to add a QuickTask to your email. The QuickTask is a pre-filled Task that can be added with just two clicks. Here is how you add a QuickTask.
1. Go to an existing email, or start composing a new one.
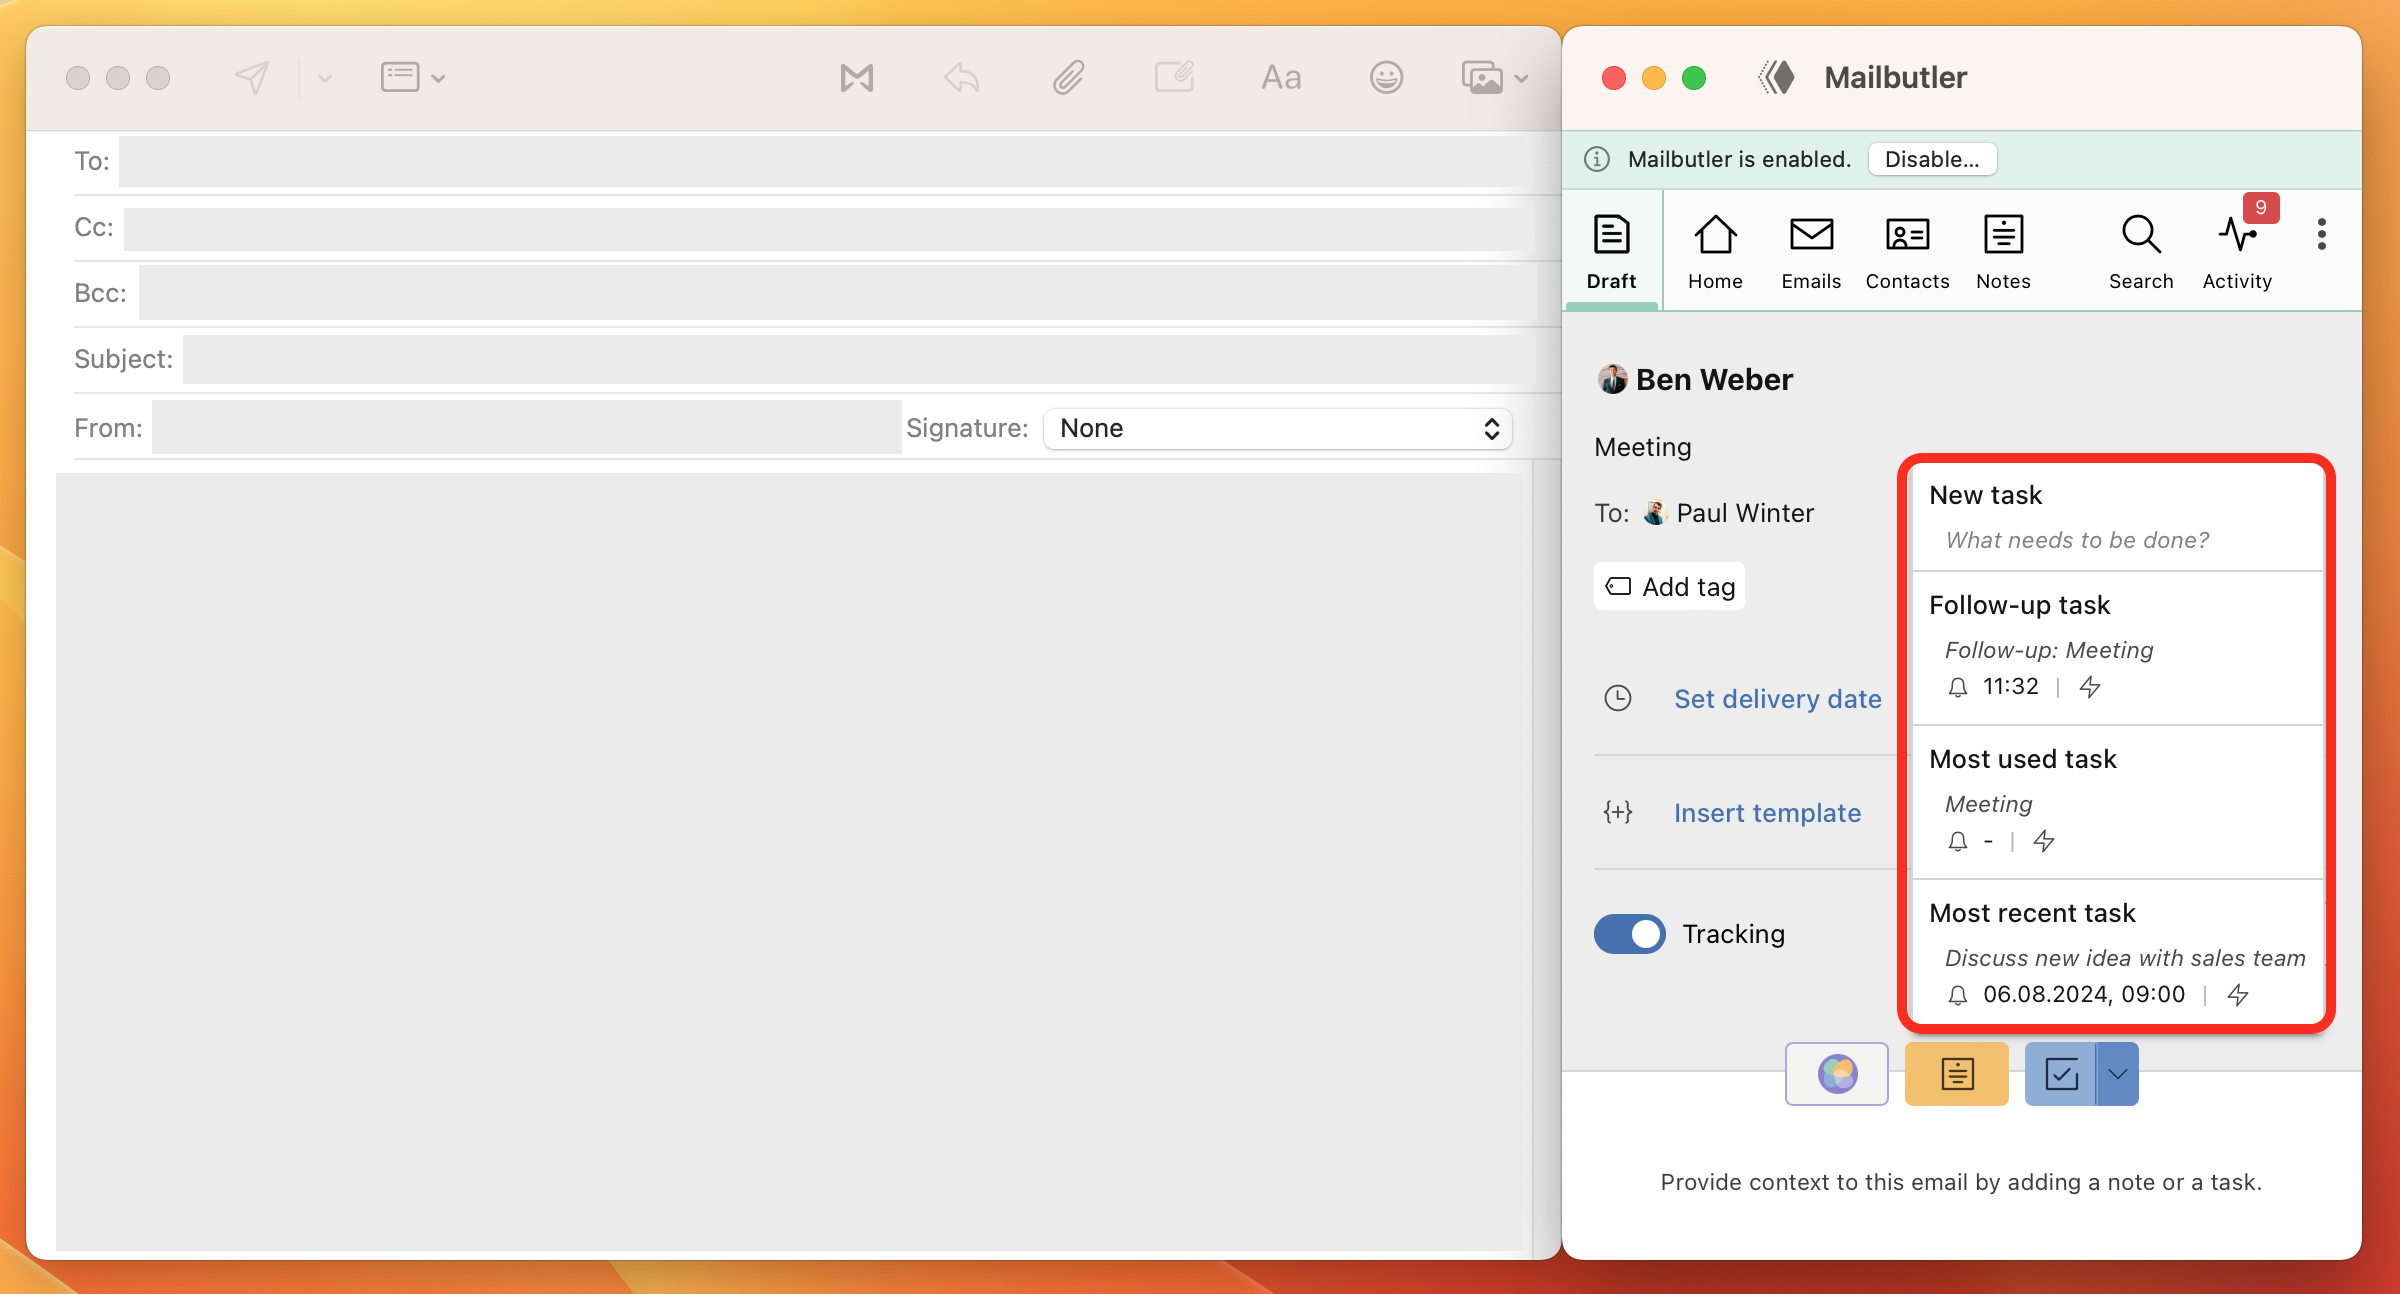
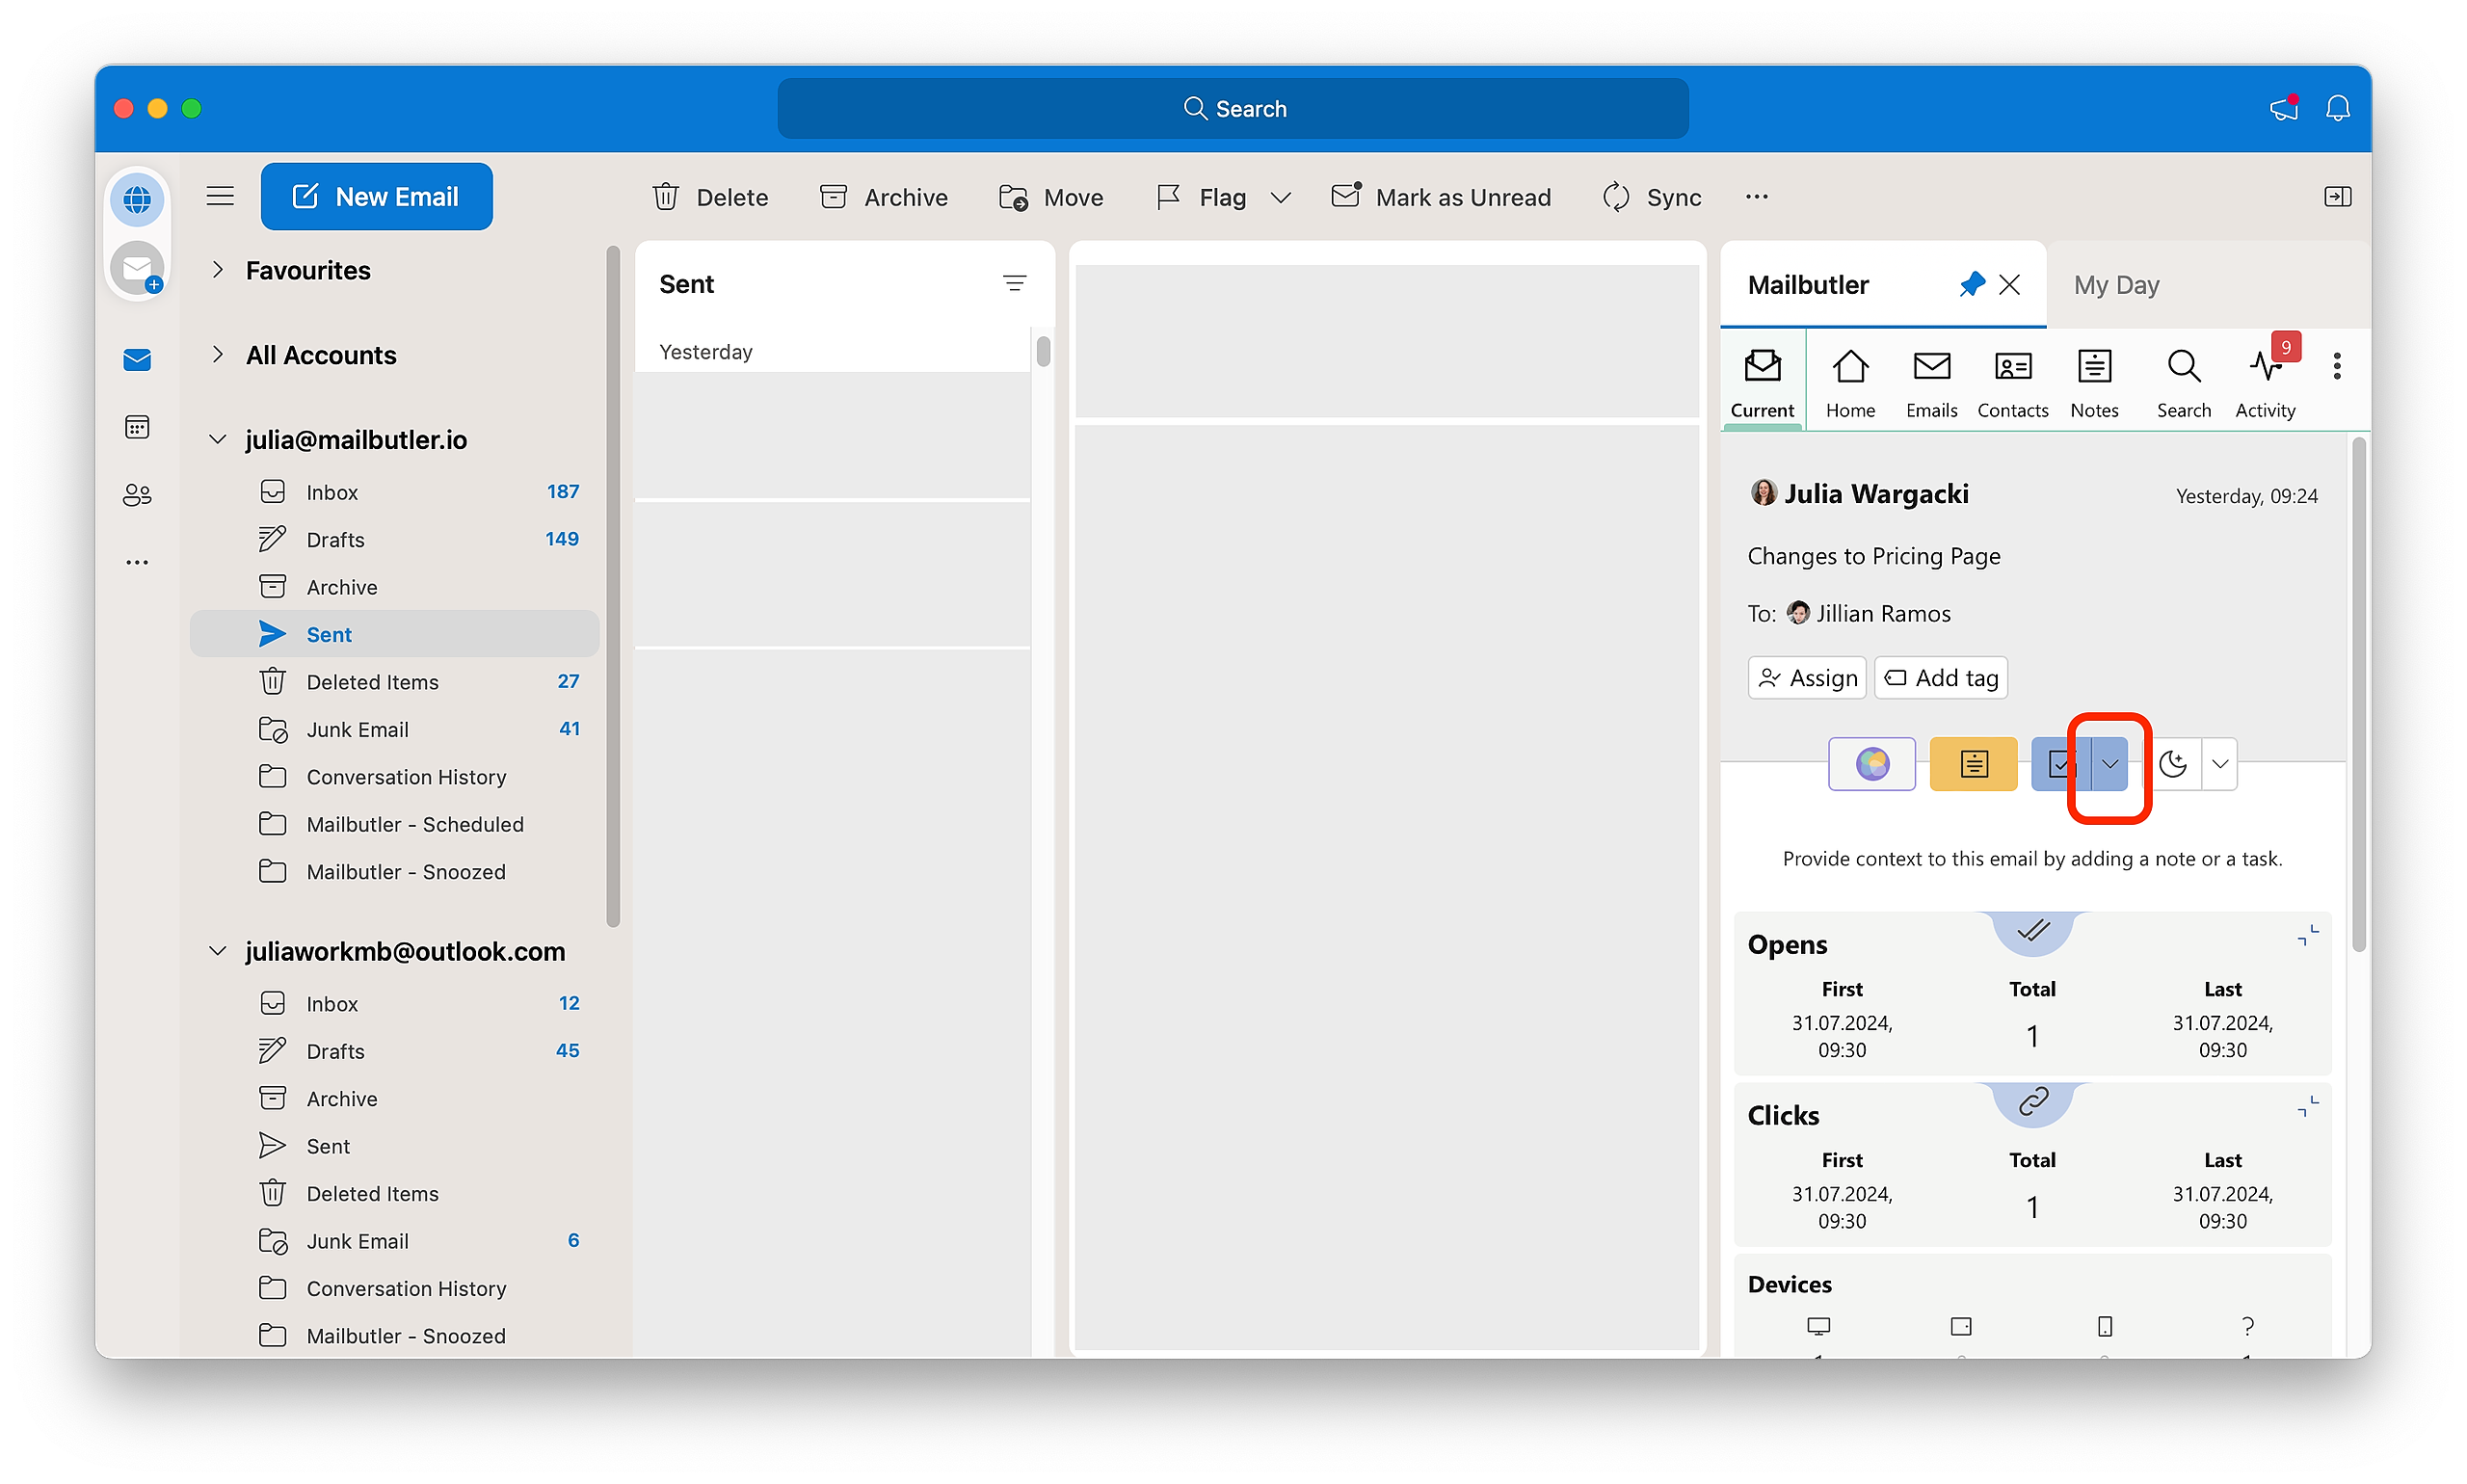
2. Open the Mailbutler Sidebar by clicking on the Mailbutler icon.3. Click on the QuickTask dropdown button.
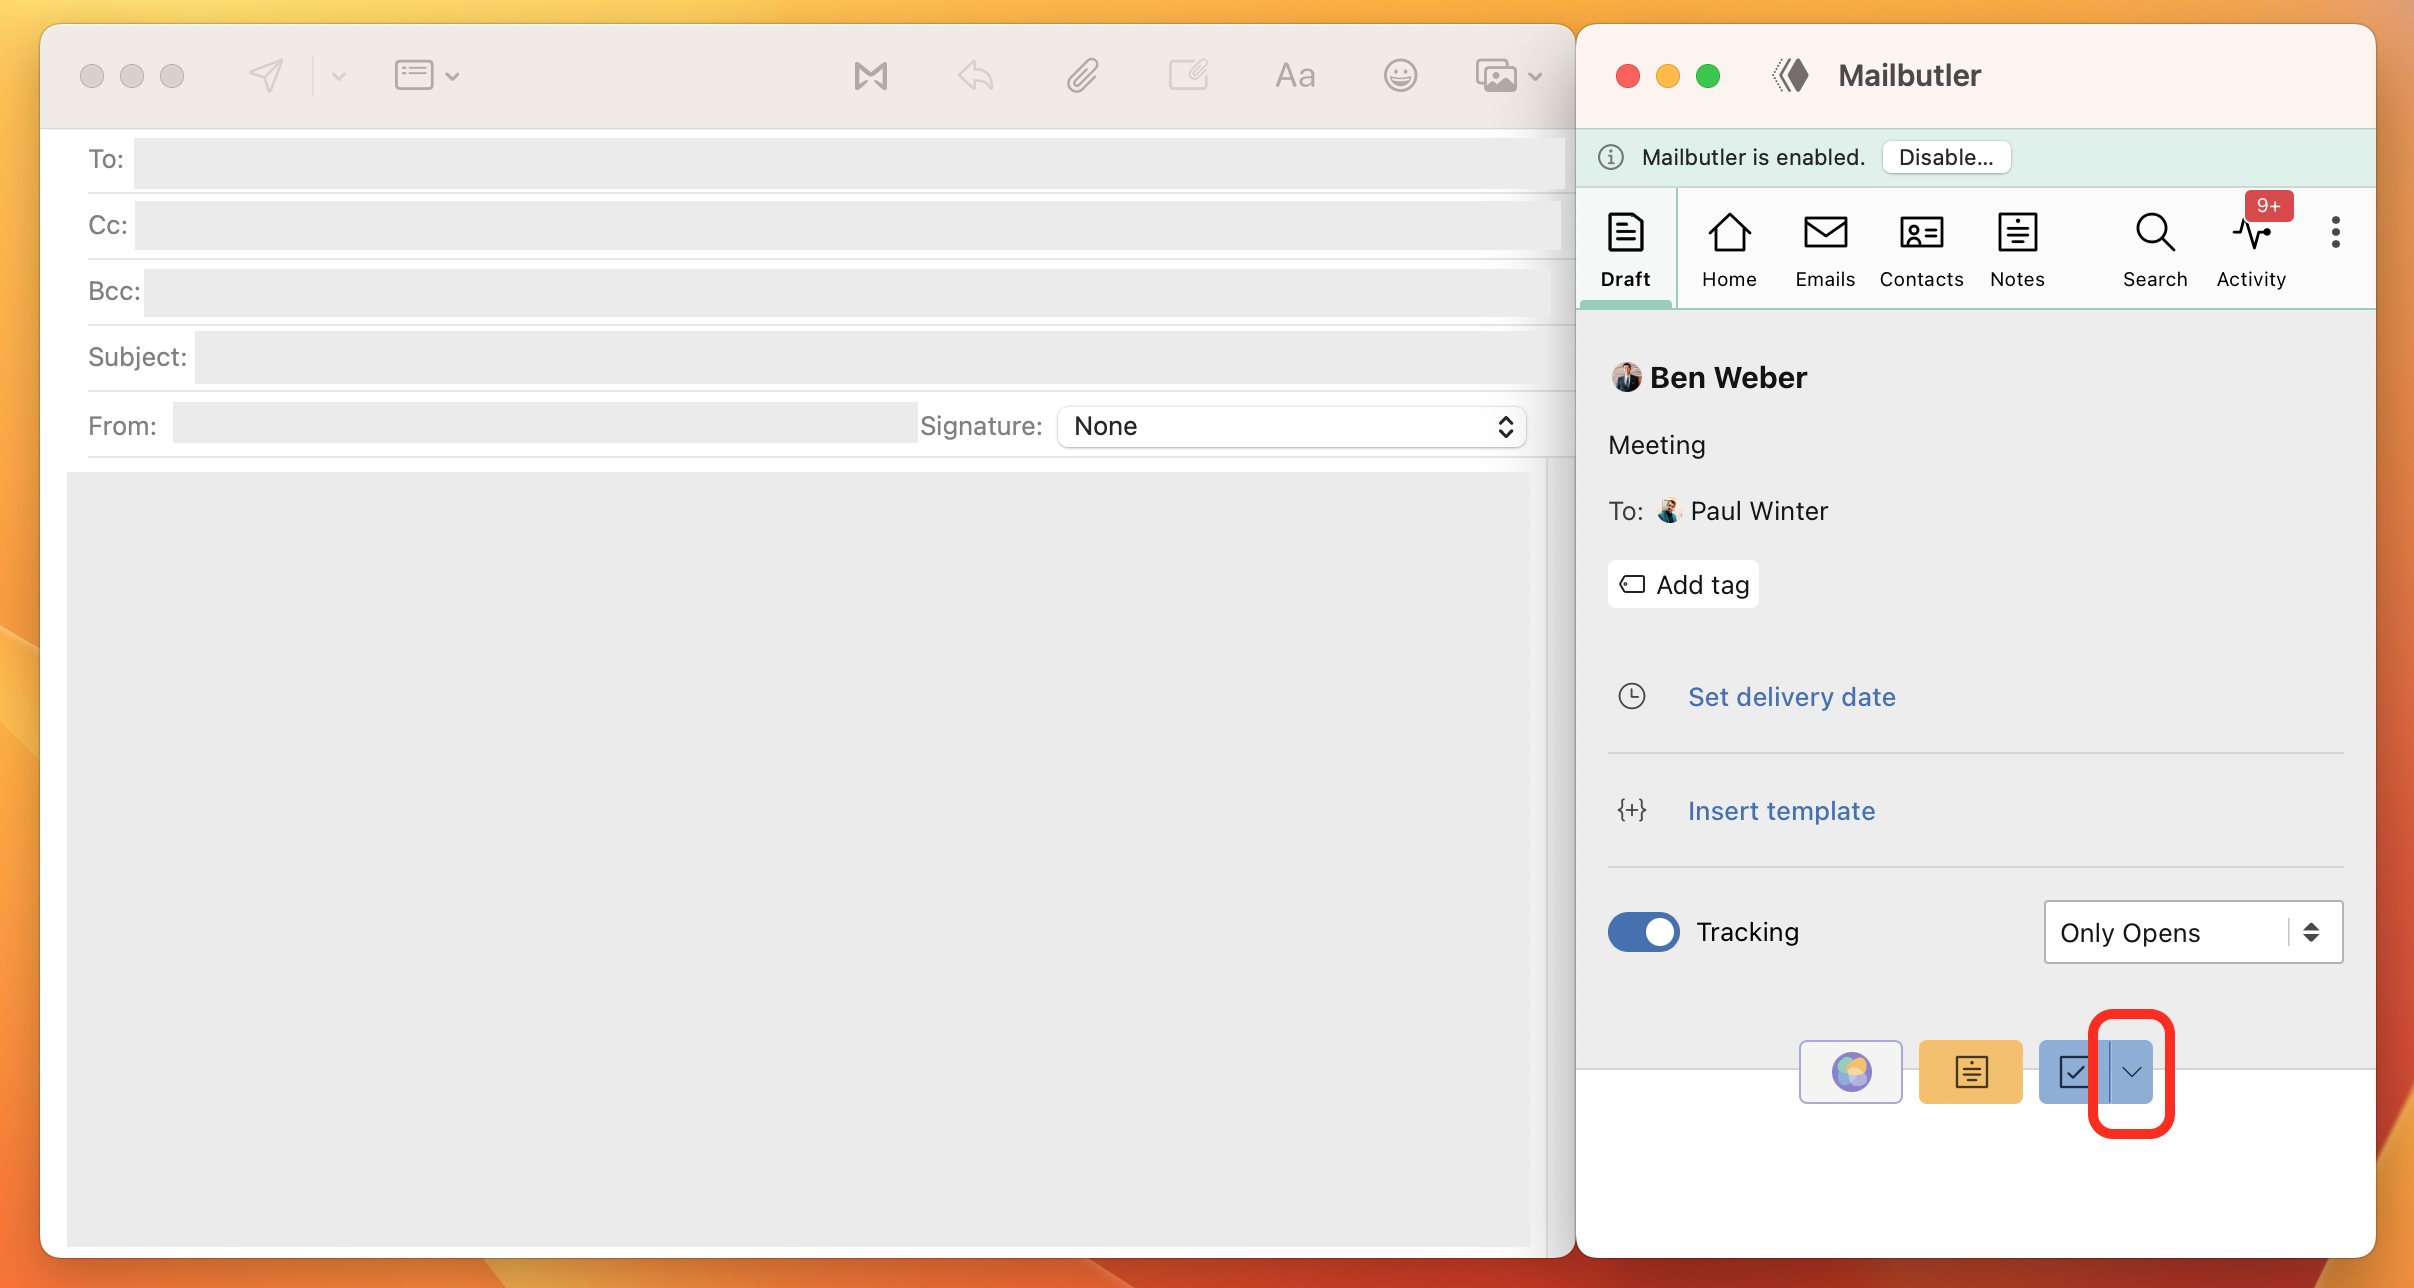
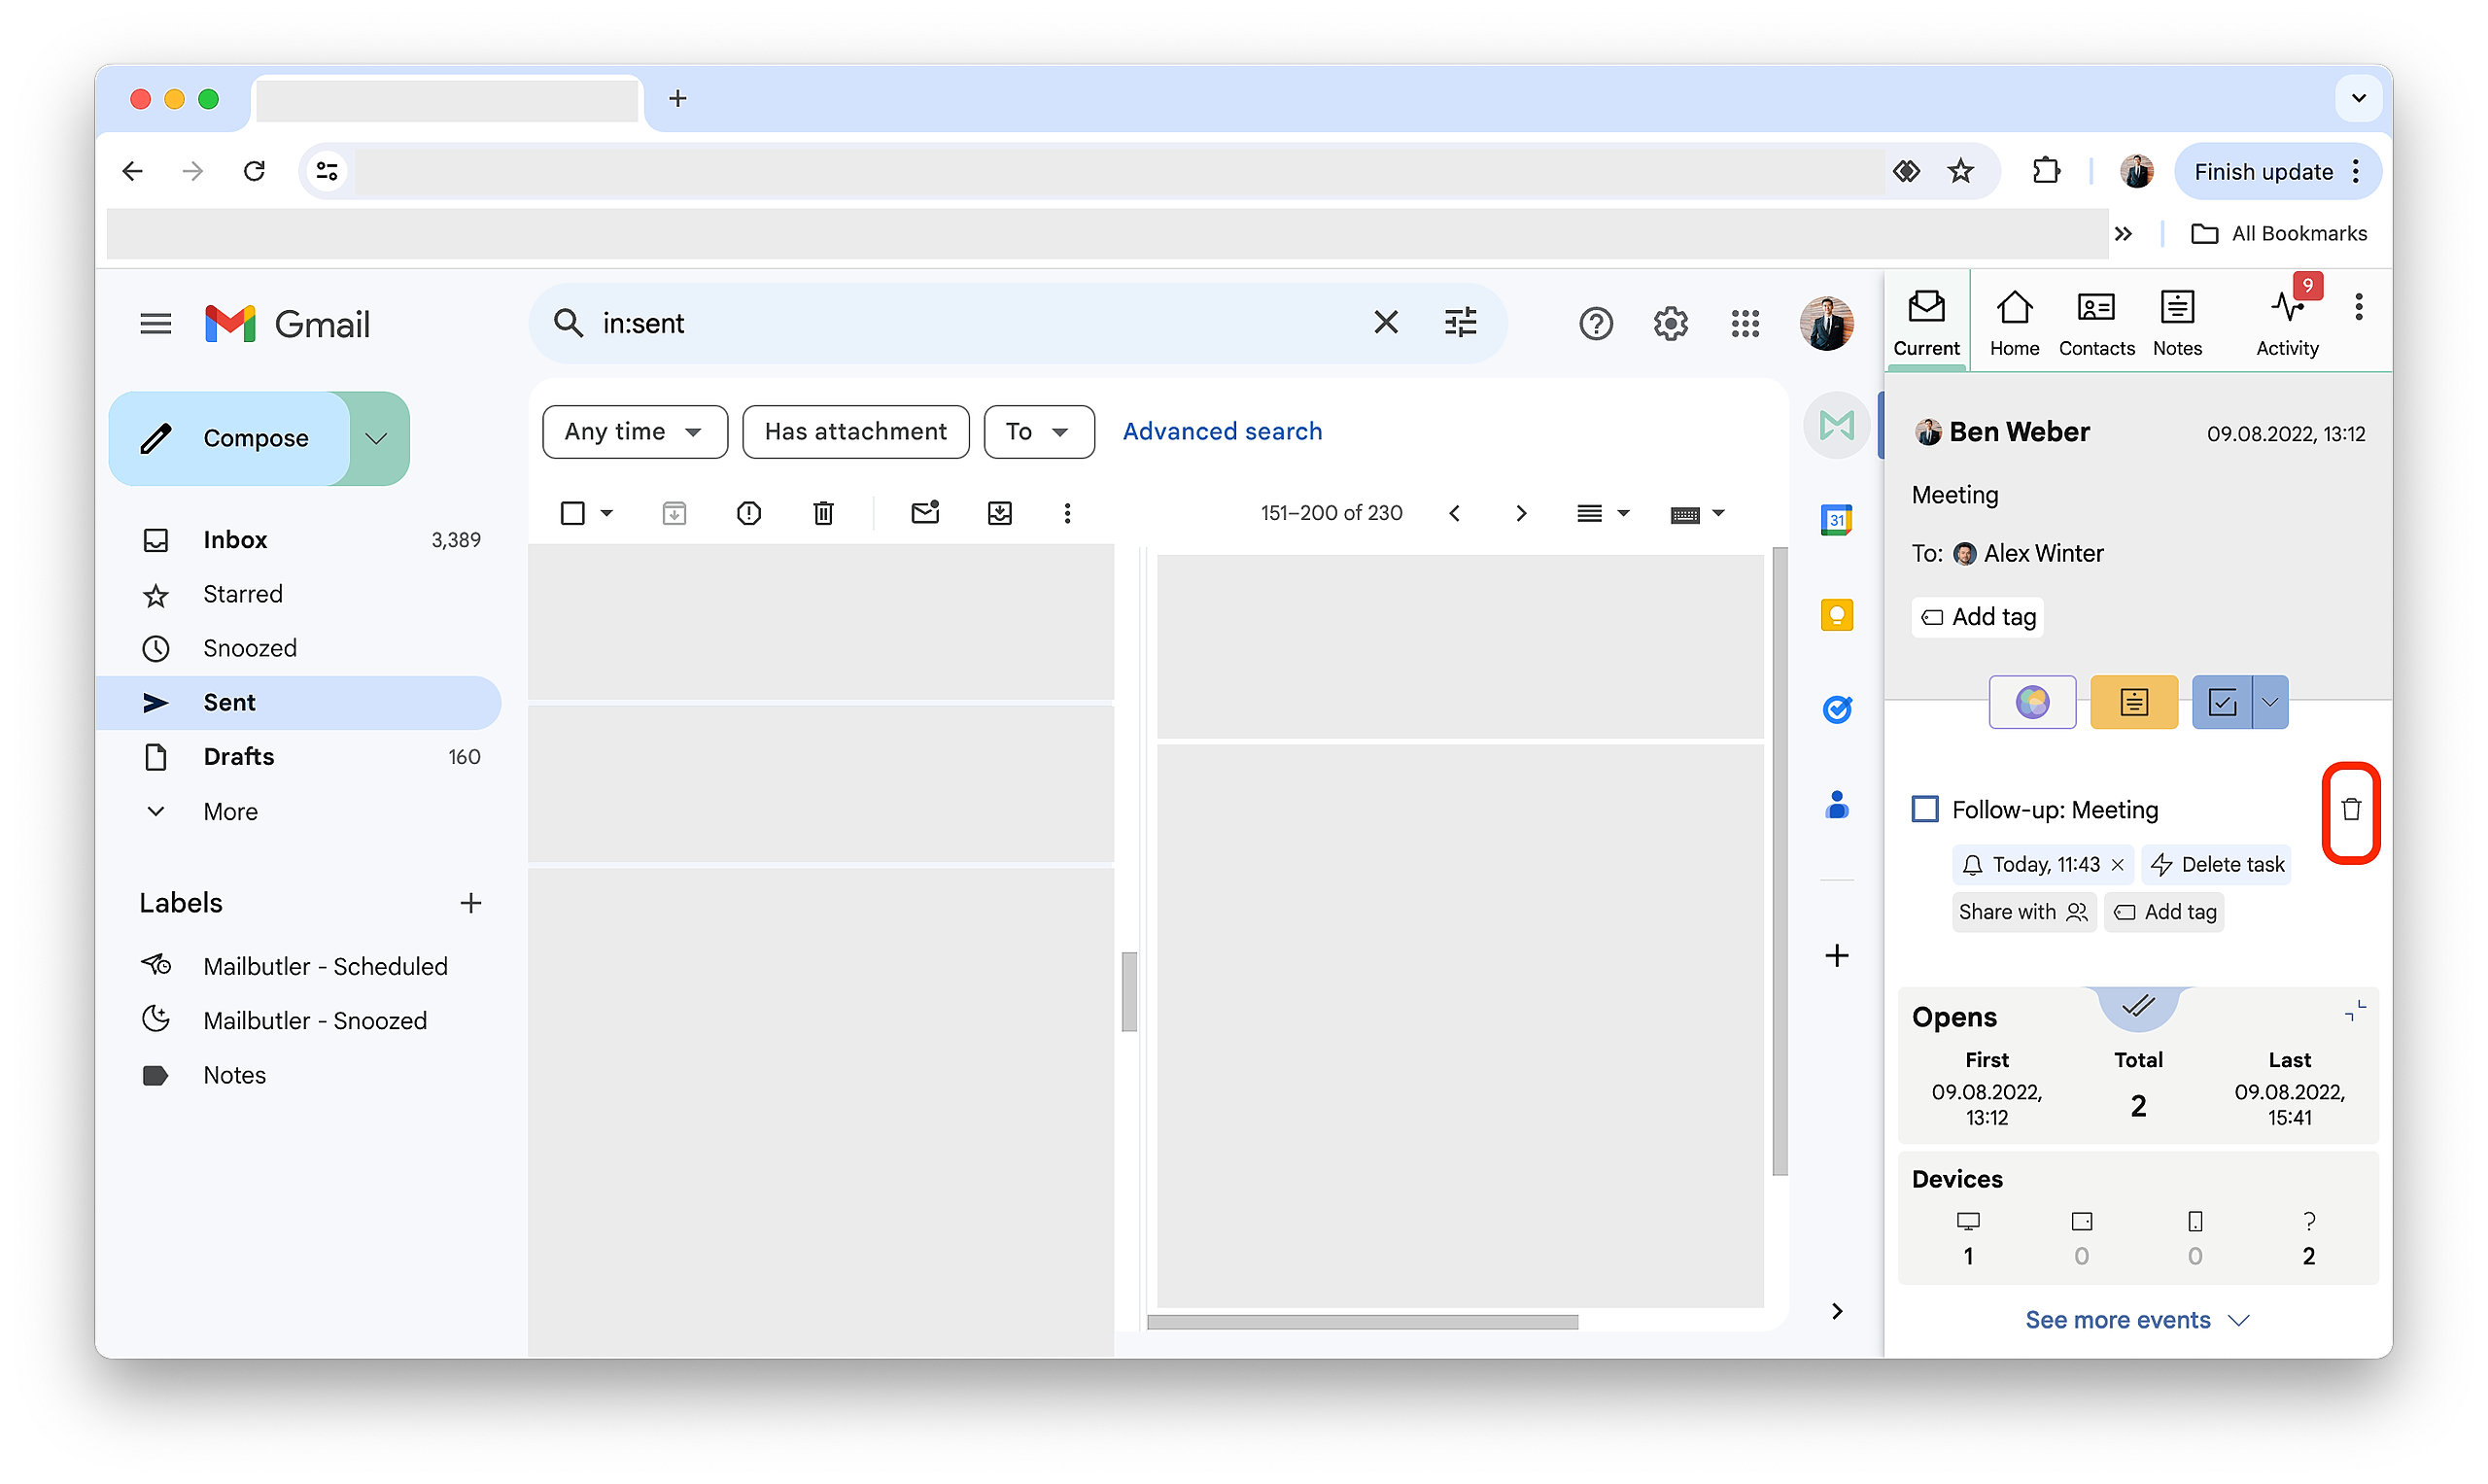
4. Choose a Quick Task. You can choose between your Most recent task or your Most used task. Or you can add a Follow-up task to get reminded to follow up on your email if your recipient doesn't reply.5. To delete a Task, hover over it to display the bin icon and click it.
Gmail
You have the option to add a QuickTask to your email. The QuickTask is a pre-filled Task that can be added with just two clicks. Here is how you add a QuickTask.
1. Go to an existing email.
2. Click on the Mailbutler icon to open the Mailbutler Sidebar.

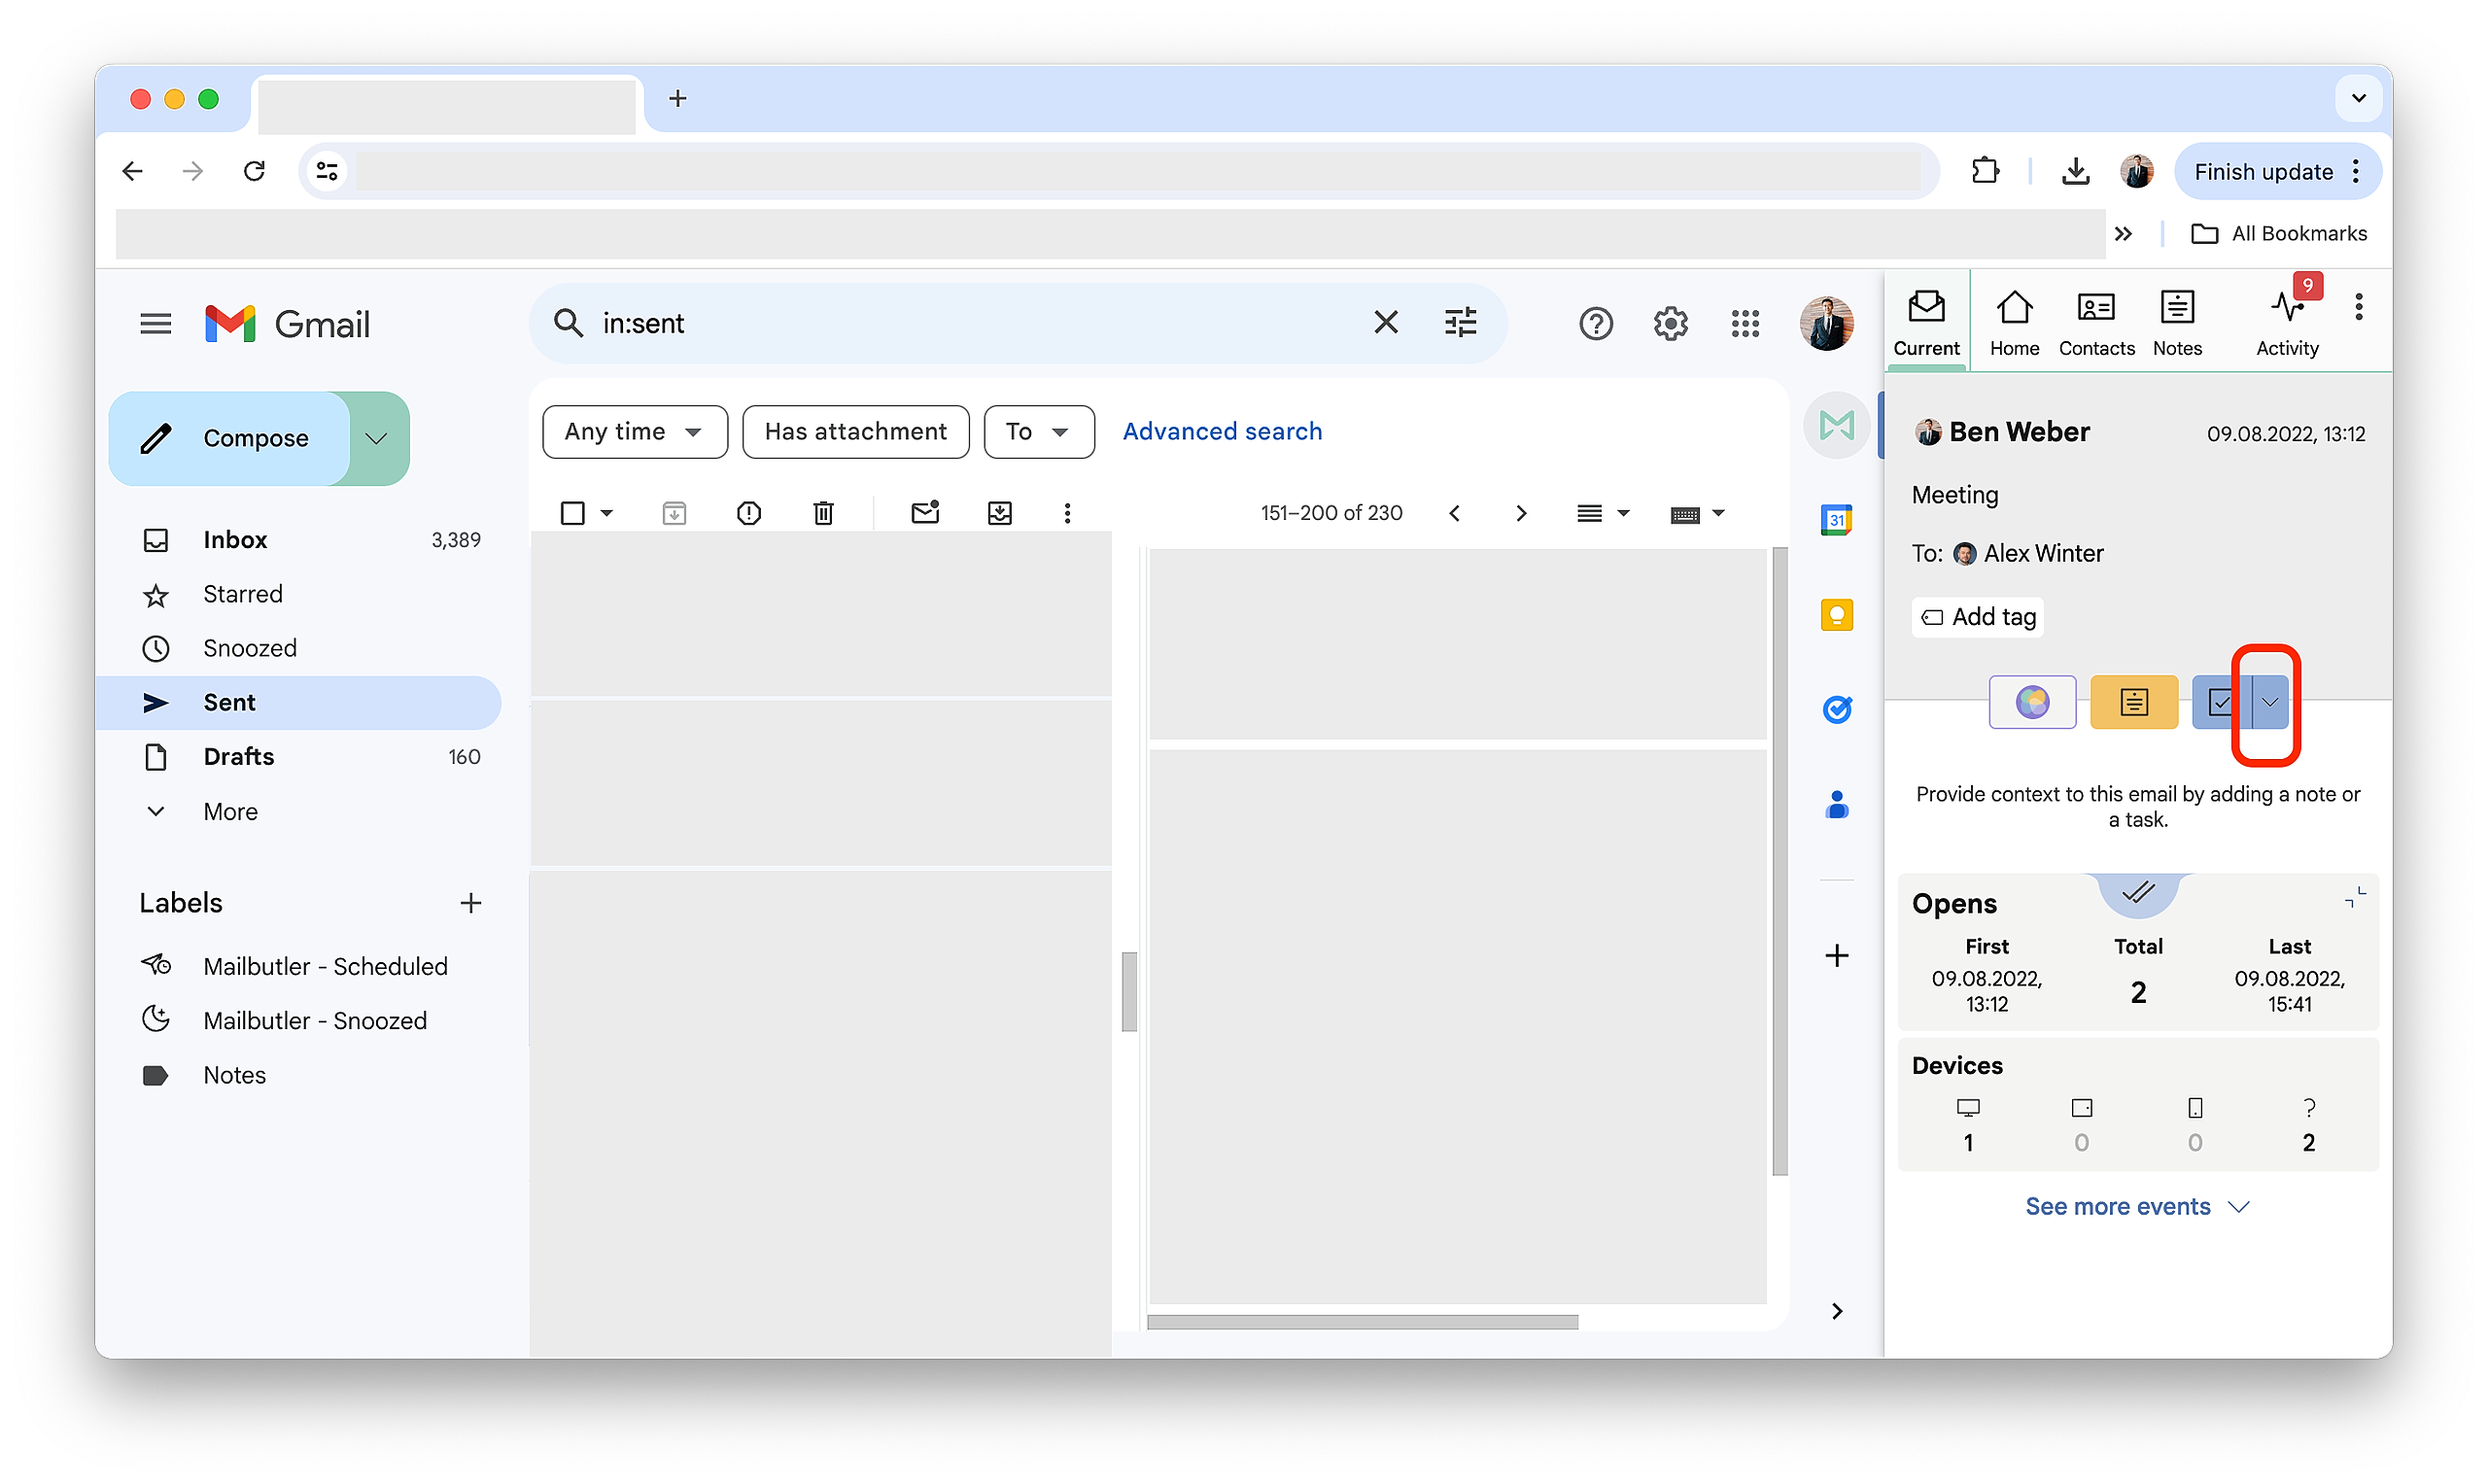
3. Click on the QuickTask dropdown button.
4. Choose a Quick Task. You can choose between your Most recent task or your Most used task. Or you can add a Follow-up task to get reminded to follow up on your email if your recipient doesn't reply.
5. To delete a Task, hover over it to display the bin icon and click it.

Outlook
You have the option to add a QuickTask to your email. The QuickTask is a pre-filled Task that can be added with just two clicks. Here is how you add a QuickTask.
1. Go to an existing email, or start composing a new one.
2. Open the Mailbutler Sidebar.
3. Go to the Mailbutler sidebar and click on the QuickTask dropdown button.
4. Choose a Quick Task. You can choose between your Most recent task or your Most used task. Or you can add a Follow-up task to get reminded to follow up on your email if your recipient doesn't reply.
5. To delete a Task, hover over it to display the bin icon and click it.
Mobile App
You have the option to add a QuickTask to your email. The QuickTask is a pre-filled Task that can be added with just two clicks. Here is how you add a QuickTask.
1. Open the Mailbutler Mobile App and go to the Emails tab.
2. Open the email that you want to add a Task to.
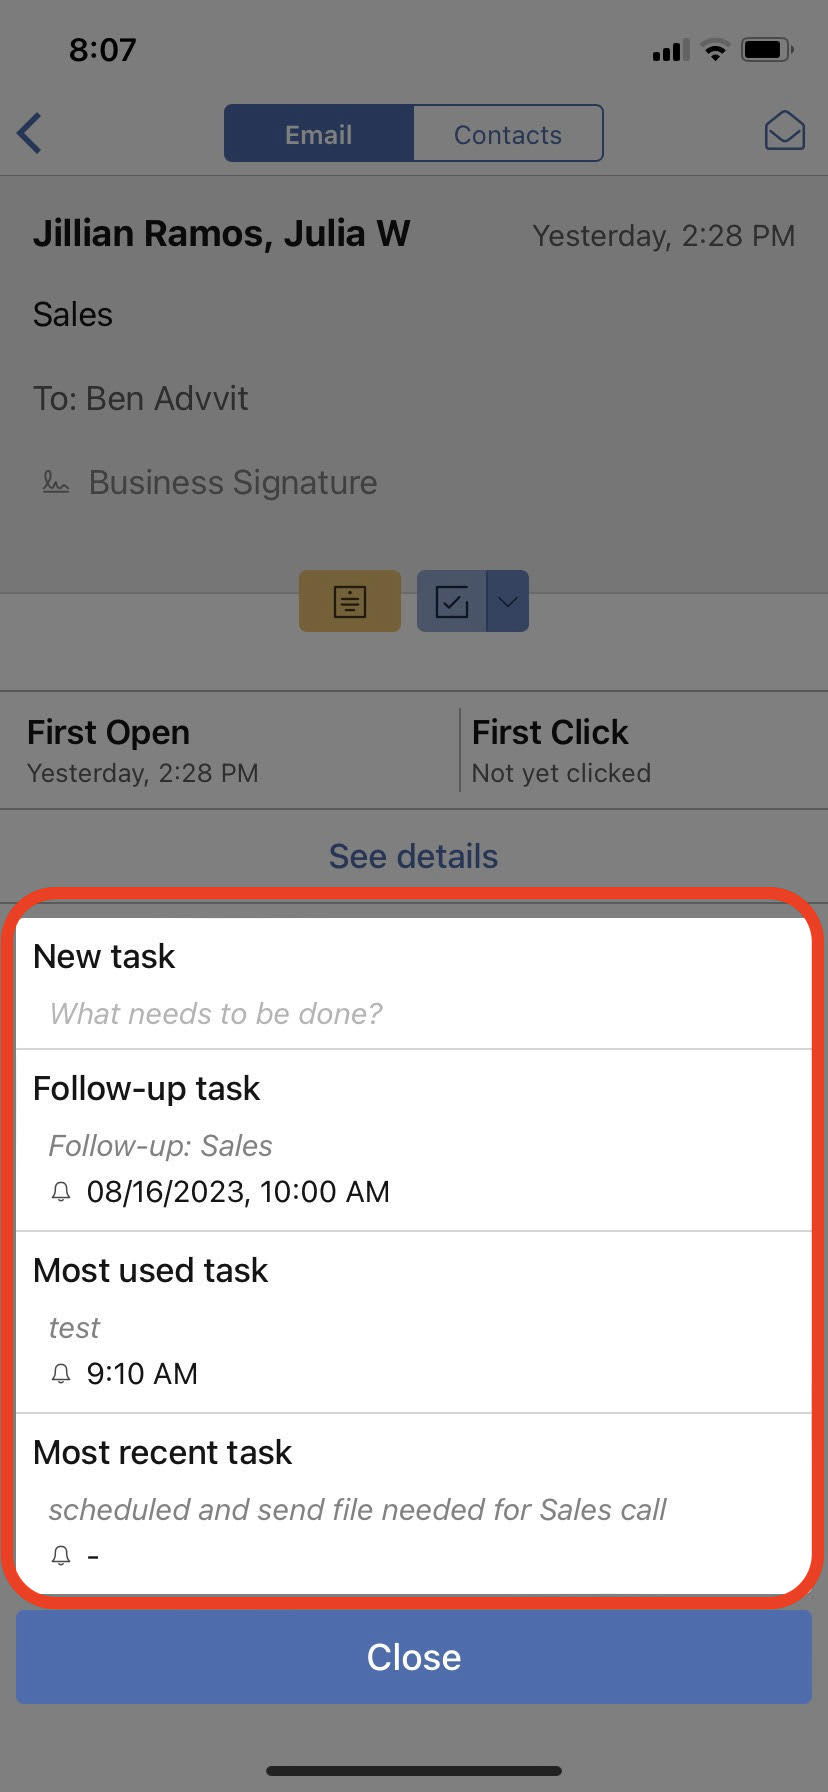
3. Click on the QuickTask dropdown button ...

4. Choose a Quick Task. You can choose between your Most recent task or your Most used task. Or you can add a Follow-up task to get reminded to follow up on your email if your recipient doesn't reply.
4. To manage your Tasks, go to the Tasks tab.
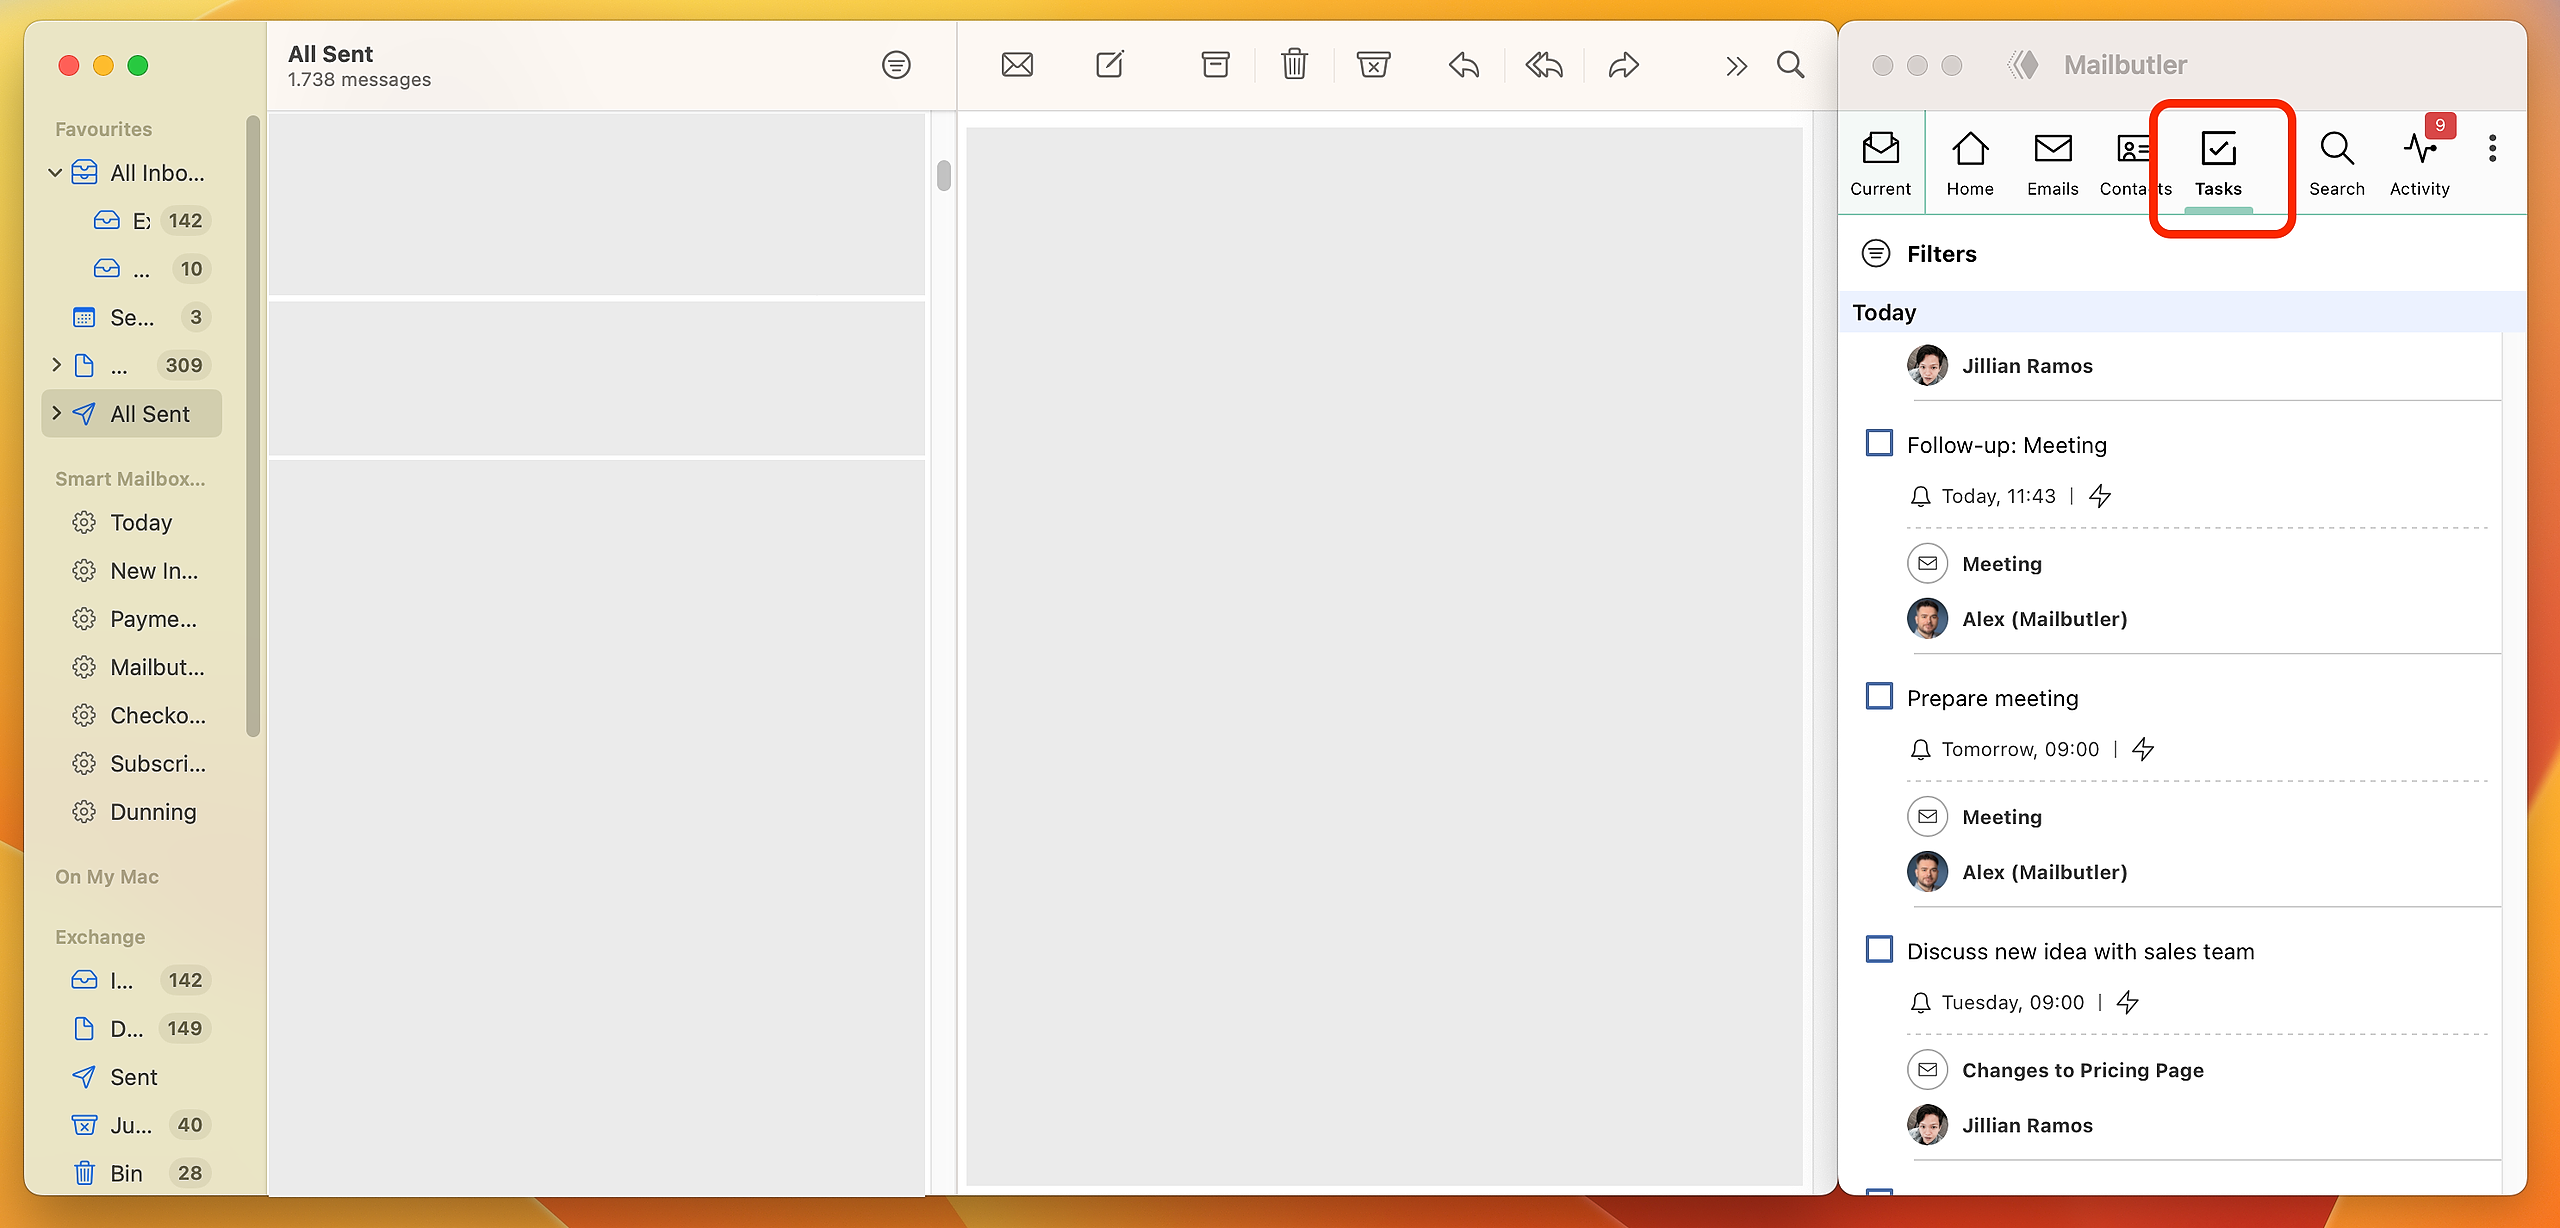
How do I view all of my Tasks in a list?
You can find an overview of all your Tasks under the Tasks tab in your navigation bar, and manage your tasks from there (mark as completed, delete).
1. Open the Mailbutler sidebar in your email client.
2. Click on the Tasks tab to view a list of all your Tasks.
How do I enable Task notifications?
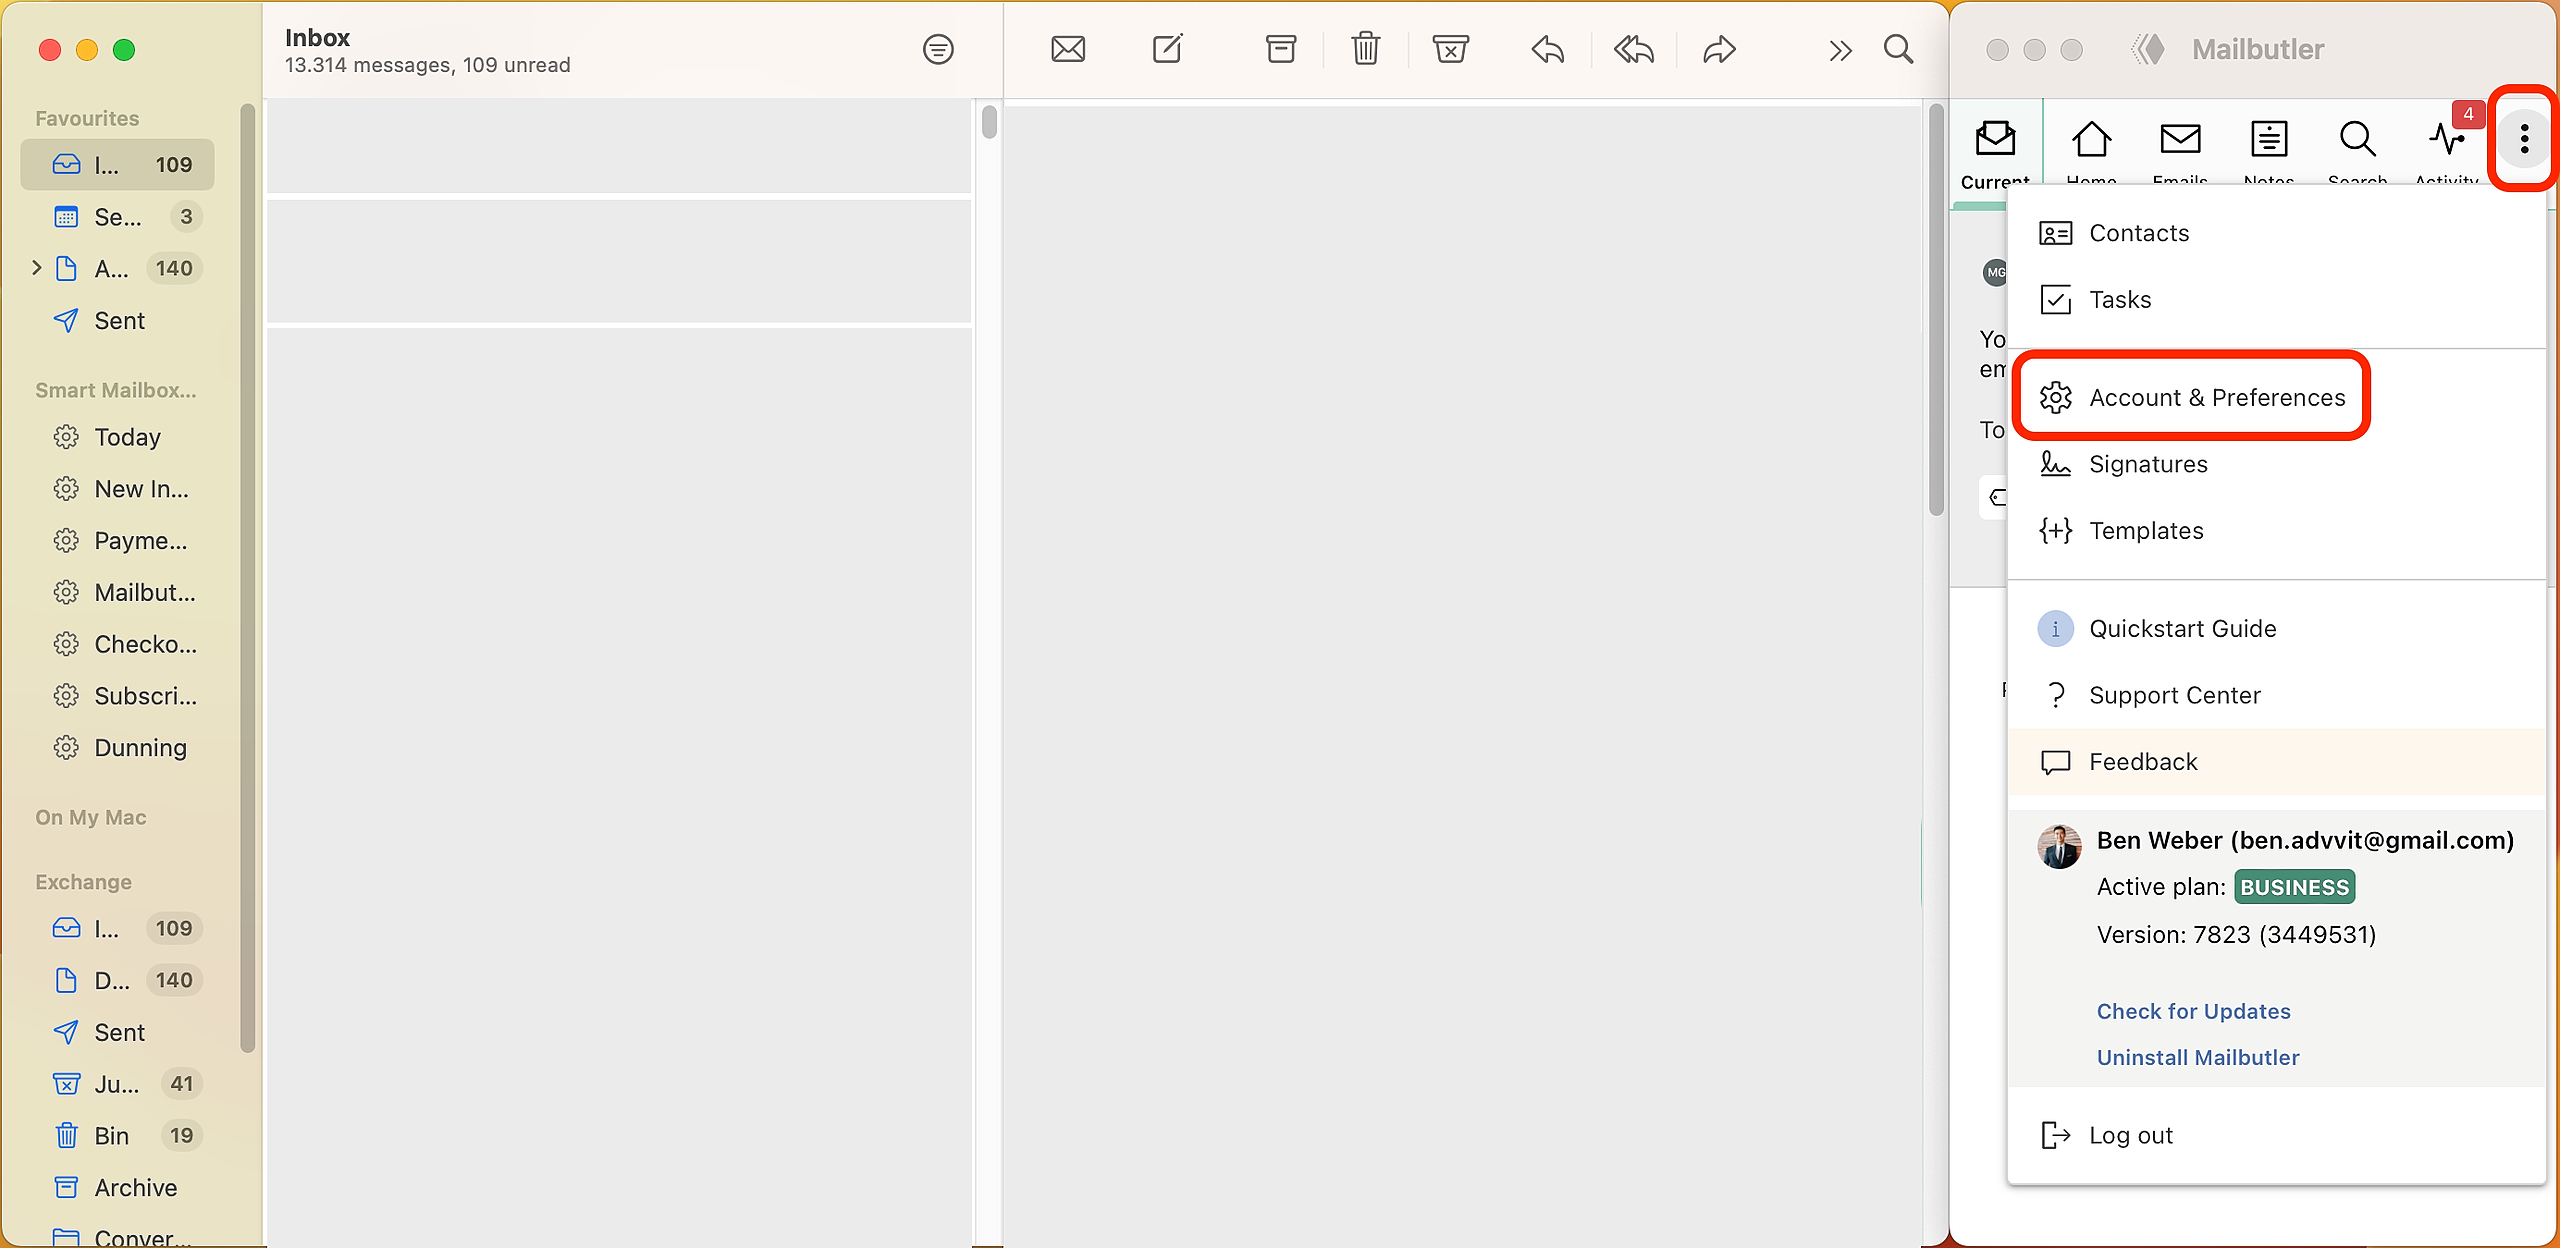
1. Open the Mailbutler sidebar in your email client.
2. In the Mailbutler Sidebar, click the three dots and then Account & Preferences.
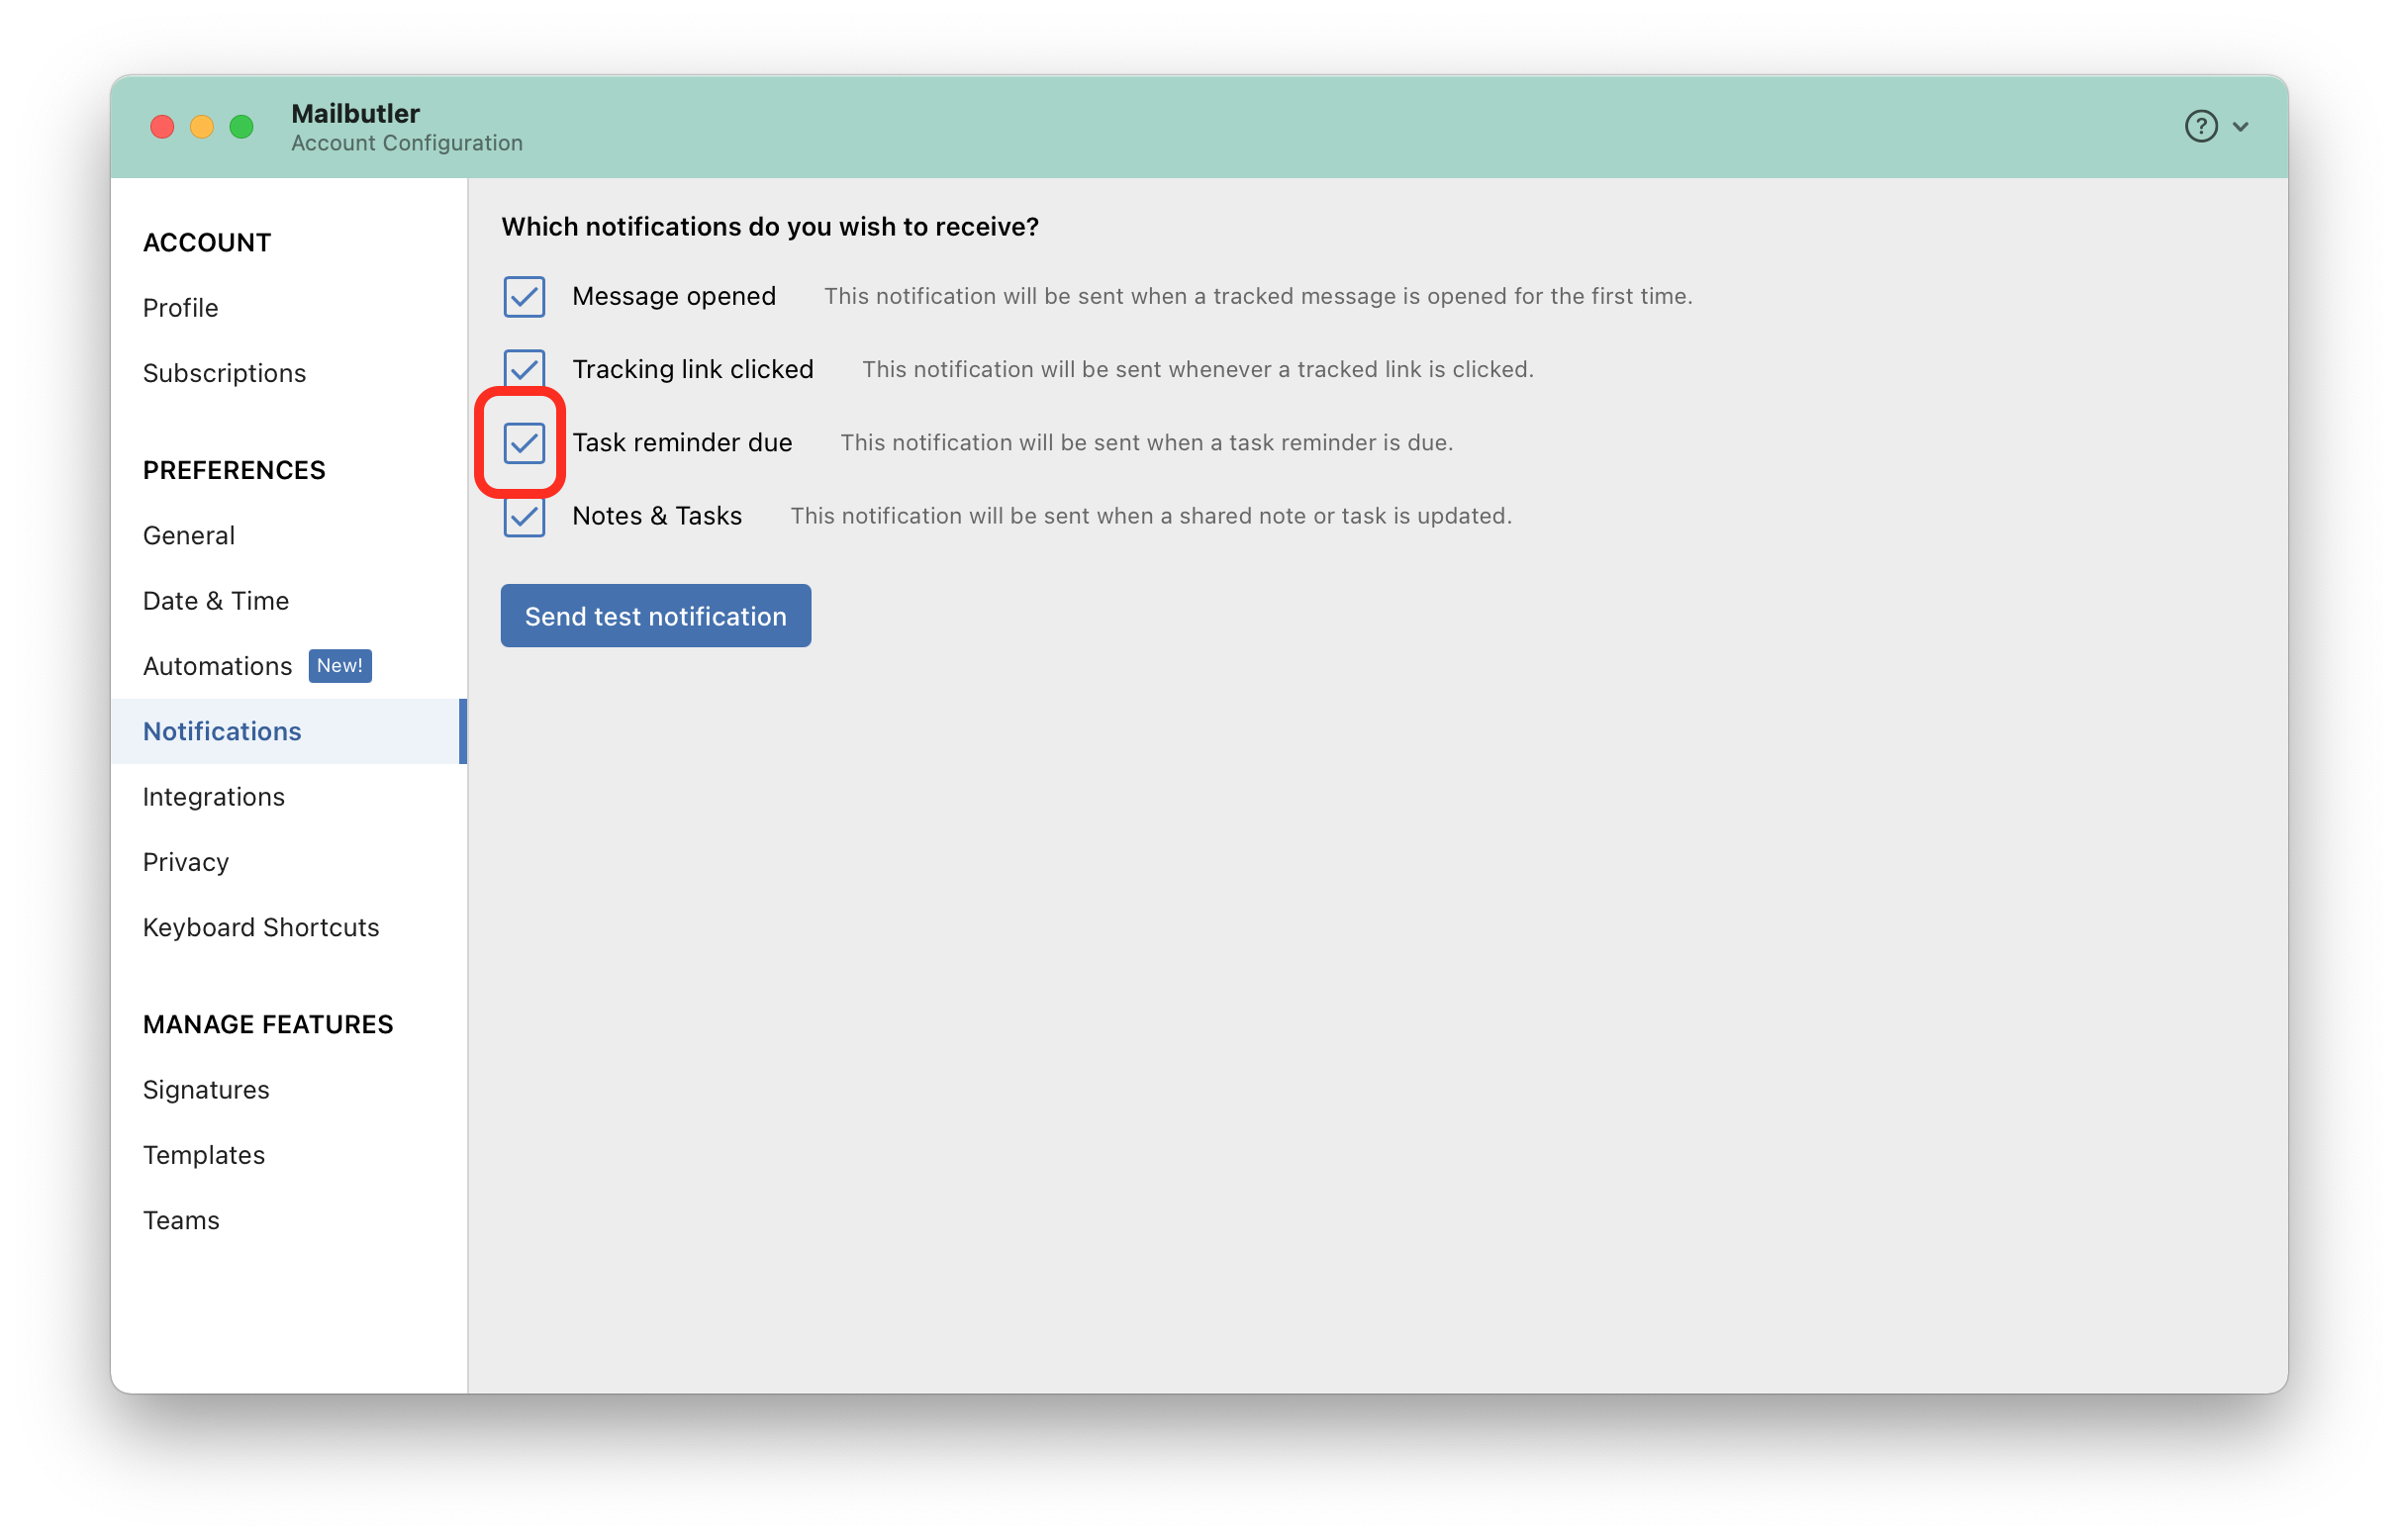
3. A new window will open. Select Notifications under Preferences in the sidebar on the left.
4. Tick the box next to "Task reminder due" to receive notifications on your desktop when your Tasks are due.

How do I sync my Tasks with external services?
Mailbutler allows you to sync your Tasks across other productivity platforms, such as Todoist or Asana. You can receive notifications from your task management app when your Tasks are due.