
Apple Reminders
If you connect Mailbutler with Apple Reminders, Tasks and Assigned Emails created with Mailbutler will be automatically synced with your Apple Reminders.
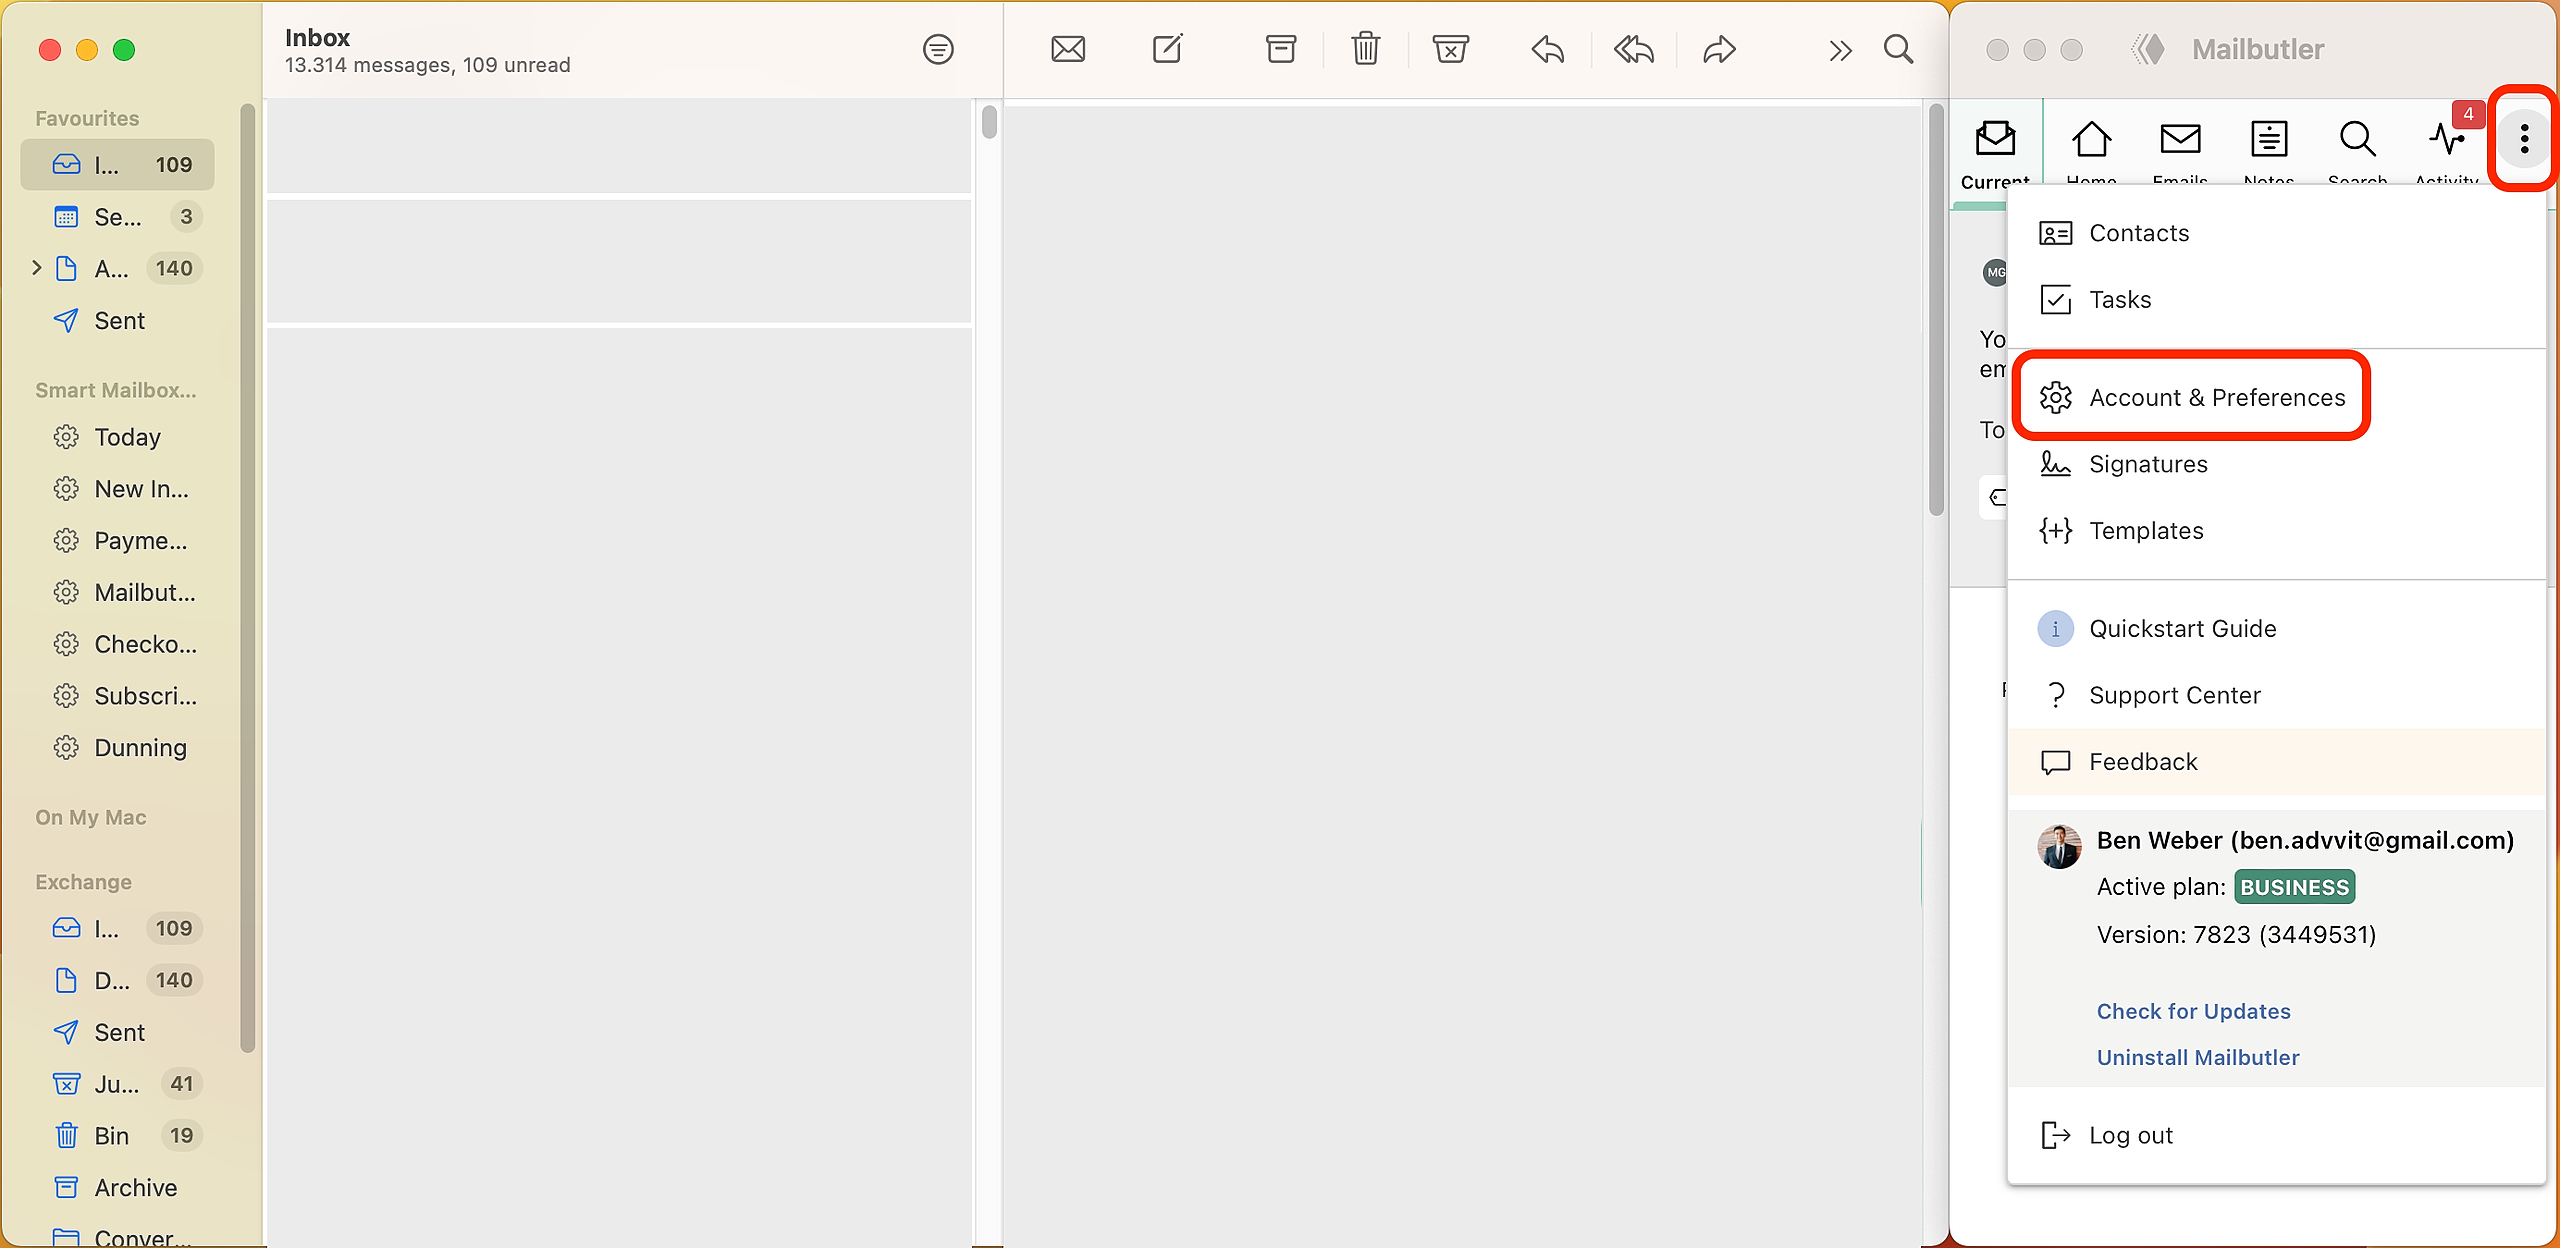
1. Open the Mailbutler sidebar in your email client, click the three dots and then Account & Preferences.
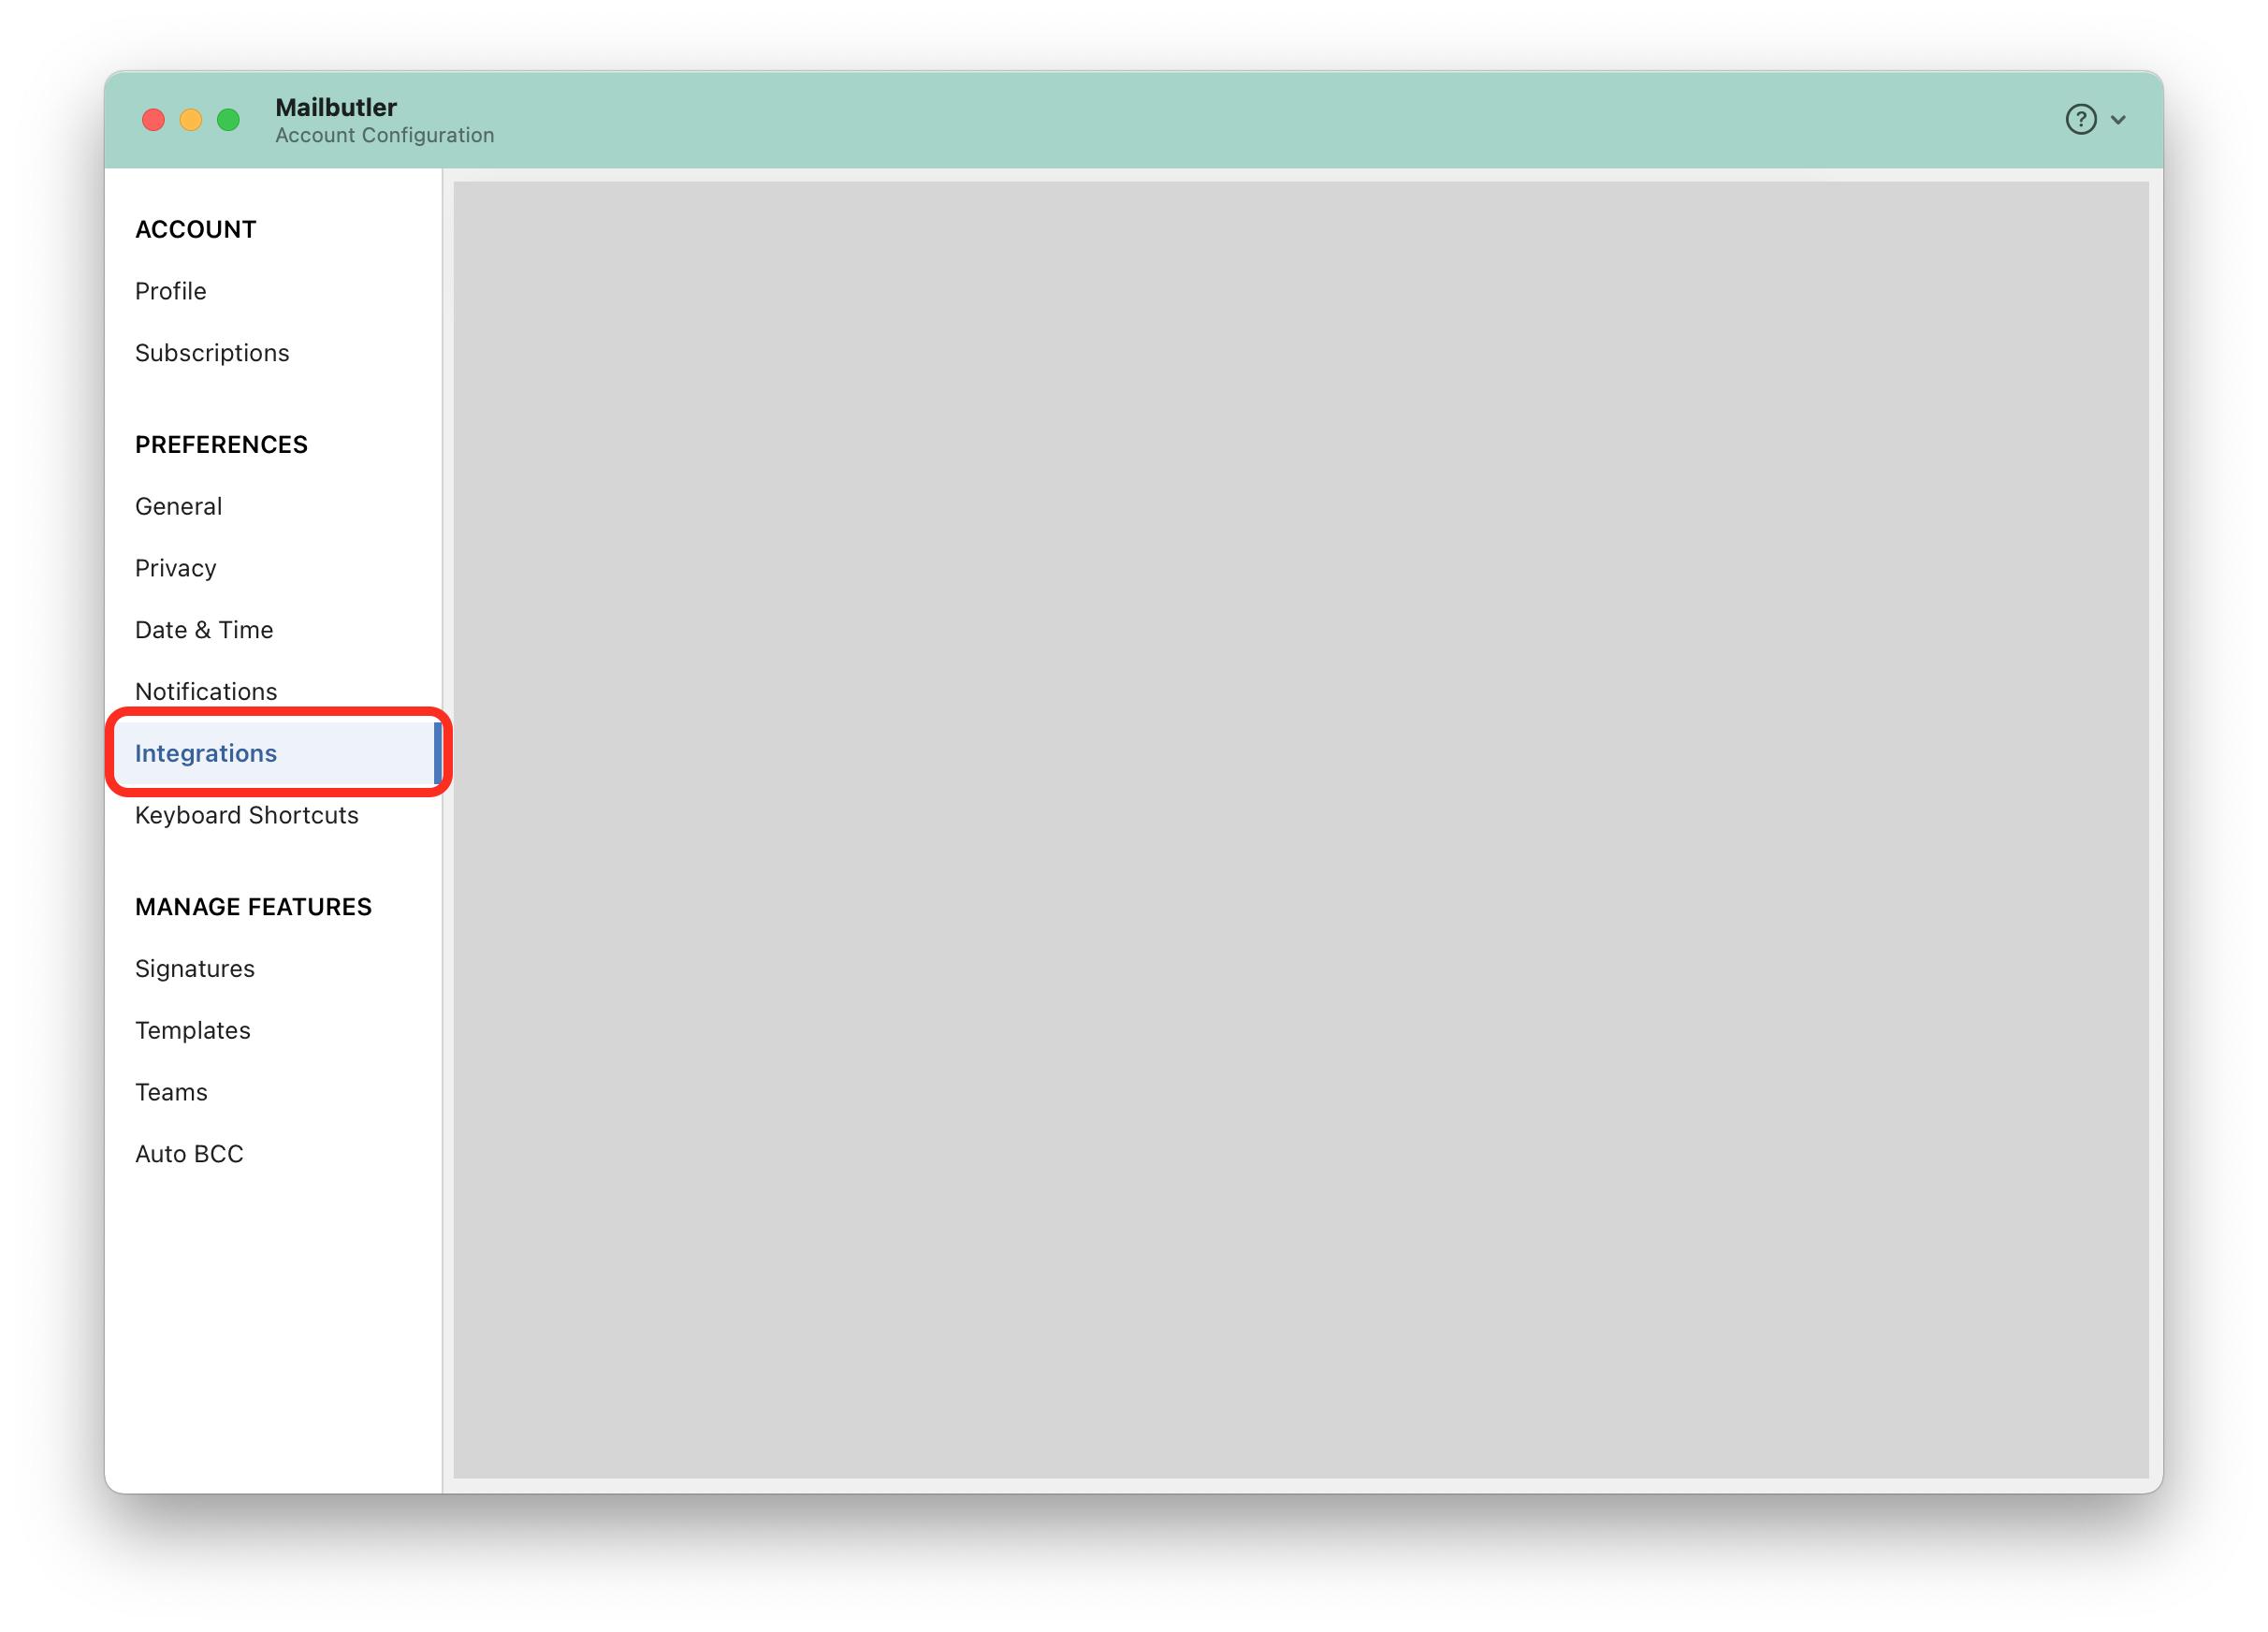
2. A new window will pop up. Select Integrations under Preferences in the sidebar on the left.
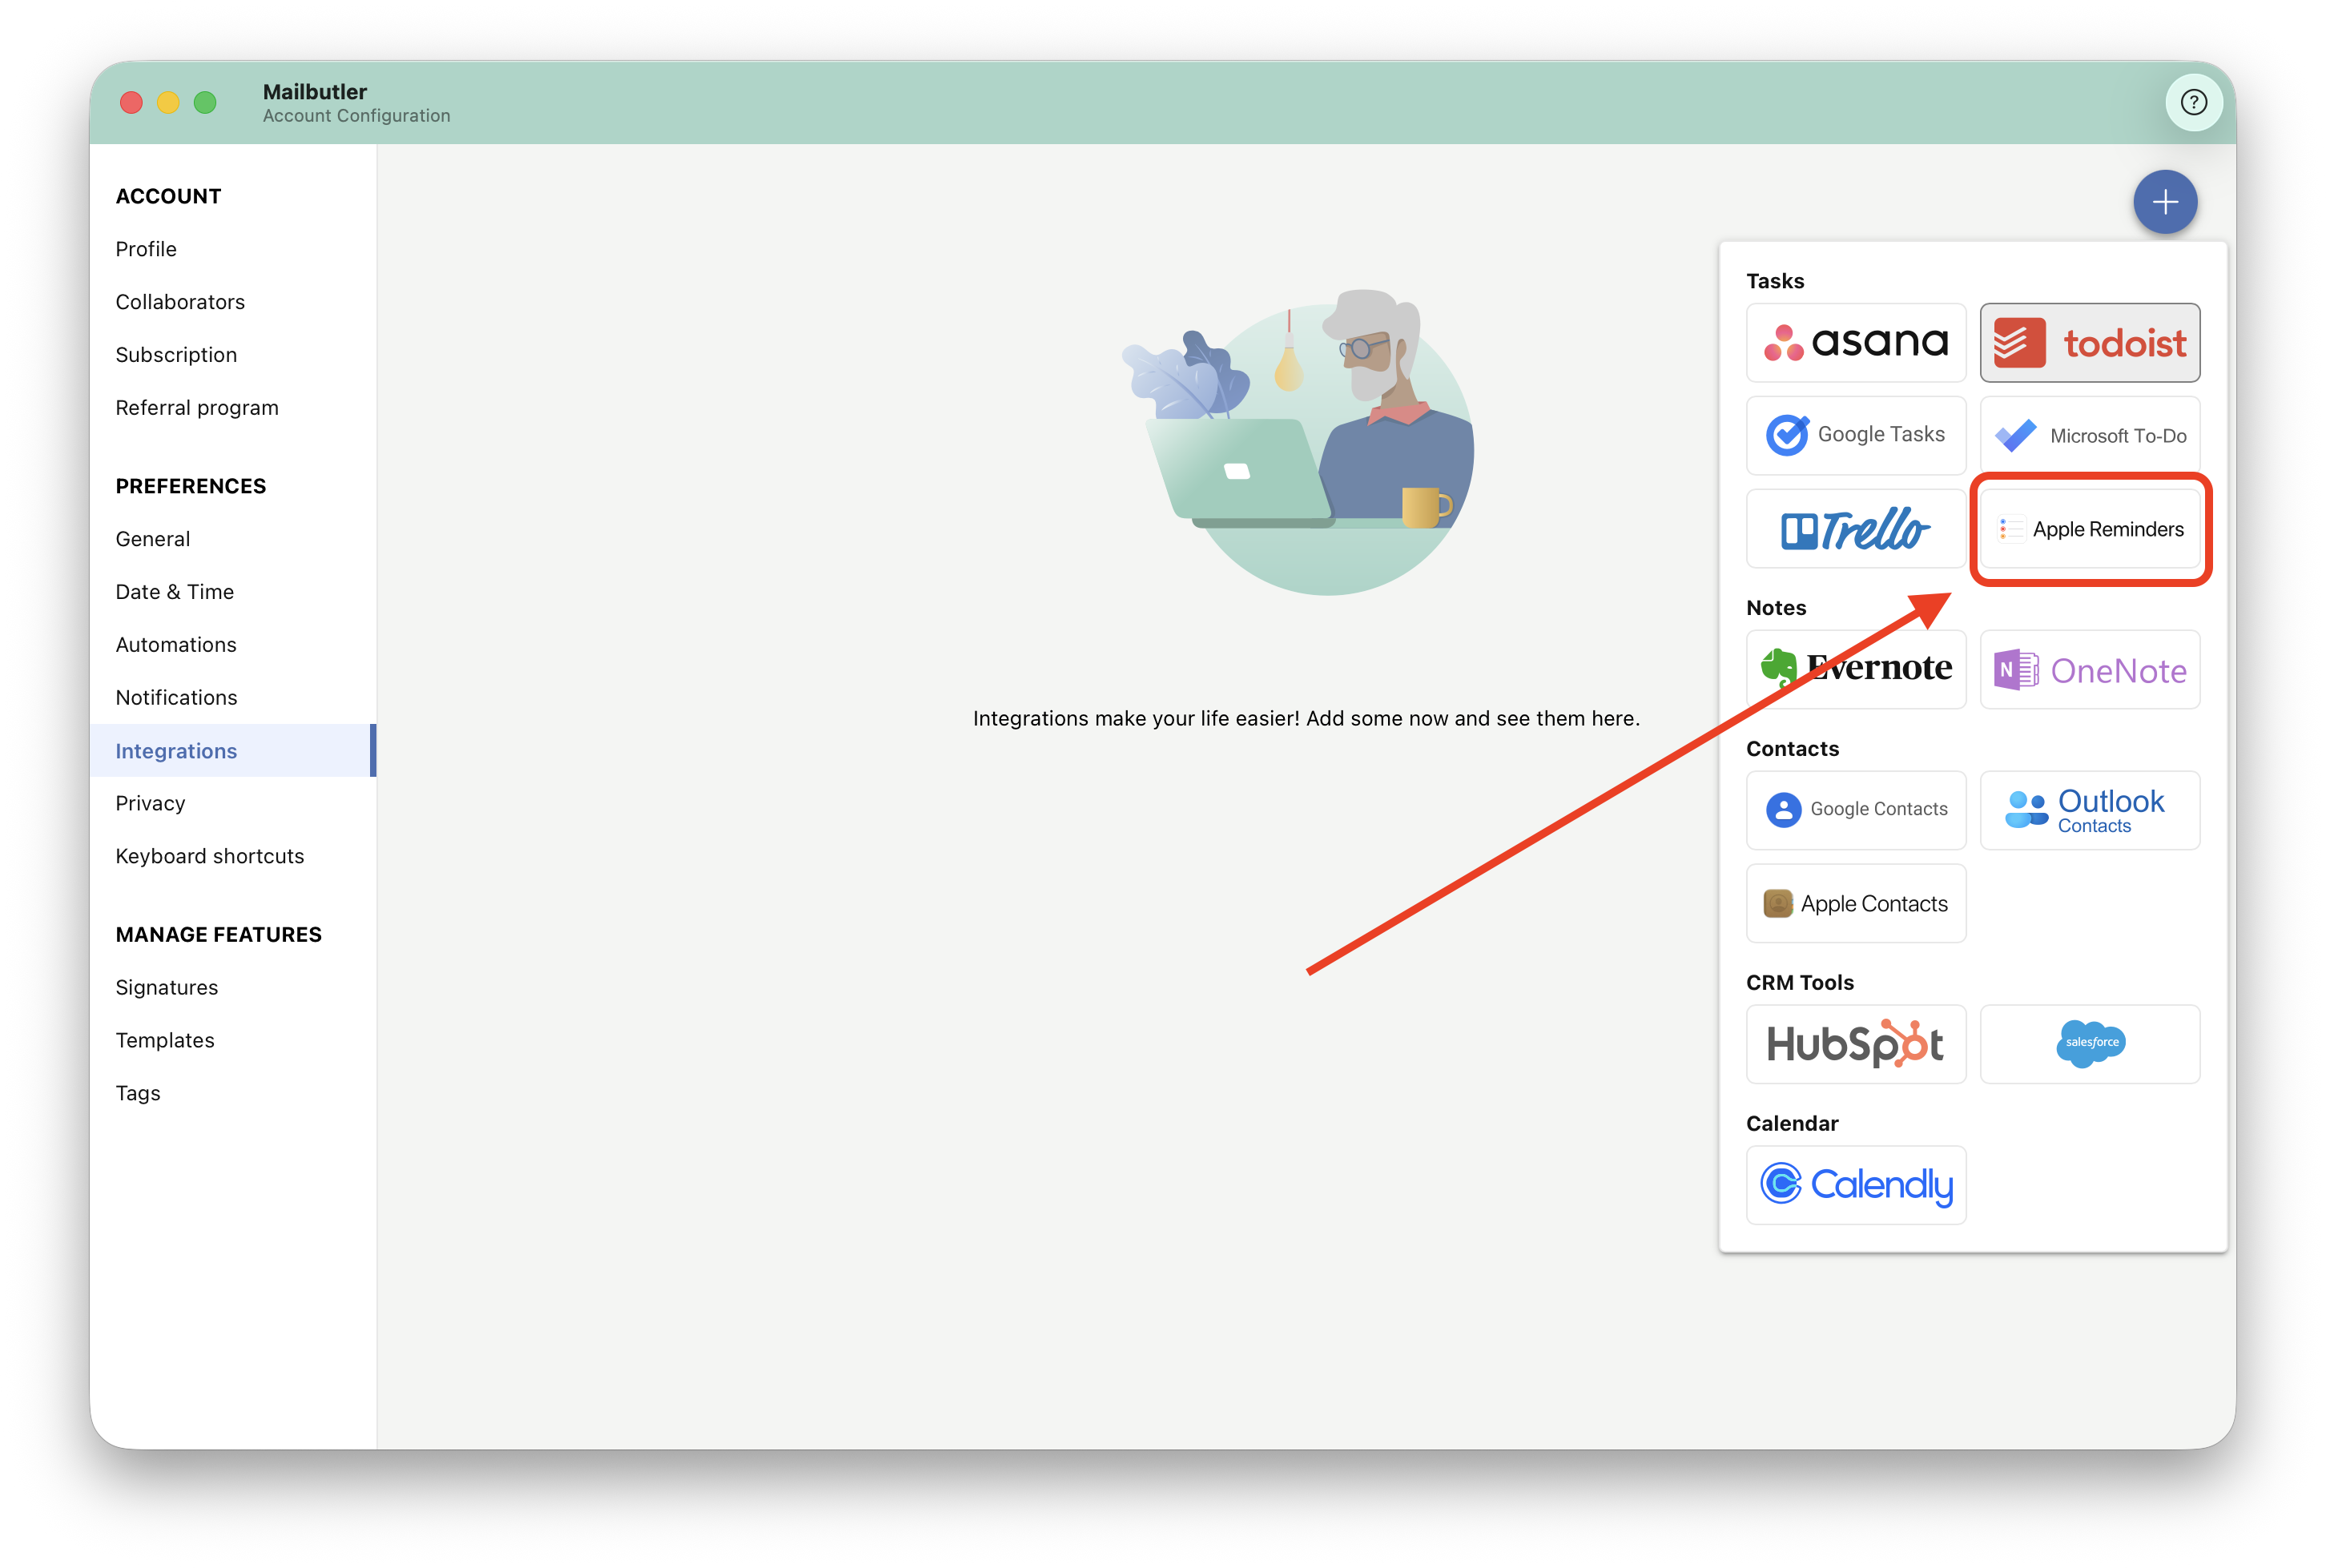
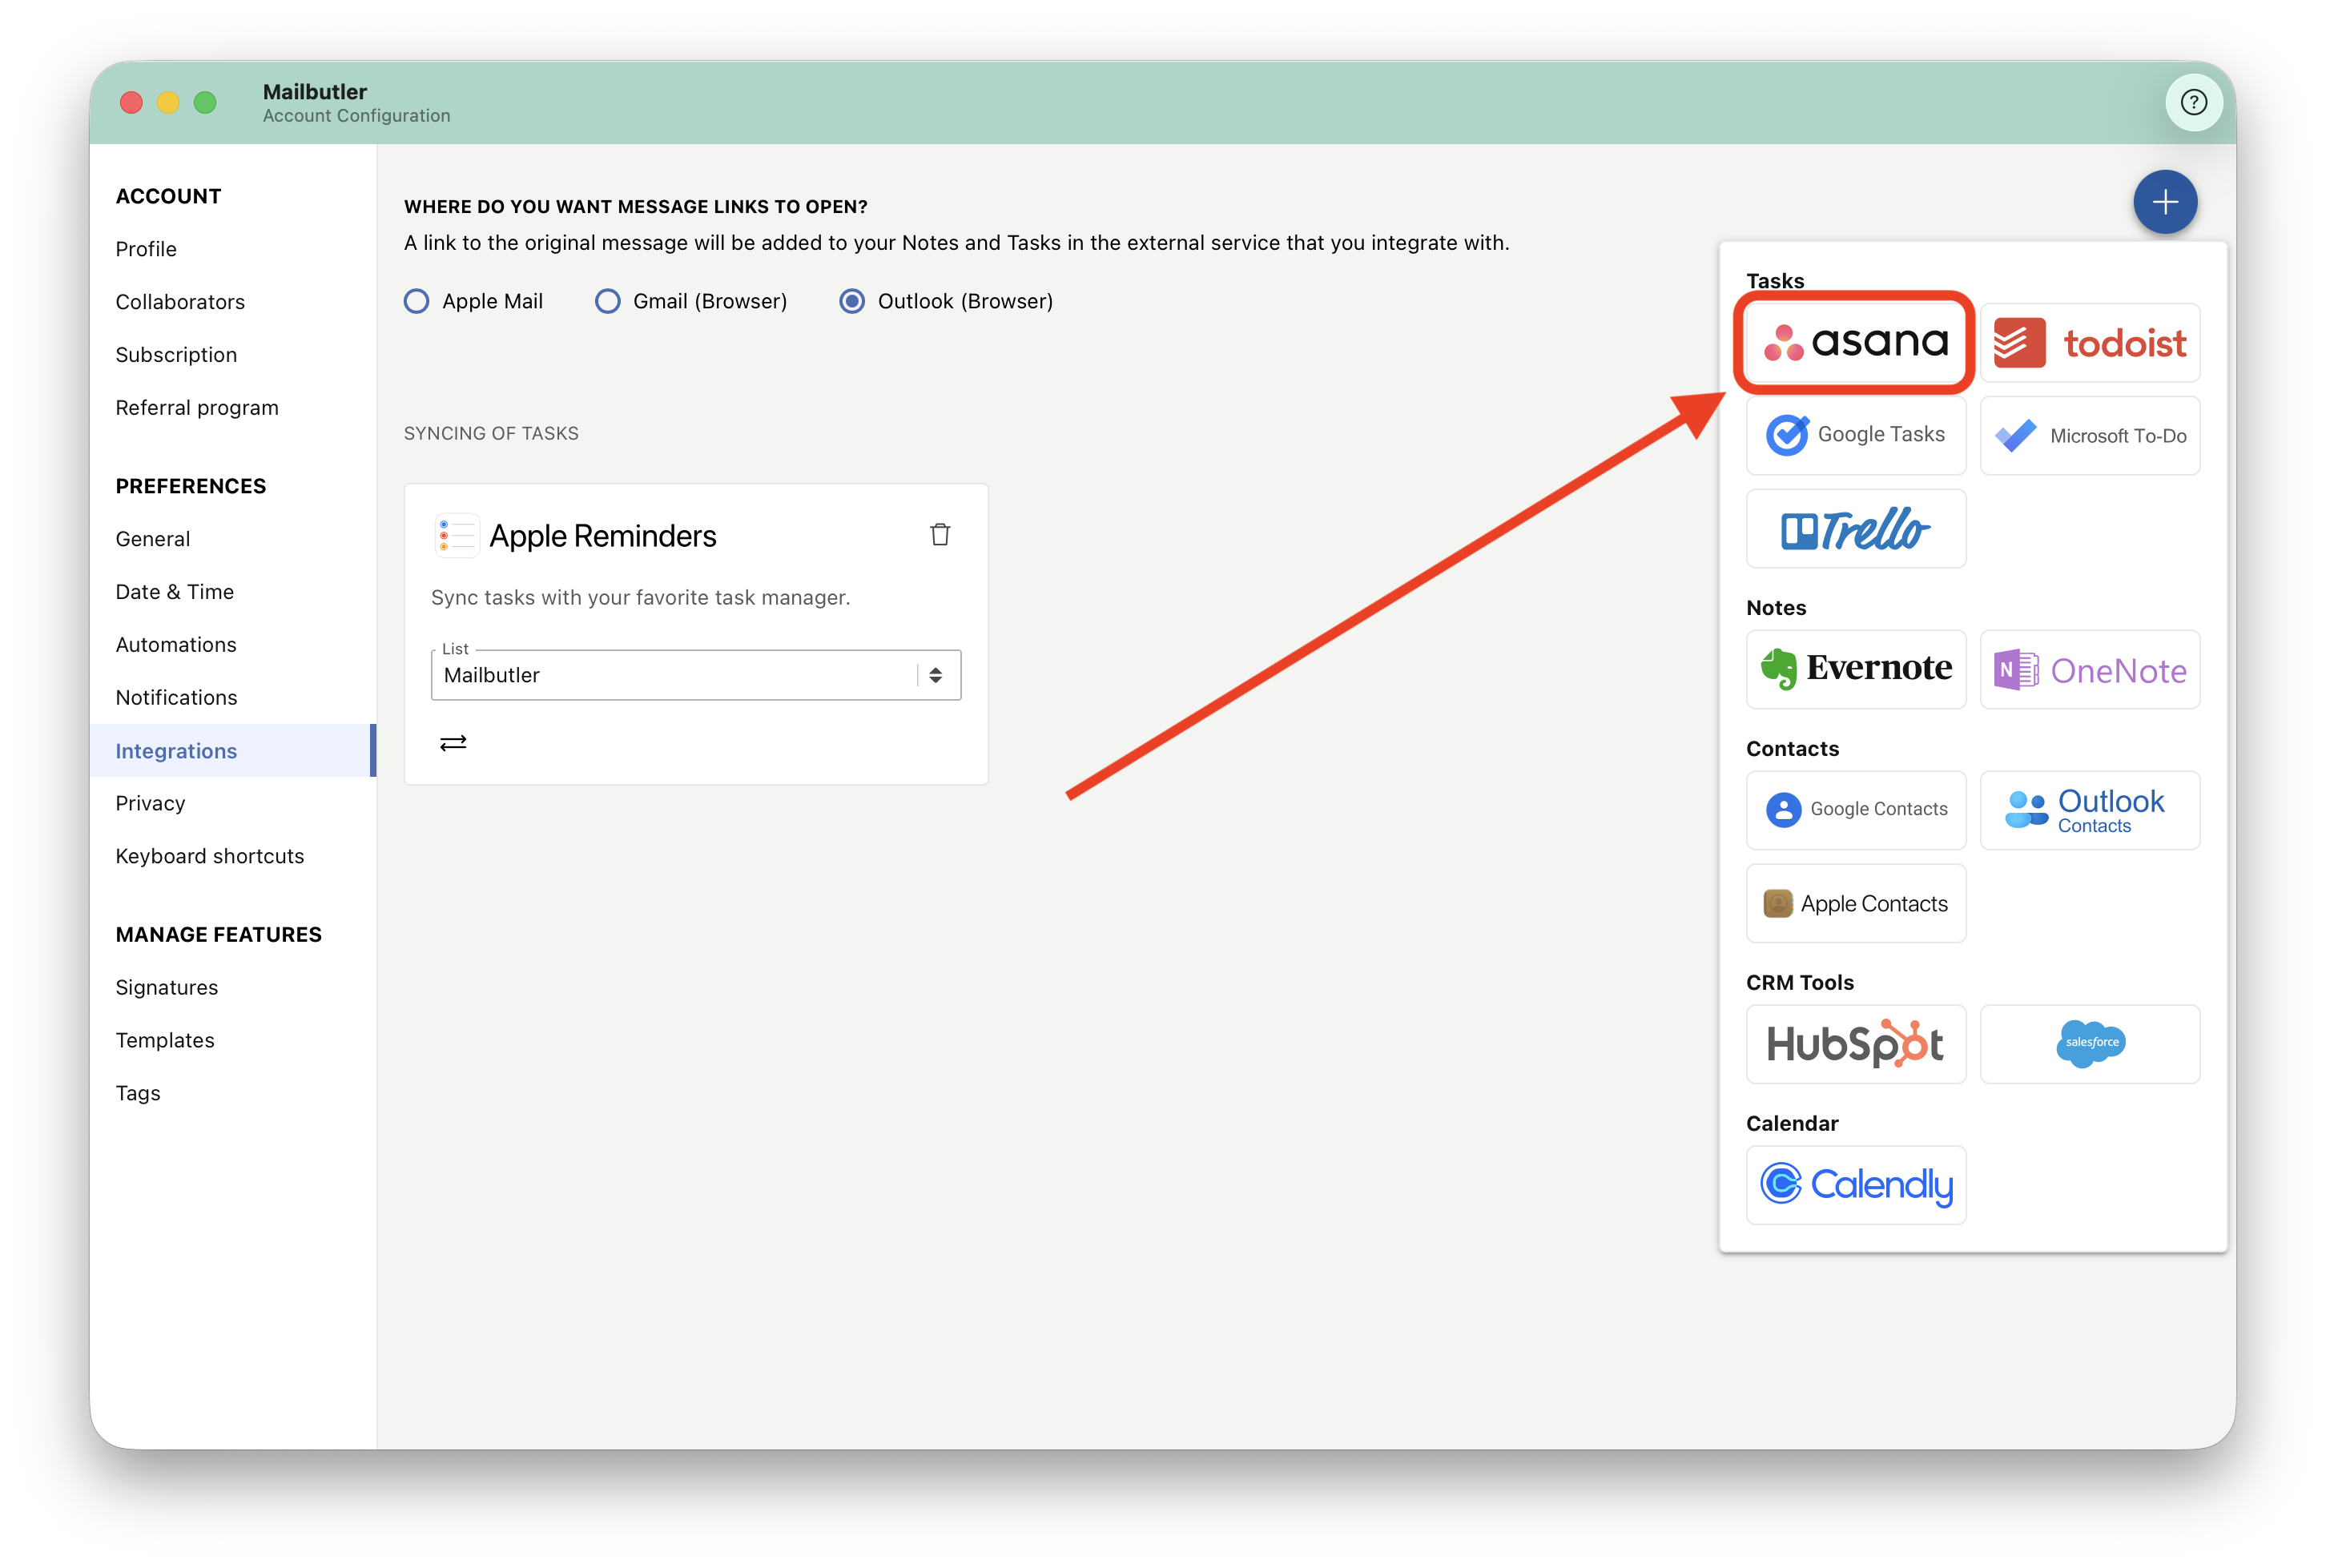
3. Click the plus icon and then click Apple Reminders.
4. A new window will pop up. Click OK.

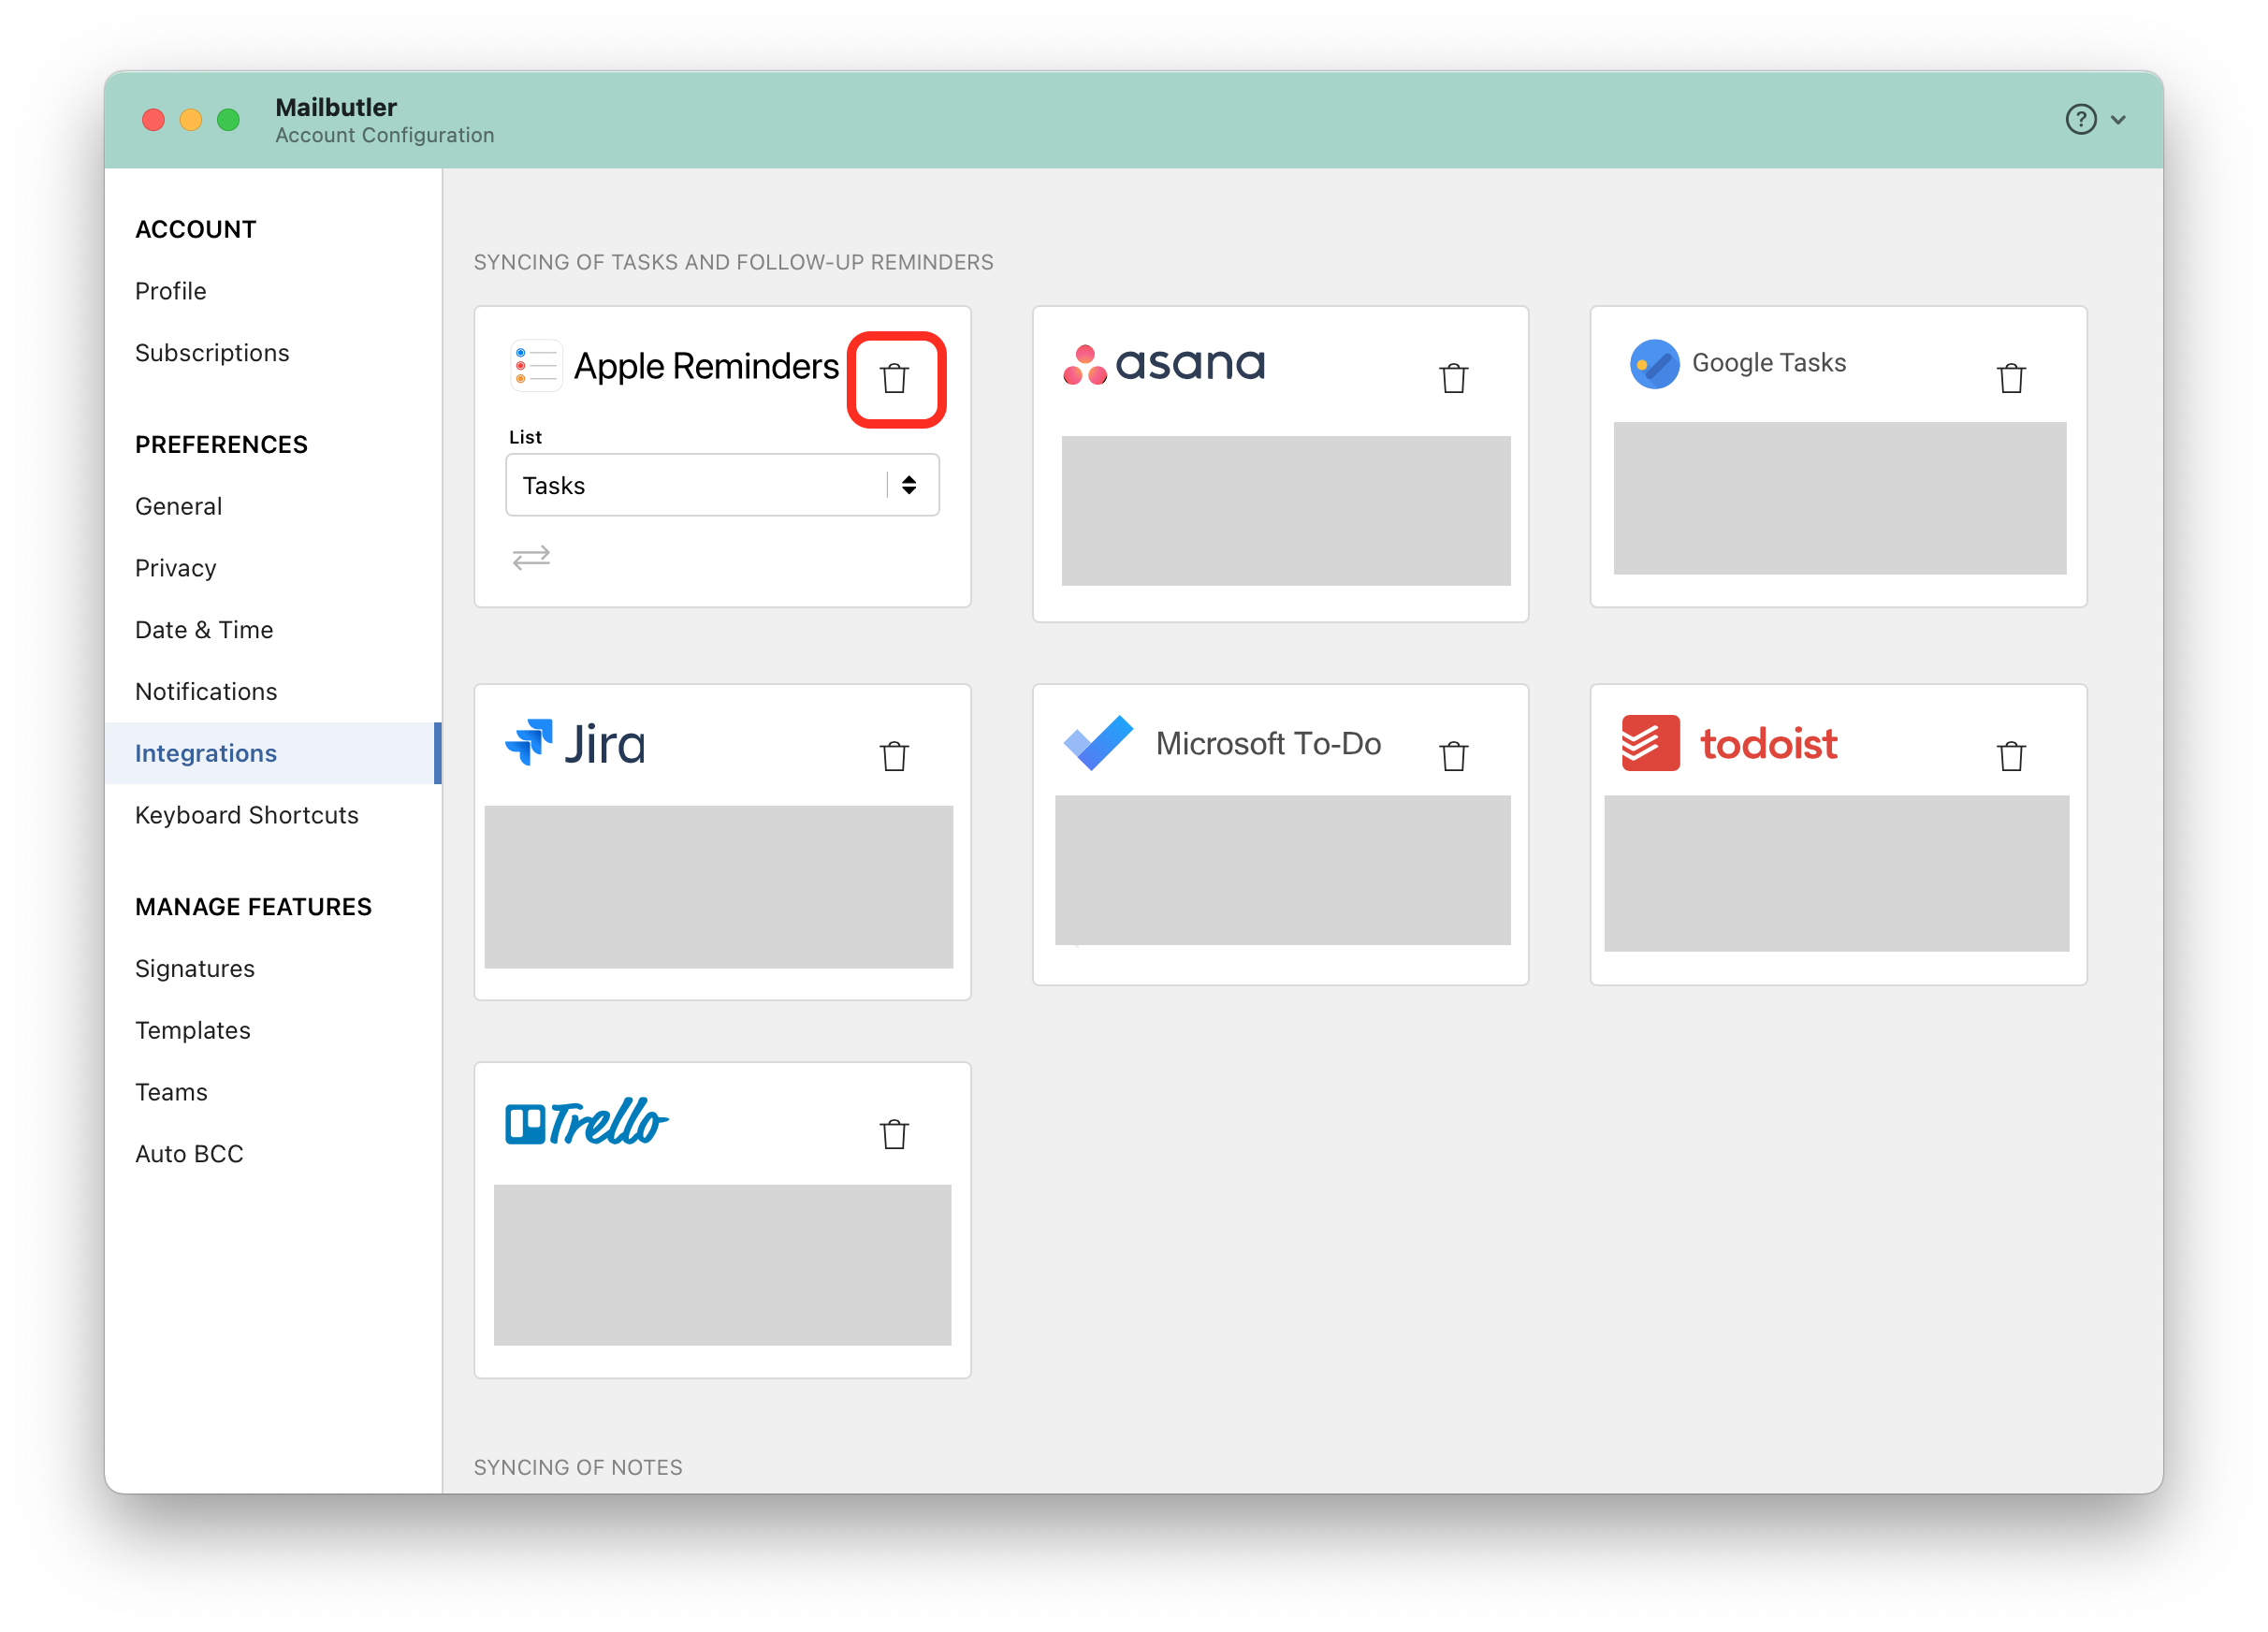
5. After the successful integration, your Tasks created and Assigned Emails with Mailbutler will automatically appear in Apple Reminders.
Information is synchronized both ways. That means that making any changes to your Tasks and Assigned Emails in Apple Reminders will be reflected in Mailbutler and the other way round.
6. Click the dropdown arrows to change the Apple Reminders list that you would like your Tasks and Assigned Emails to be synced to.
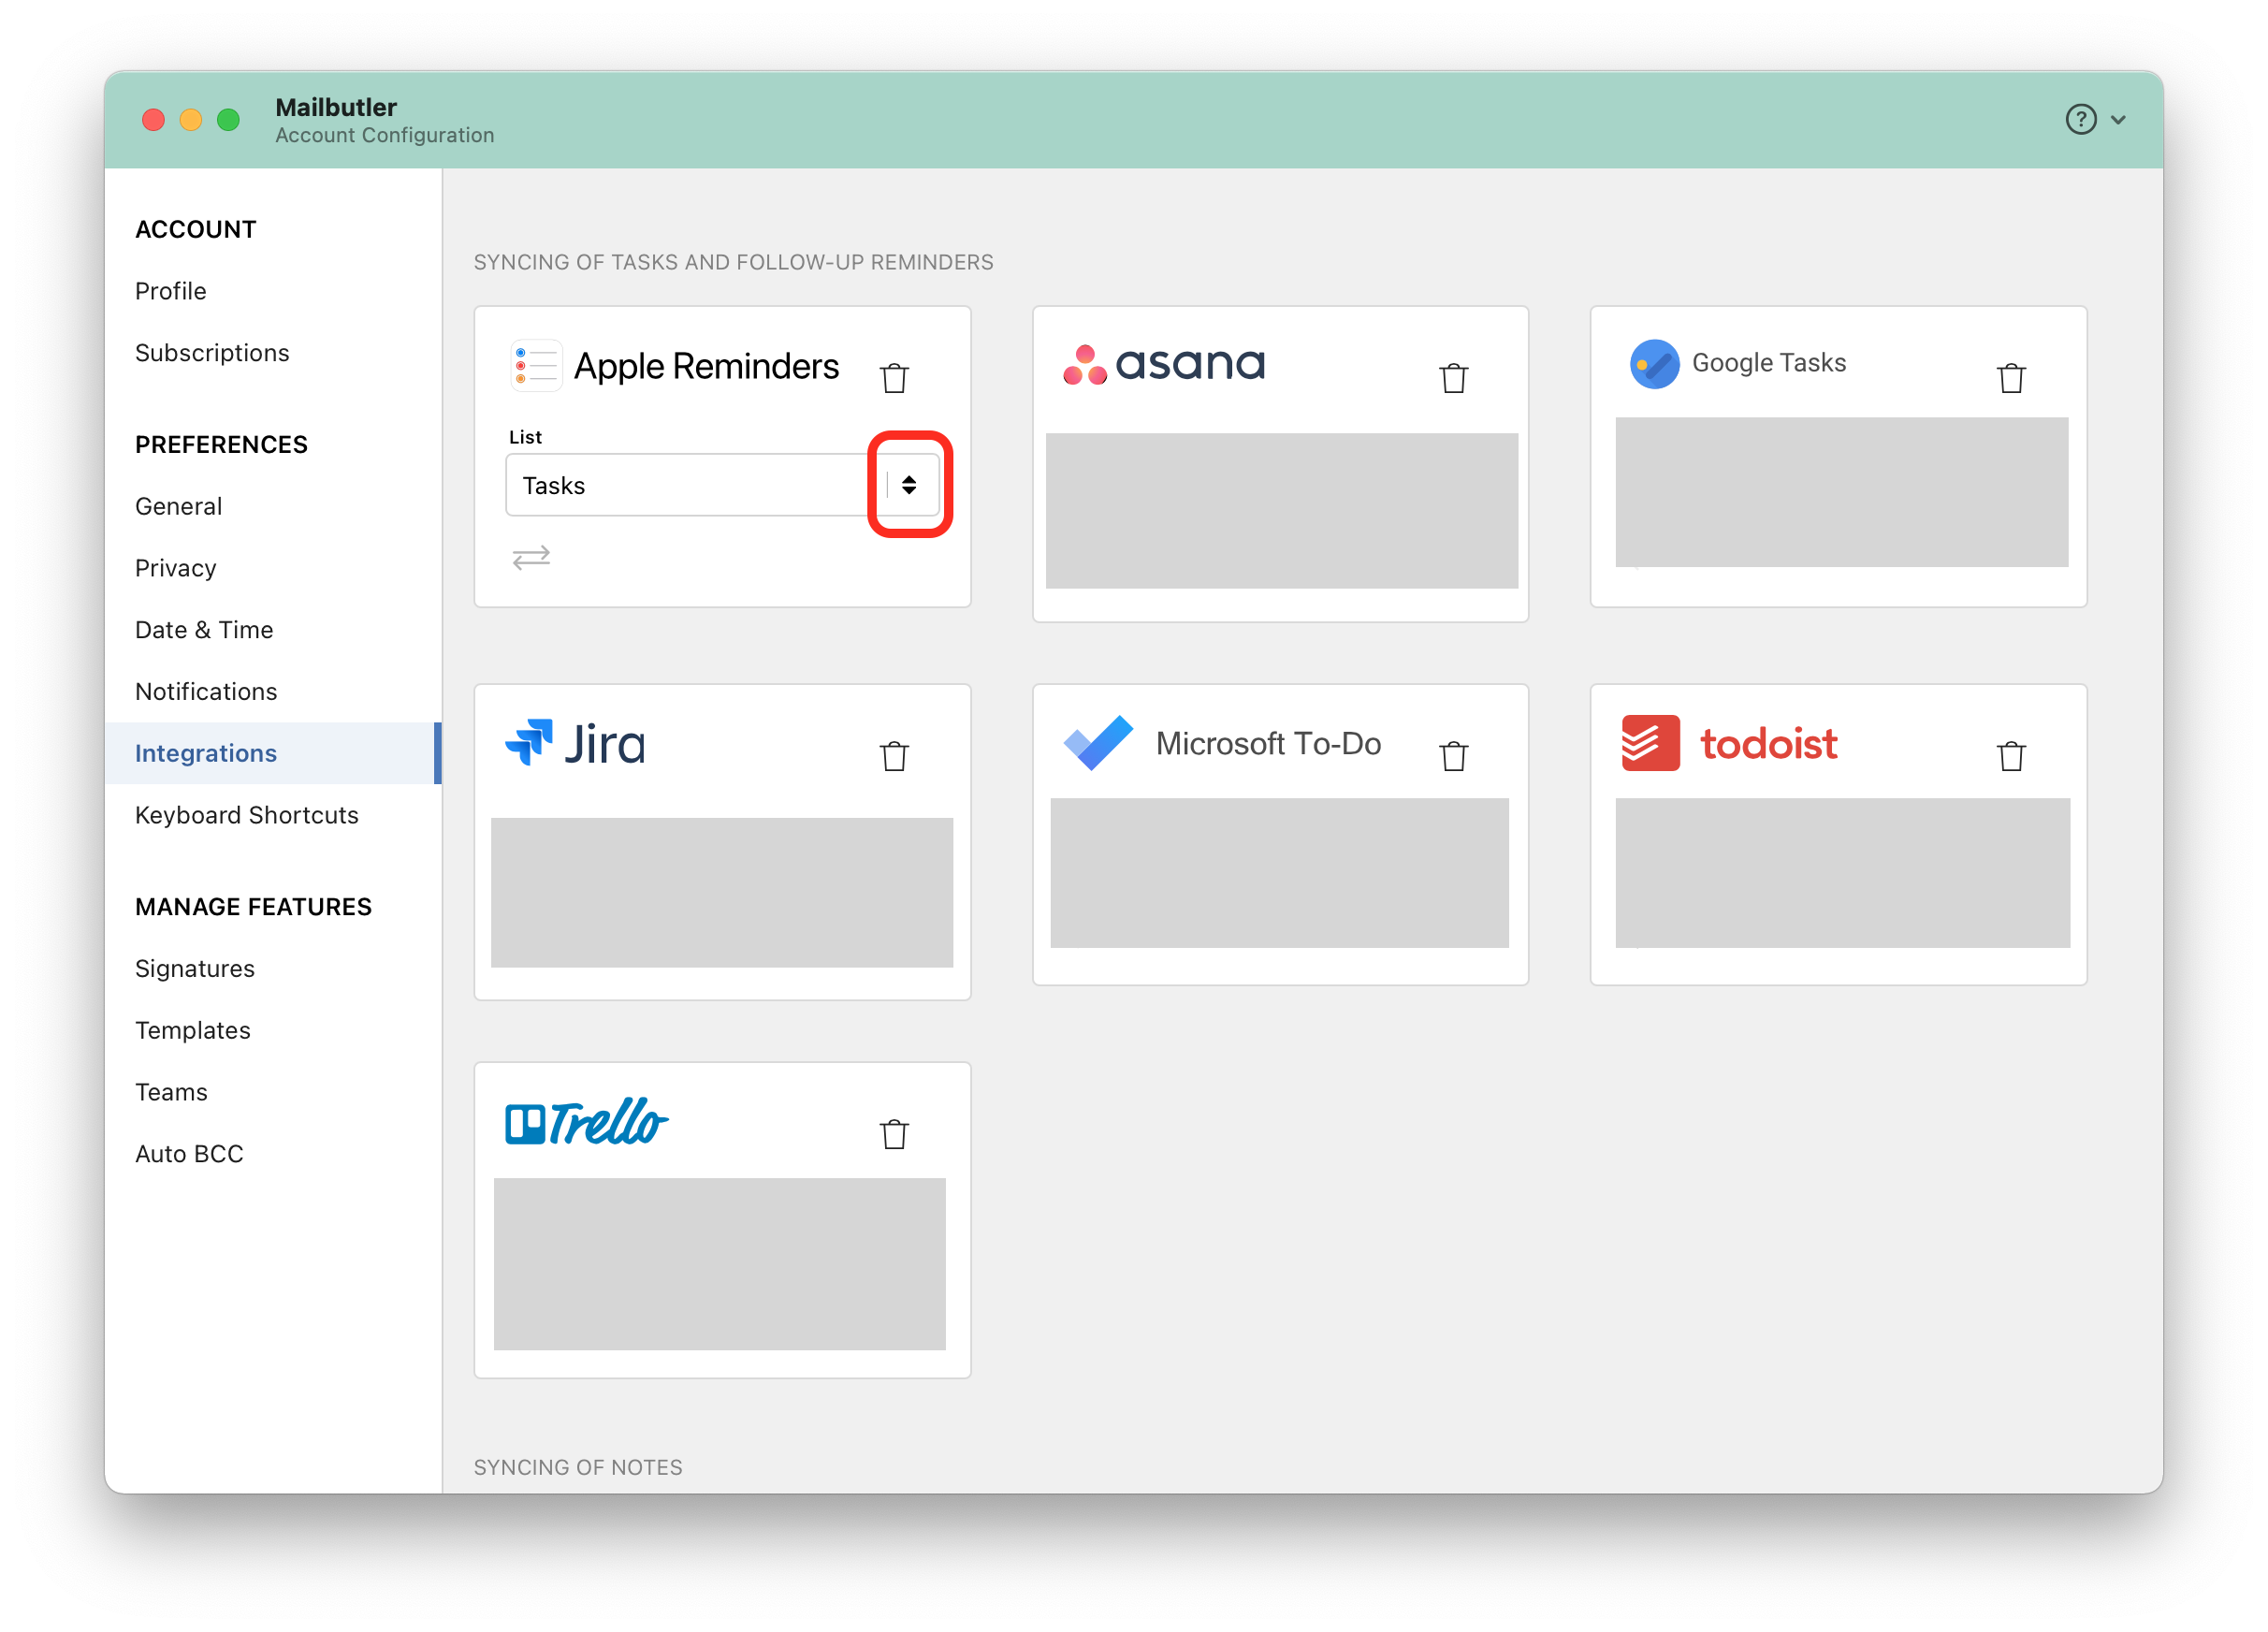
7. To disconnect the service from Mailbutler, click the trash icon.
Asana
If you connect Mailbutler with Asana, Tasks and Assigned Emails created with Mailbutler will be automatically synced with your Asana account.
1. Open the Mailbutler sidebar in your email client, click the three dots and then Account & Preferences.
2. A new window will pop up. Select Integrations under Preferences in the sidebar on the left.
3. Click the plus icon and then click Asana.
4. Sign in with your Asana account and follow the on-screen instructions to give Mailbutler access.
5. After the successful integration, your Tasks created, and Assigned Emails with Mailbutler will automatically appear in Asana.
Information is synchronized both ways. That means that making any changes to your Tasks and Assigned Emails in Asana will be reflected in Mailbutler and the other way round.
6. Click the dropdown arrows to change the Asana project that you would like your Tasks and Assigned Emails to be synced to.

7. To disconnect the service from Mailbutler, click the trash icon.

Evernote
If you connect Mailbutler with Evernote, Notes created with Mailbutler will be automatically synced with your Evernote account.
1. Open the Mailbutler sidebar in your email client, click the three dots and then Account & Preferences.
2. A new window will pop up. Select Integrations under Preferences in the sidebar on the left.
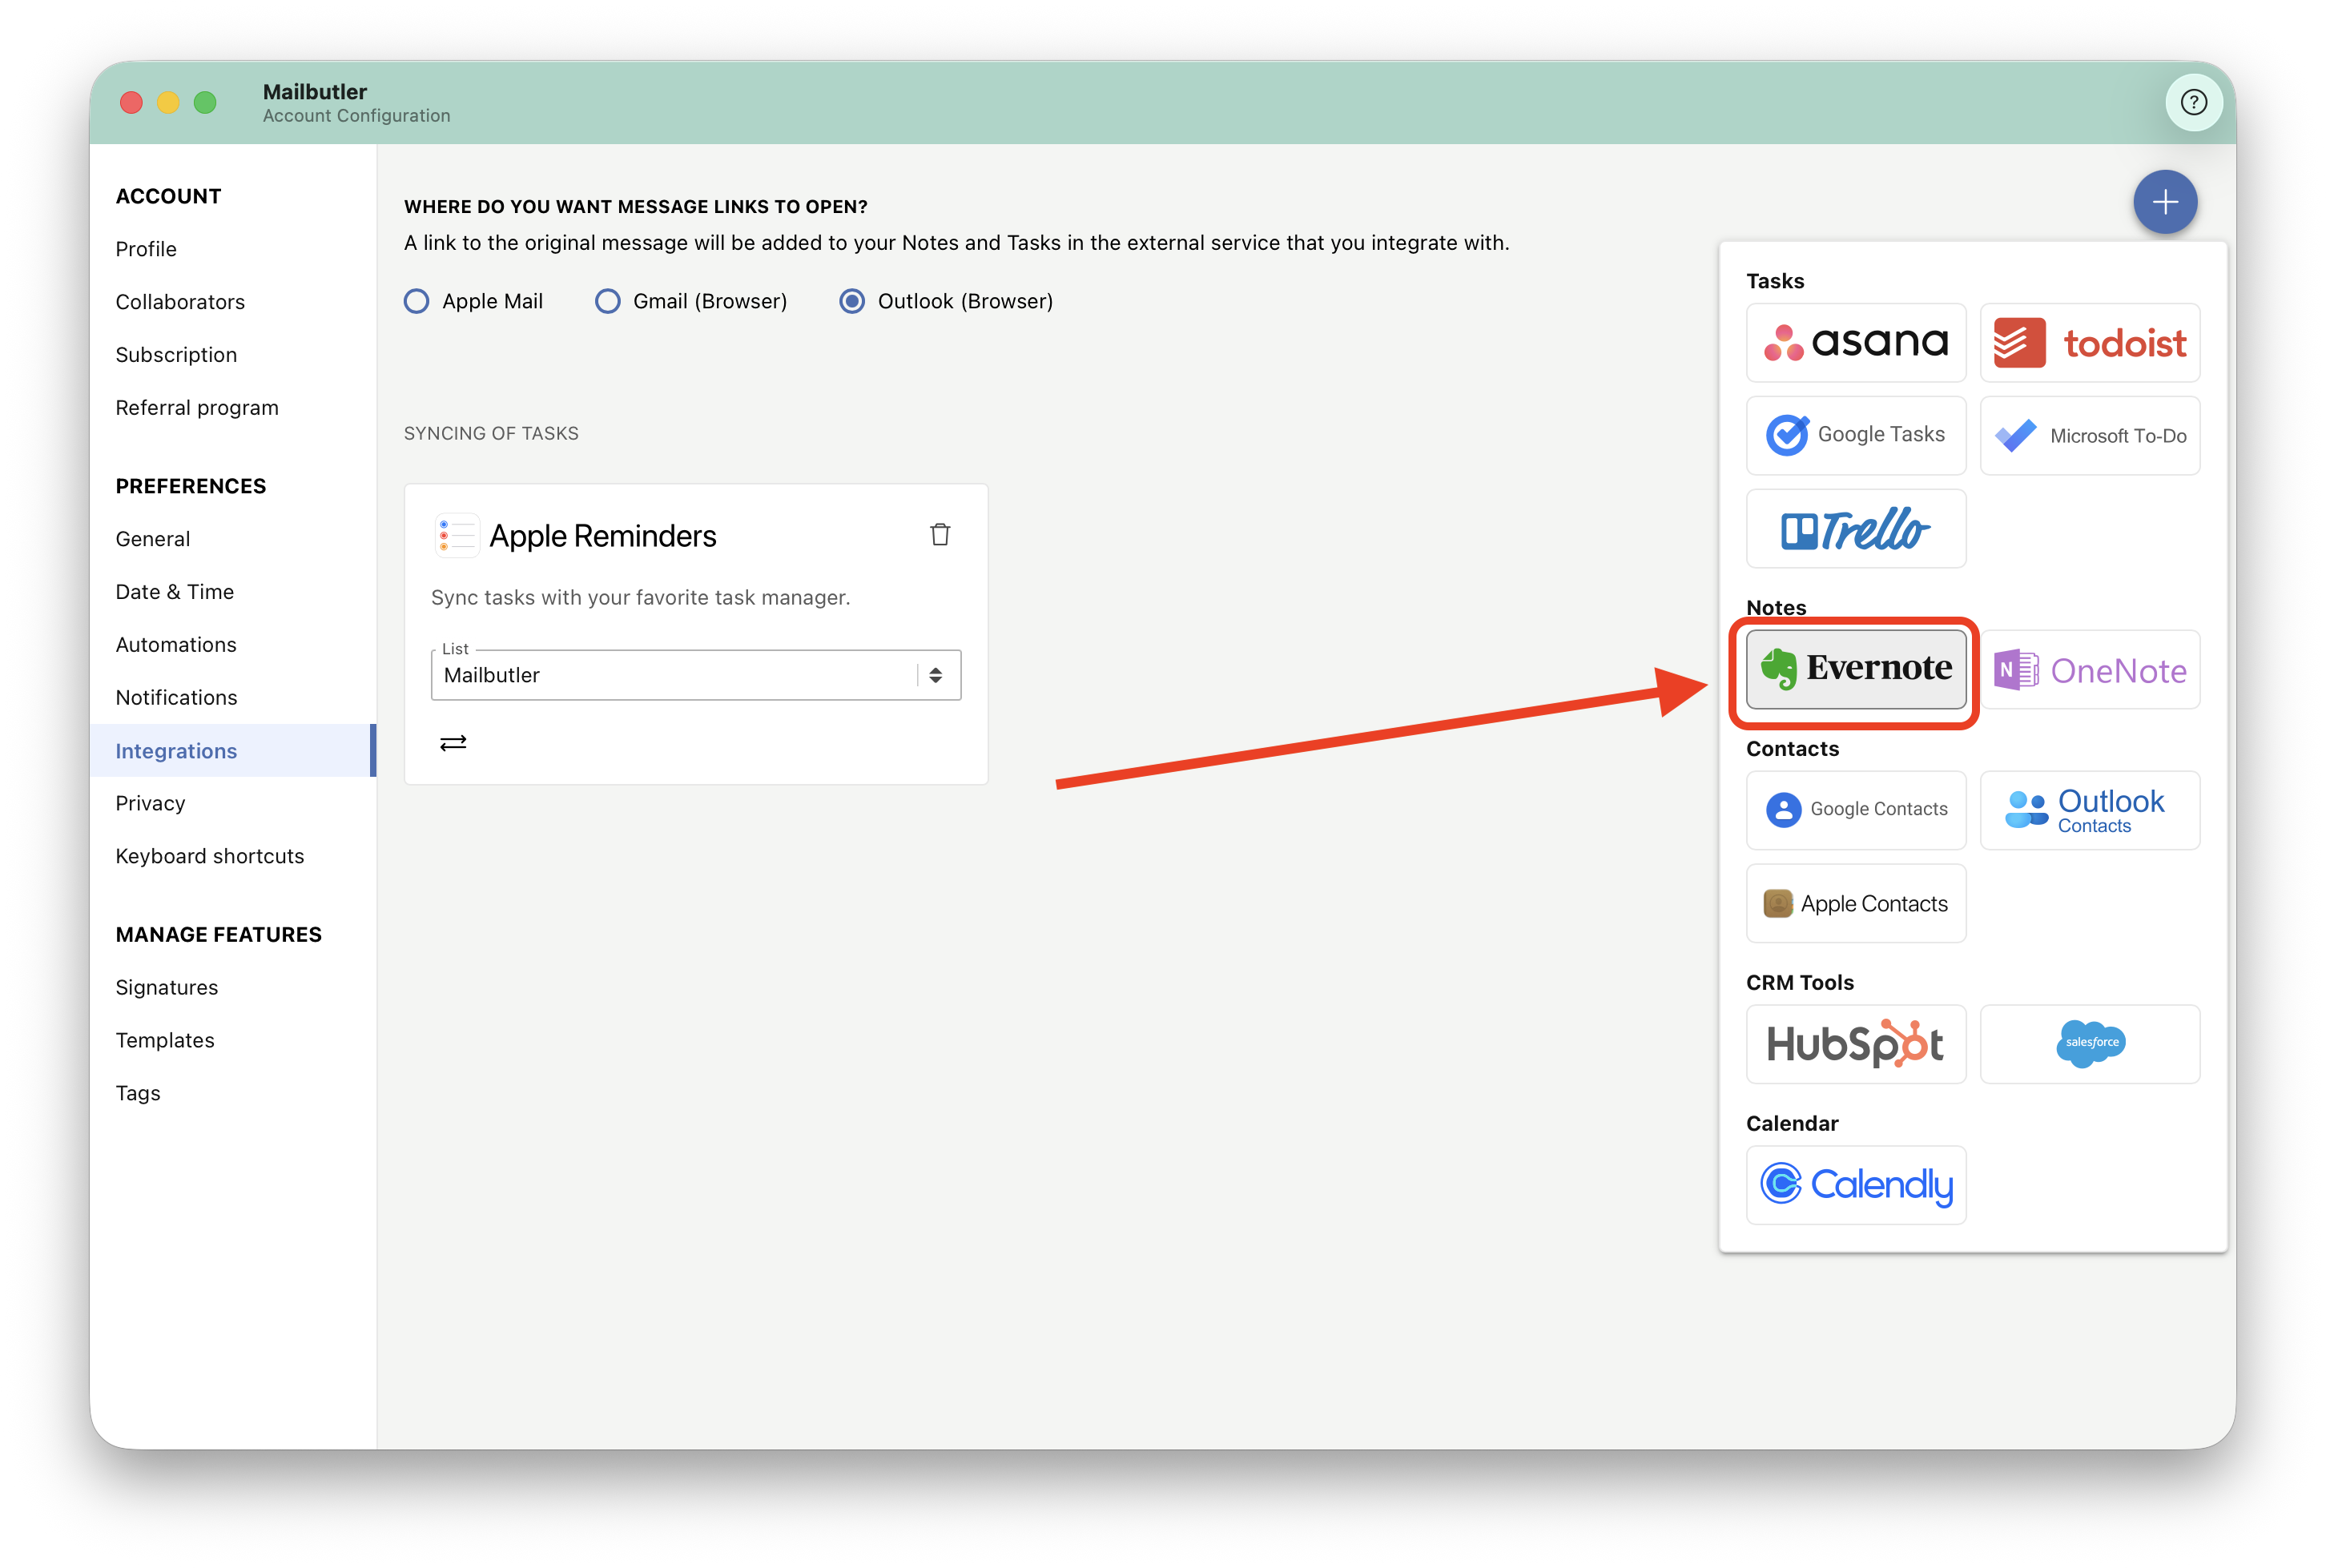
3. Click the plus icon and then click Evernote.
4. Sign in with your Evernote account, select the time duration, and authorize Mailbutler to access your Evernote account.
5. After the successful integration, your Notes created with Mailbutler will automatically appear in Evernote.
Information is synchronized both ways. That means that making any changes to your Notes in Evernote will be reflected in Mailbutler and the other way round.
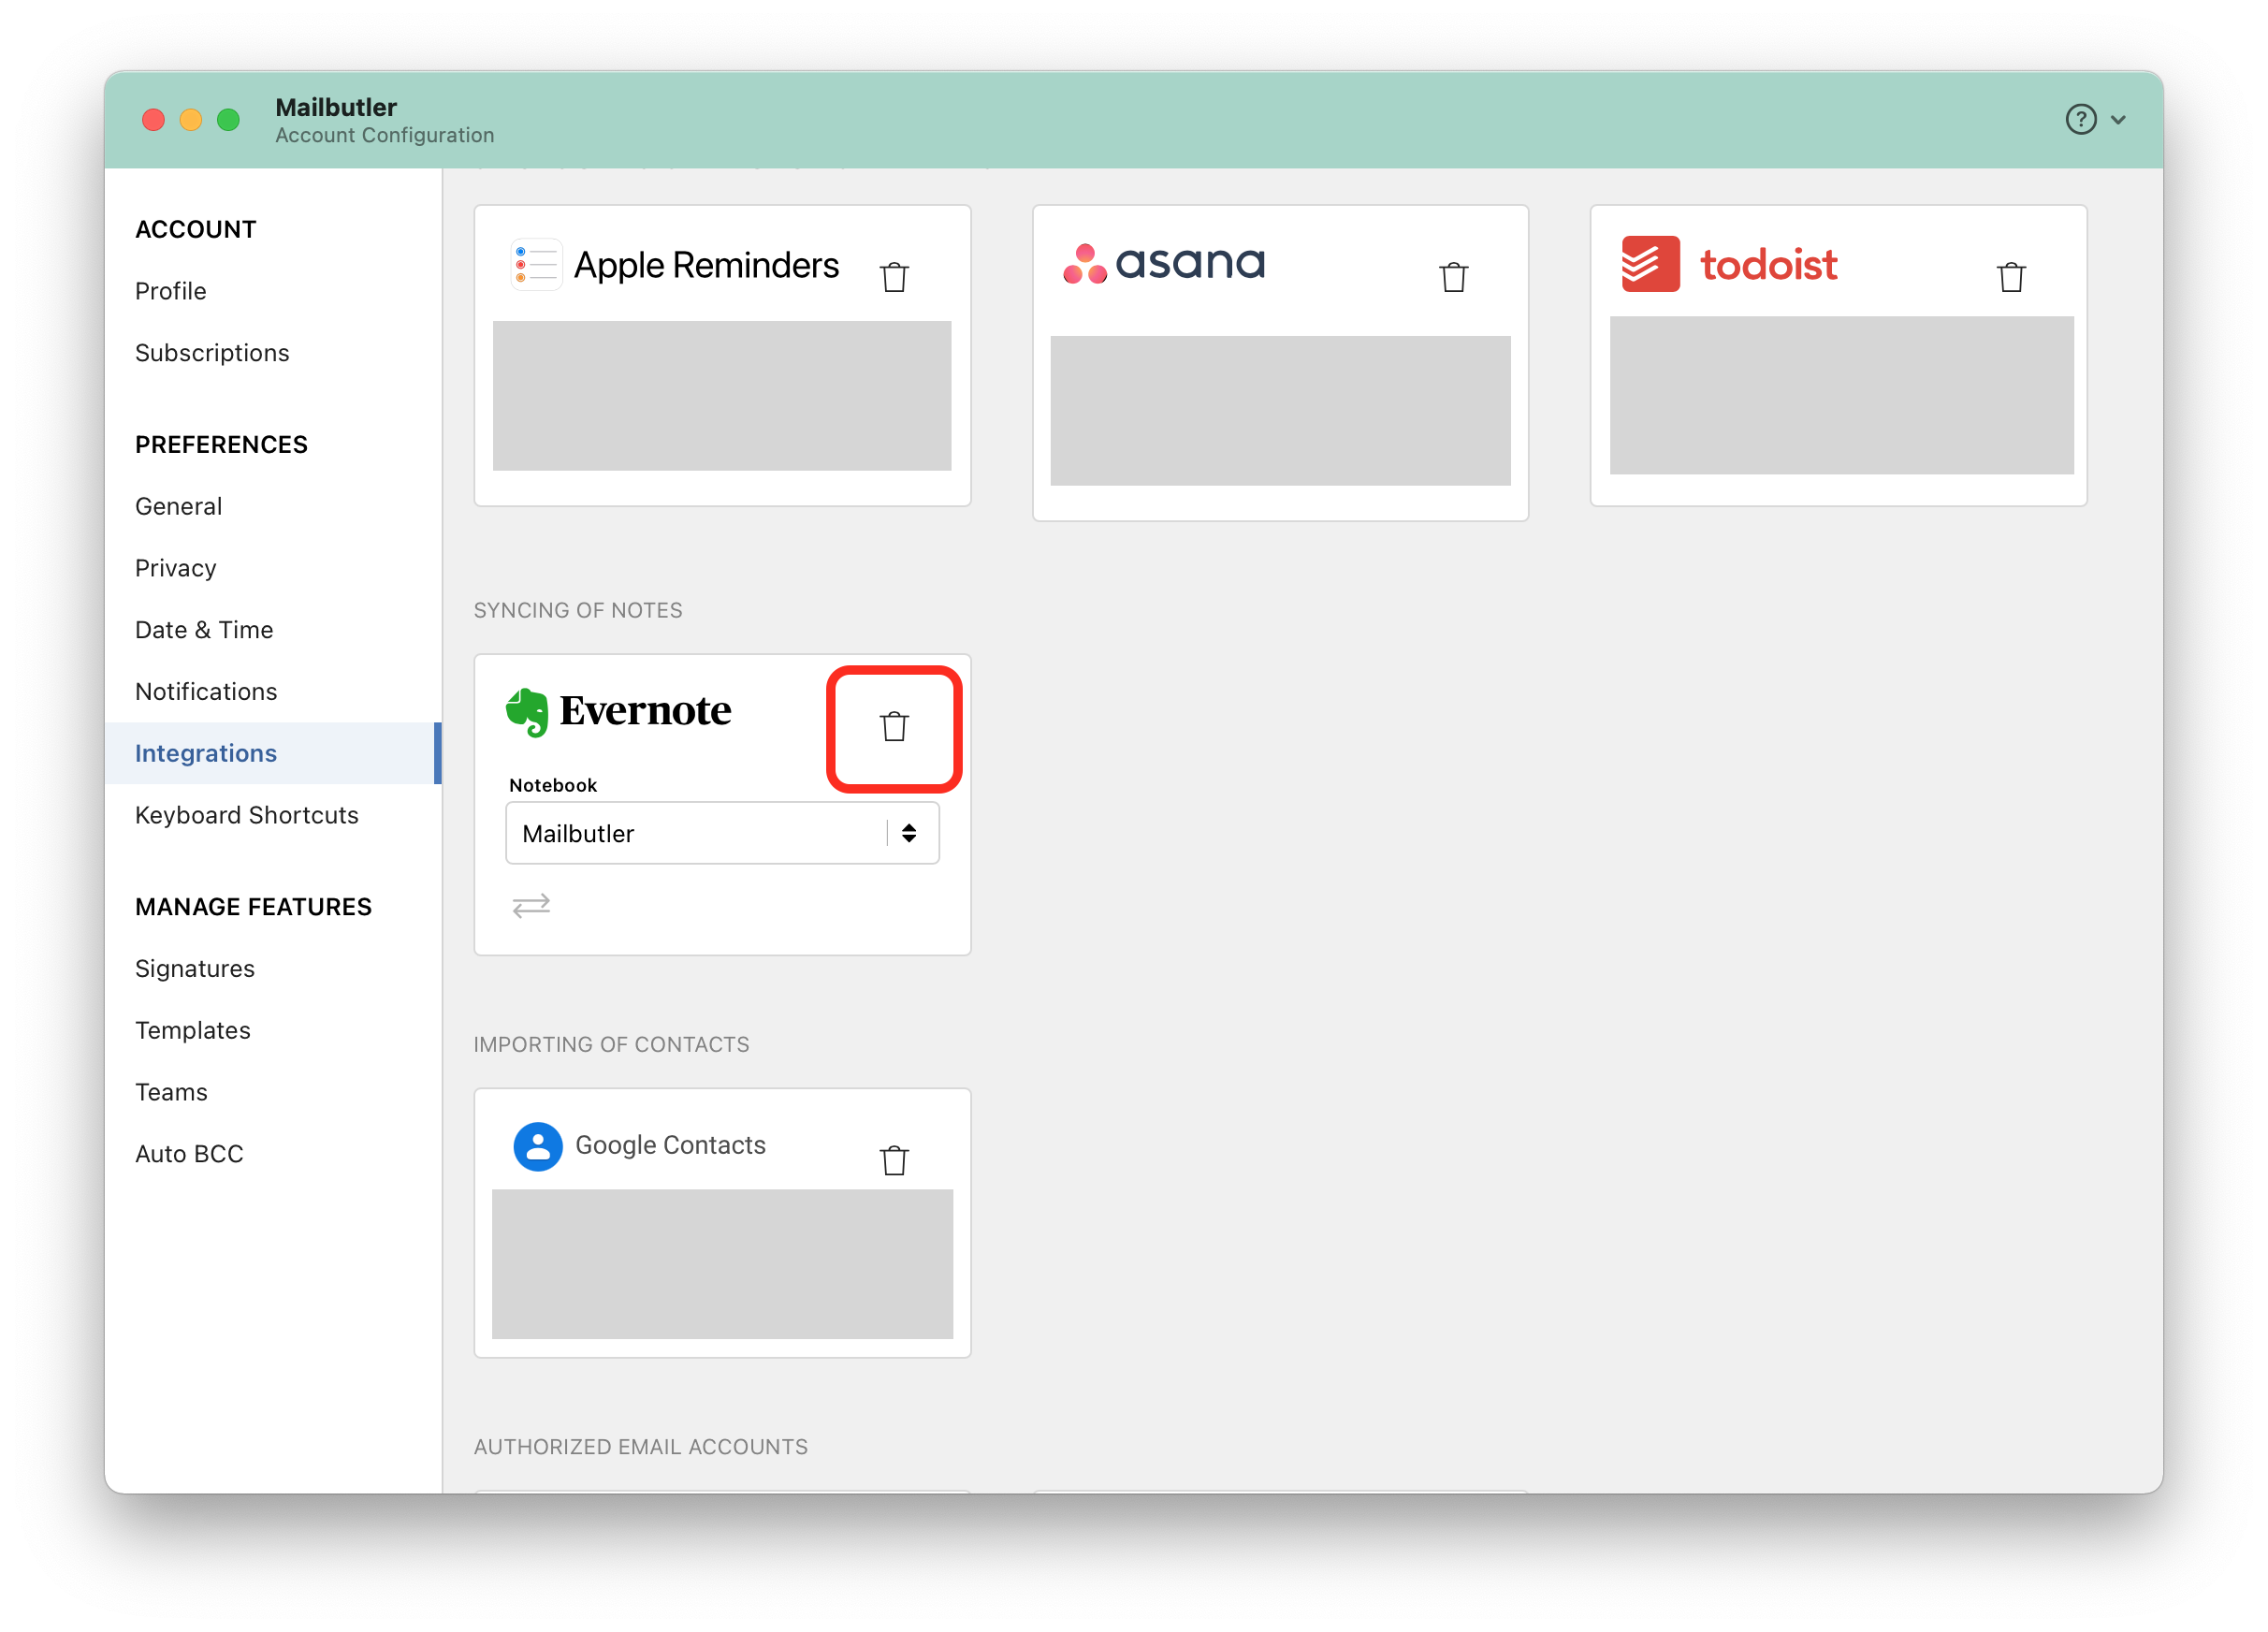
6. Click the dropdown arrows to change the Evernote notebook that you would like your Notes to be synced to.

7. To disconnect the service from Mailbutler, click the trash icon.
Google Tasks
If you connect Mailbutler with Google Task, Tasks and Assigned Emails created with Mailbutler will be automatically synced with your Google Task account.
1. Open the Mailbutler sidebar in your email client, click the three dots and then Account & Preferences.
2. A new window will pop up. Select Integrations under Preferences in the sidebar on the left.
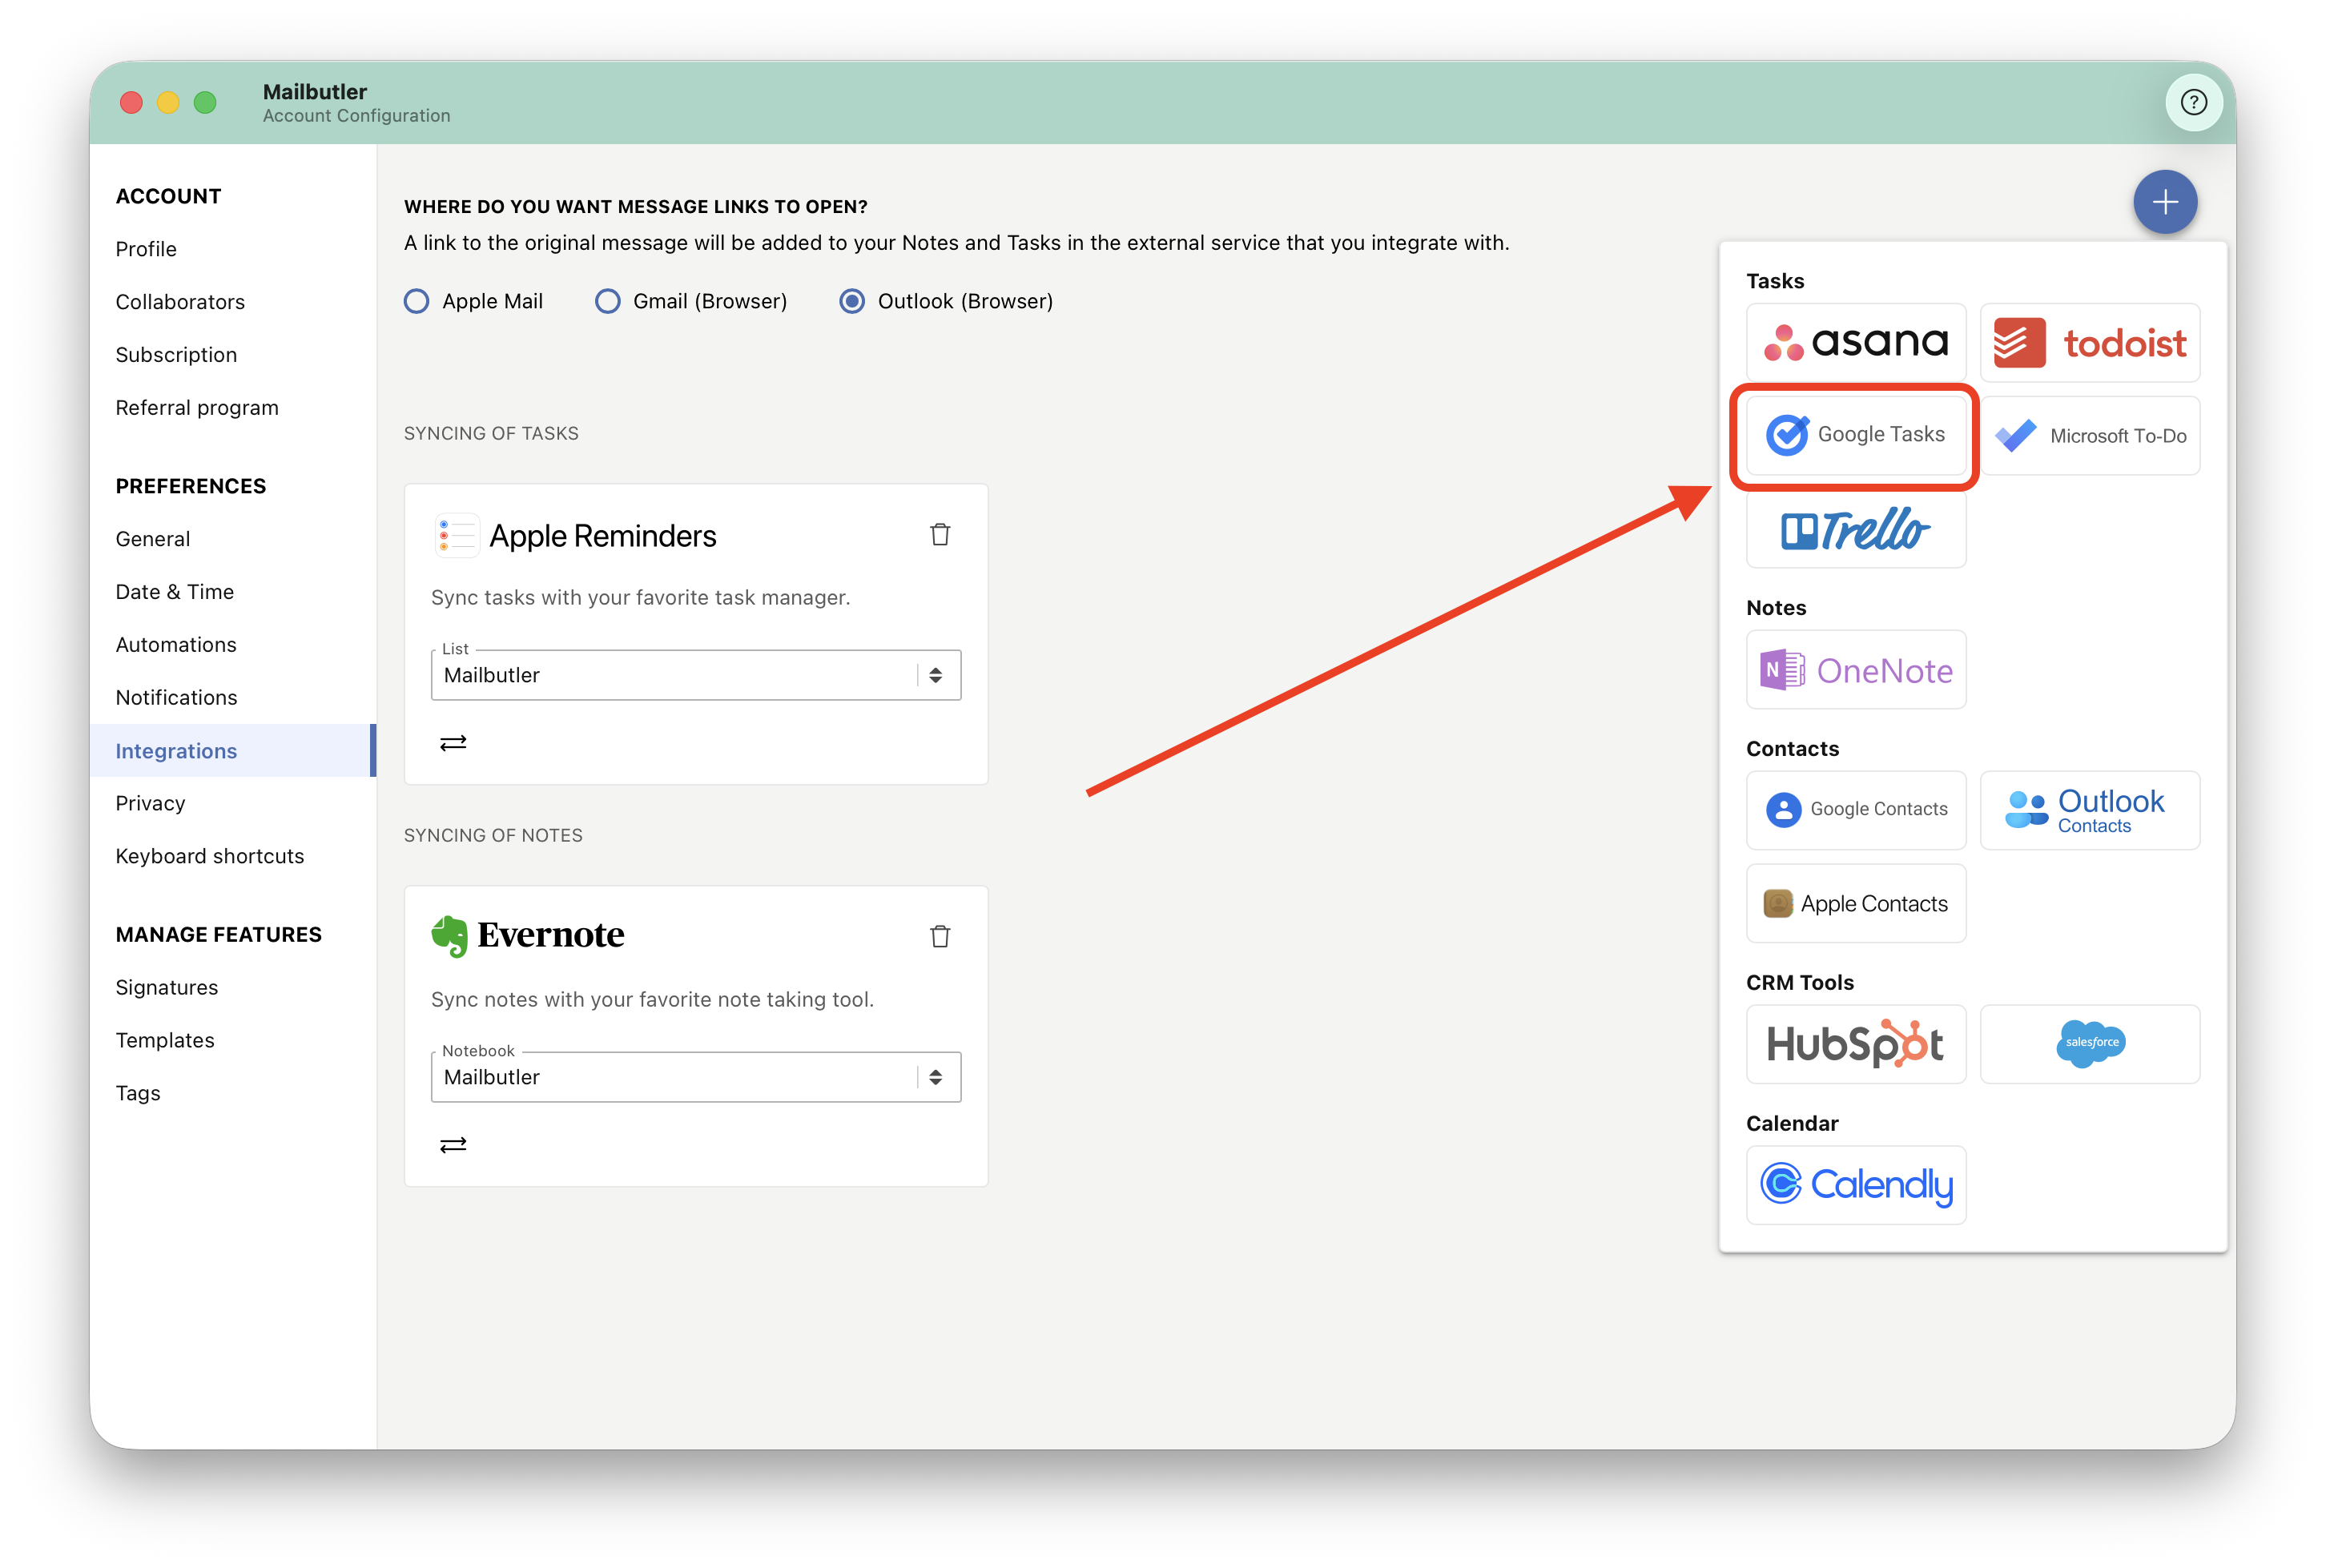
3. Click the plus icon and then click Google Tasks.
4. Sign in with your Google Tasks account and follow the on-screen instructions to give Mailbutler access.
5. After the successful integration, your Tasks and Assigned Emails created with Mailbutler will automatically appear in Google Tasks.
Information is synchronized one way - from Mailbutler to Google Tasks. That means that making any changes to your Tasks and Assigned Emails in Google Tasks will NOT be reflected in Mailbutler.
6. Click the dropdown arrows to change the Google Tasks list that you would like your Tasks and Assigned Emails to be synced to.

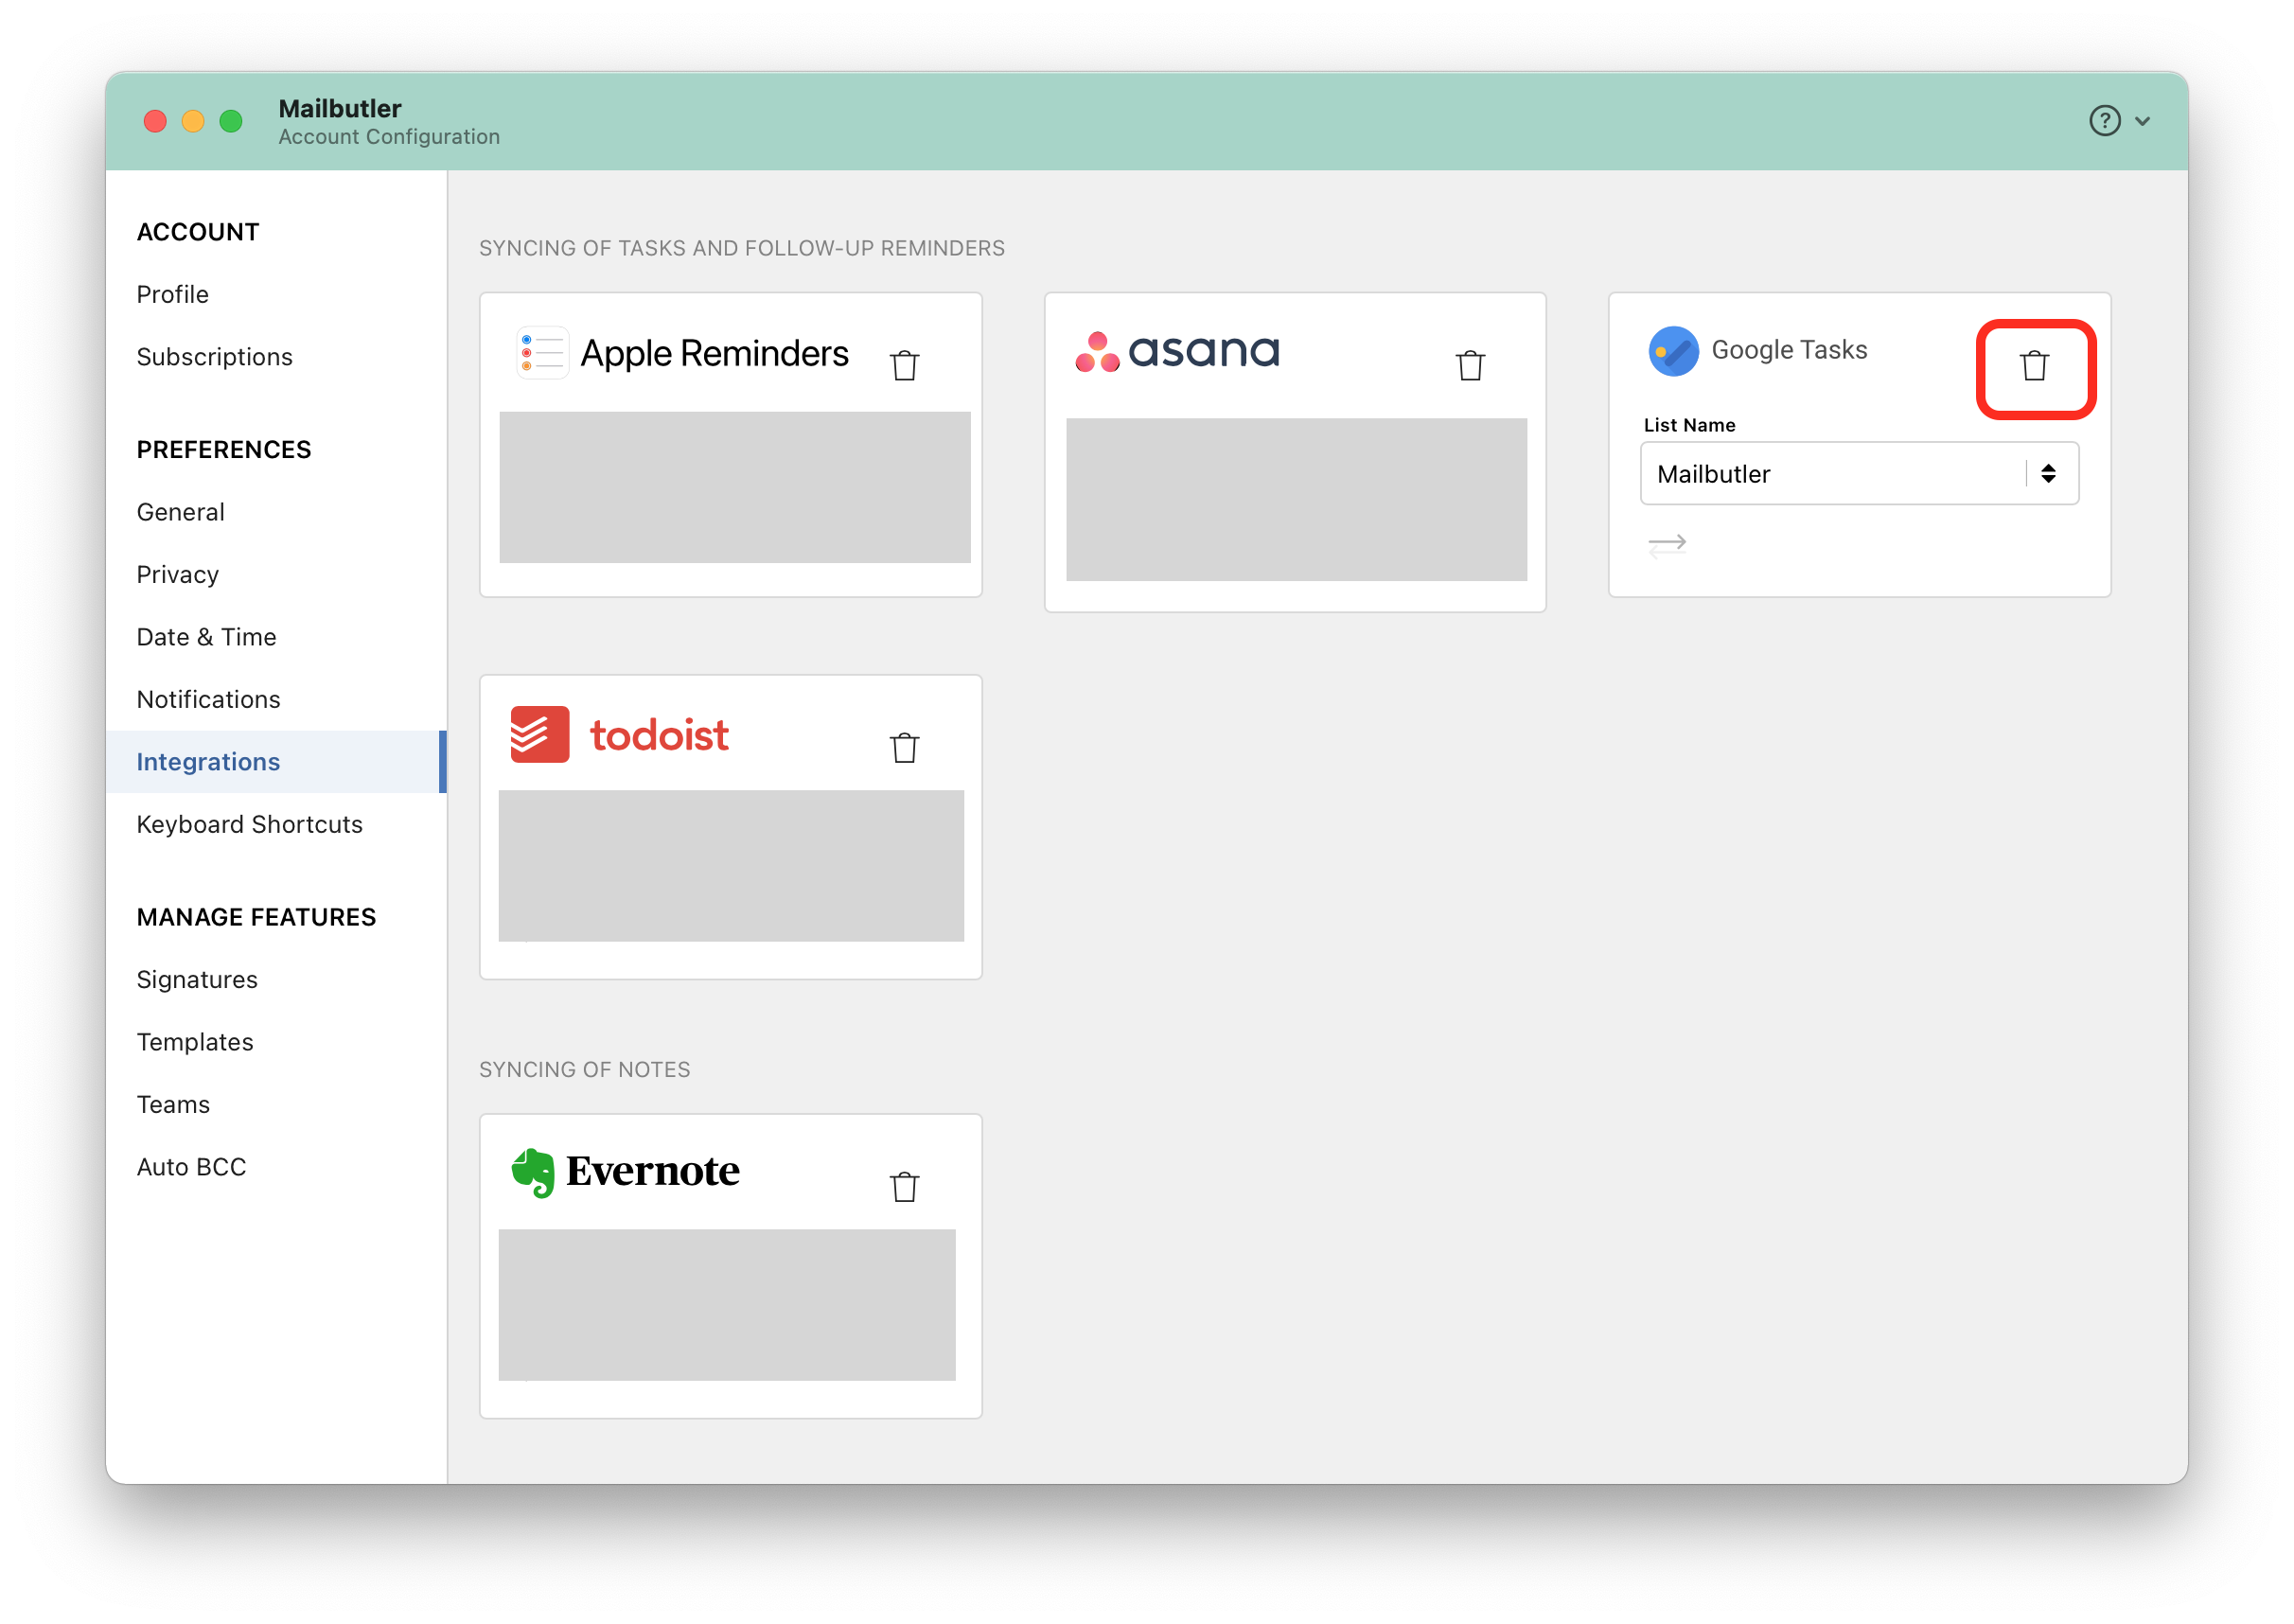
7. To disconnect the service from Mailbutler, click the trash icon.
Microsoft To Do
If you connect Mailbutler with Microsoft To Do, Tasks and Assigned Emails created with Mailbutler will be automatically synced with your Microsoft To Do account.
1. Open the Mailbutler sidebar in your email client, click the three dots and then Account & Preferences.
2. A new window will pop up. Select Integrations under Preferences in the sidebar on the left.
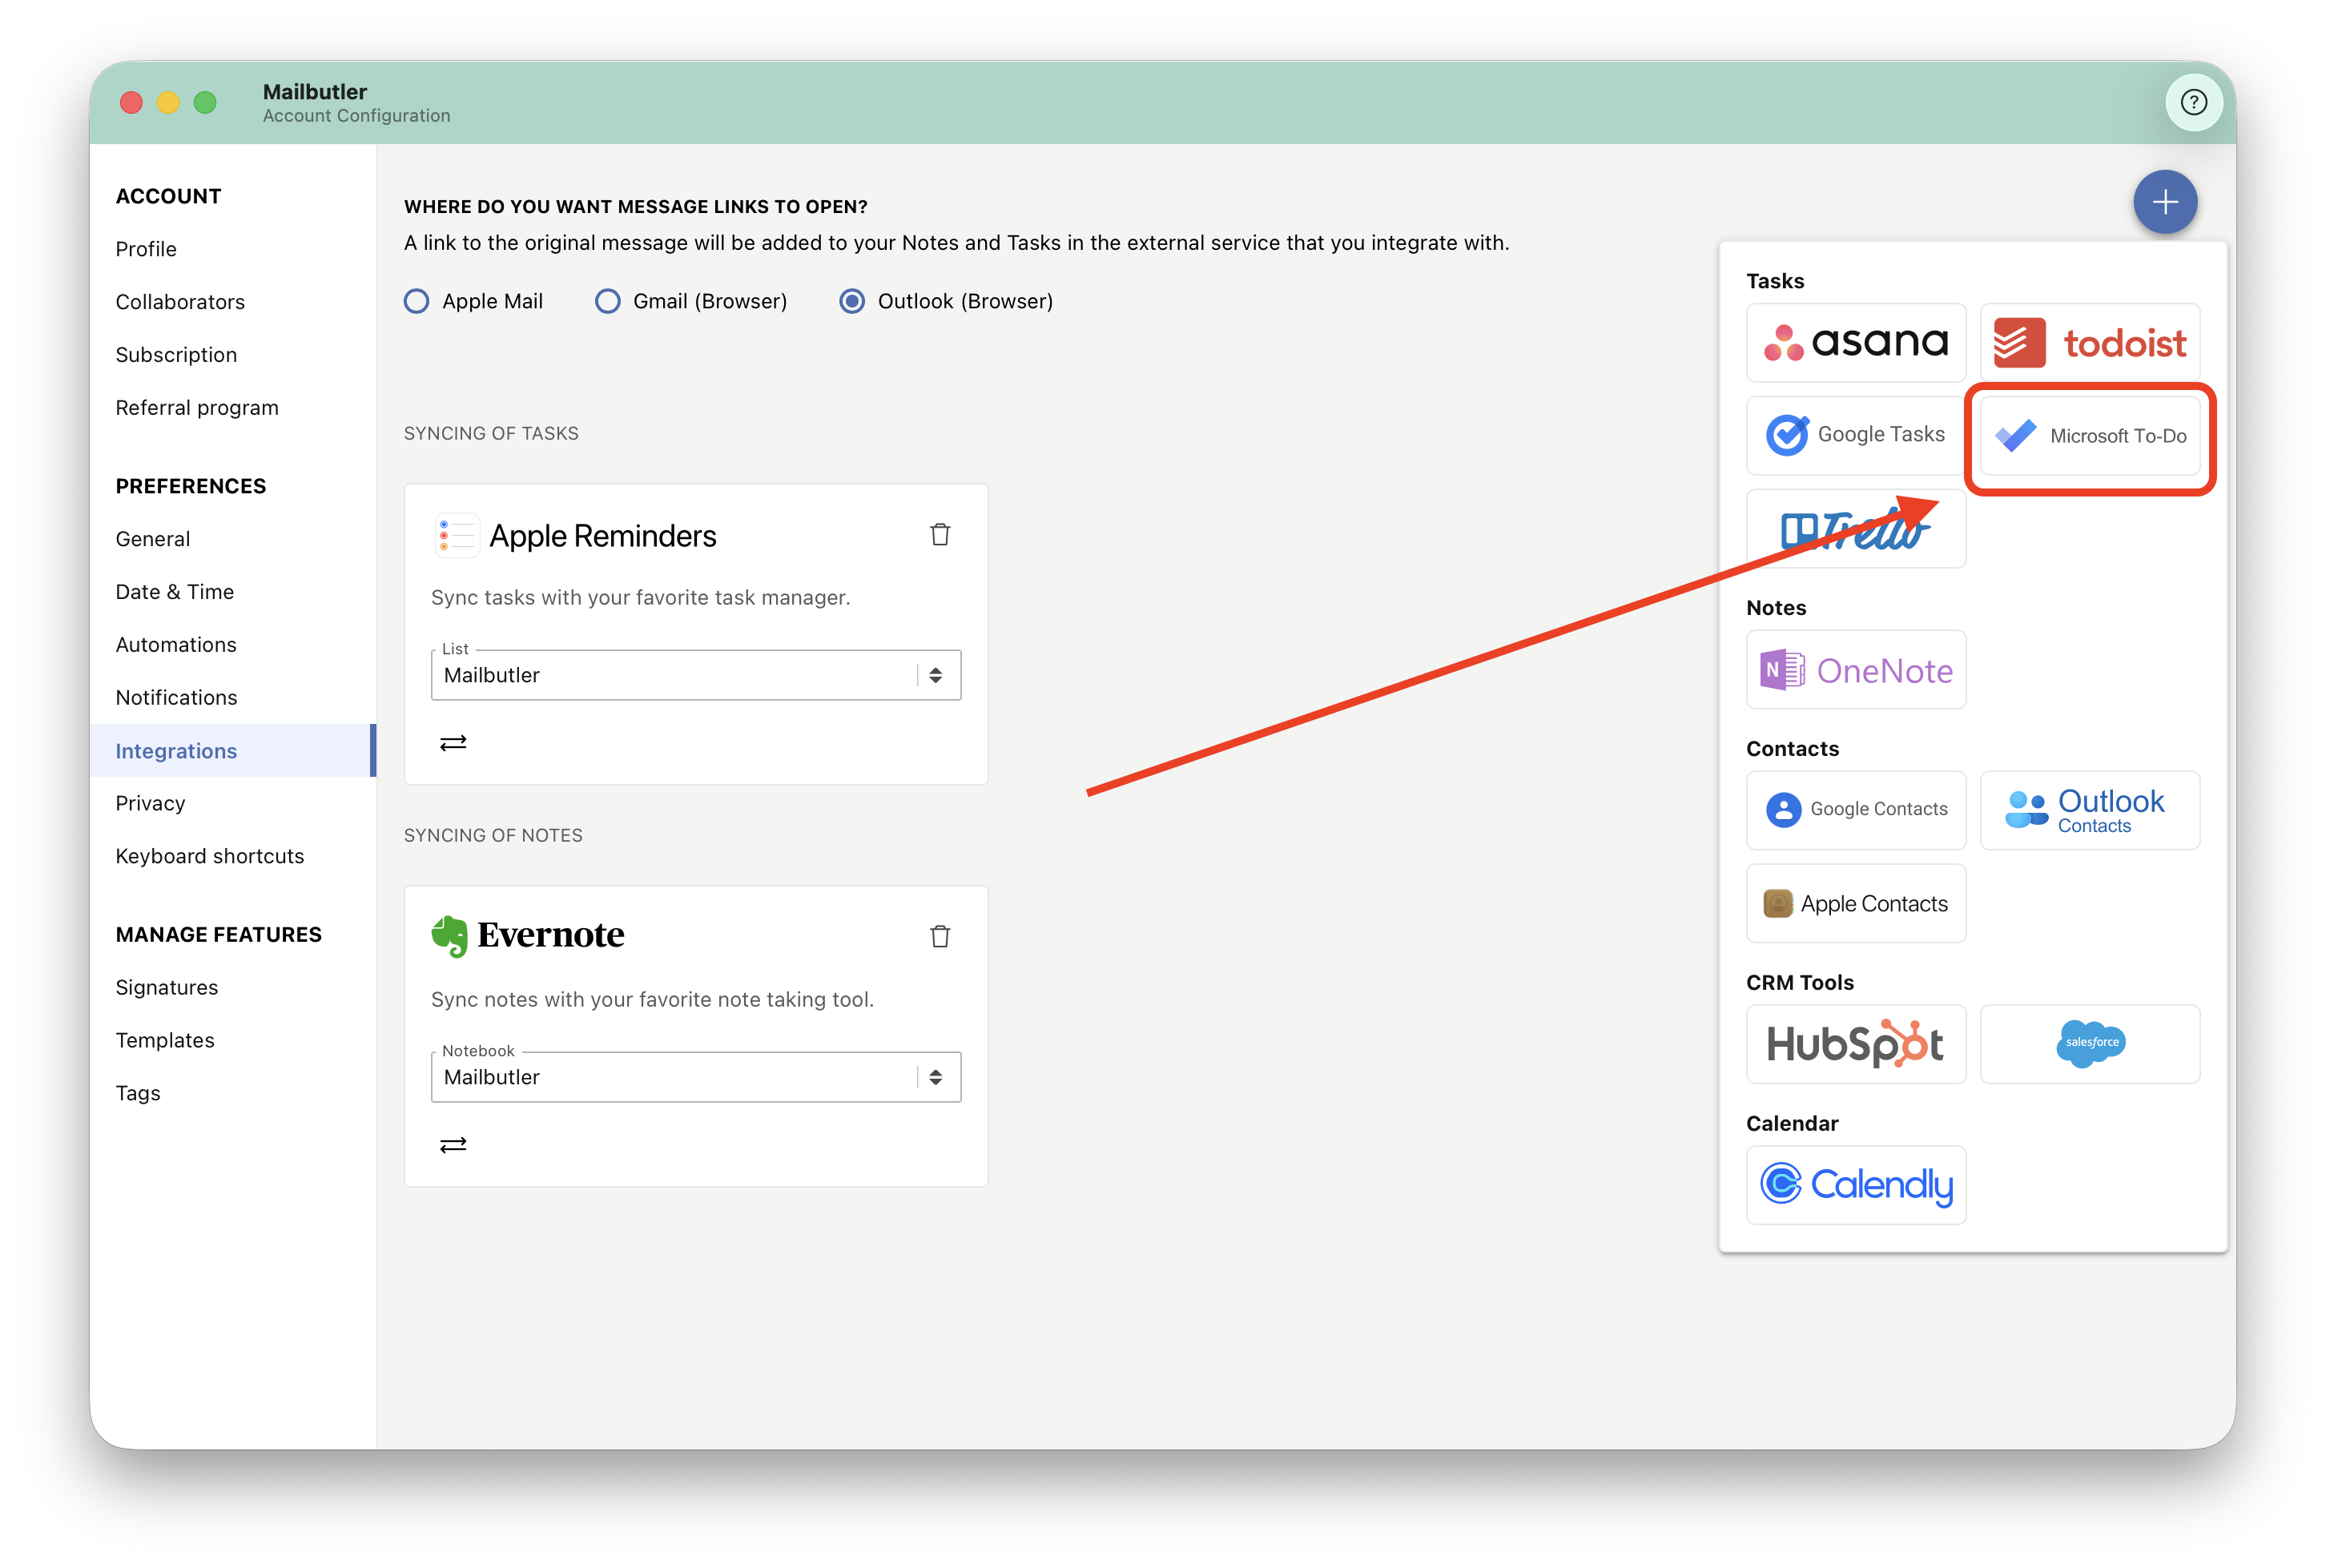
3. Click the plus icon and then click Microsoft To-Do.
4. Sign in with your Microsoft To Do account and follow the on-screen instructions to give Mailbutler access.
5. After the successful integration, your Tasks created, and Assigned Emails with Mailbutler will automatically appear in Microsoft To Do.
Information is synchronized one way - from Mailbutler to Microsoft To Do. That means that making any changes to your Tasks and Follow-up tasks in Microsoft To Do will NOT be reflected in Mailbutler.
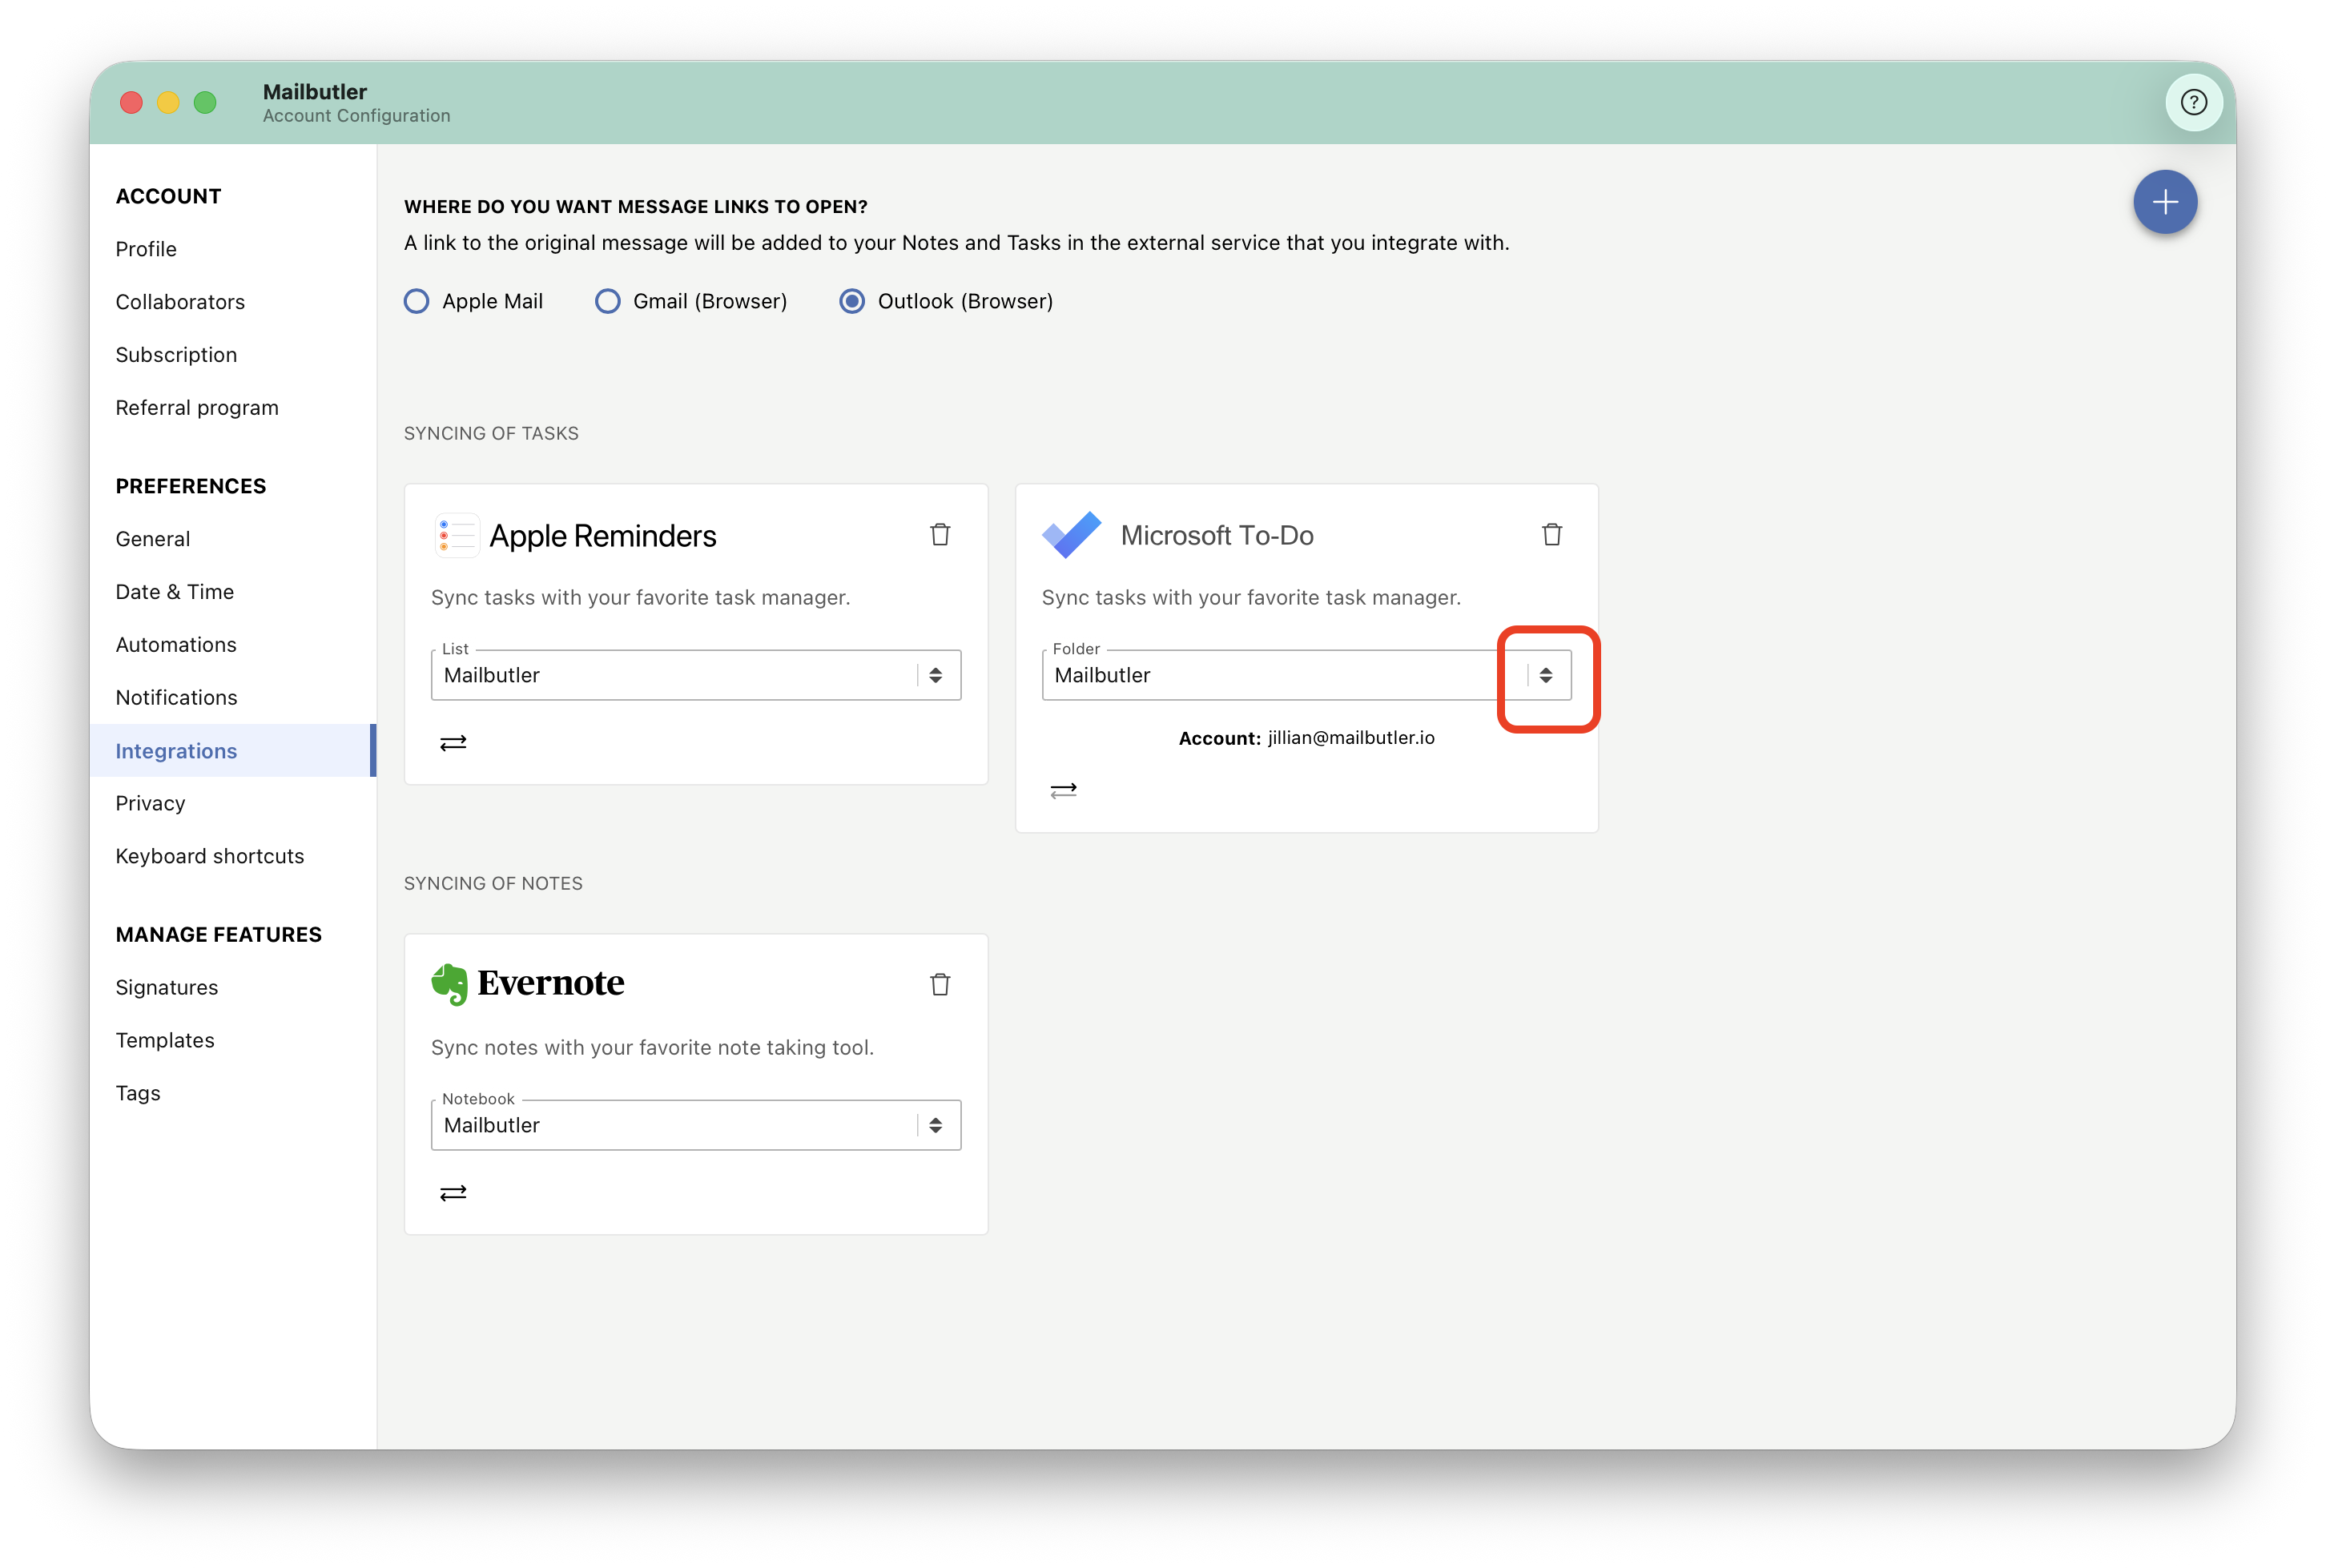
6. Click the dropdown arrows to change the Microsoft To Do folder that you would like your Tasks and Follow-up tasks to be synced to.
7. To disconnect the service from Mailbutler, click the trash icon.

OneNote
If you connect Mailbutler with OneNote, Notes created with Mailbutler will be automatically synced with your OneNote account.
1. Open the Mailbutler sidebar in your email client, click the three dots and then Account & Preferences.
2. A new window will pop up. Select Integrations under Preferences in the sidebar on the left.
4. Sign in with your OneNote account and authorize Mailbutler to access your OneNote account.
5. After the successful integration, your Notes created with Mailbutler will automatically appear in OneNote.
Information is synchronized one way - from Mailbutler to OneNote. That means that making any changes to your Notes in OneNote will NOT be reflected in Mailbutler.
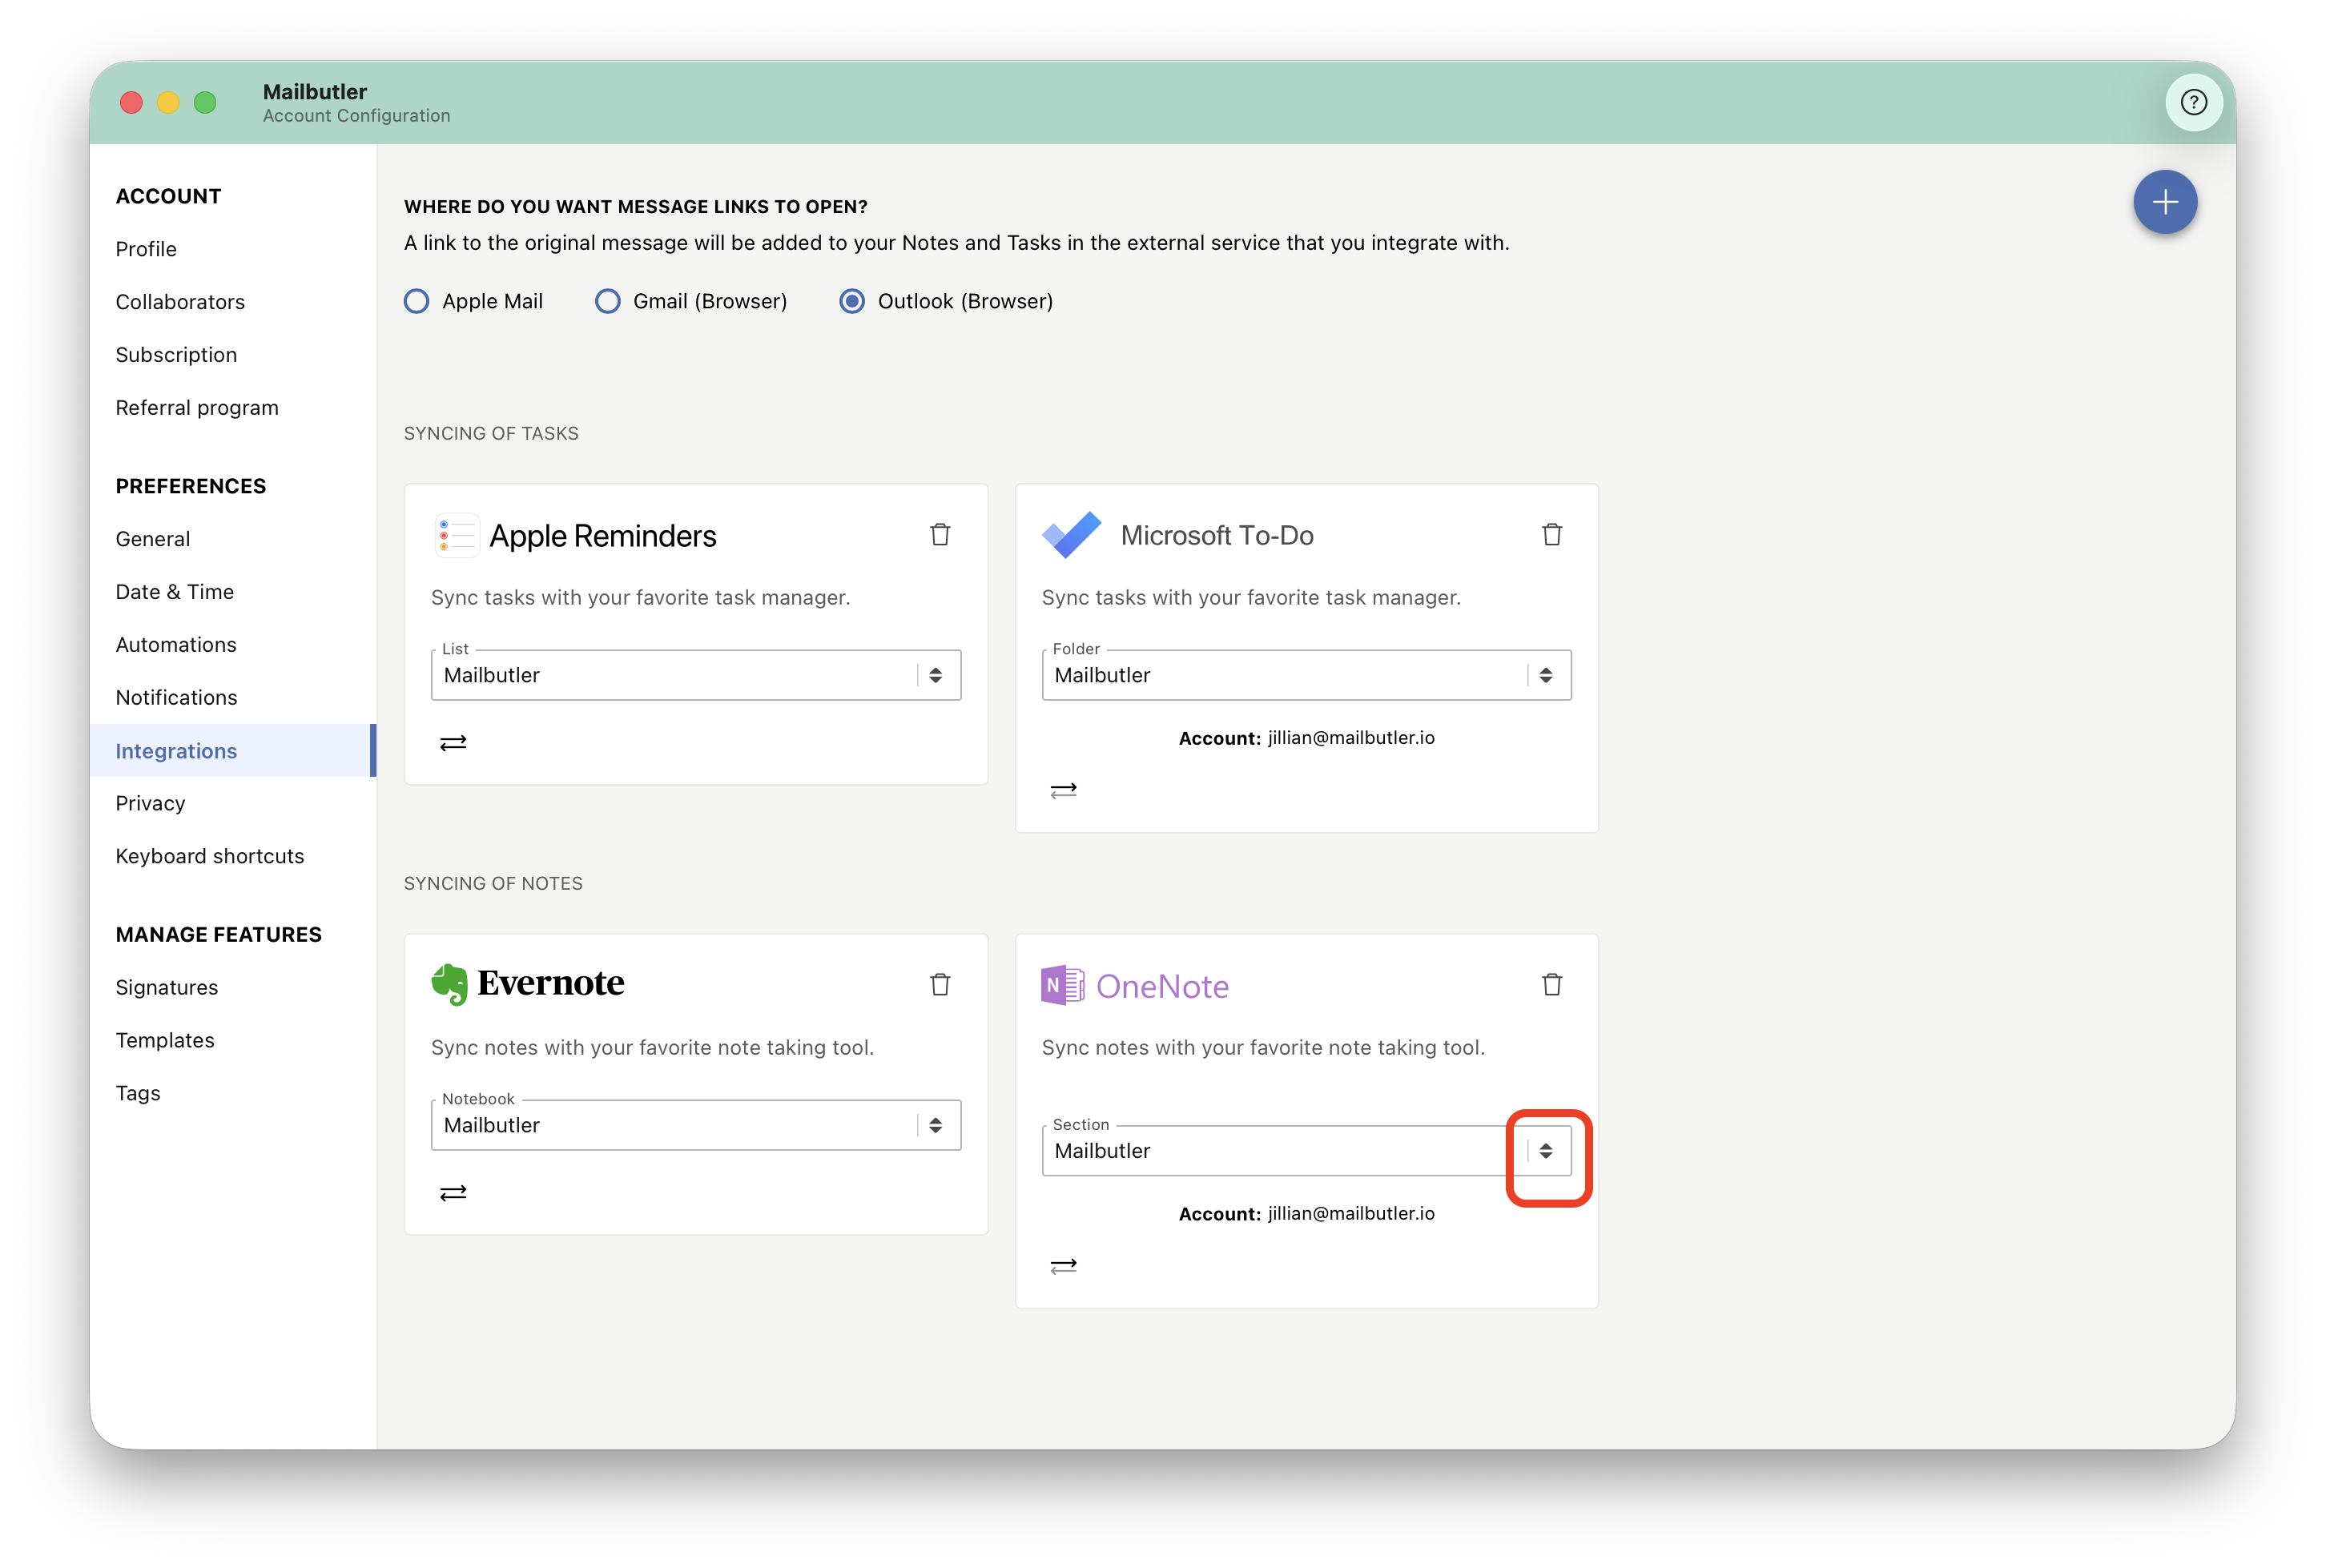
6. Click the dropdown arrows to change the OneNote section that you would like your Notes to be synced to.
7. To disconnect the service from Mailbutler, click the trash icon.

Todoist
If you connect Mailbutler with Todoist, Tasks and Assigned Emails created with Mailbutler will be automatically synced with your Todoist account.
1. Open the Mailbutler sidebar in your email client, click the three dots and then Account & Preferences.
2. A new window will pop up. Select Integrations under Preferences in the sidebar on the left.
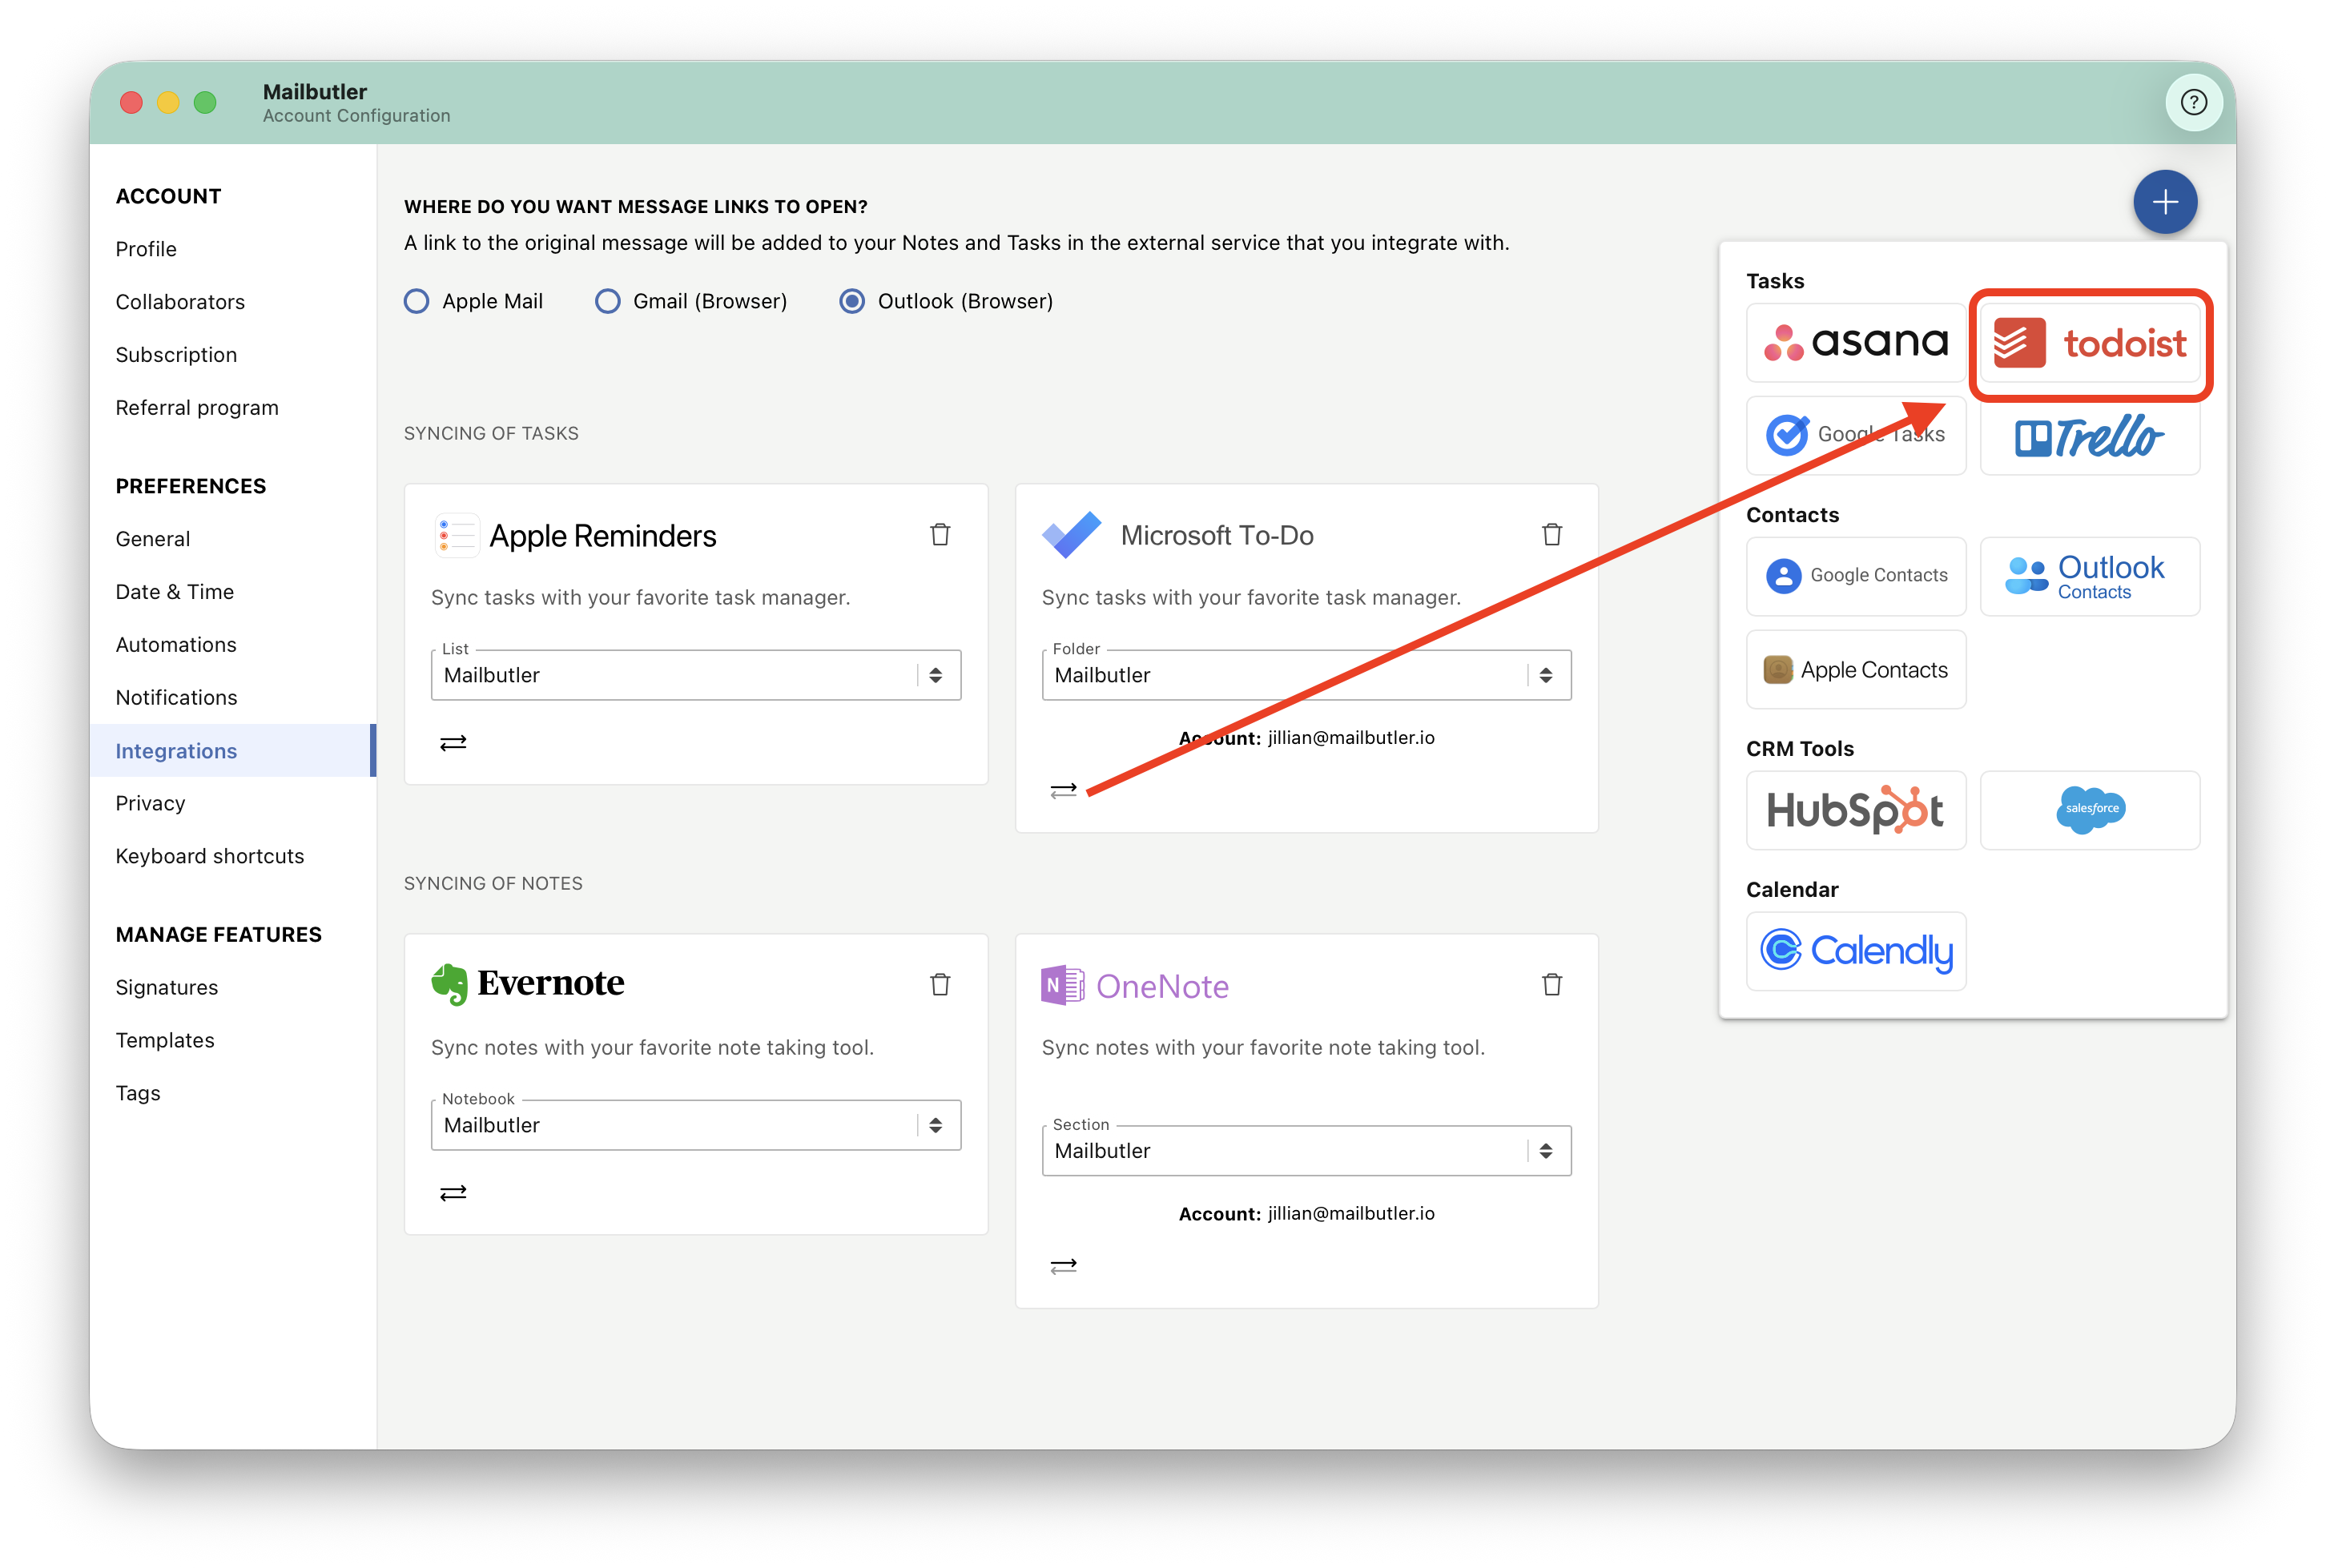
3. Click the plus icon and then click Todoist.
4. Sign in with your Todoist account and follow the on-screen instructions to give Mailbutler access.
5. After the successful integration, your Tasks created and Assigned Emails with Mailbutler will automatically appear in Todoist.
Information is synchronized both ways. That means that making any changes to your Tasks and Assigned Emails in Todoist will be reflected in Mailbutler and the other way round.
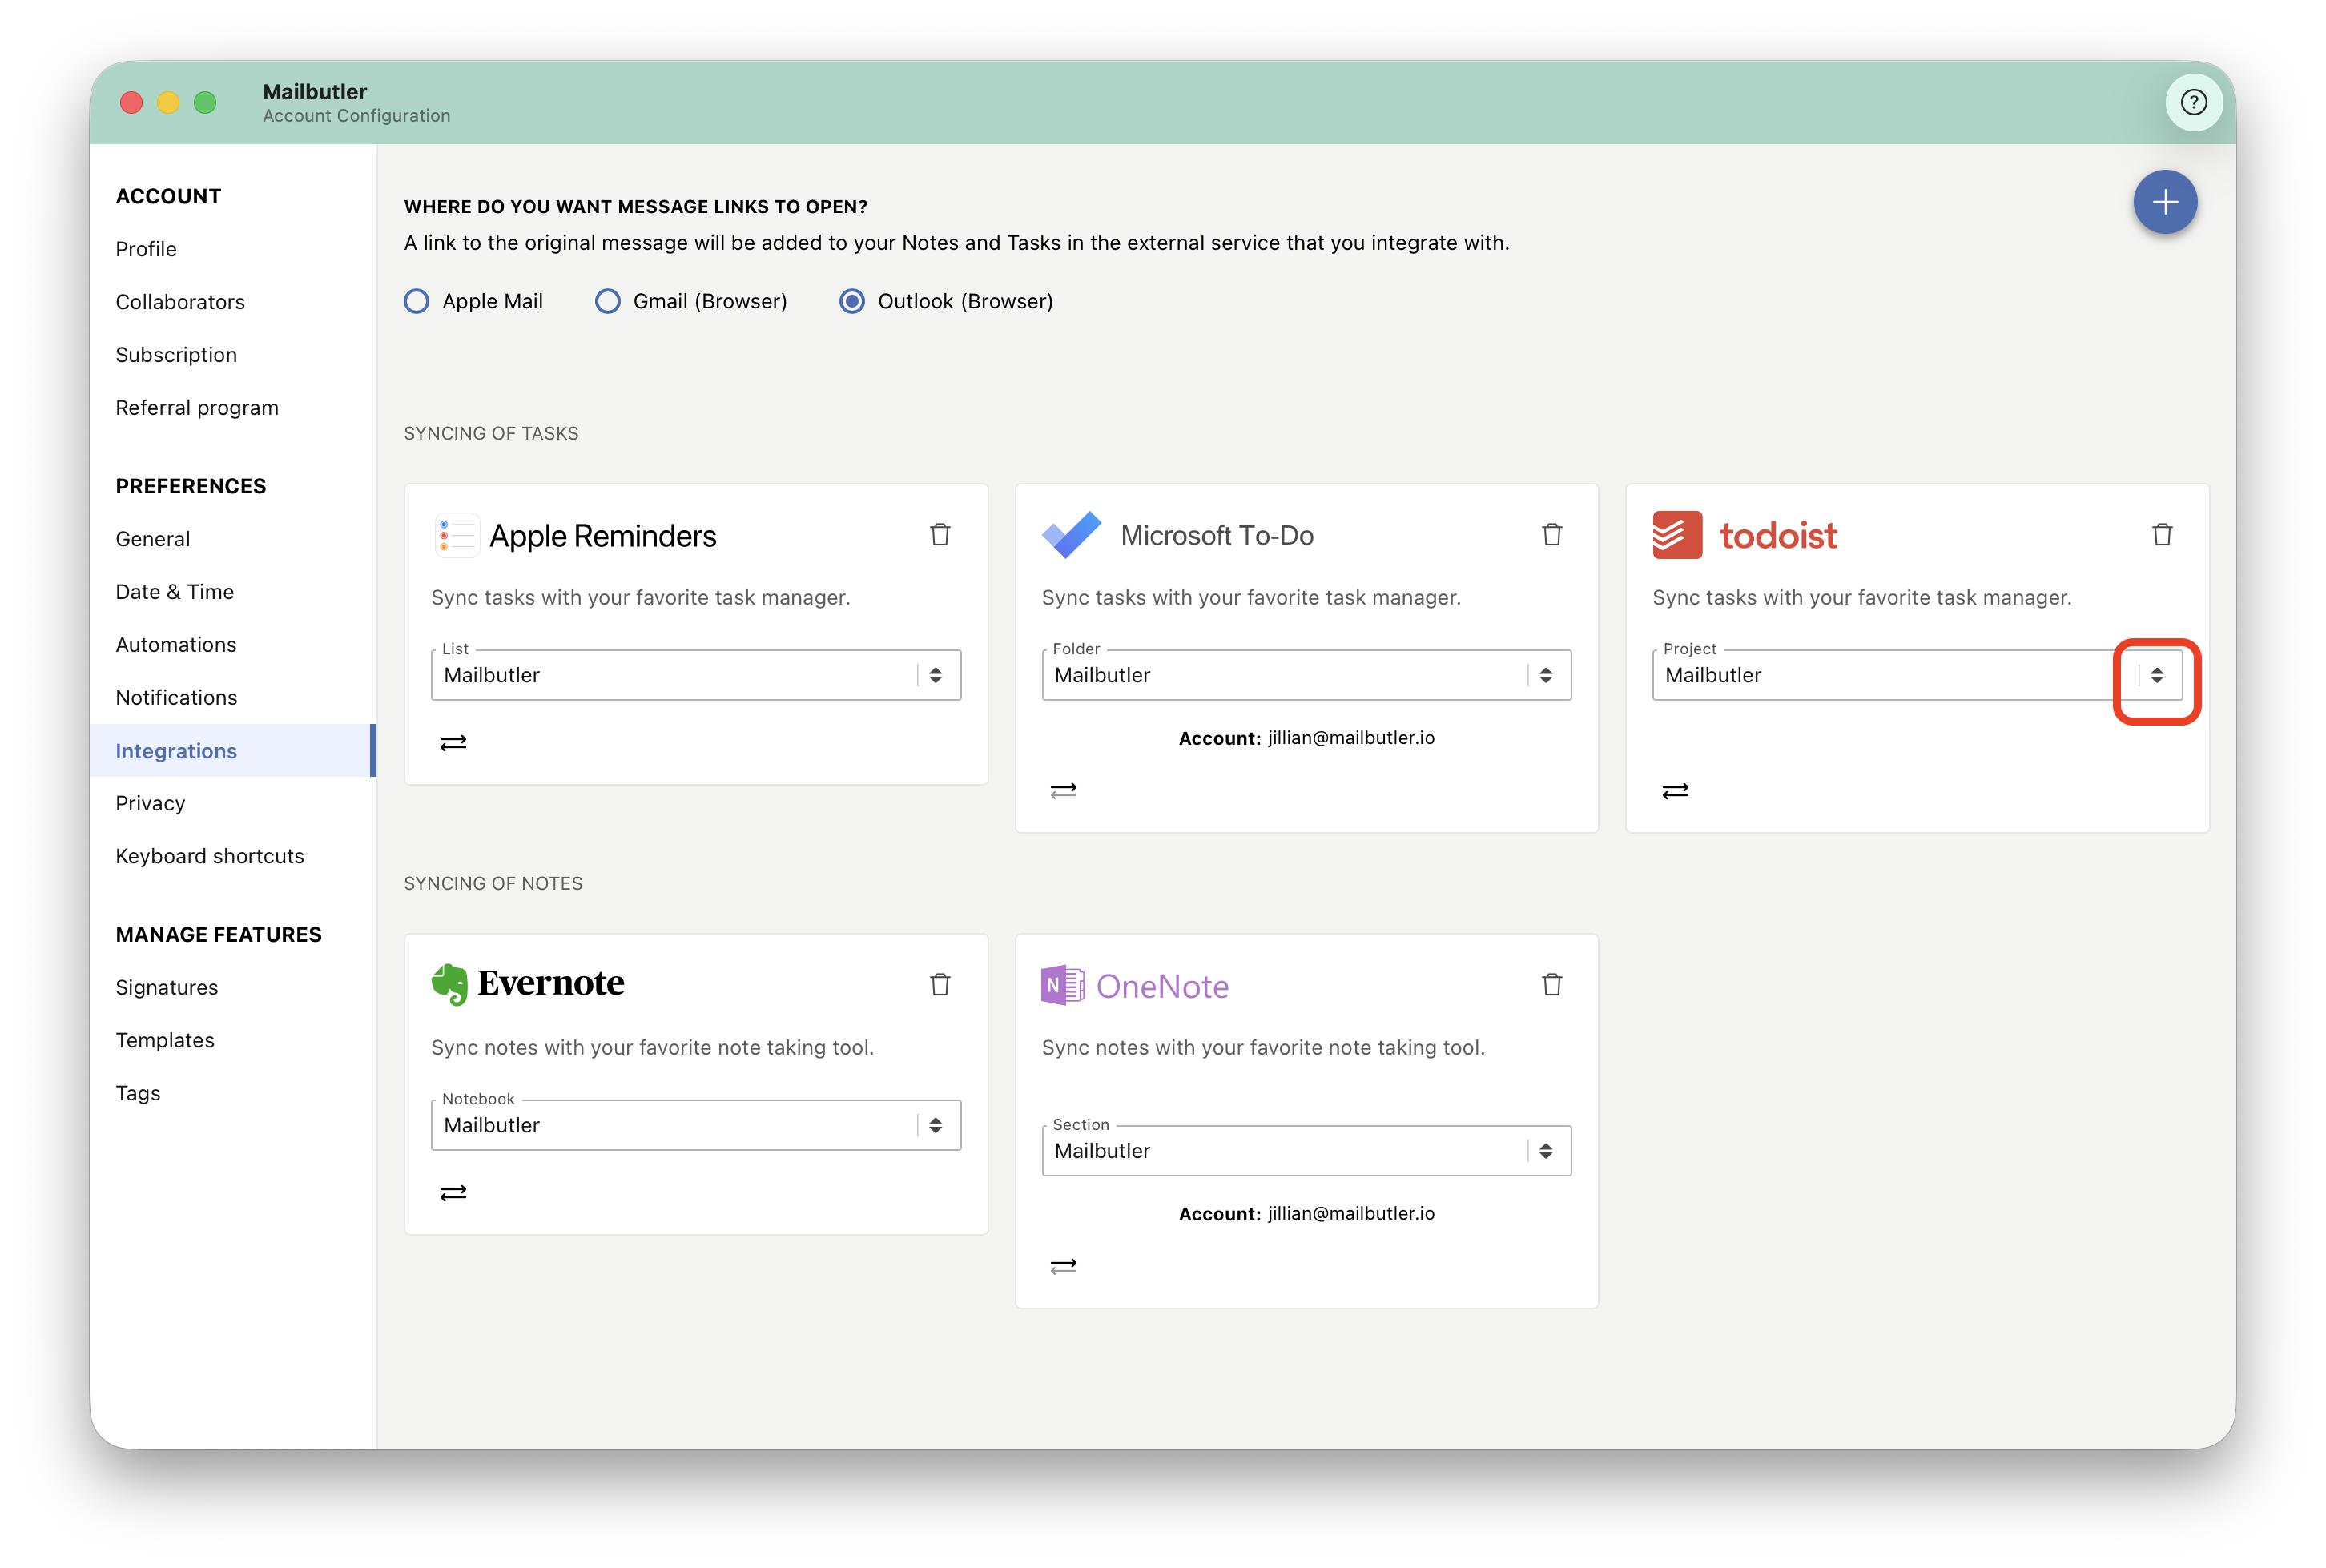
6. Click the dropdown arrows to change the Todoist project that you would like your Tasks and Assigned Emails to be synced to.
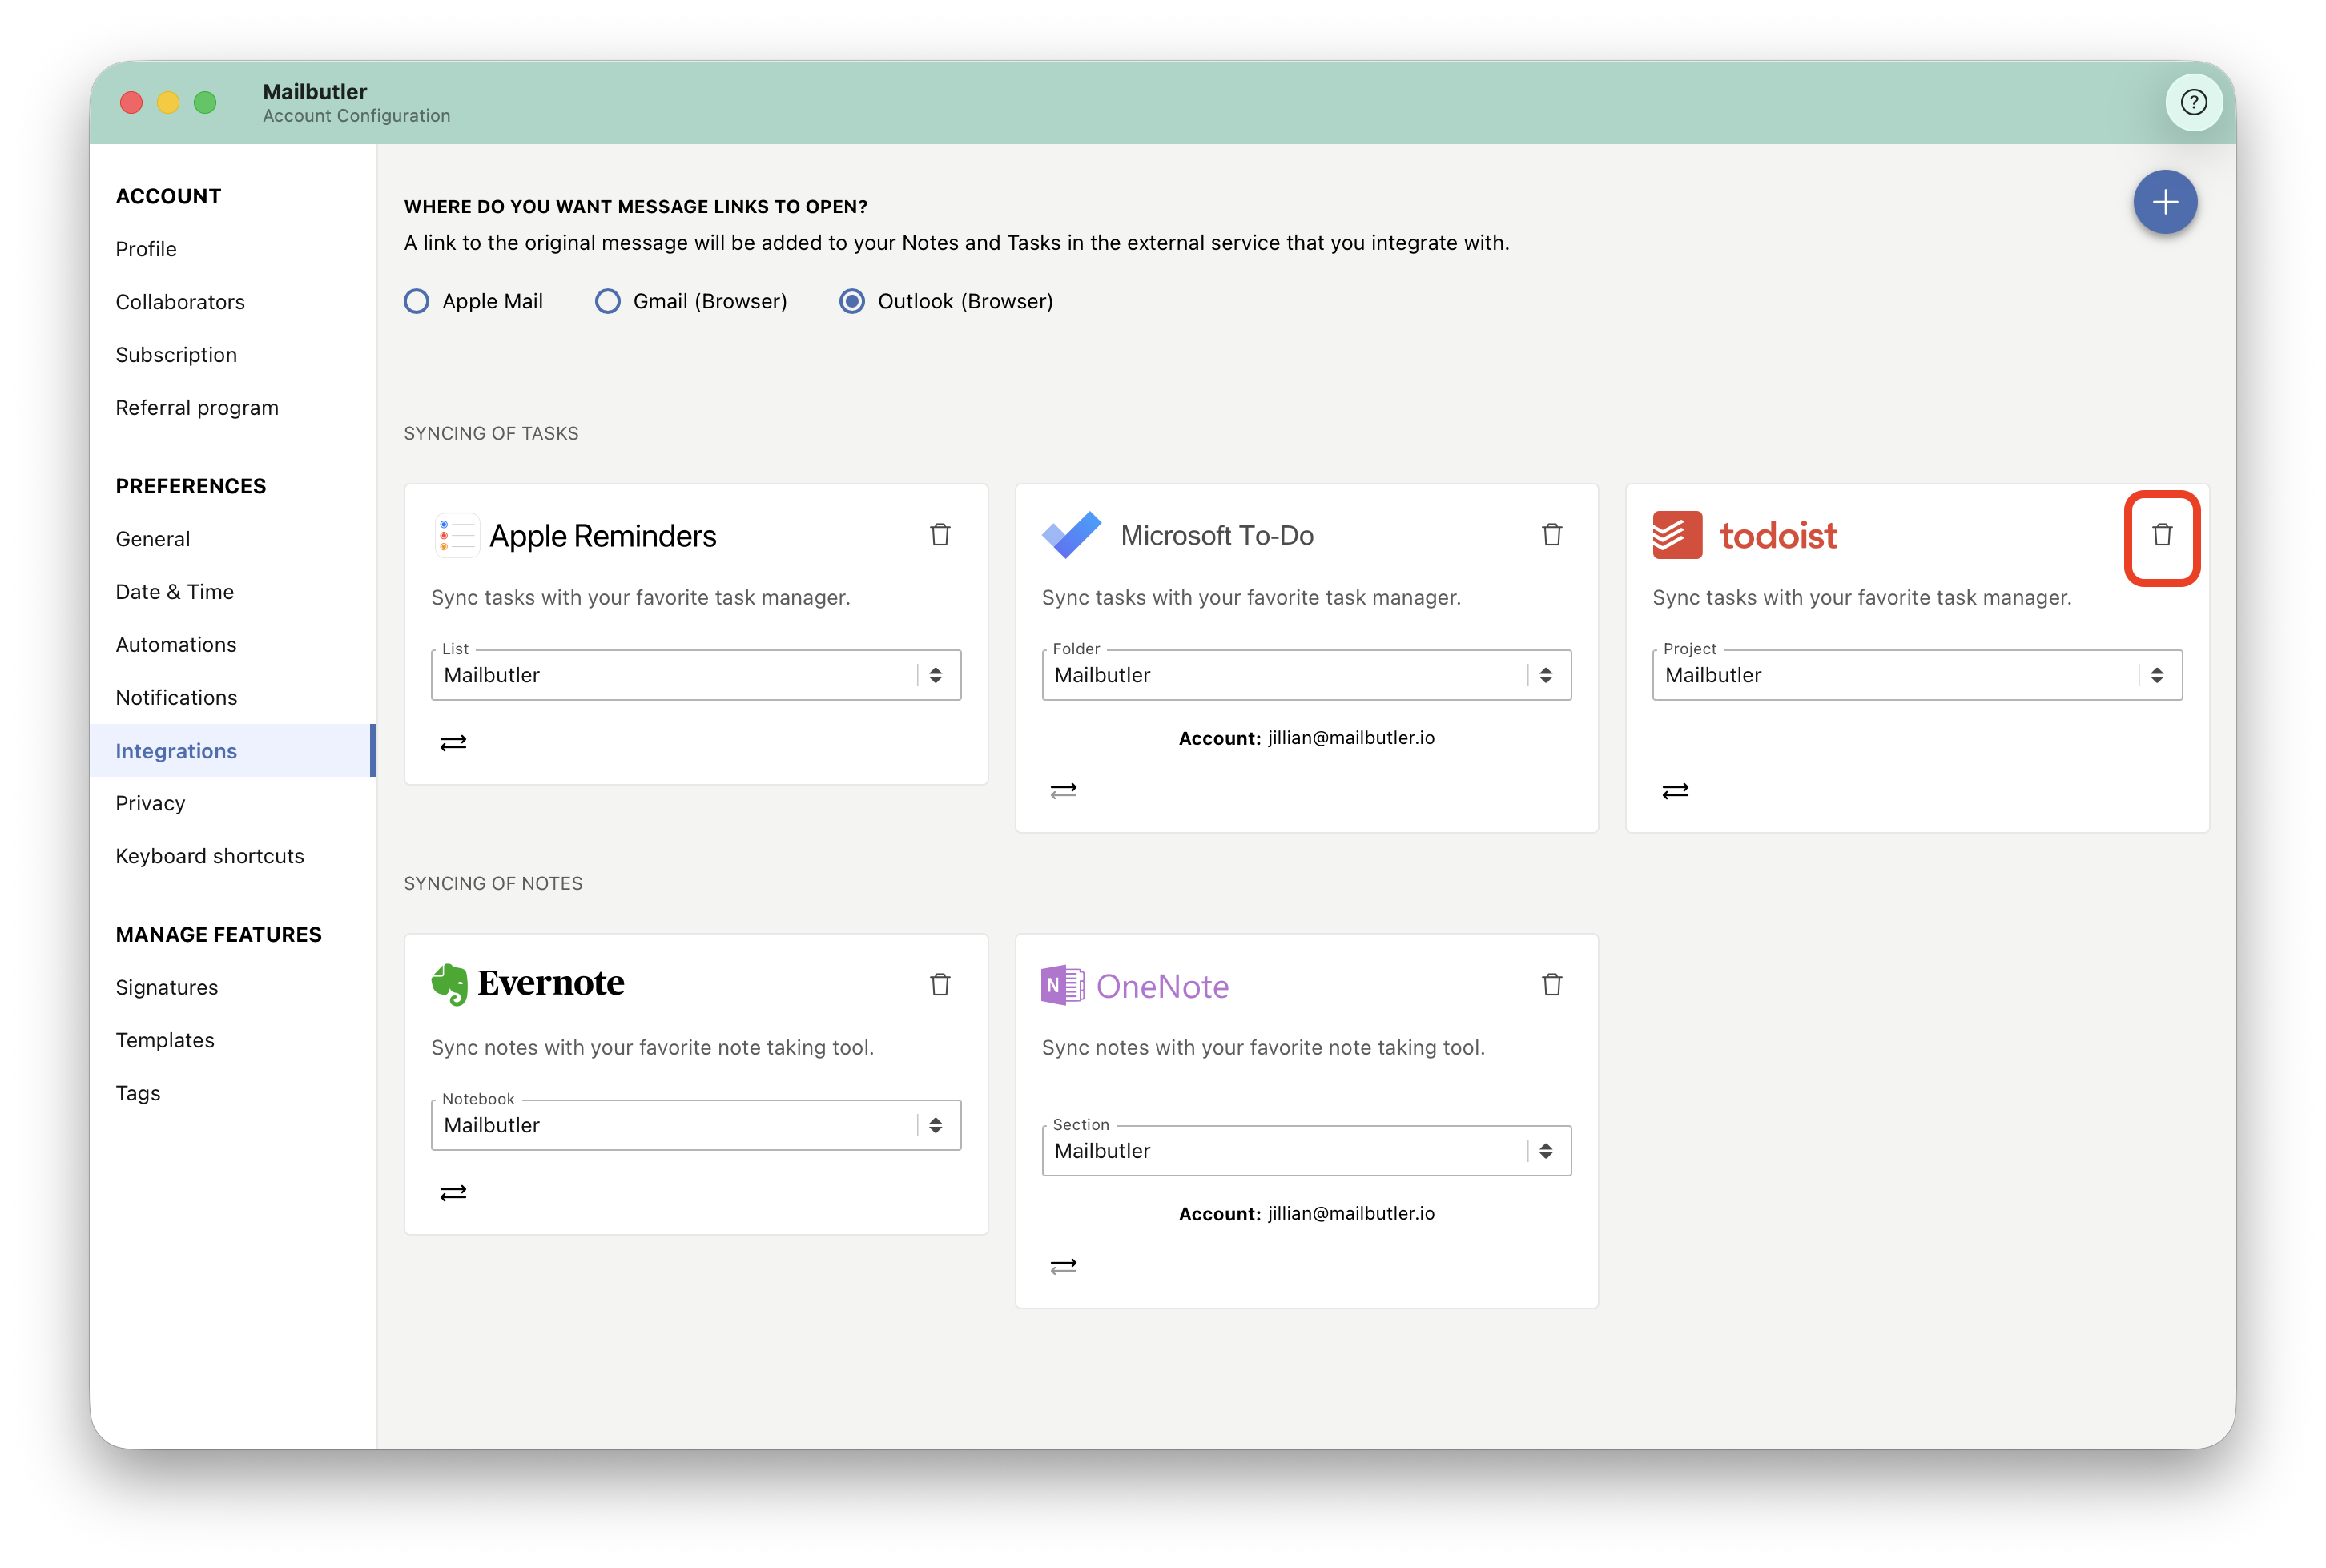
7. To disconnect the service from Mailbutler, click the trash icon.
Trello
If you connect Mailbutler with Trello, Tasks and Assigned Emails created with Mailbutler will be automatically synced with your Todoist account.
1. Open the Mailbutler sidebar in your email client, click the three dots and then Account & Preferences.
2. A new window will pop up. Select Integrations under Preferences in the sidebar on the left.
3. Click the plus icon and then click Trello.
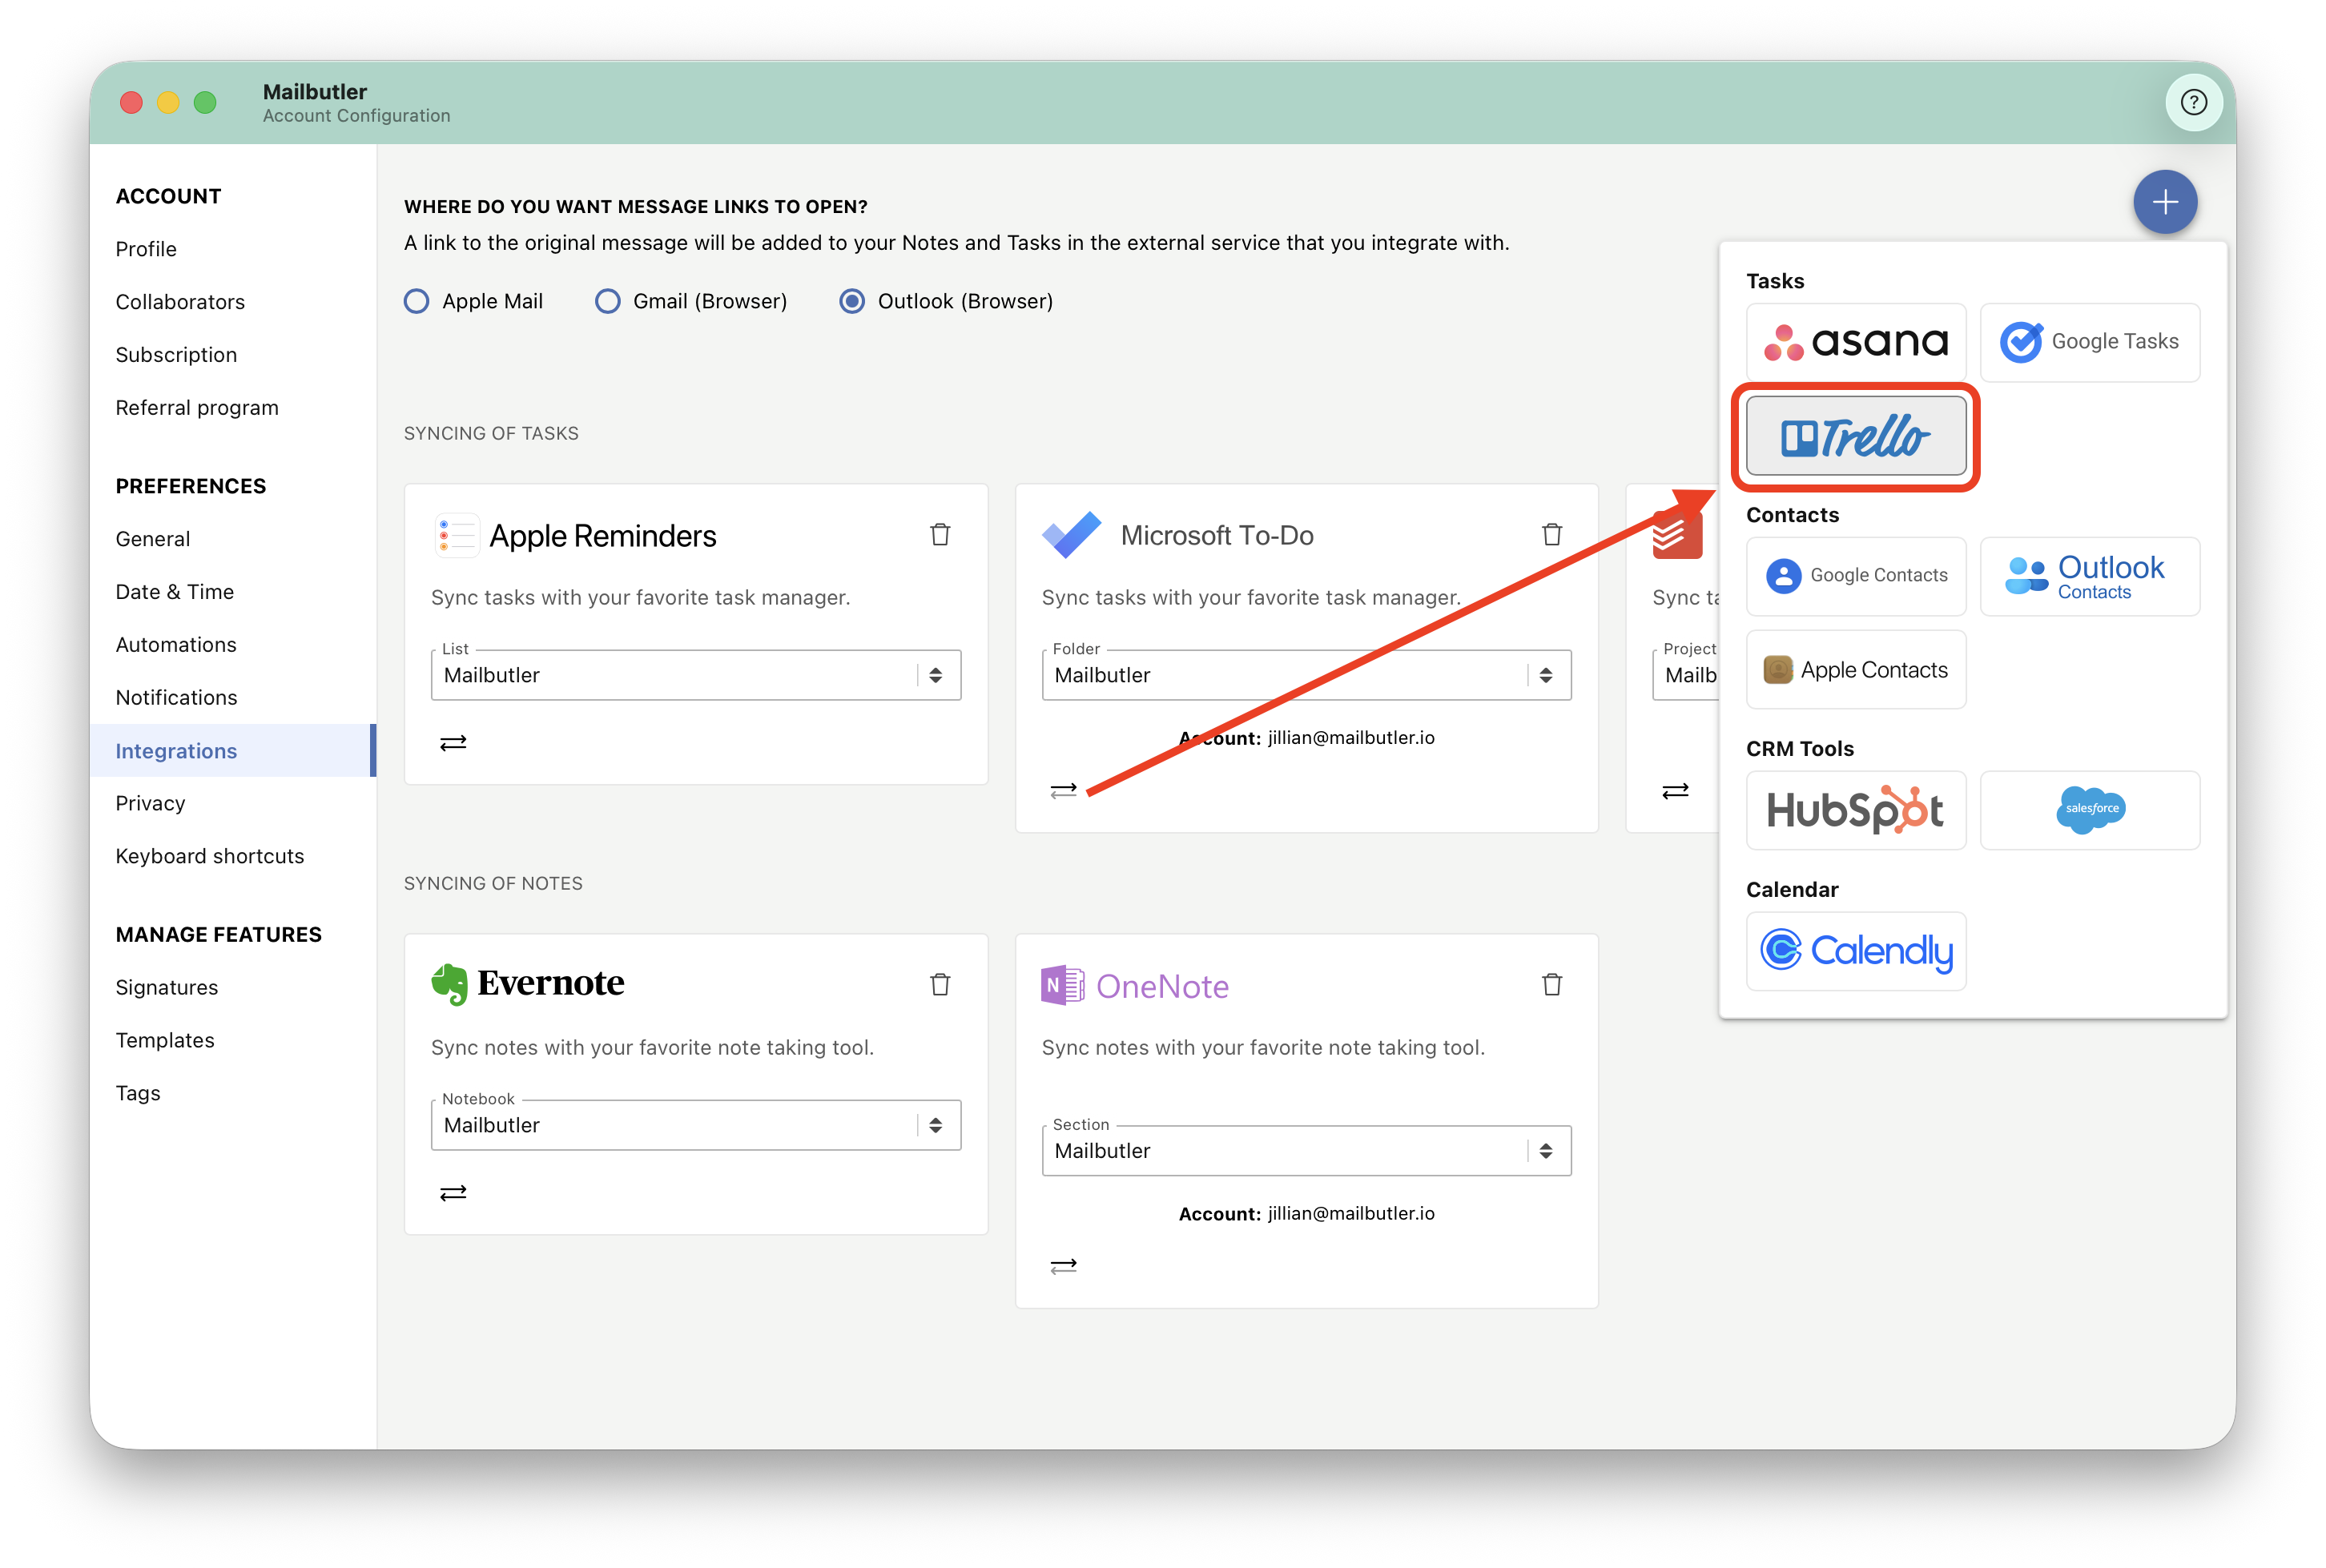
Sign in with your Trello account and follow the on-screen instructions to give Mailbutler access.
5. After the successful integration, your Tasks created, and Assigned Emails with Mailbutler will automatically appear in Trello.
Information is synchronized both ways. That means that making any changes to your Tasks and Assigned Emails in Trello will be reflected in Mailbutler and the other way round.
6. Click the dropdown arrows to change the Trello list that you would like your Tasks and Assigned Emails to be synced to.
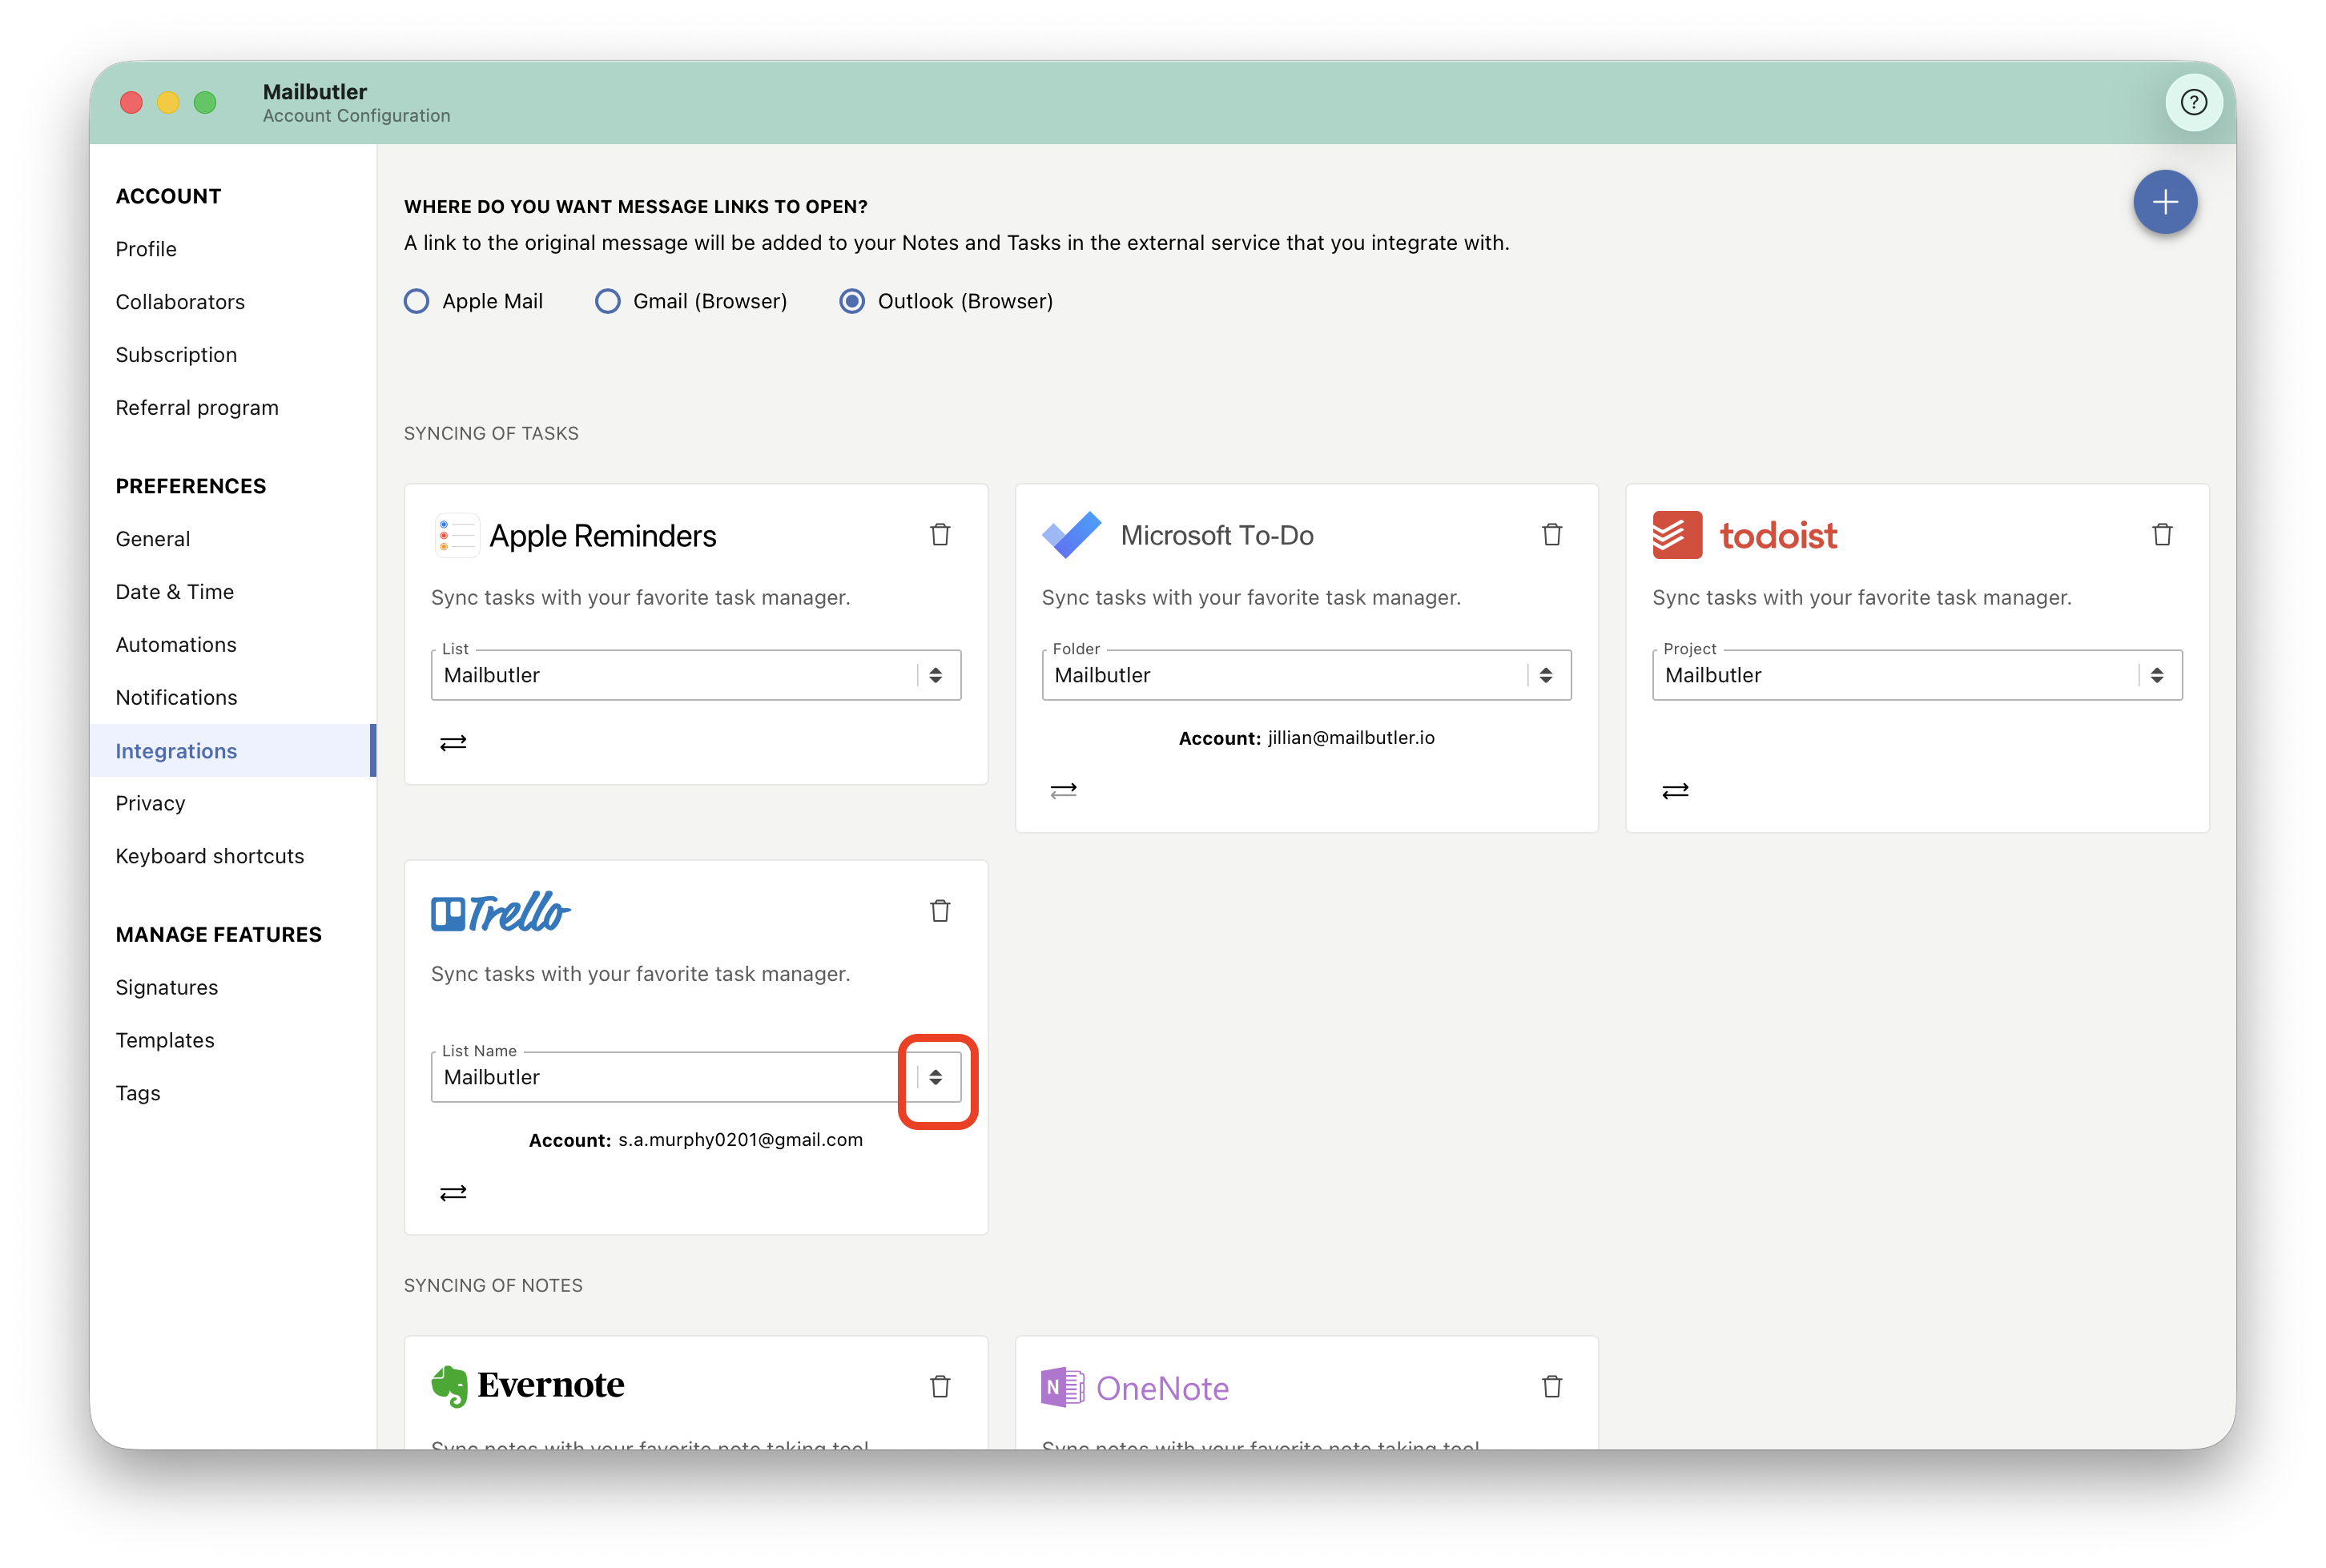
7. To disconnect the service from Mailbutler, click the trash icon.
