
If you are using a different email account type not listed here, please contact us at support@mailbutler.io for instructions.
Outlook.com
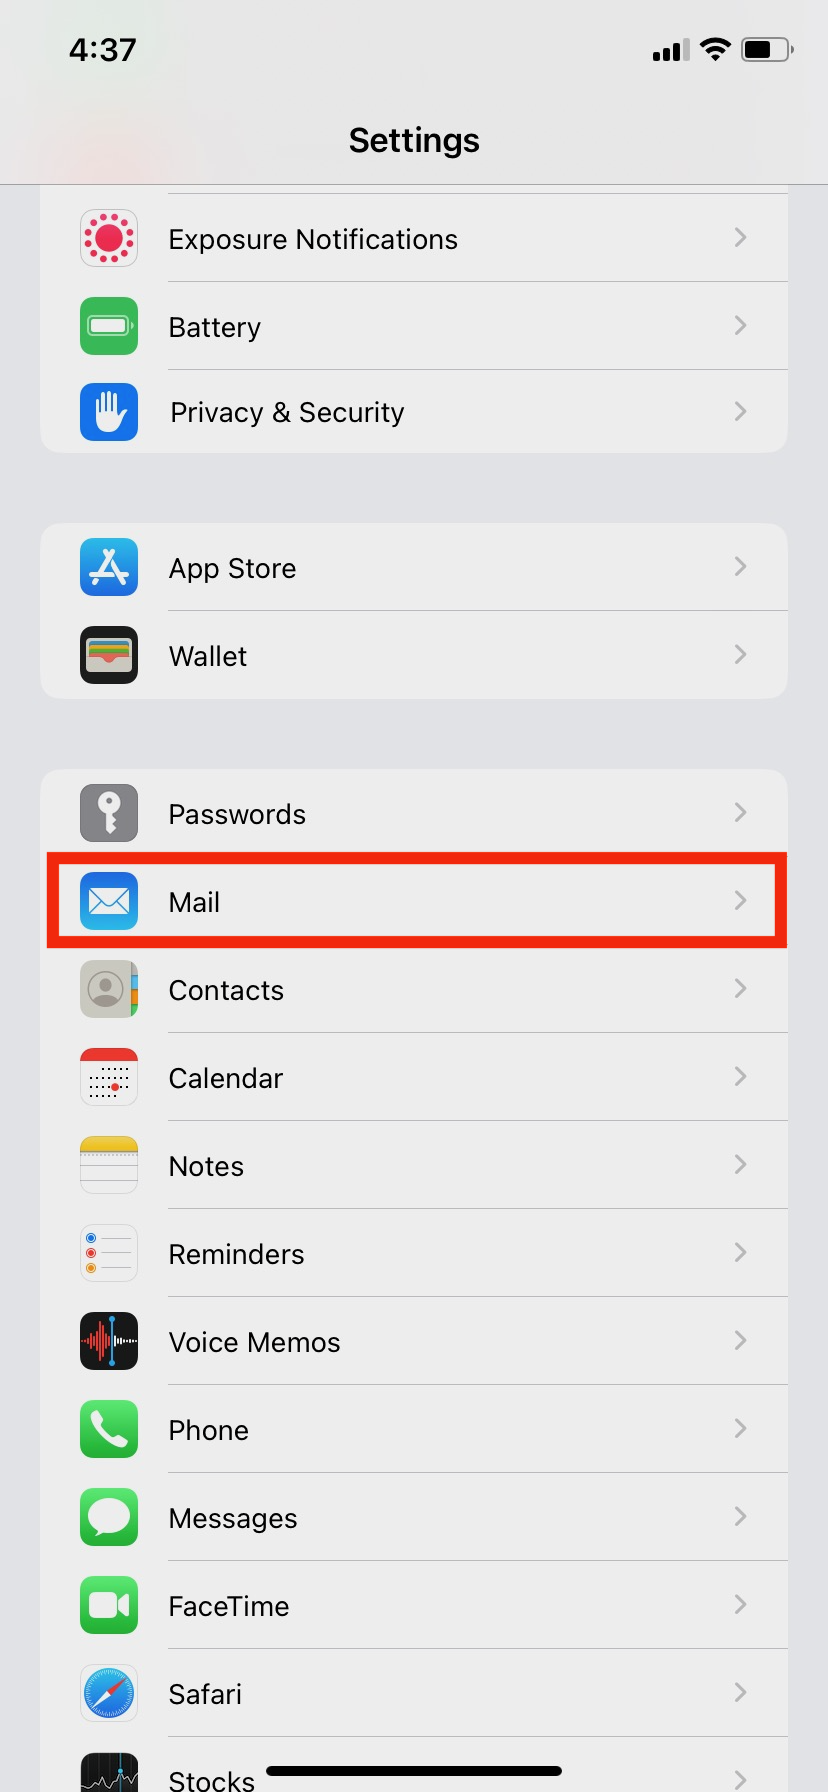
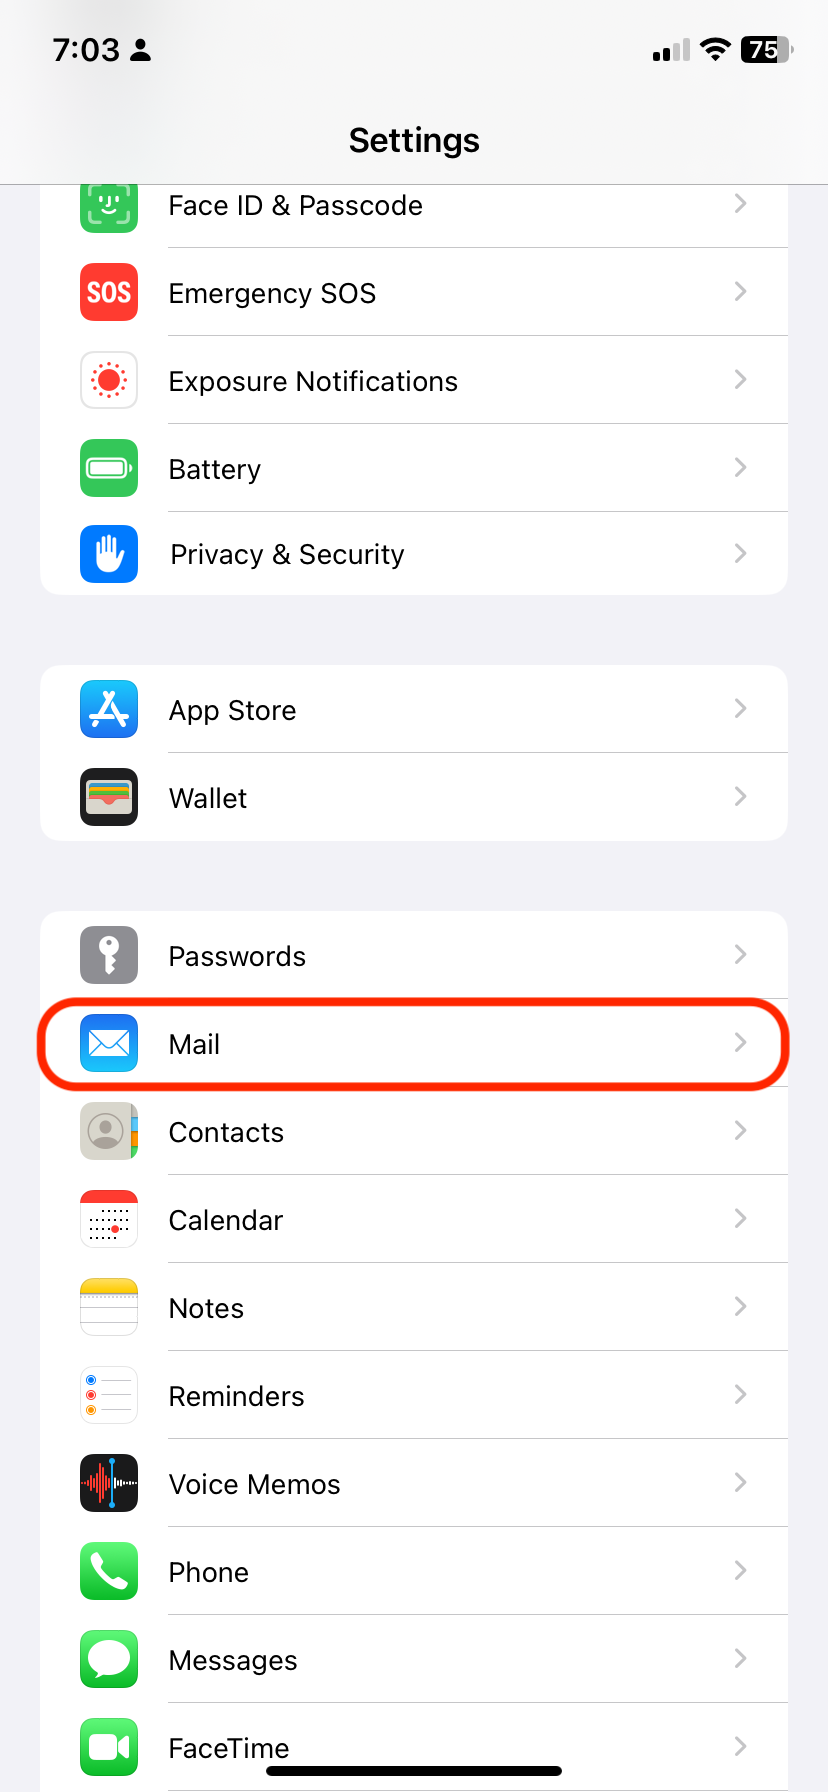
1. Open your iOS Settings and select Mail.
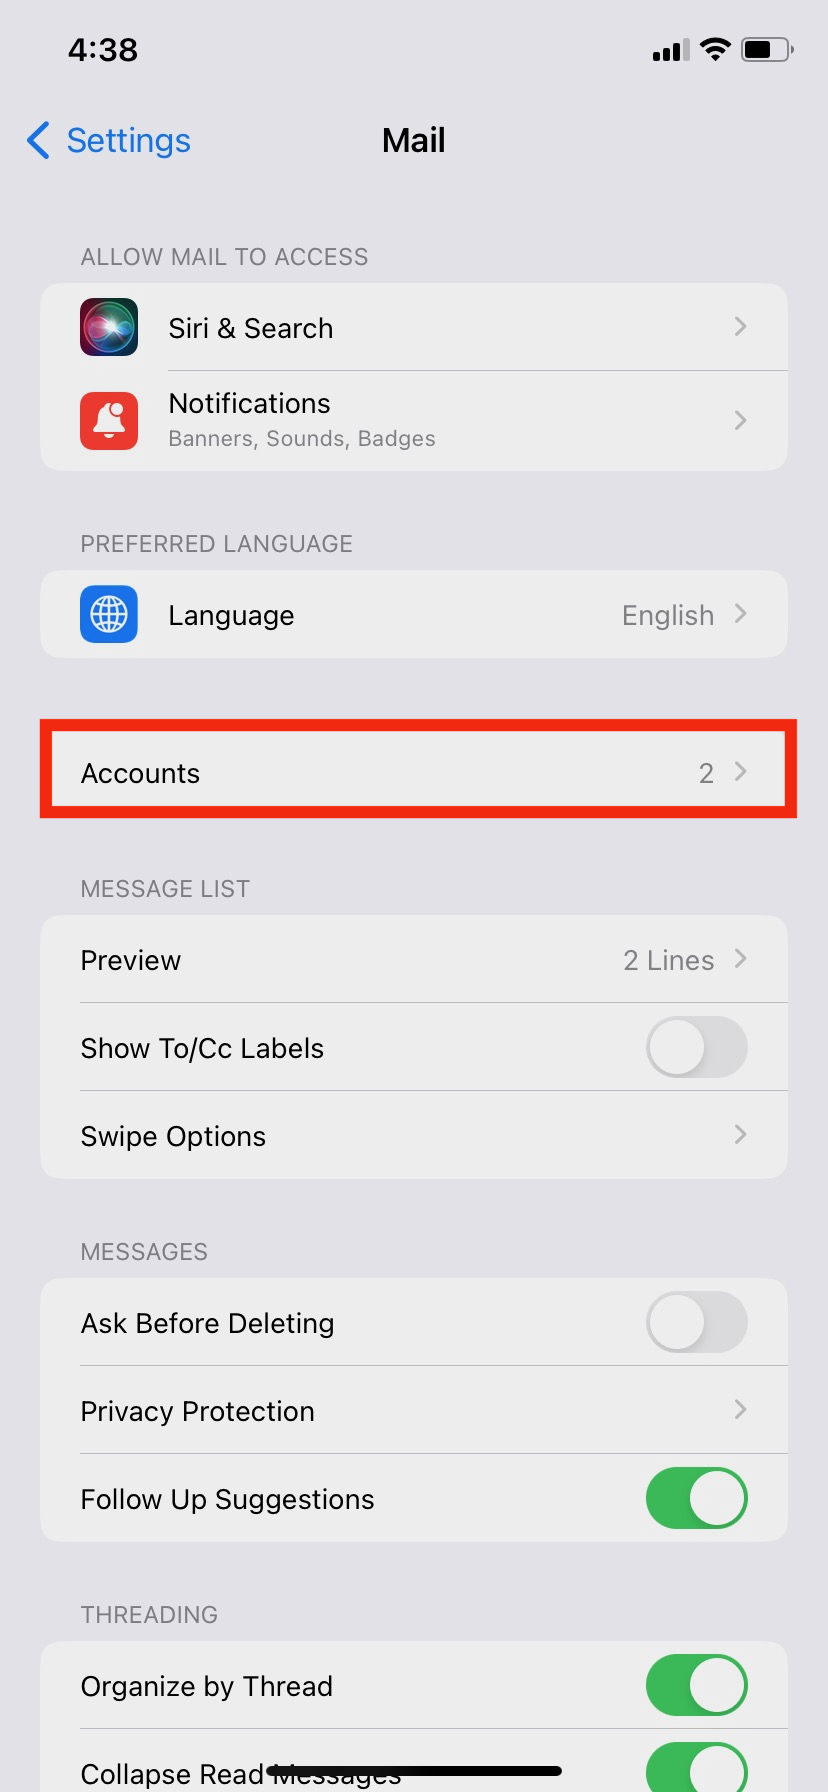
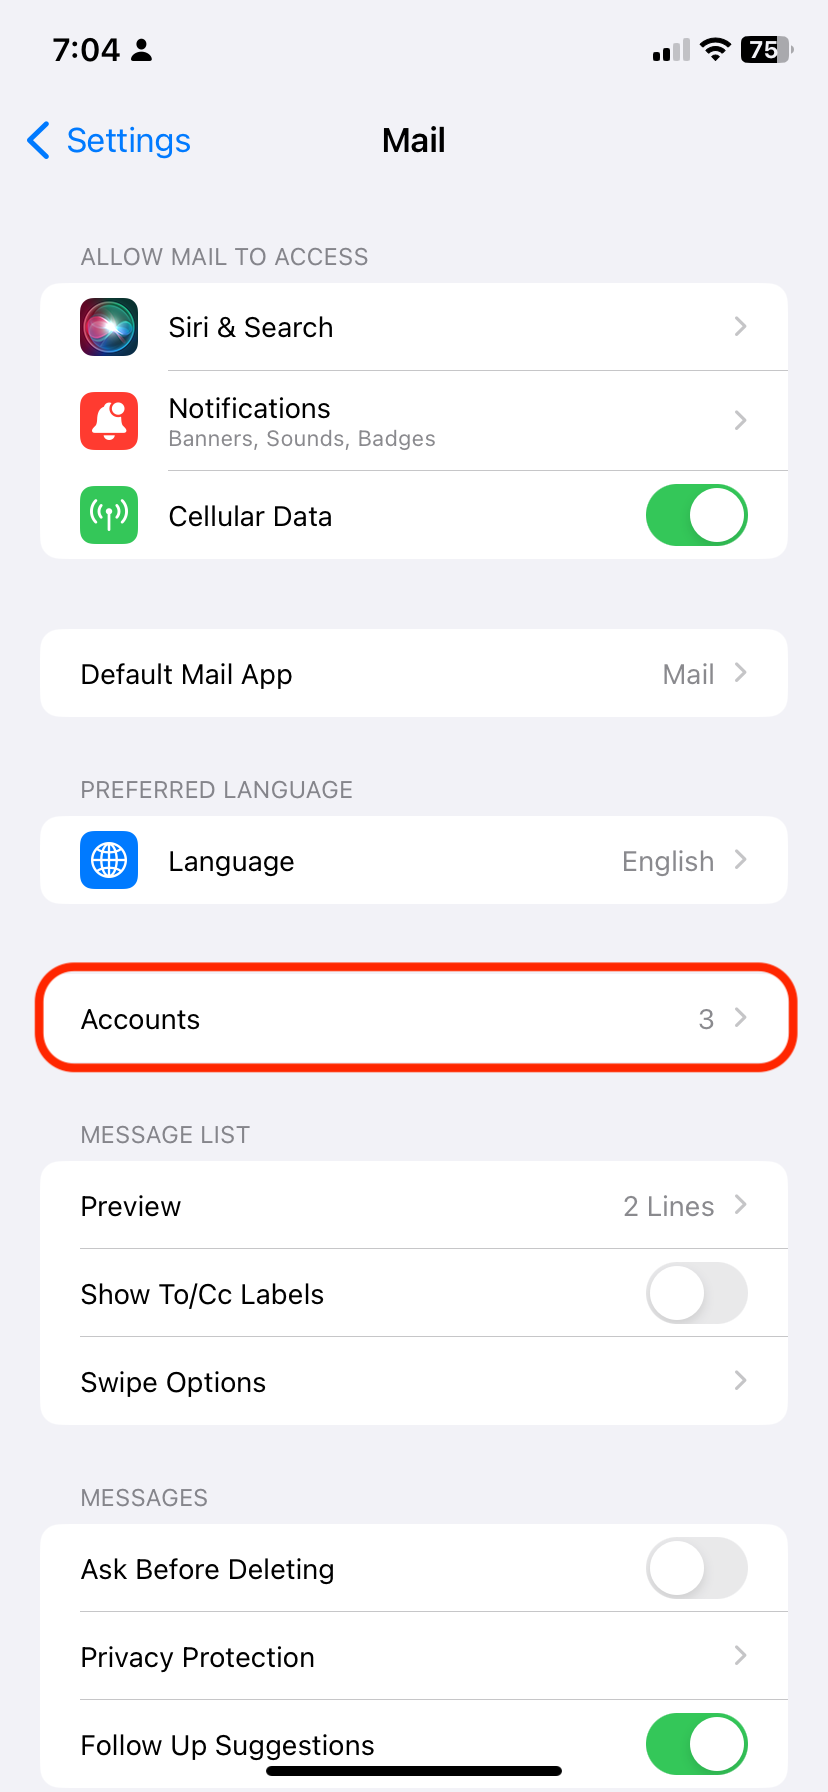
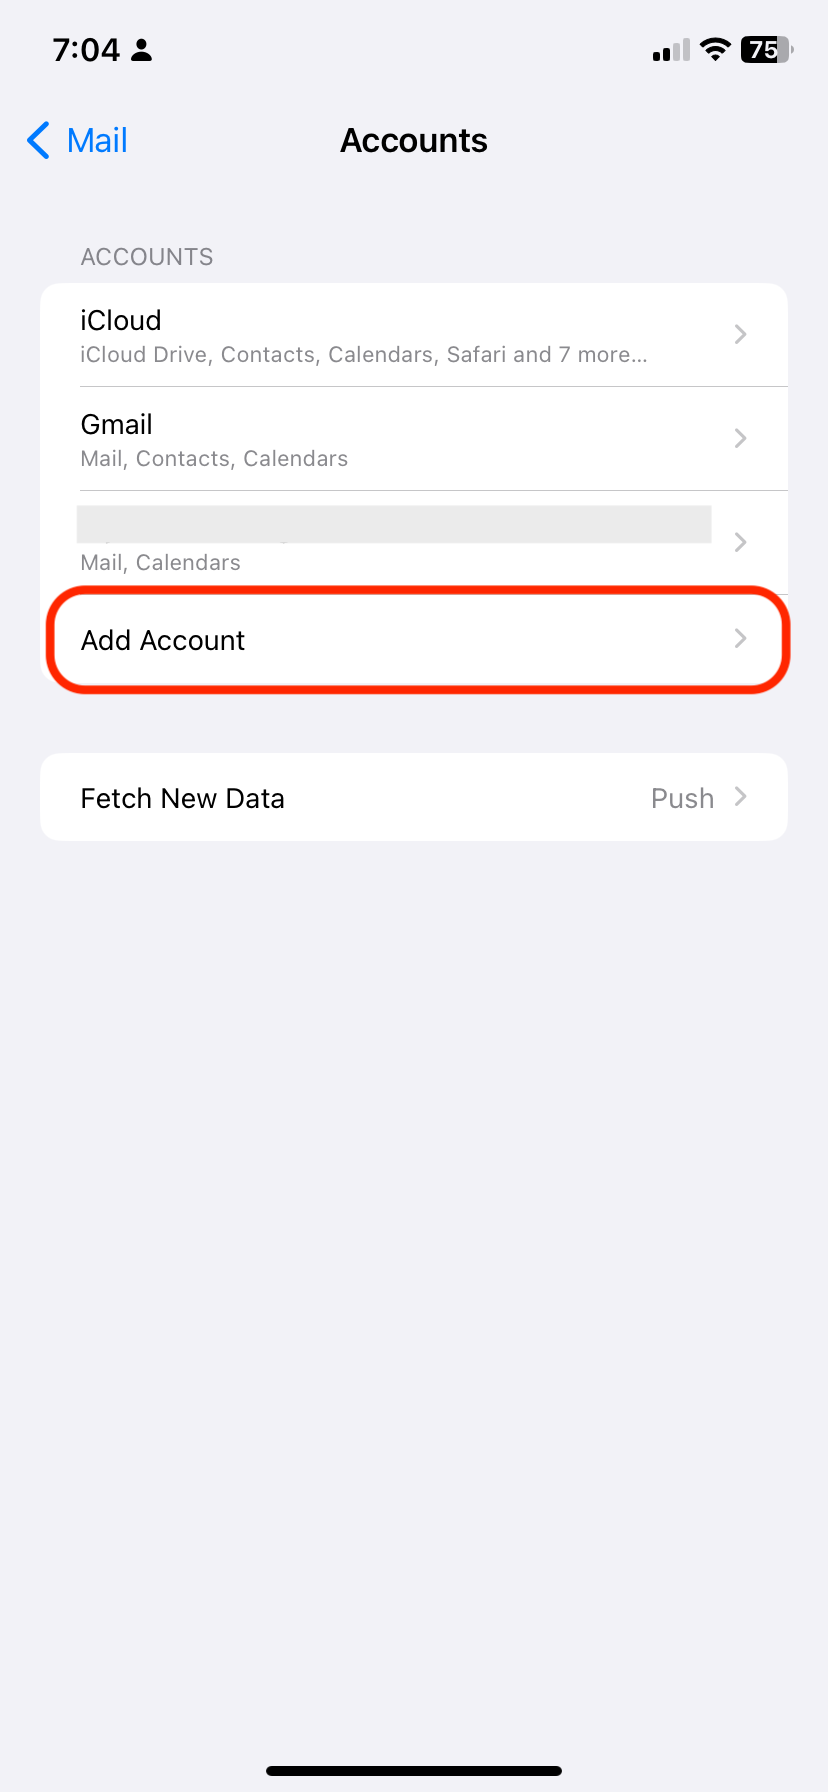
2. Tap Accounts and then click Add Account.

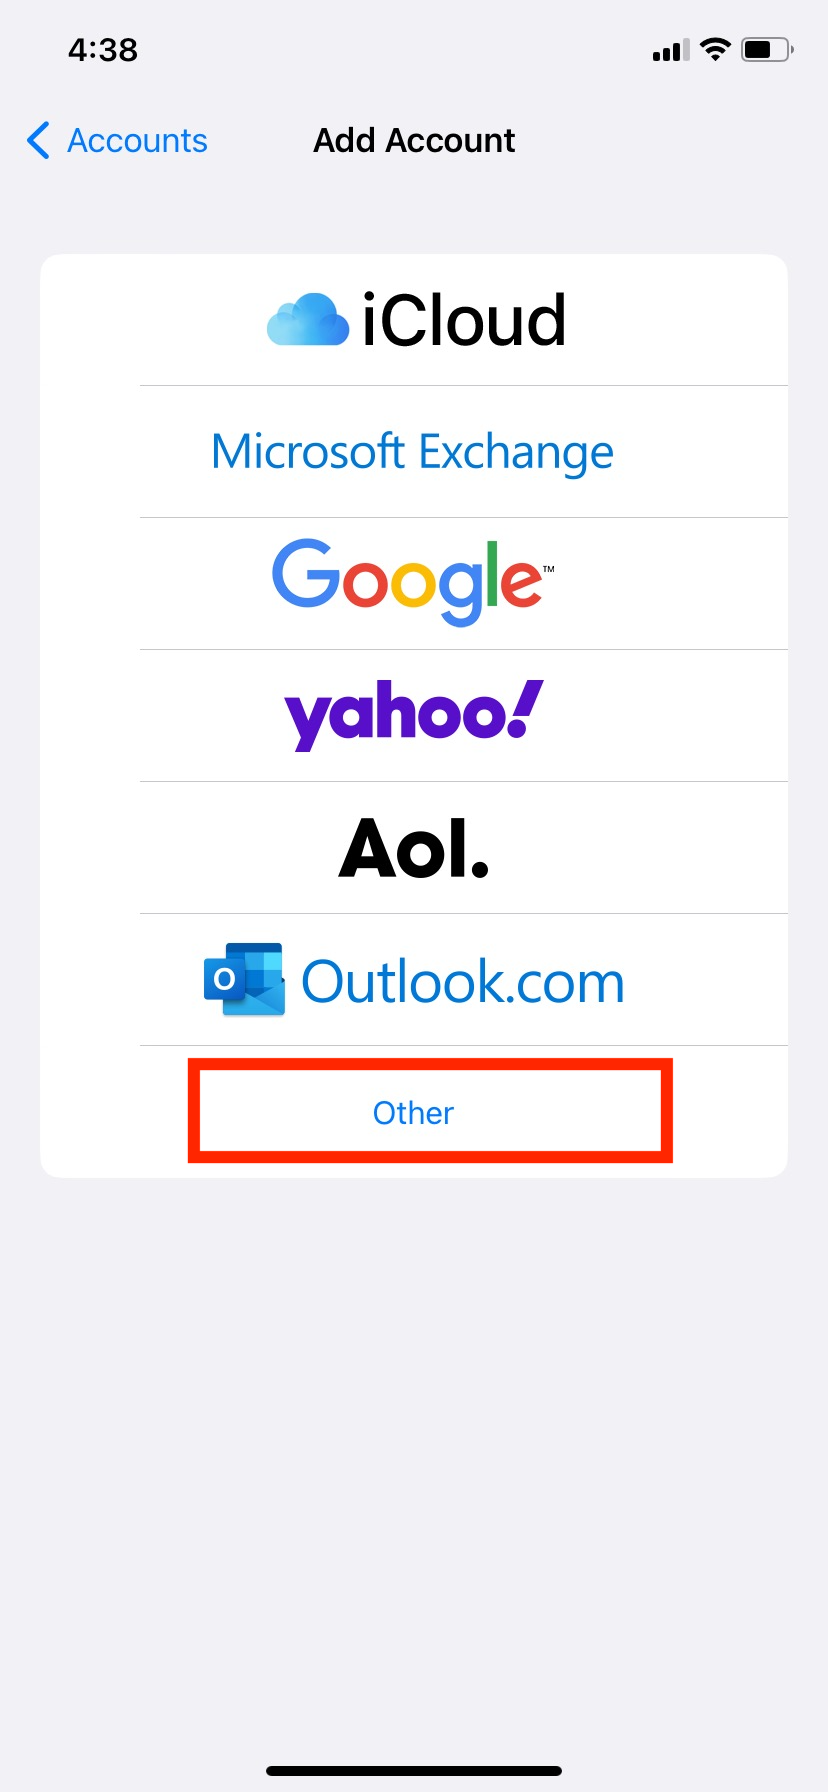
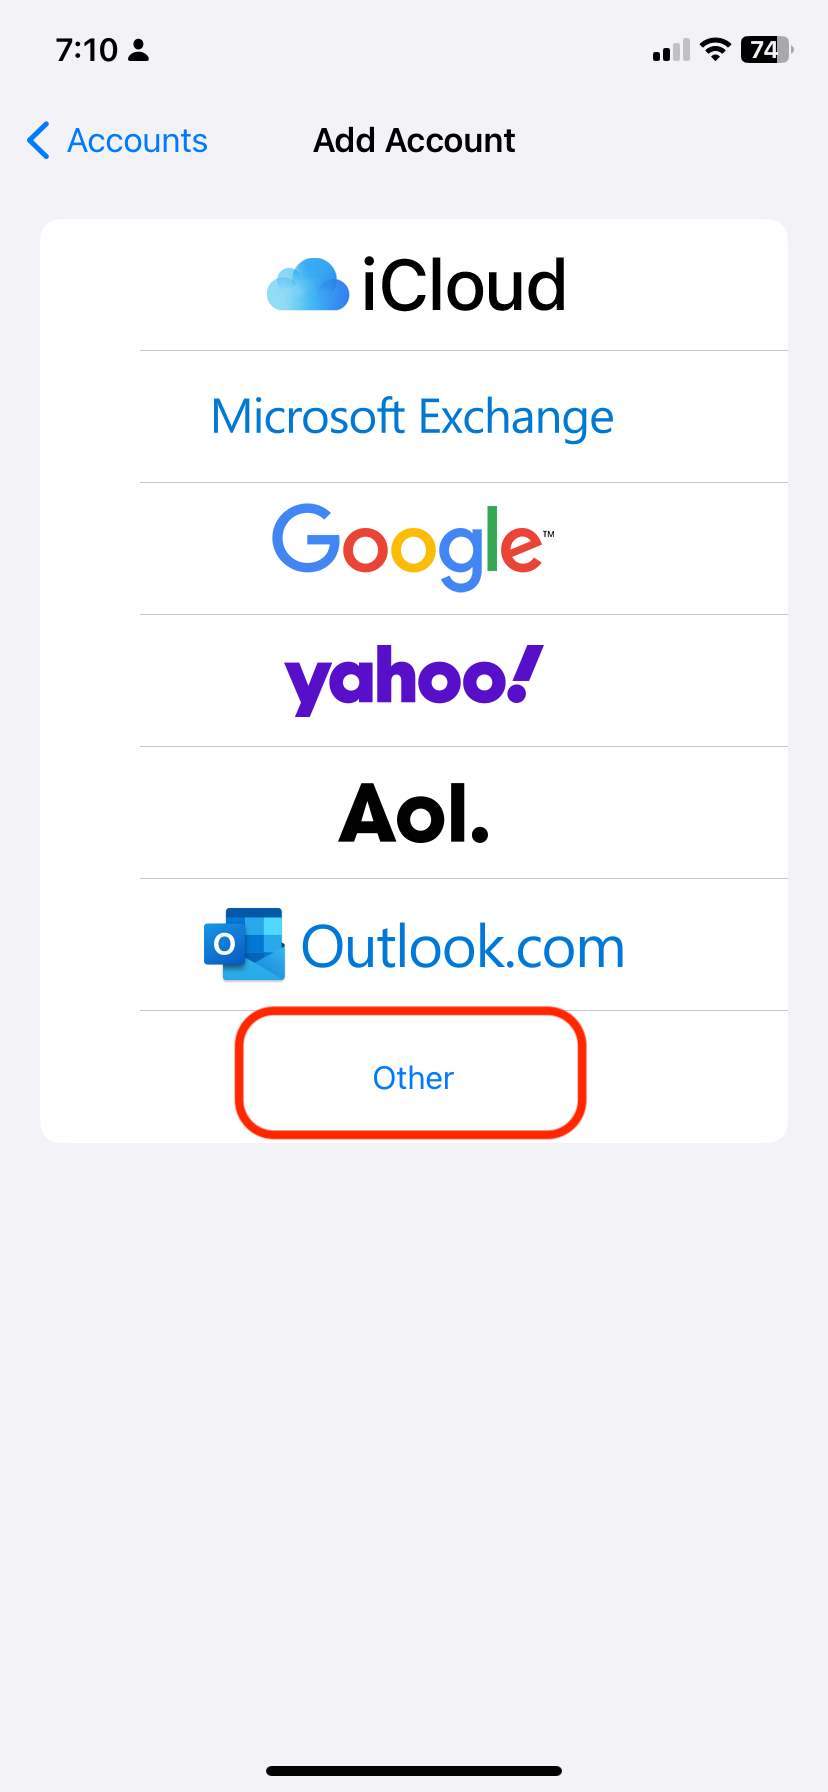
3. Select Other.
4. Select IMAP. Fill out the Incoming Mail Server and Outgoing Mail Server using the information below.
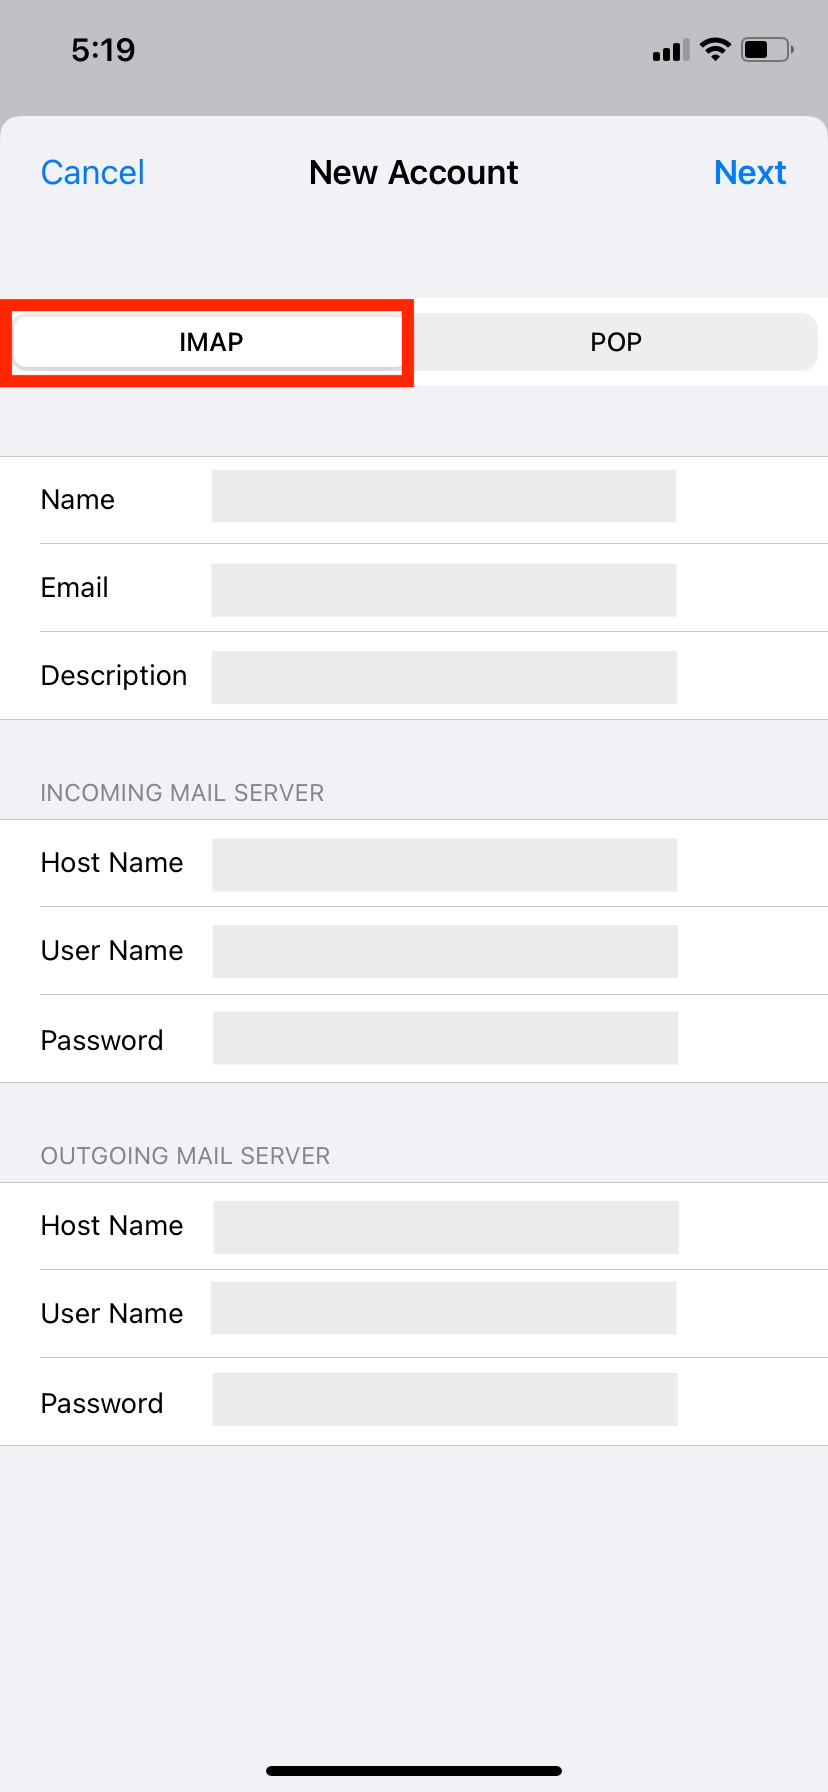
Under Incoming Mail Server, enter the following details:
Hostname: outlook.office365.com
Username: Your full outlook.com address
Password: Your outlook.com password
Under Outgoing Mail Server, enter the following details:
Hostname: smtp.office365.com
Username: Your full outlook.com address
Password: Your outlook.com password
5. Tap Next and then hit Save.
6. Once the Outlook.com email account was added successfully, you can now set up the Mailbutler SMTP configuration.
7. Go to Mail > Accounts, and tap on Outlook.com > Account.
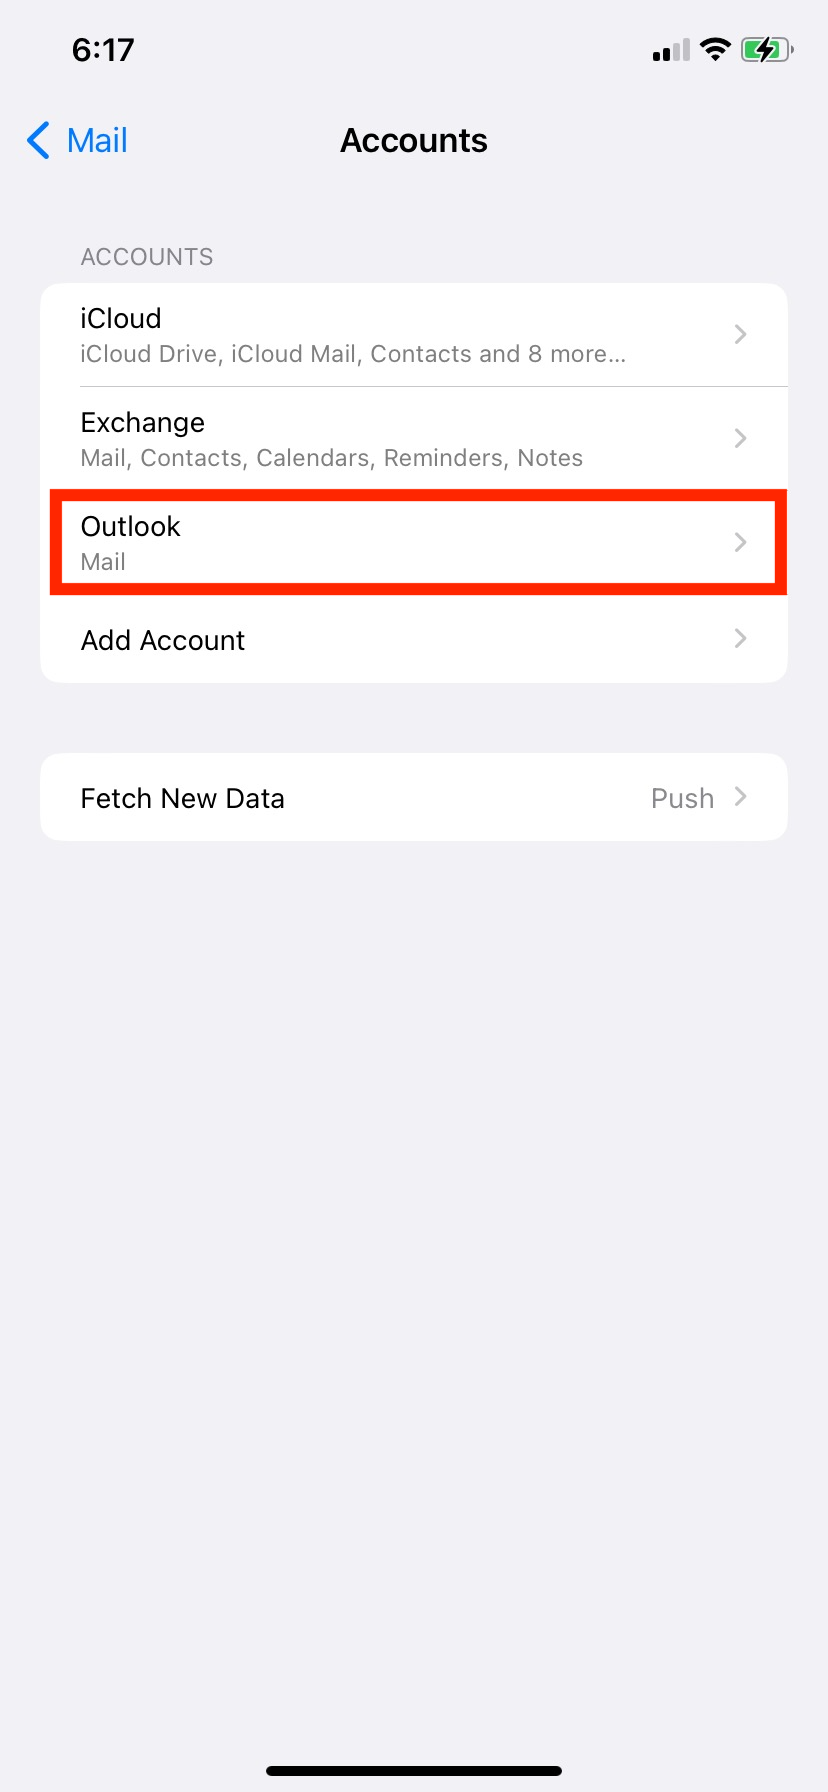
8. Under Outgoing Mail Server, tap SMTP.

9. Click Add Server.

10. Enter the below information:
Host Name: smtp.mailbutler.io
Username: <Your Mailbutler account email address>
Password: <Your Mailbutler account password> (Note: If you're a new Mailbutler user and haven’t set up a password yet, go to this link to create one. Once set, use this password to complete the setup.)
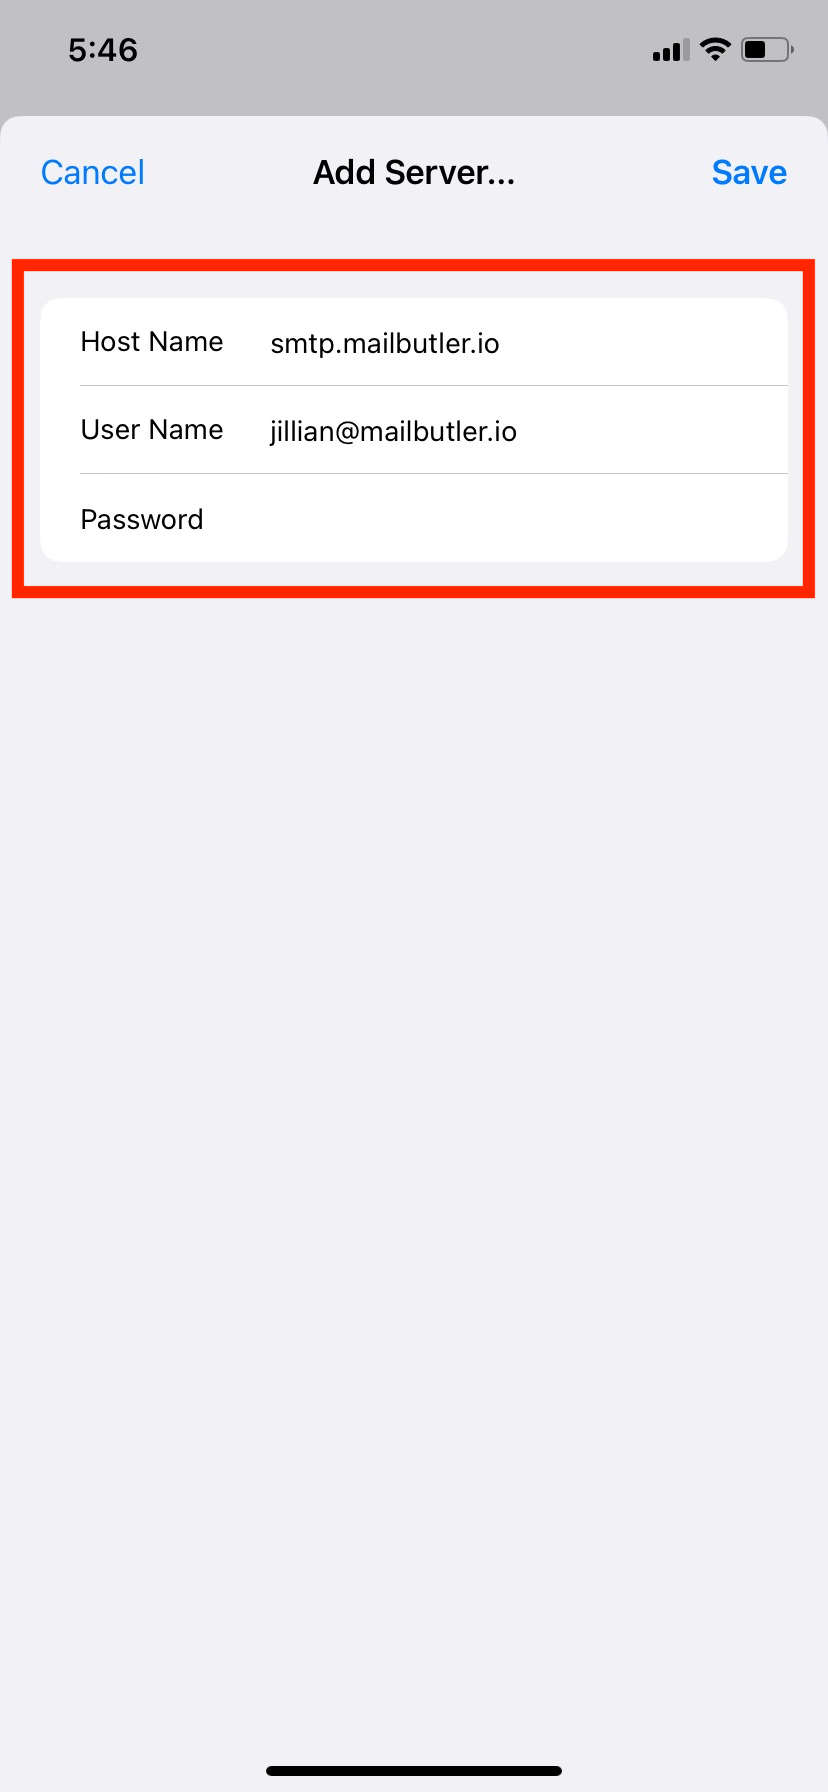
11. Click Save.
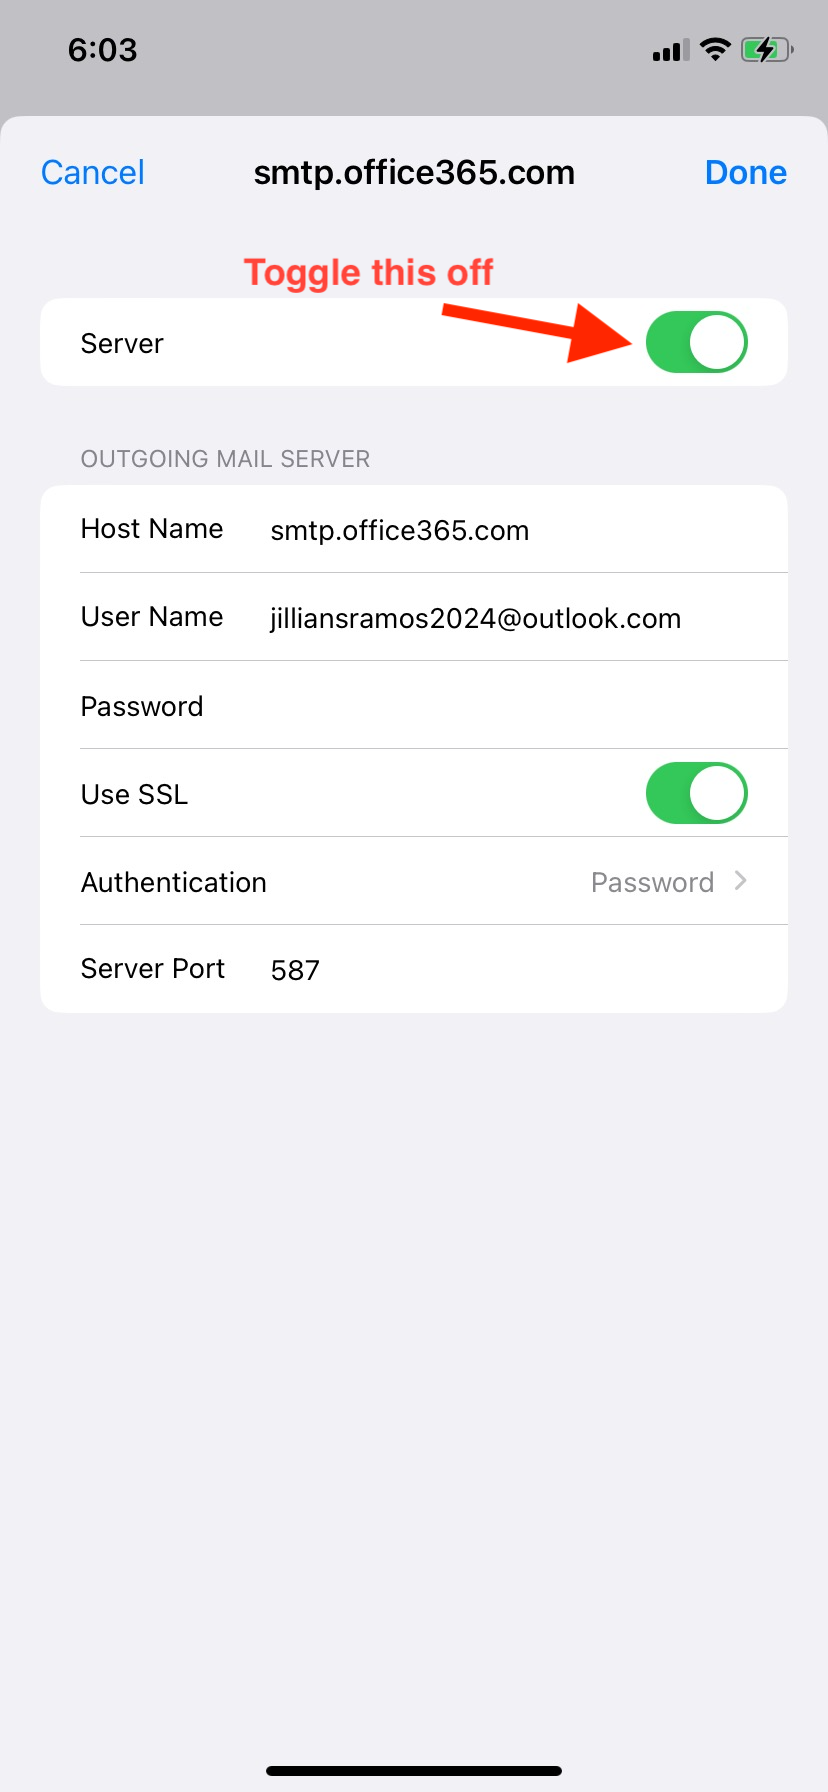
12. Now, you will need to turn off the Outlook SMTP server. Under Primary Server, select smtp.office365.com, toggle it off, and then click Done.
13. Once the Outlook SMTP Sever is off, please make sure that the Mailbutler SMTP server is enabled.
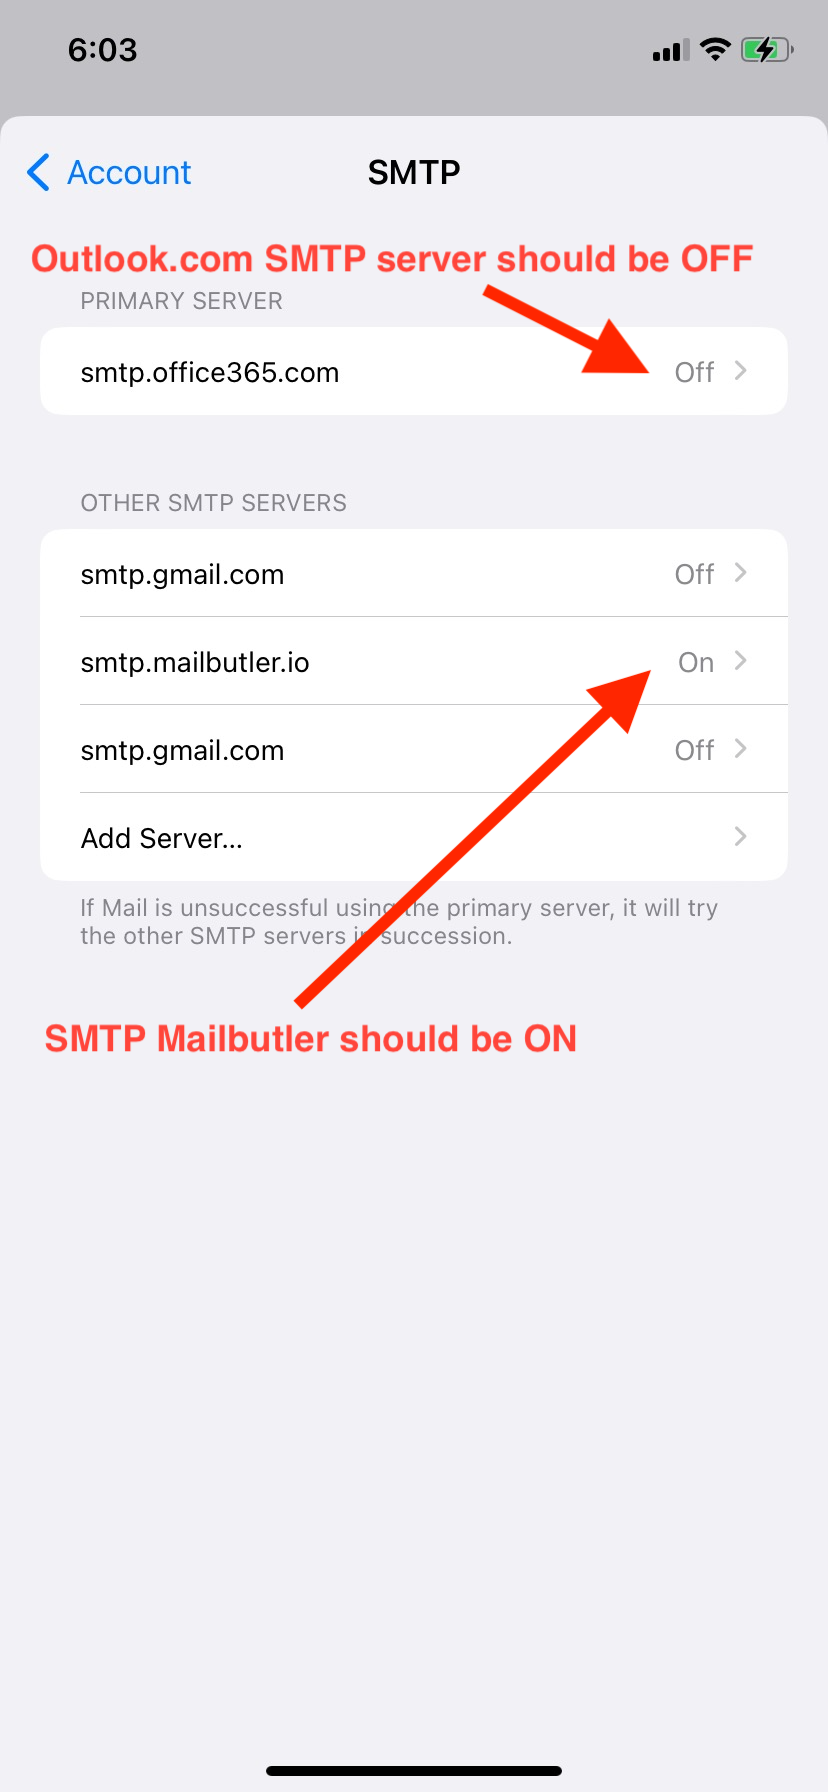
Once you complete these steps, you’re all set to send tracked emails from your iOS device.
iCloud (iOS 17/18)
1. Open your iOS Settings and scroll down to select Mail.
If this option is not immediately visible, use the search bar at the top of your Settings to locate it.
2. Tap Accounts and then click Add Account.
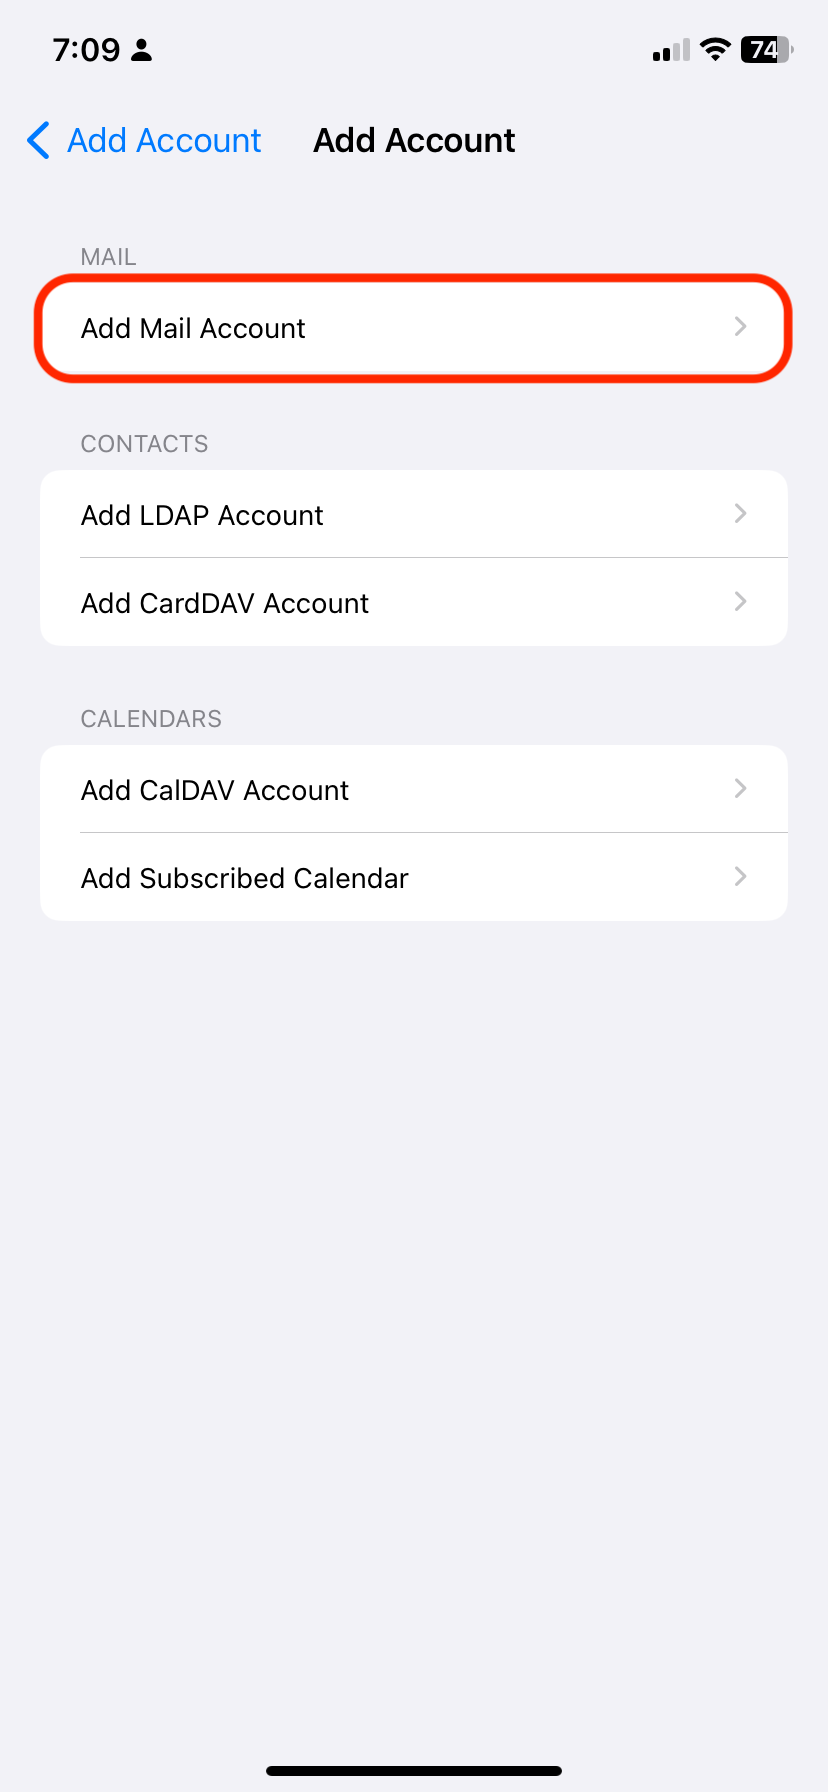
3. Select Other > Add Mail Account.
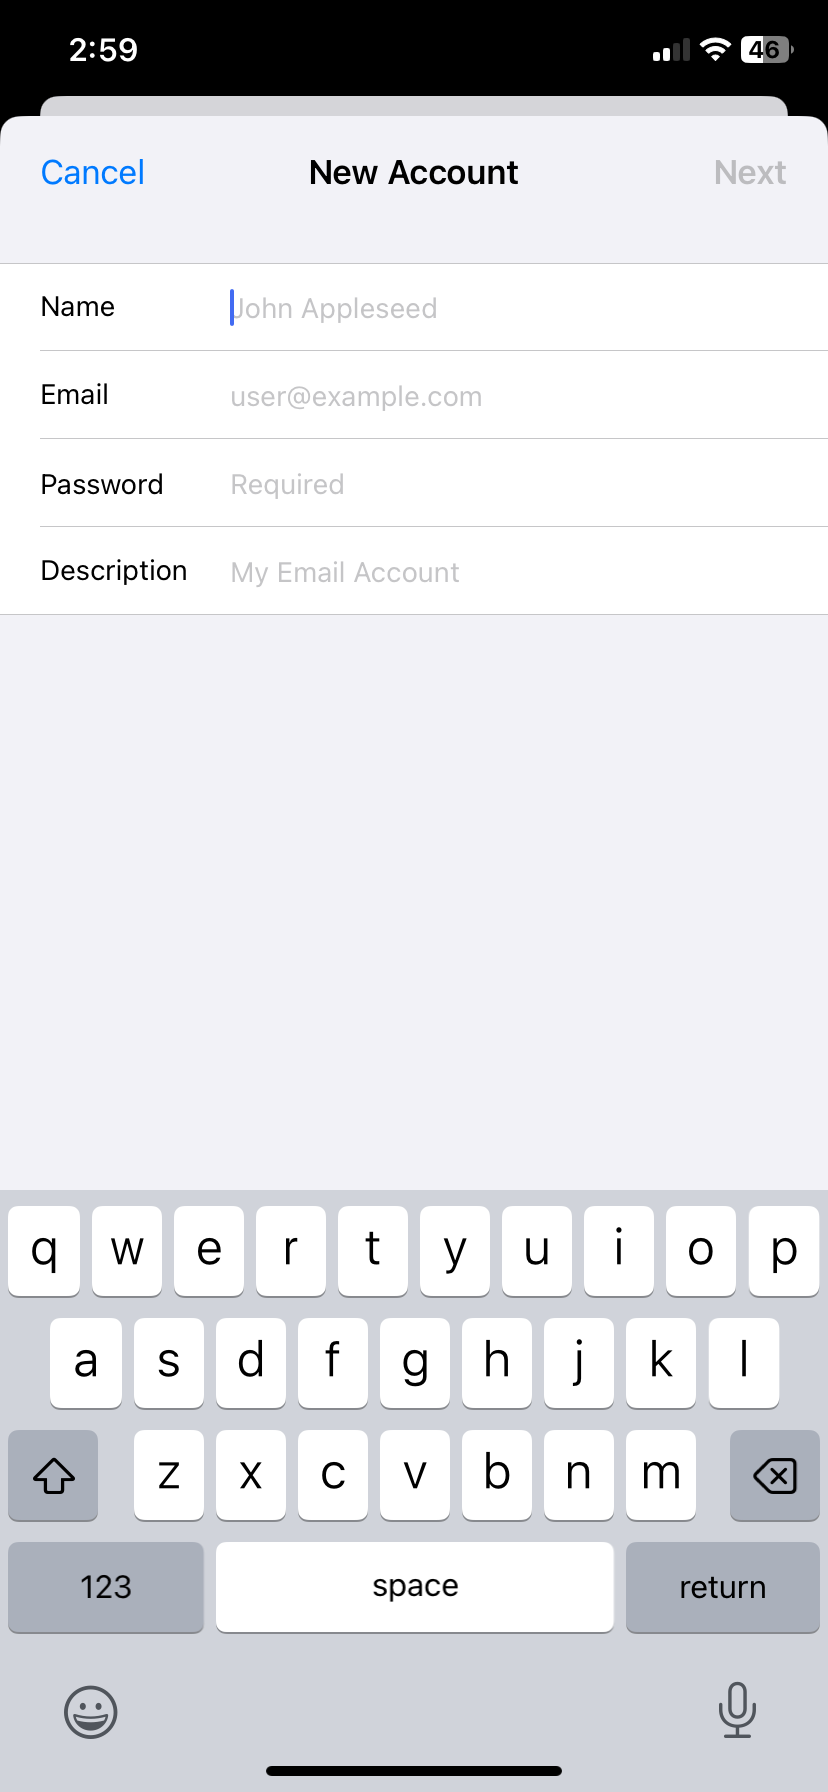
4. When prompted to enter new account information, please input the following details:
Name: (Your name)
Email: (Your iCloud email address)
Password: (Enter the iCloud app-specific password. You can find instructions on generating app-specific passwords here: Apple Support - How to Generate App-Specific Passwords)
Description: (A label or description for the account, e.g., "iCloud Email")
5. Fill out the Incoming Mail Server and Outgoing Mail Server using the information below.
Under Incoming Mail Server, enter the following details:
Hostname: imap.mail.me.com
Username: Your iCloud address
Password: Enter the app-specific password you generated earlier
Under Outgoing Mail Server, enter the following details:
Hostname: smtp.mail.me.com
Username: Your iCloud address
Password: Enter the app-specific password you generated earlier
6. Once the iCloud account is successfully added, to set up Mailbutler SMTP, please enter the information provided below.
Host Name: smtp.mailbutler.io
Username: <Your Mailbutler account email address>
Password: <Your Mailbutler account password> (Note: If you're a new Mailbutler user and haven’t set up a password yet, go to this link to create one. Once set, use this password to complete the setup.)
7. Tap on Save.
8. Once the Mailbutler SMTP is set up, the iCloud email server should be turned off. To do this, follow the instructions below.
Go to Settings > Mail > Accounts > iCloud Account.
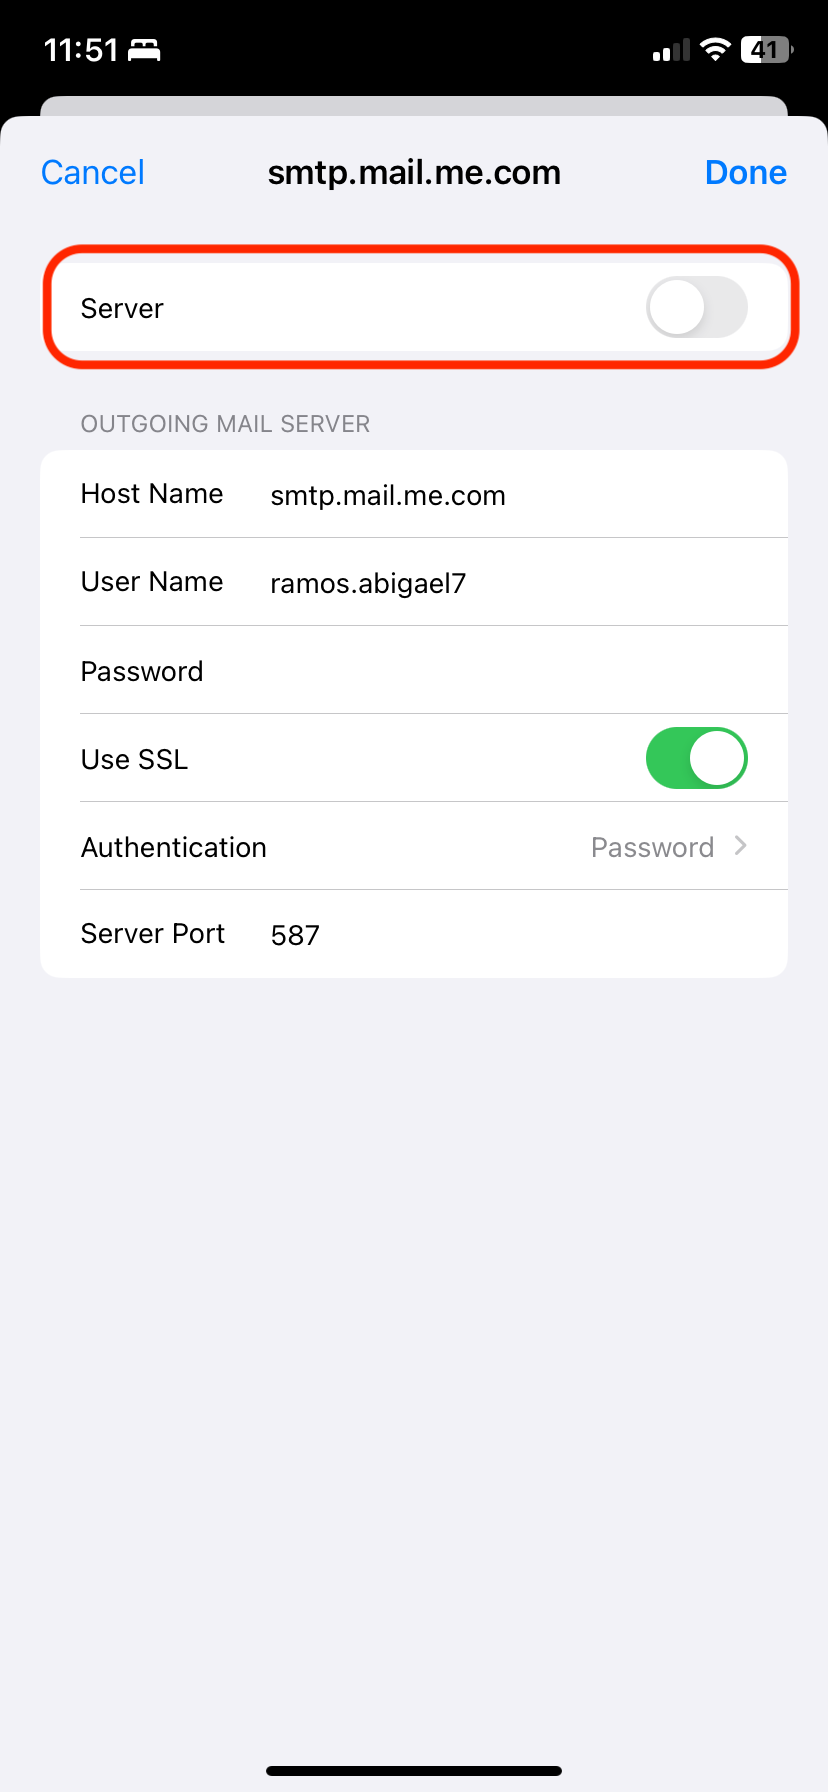
Tap SMTP under the Outgoing Mail Server.
Select smtp.mail.me.com, toggle it Off, and tap Done.
Once you complete these steps, you’re all set to send tracked emails from your iOS device.
iCloud (iOS 16 and earlier)
1. Open your iOS Settings and select Mail.
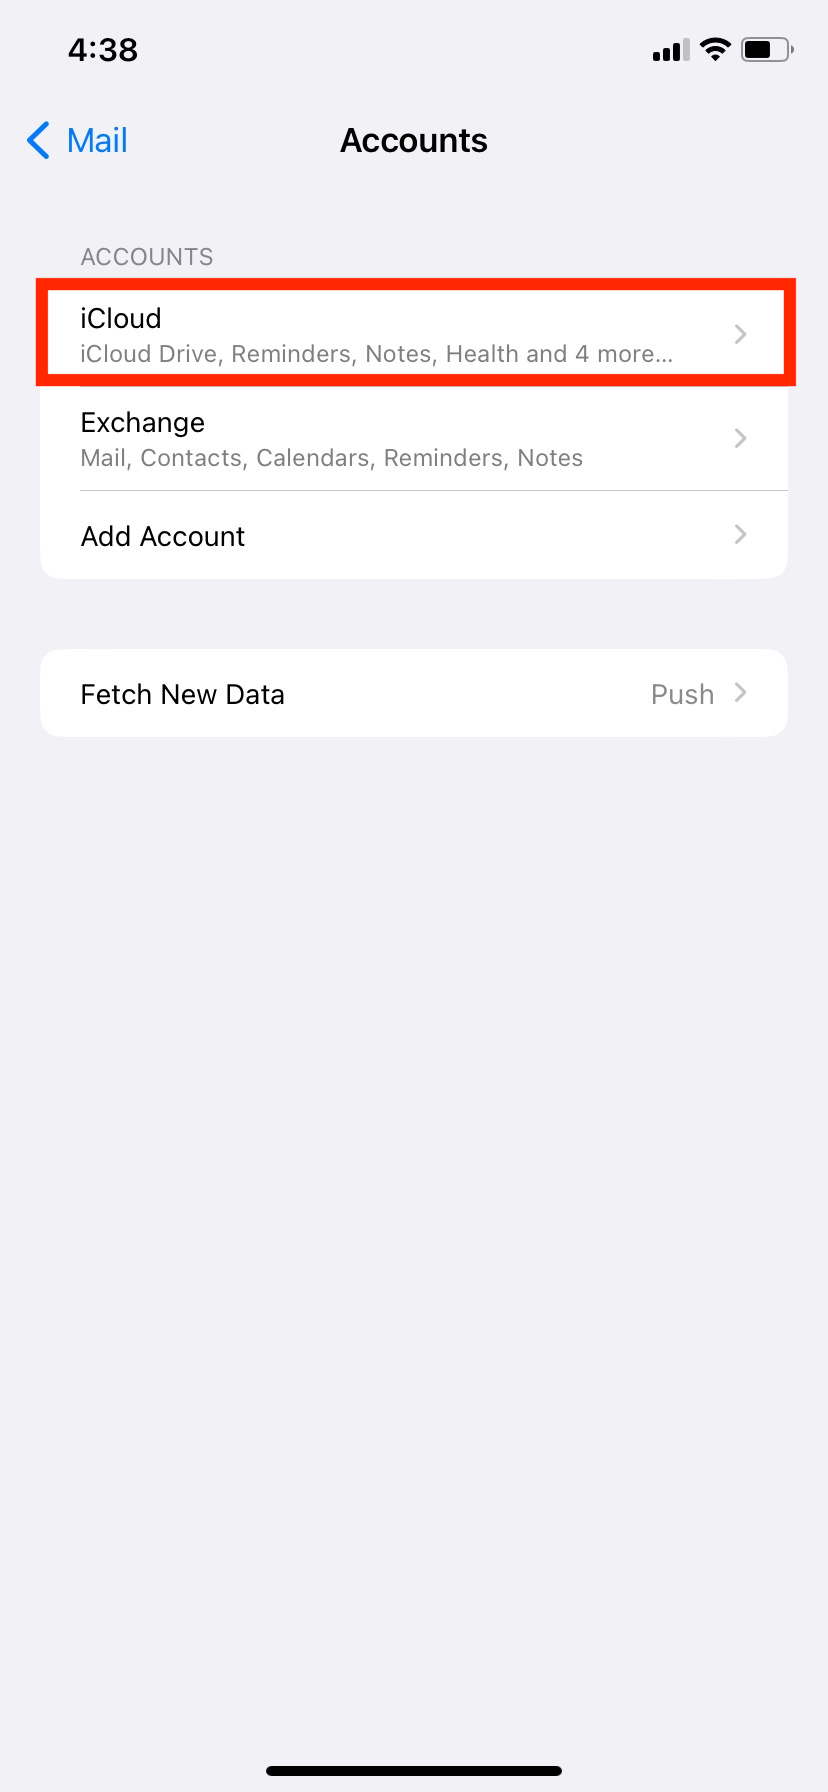
2. Tap Accounts.
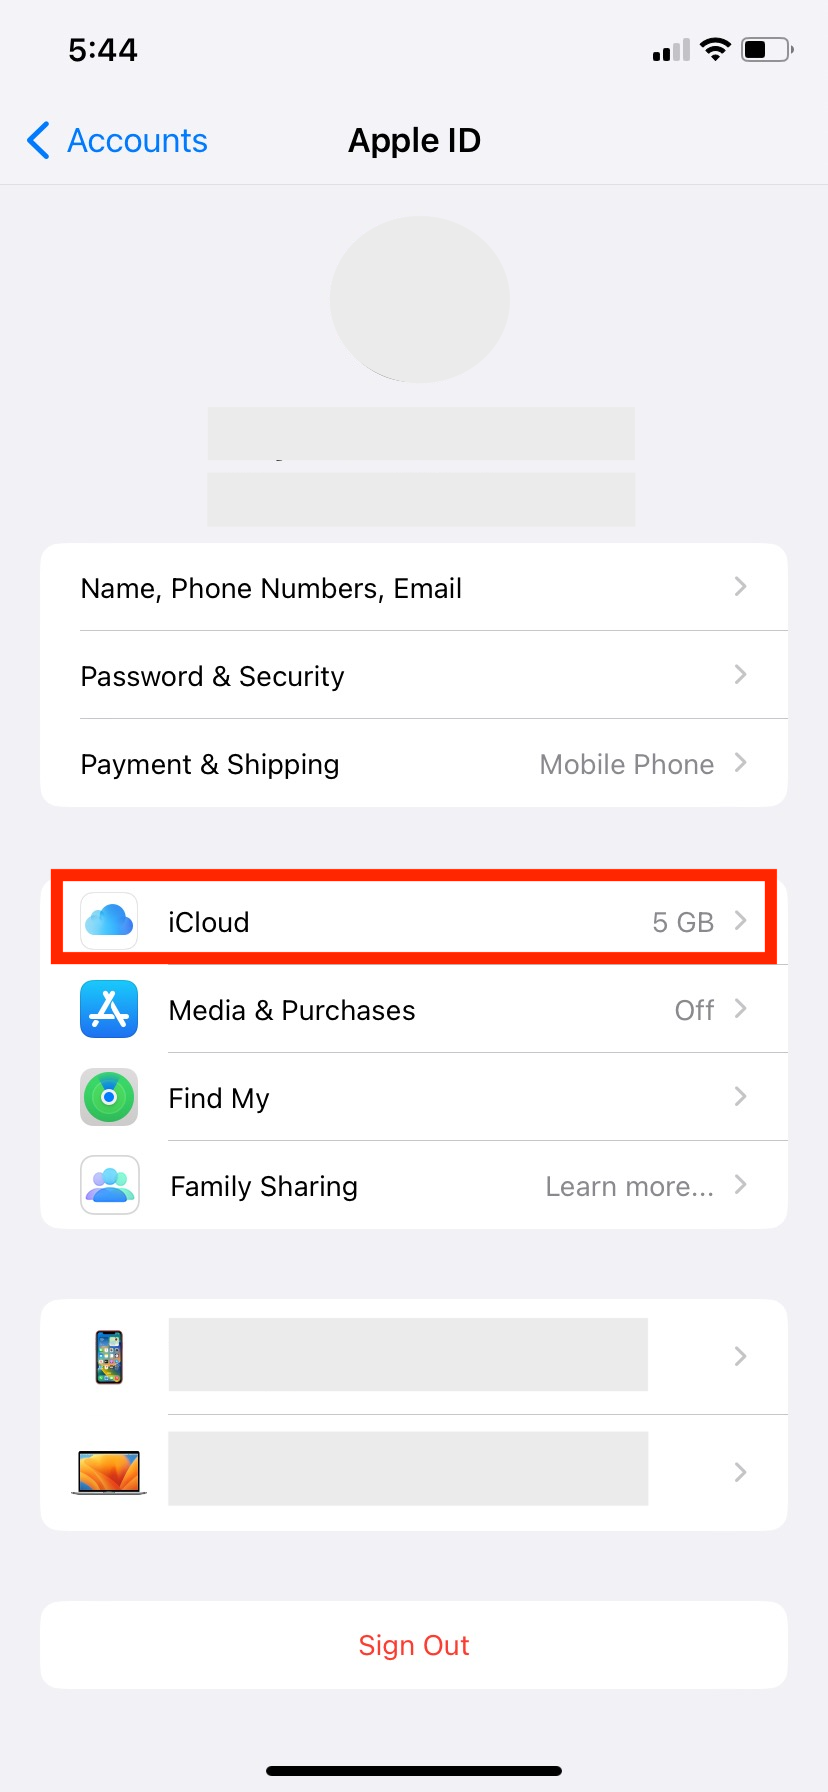
3. Under Accounts, select iCloud.
4. Under your Apple ID Settings, select iCloud and tap iCloud Mail.
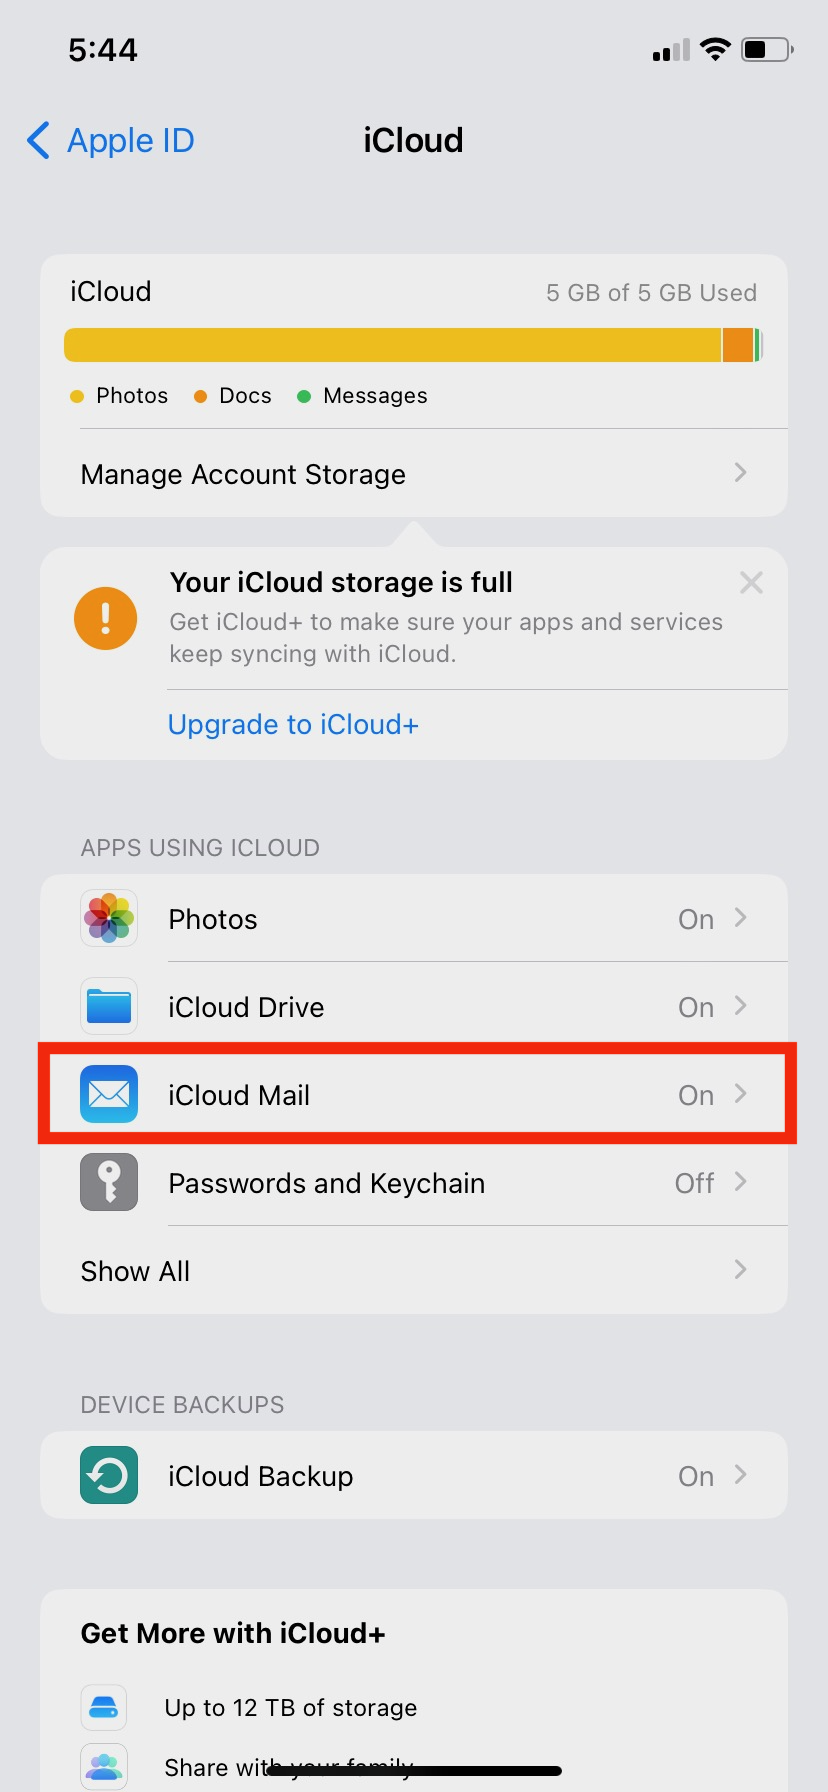
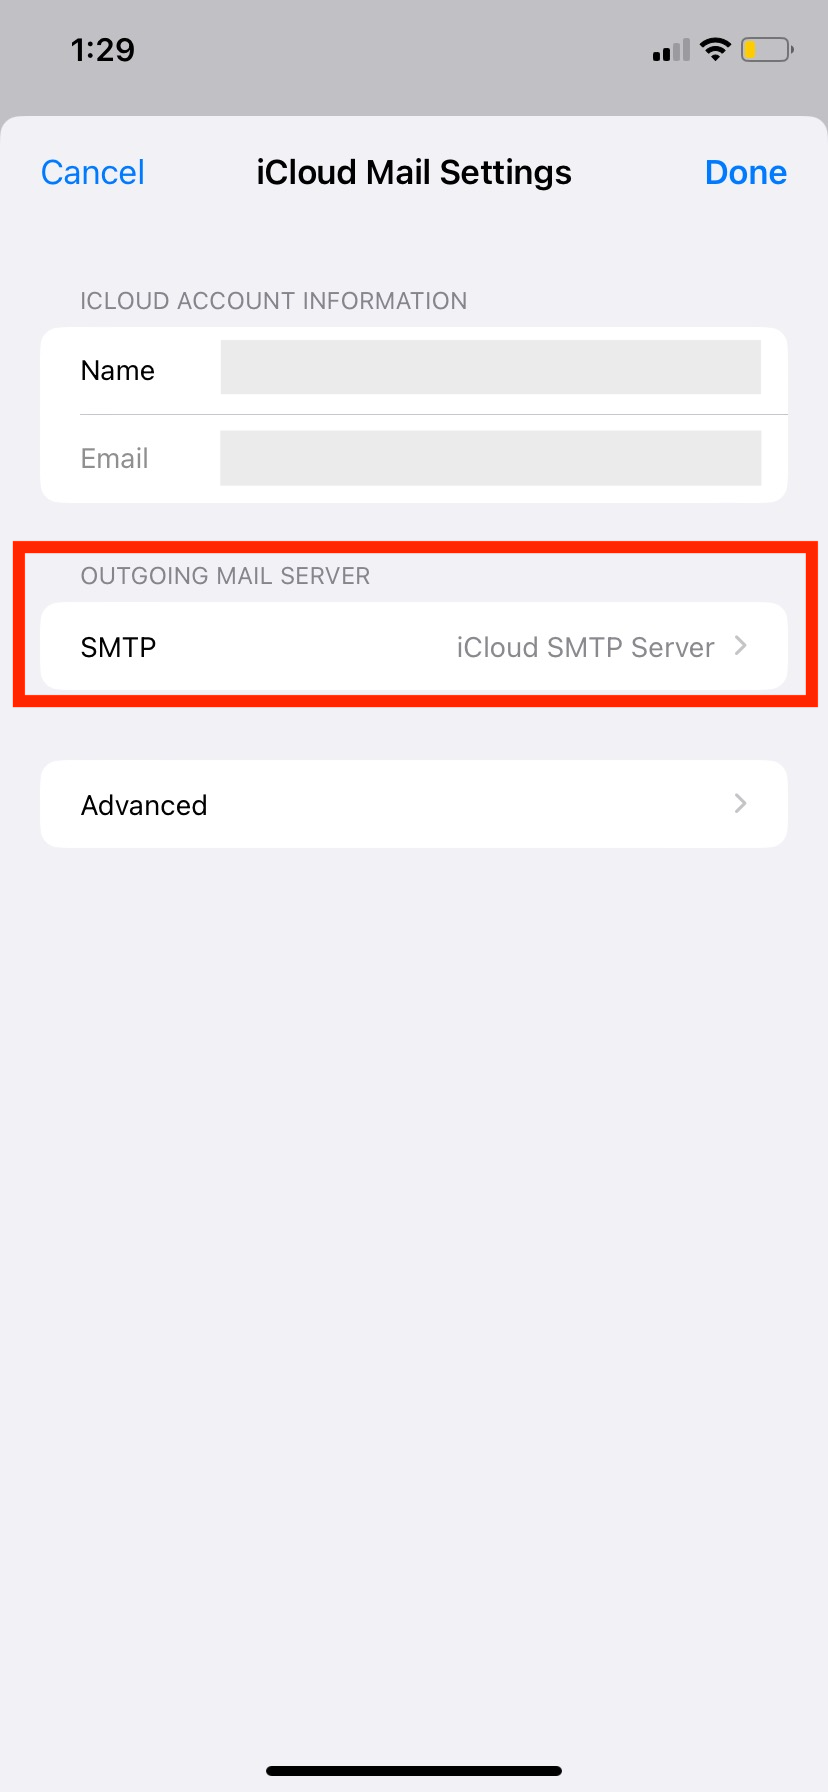
5. Then tap iCloud Mail Settings.
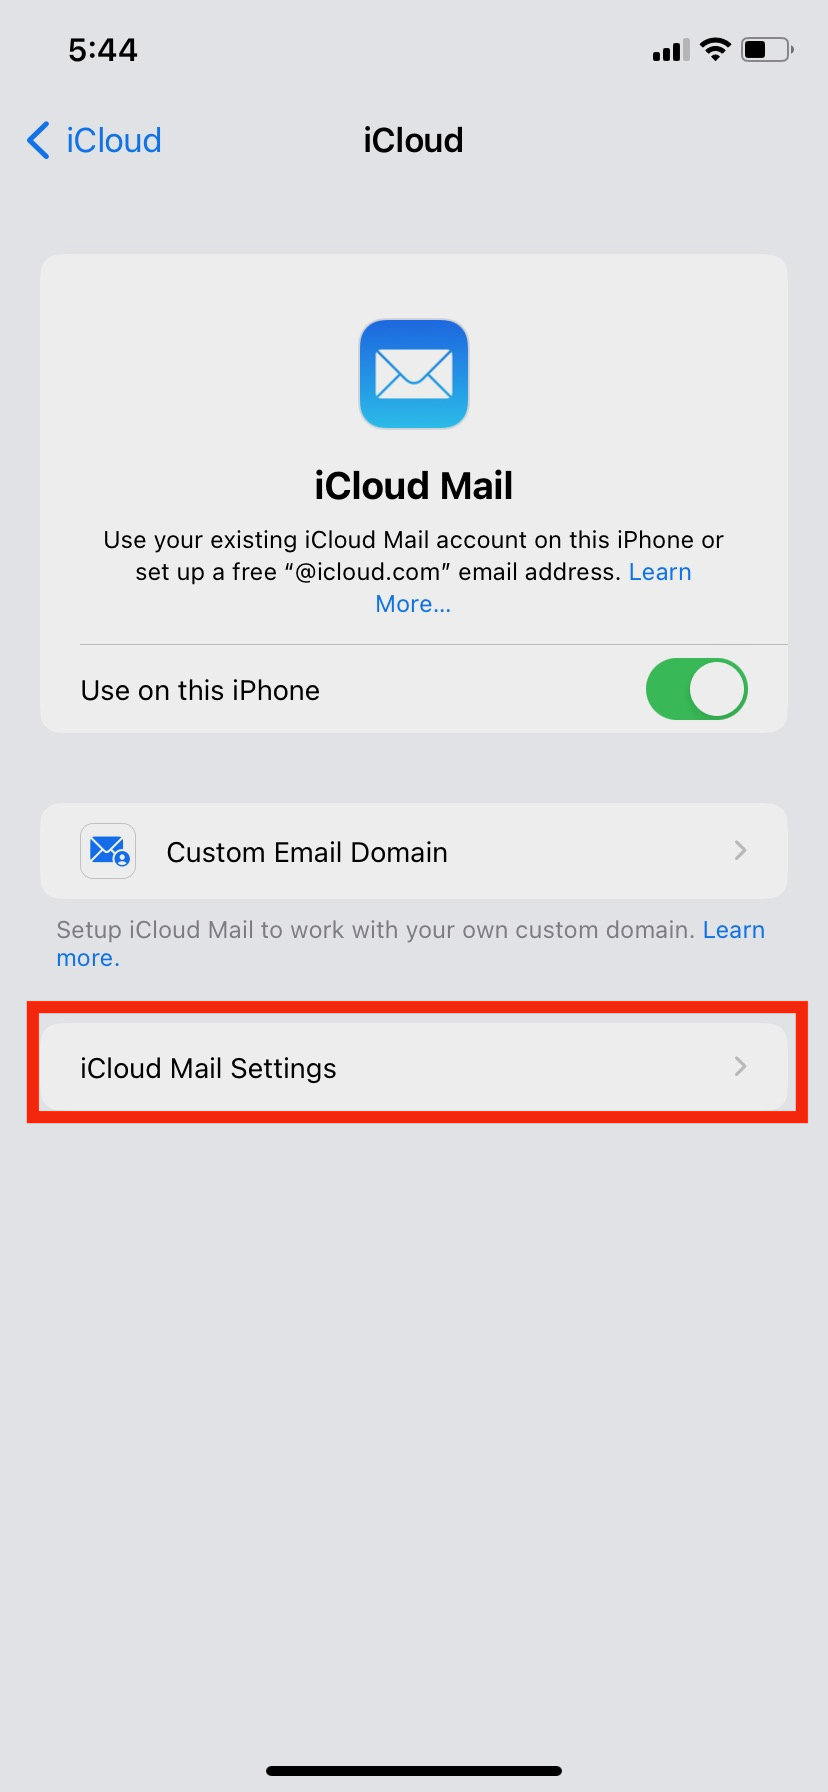
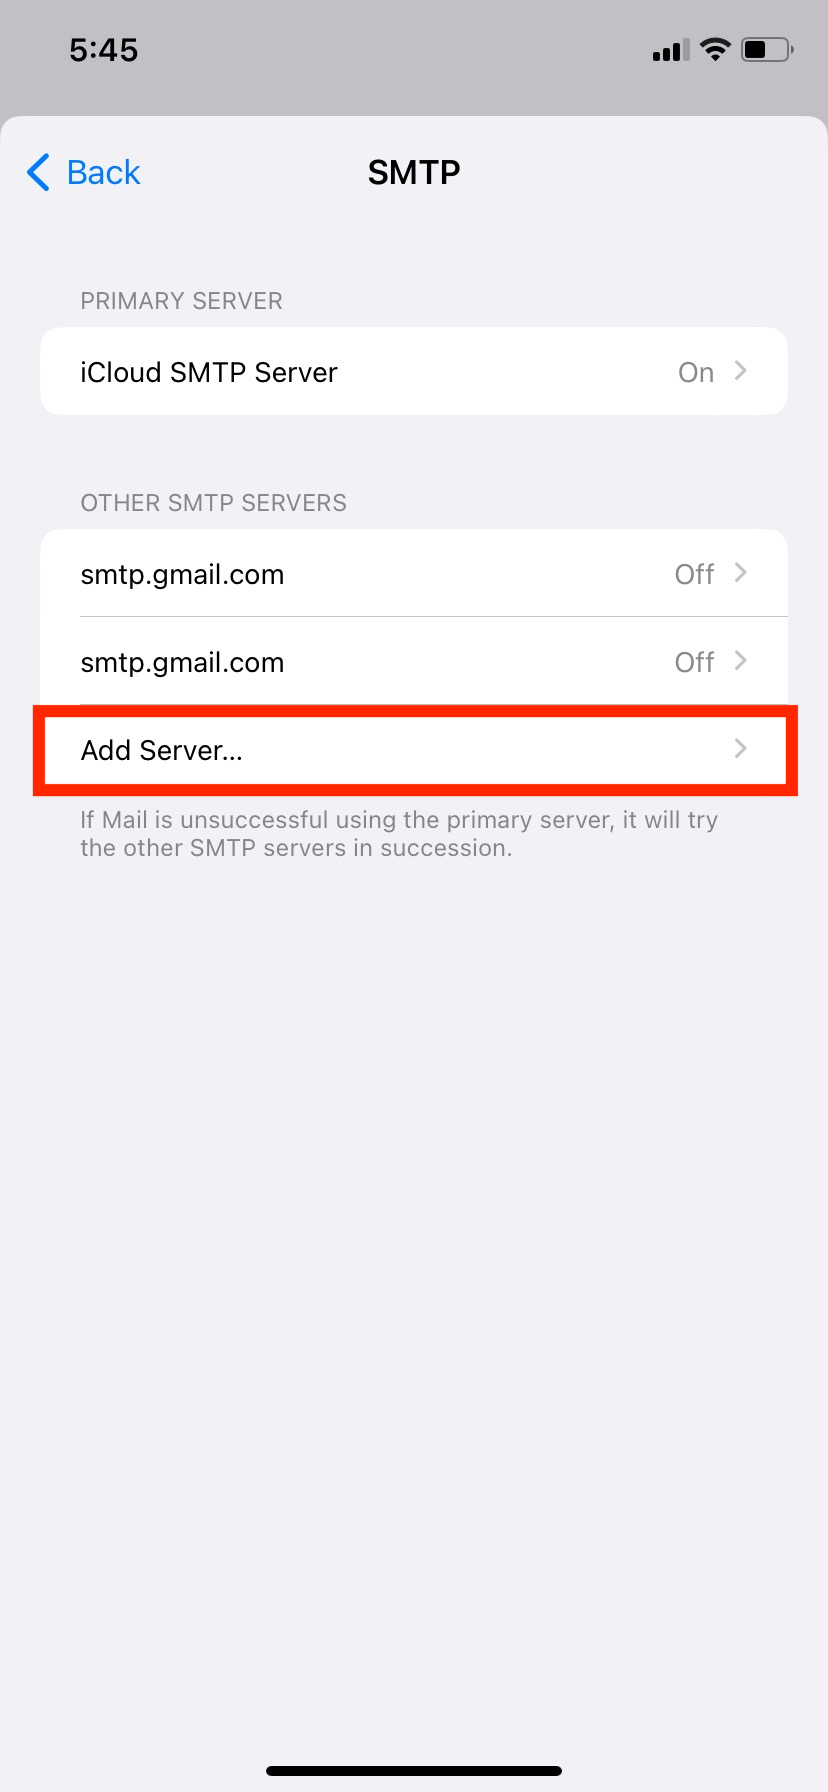
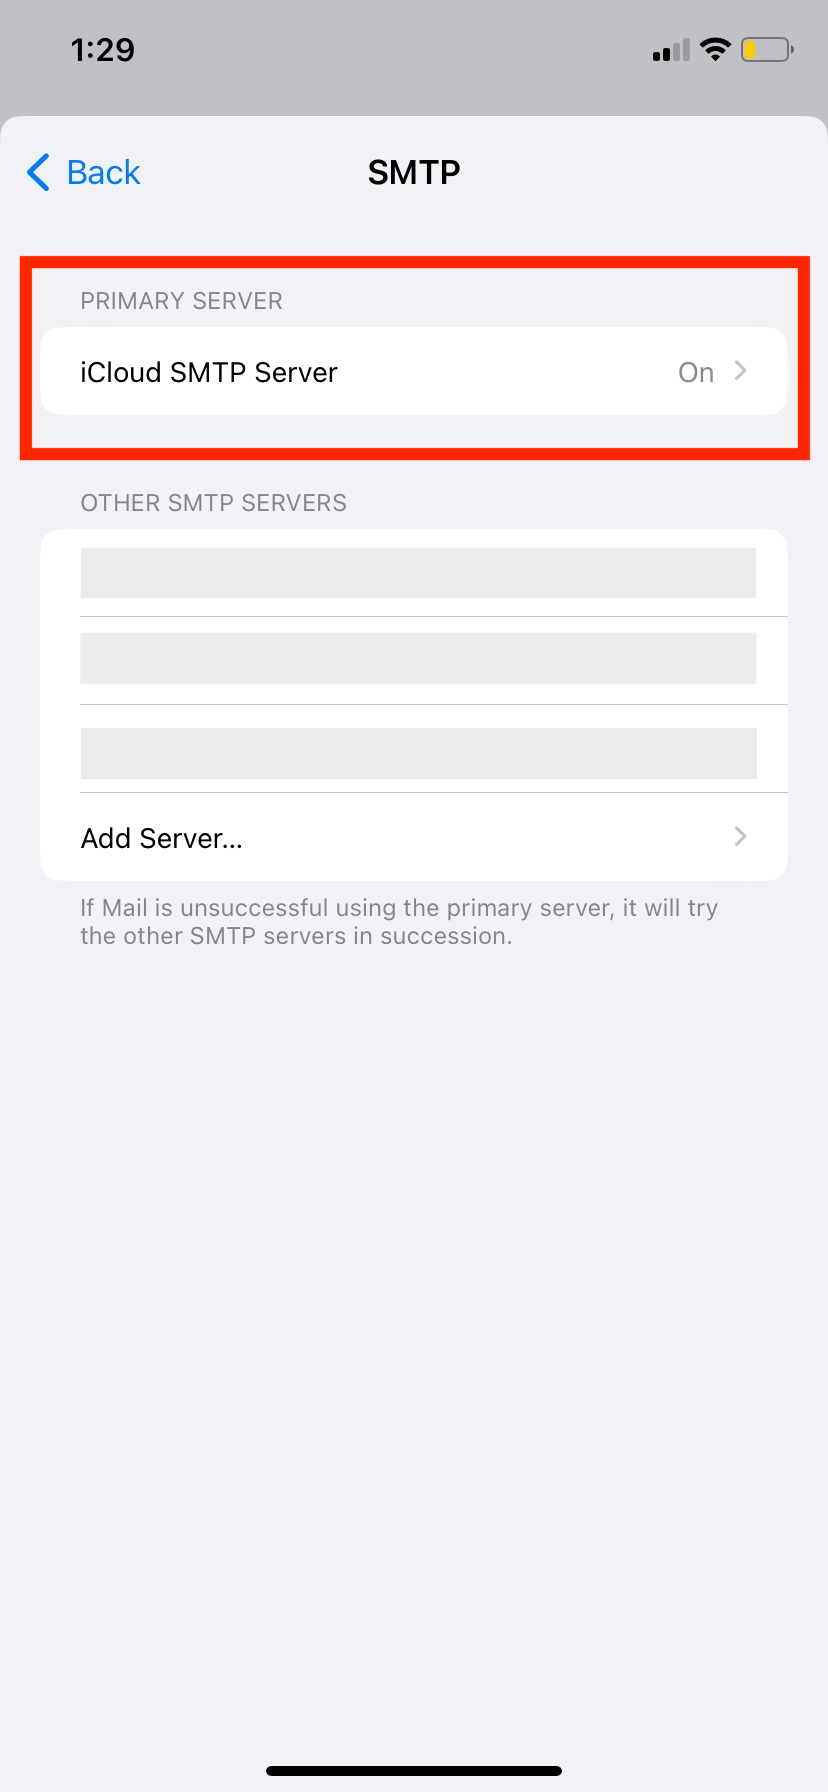
6. In your iCloud Mail Settings, under Other SMTP Servers, click Add Server.
7. To set up Mailbutler SMTP, please enter the information provided below.
Host Name: smtp.mailbutler.io
Username: <Your Mailbutler account email address>
Password: <Your Mailbutler account password> (Note: If you're a new Mailbutler user and haven’t set up a password yet, go to this link to create one. Once set, use this password to complete the setup.)
8. Tap on Save.
9. Once the Mailbutler SMTP is set up, the iCloud email server should be turned off. To do this, follow the instructions below.
10. Go to your iCloud Mail Settings.
11. Tap on Outgoing Mail Server.
12. Select iCloud SMTP Server.
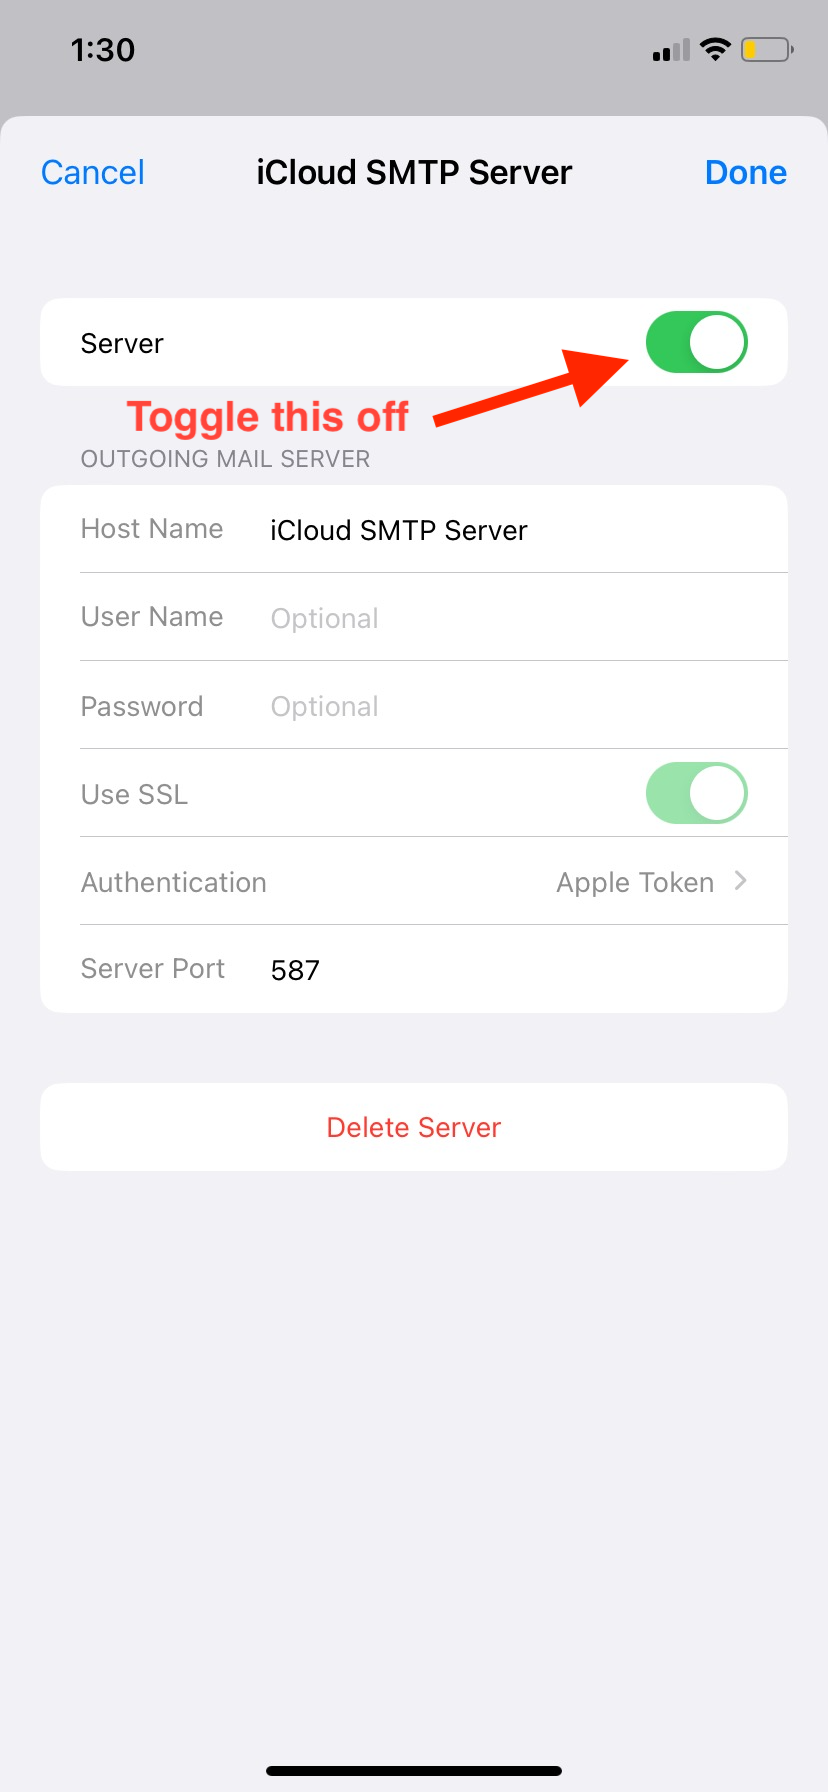
13. Toggle the Server off, and then tap Done.
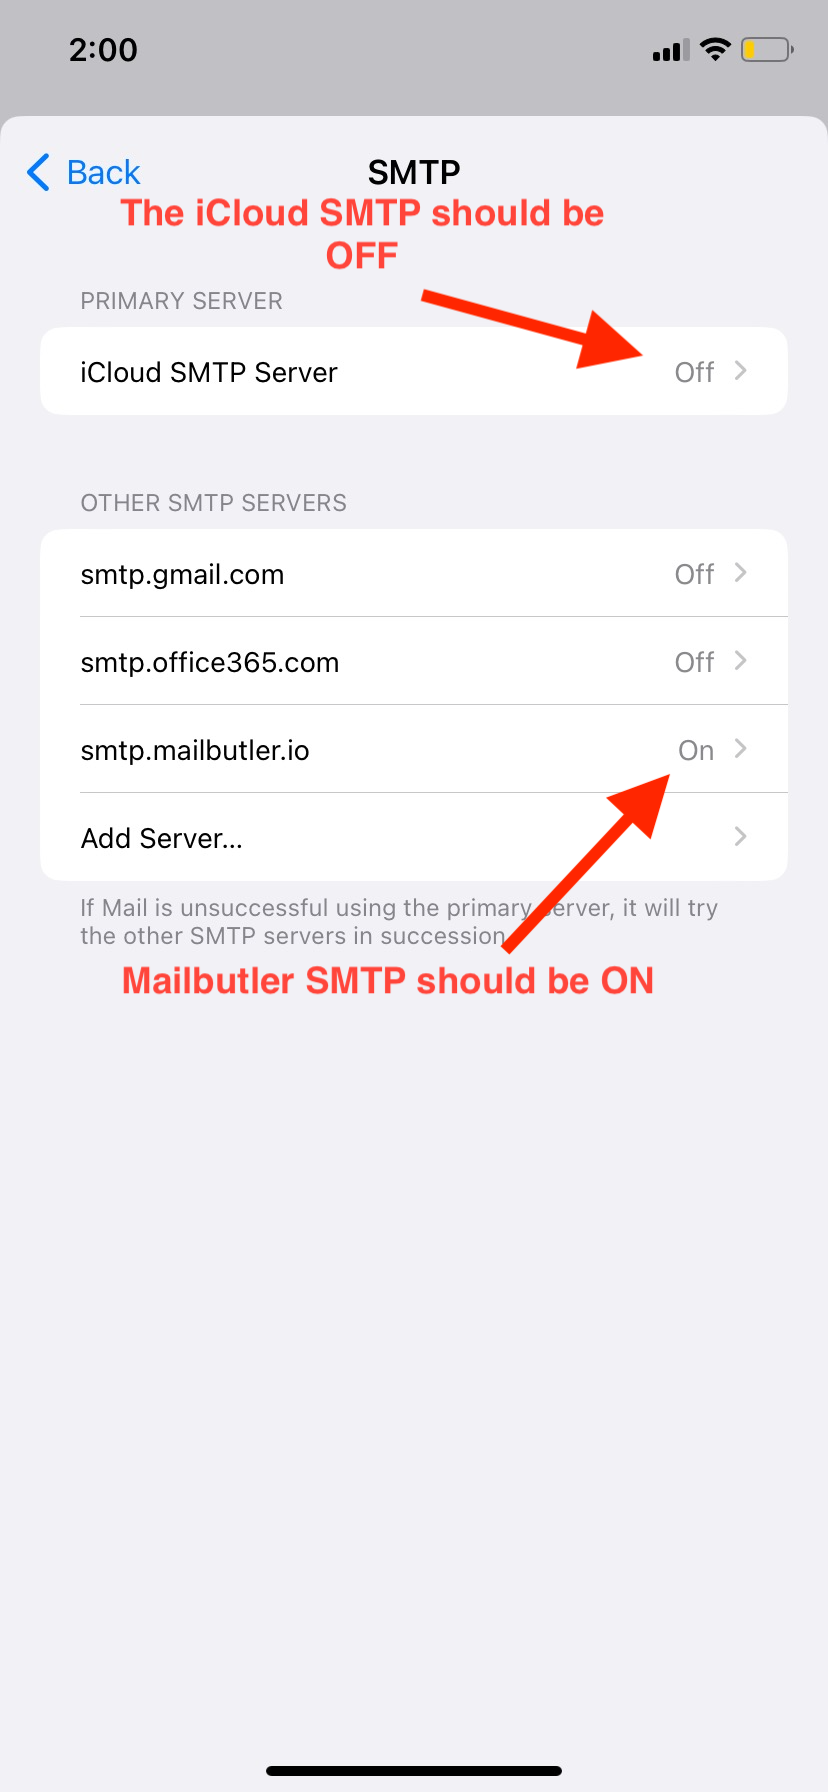
14. Once the iCloud Sever is off, please make sure that the Mailbutler SMTP server is enabled.
15. After you've configured all the settings and enabled Mailbutler SMTP in your iCloud email account settings, try sending a test email. You will see an error, but you can ignore it.
16. Next, check the inbox of the email account linked to your Mailbutler account to see if you've received an email from us about adding the server configuration.

17. You will be redirected to log into your Mailbutler account if you are not logged in already. After successfully logging in, you will need to generate an app-specific password for your iCloud account, as per the provided instructions.
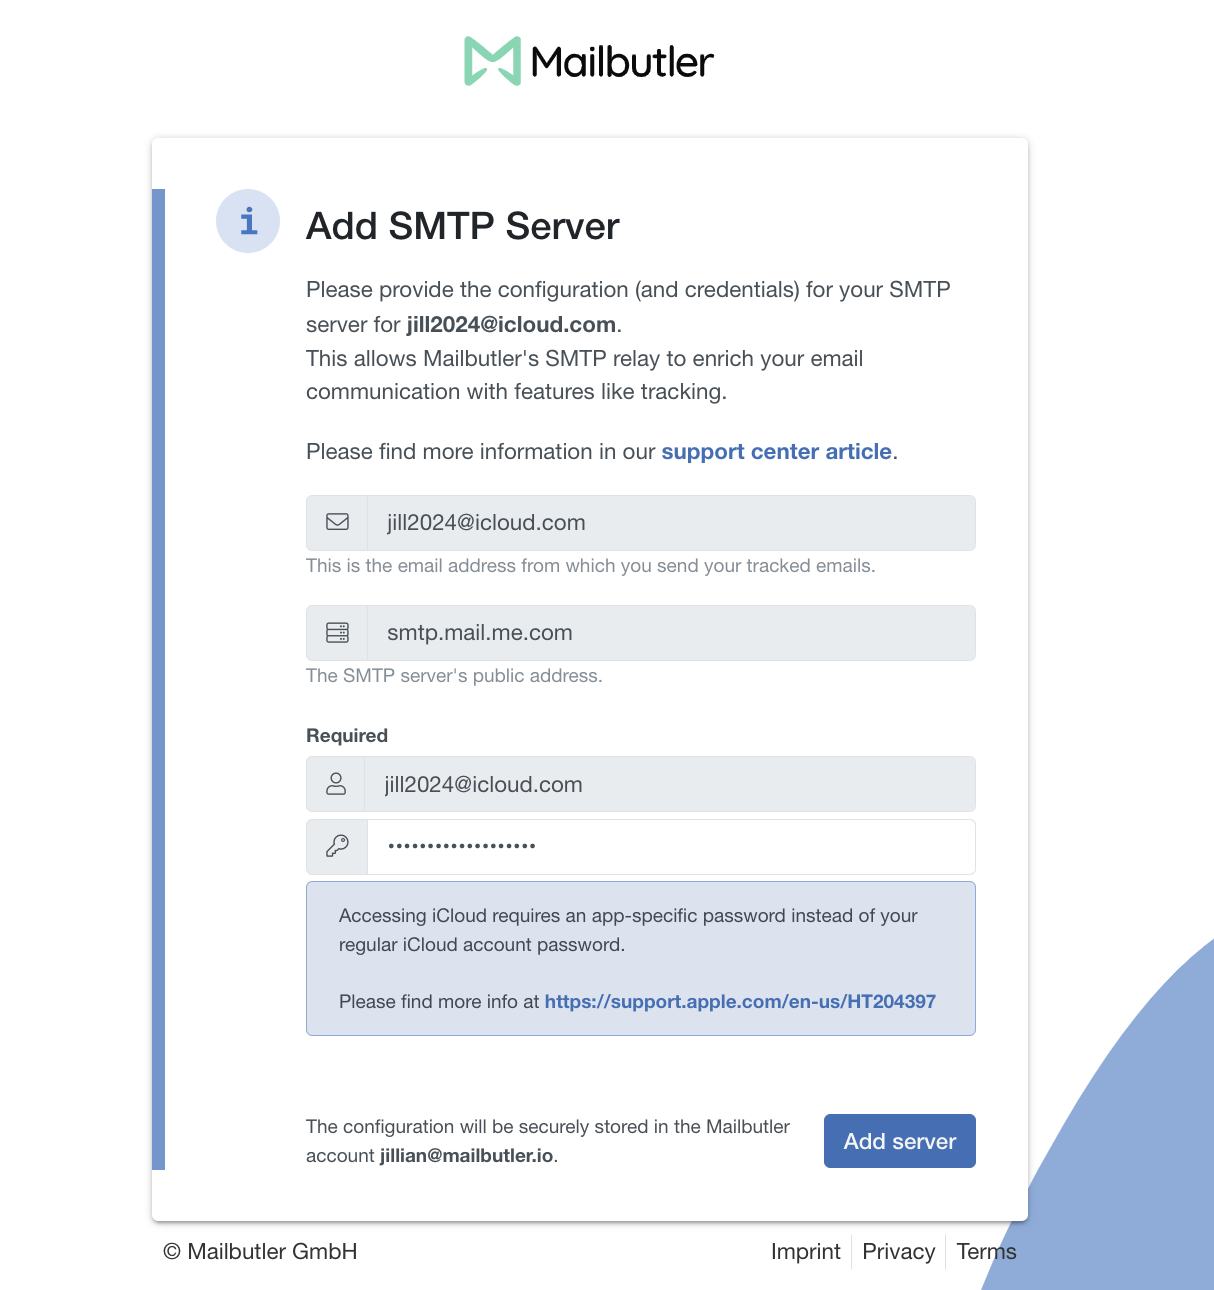
18. Once you successfully input your app-specific password for Mailbutler, select Add Server. You should receive a success message like the below.
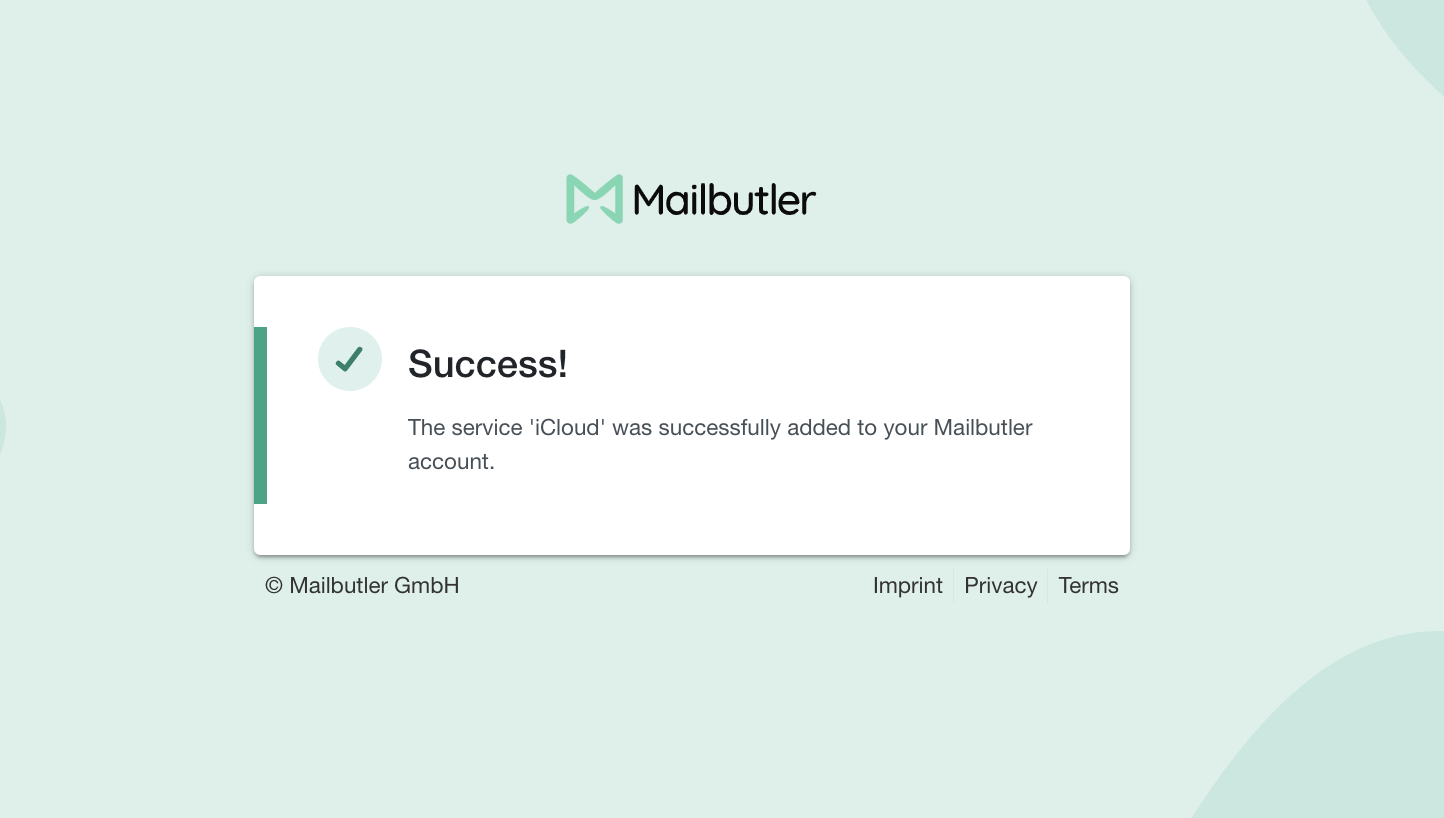
Once you complete these steps, you’re all set to send tracked emails from your iOS device.