
General information about the Collaborators feature.
How do I add Collaborators?
Apple Mail
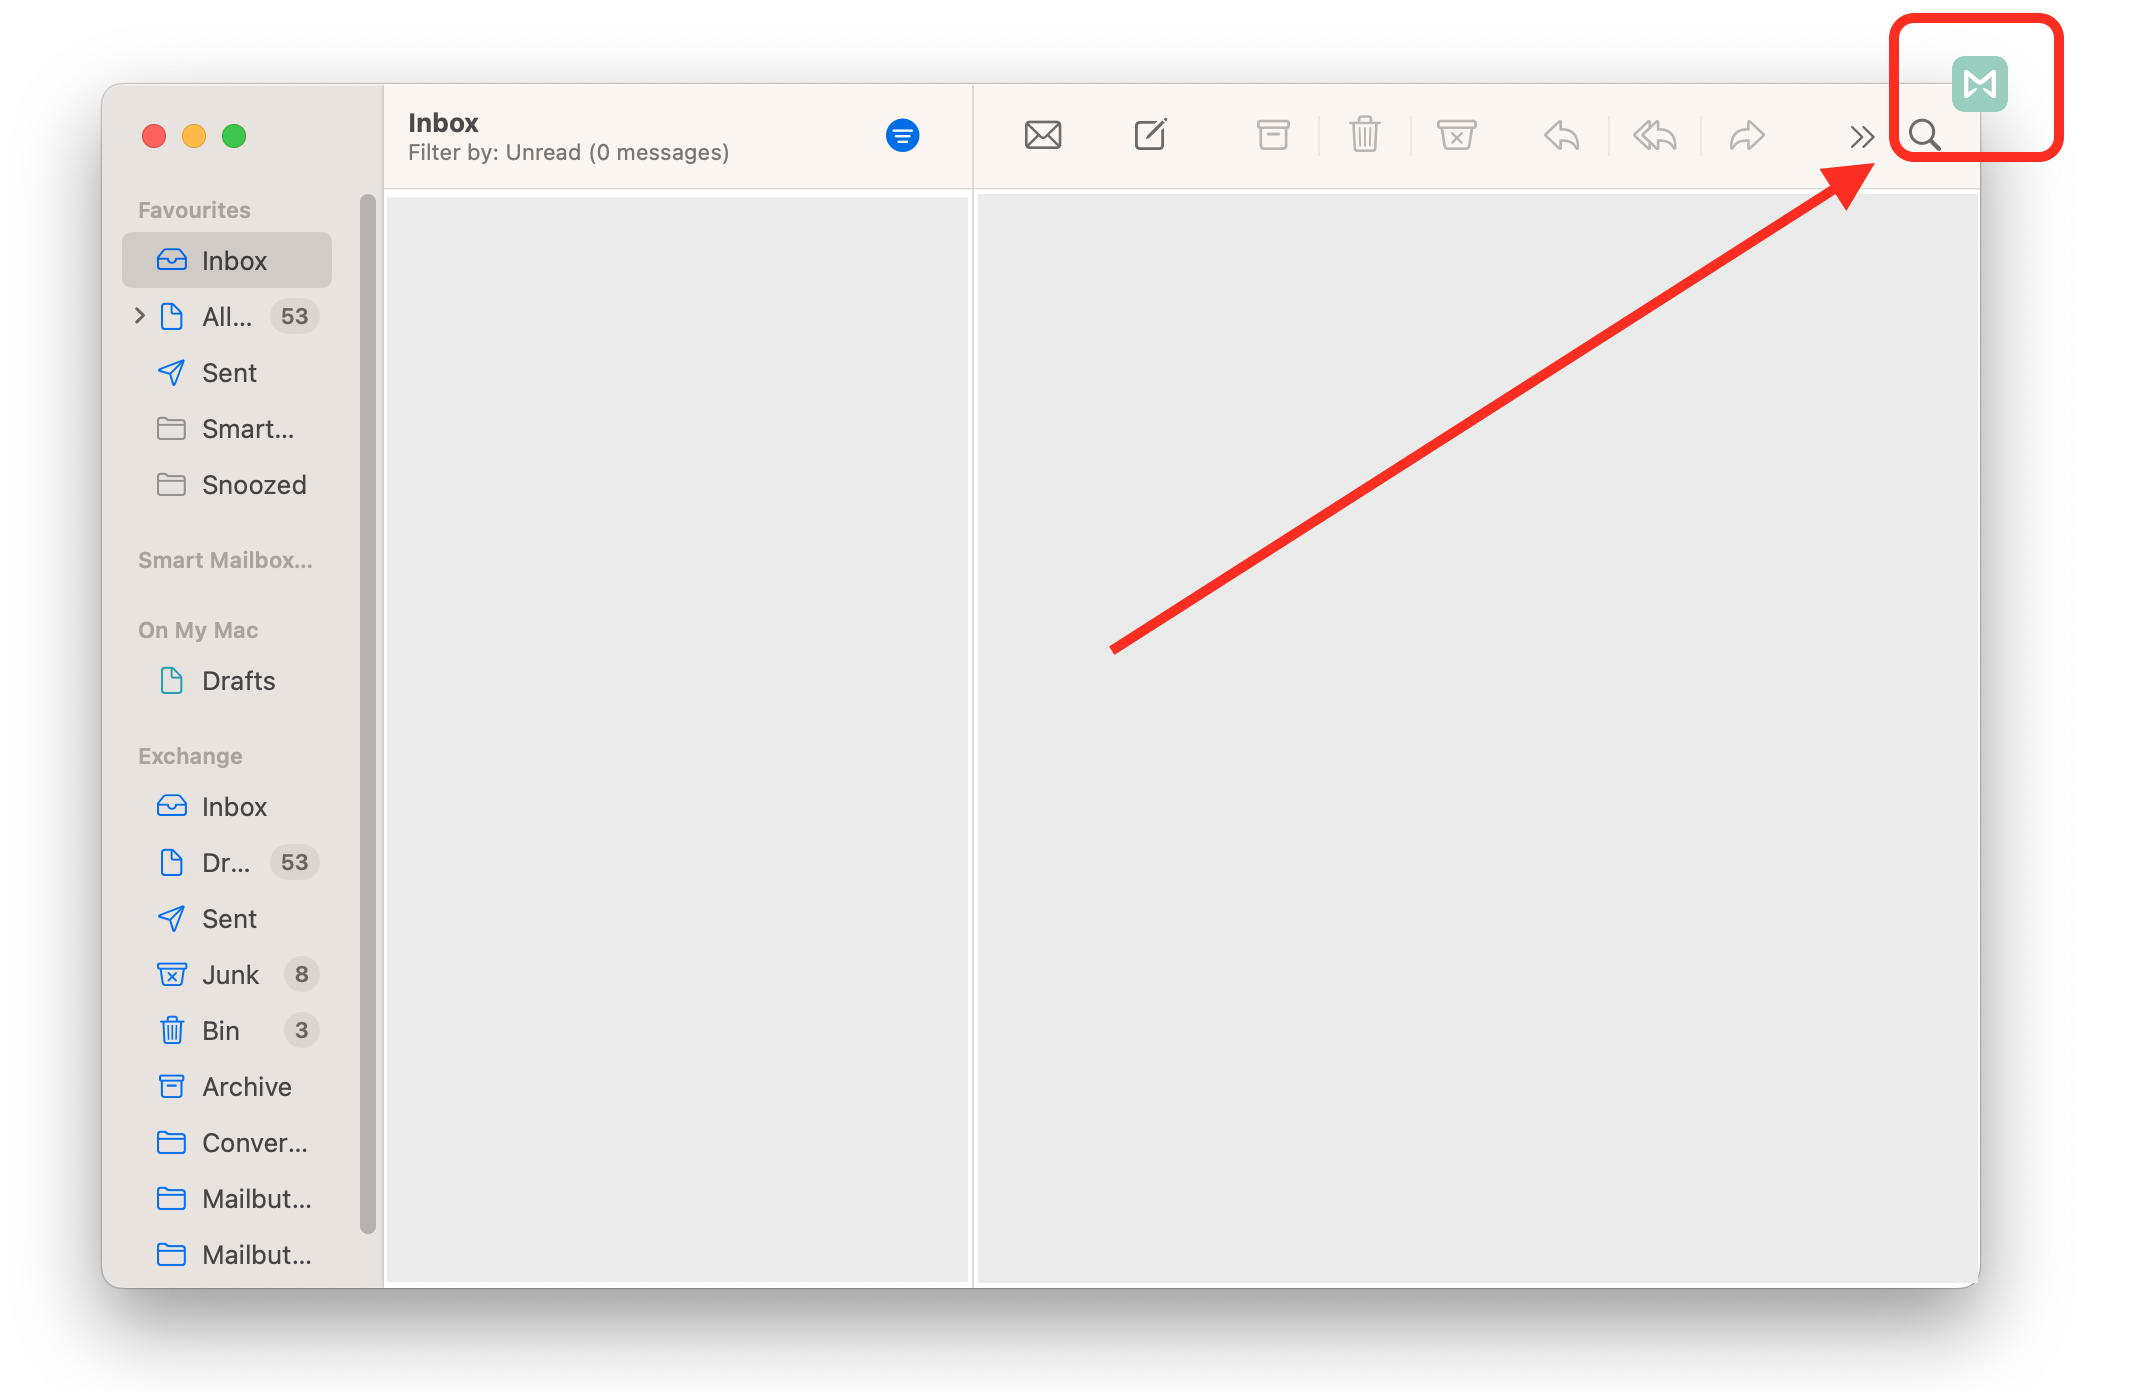
1. Click the Mailbutler icon at the top of your Apple Mail window to open the Mailbutler Sidebar.
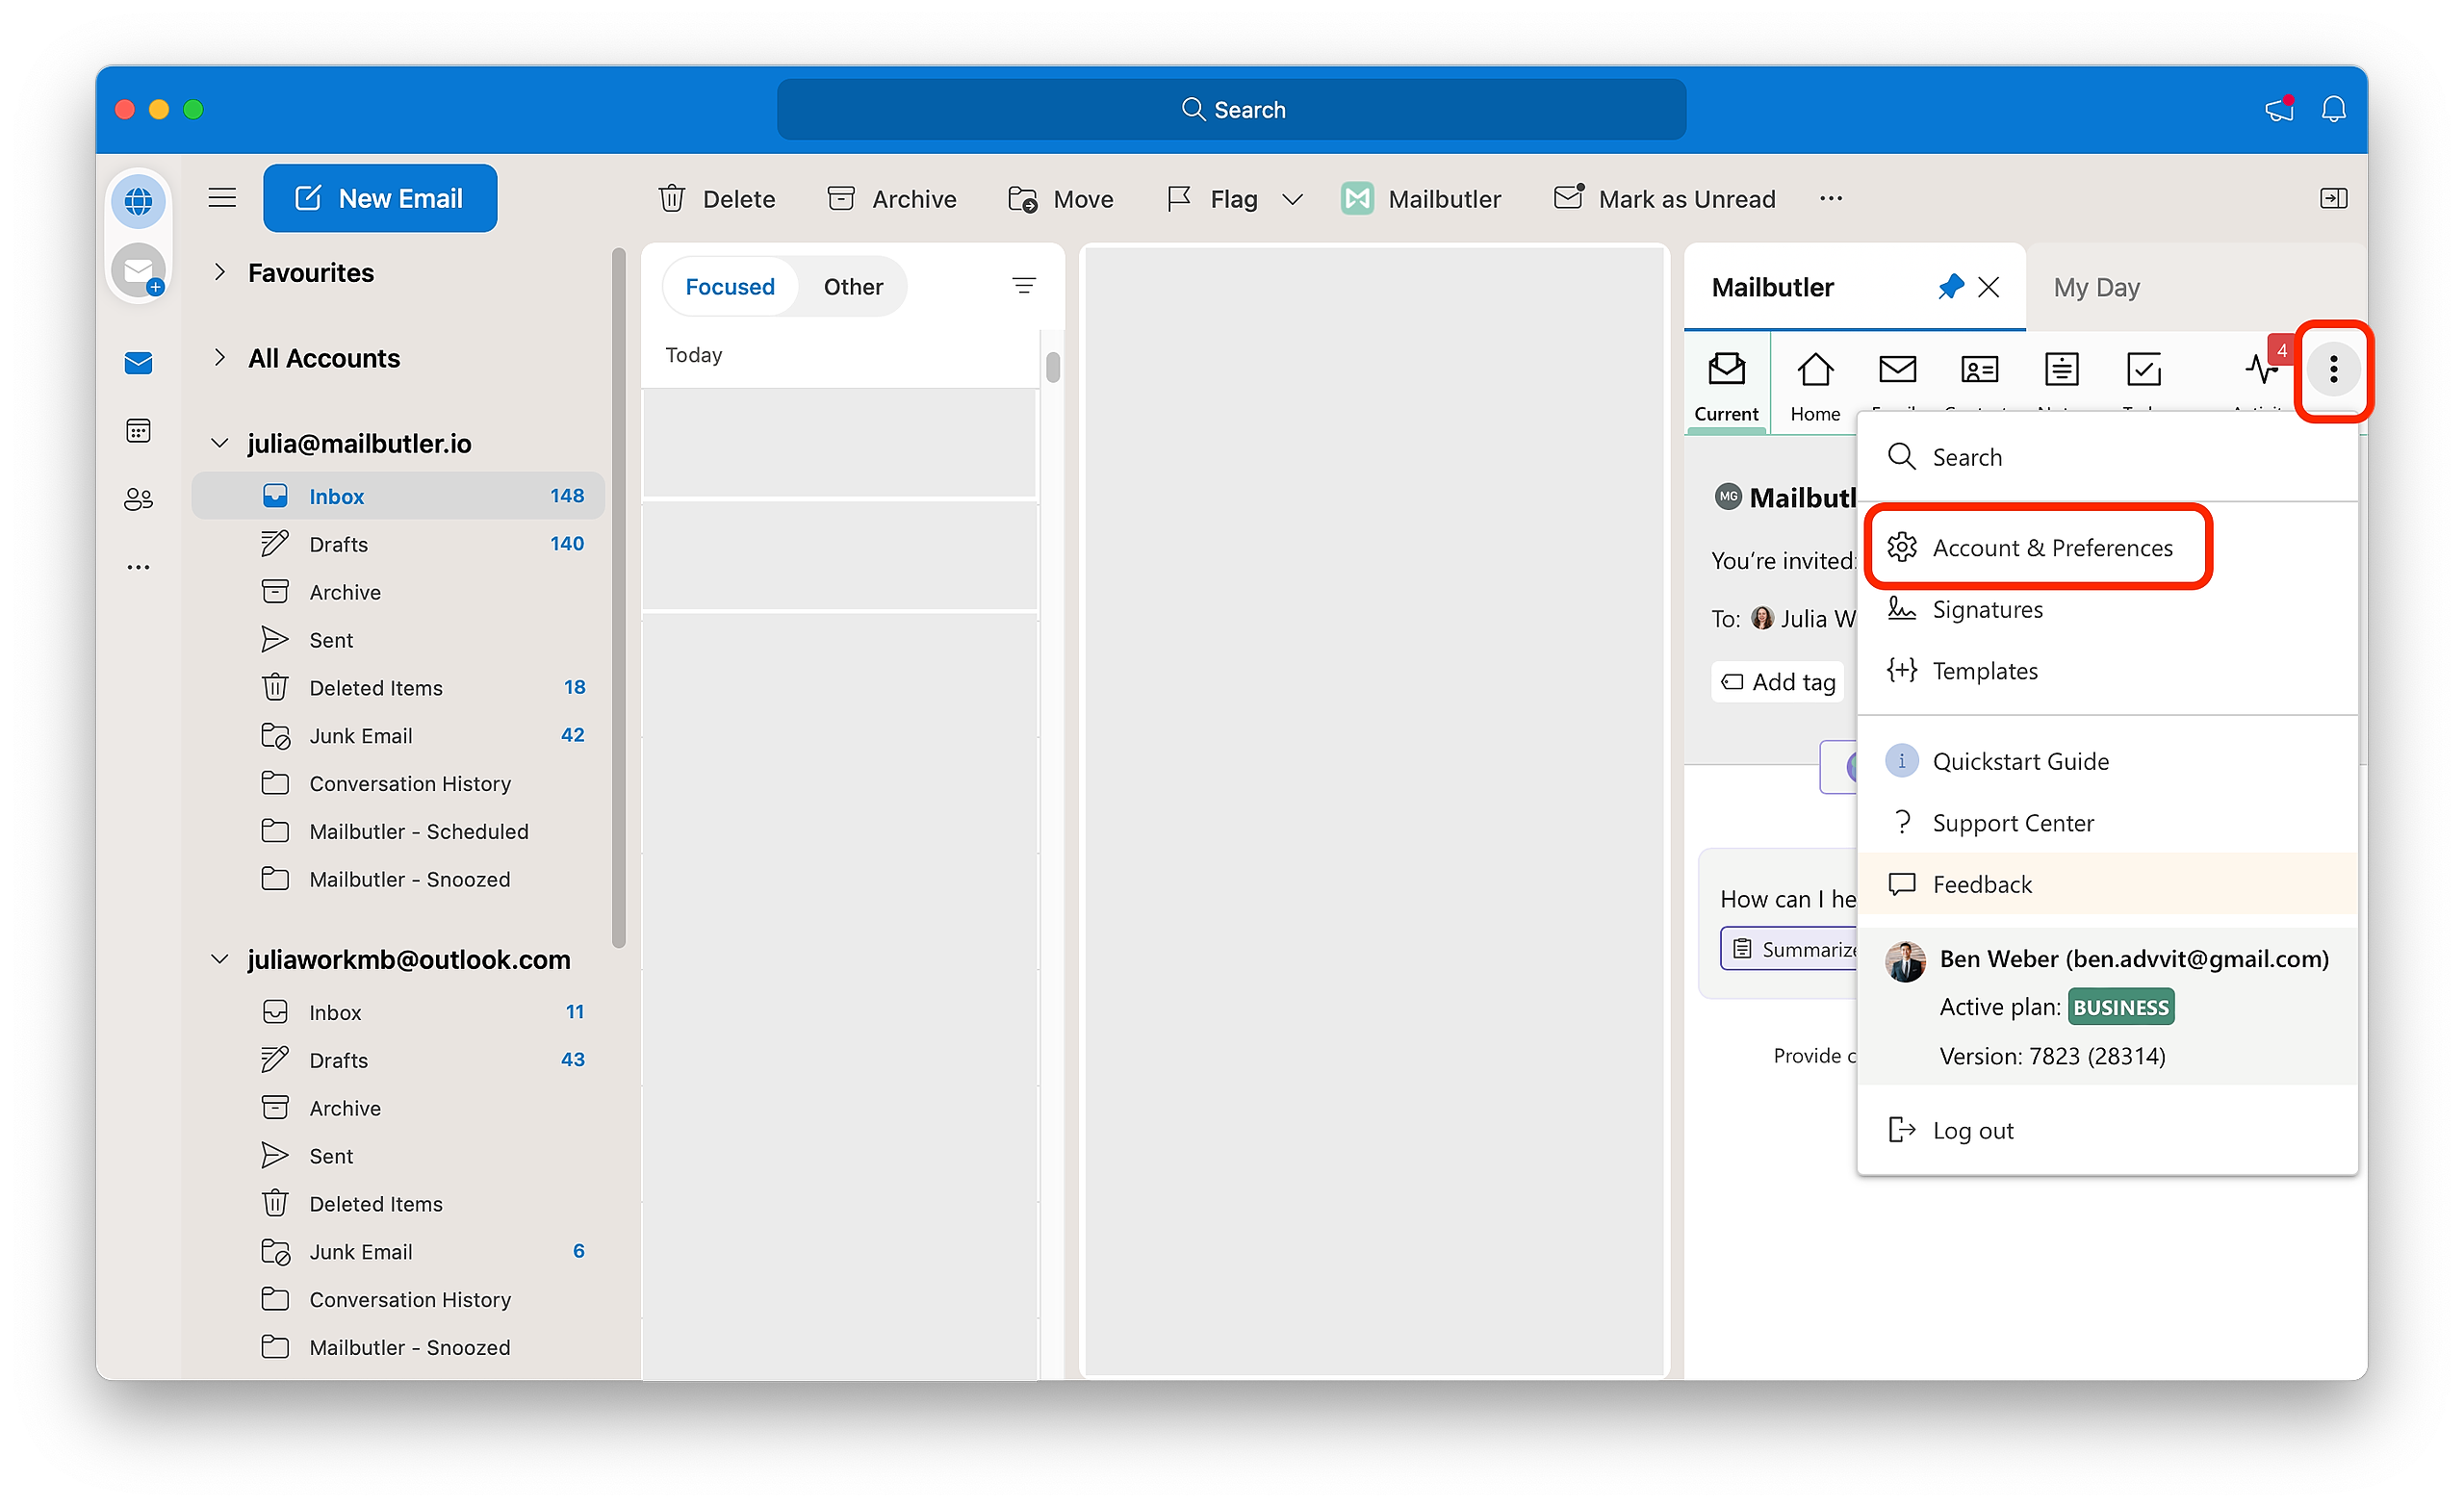
2. In the Mailbutler Sidebar, click the three dots and then Account & Preferences.
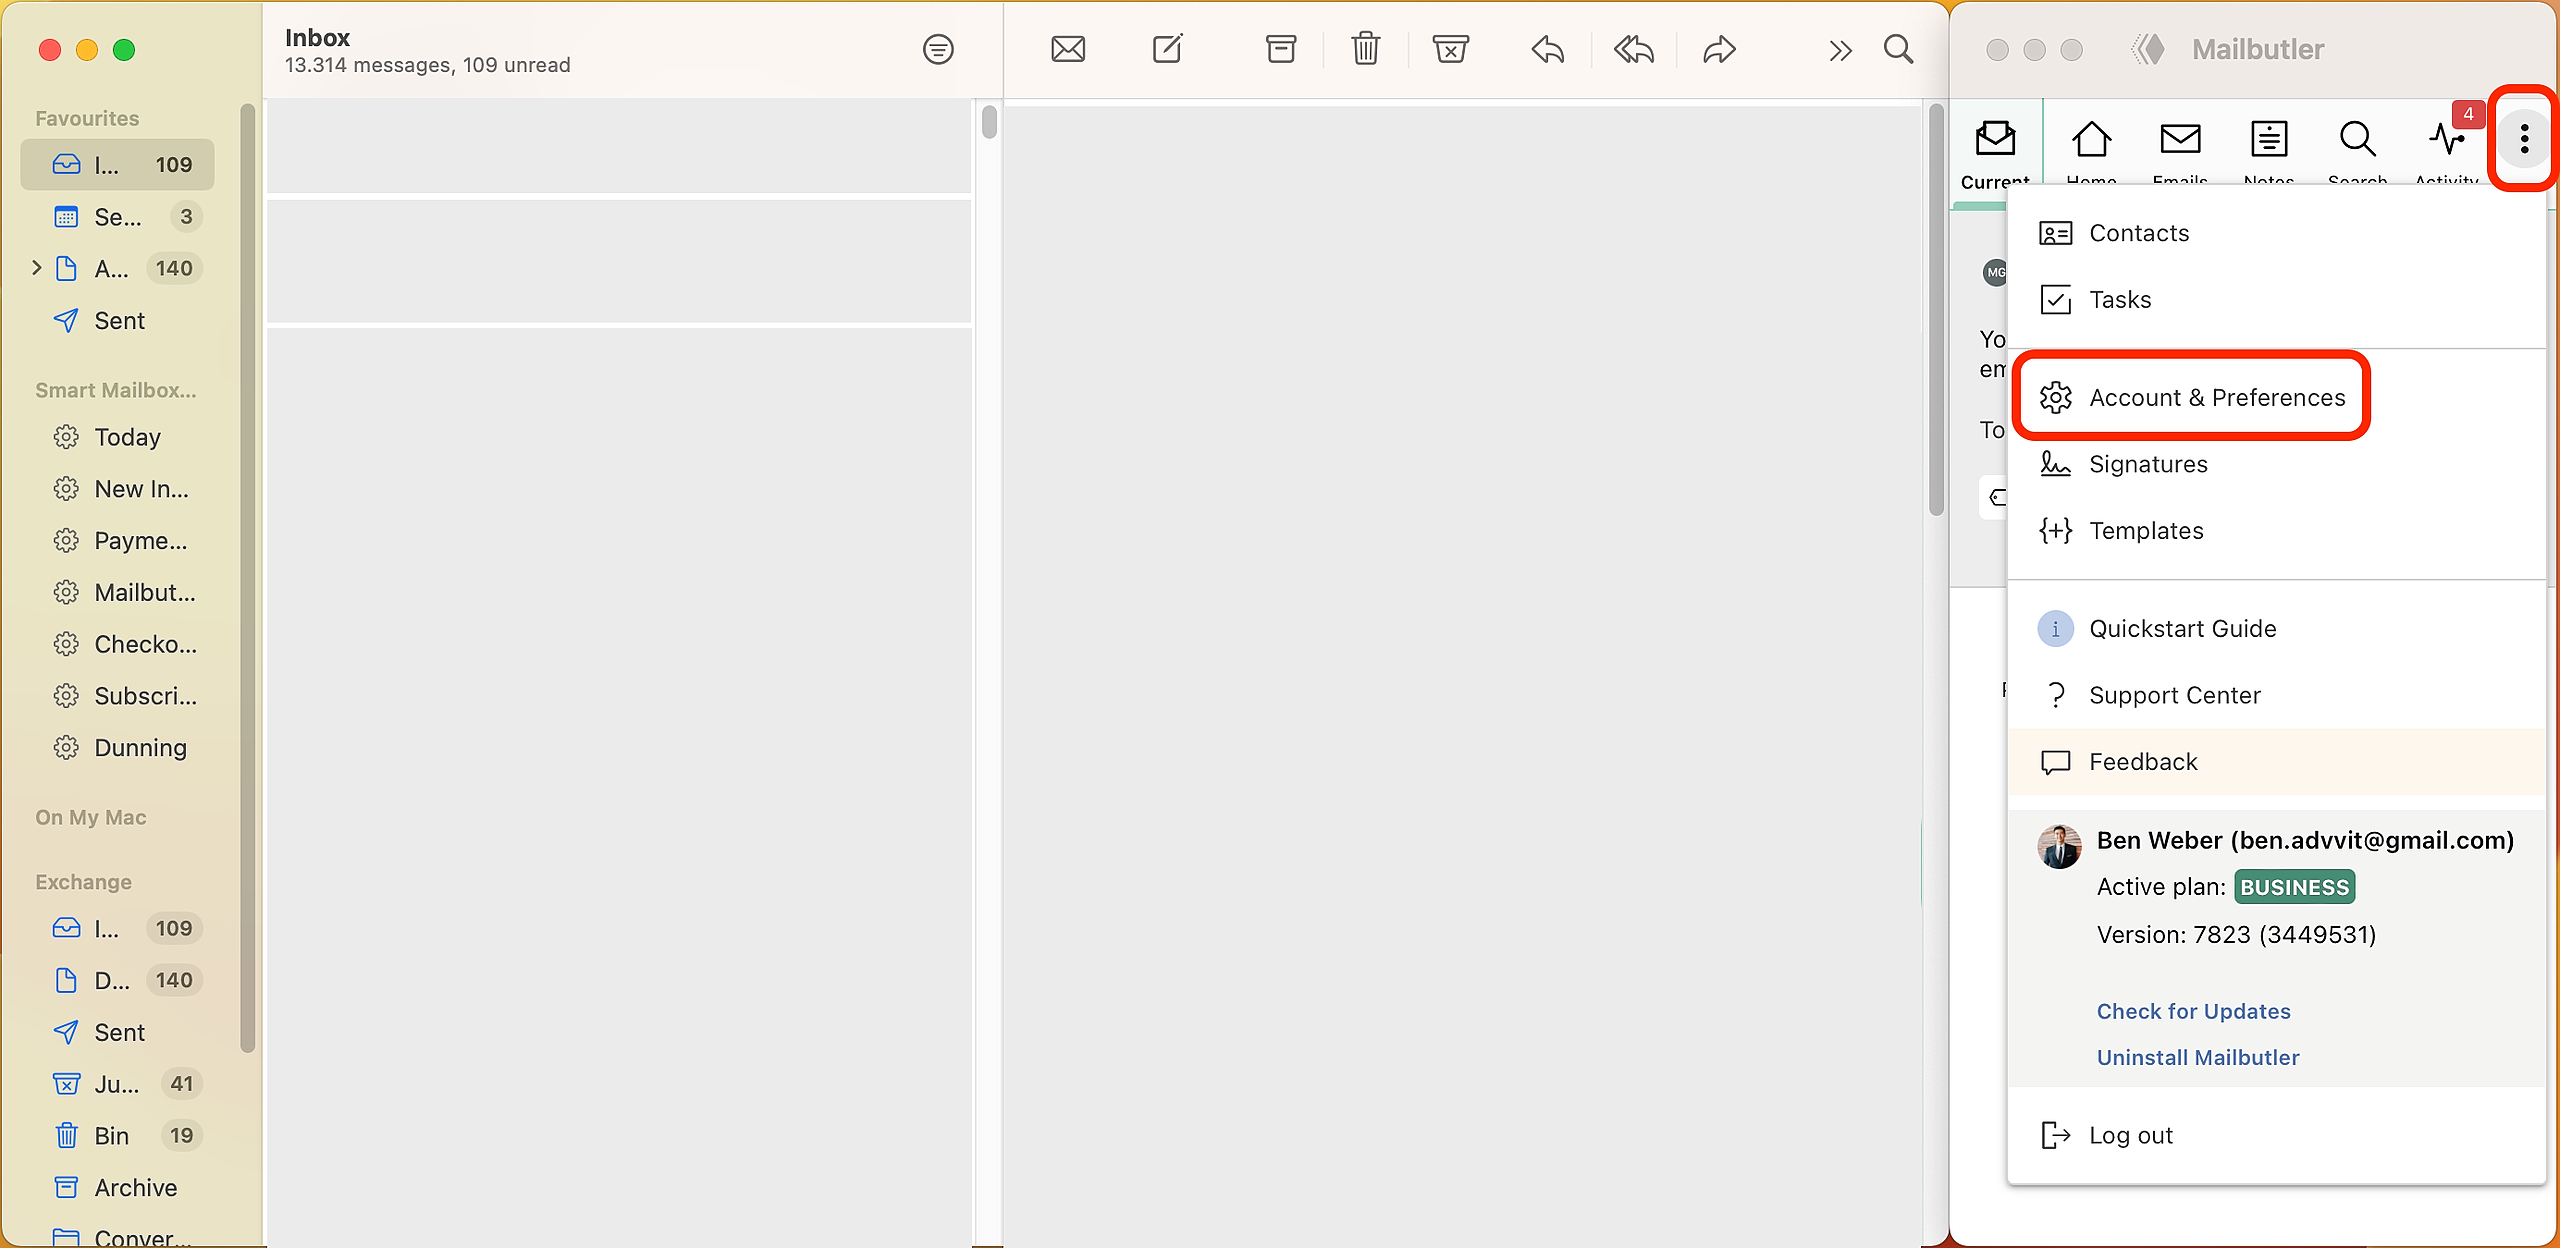
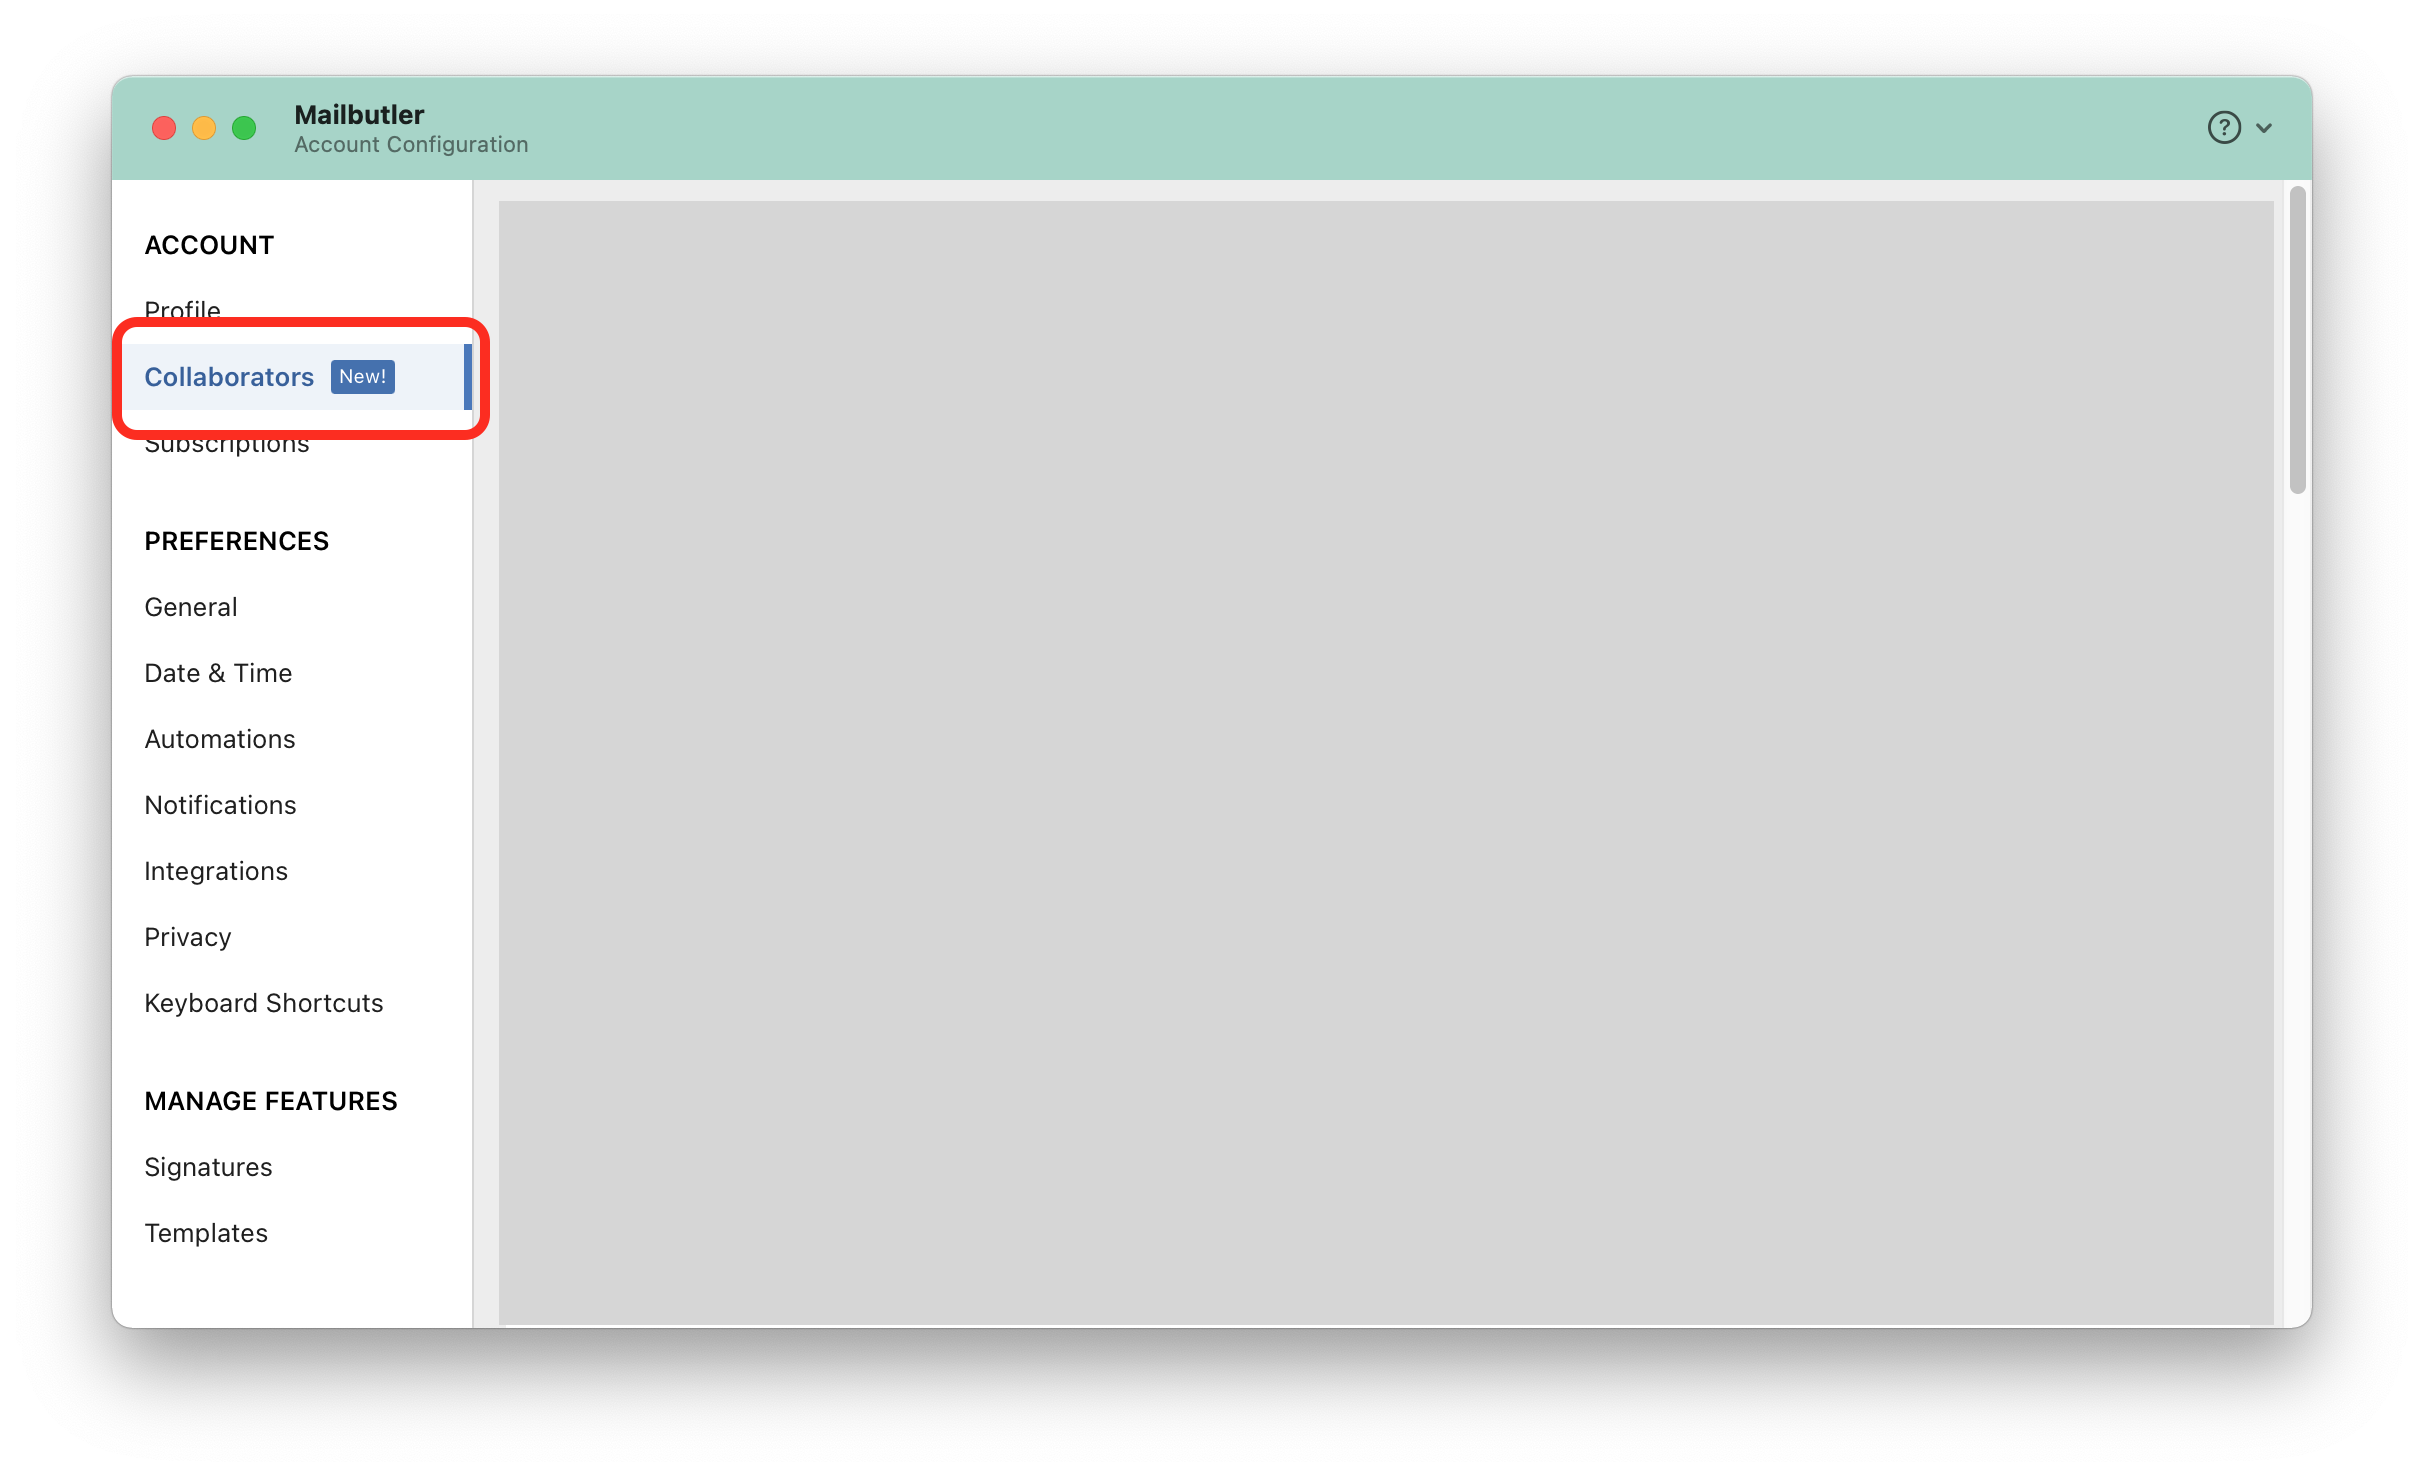
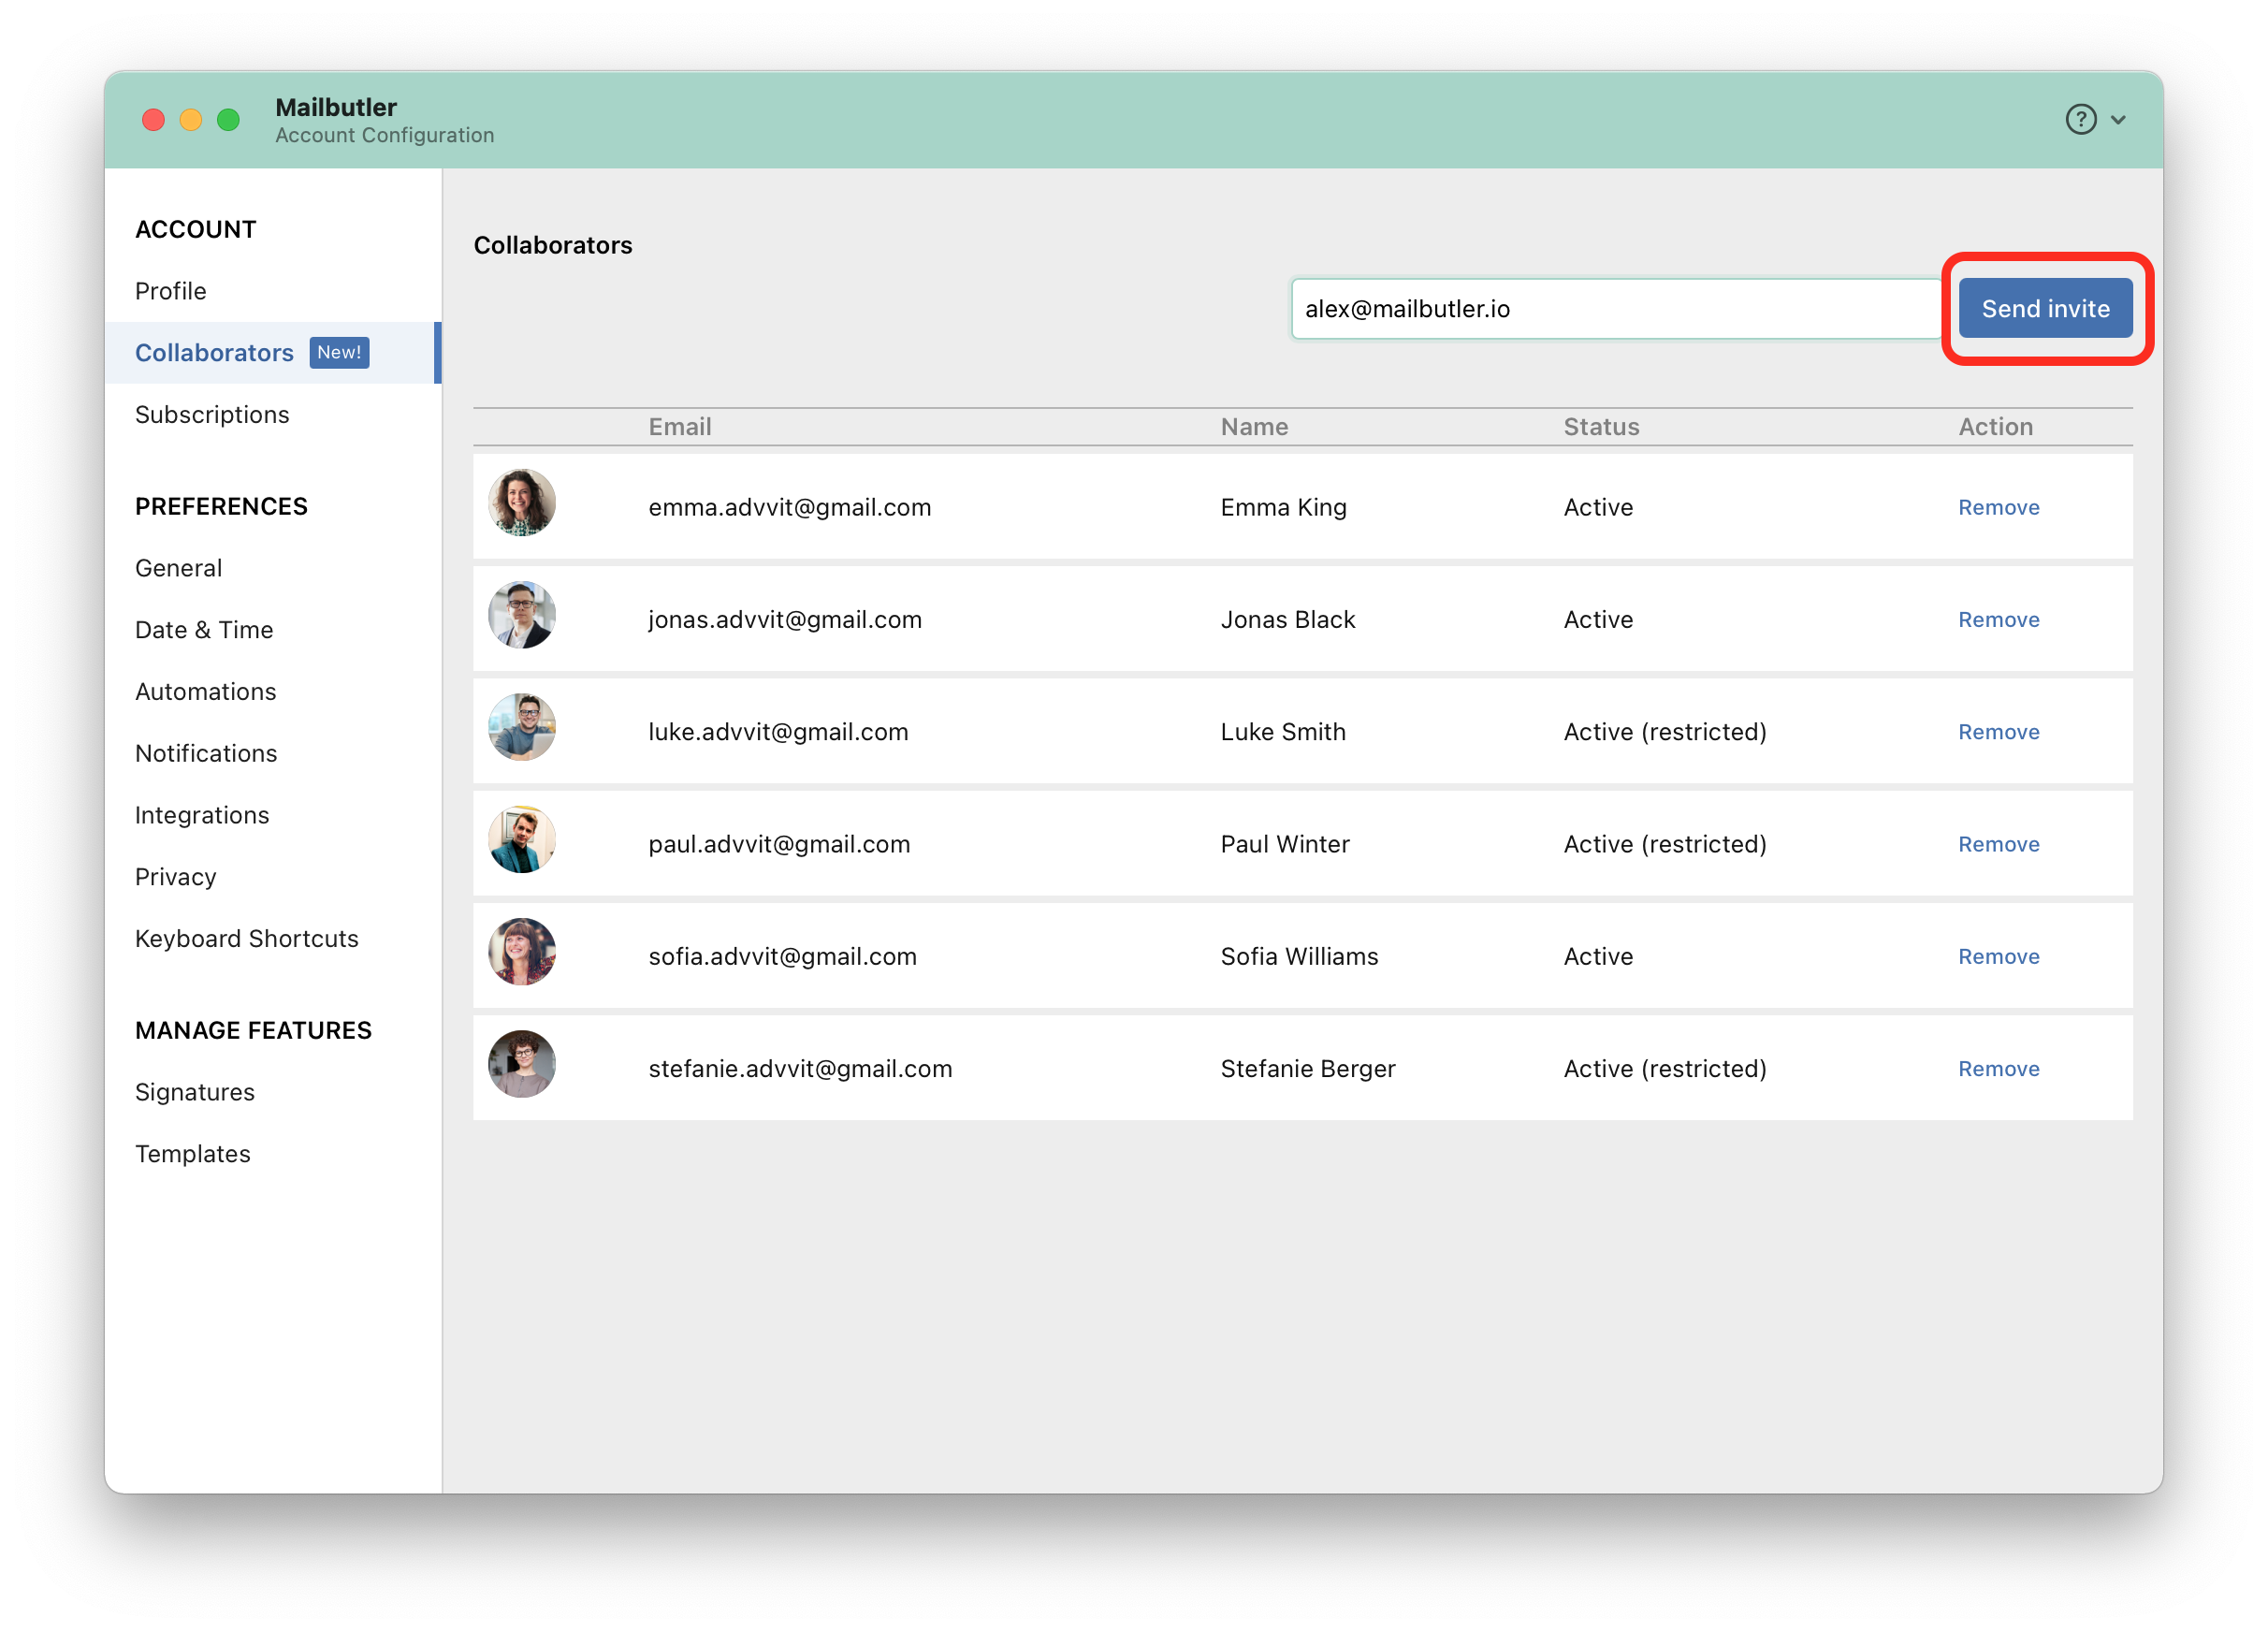
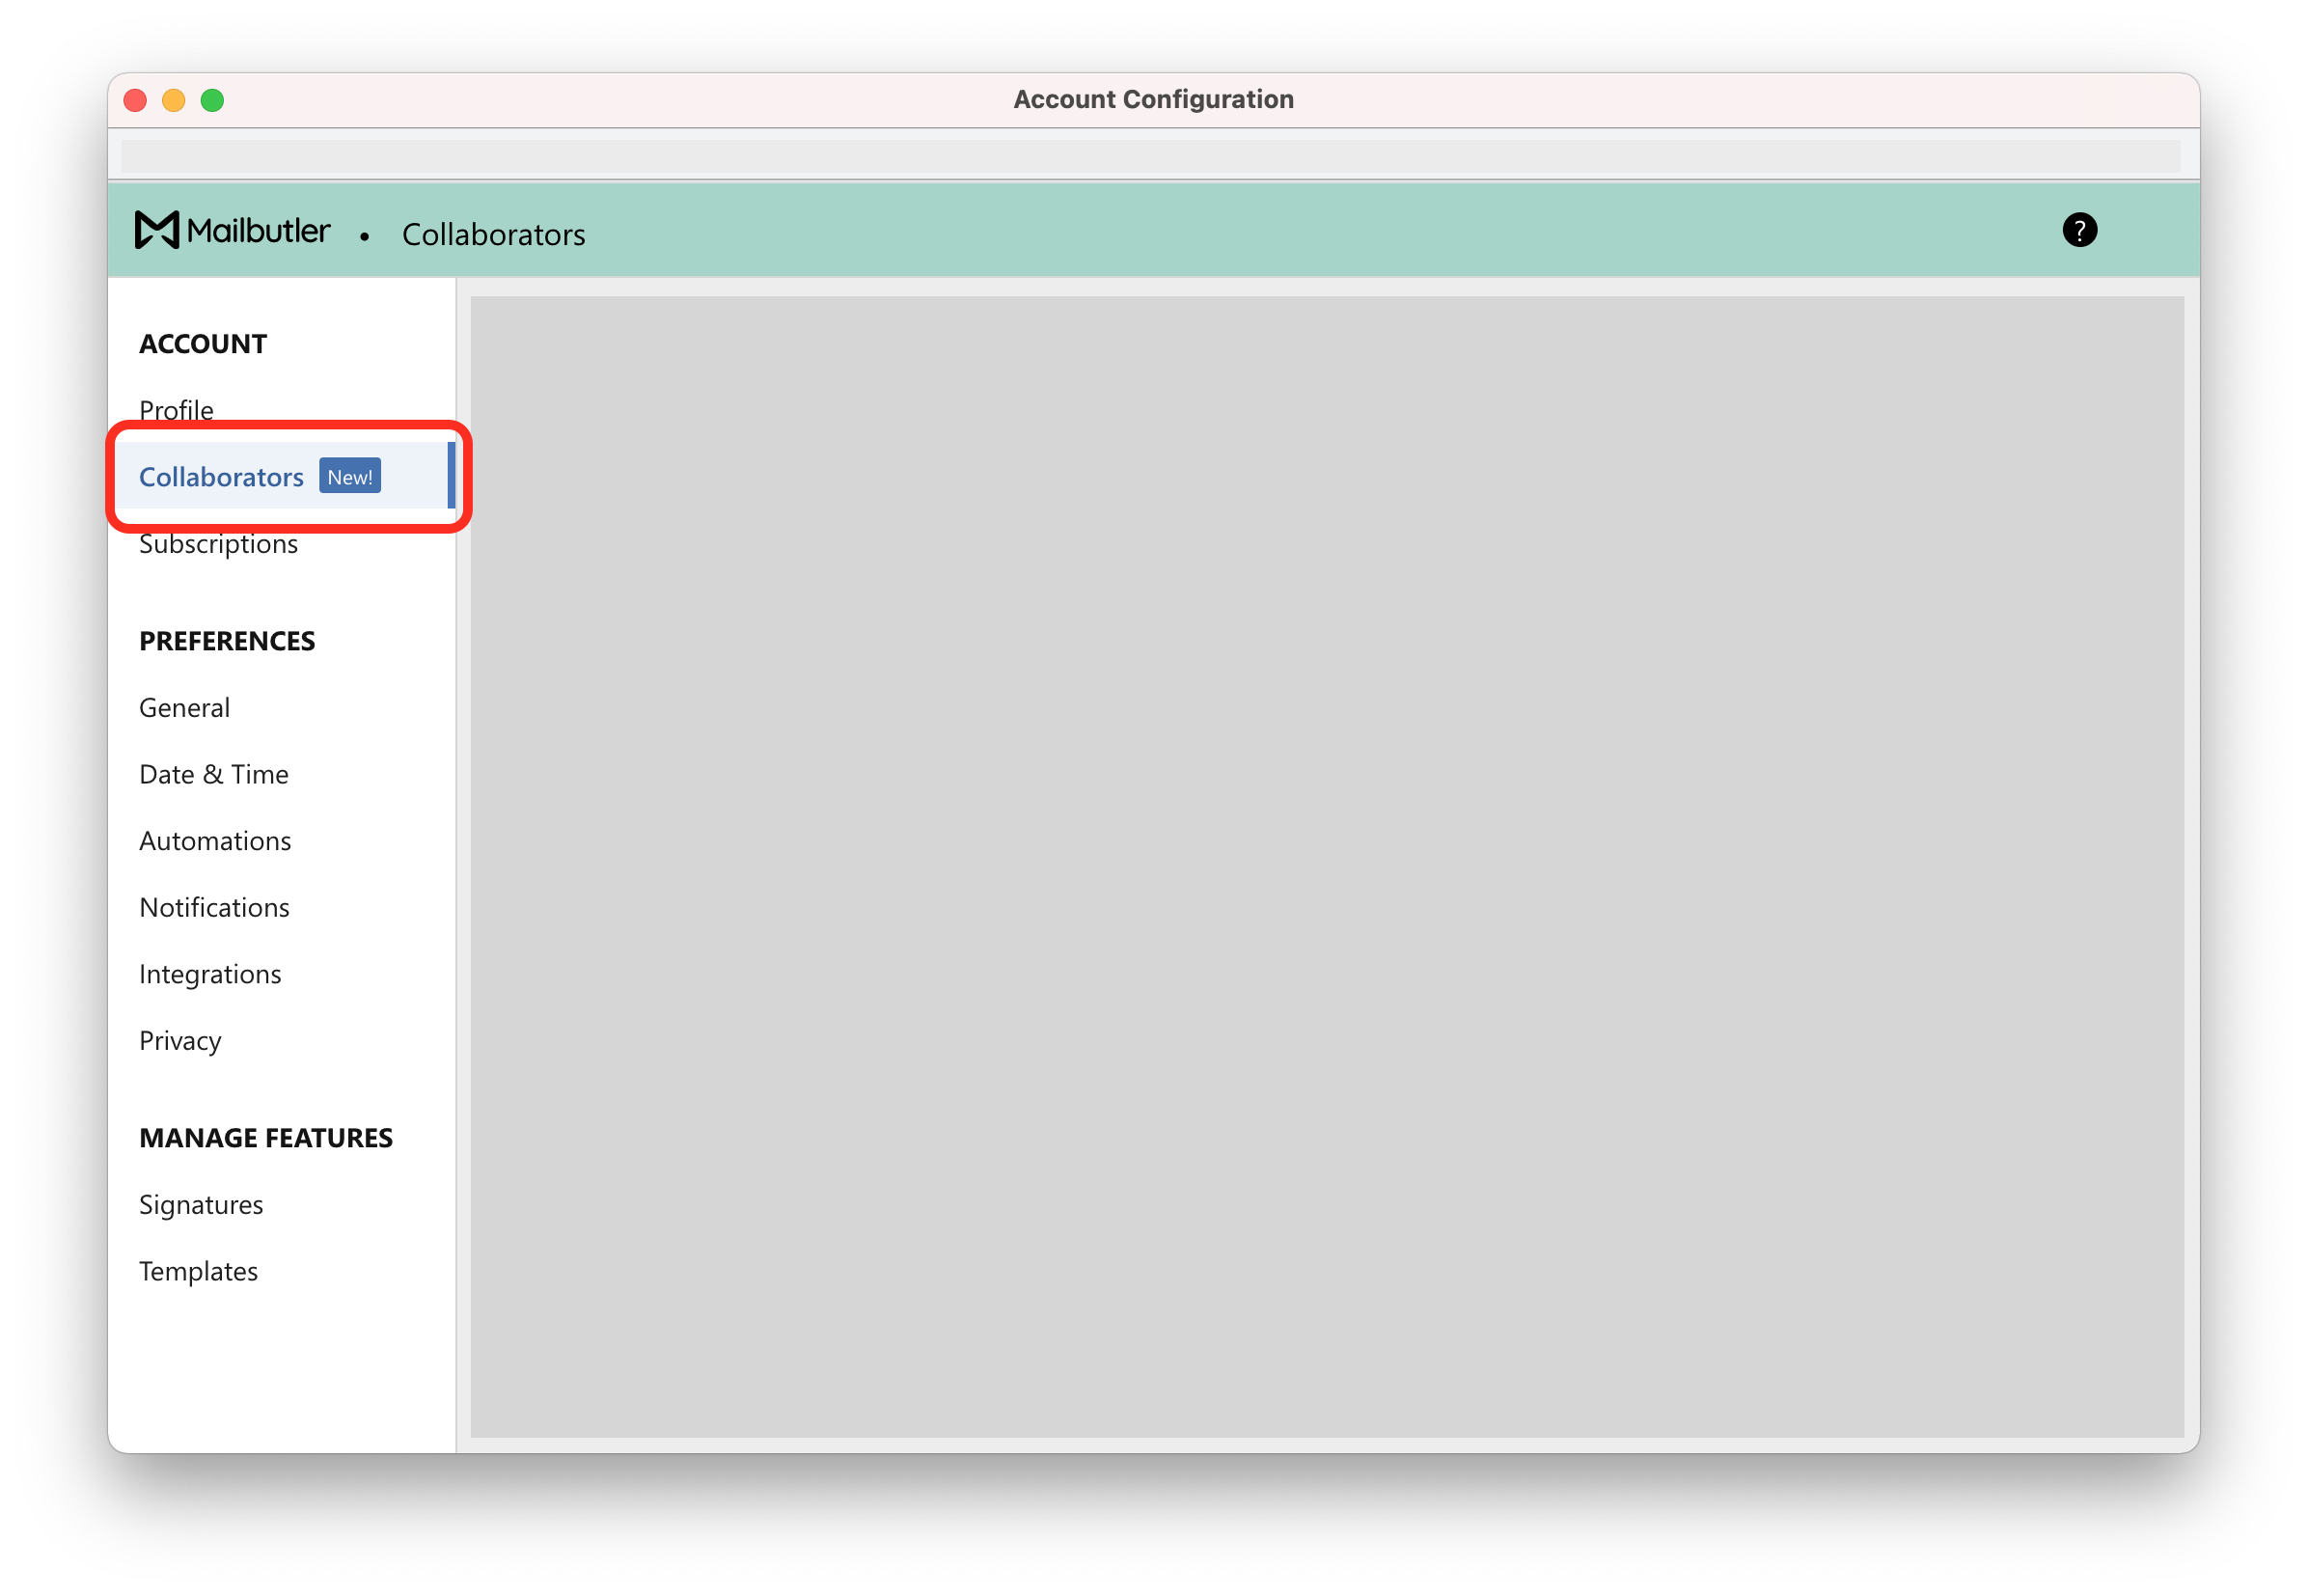
3. A new window will open. Select Collaborators under Account in the sidebar on the left.
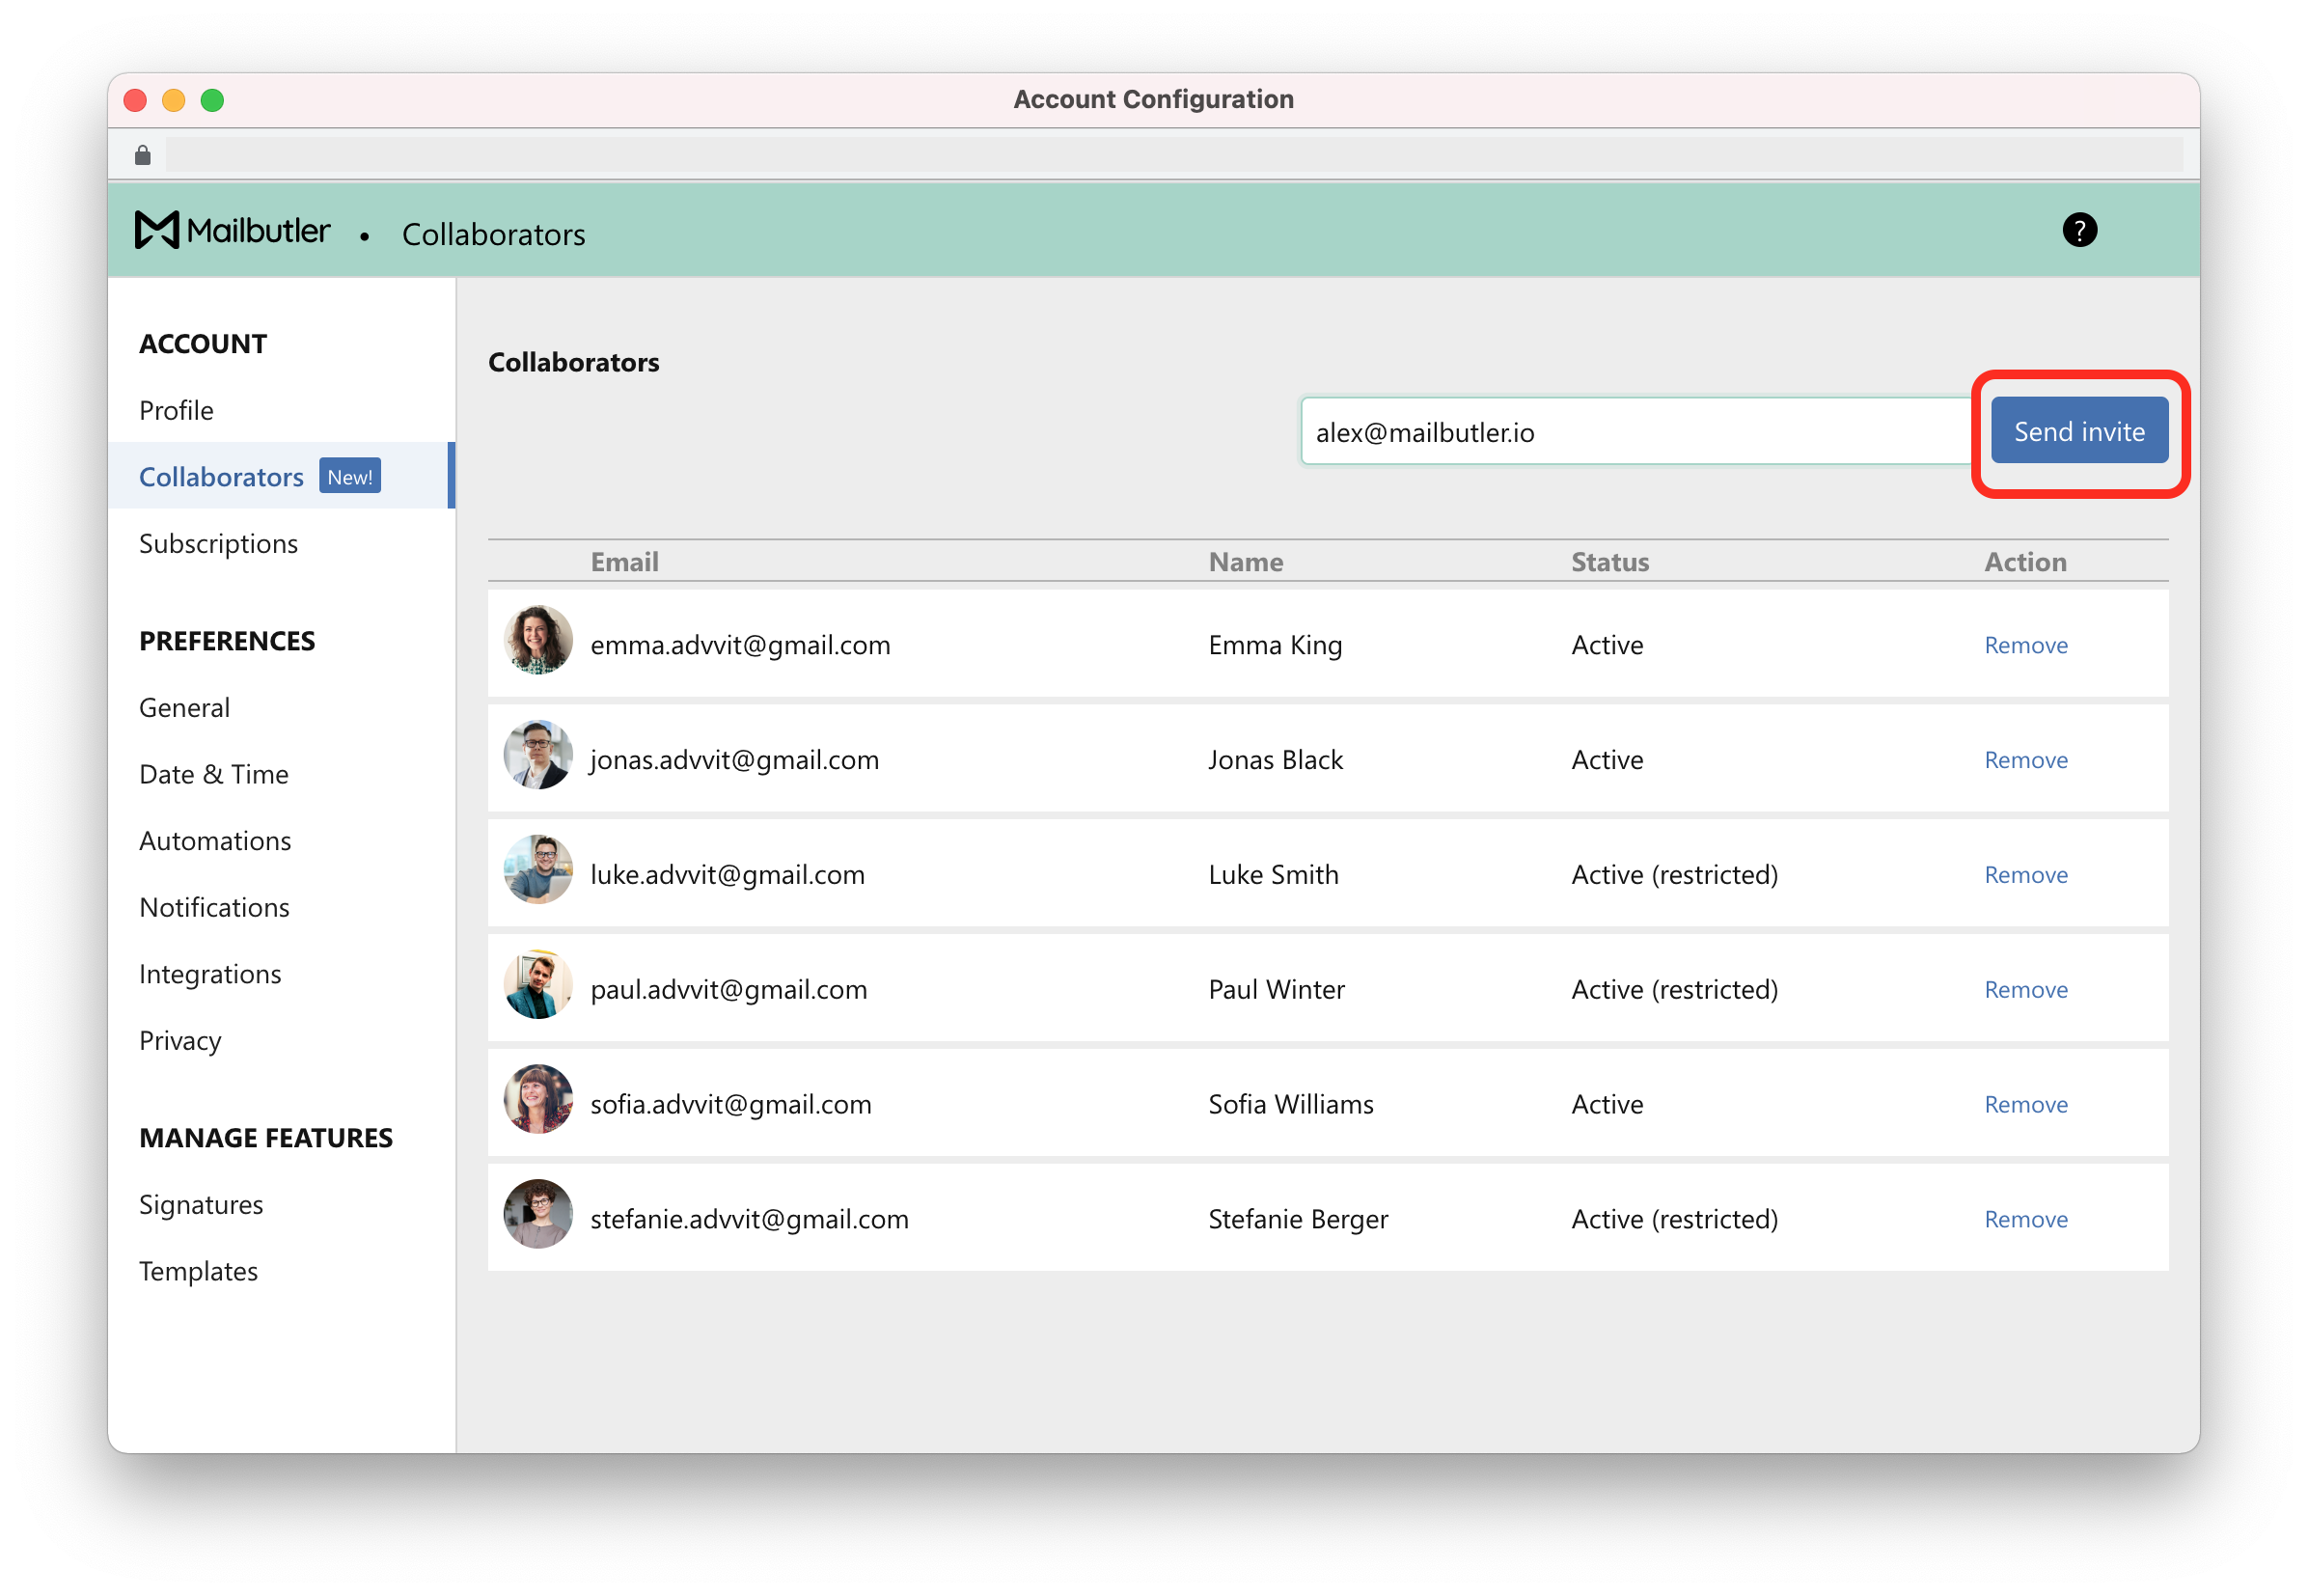
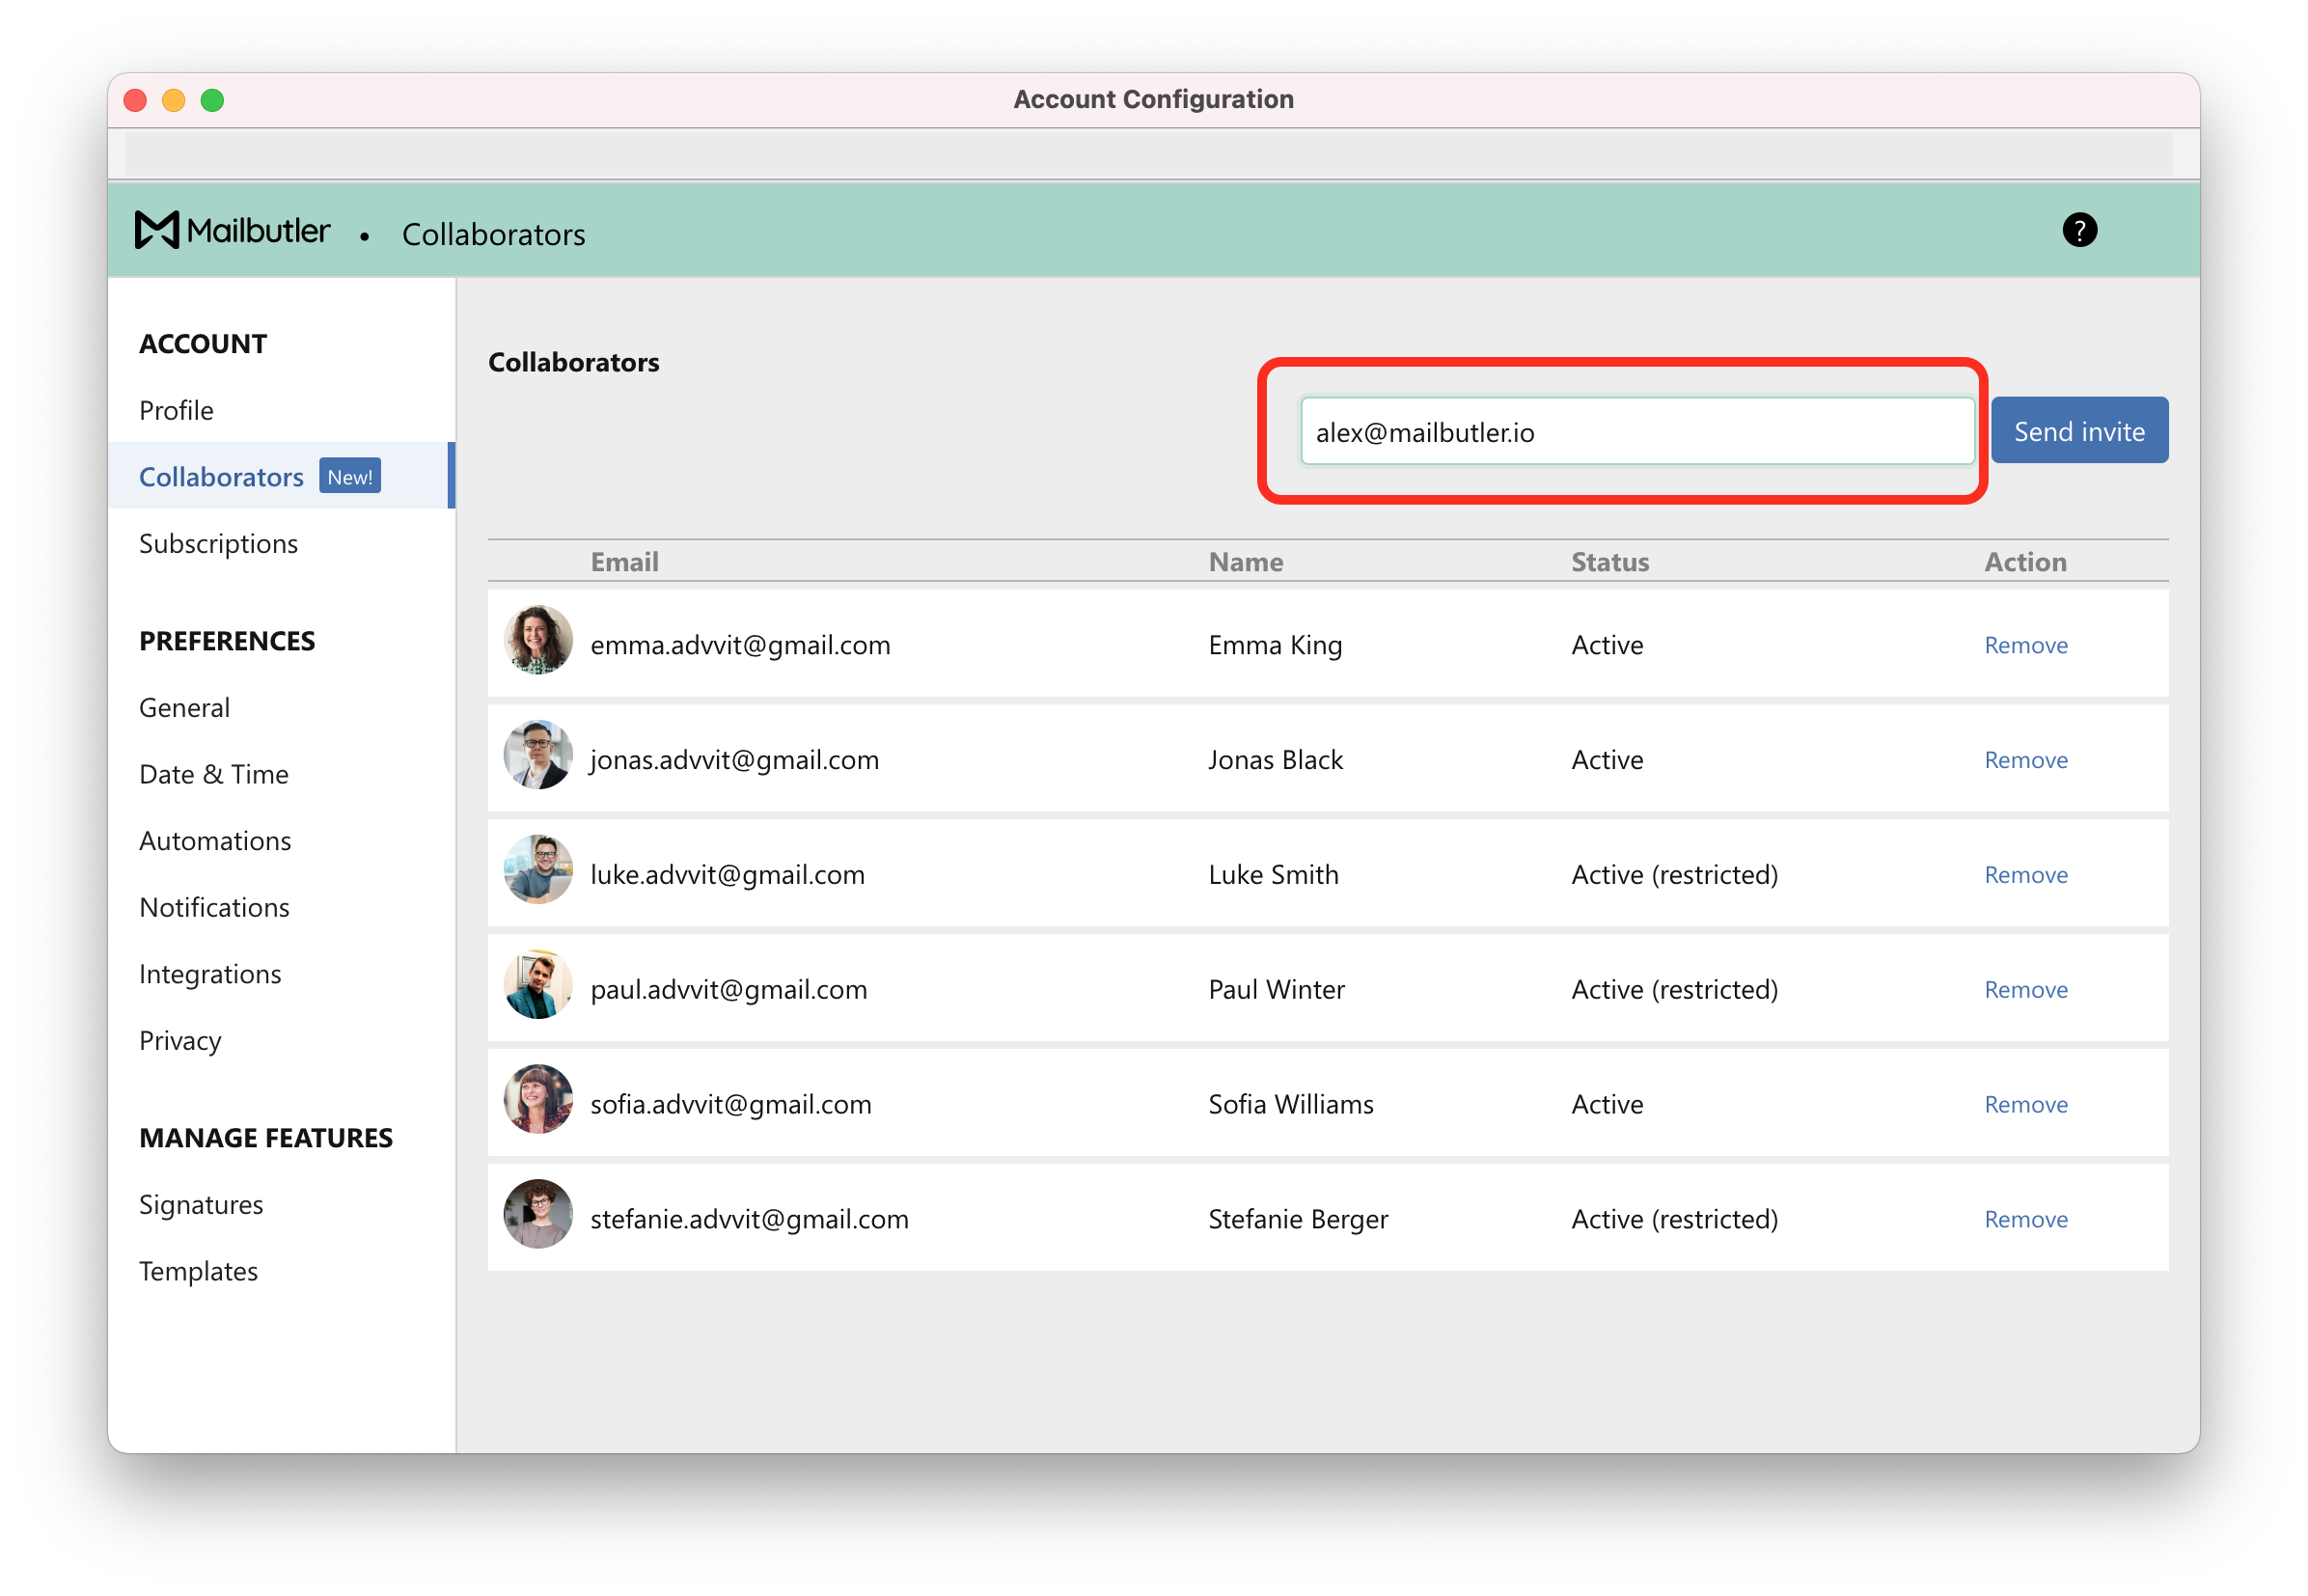
4. You can add anyone with a registered Mailbutler account as a Collaborator. To add a Collaborator, enter the email associated with the person's Mailbutler account in the email address field.
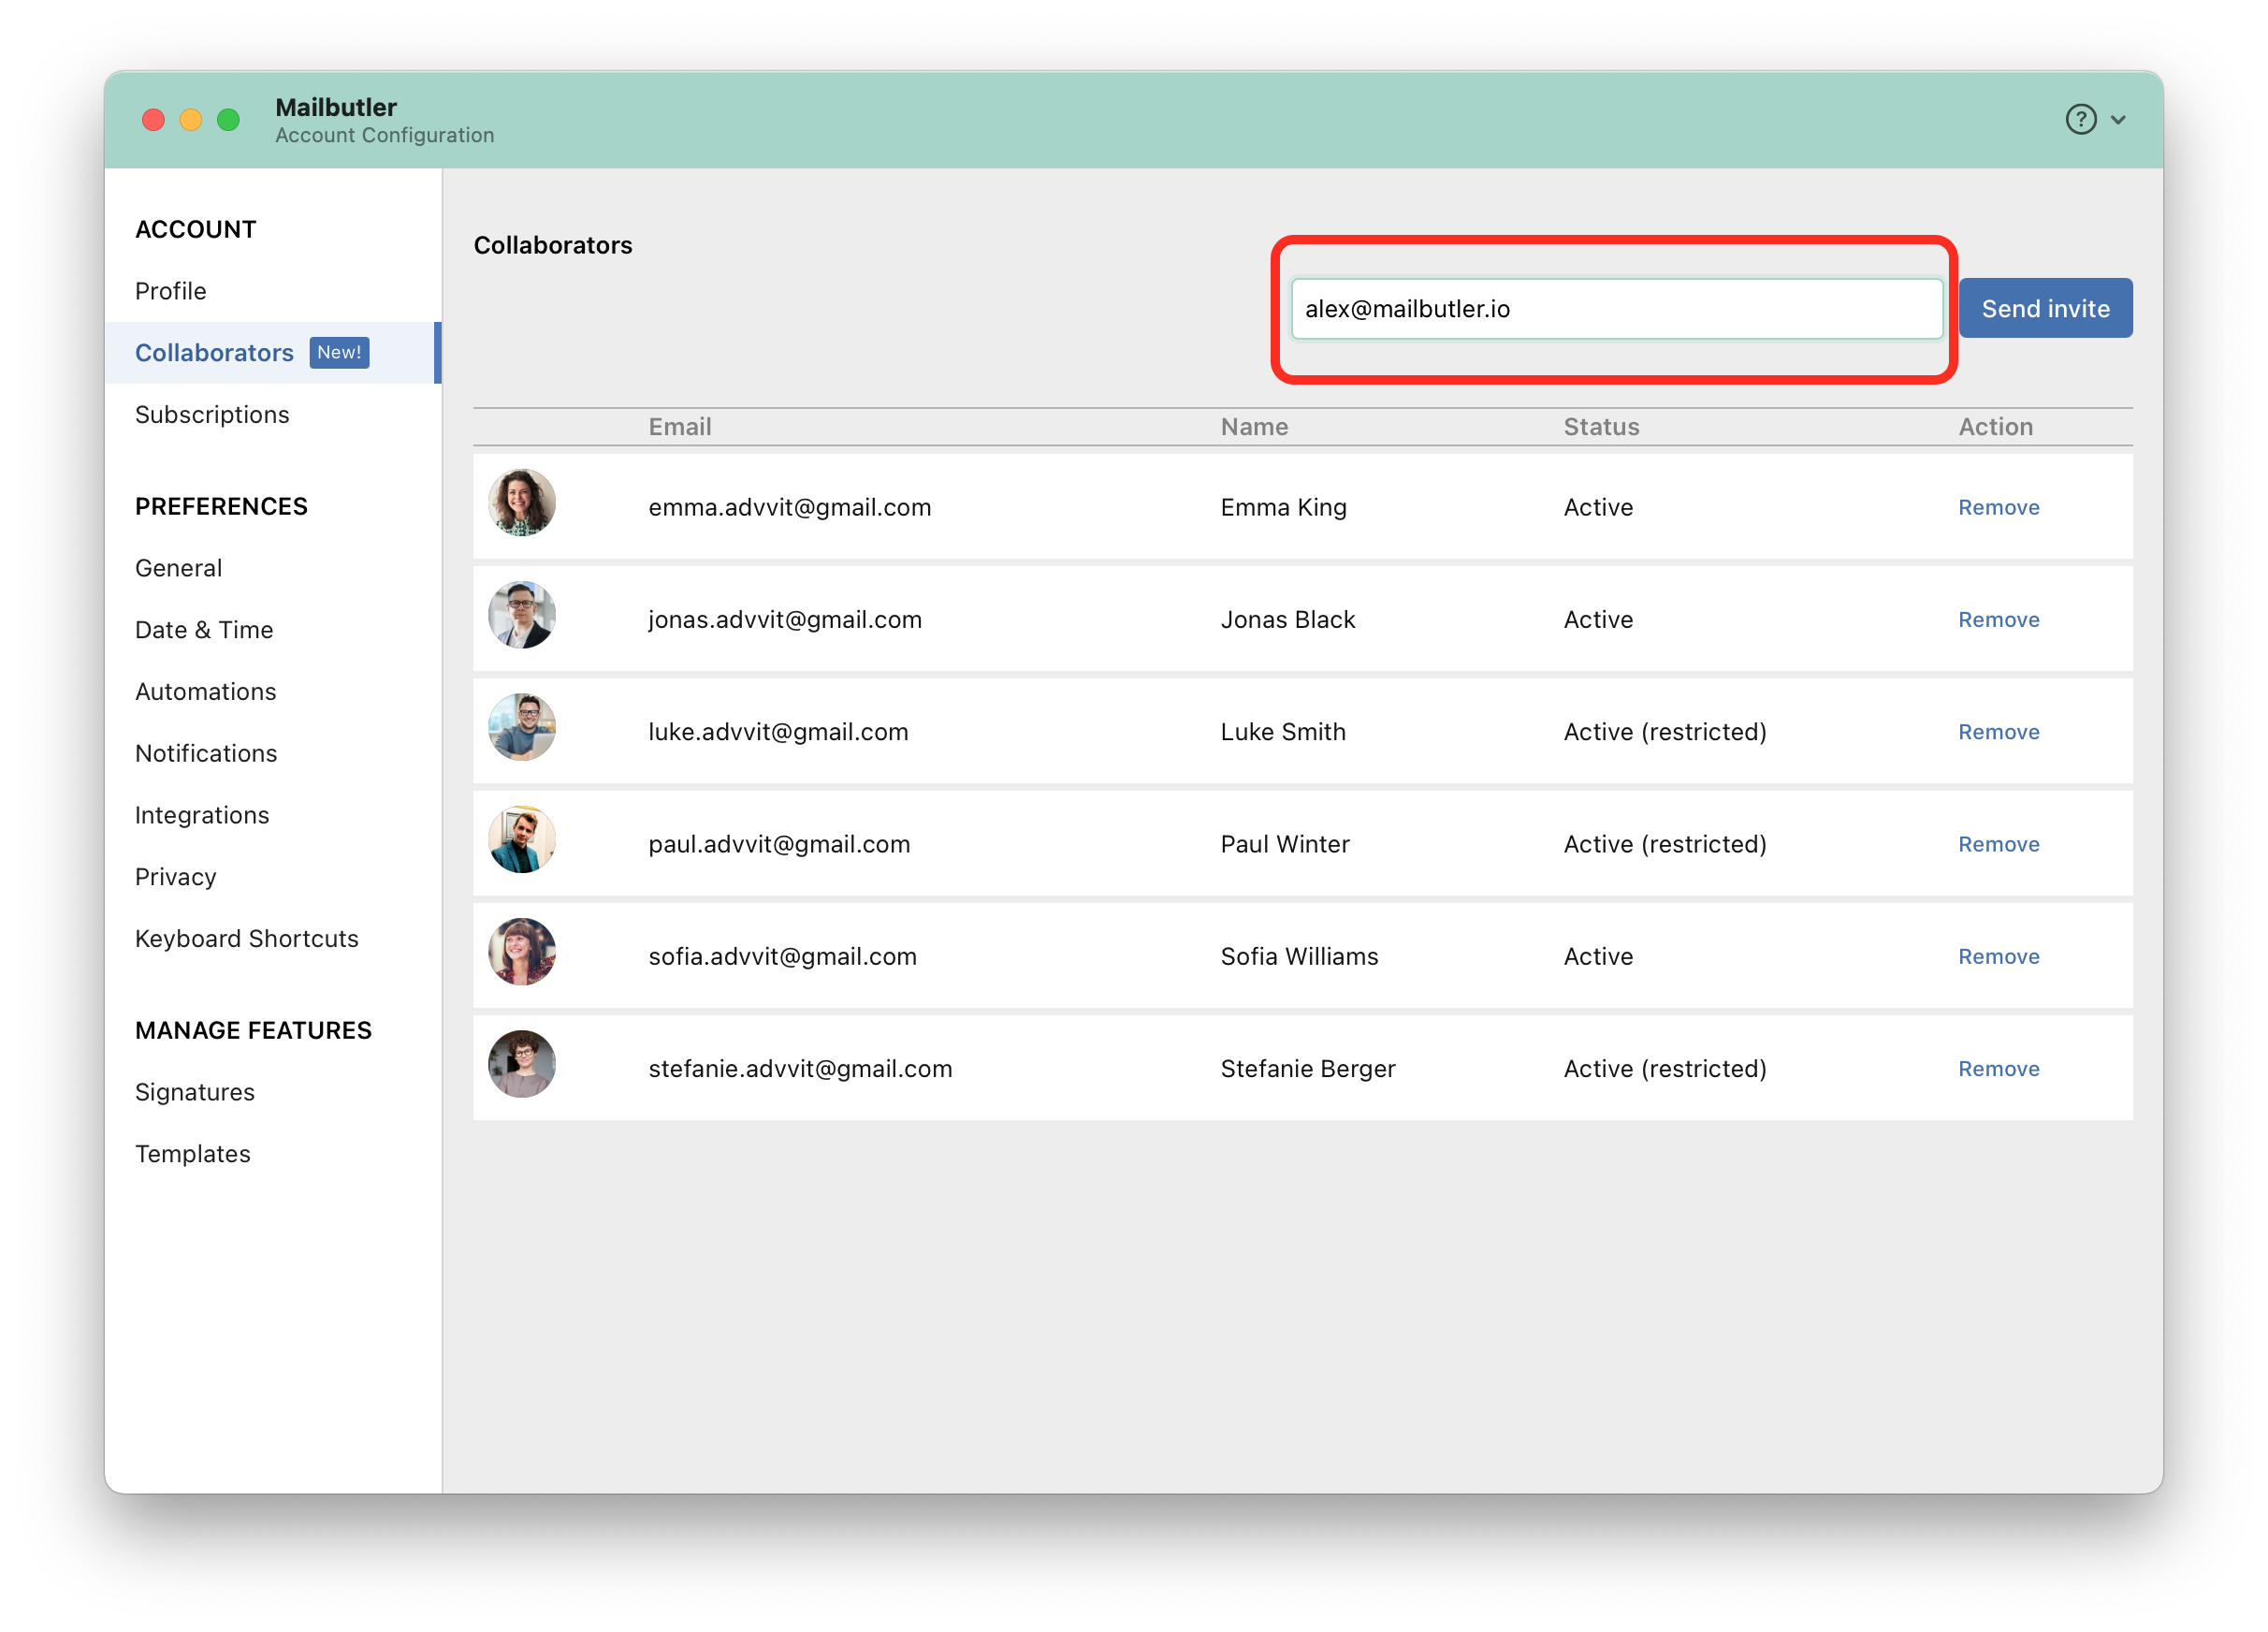
5. Click Send Invite. The Collaborator will receive an invite email with a confirmation link.
6. Once your Collaborator has confirmed the invite, they will be added to your list of Collaborators and you will also be added to their list of Collaborators. That means, you can share information with your Collaborator and they can share information with you.
7. You can now start sharing information with your Collaborators. You can share Notes, Tasks, Message Templates, Signatures and Contact information.
Gmail
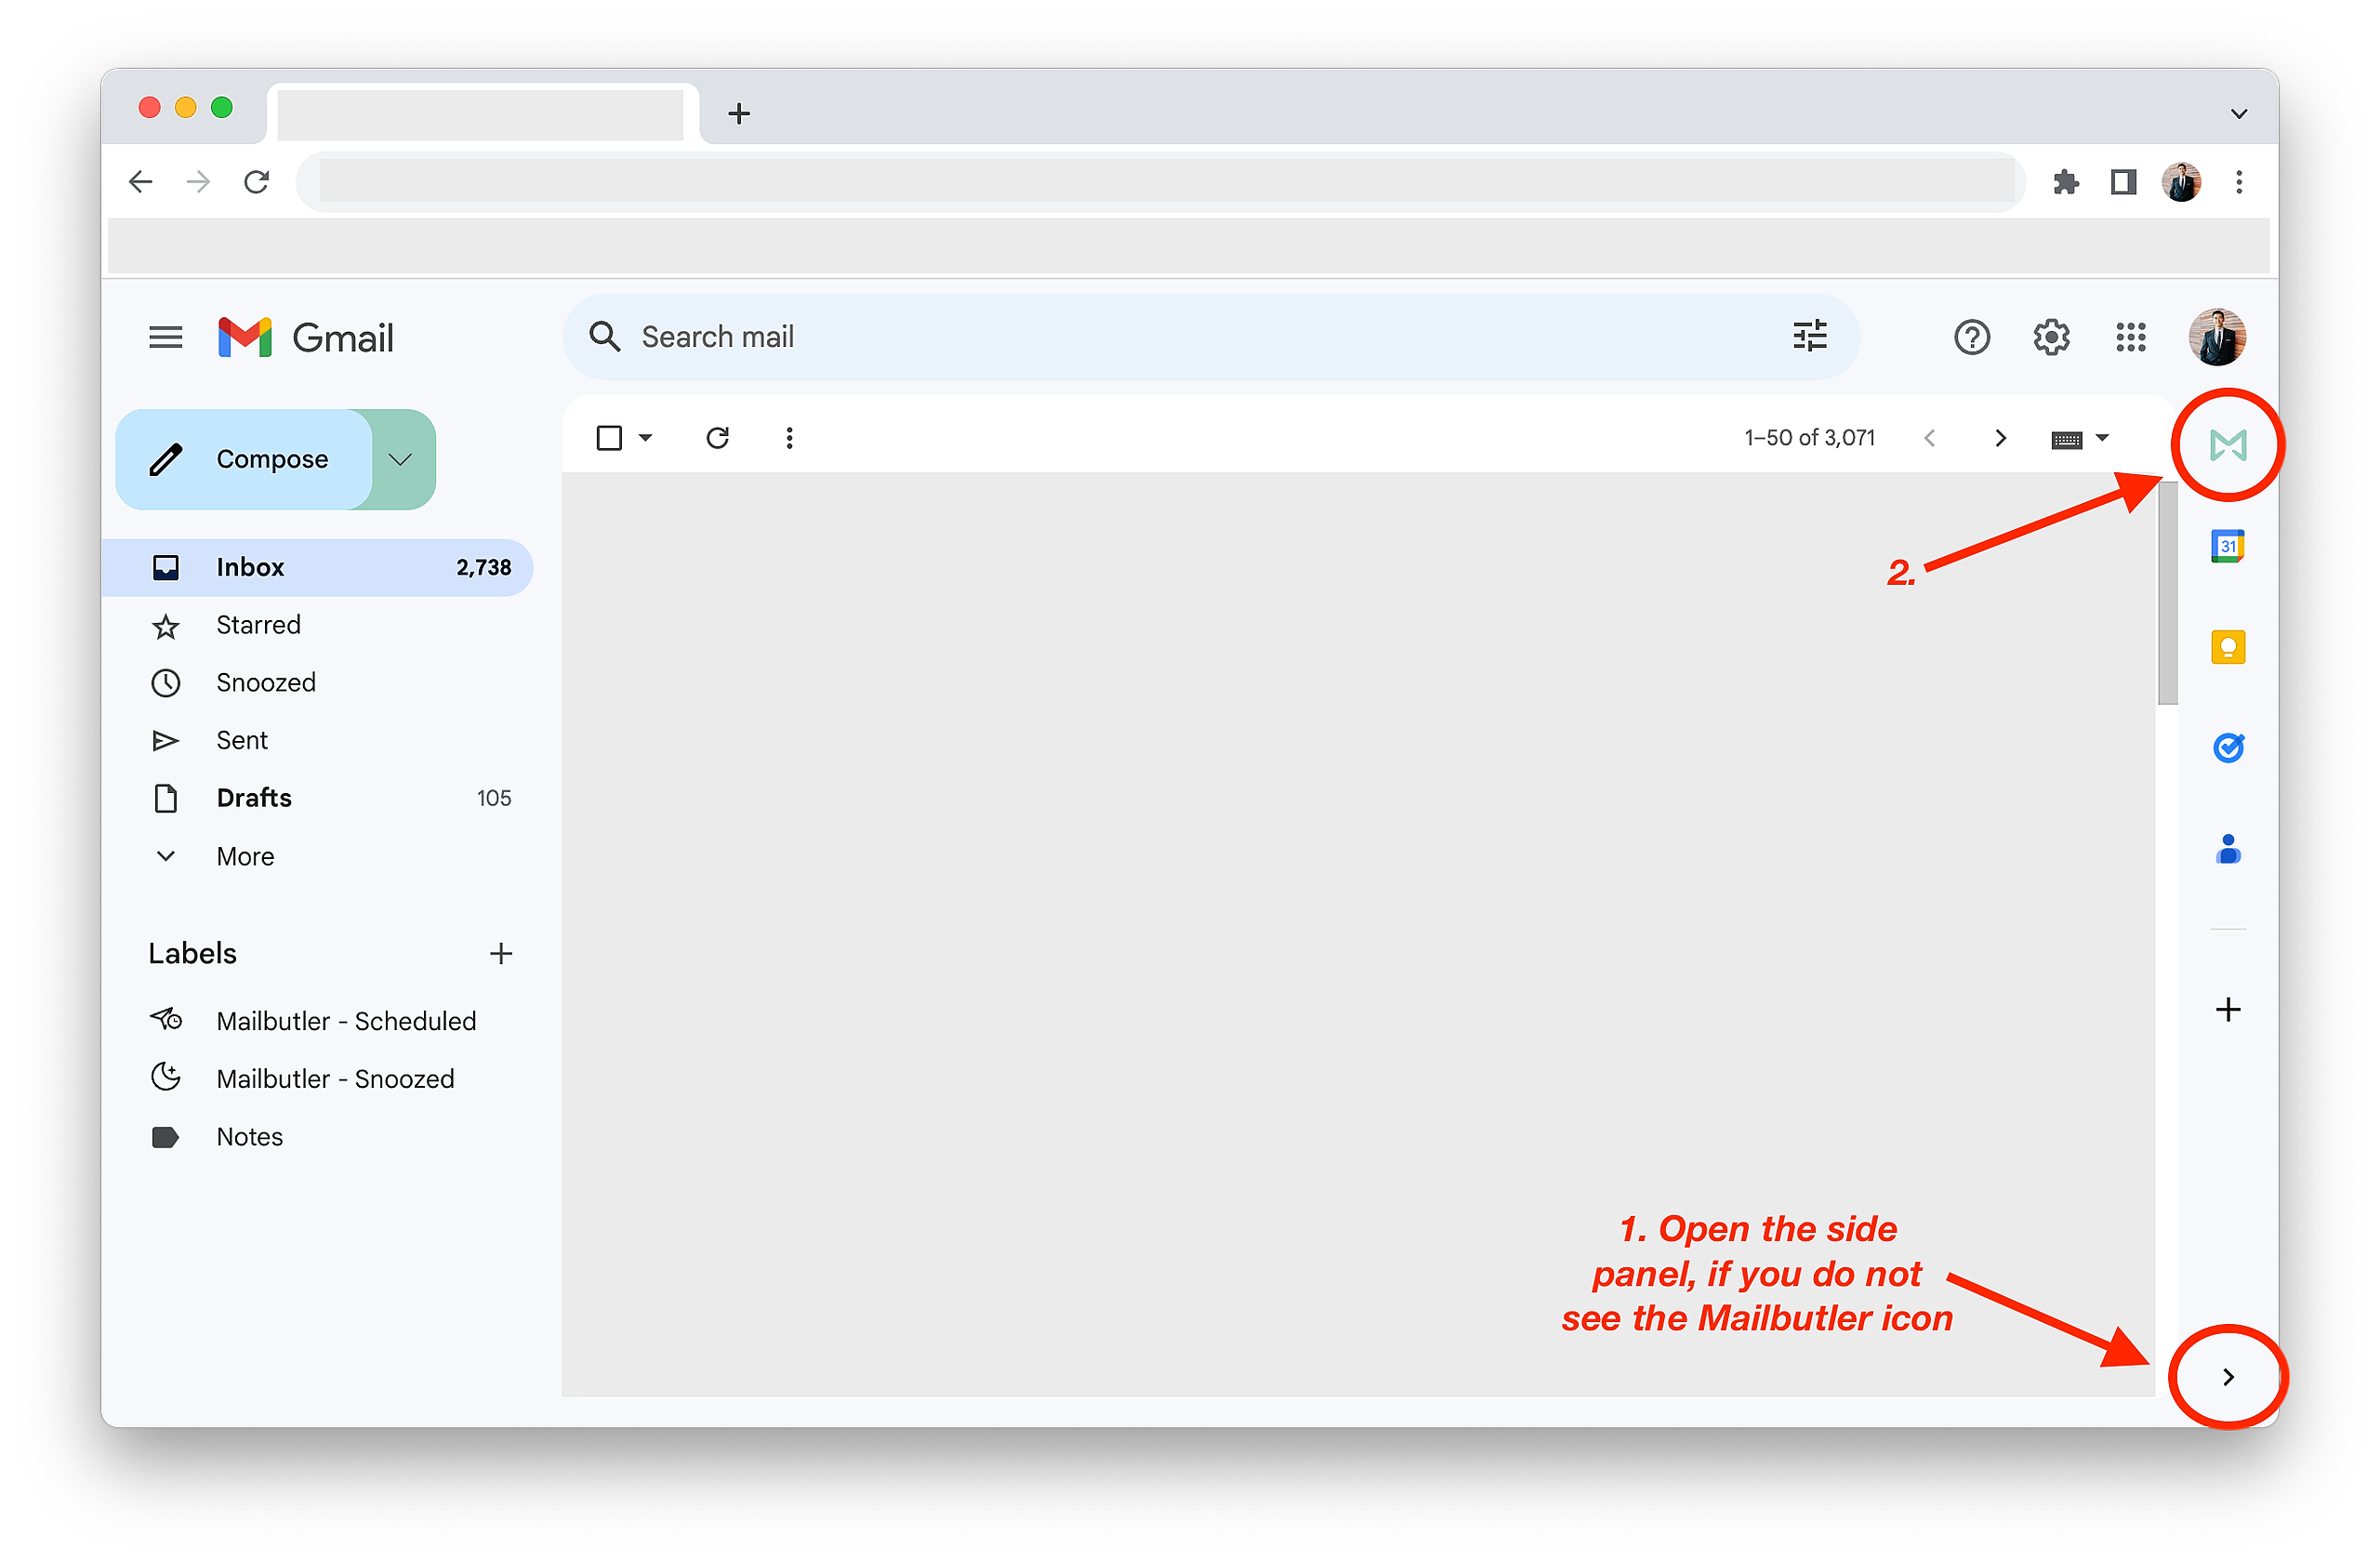
1. Click on the Mailbutler icon to open the Mailbutler Sidebar.

2. In the Mailbutler Sidebar, click the three dots and then Account & Preferences.

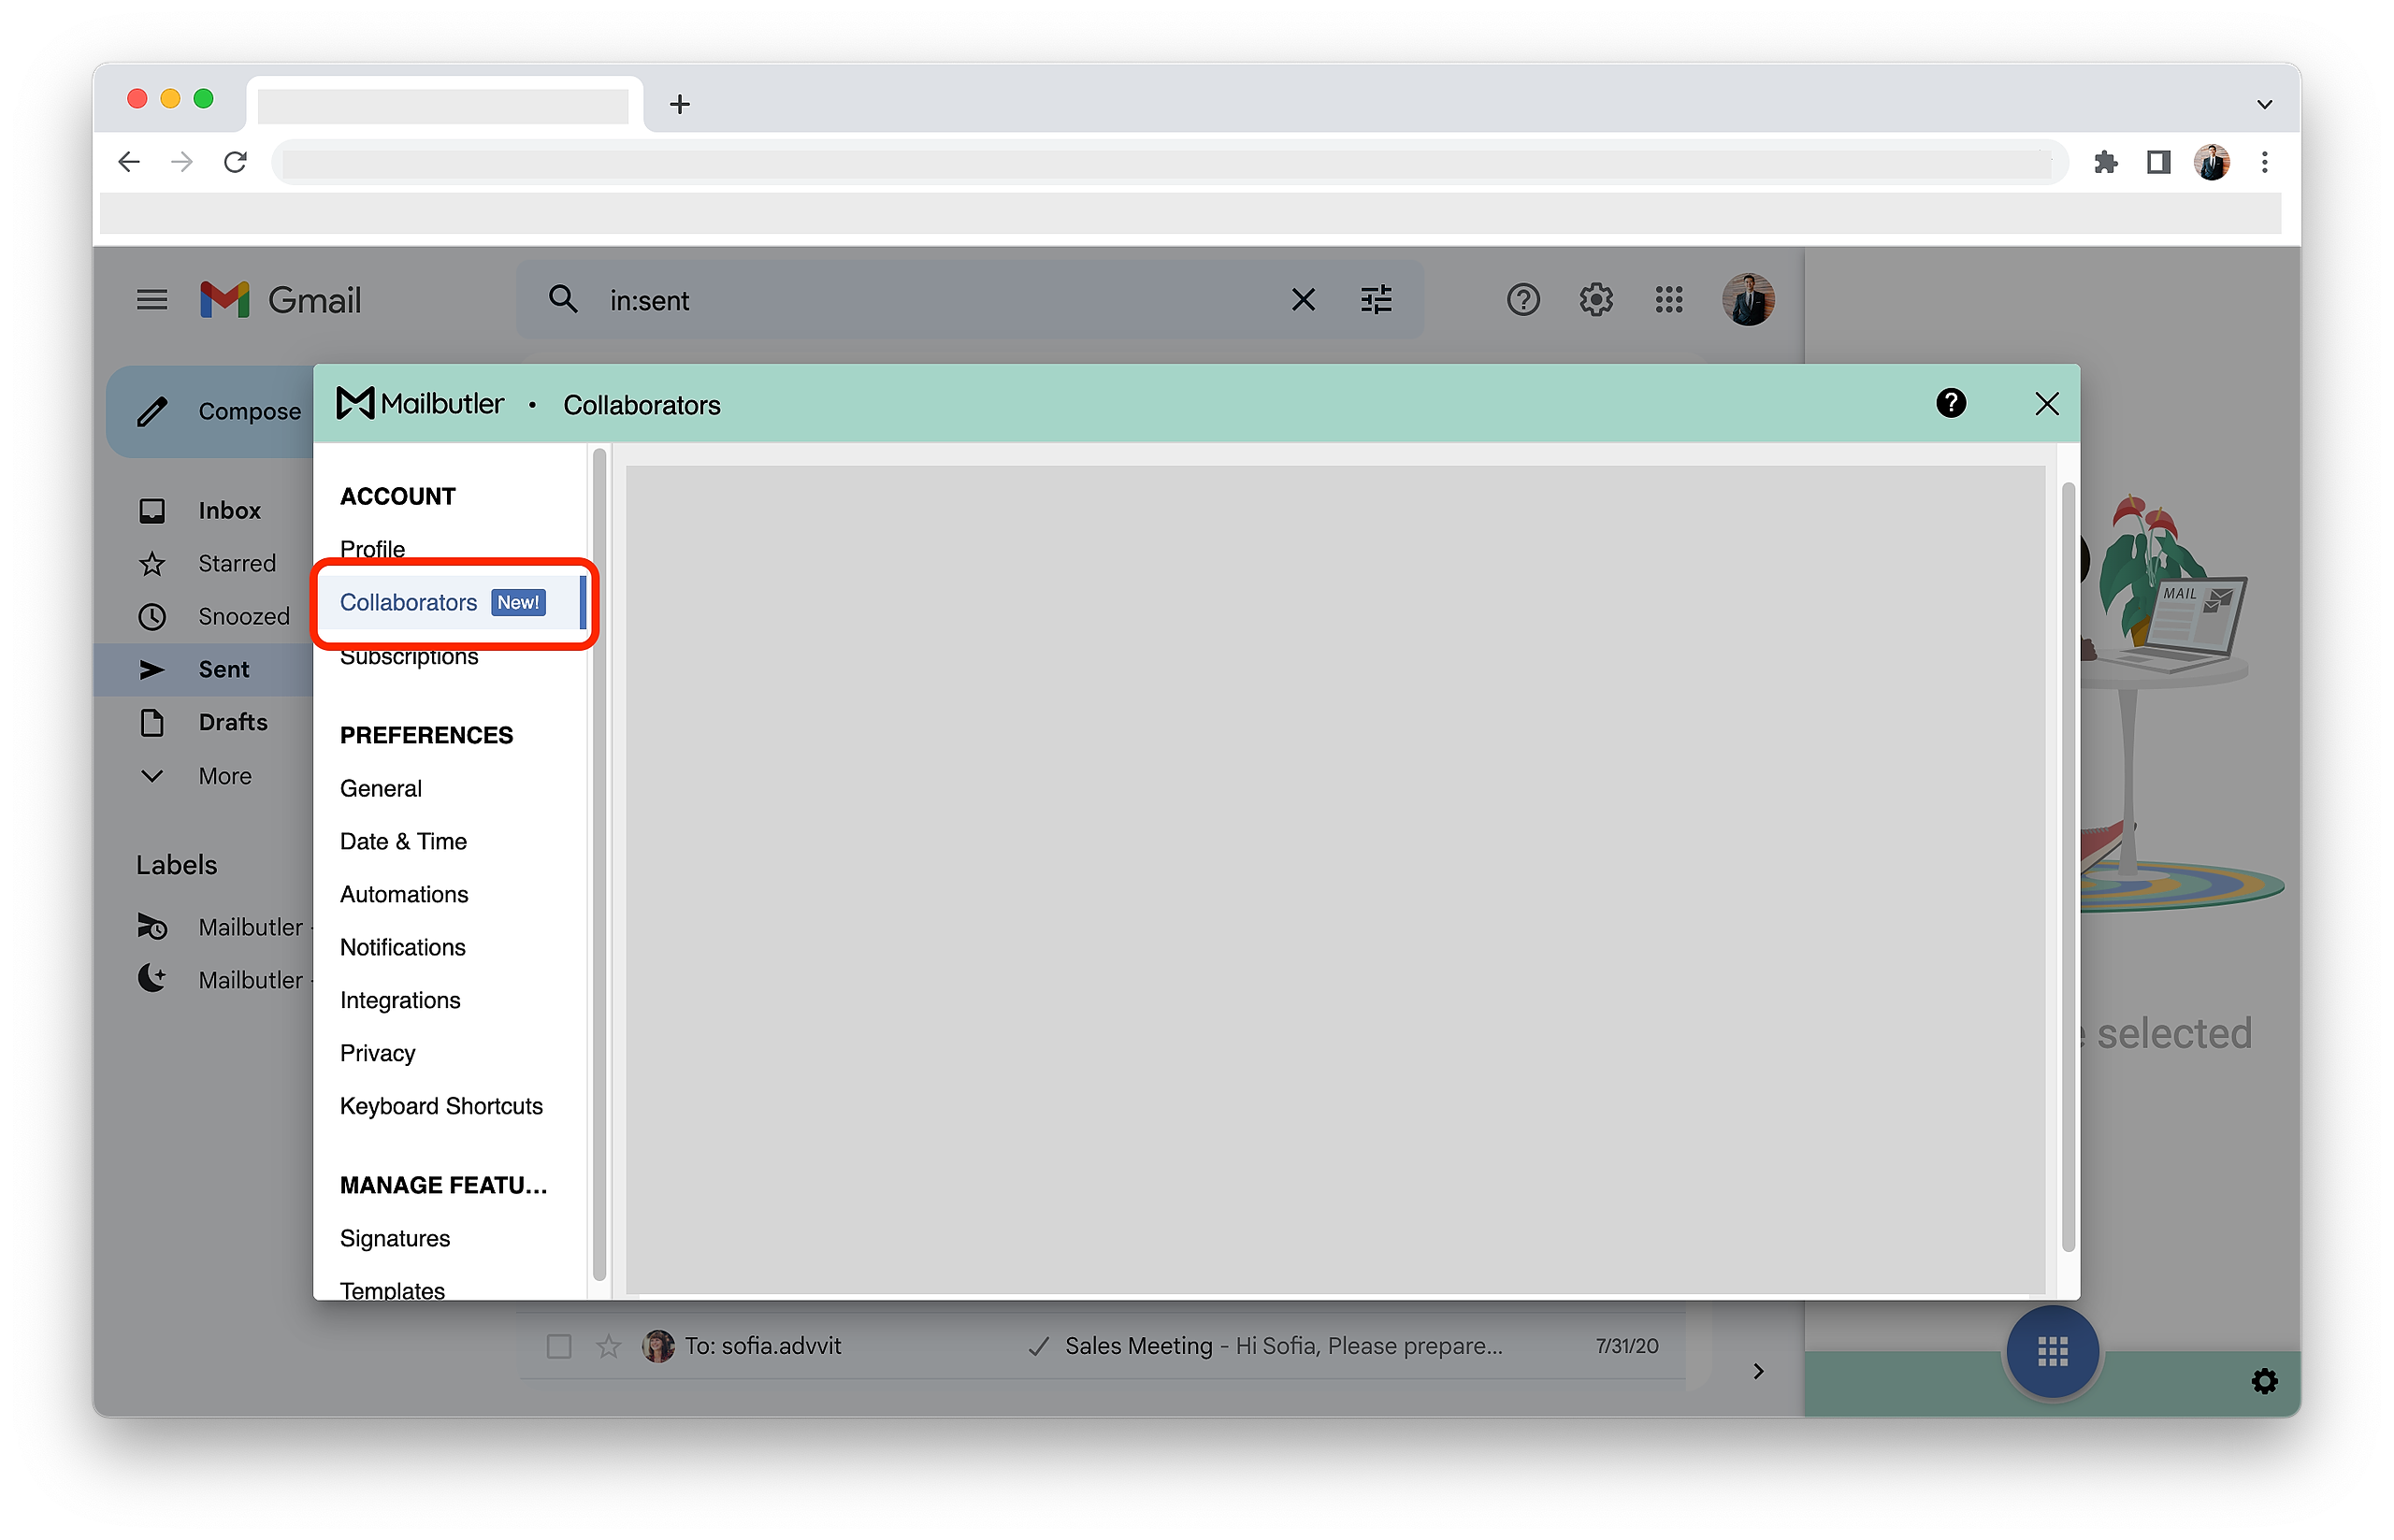
3. A new window will open. Select Collaborators under Account in the sidebar on the left.
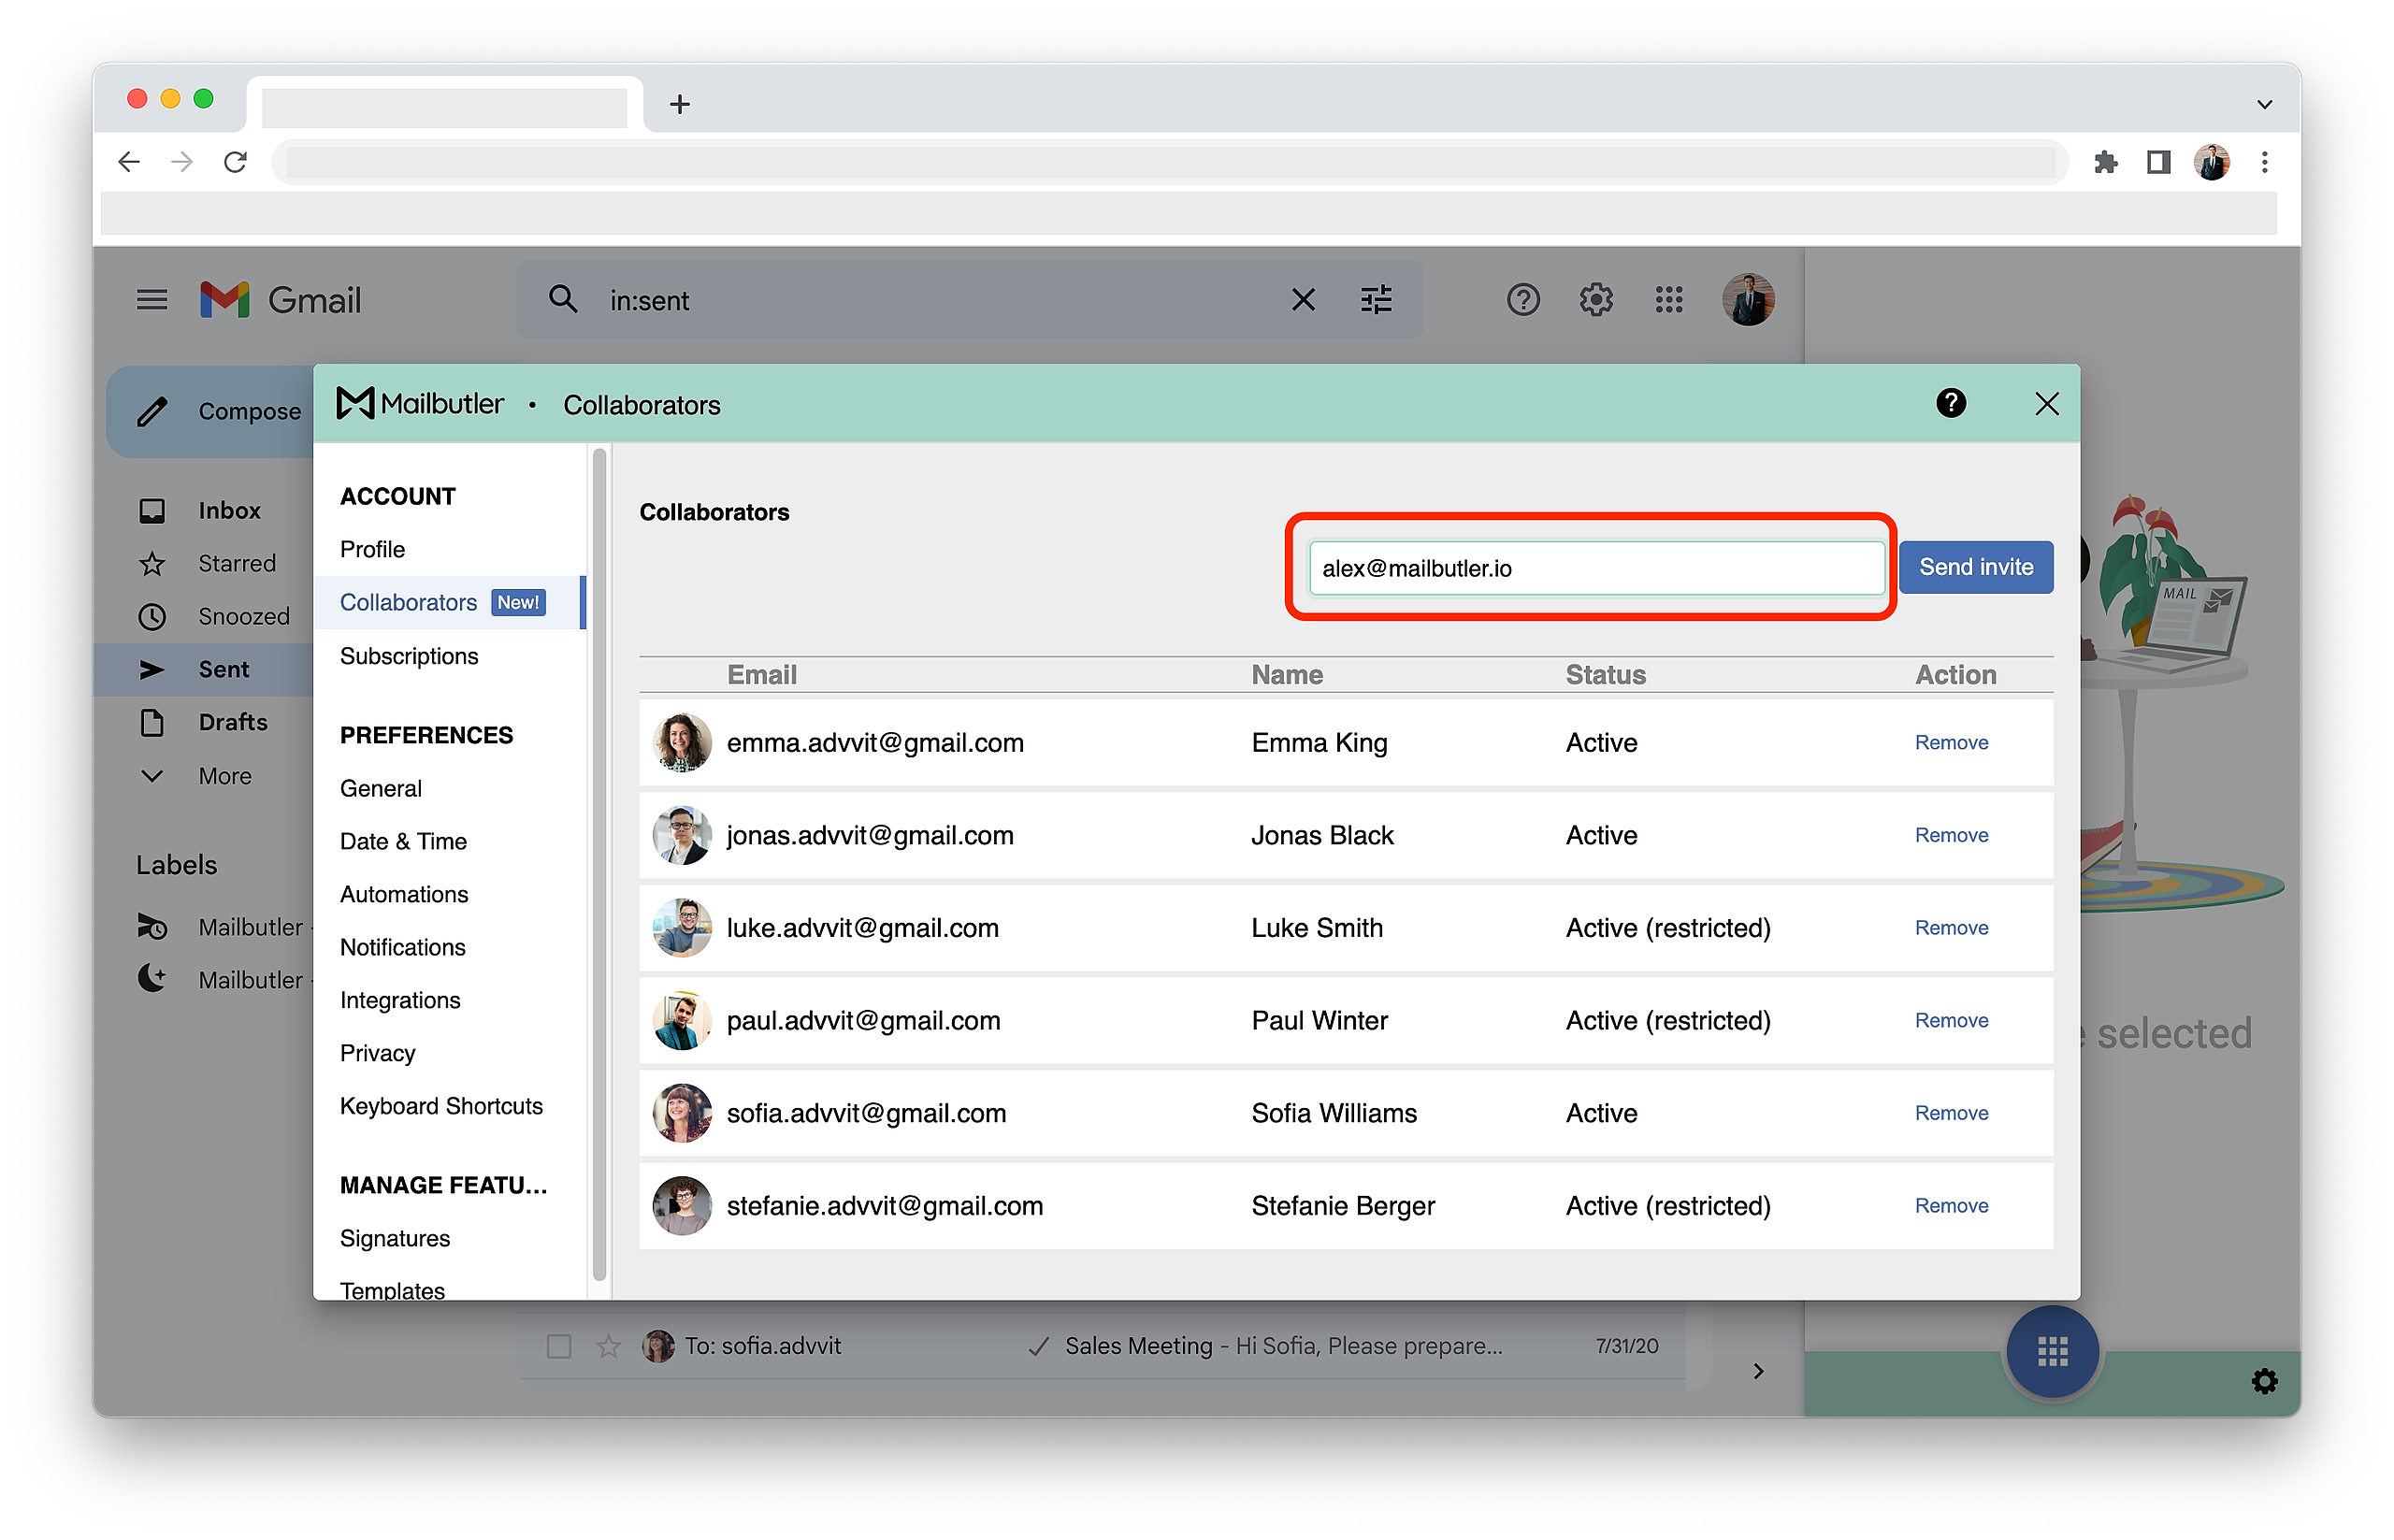
4. You can add anyone with a registered Mailbutler account as a Collaborator. To add a Collaborator, enter the email associated with the person's Mailbutler account in the email address field.
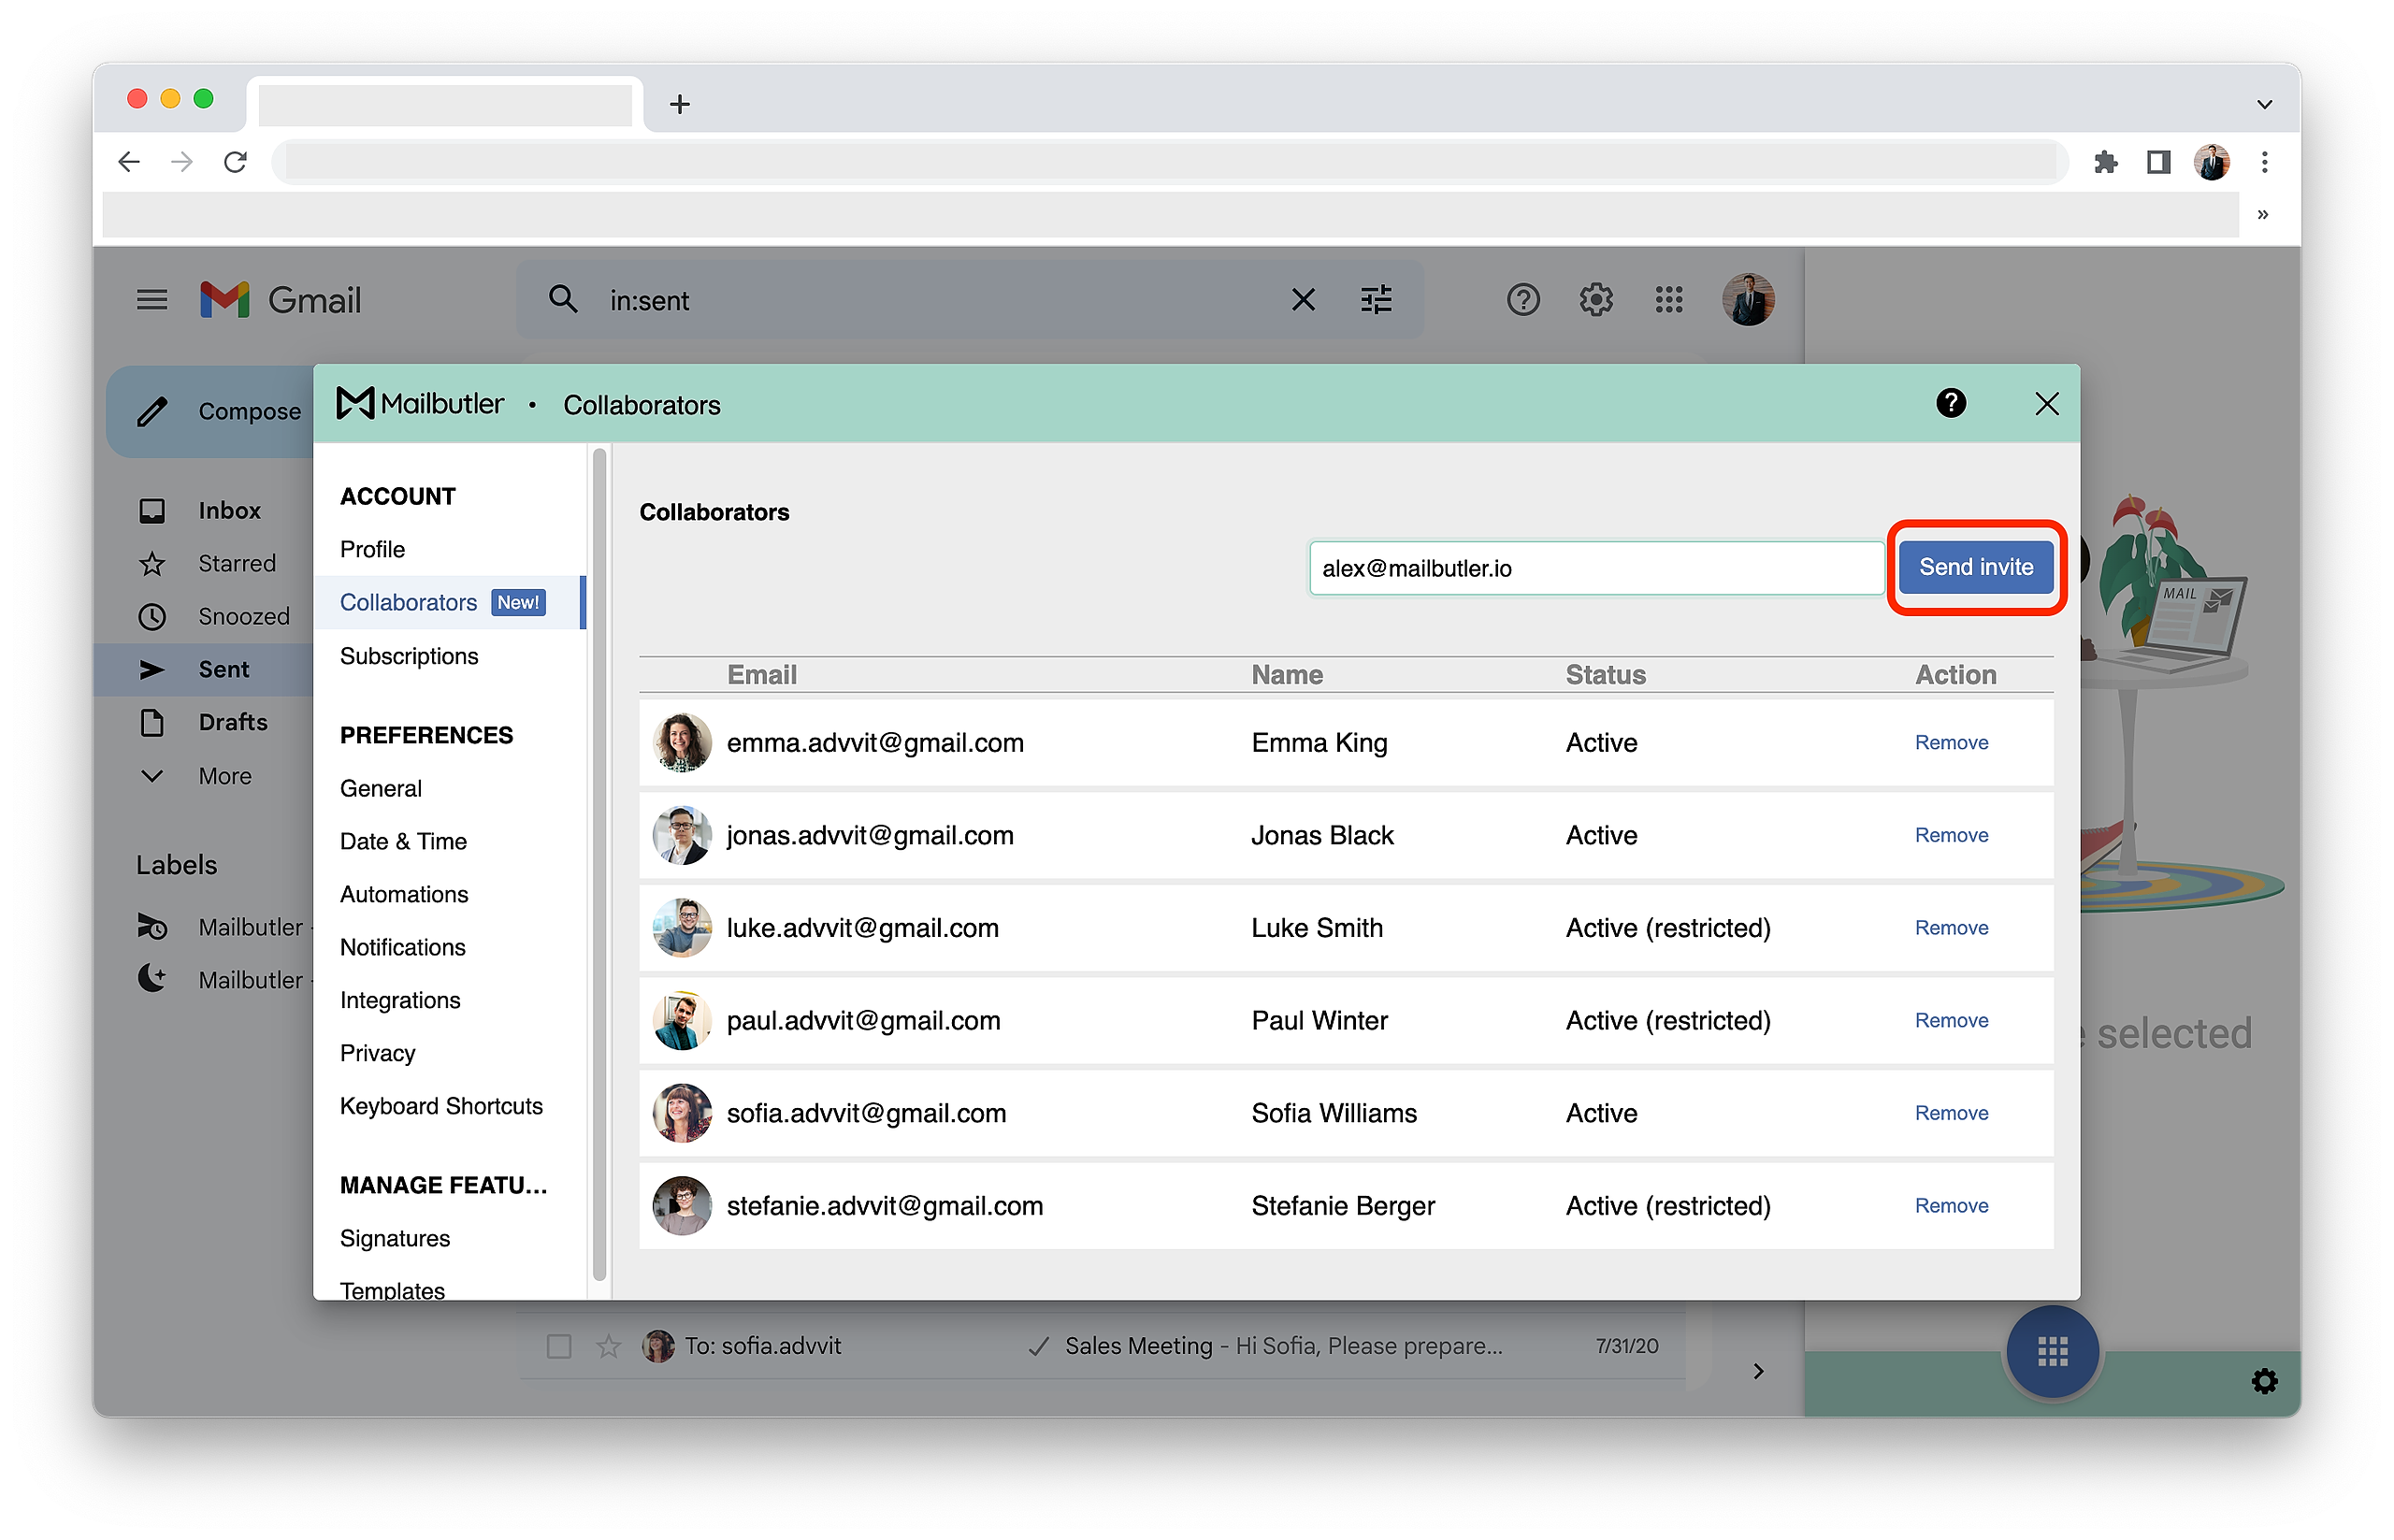
5. Click Send Invite. The Collaborator will receive an invite email with a confirmation link.
6. Once your Collaborator has confirmed the invite, they will be added to your list of Collaborators and you will also be added to their list of Collaborators. That means, you can share information with your Collaborator and they can share information with you.
7. You can now start sharing information with your Collaborators. You can share Notes, Tasks, Message Templates, Signatures and Contact information.
Outlook
1. Open the Mailbutler Sidebar.
2. In the Mailbutler Sidebar, click the three dots and then Account & Preferences.
3. A new window will open. Select Collaborators under Account in the sidebar on the left.
4. You can add anyone with a registered Mailbutler account as a Collaborator. To add a Collaborator, enter the email associated with the person's Mailbutler account in the email address field.
5. Click Send Invite. The Collaborator will receive an invite email with a confirmation link.
6. Once your Collaborator has confirmed the invite, they will be added to your list of Collaborators and you will also be added to their list of Collaborators. That means, you can share information with your Collaborator and they can share information with you.
7. You can now start sharing information with your Collaborators. You can share Notes, Tasks, Message Templates, Signatures and Contact information.
How do I share Tasks?
Apple Mail
1. Go to an email that already has a Task attached or add a new Task.
2. Click the Mailbutler icon at the top of your Apple Mail window to open the Mailbutler Sidebar.
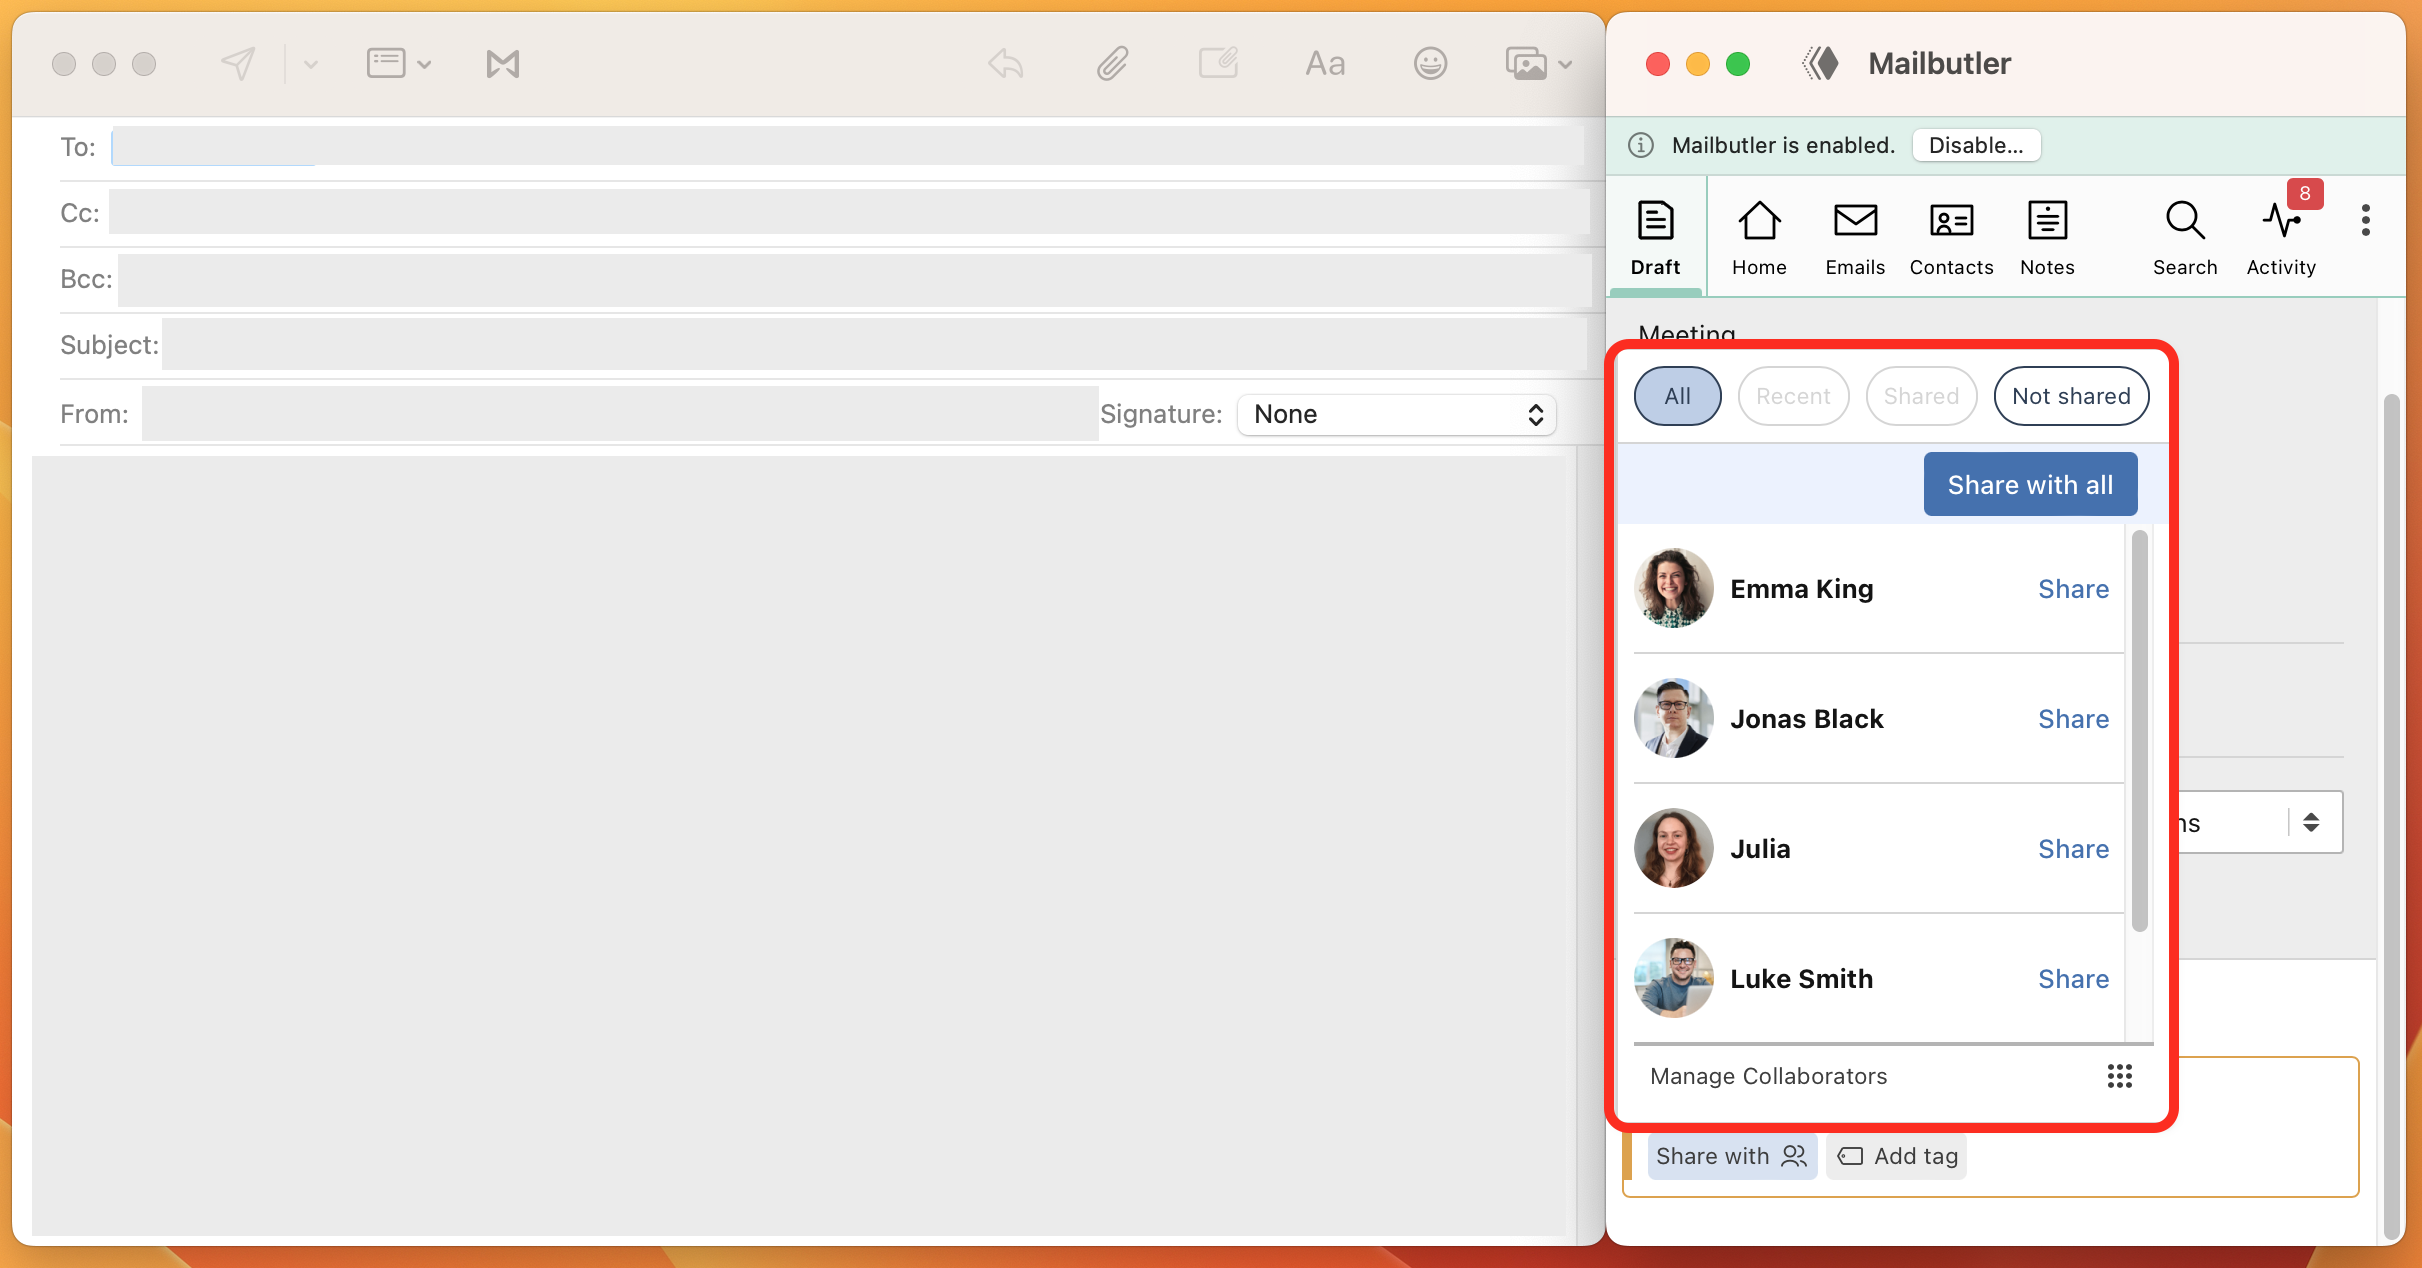
3. Click anywhere inside your Task to reveal the sharing button. Then click Share with.
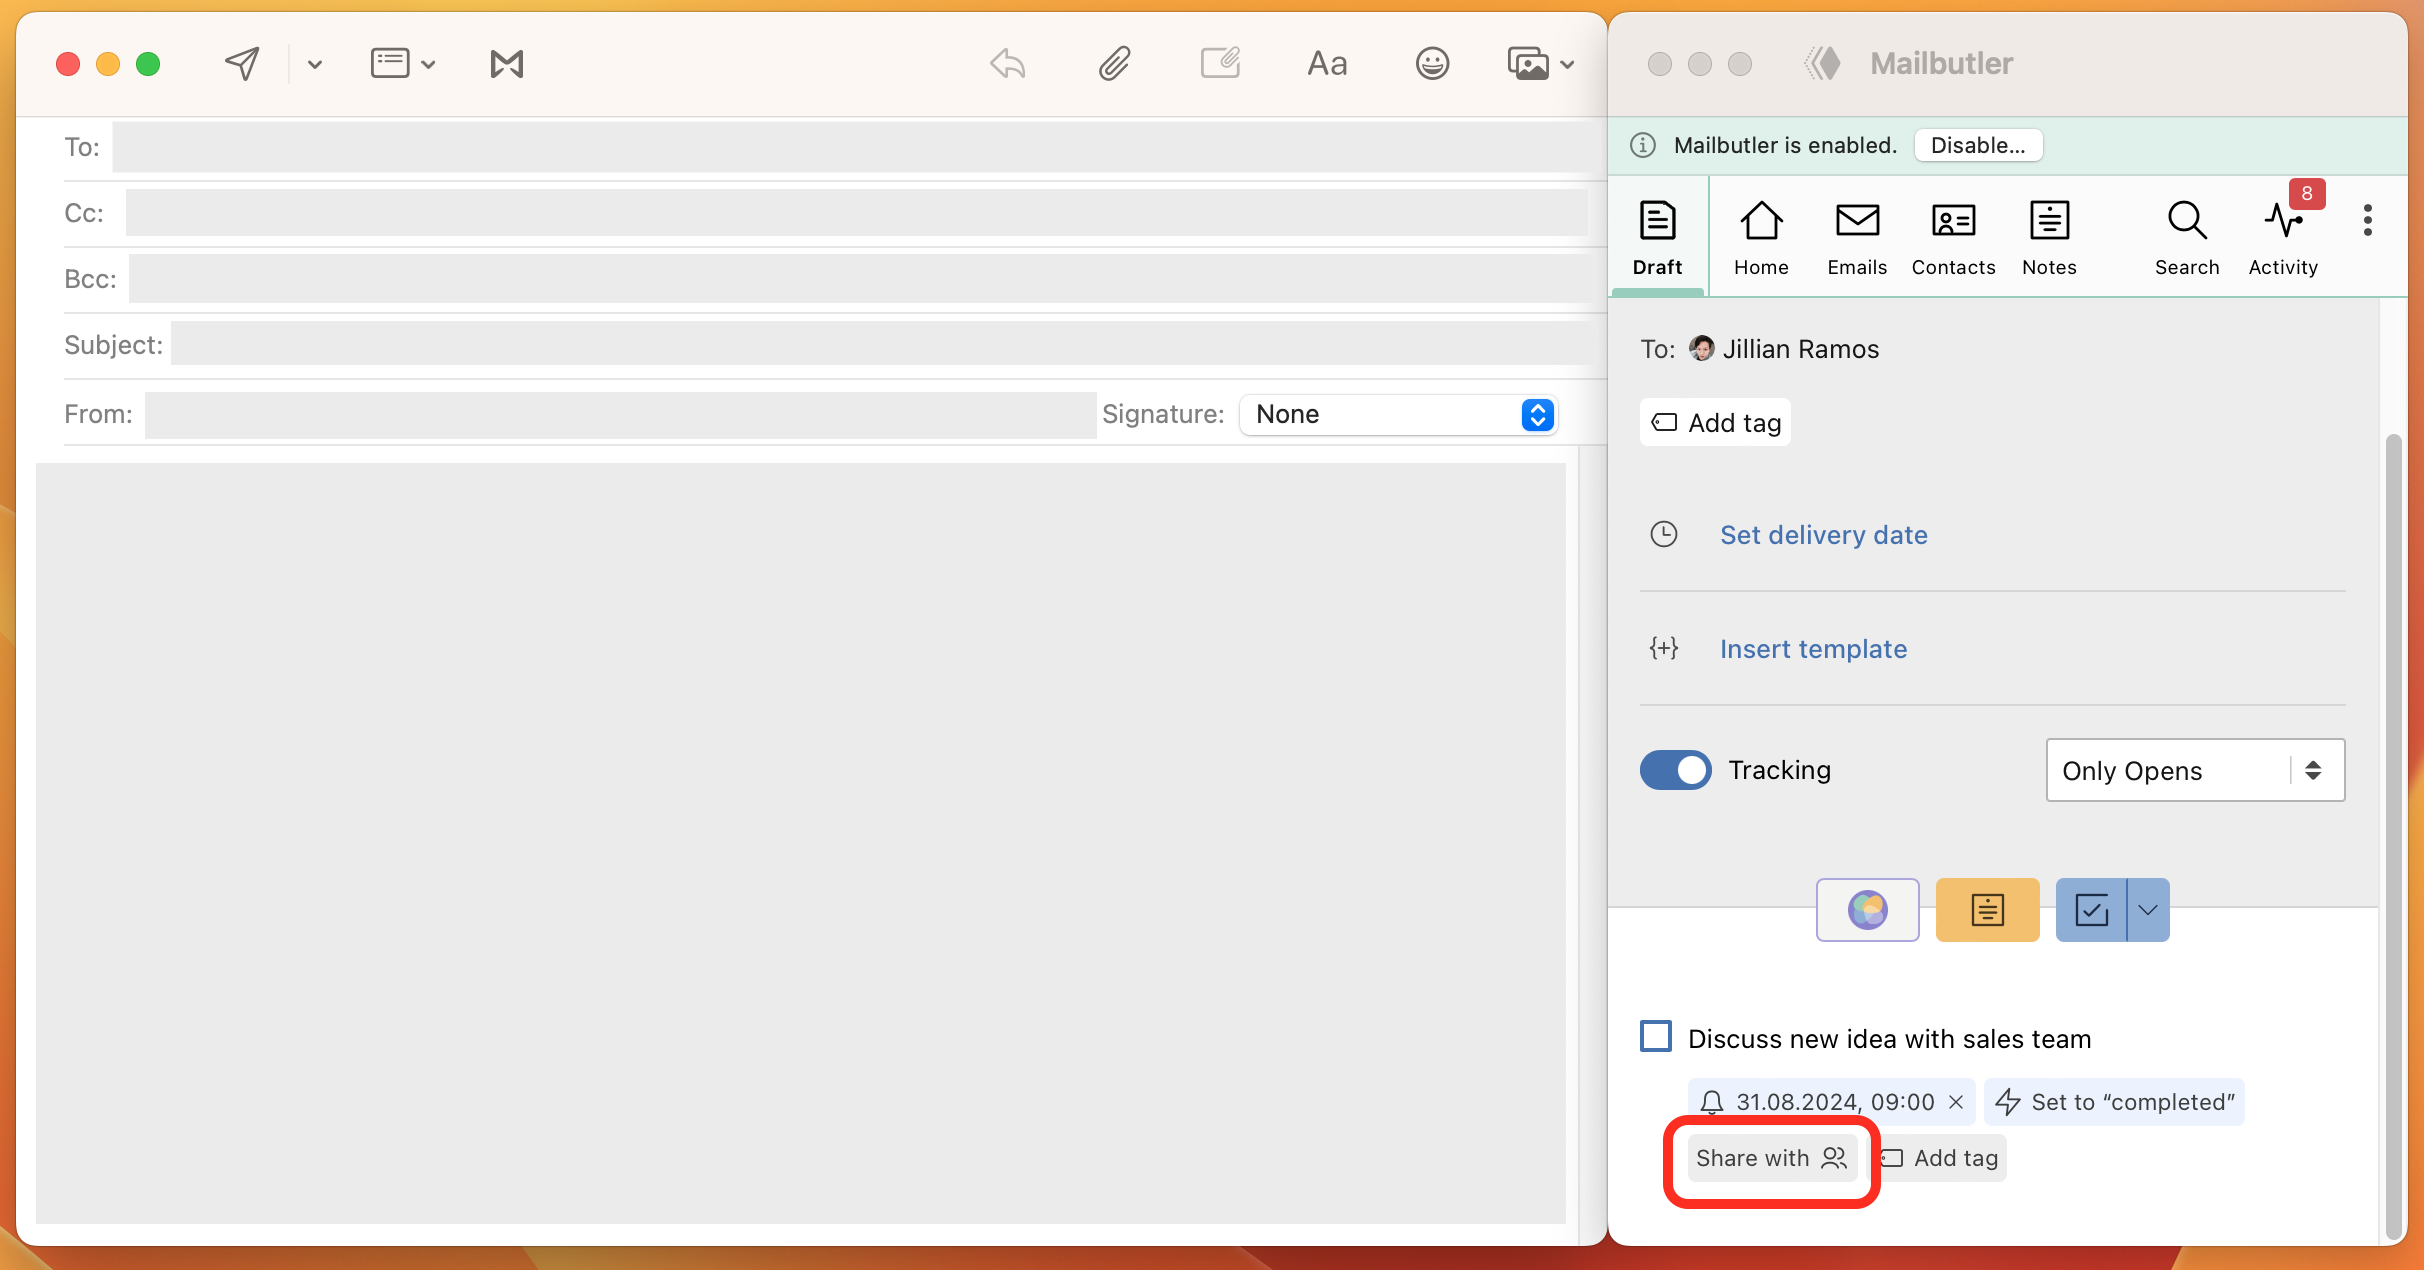
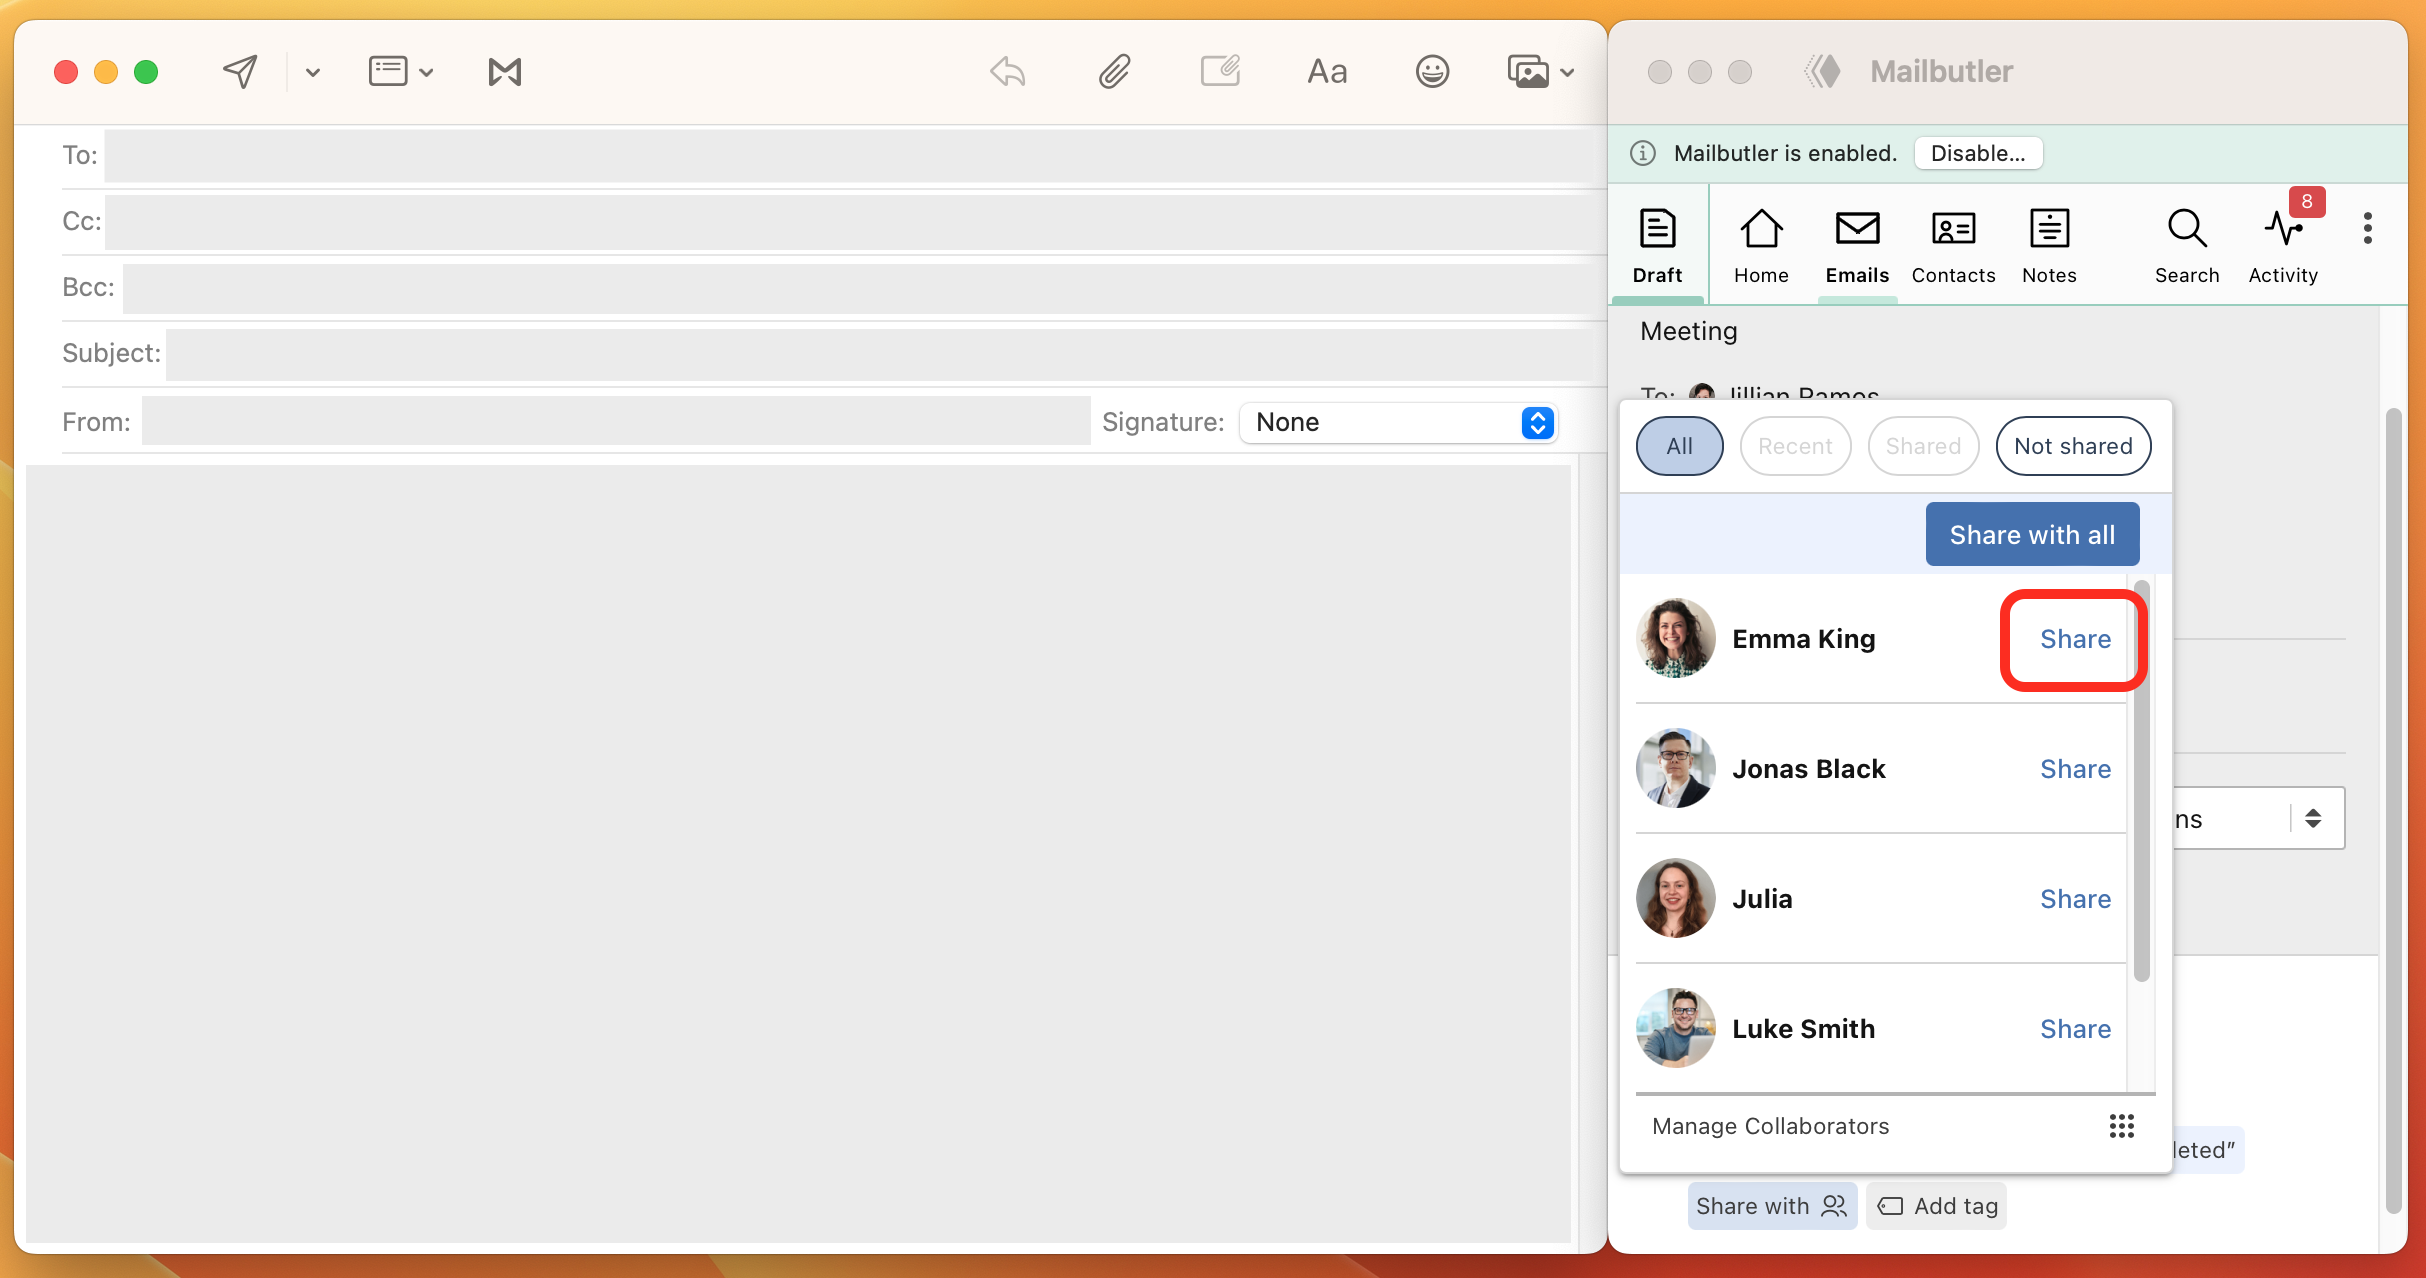
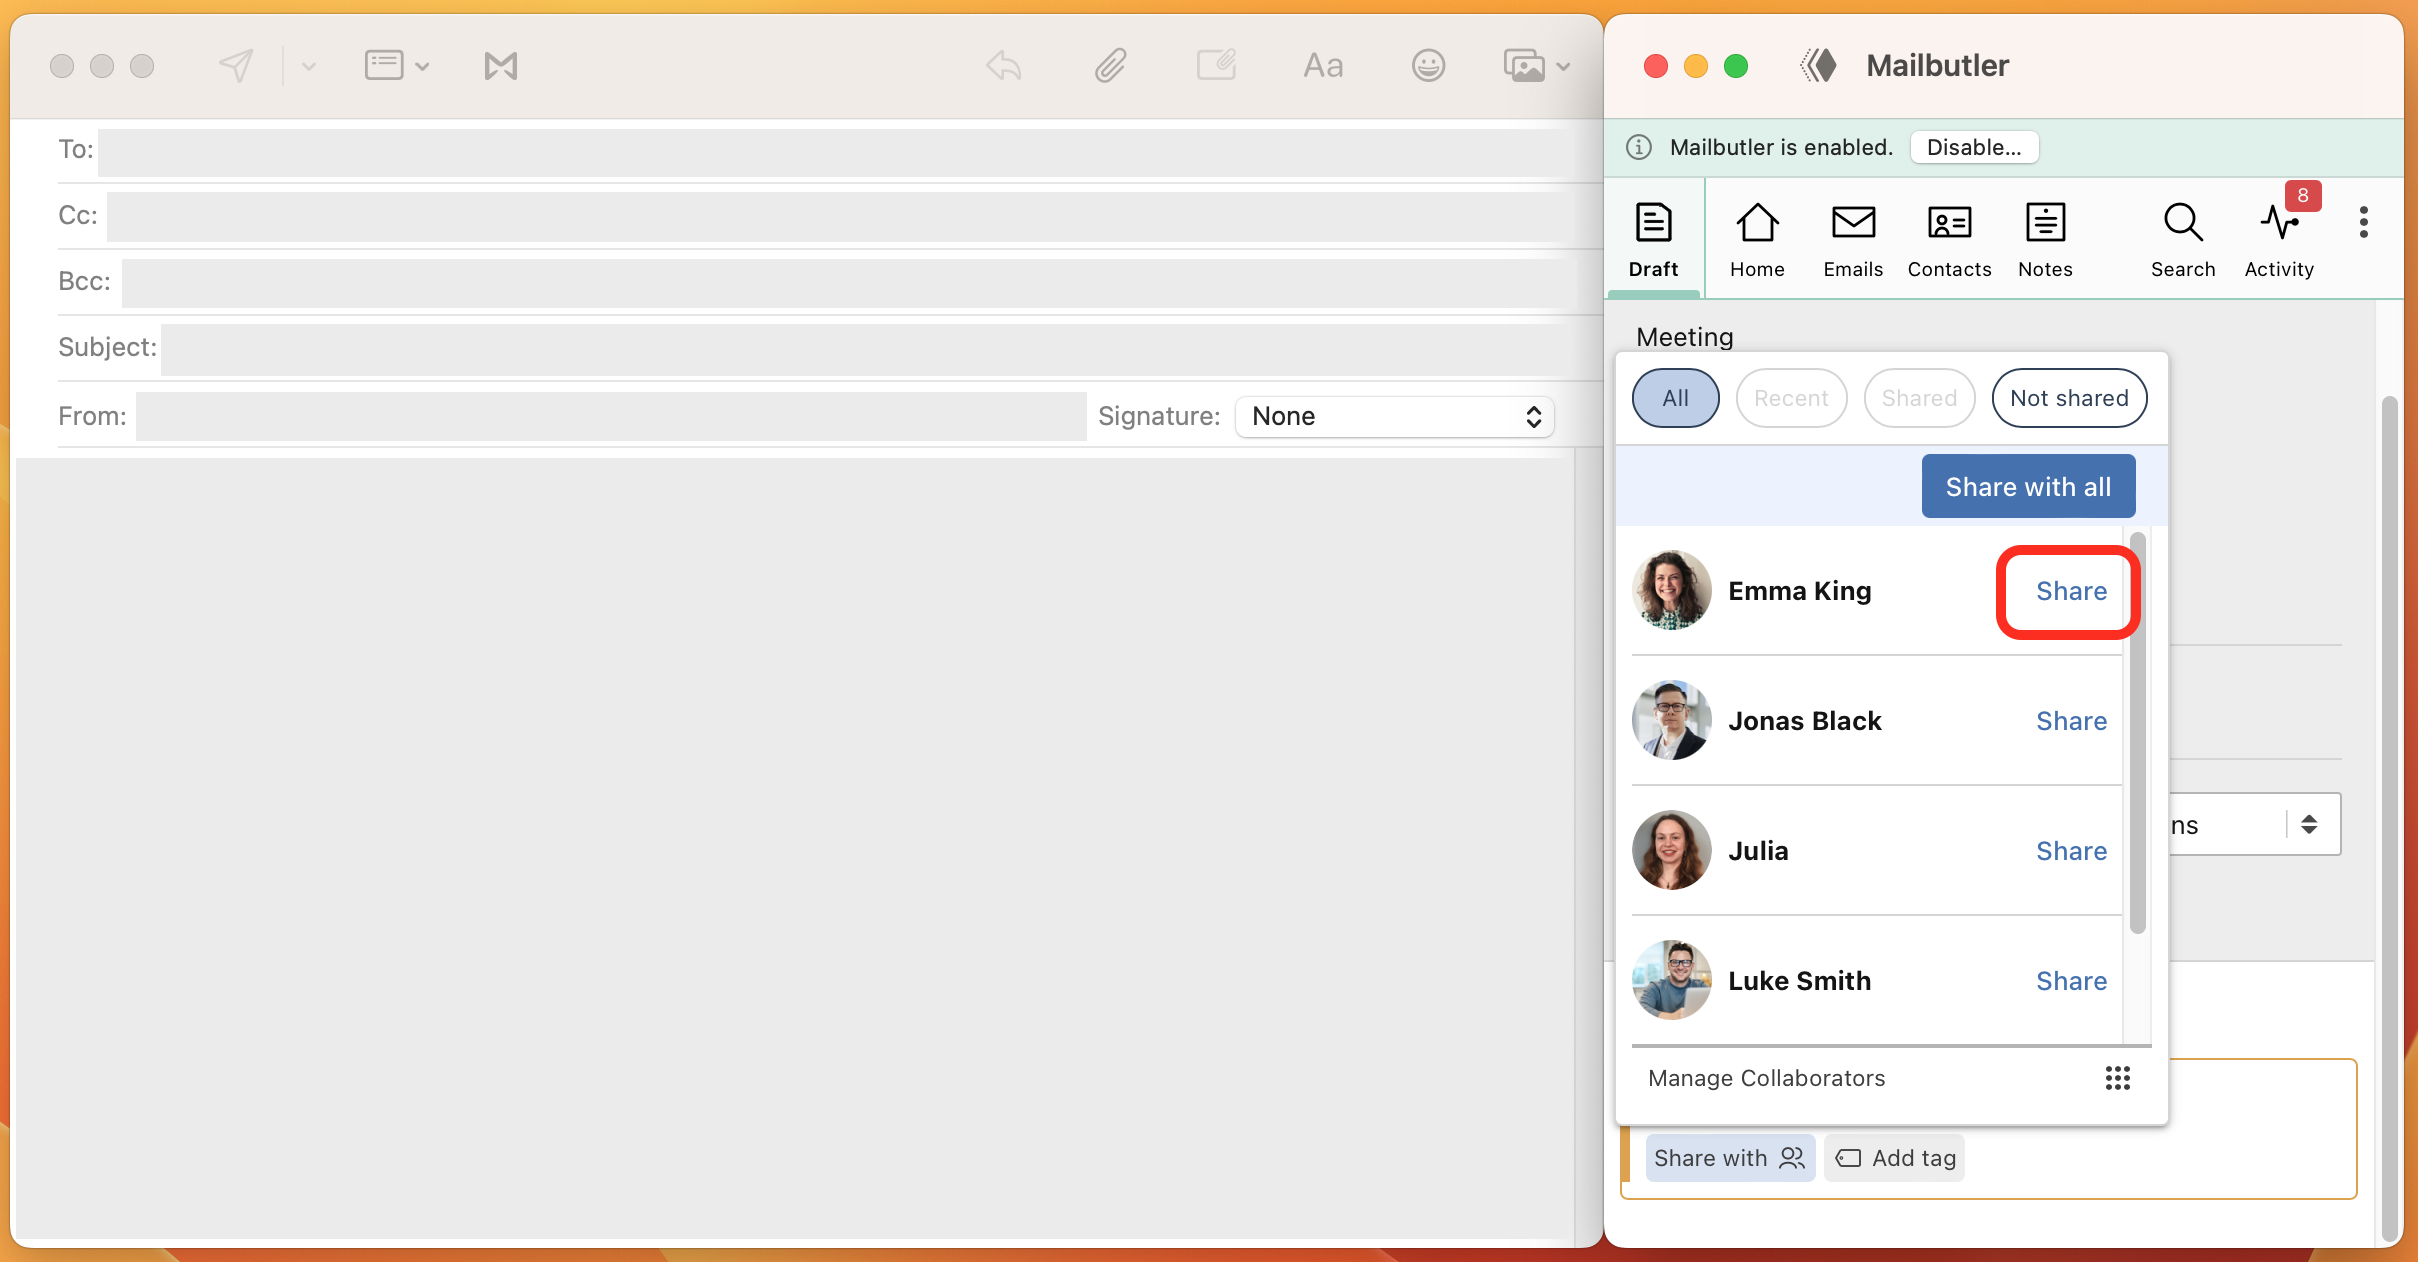
4. Select the Collaborator that you want to share the Task with.
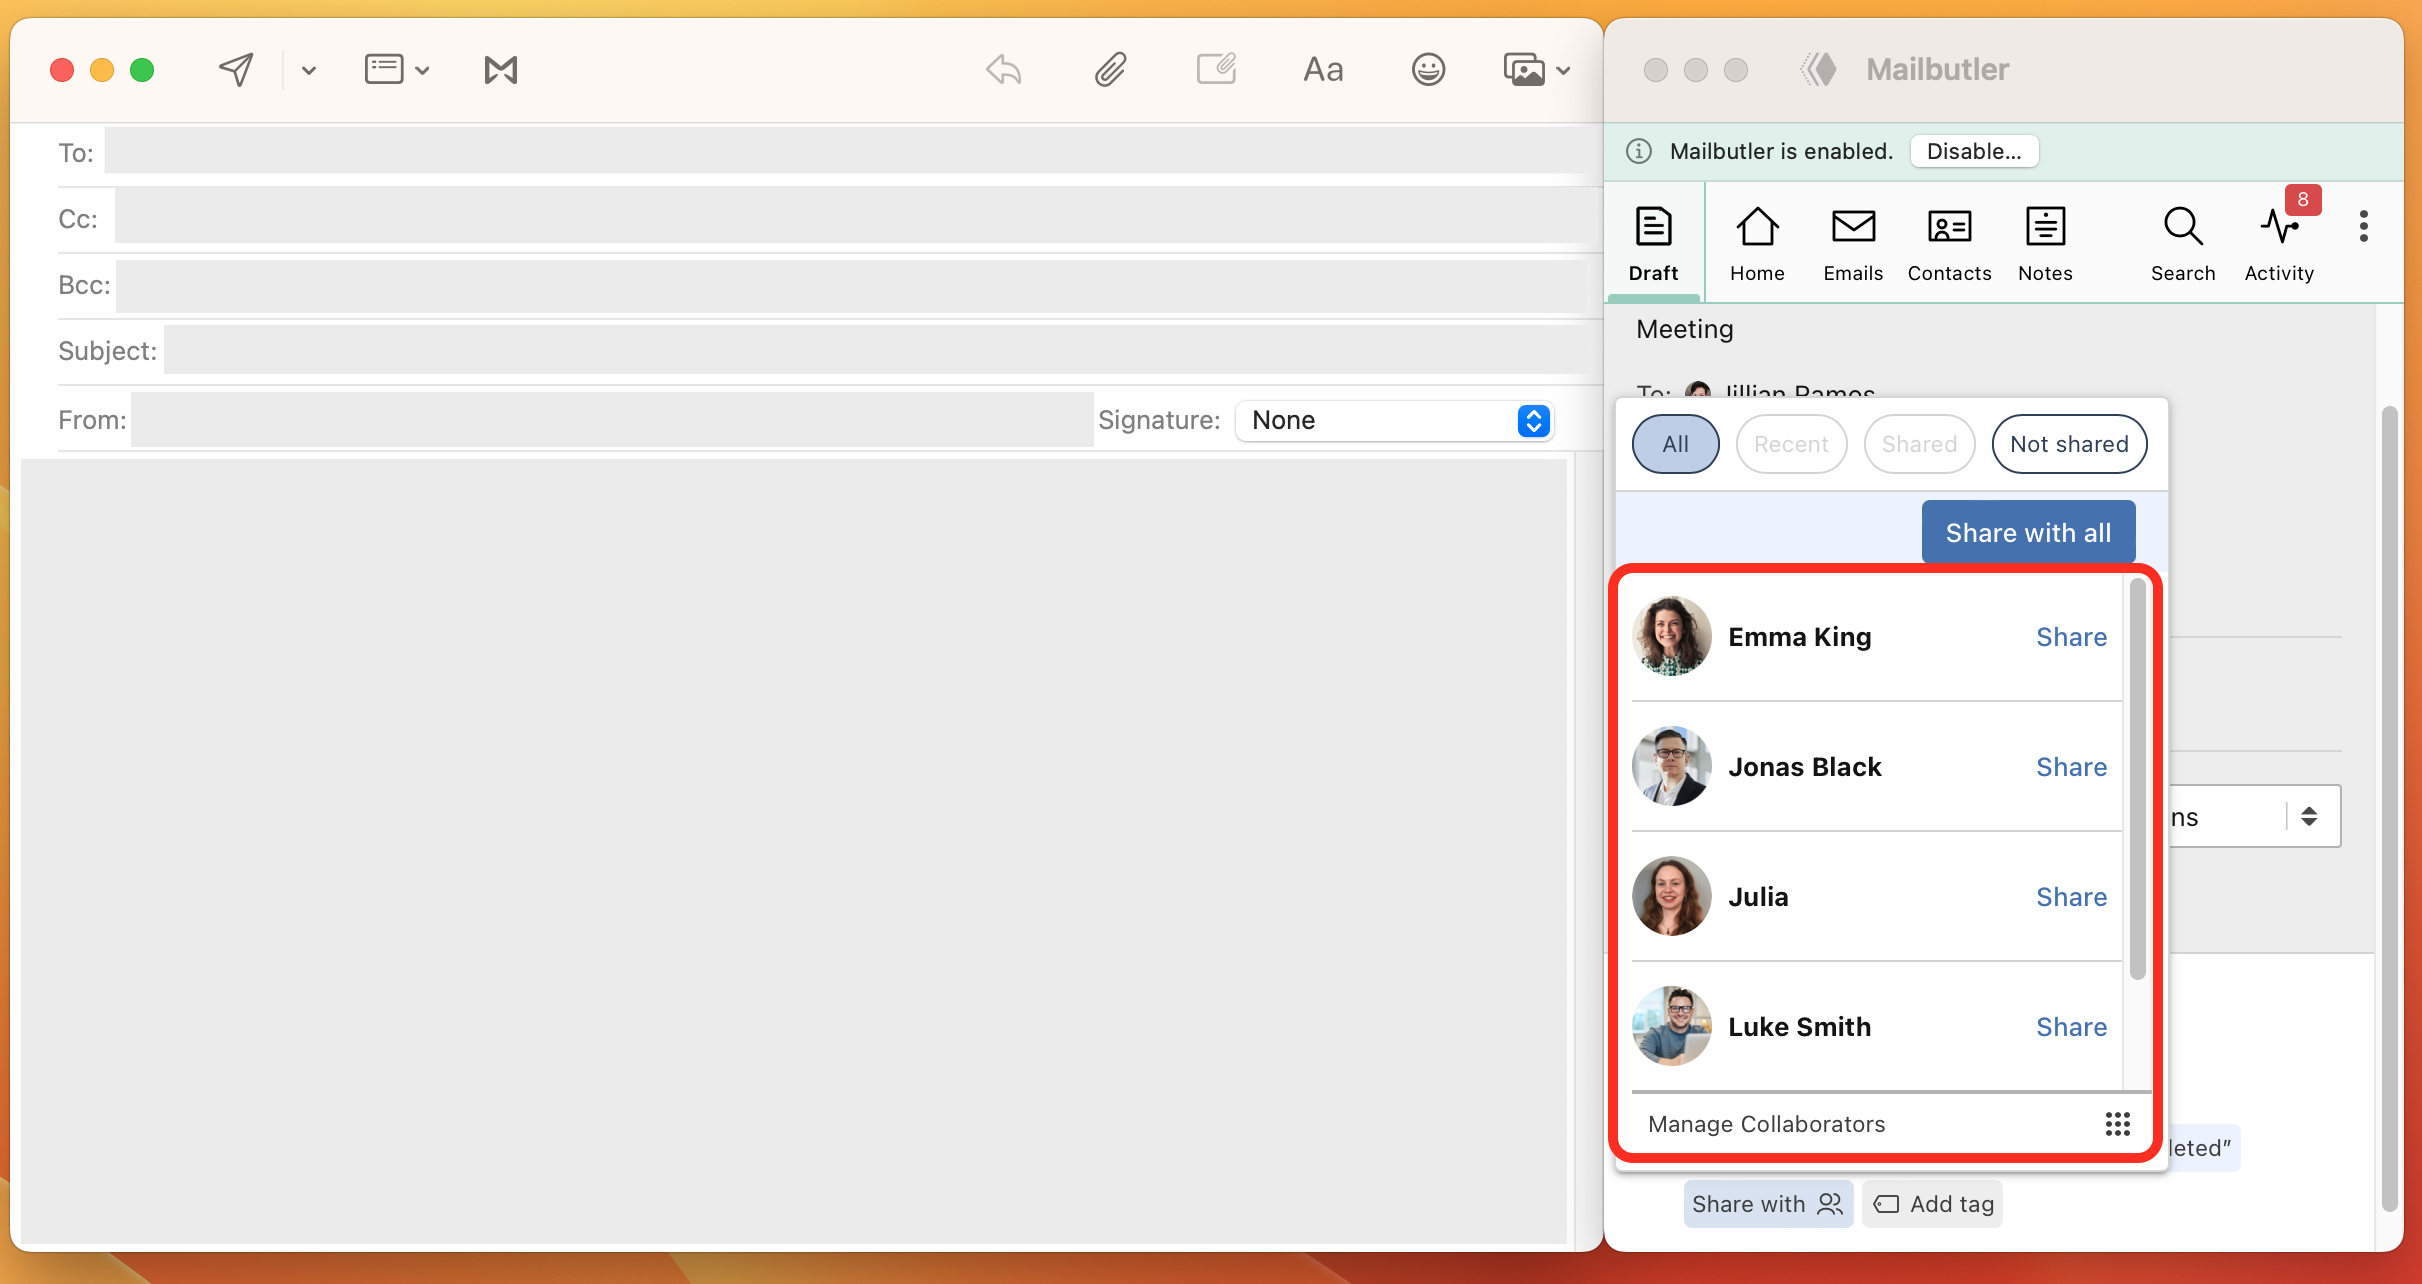
5. Click Share.
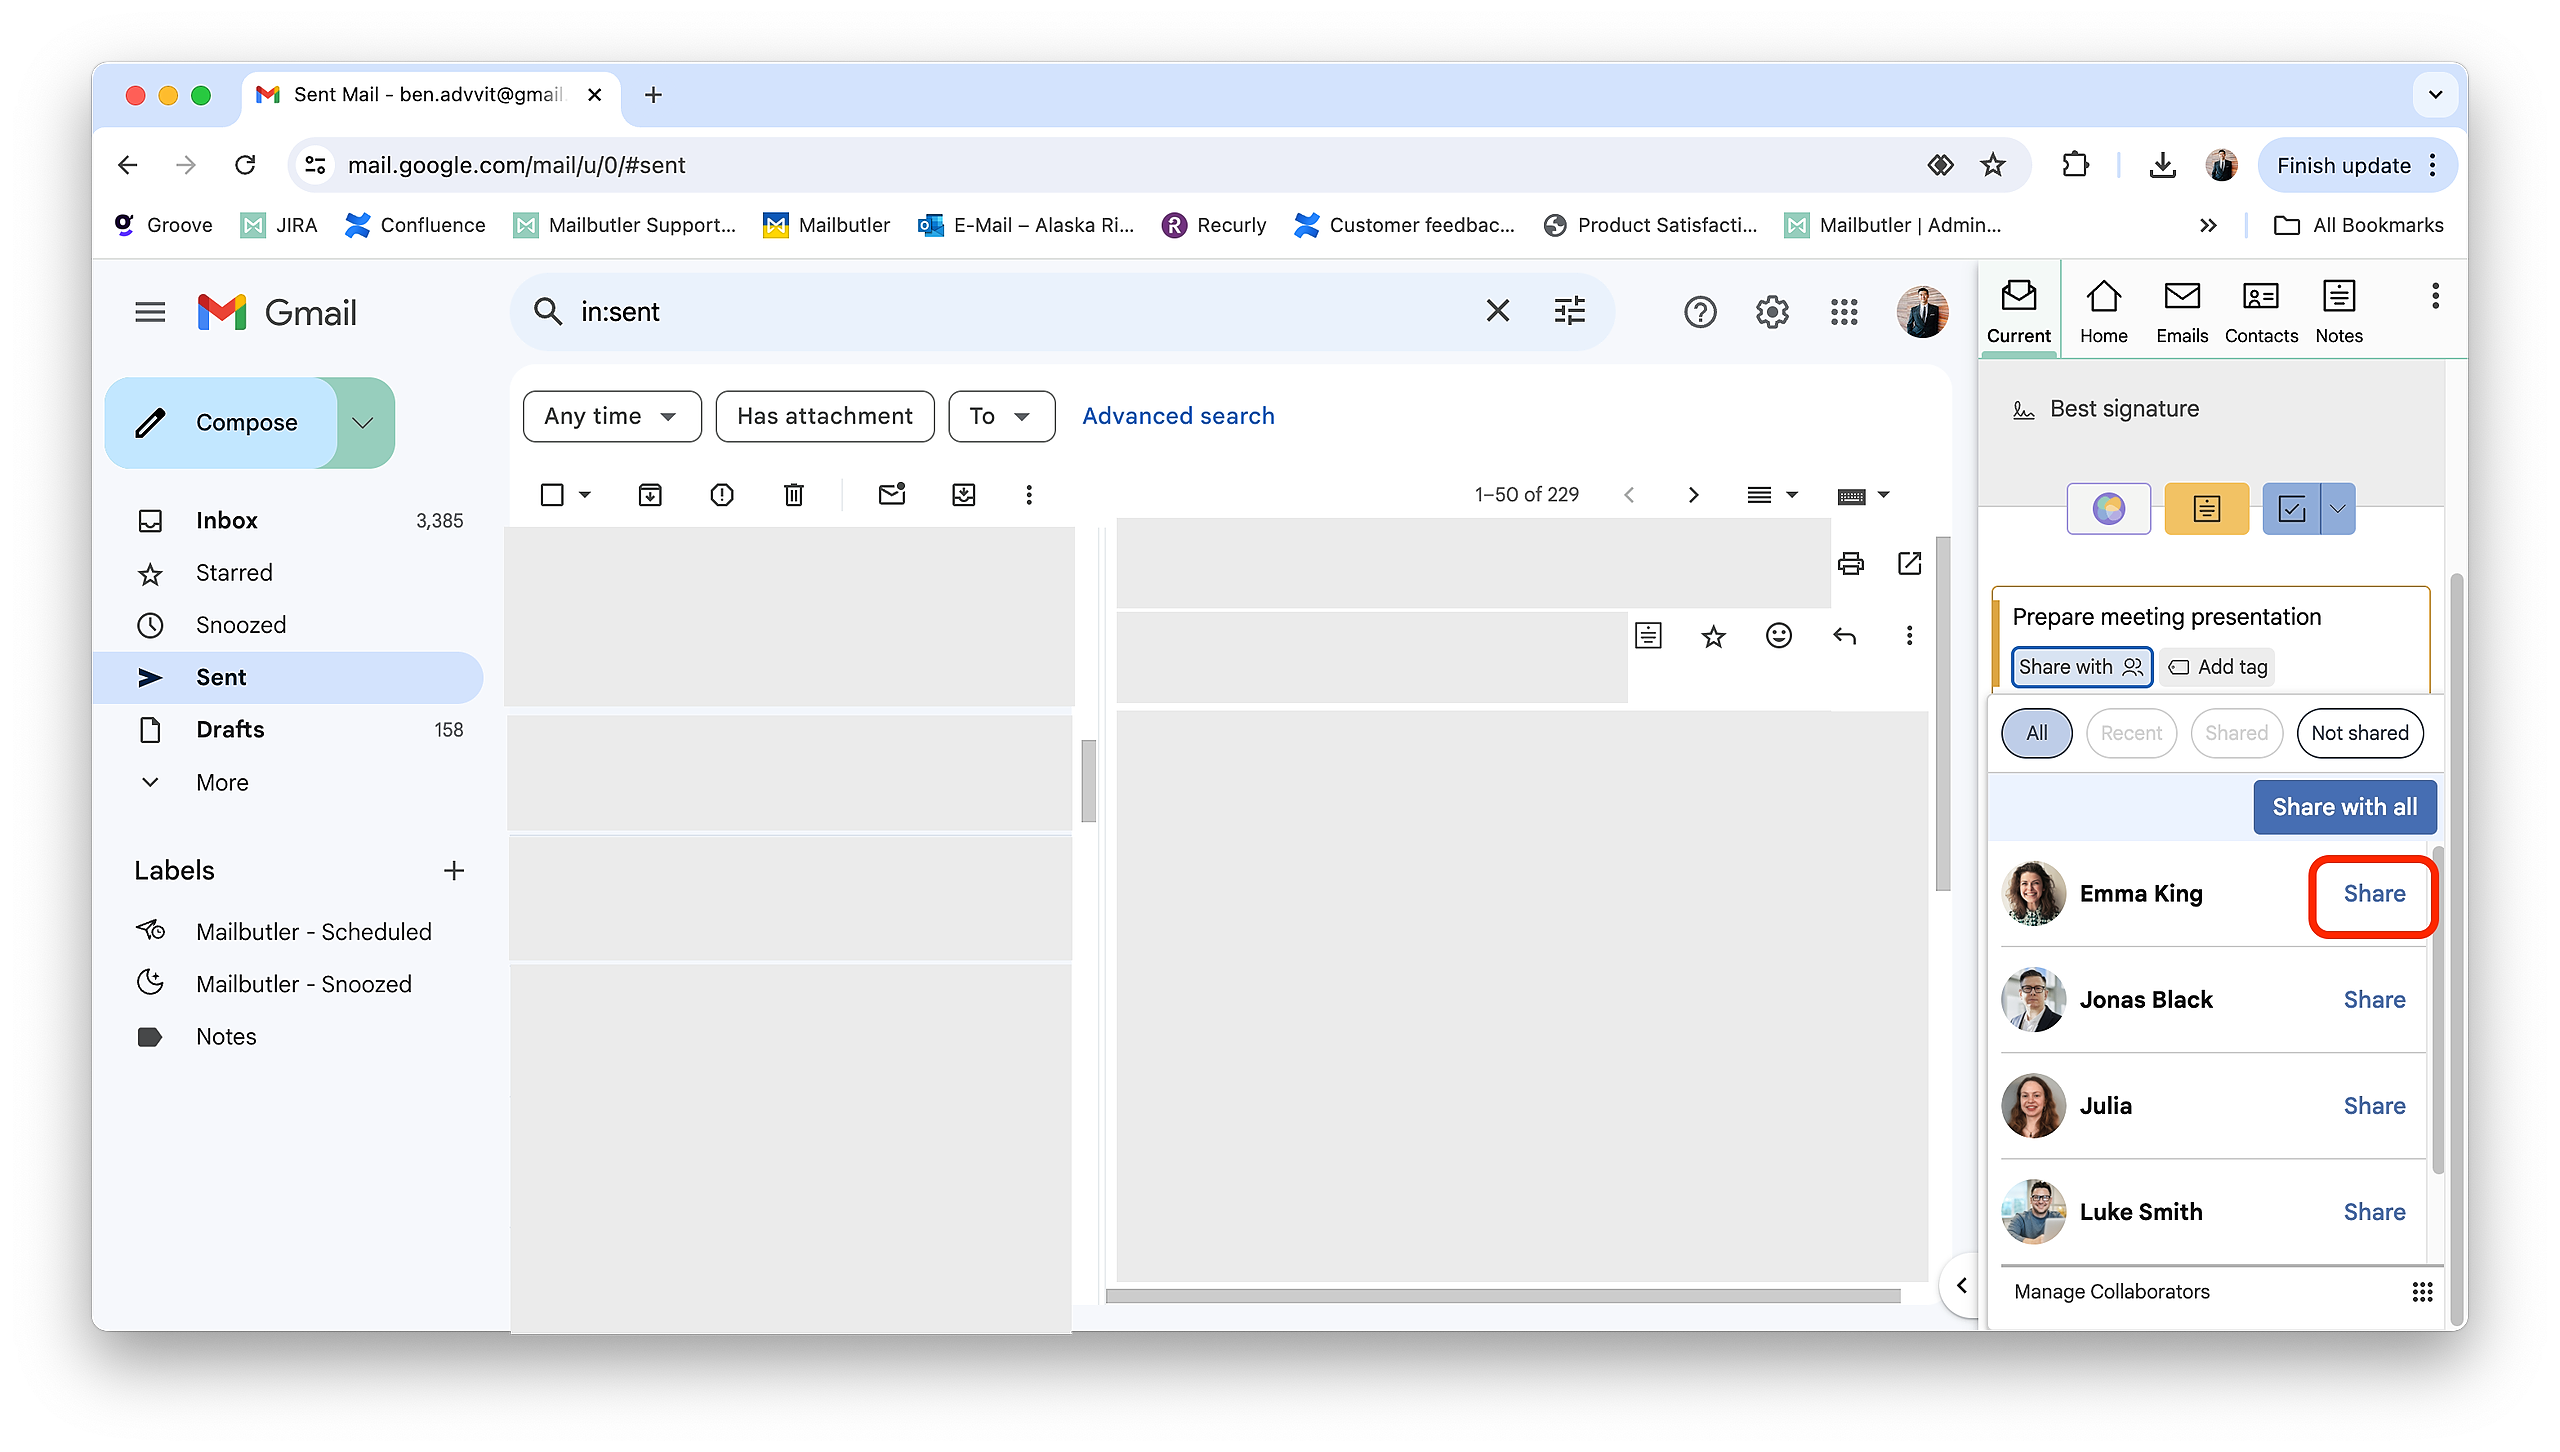
Gmail
1. Go to an email that already has a Task attached or add a new Task.
2. Click on the Mailbutler icon to open the Mailbutler Sidebar.

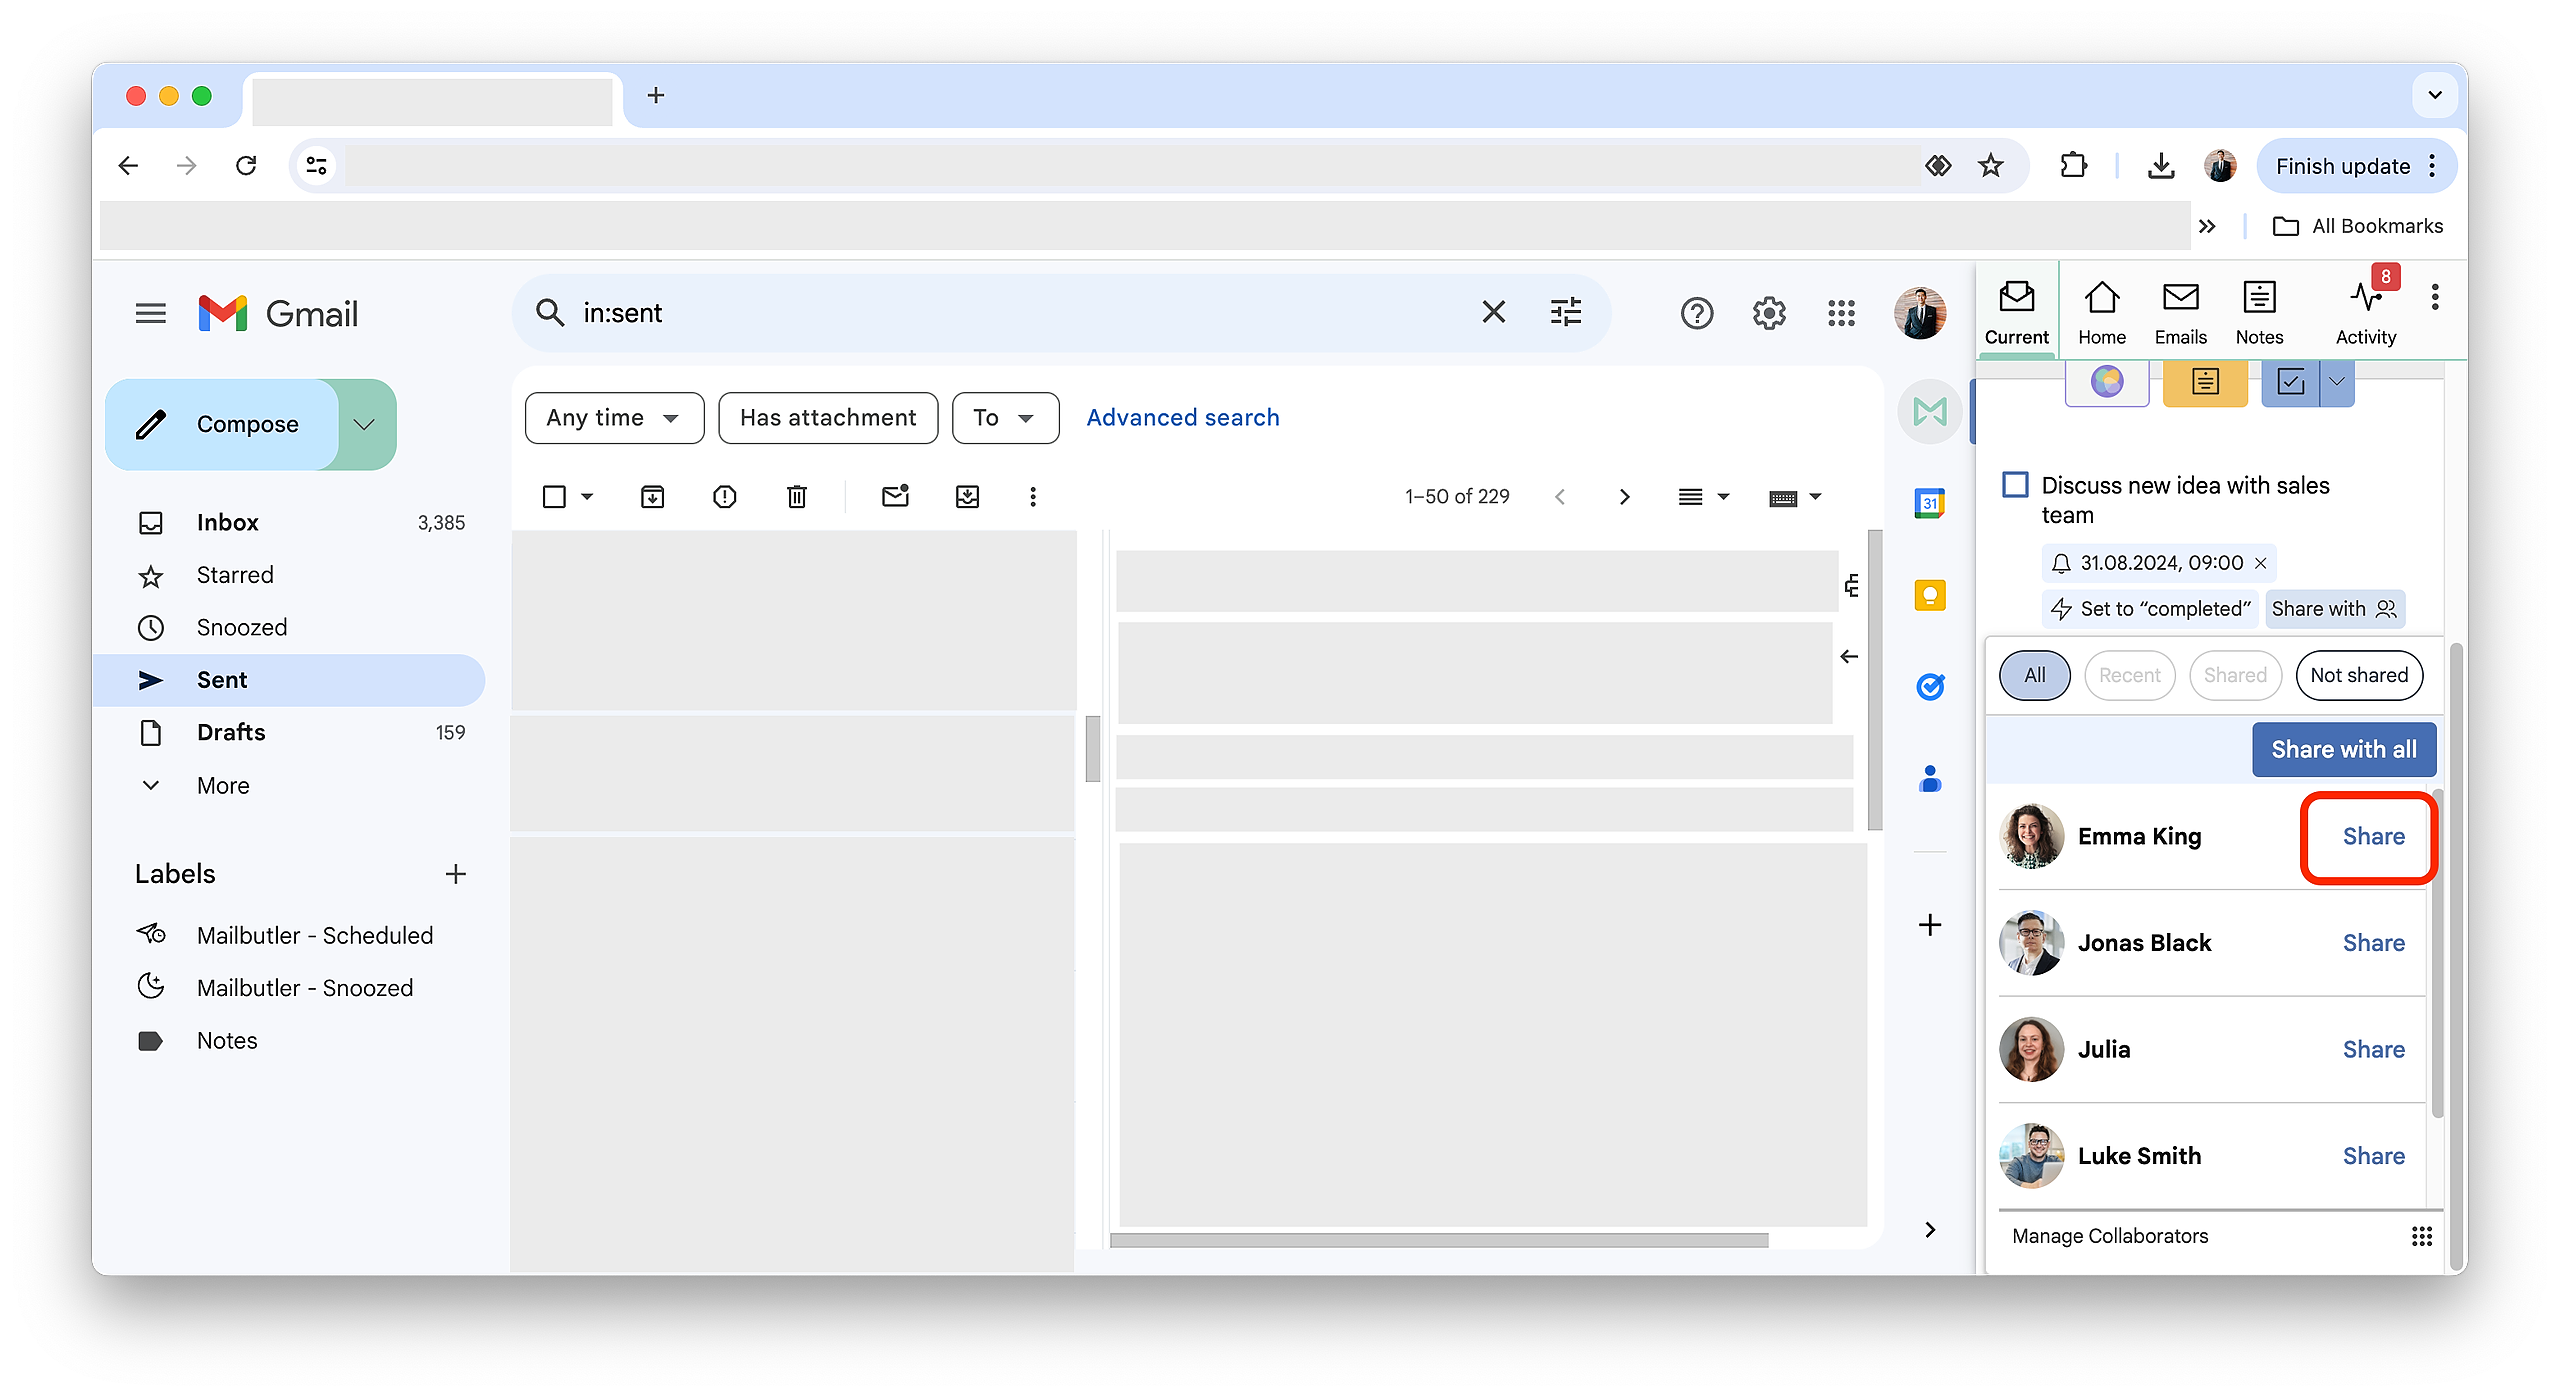
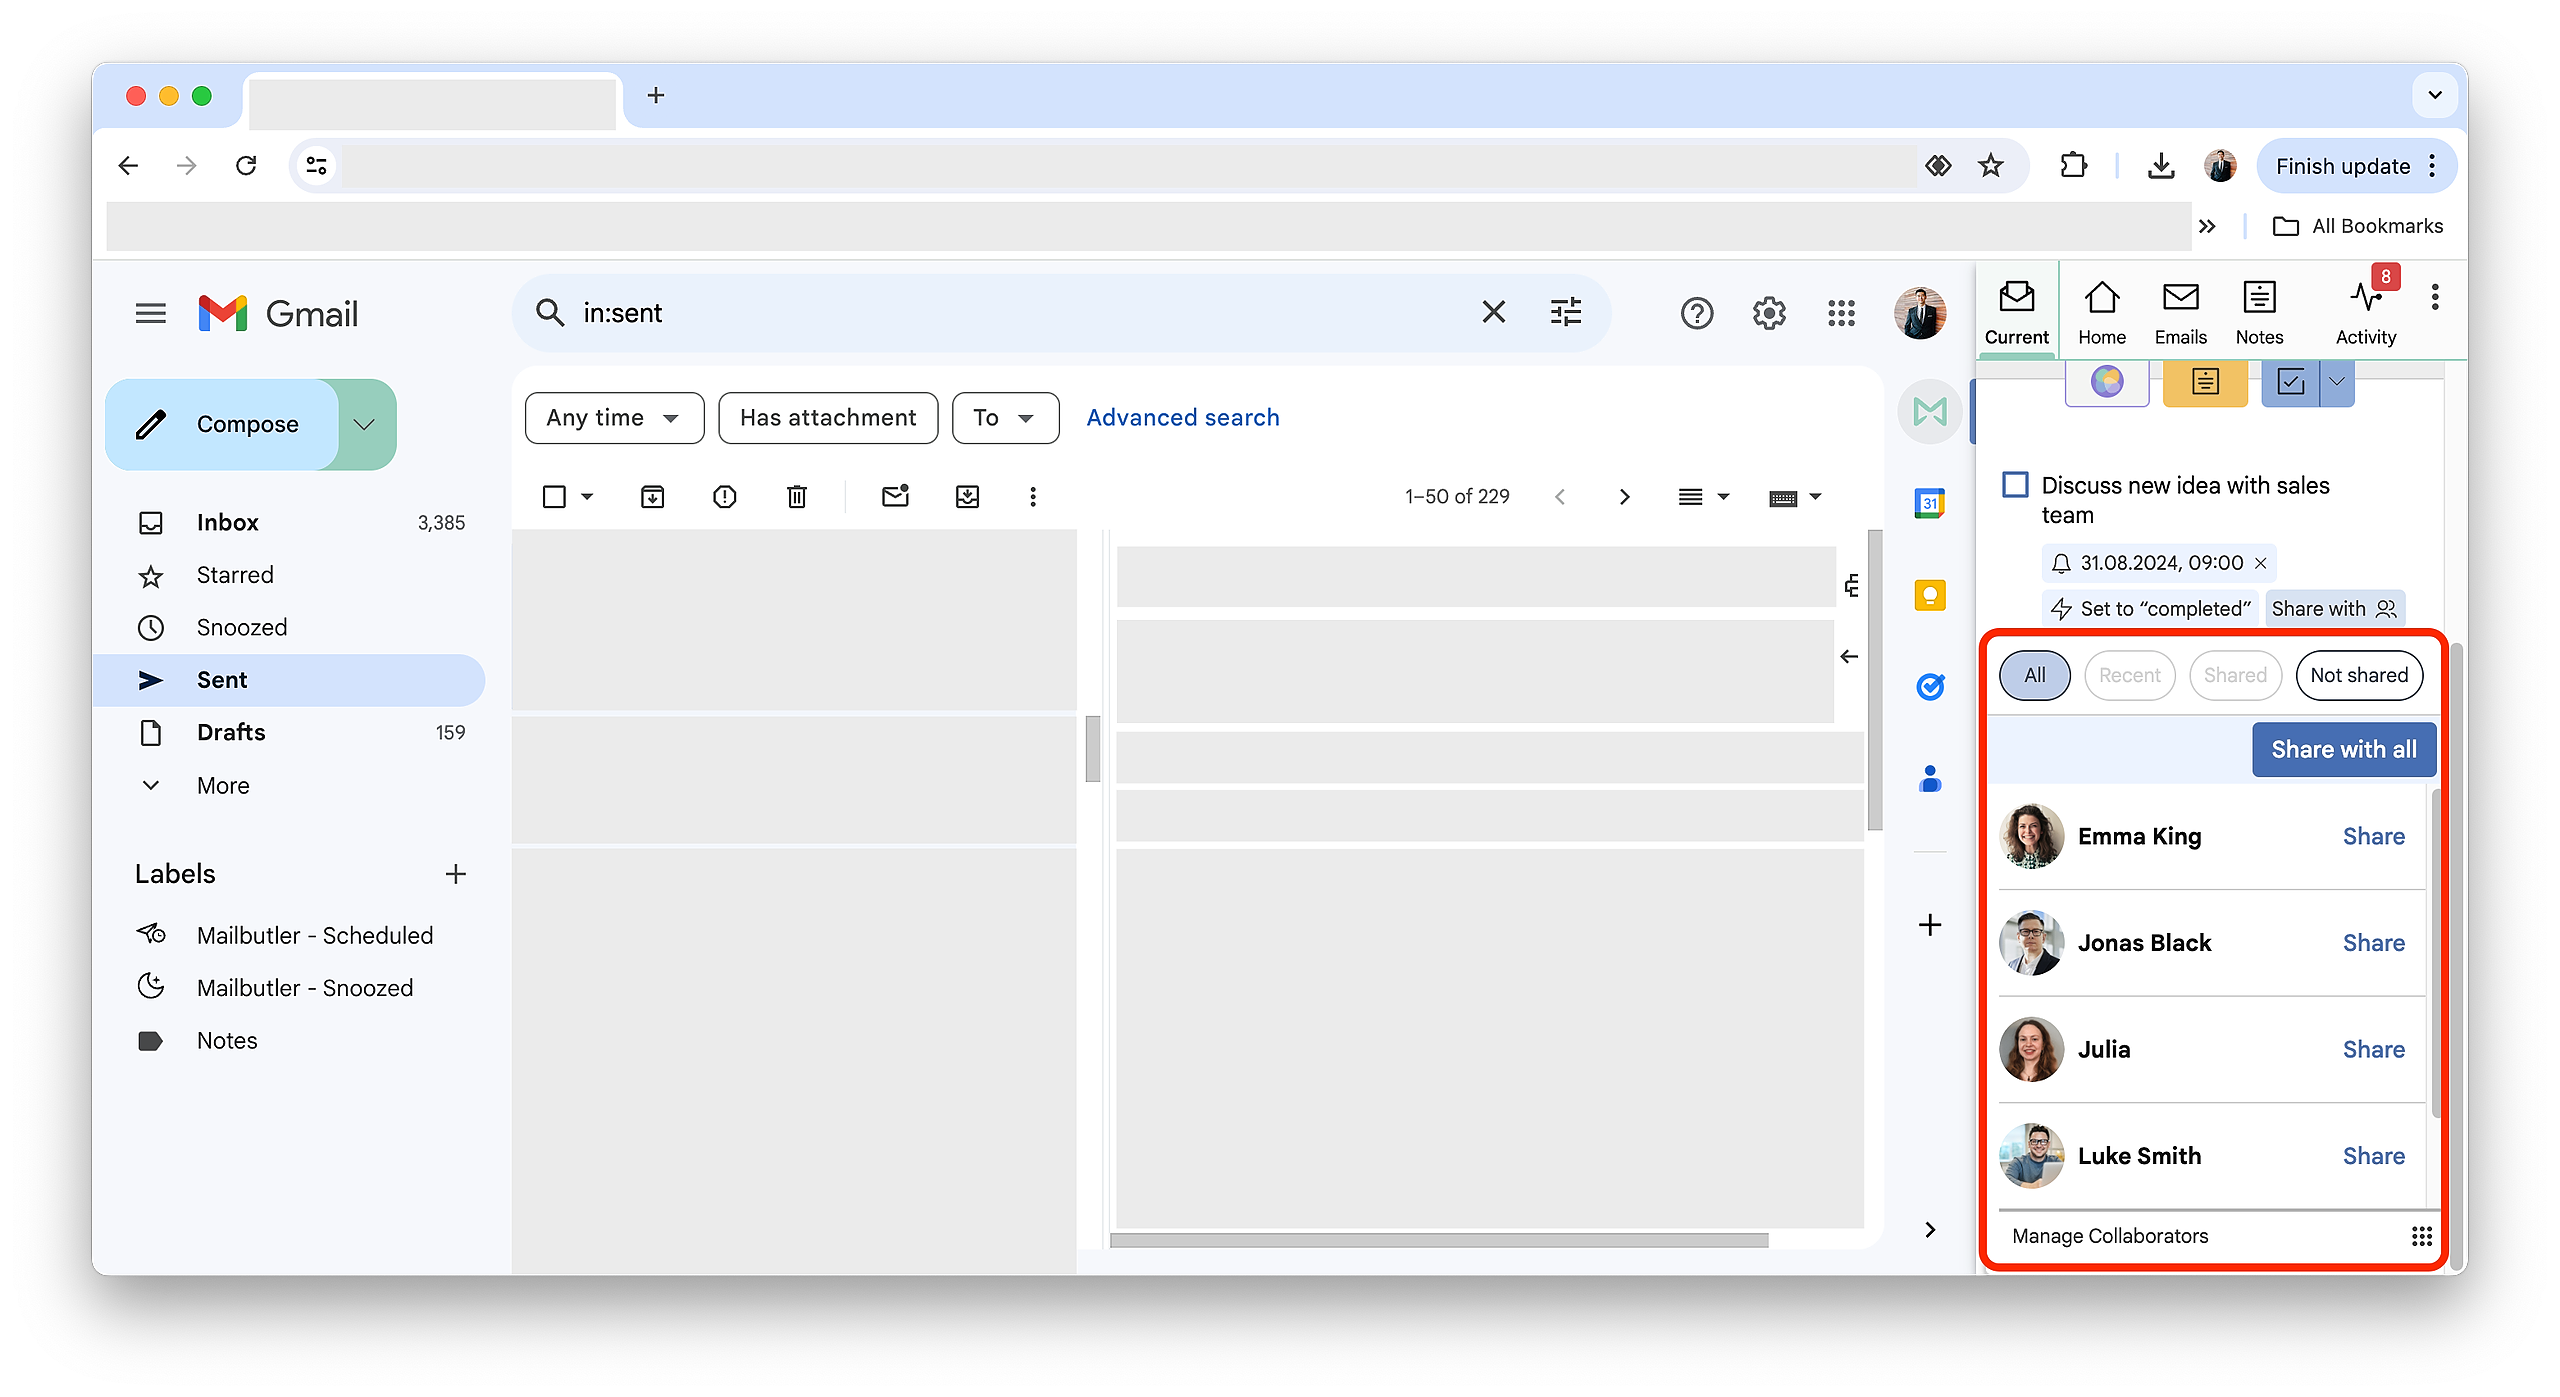
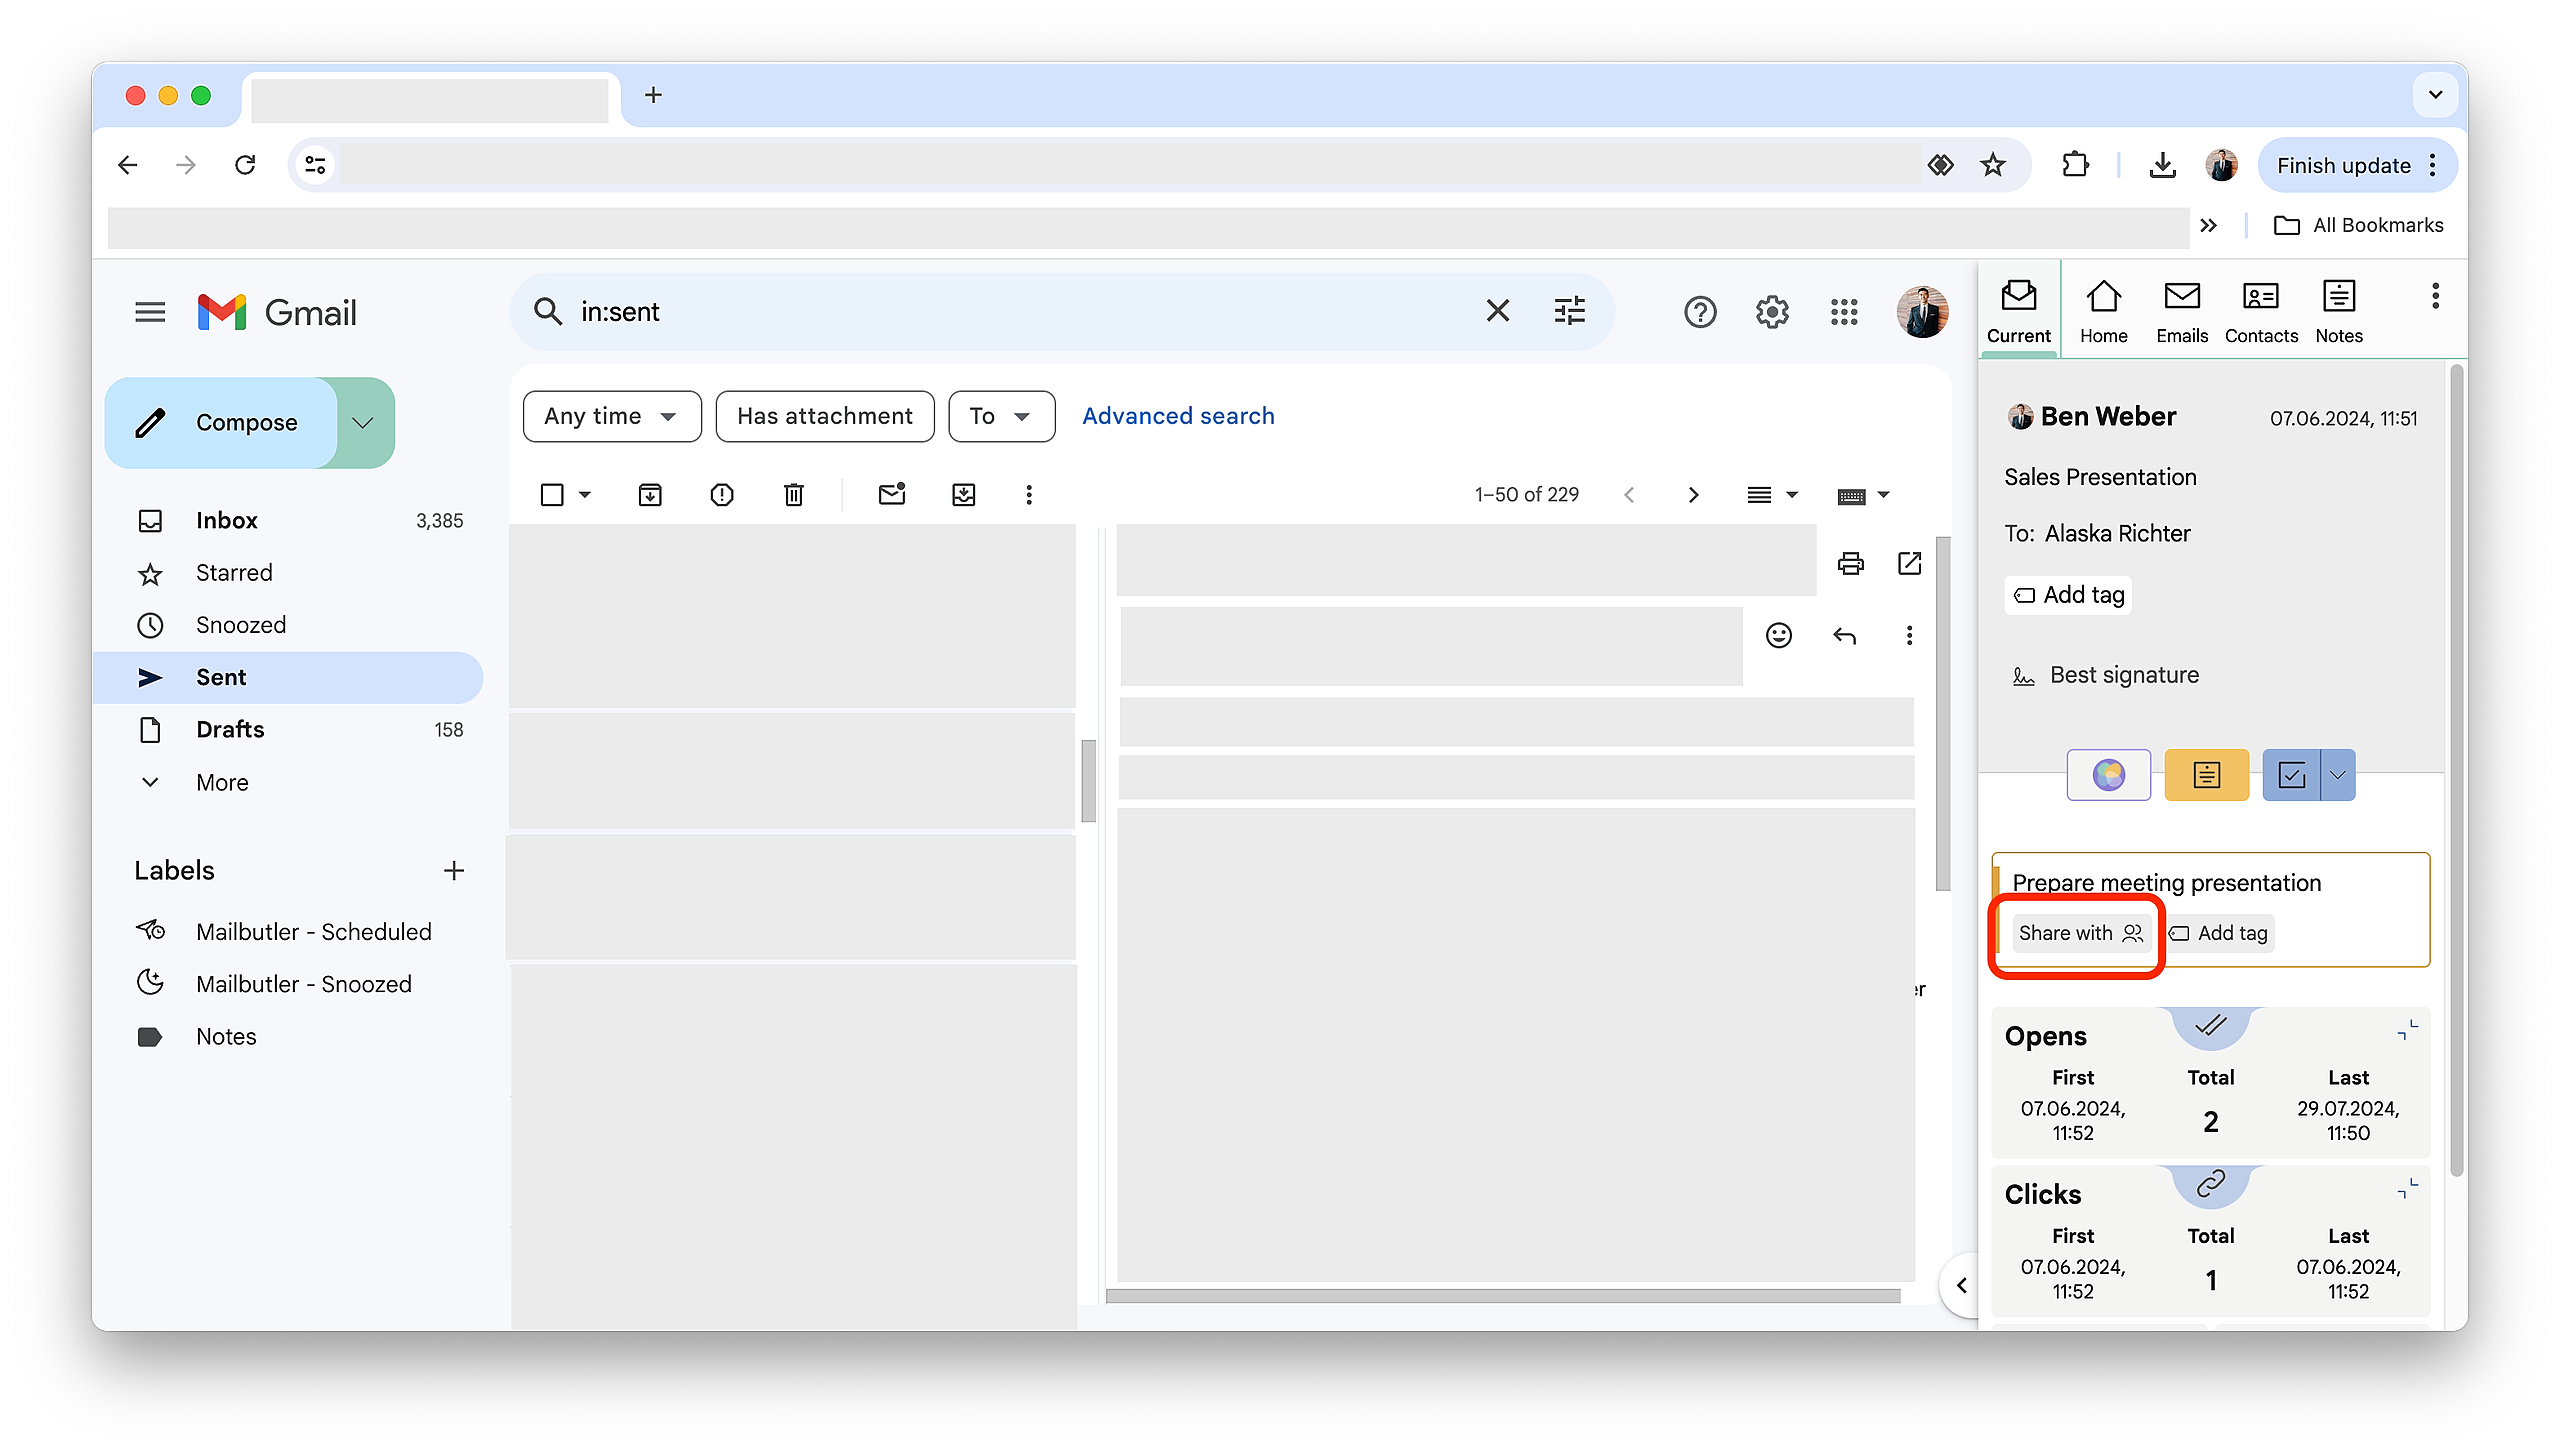
3. Click anywhere inside your Task to reveal the sharing button. Then click Share with.
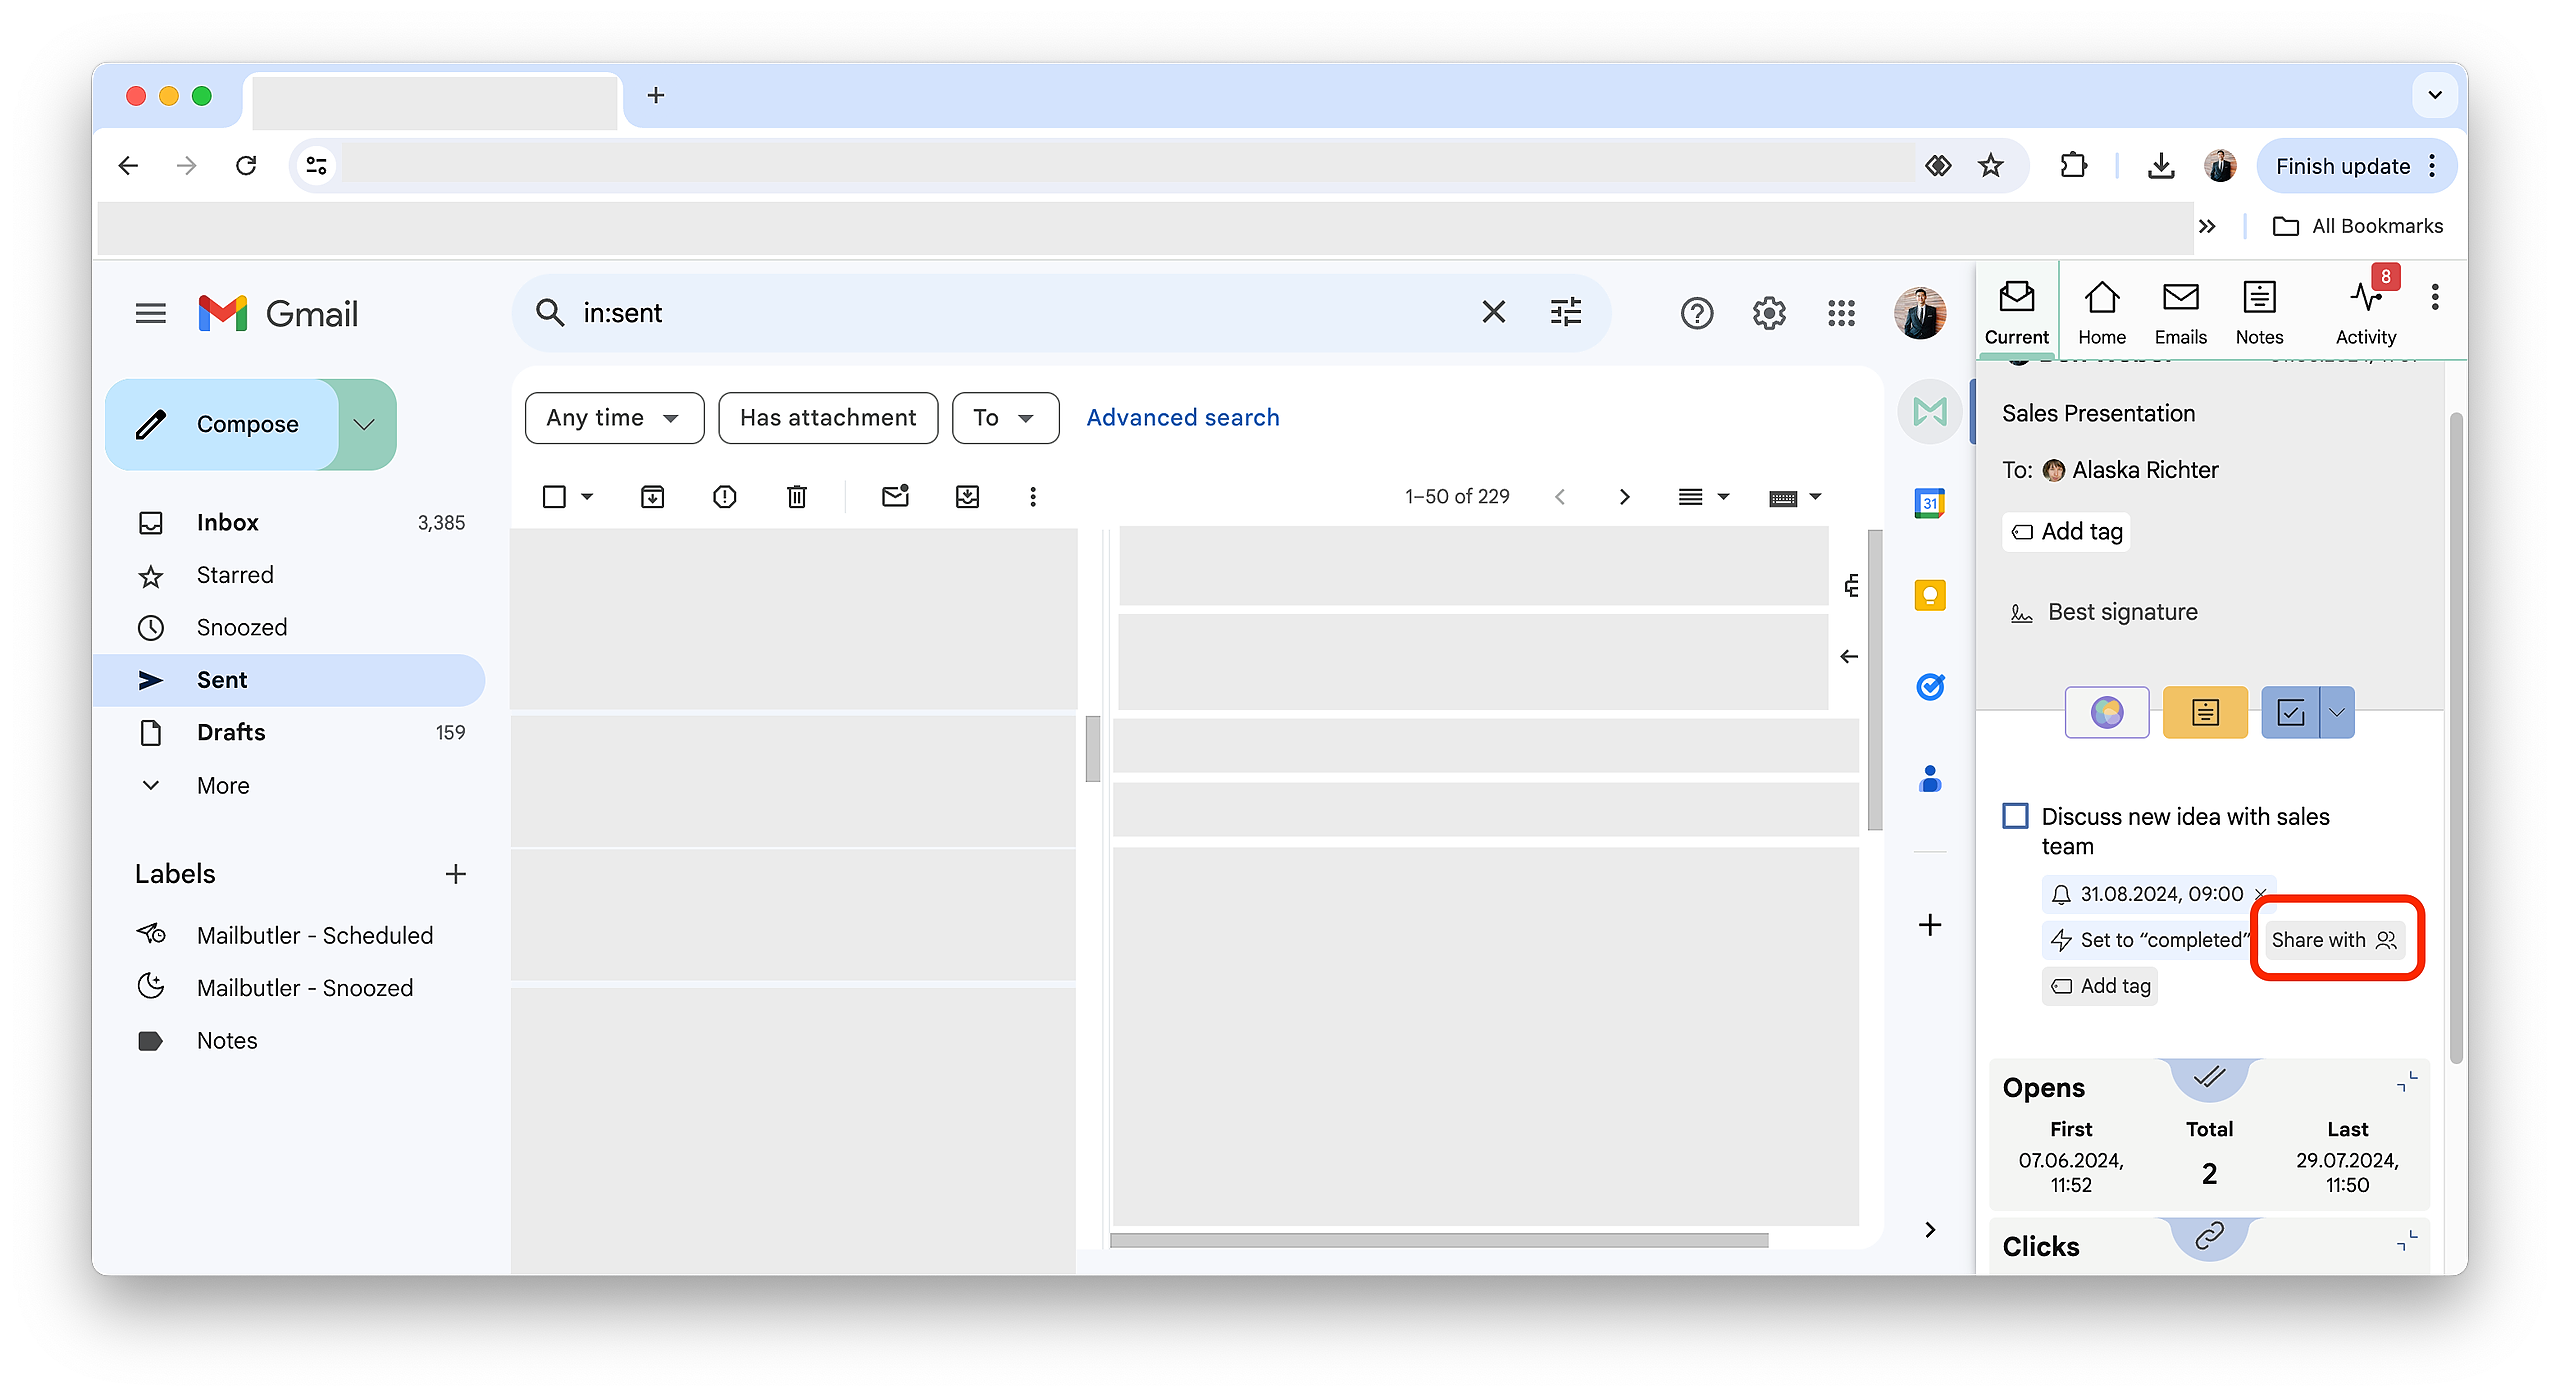
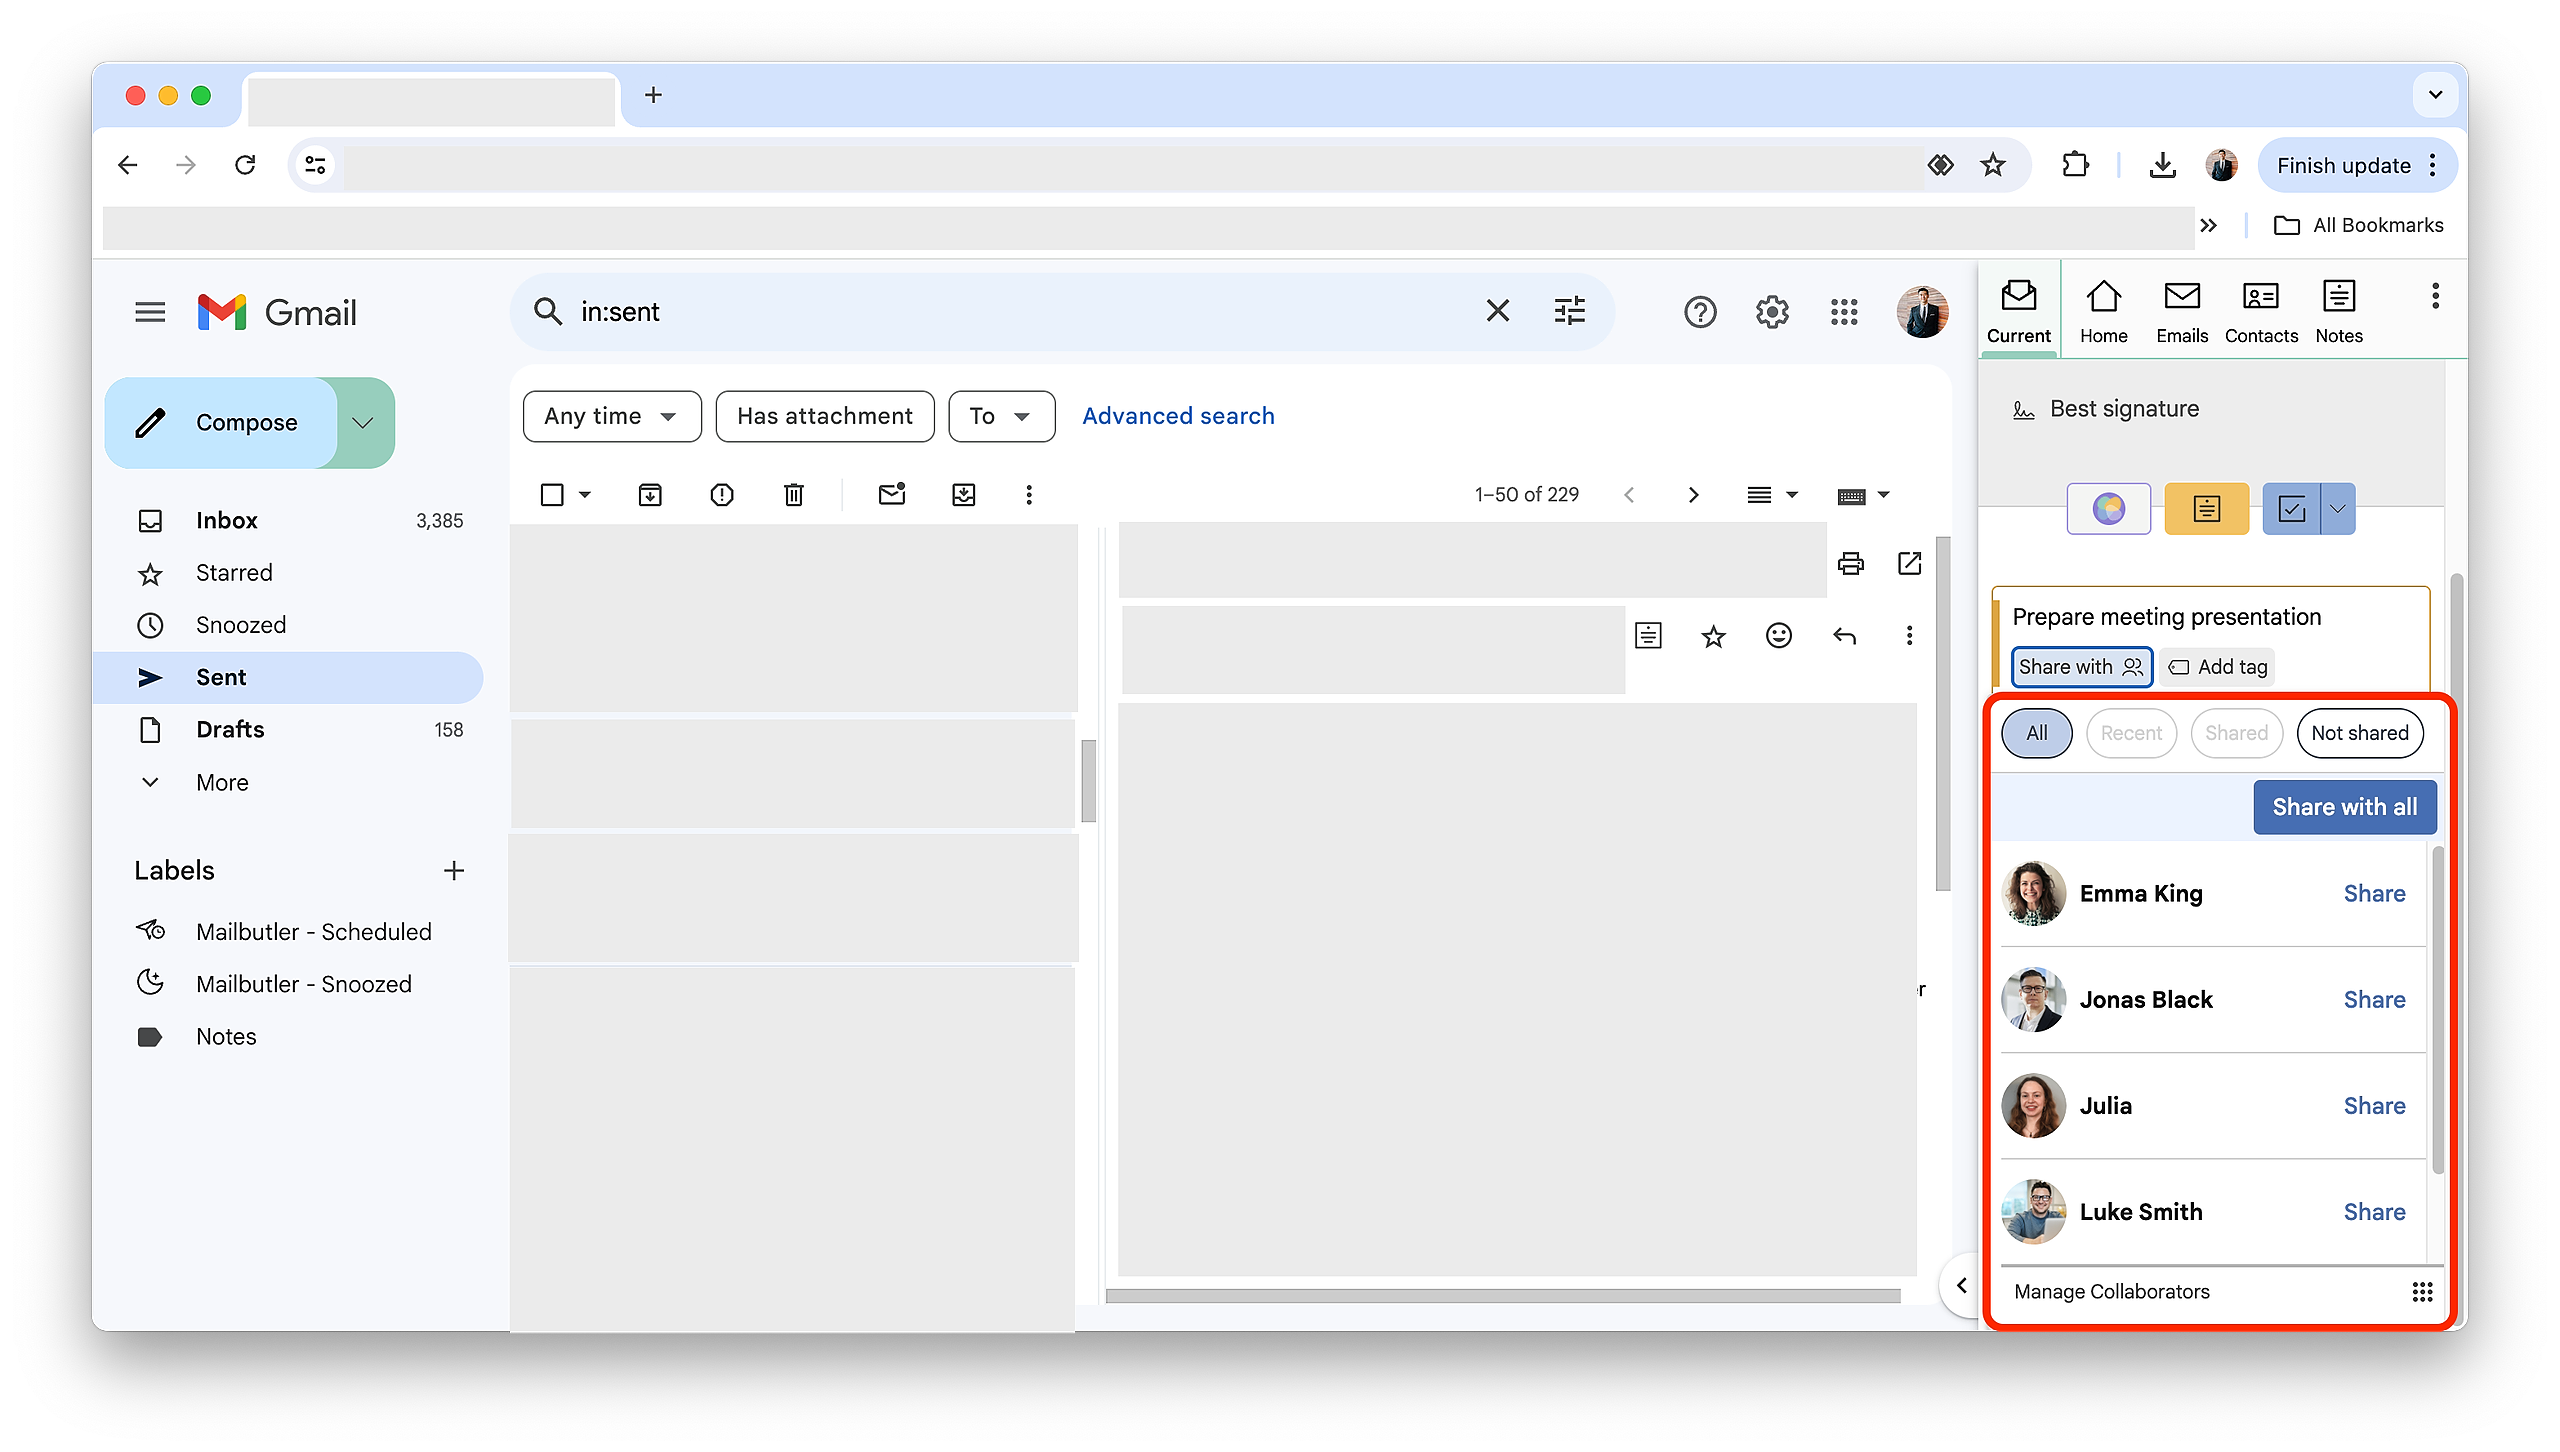
4. Select the Collaborator that you want to share the Task with.
5. Click Share.
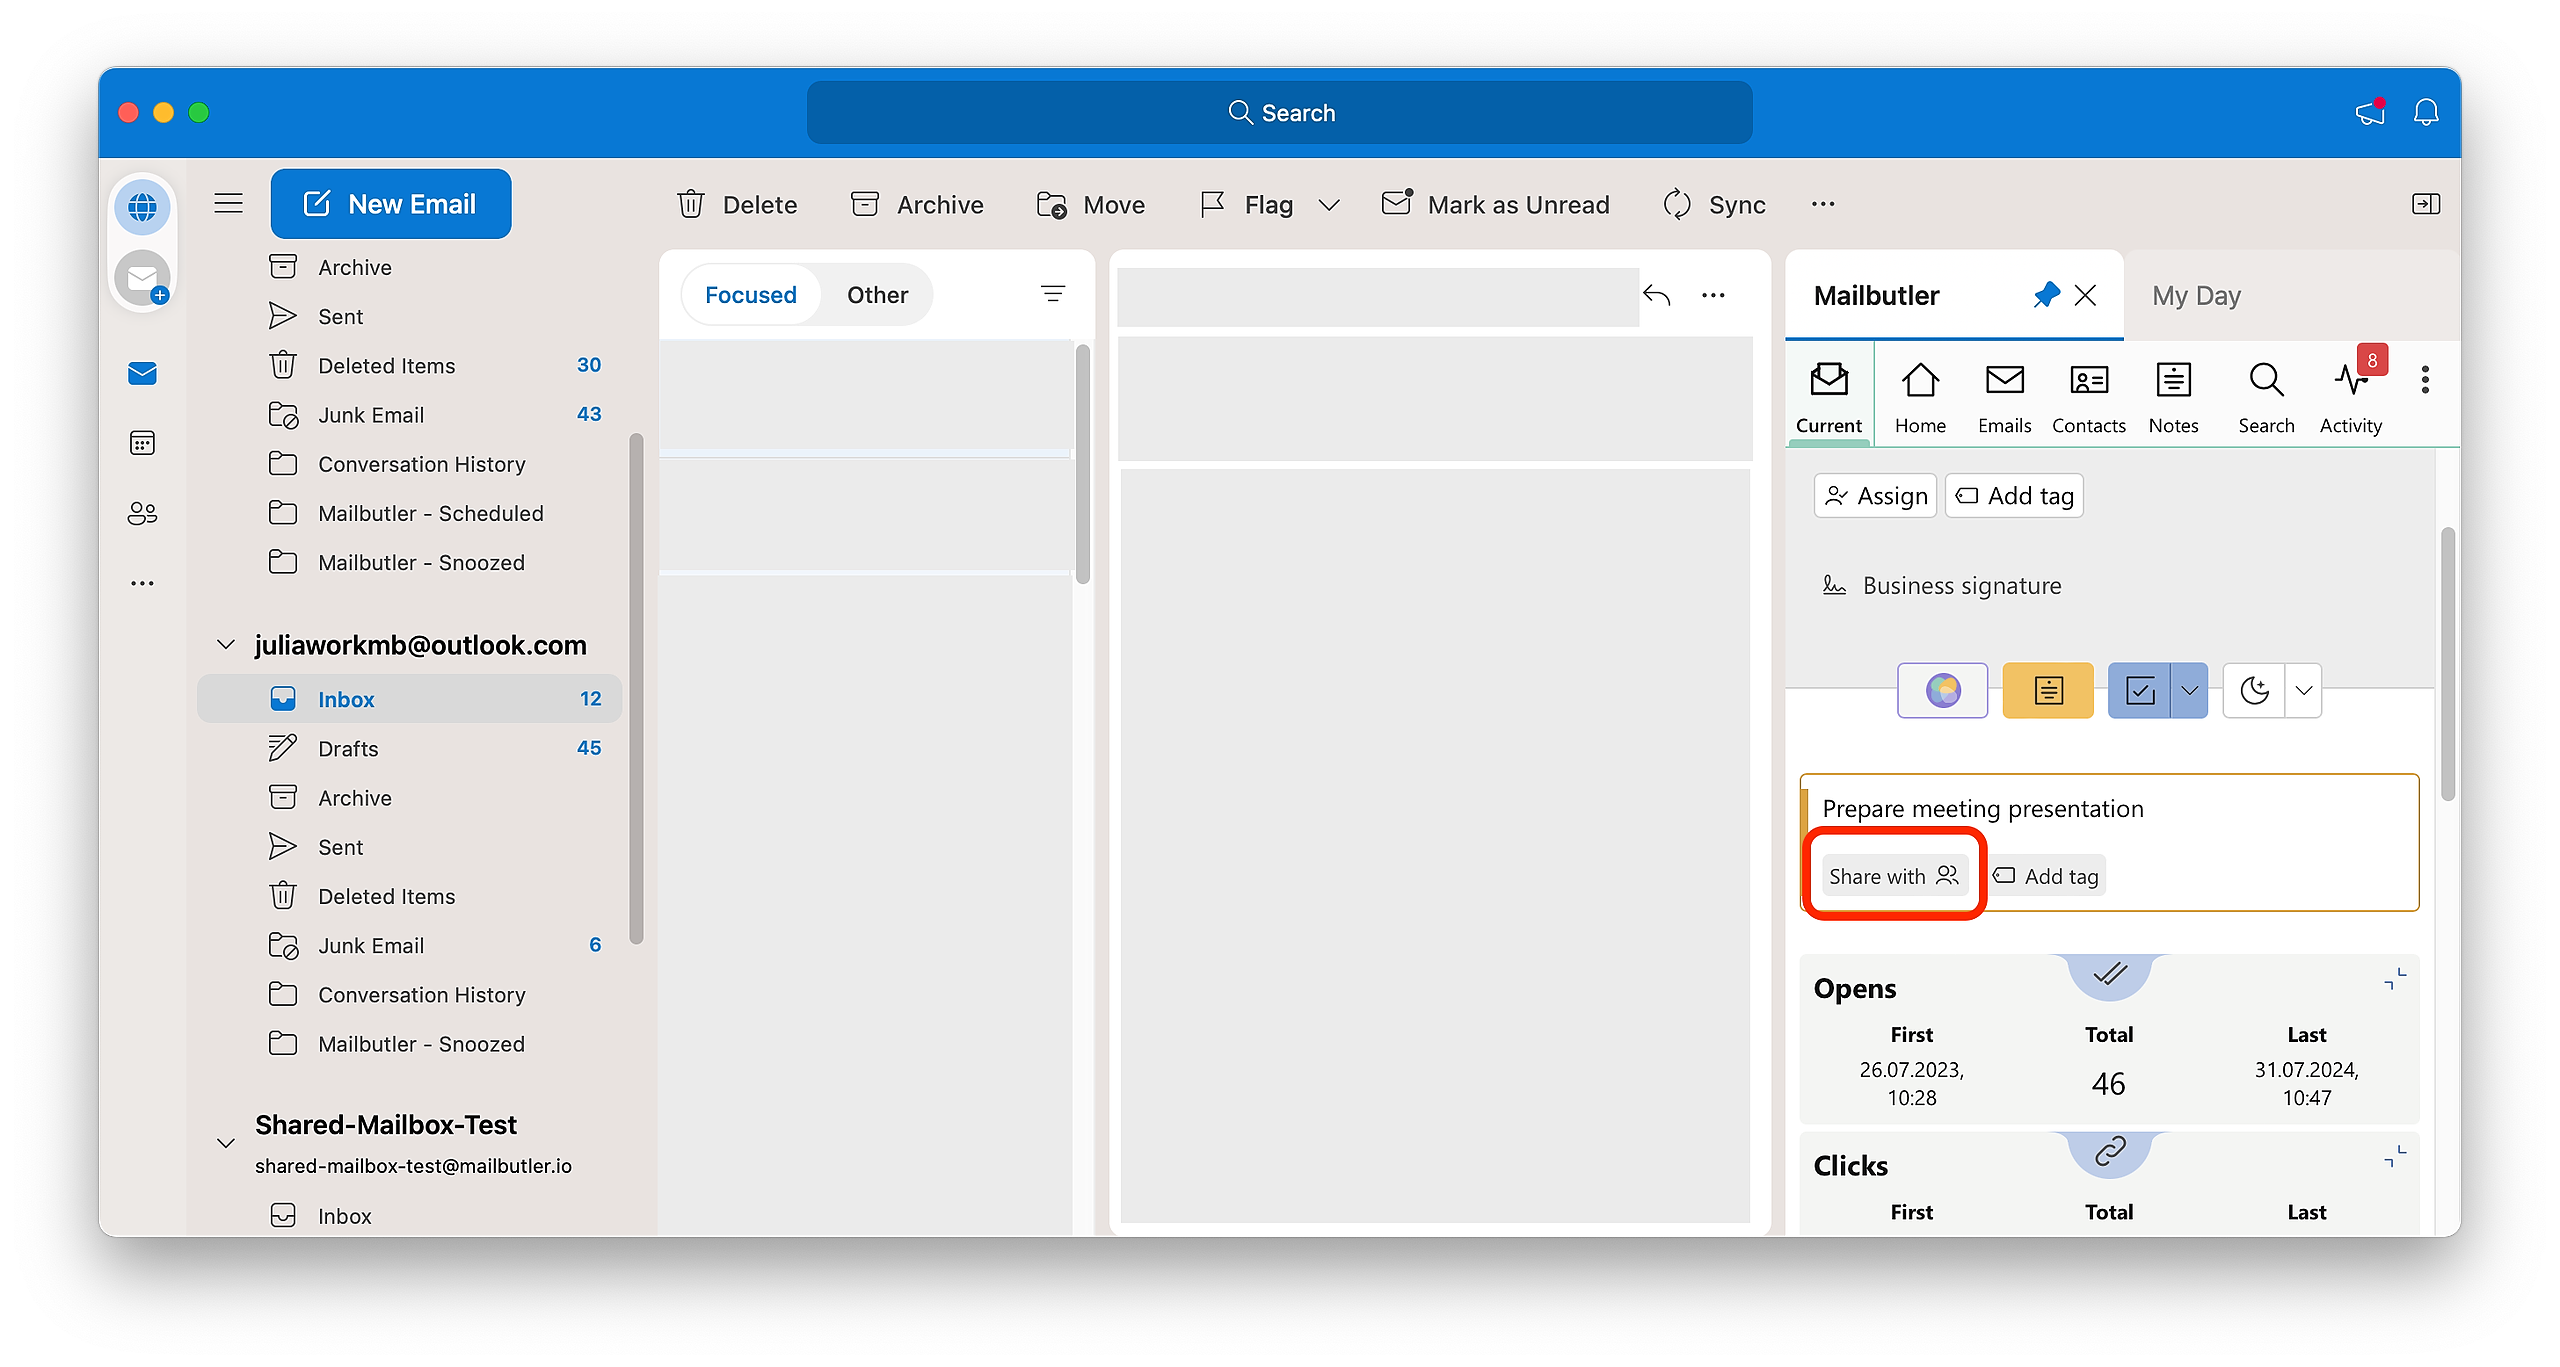
Outlook
1. Go to an email that already has a Task attached or add a new Task.
2. Open the Mailbutler Sidebar.
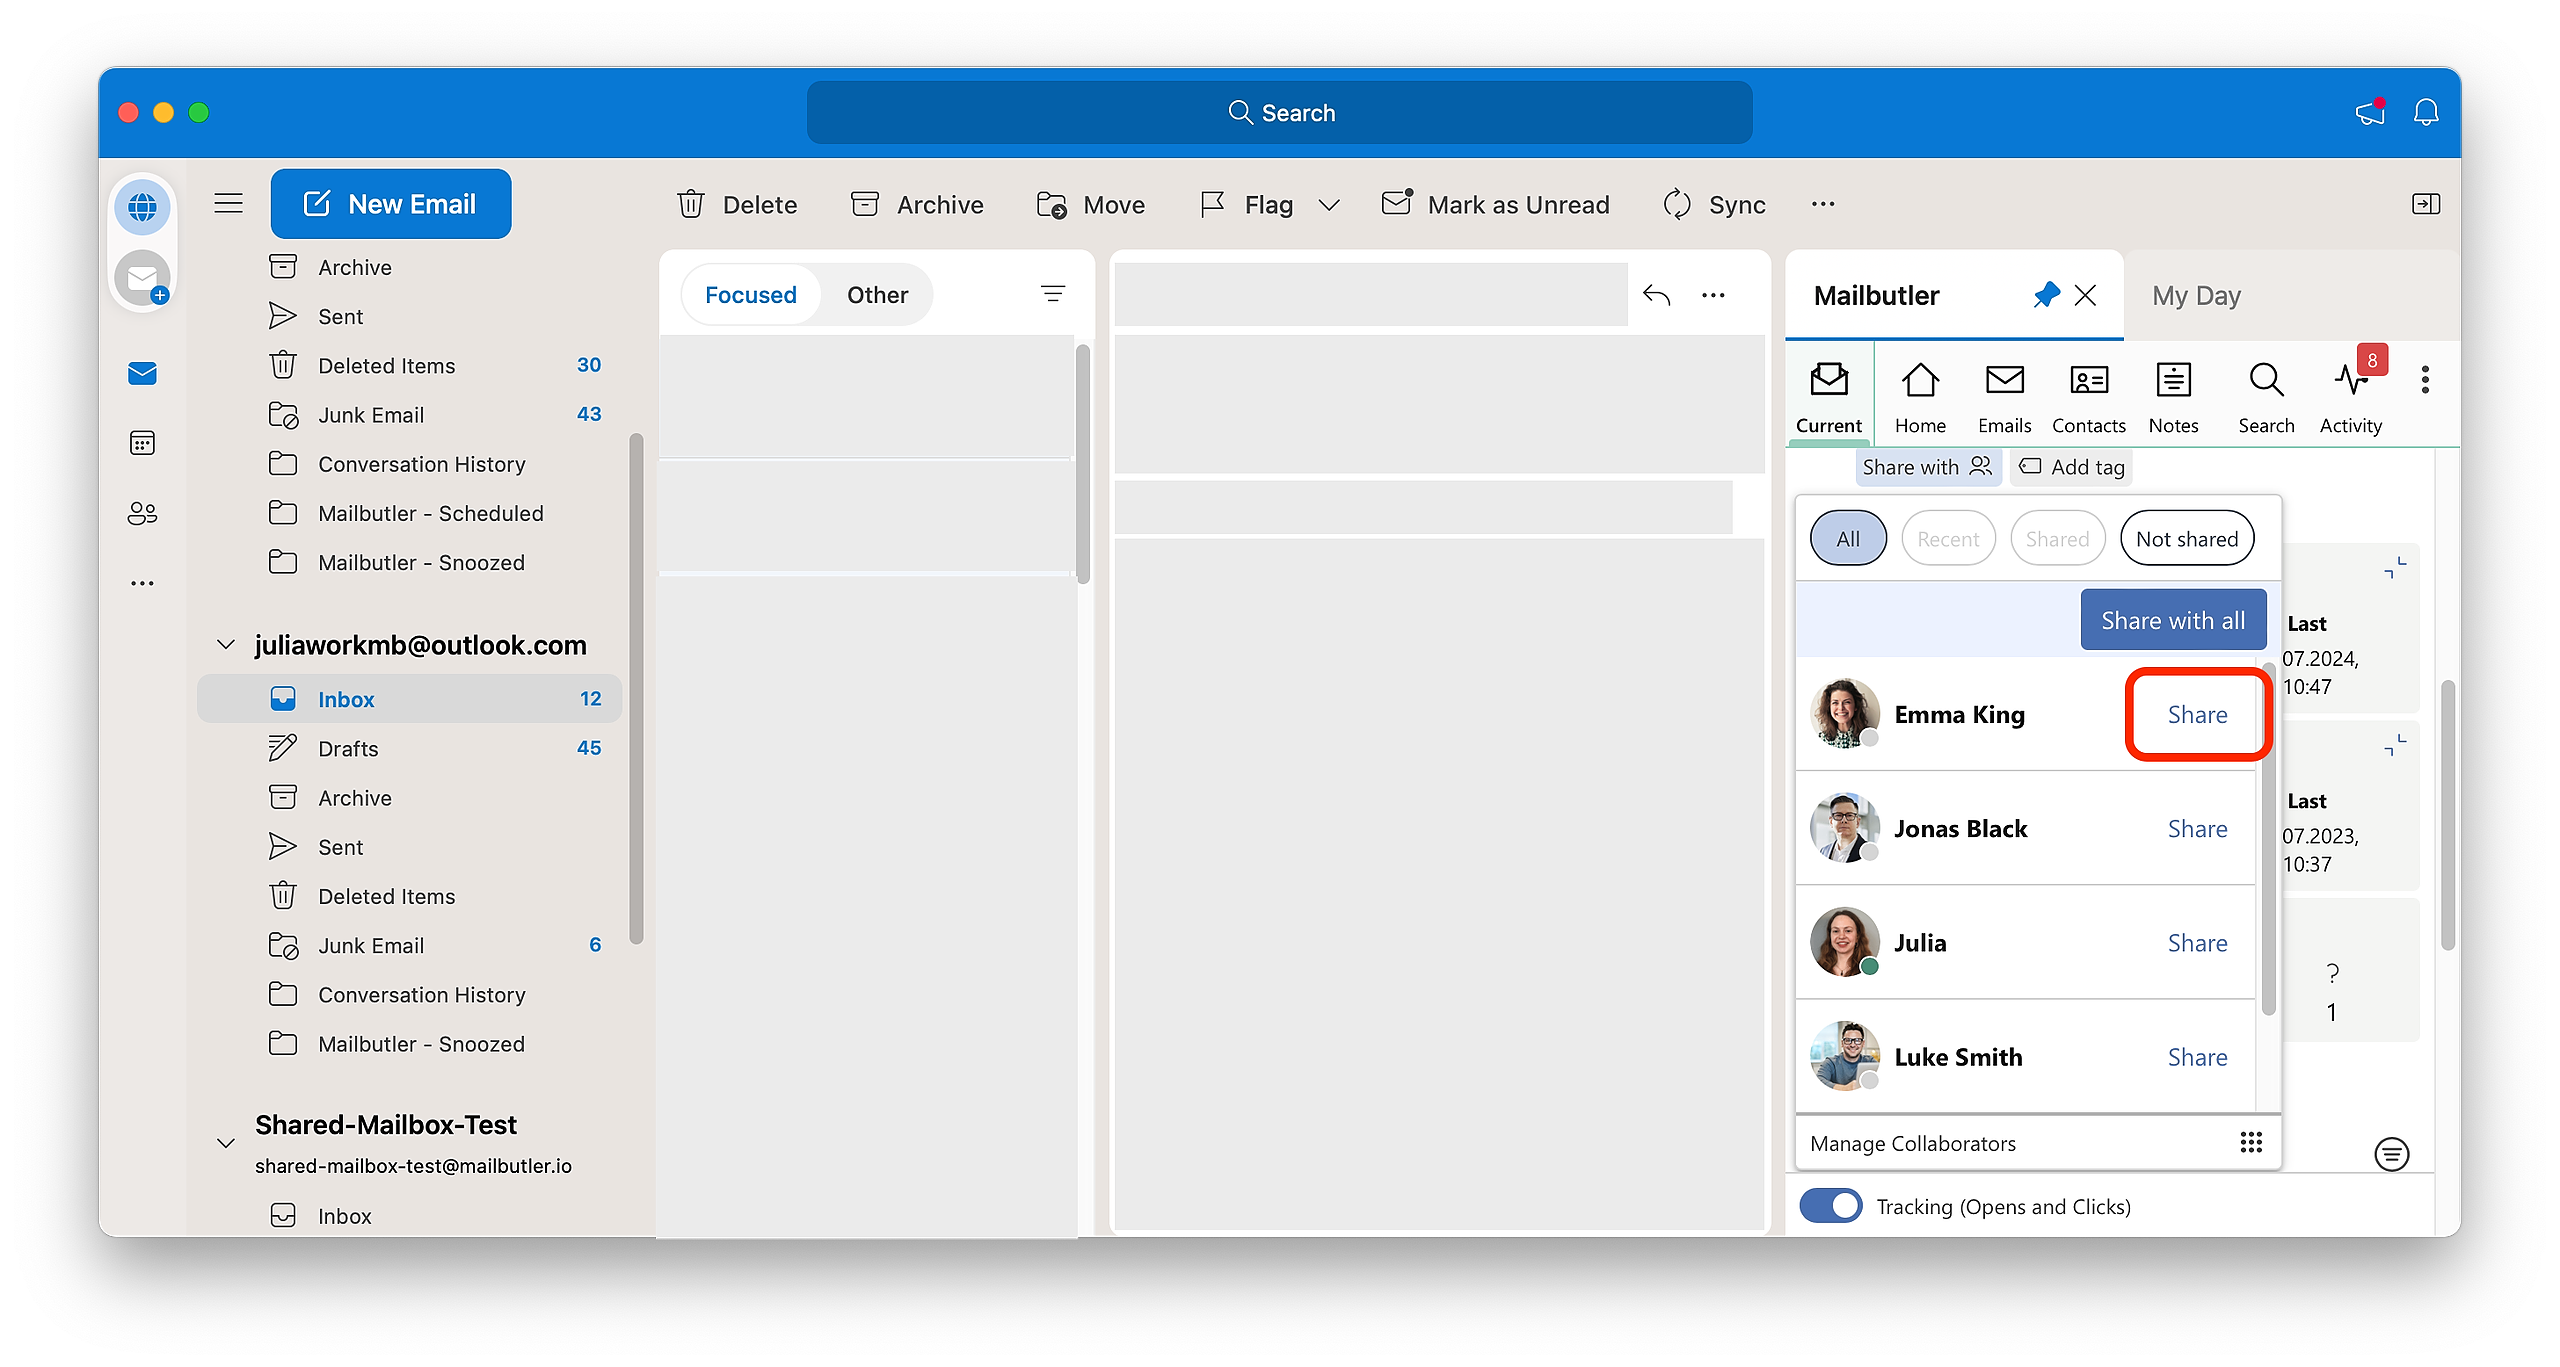
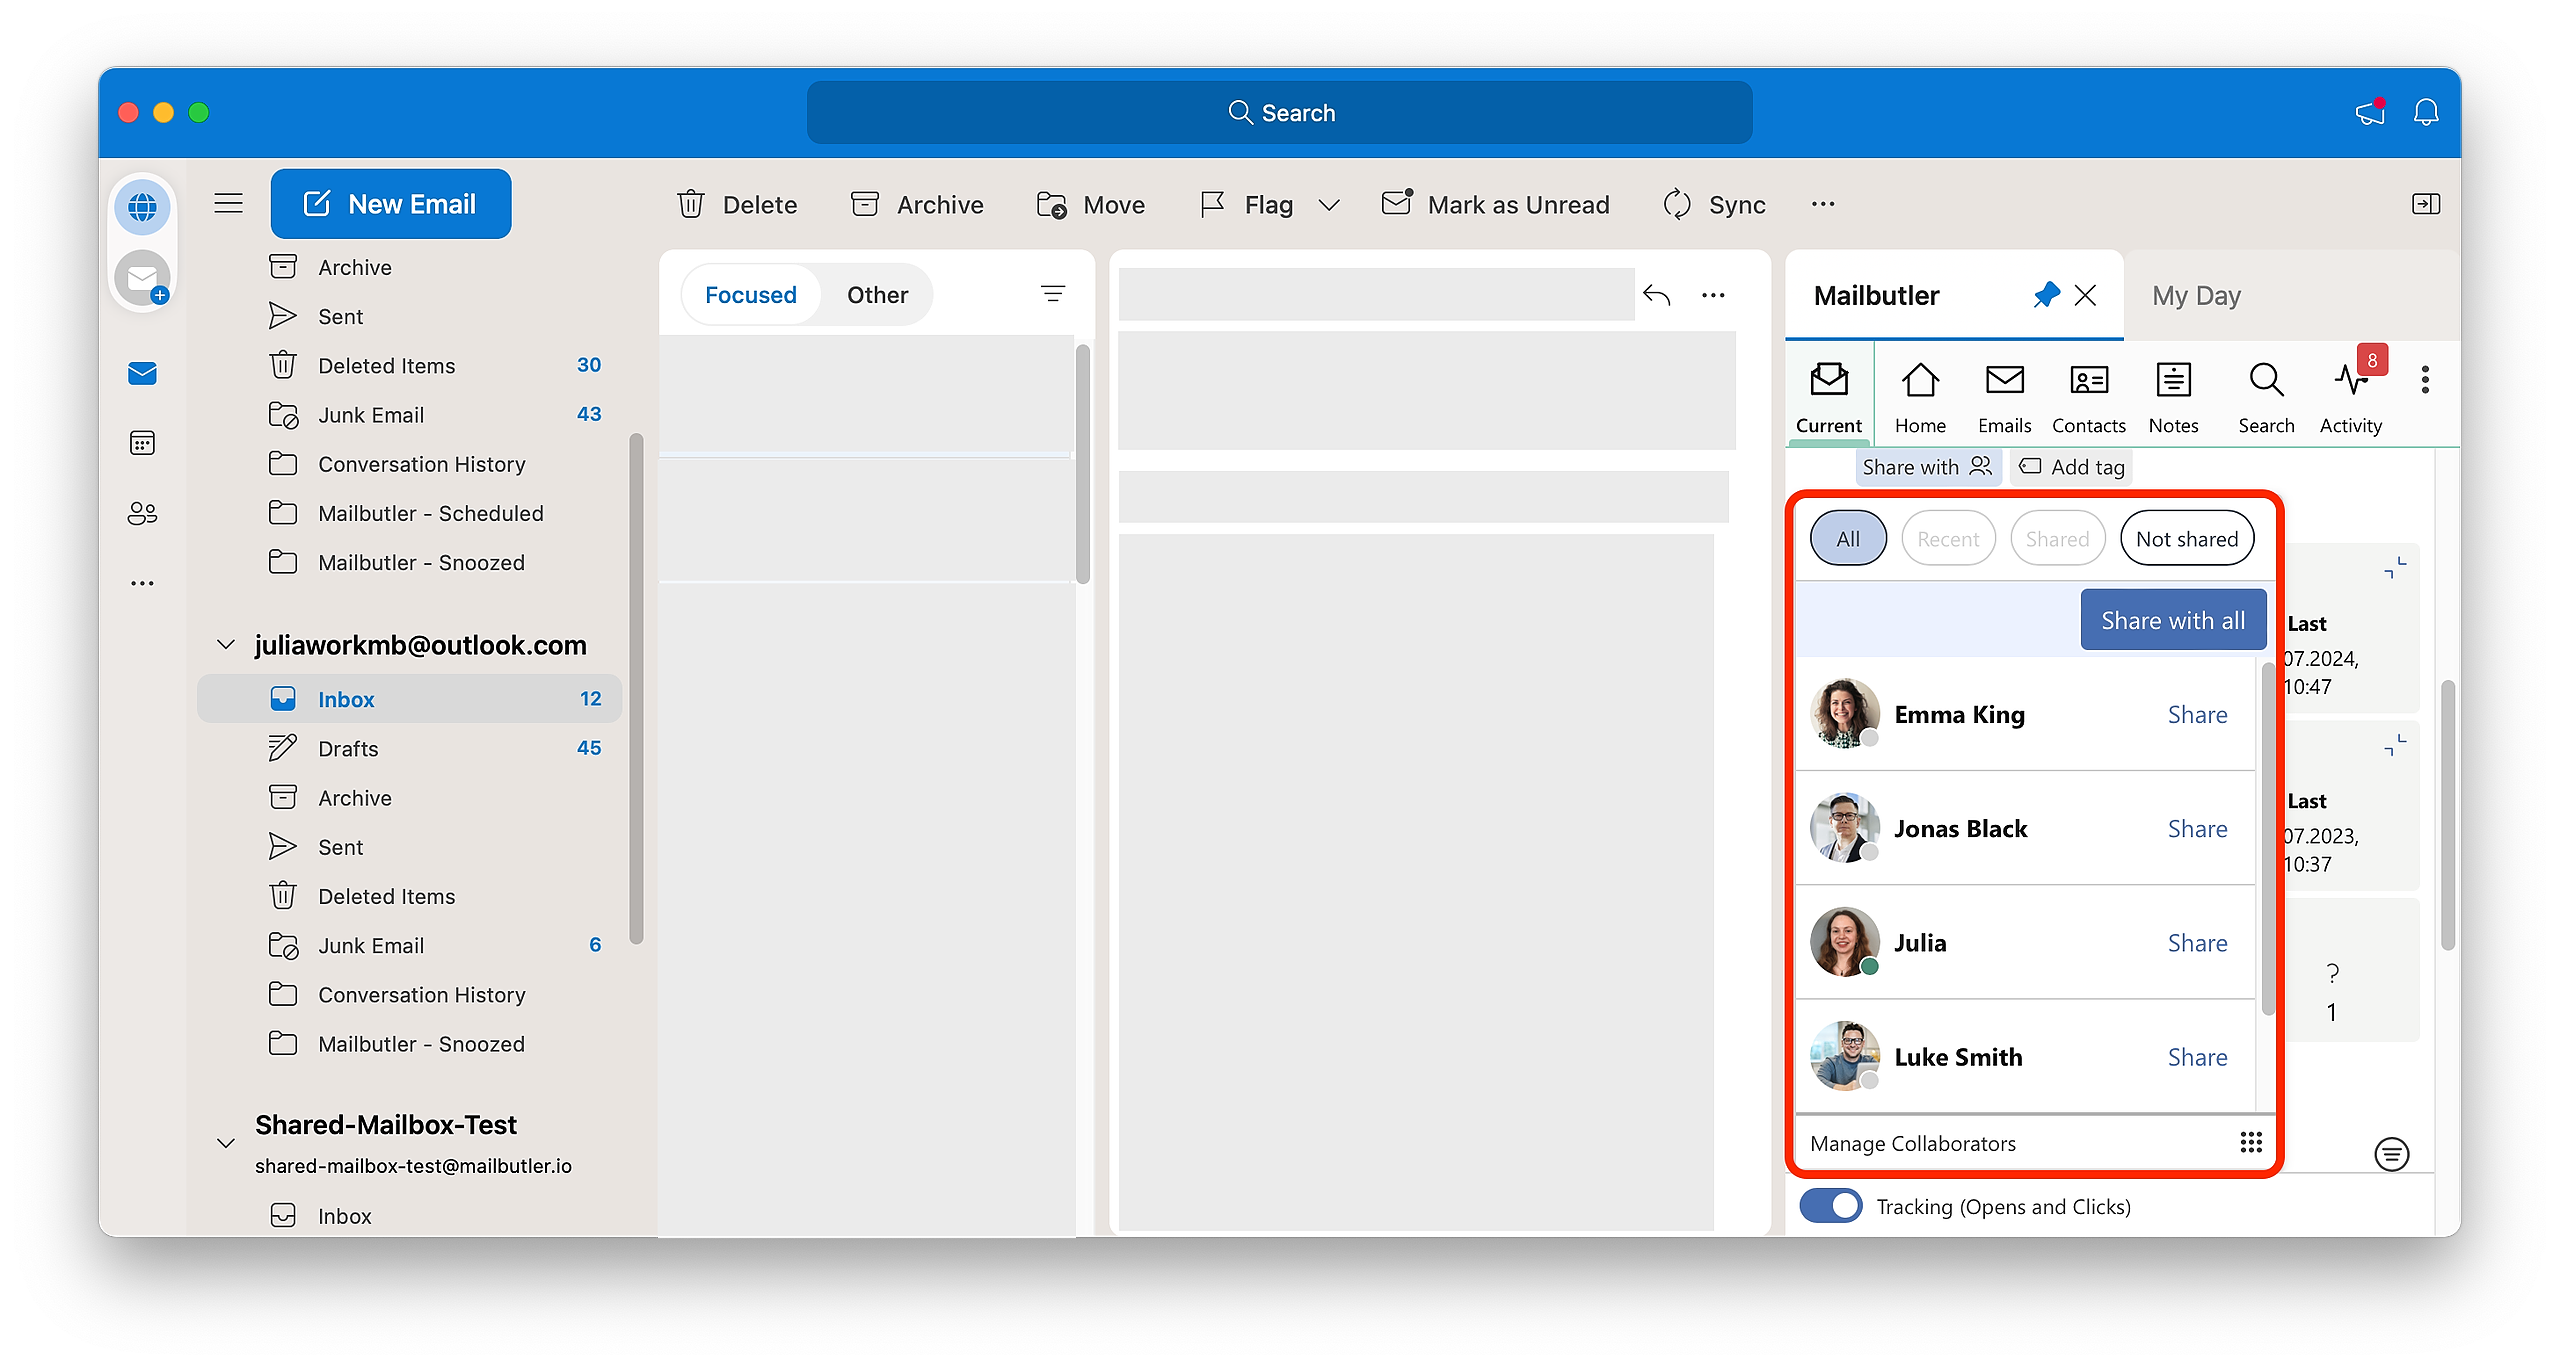
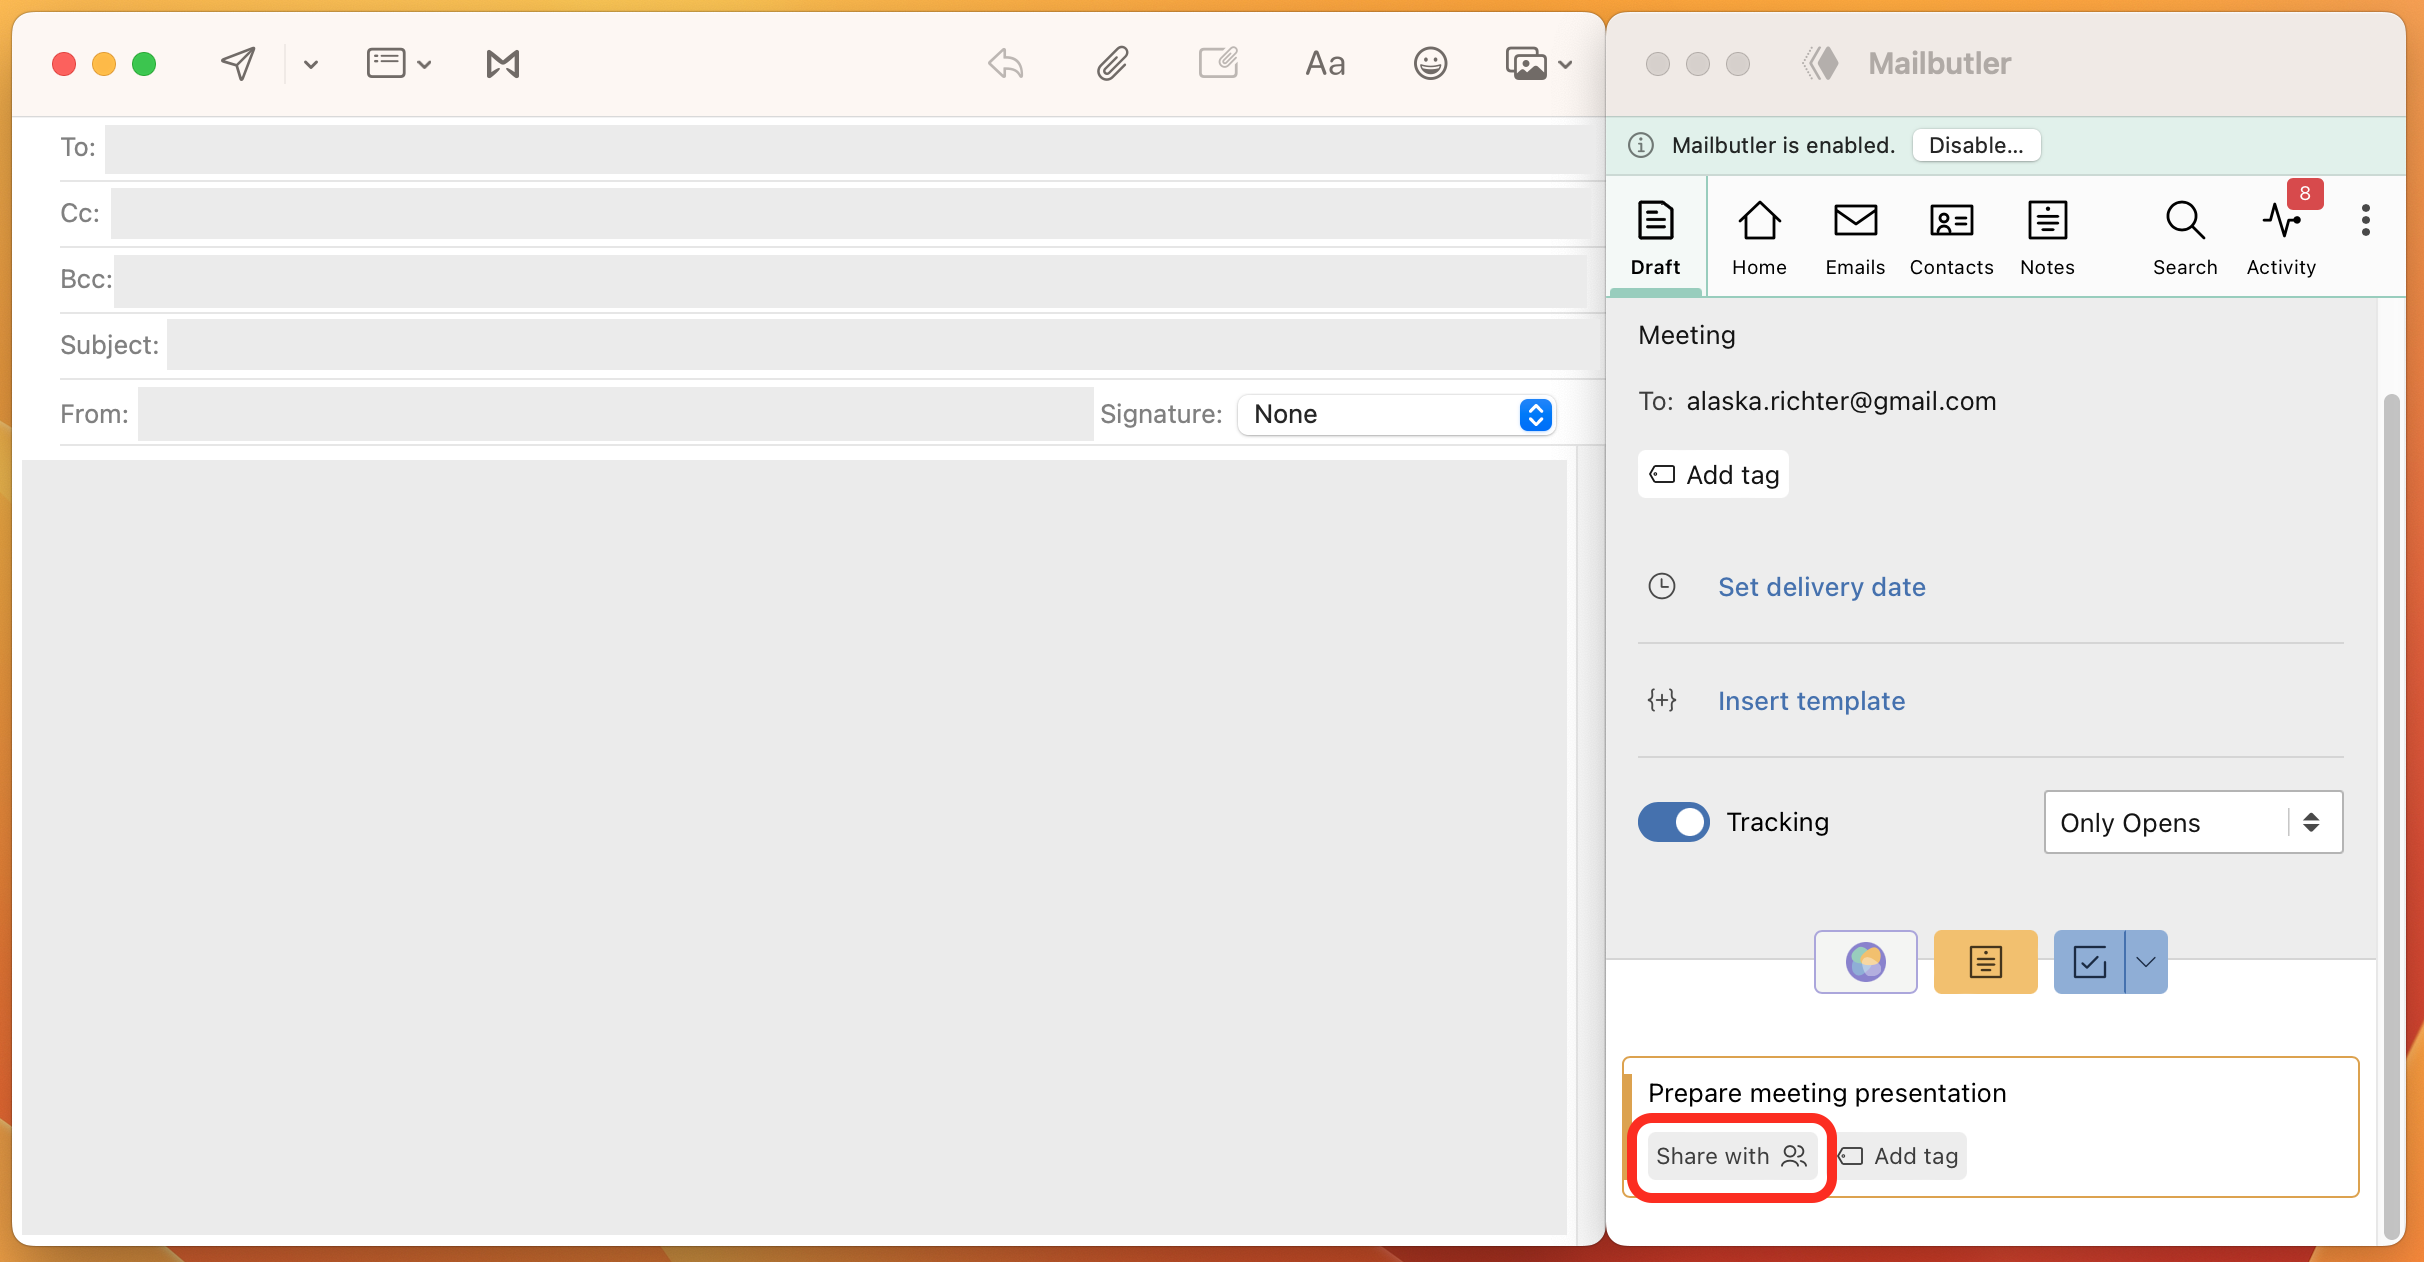
3. Click anywhere inside your Task to reveal the sharing button. Then click Share with.
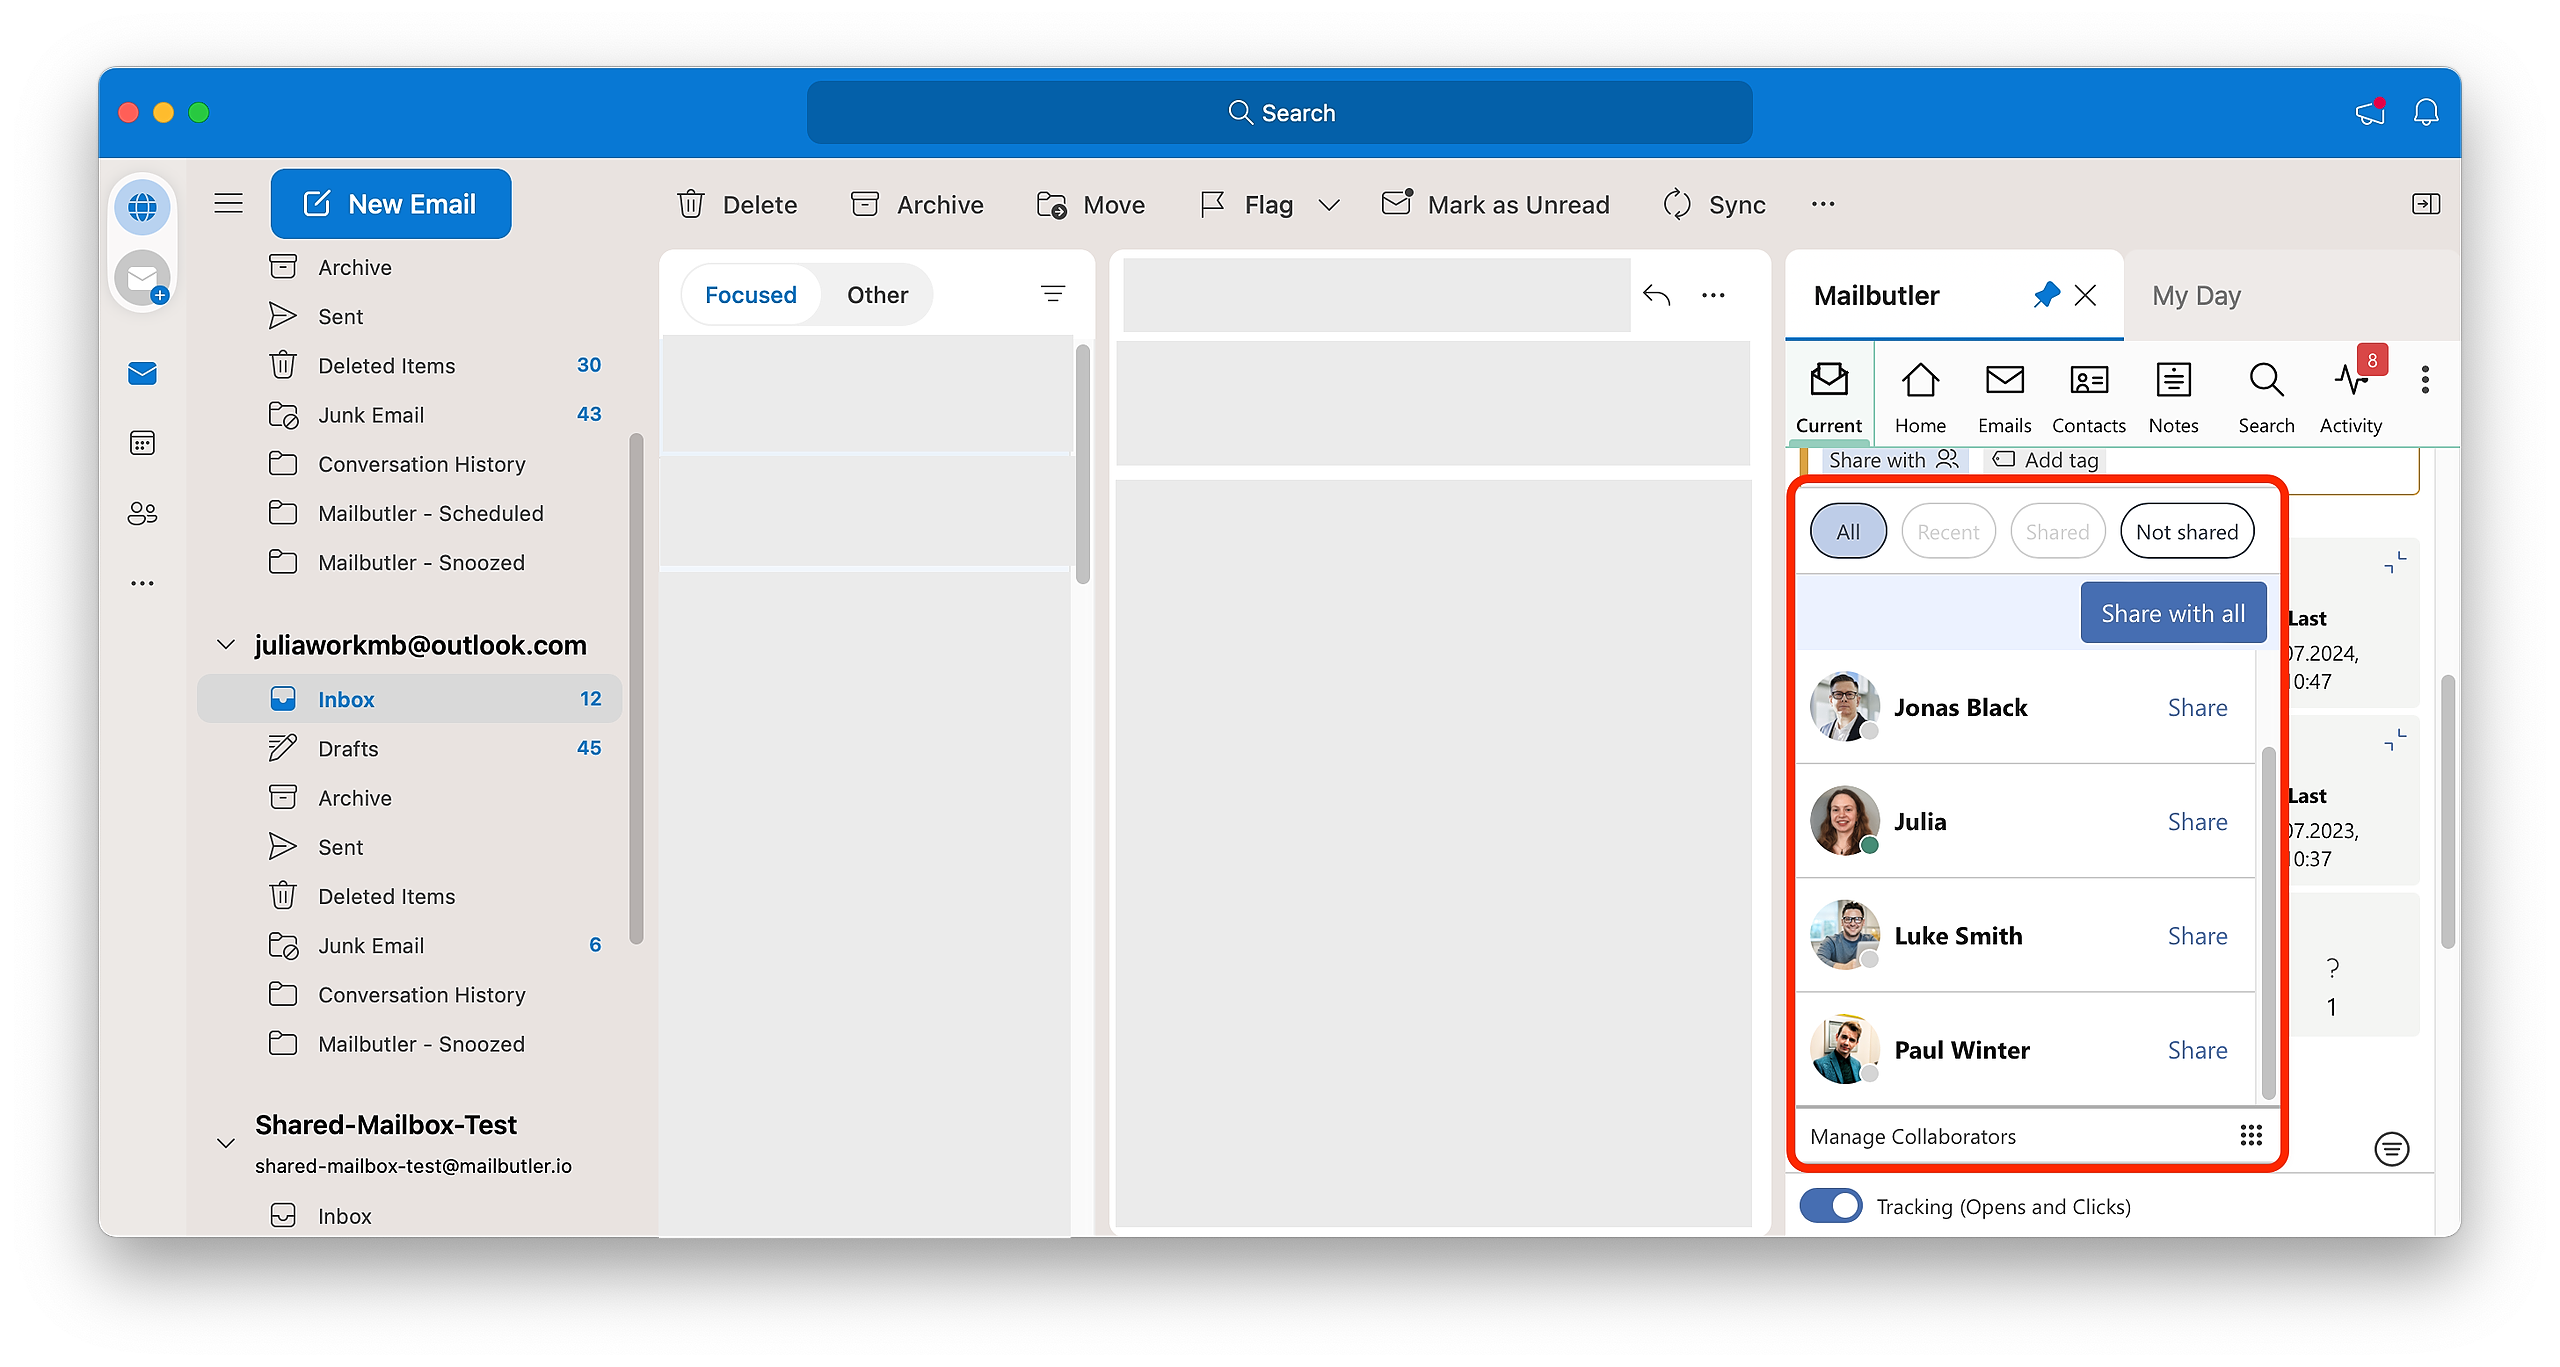
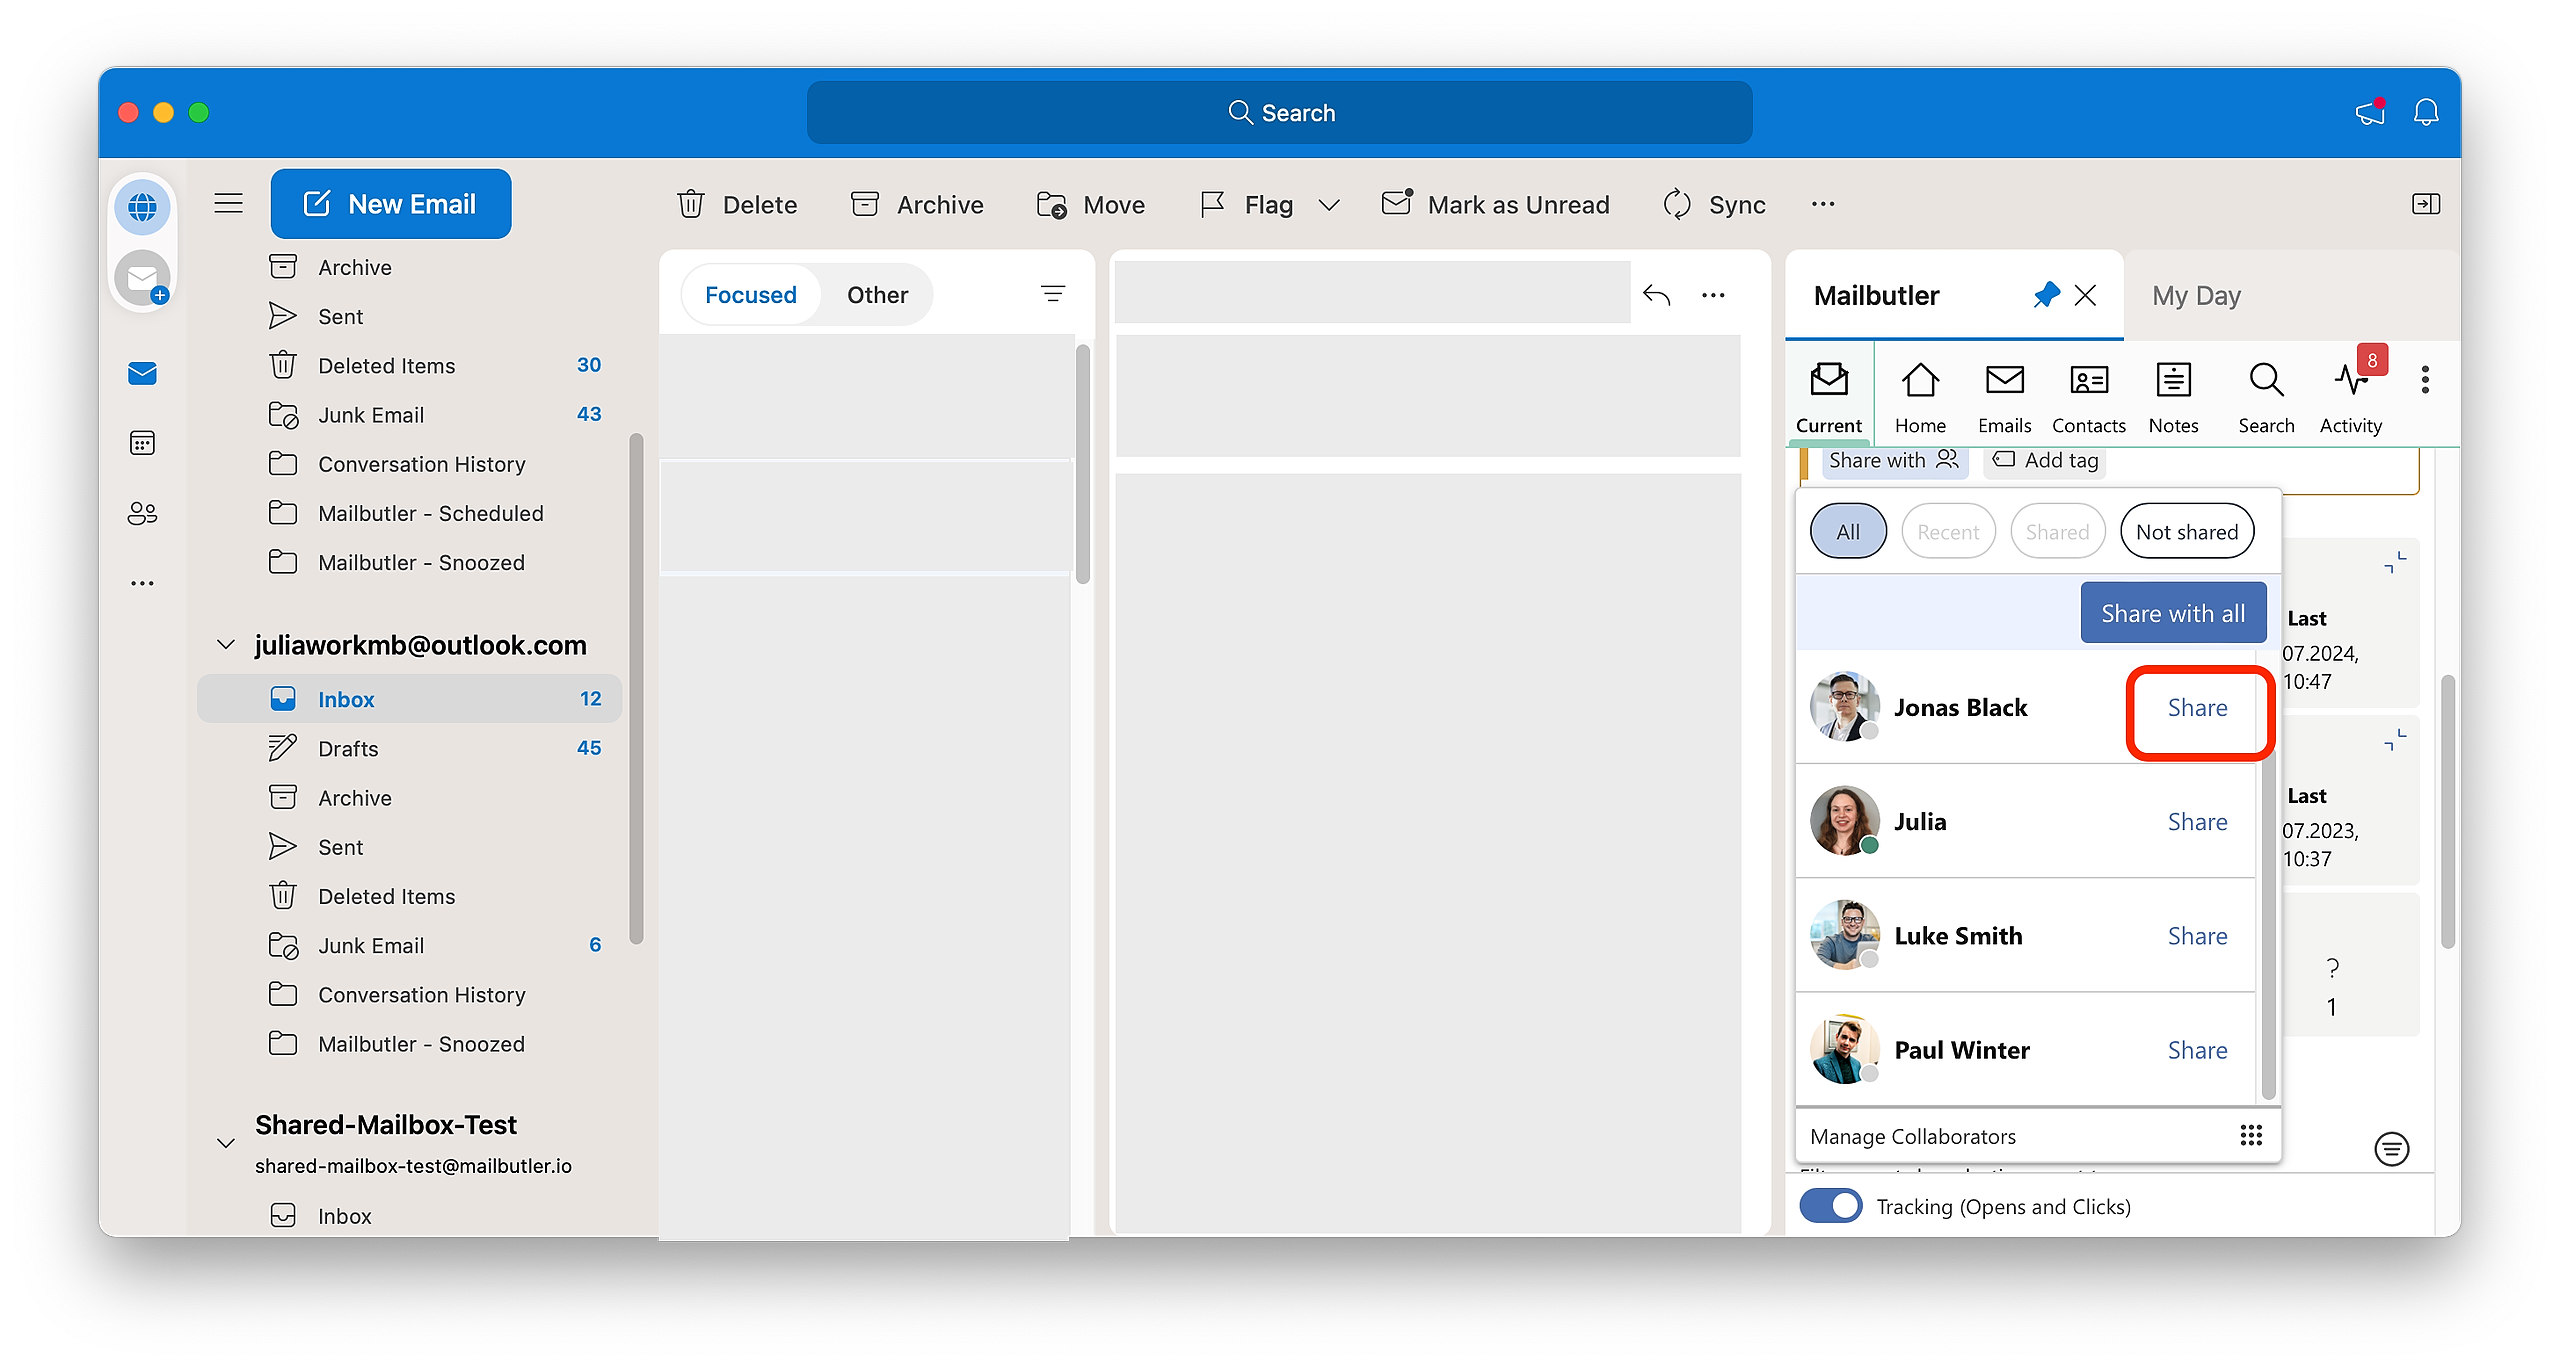
4. Select the Collaborator that you want to share the Task with.
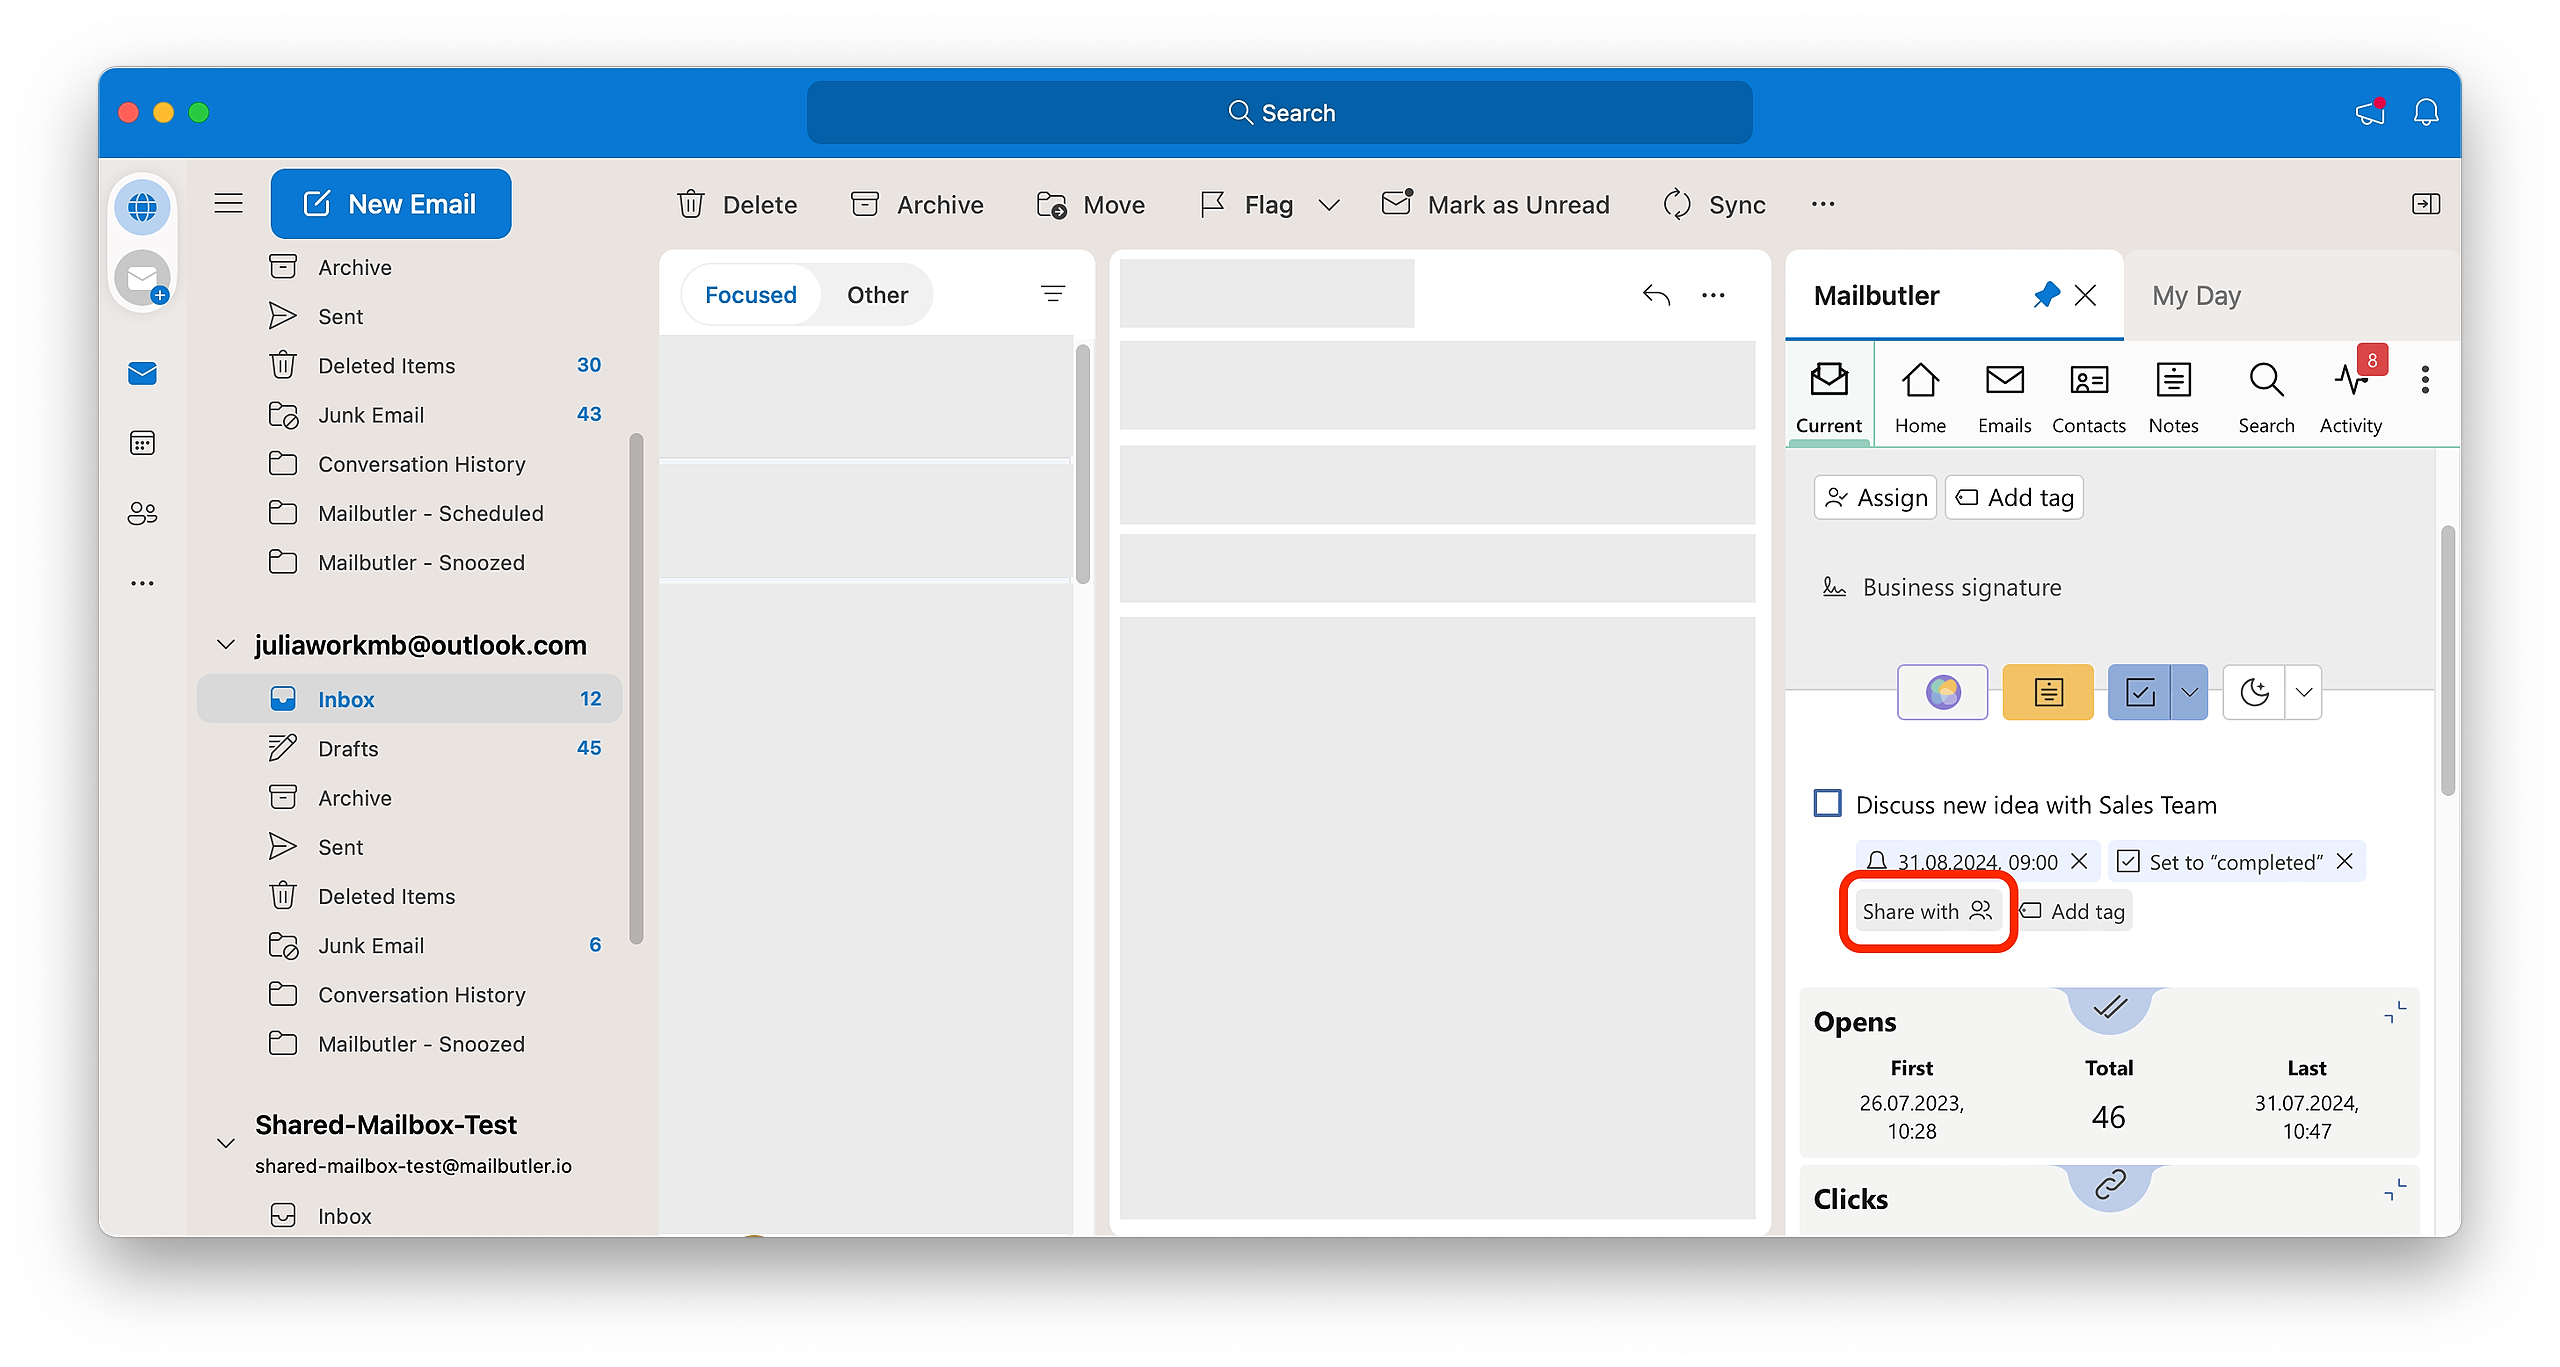
5. Click Share.
Mobile App
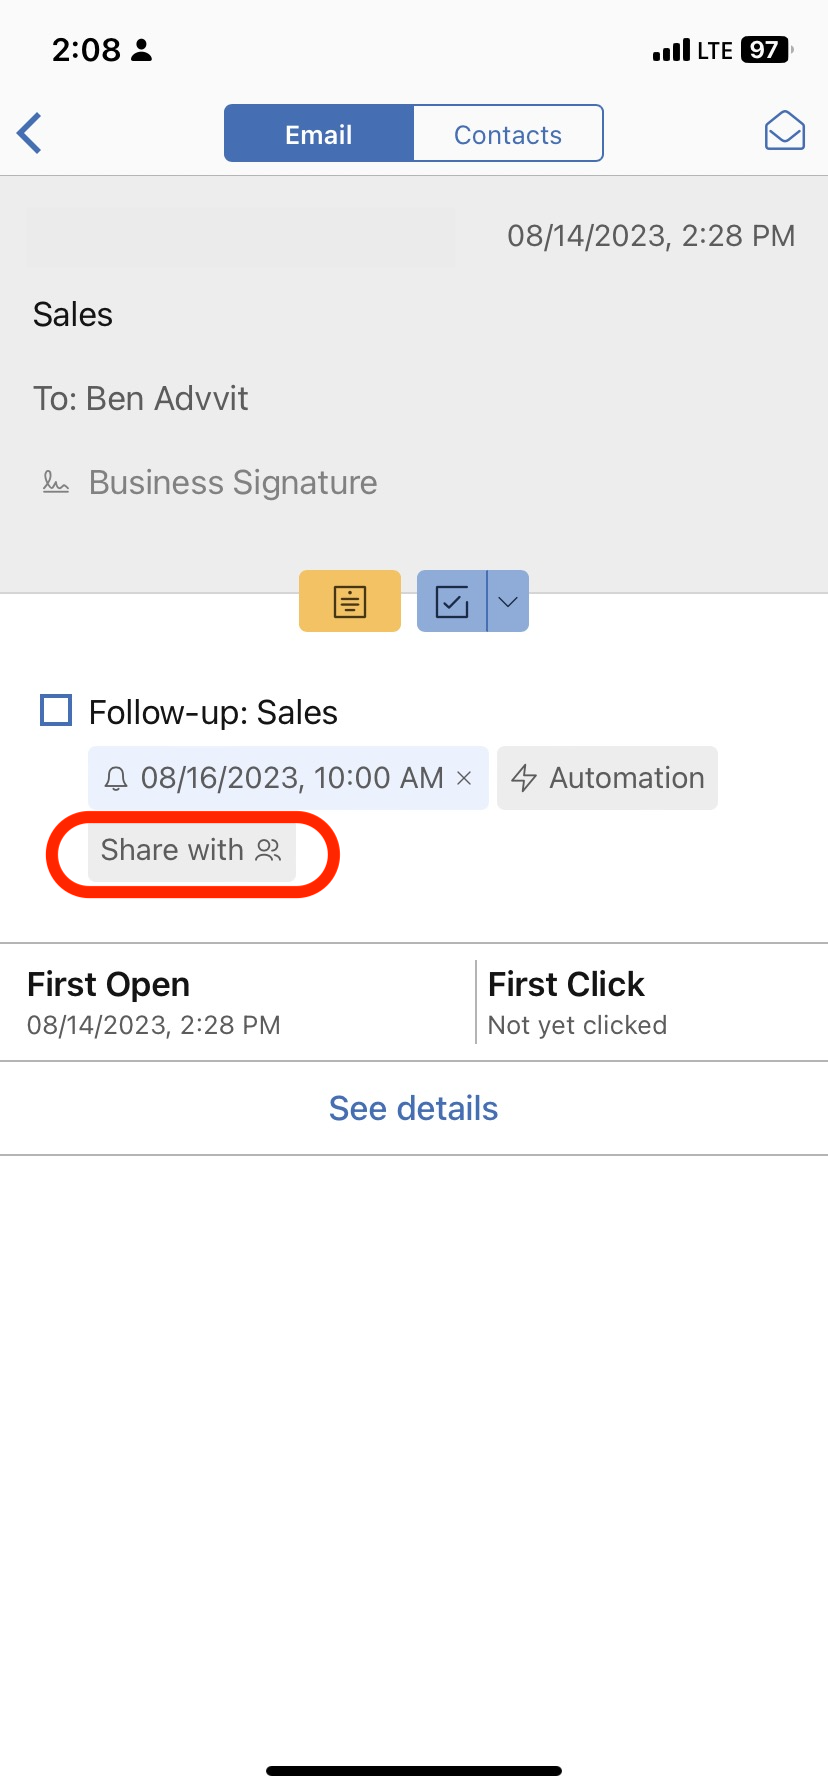
1. Go to an email that already has a Task attached or add a new Task.
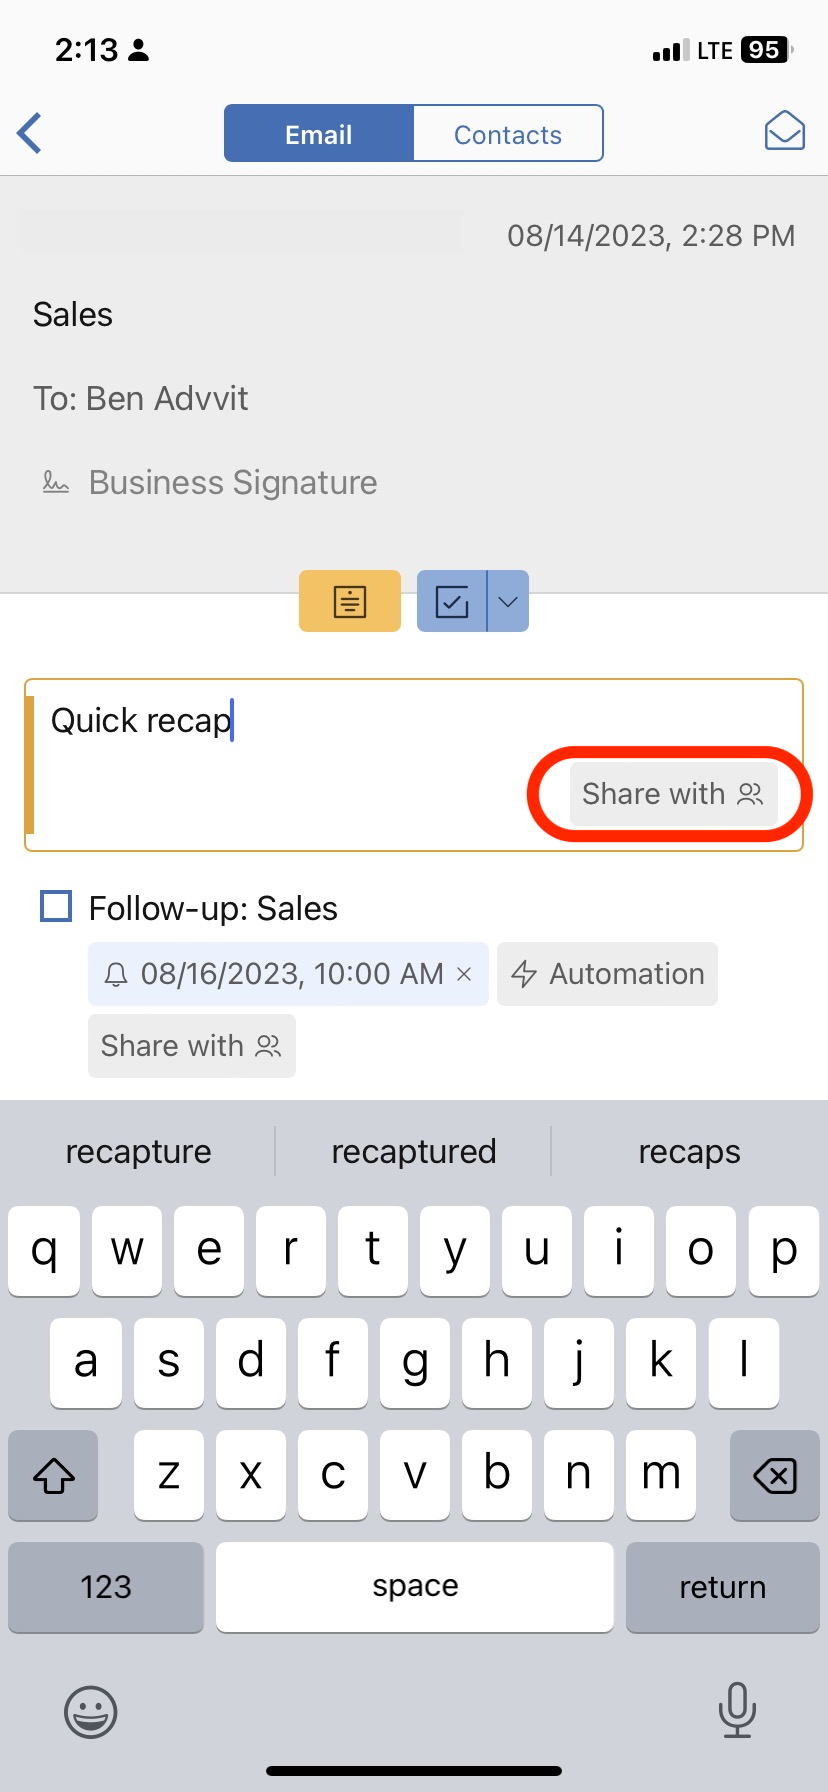
2. Click anywhere inside your Task to reveal the sharing button. Then click Share with.
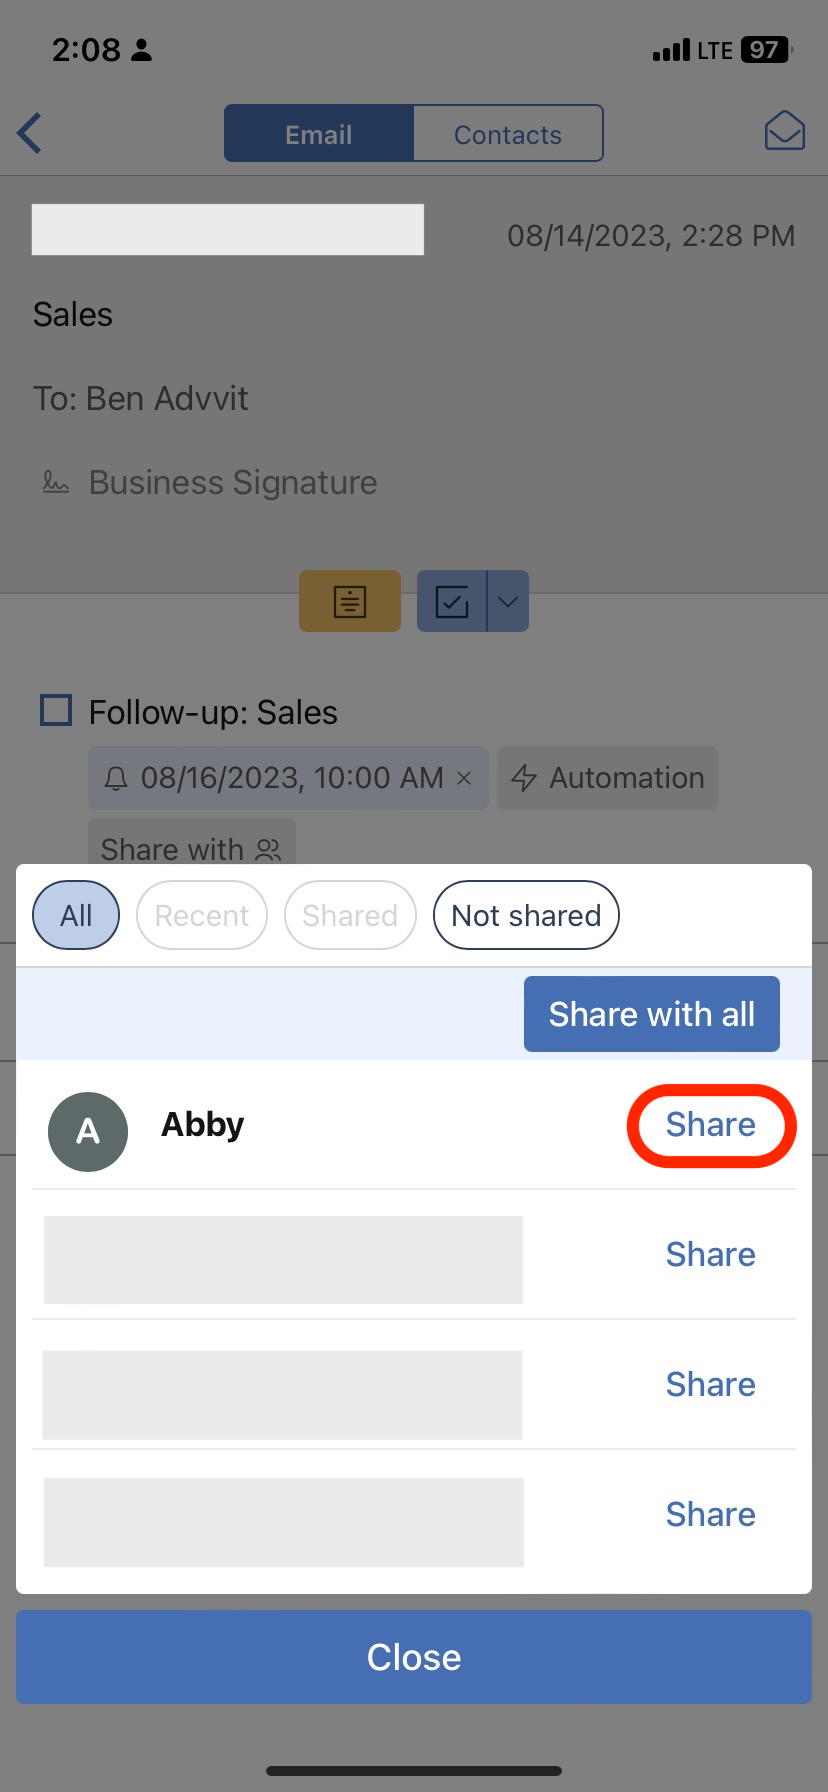
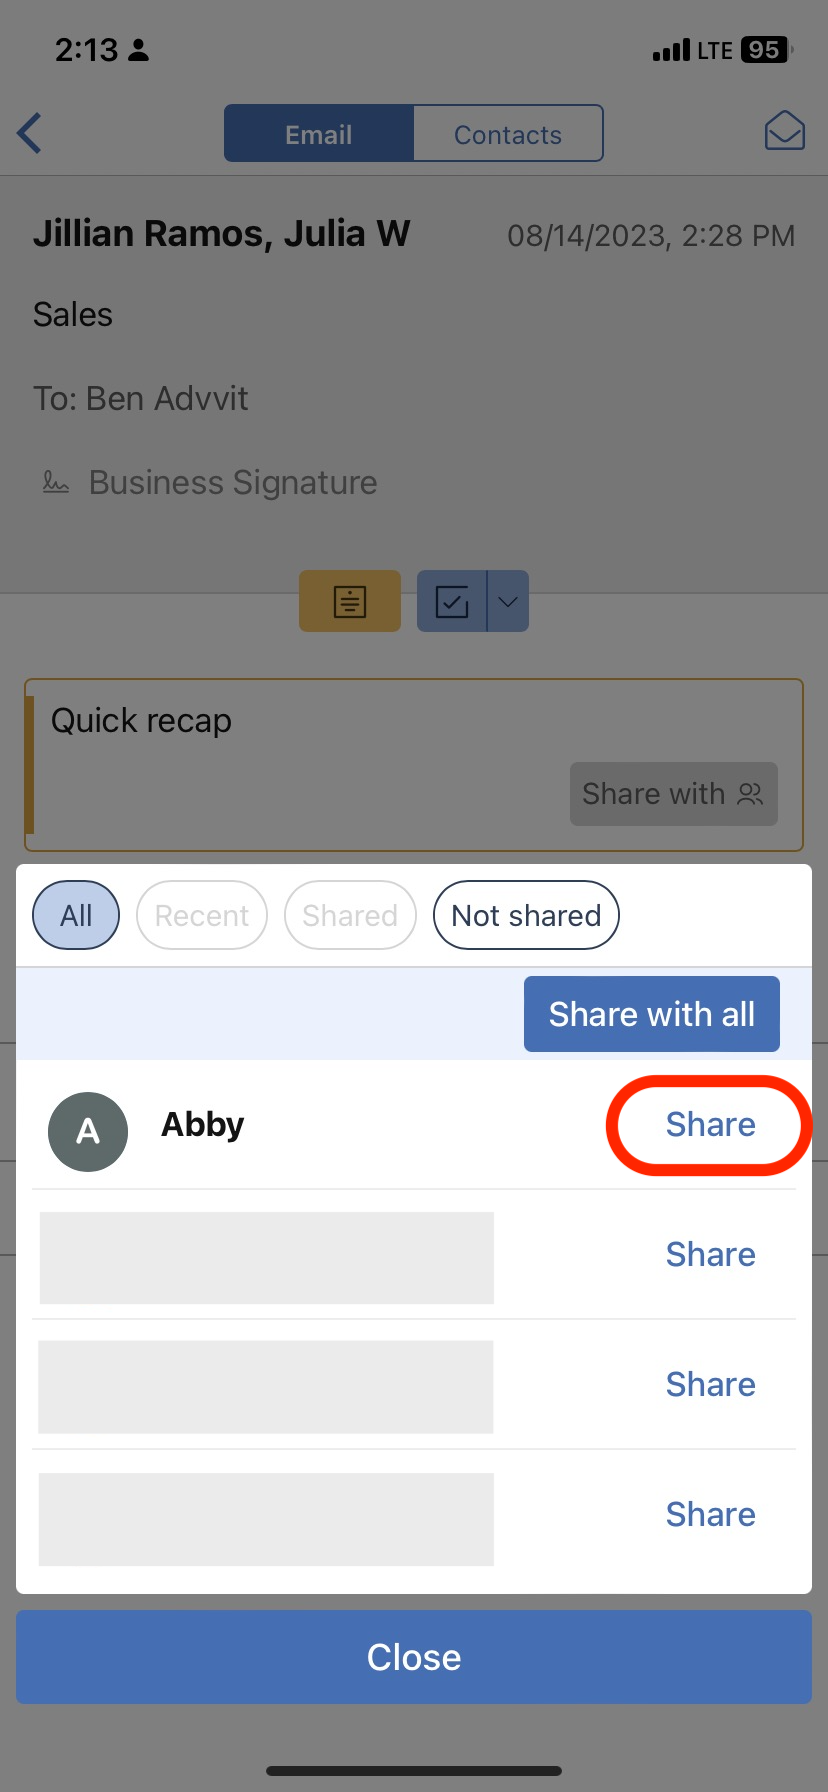
3. Select the Collaborator that you want to share the Task with.
4. Click Share.
How do I share Notes?
Apple Mail
1. Go to an email that already has a Note attached or add a new Note.
2. Click the Mailbutler icon at the top of your Apple Mail window to open the Mailbutler Sidebar.
3. Click anywhere inside your Note to reveal the sharing button. Then click Share with.
4. Select the Collaborator that you want to share the Note with.
5. Click Share.
Gmail
1. Go to an email that already has a Note attached or add a new Note.
2. Click on the Mailbutler icon to open the Mailbutler Sidebar.

3. Click anywhere inside your Note to reveal the sharing button. Then click Share with.
4. Select the Collaborator that you want to share the Note with.
5. Click Share.
Outlook
1. Go to an email that already has a Note attached or add a new Note.
2. Open the Mailbutler Sidebar.
3. Click anywhere inside your Note to reveal the sharing button. Then click Share with.
4. Select the Collaborator that you want to share the Note with.
5. Click Share.
Mobile App
1. Go to an email that already has a Note attached or add a new Note.
2. Click anywhere inside your Note to reveal the sharing button. Then click Share with.
3. Select the Collaborator that you want to share the Note with.
4. Click Share.
How do I share Message Templates?
Apple Mail
1. Click the Mailbutler icon at the top of your Apple Mail window to open the Mailbutler Sidebar.
2. In the Mailbutler Sidebar, click the three dots and then Account & Preferences.
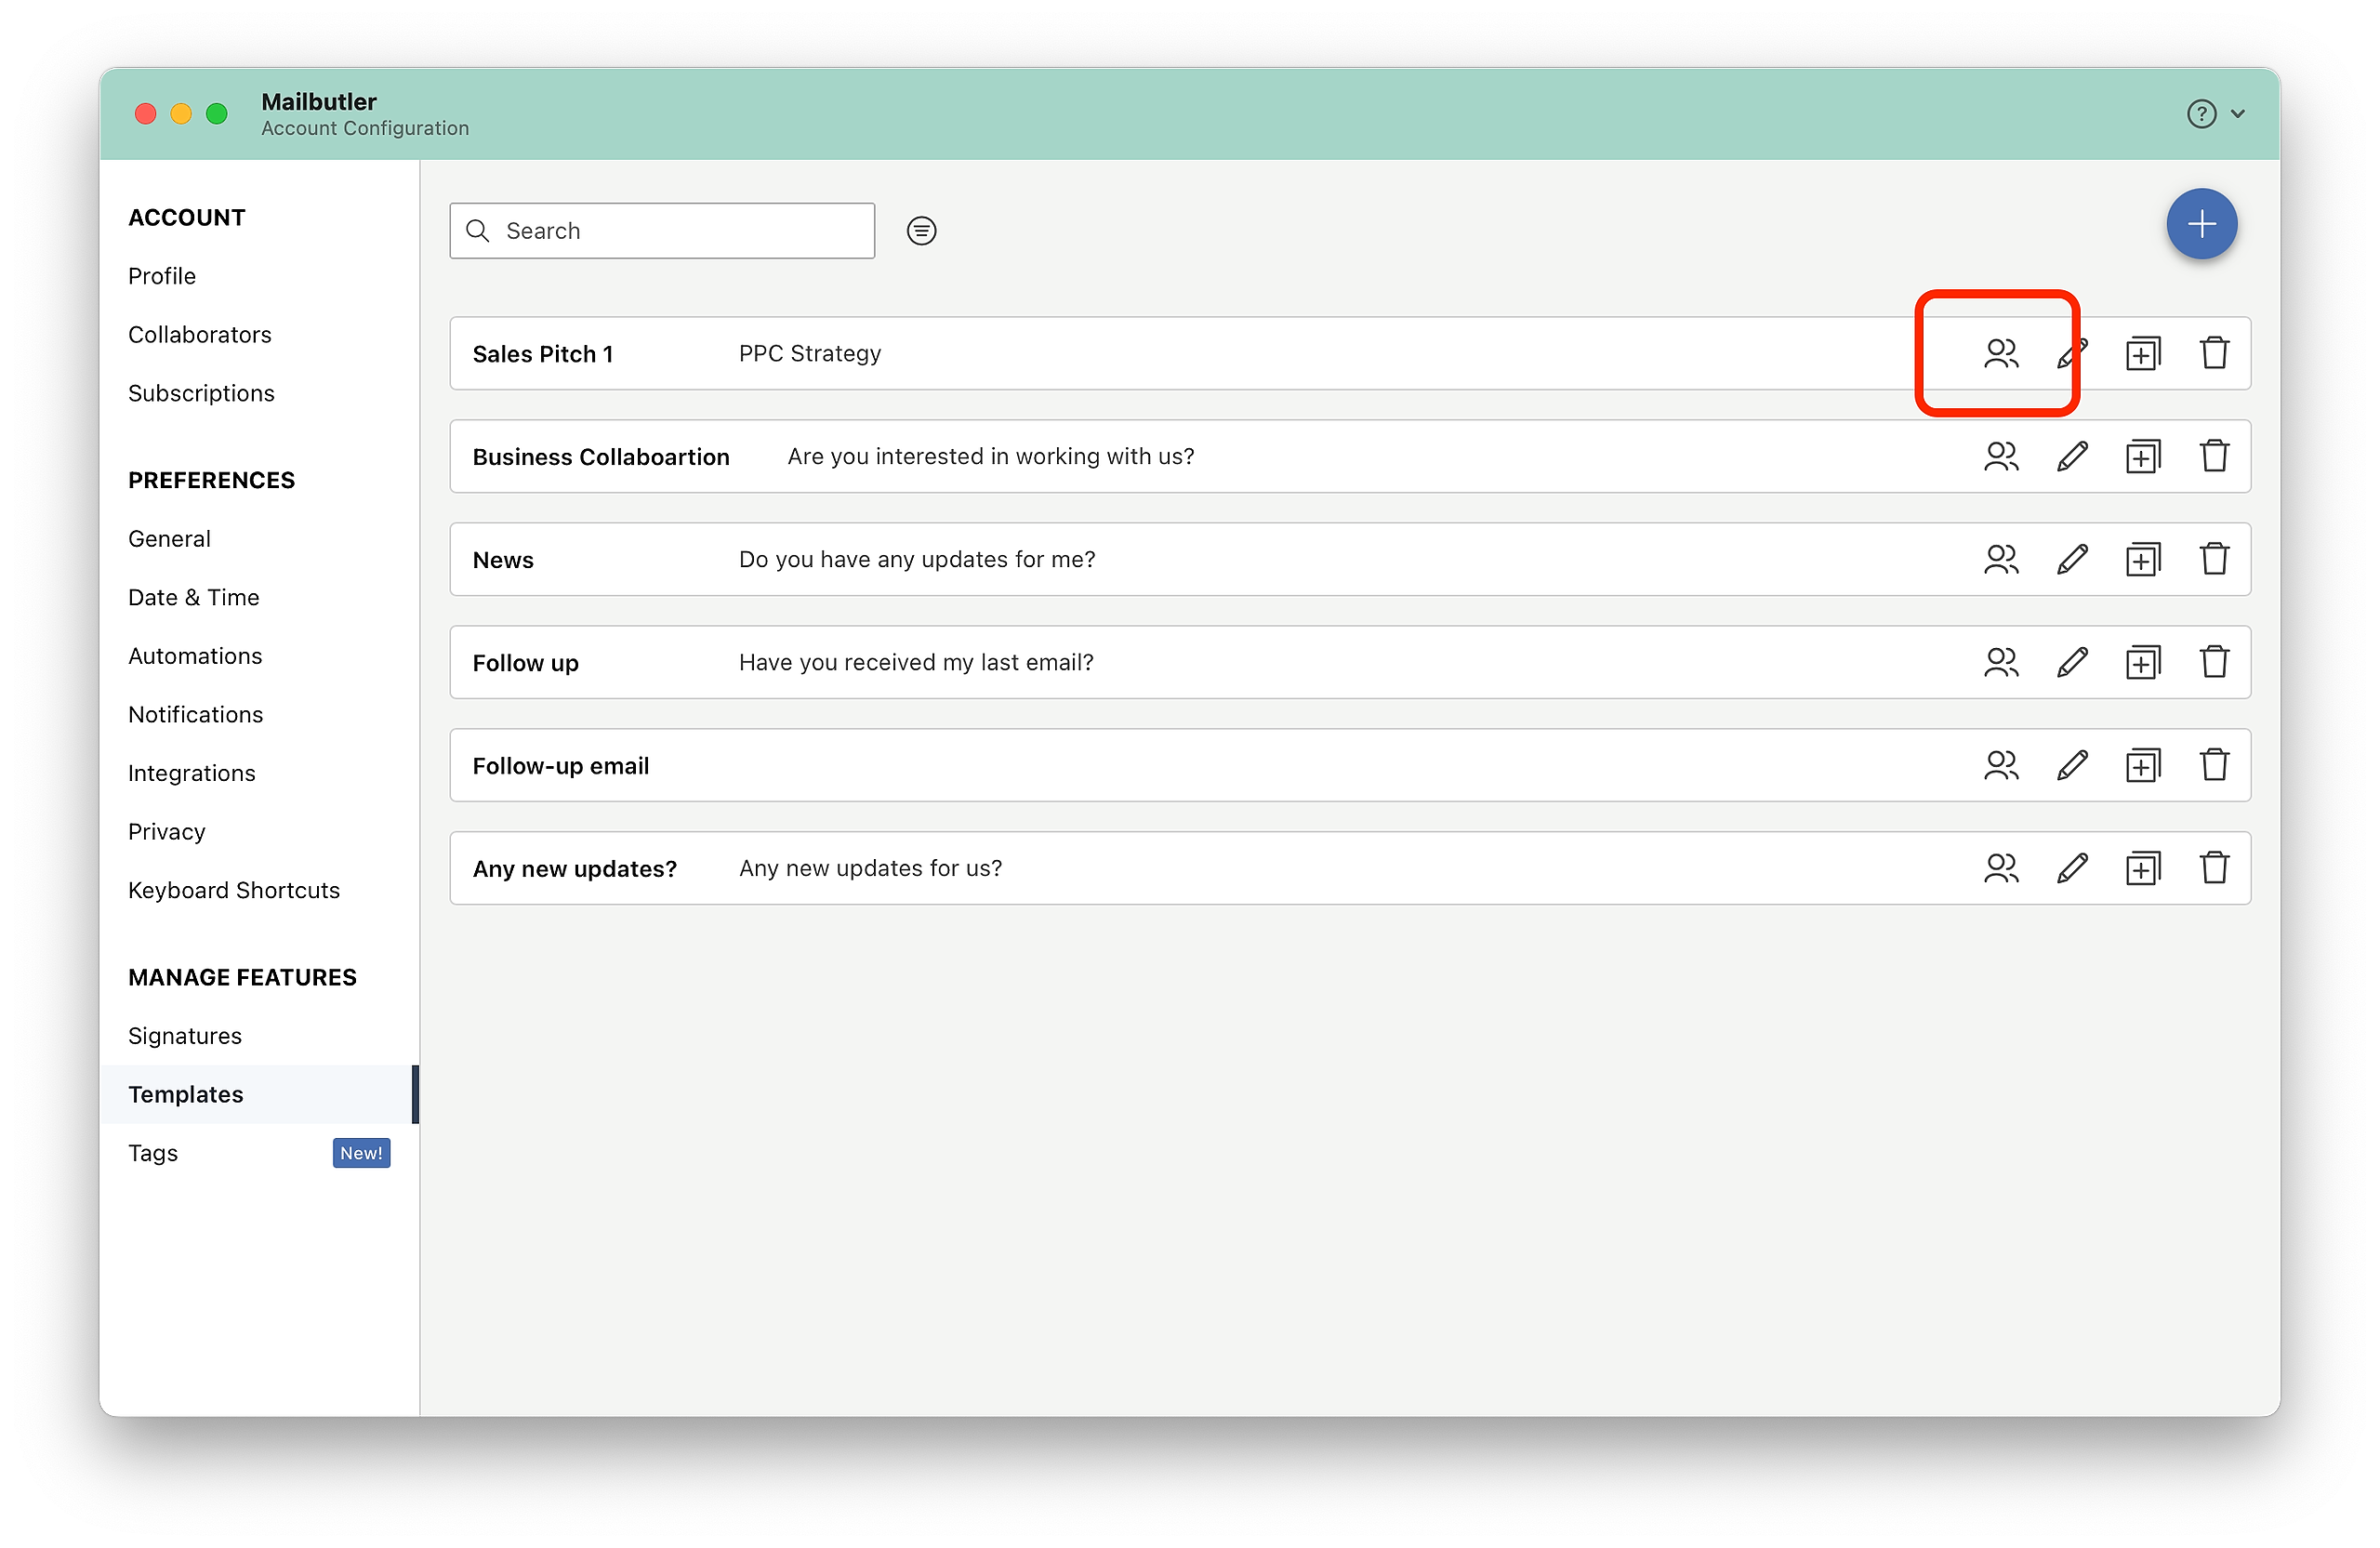
3. A new window will open. Select Templates under Manage Features in the sidebar on the left.
4. Select the Message Template that you would like to share or create a new one and click the sharing icon.

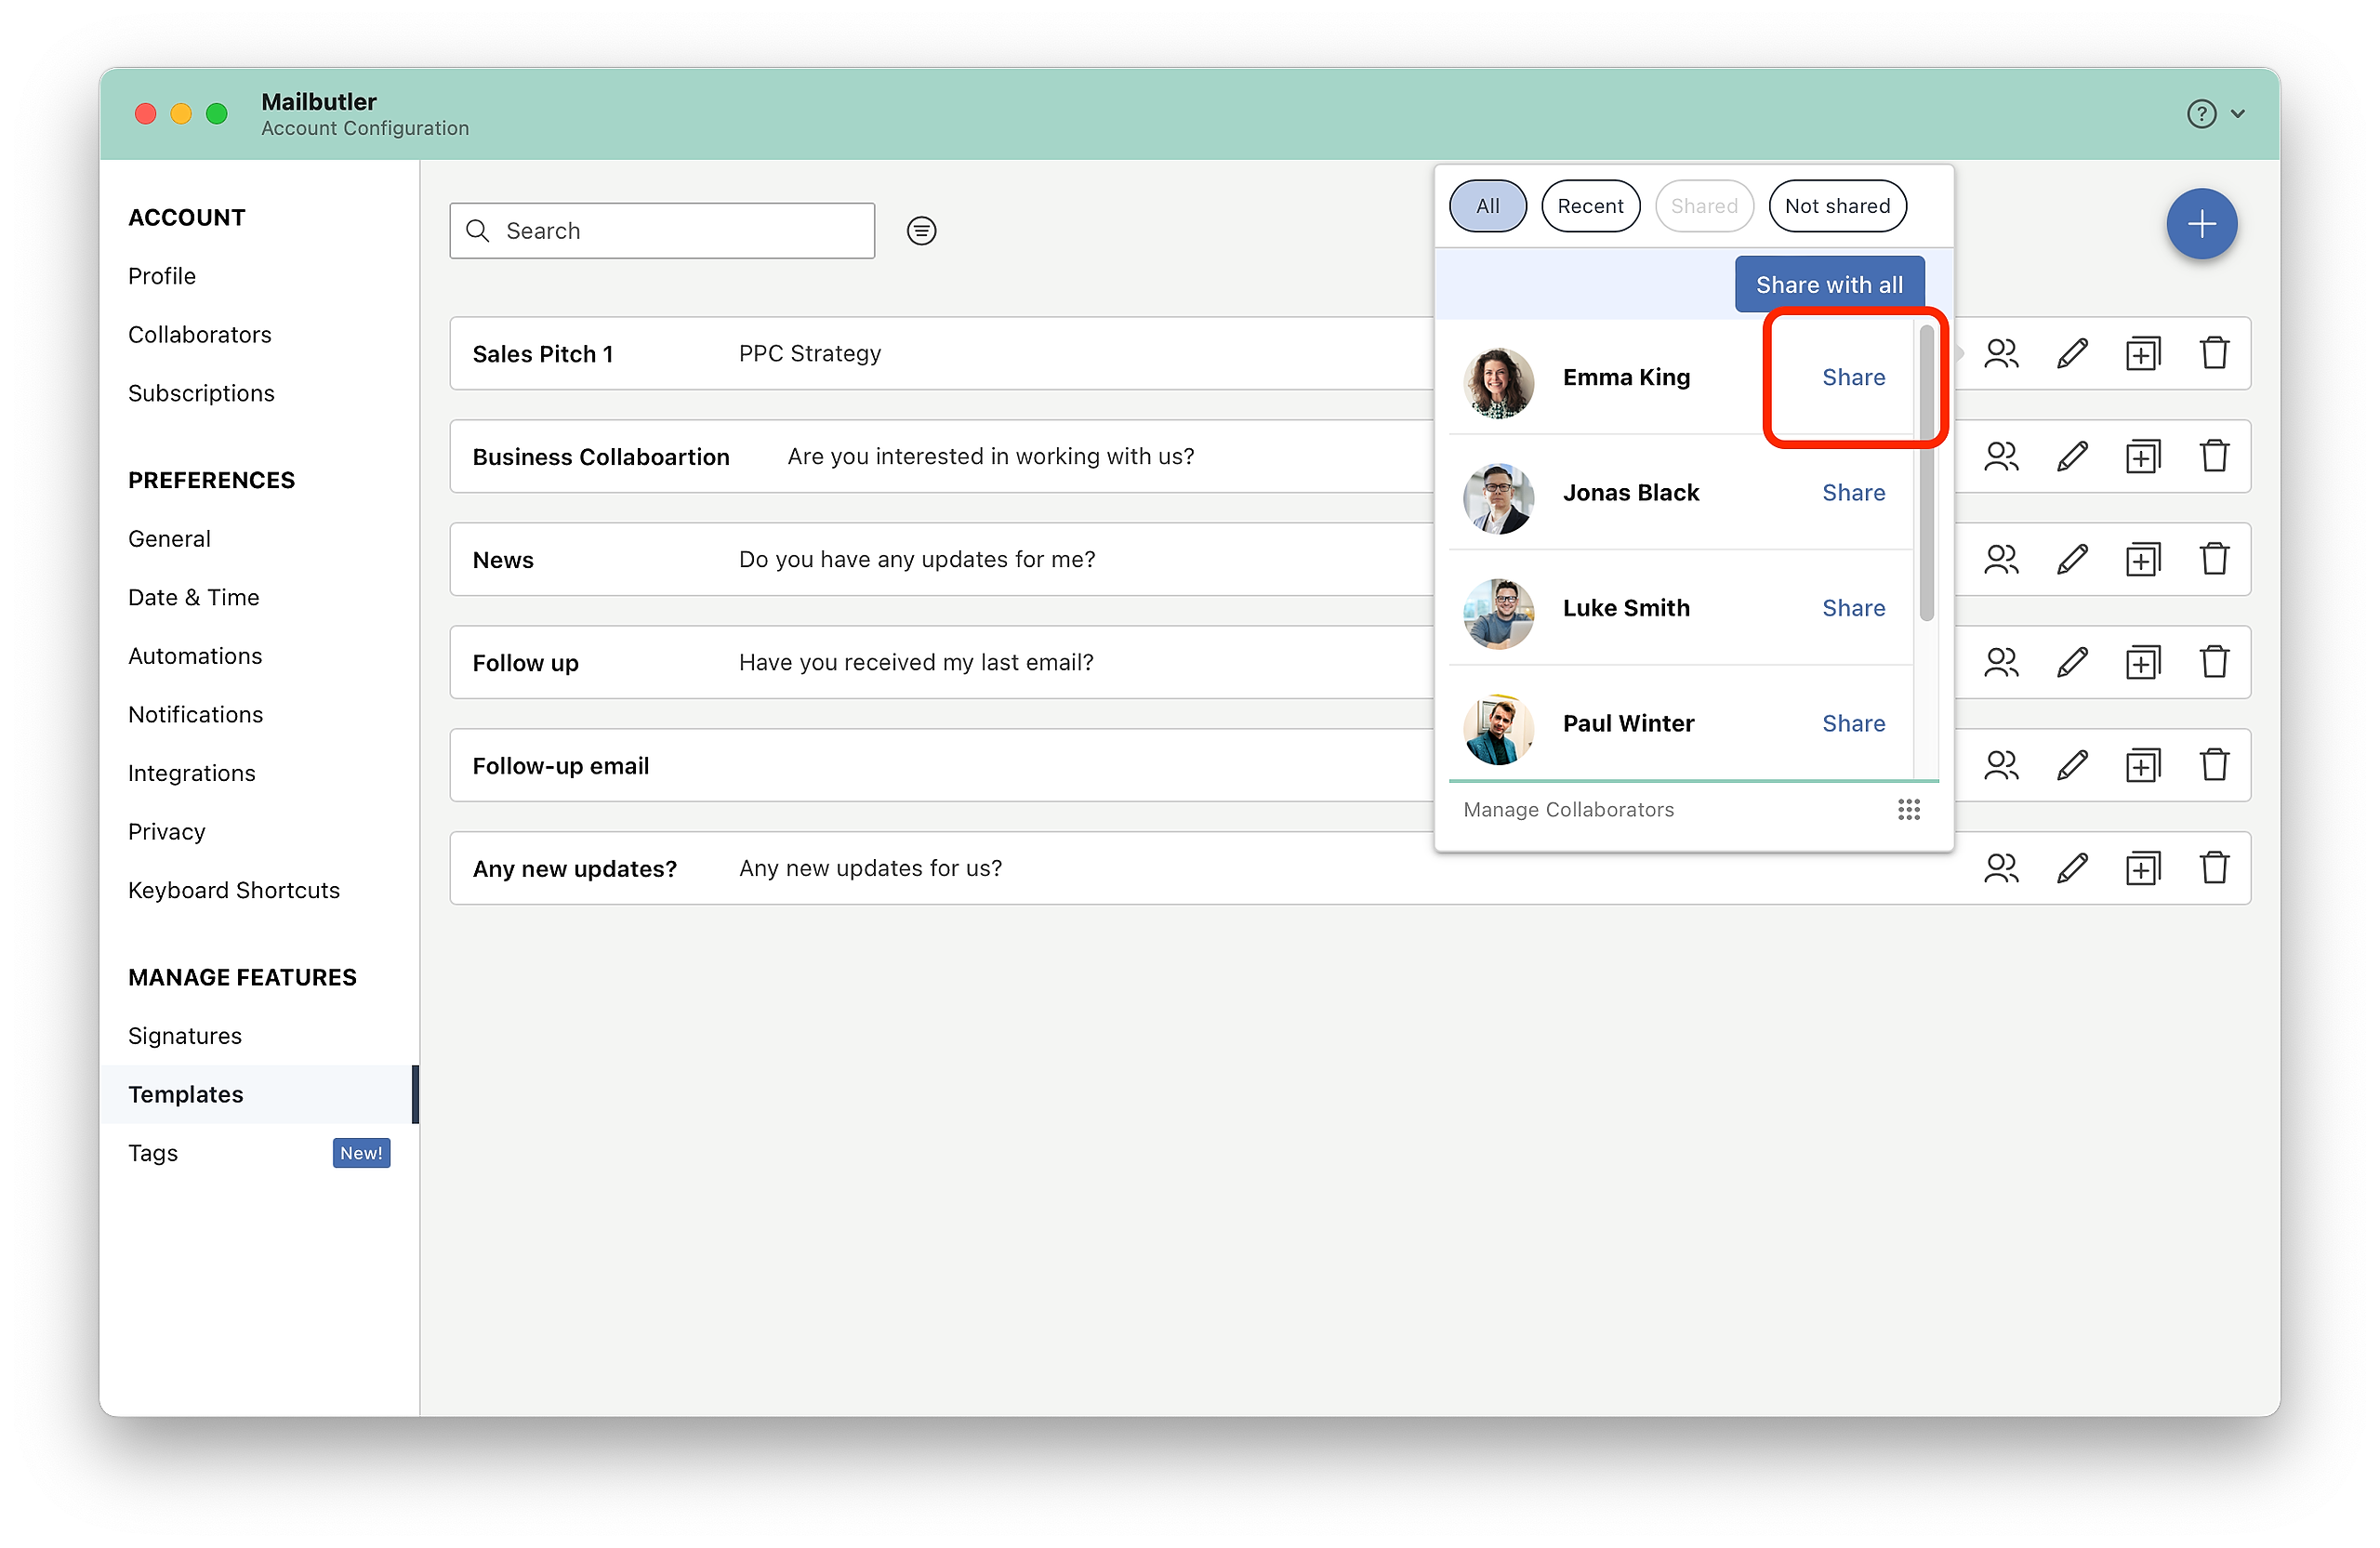
5. Select the Collaborator that you want to share the Message Template with and click Share.
Note: Shared Message Templates are read-only for your team members. Only the original creator has the option to edit, unshare or delete a shared Message Template.
Gmail
1. Click on the Mailbutler icon to open the Mailbutler Sidebar.

2. In the Mailbutler sidebar, click on the Account Settings (⚙) button, then Account & Preferences.
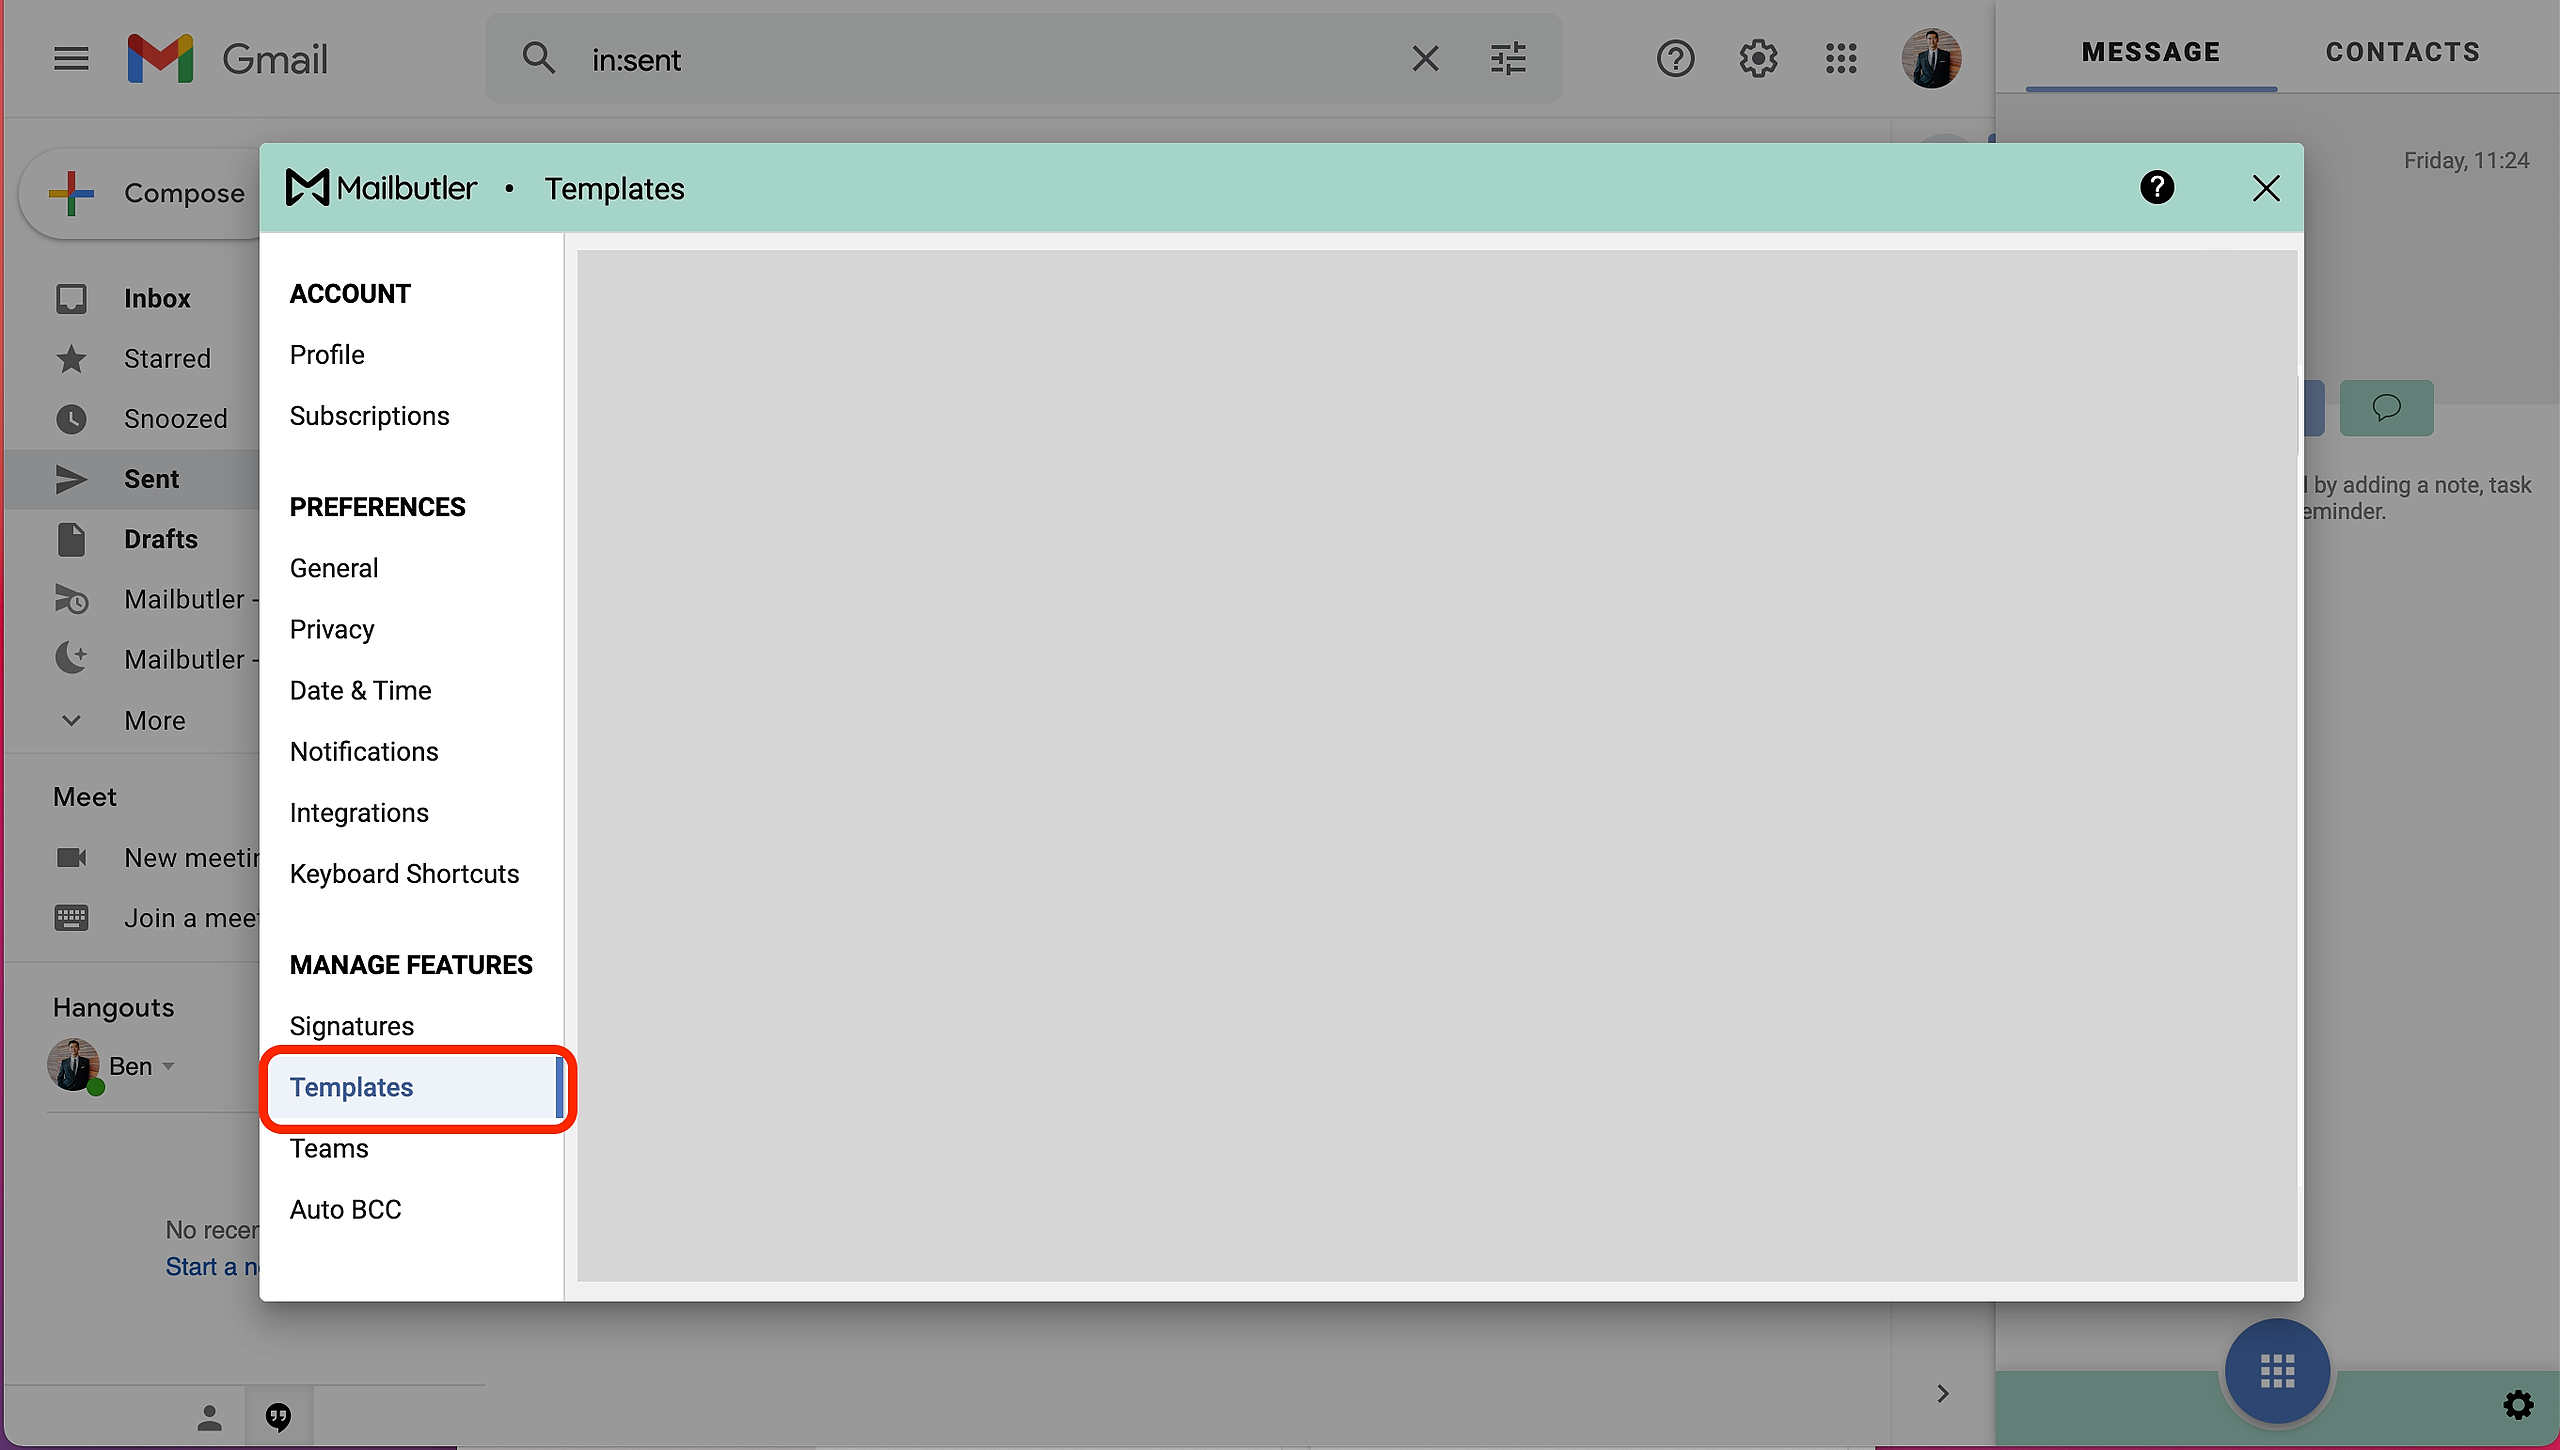
3. A new window will open. Select Message Templates under Manage Features in the sidebar on the left.
4. Select the Message Template that you would like to share or create a new one and click the sharing icon.
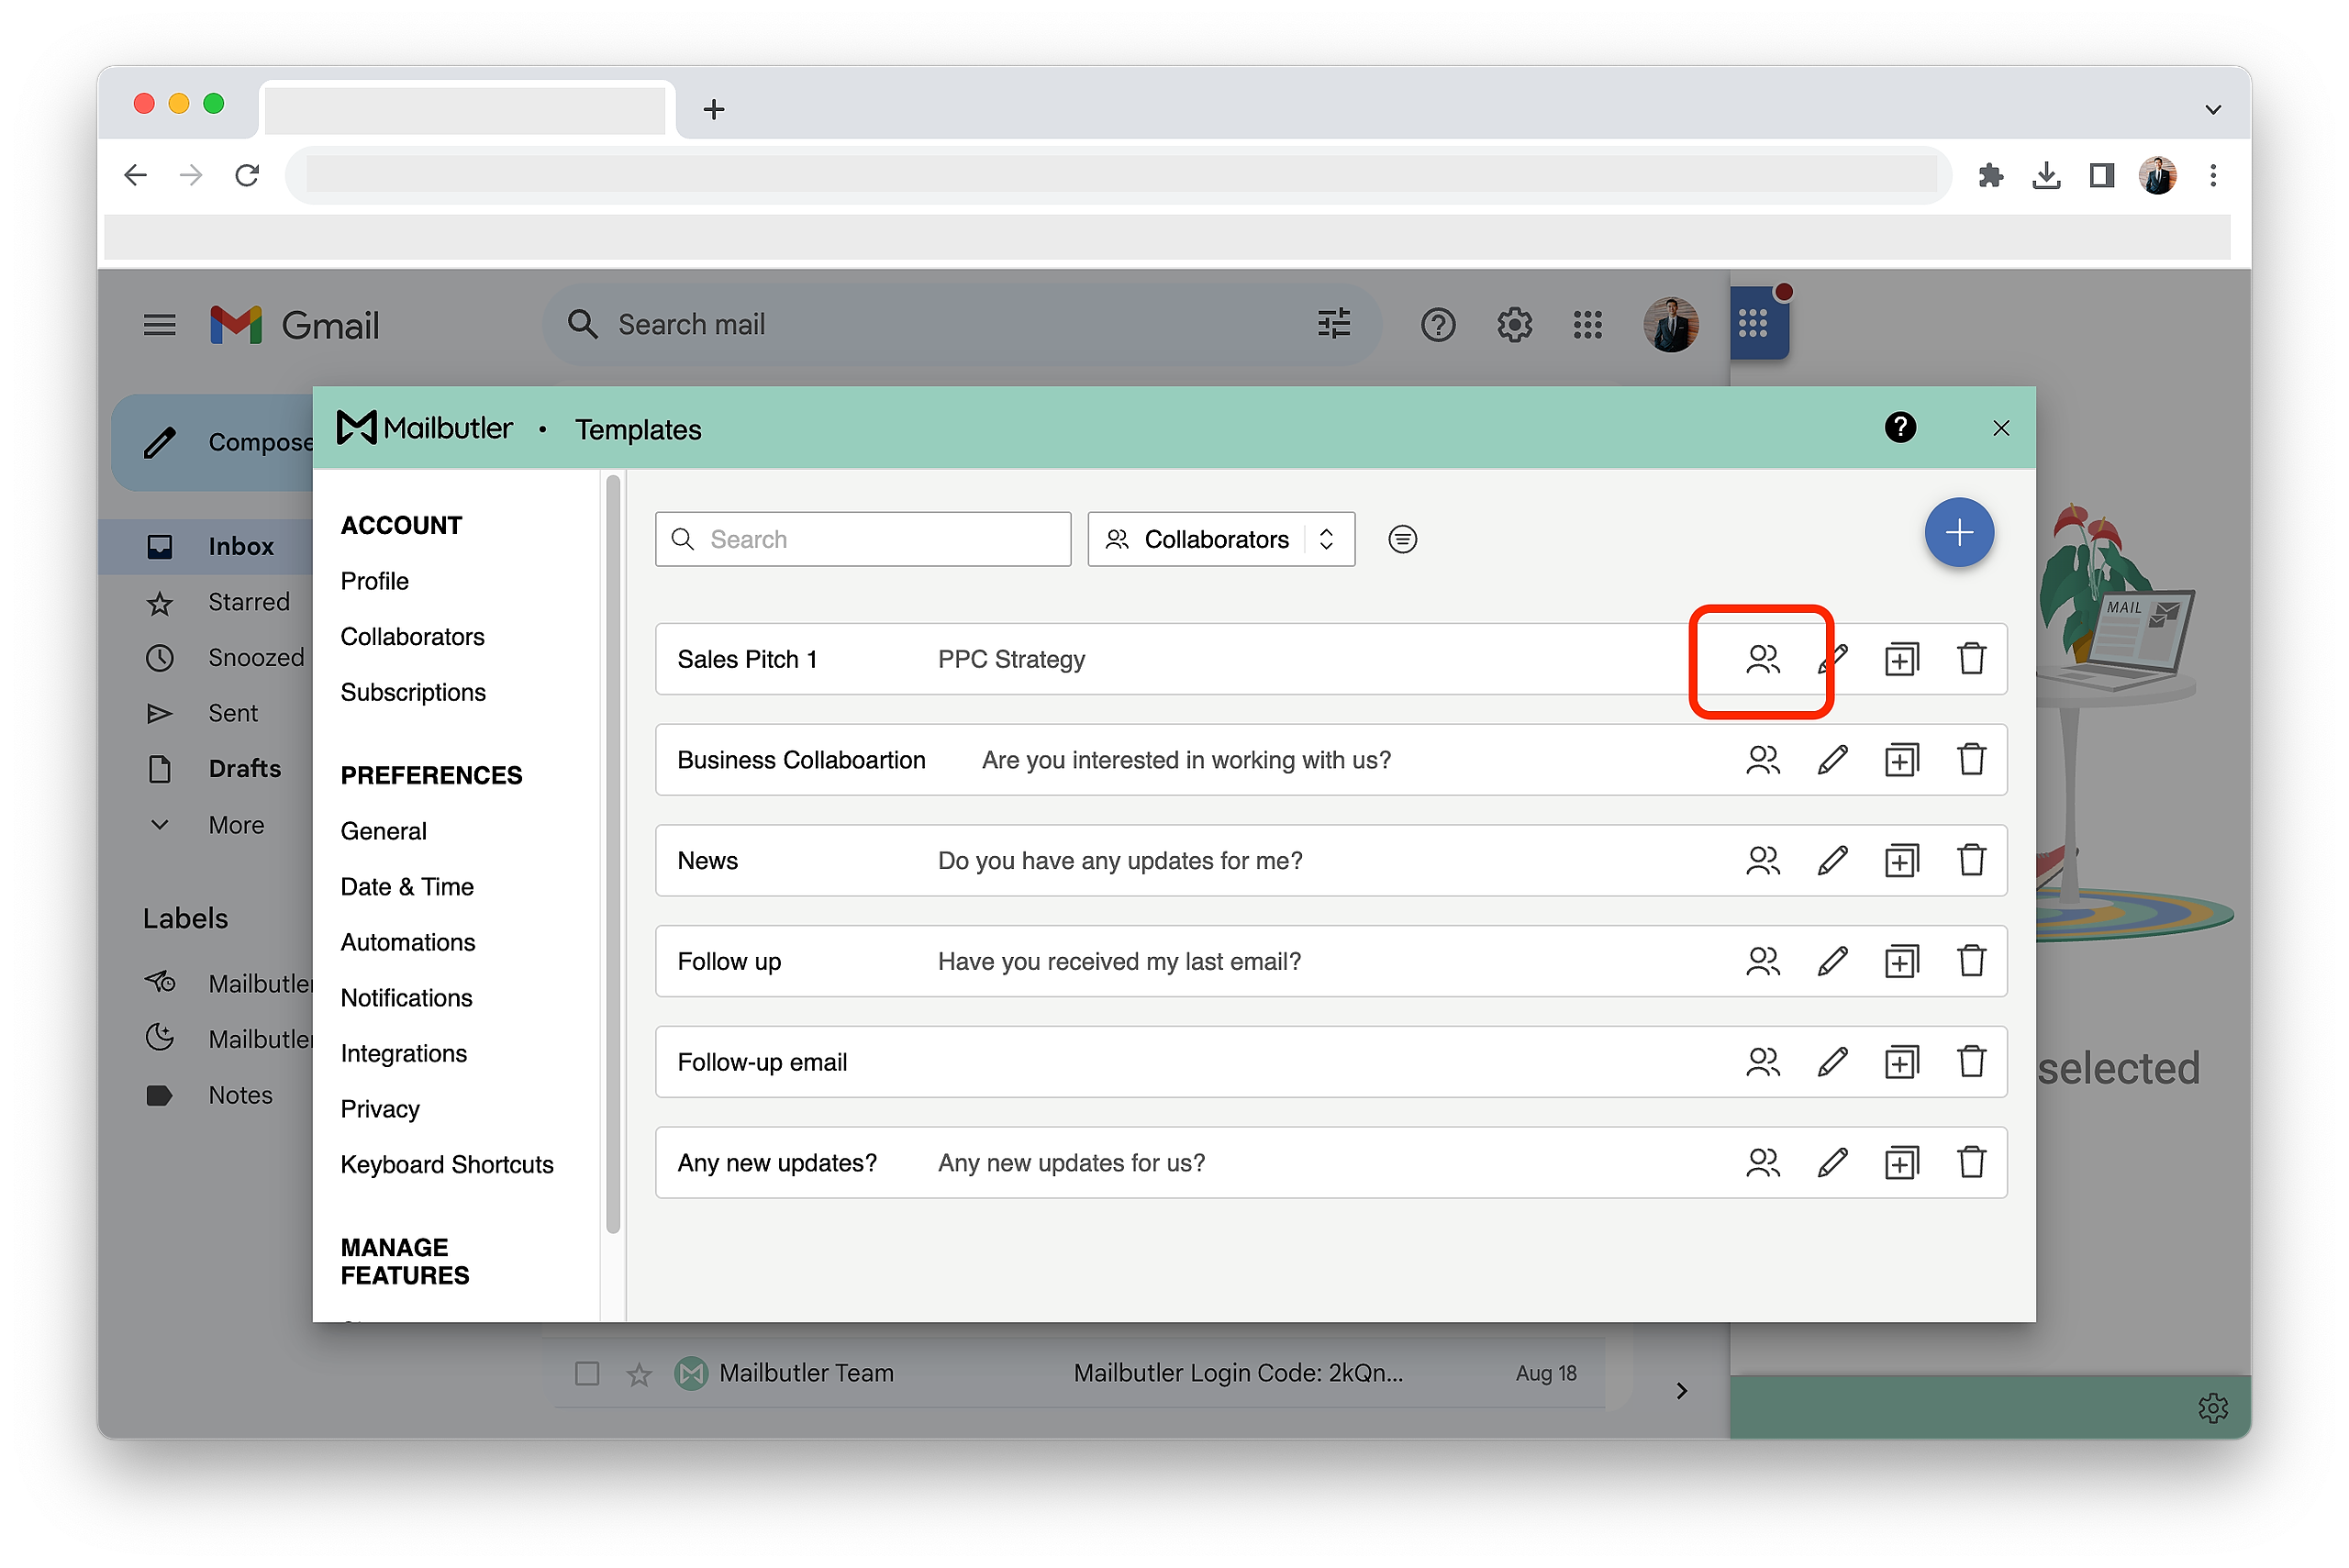
5. Select the Collaborator that you want to share the Message Template with and click Share.
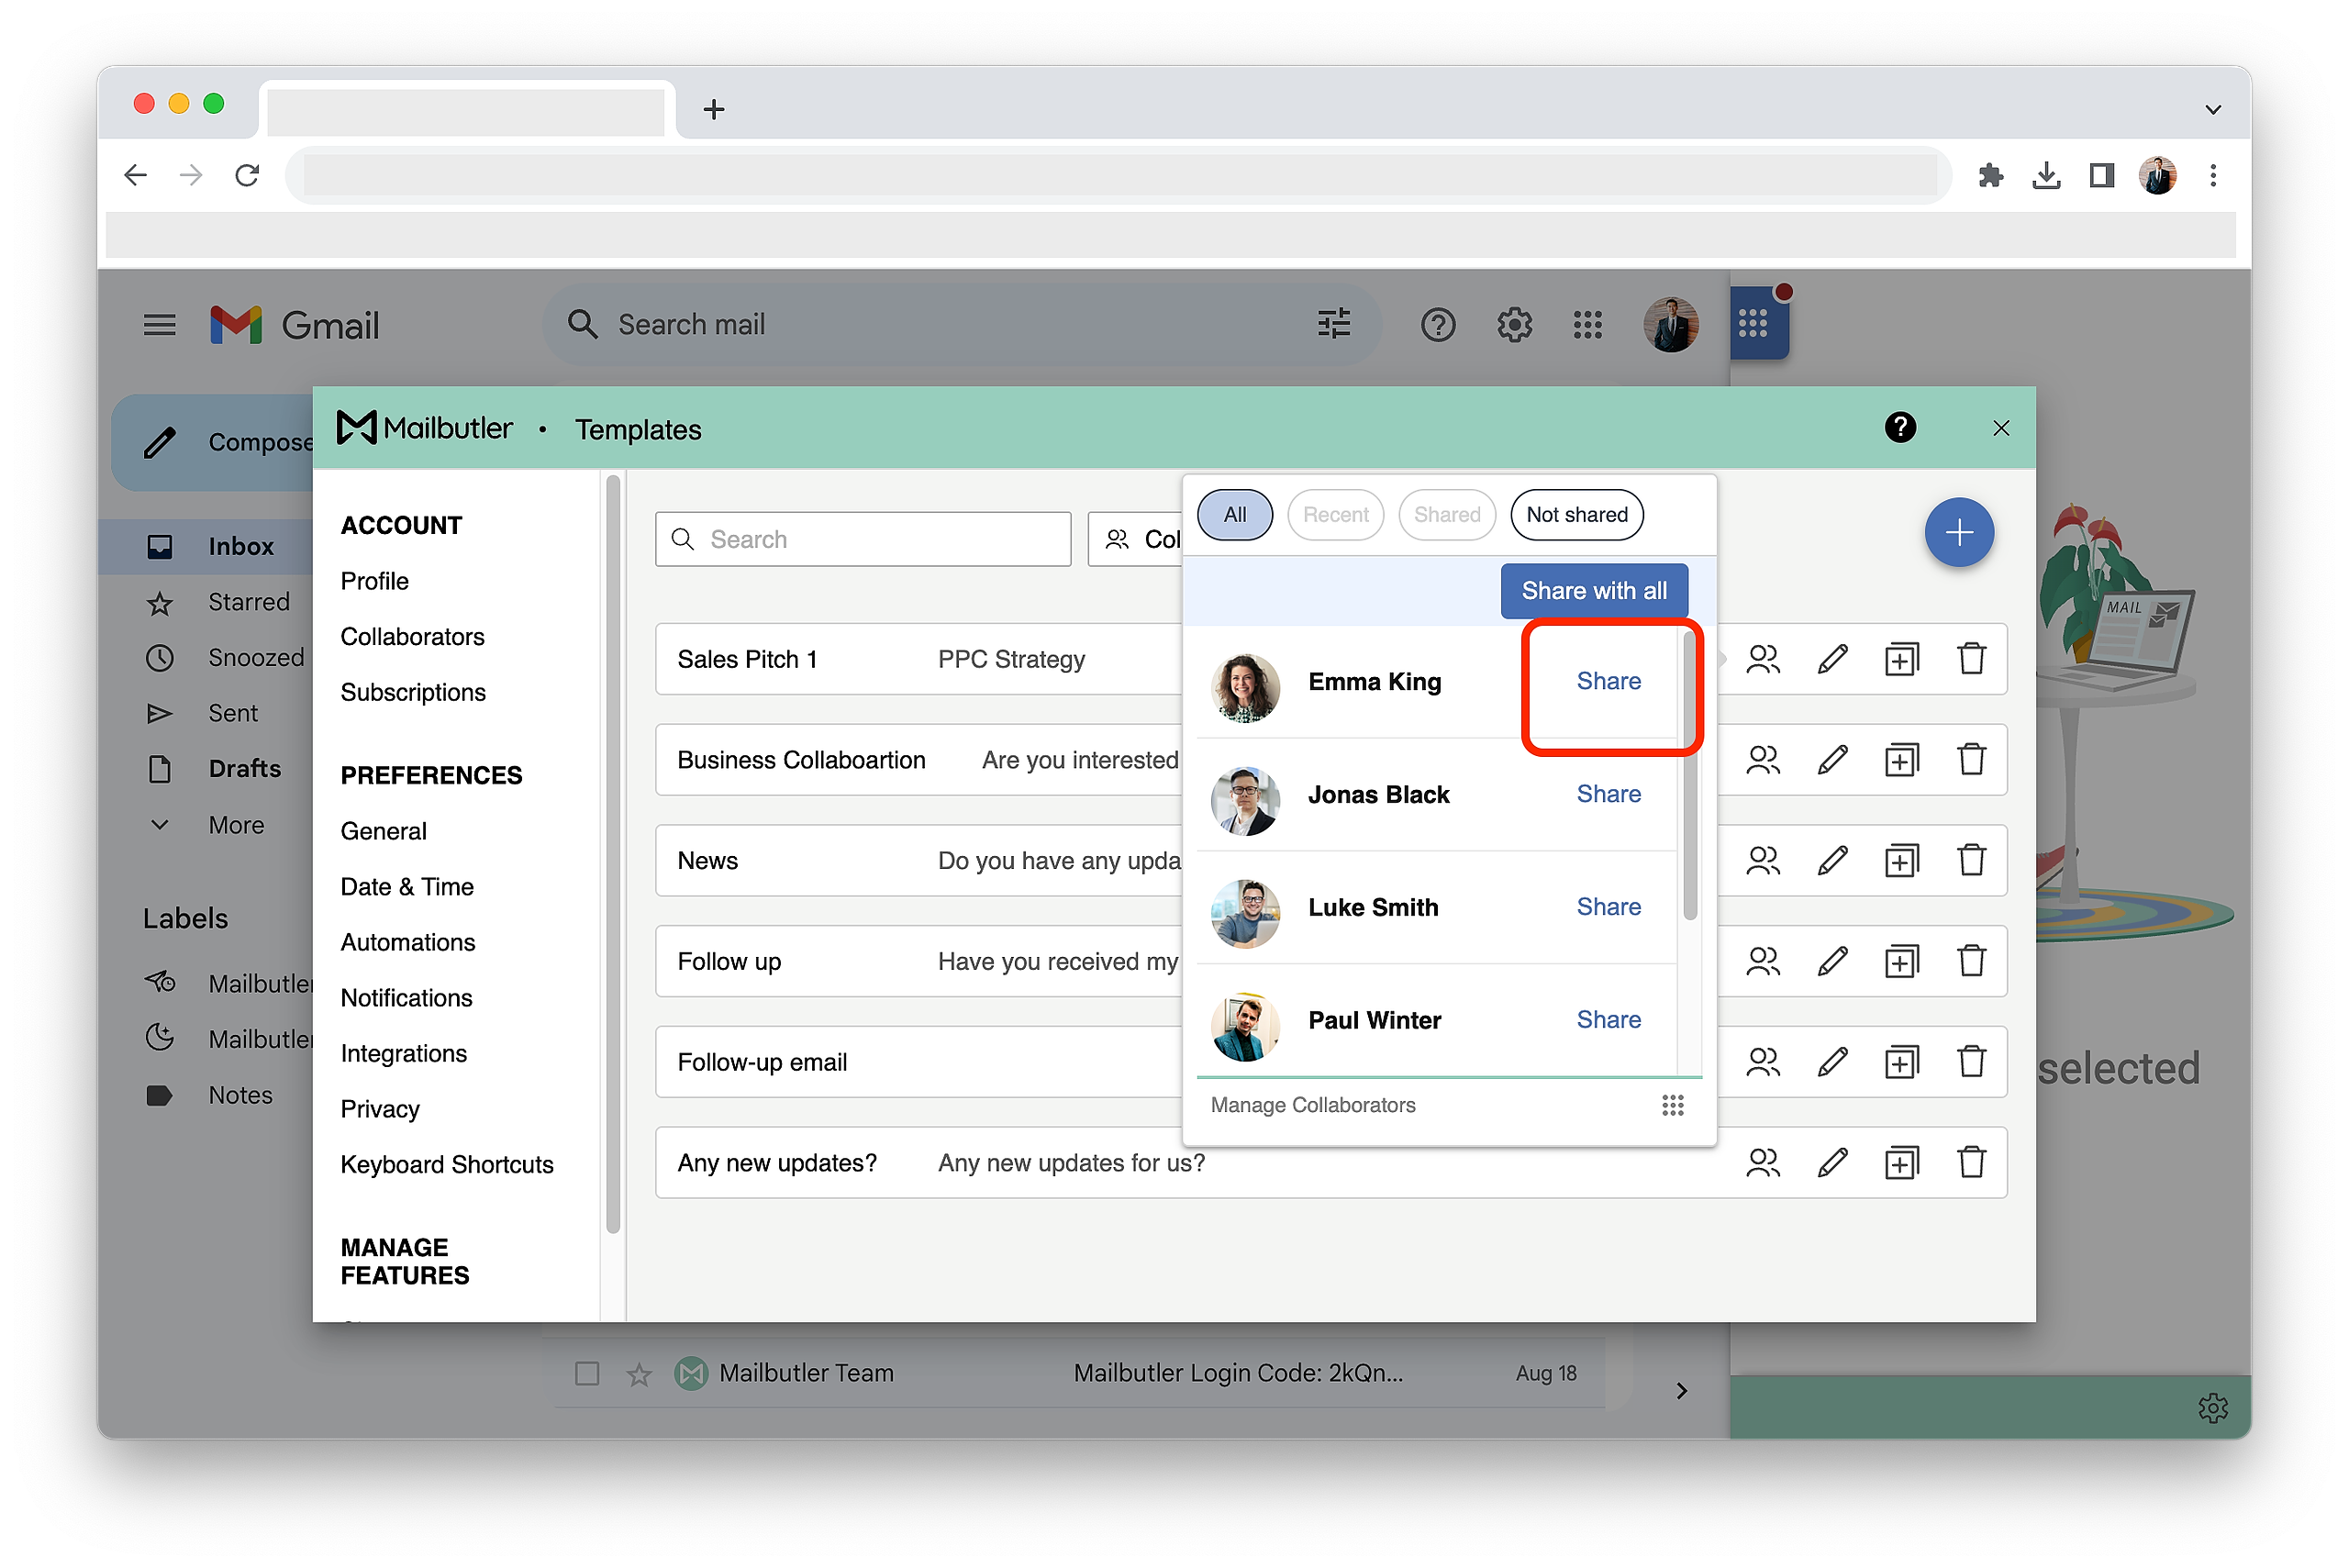
Note: Shared Message Templates are read-only for your team members. Only the original creator has the option to edit, unshare or delete a shared Message Template.
Outlook
1. Open the Mailbutler sidebar.
2. In the Mailbutler Sidebar, click the three dots and then Account & Preferences.
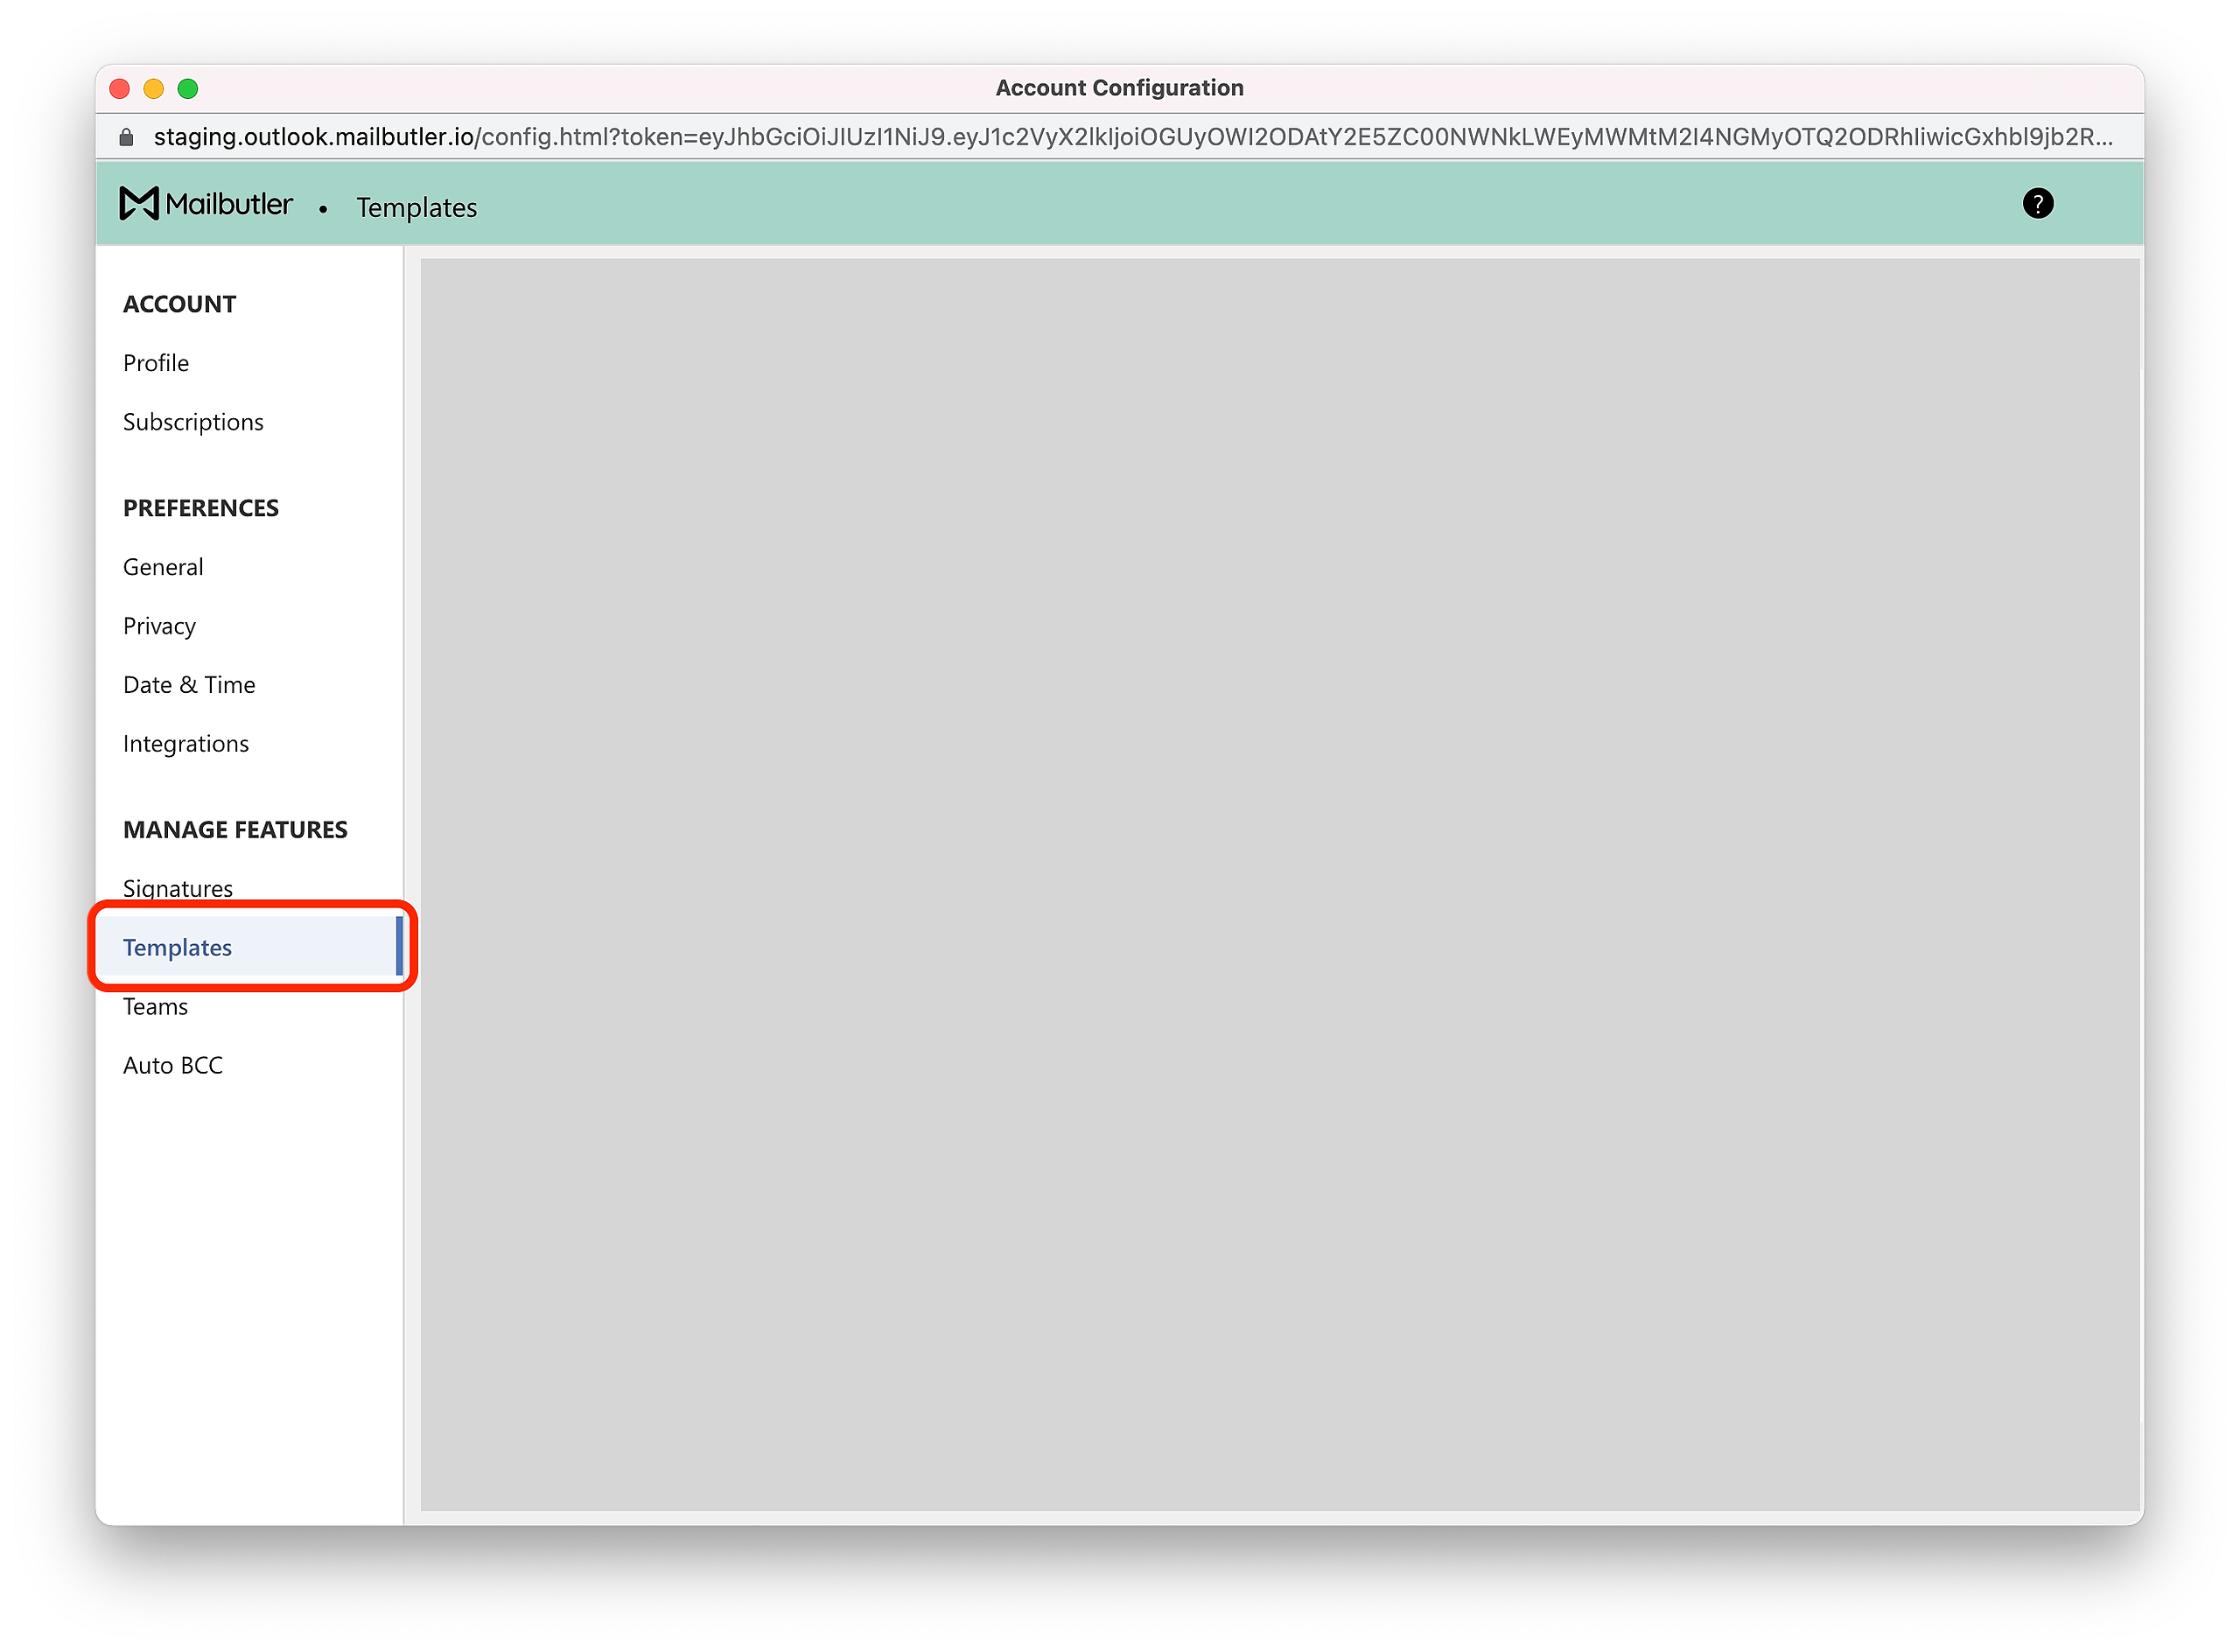
3. A new window will open. Select Message Templates under Manage Features in the sidebar on the left.
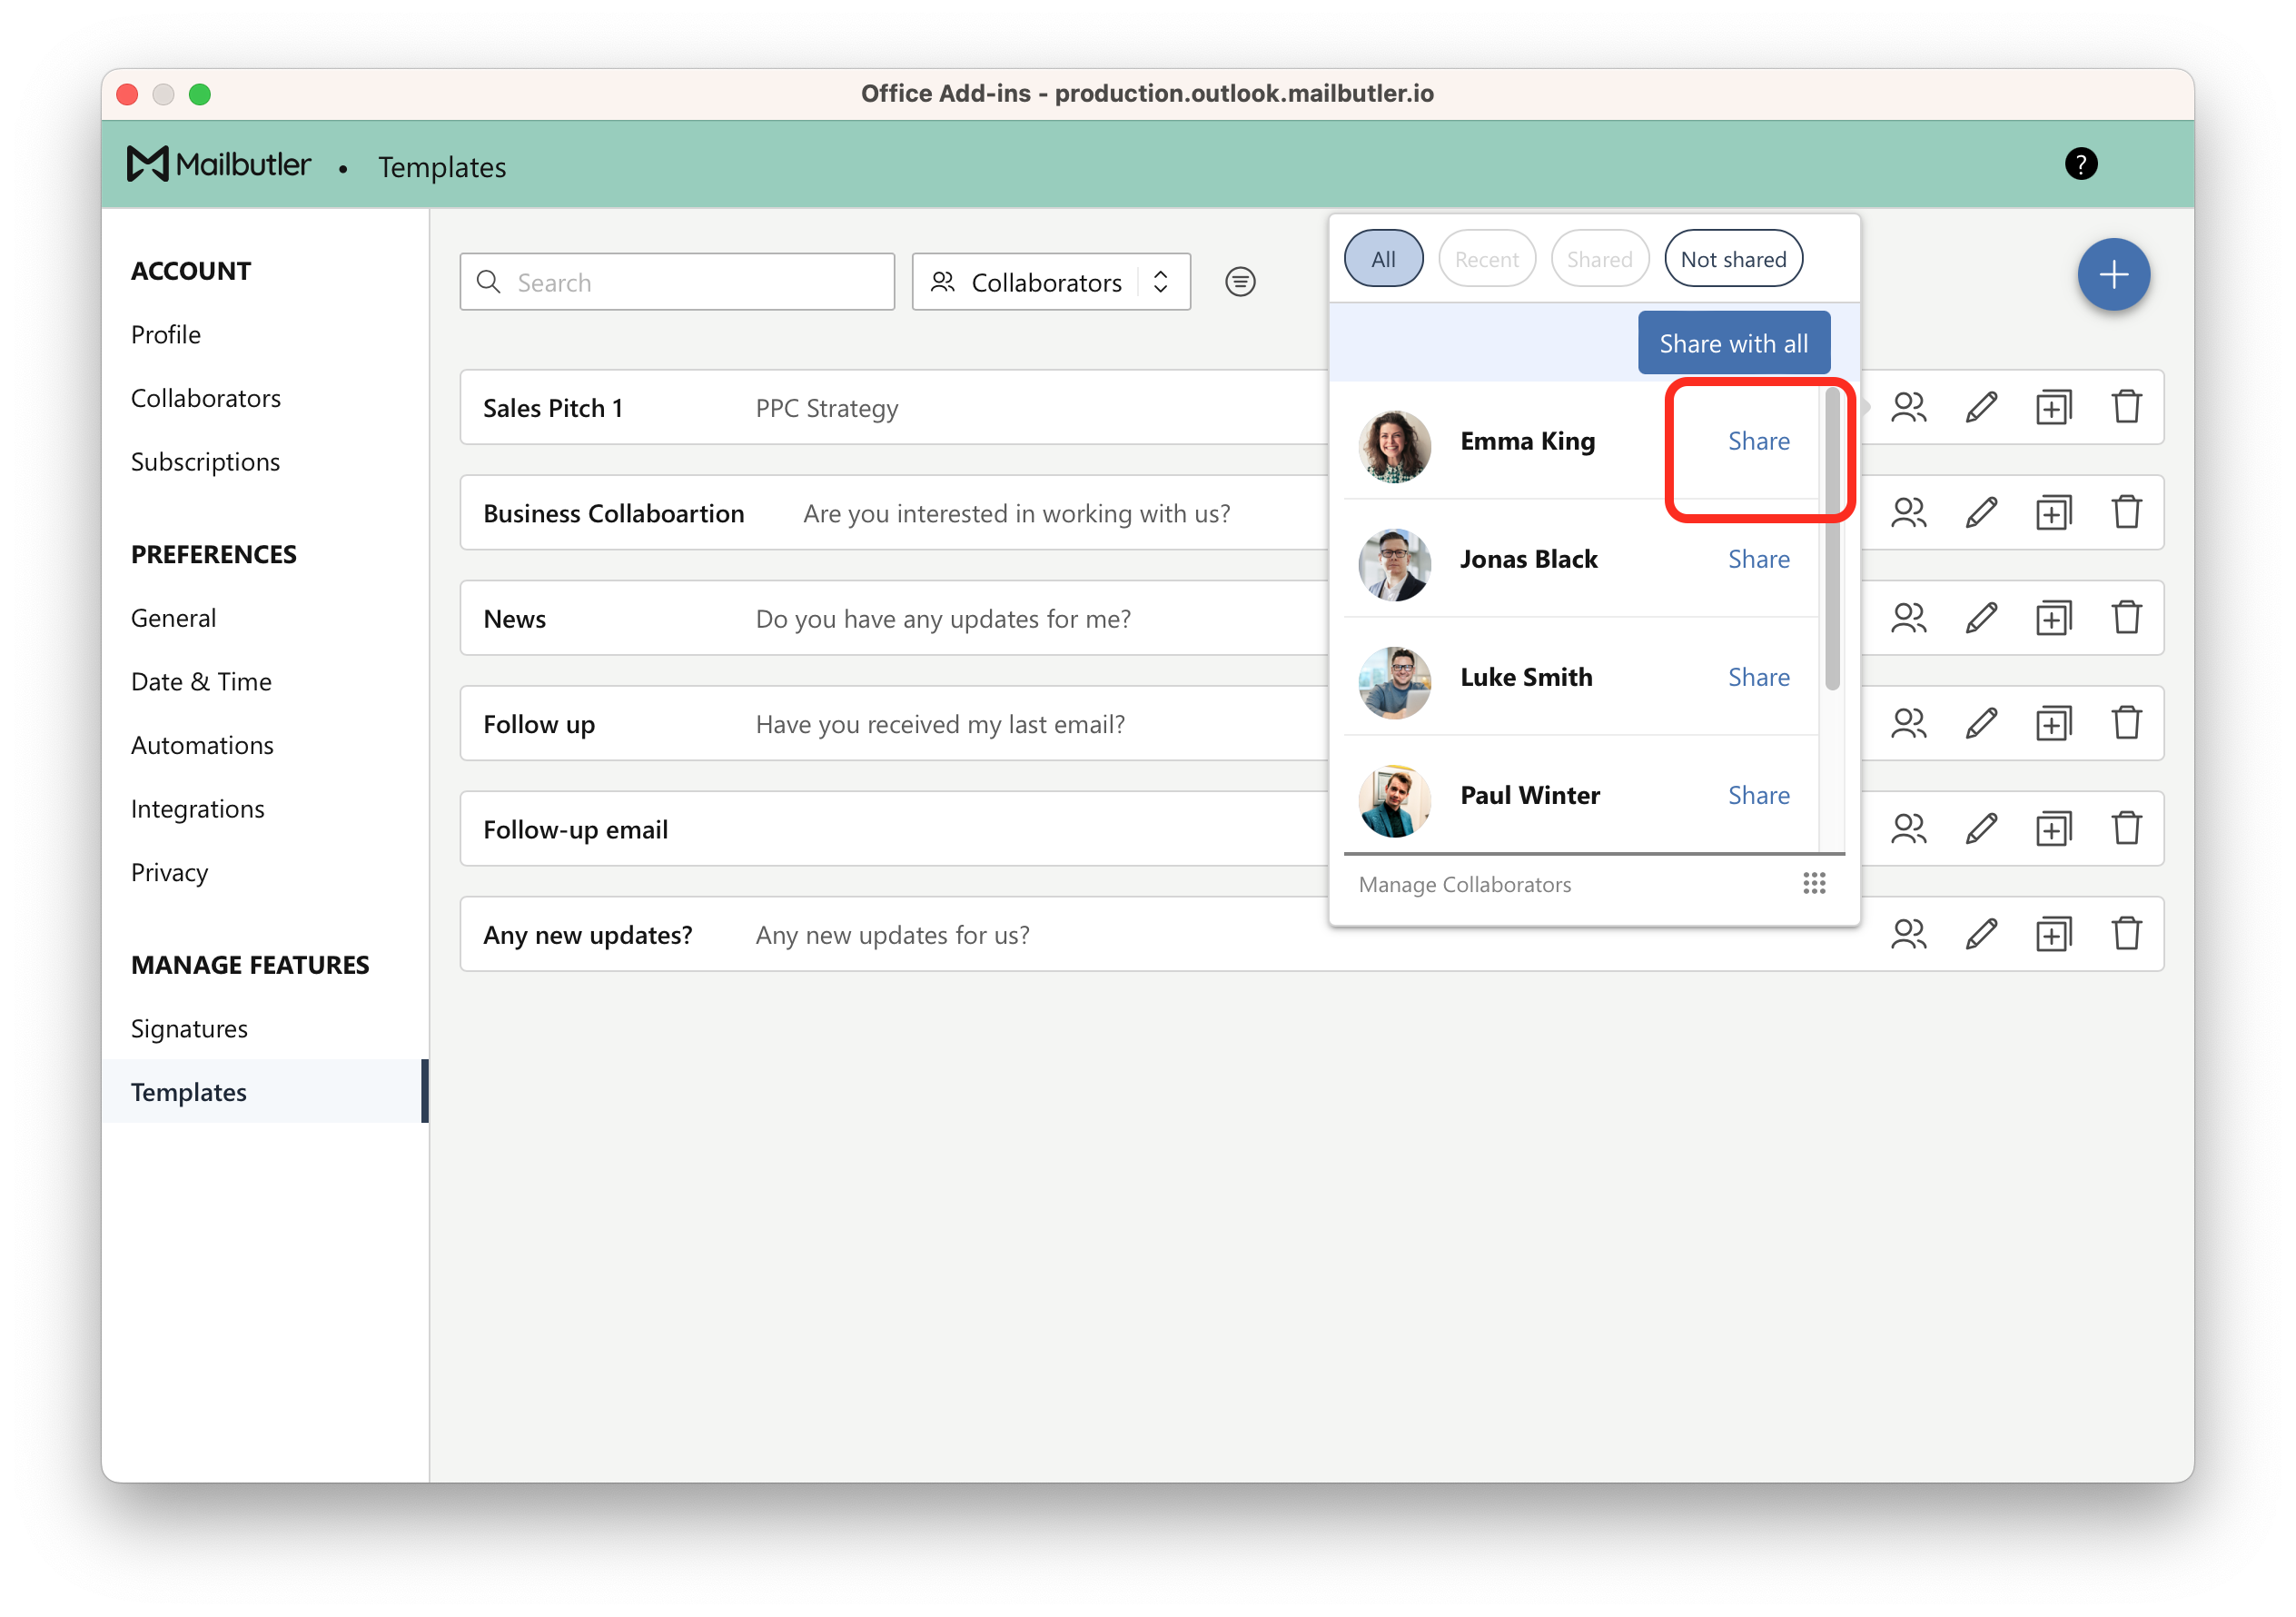
4. Select the Message Template that you would like to share or create a new one and click the sharing icon.
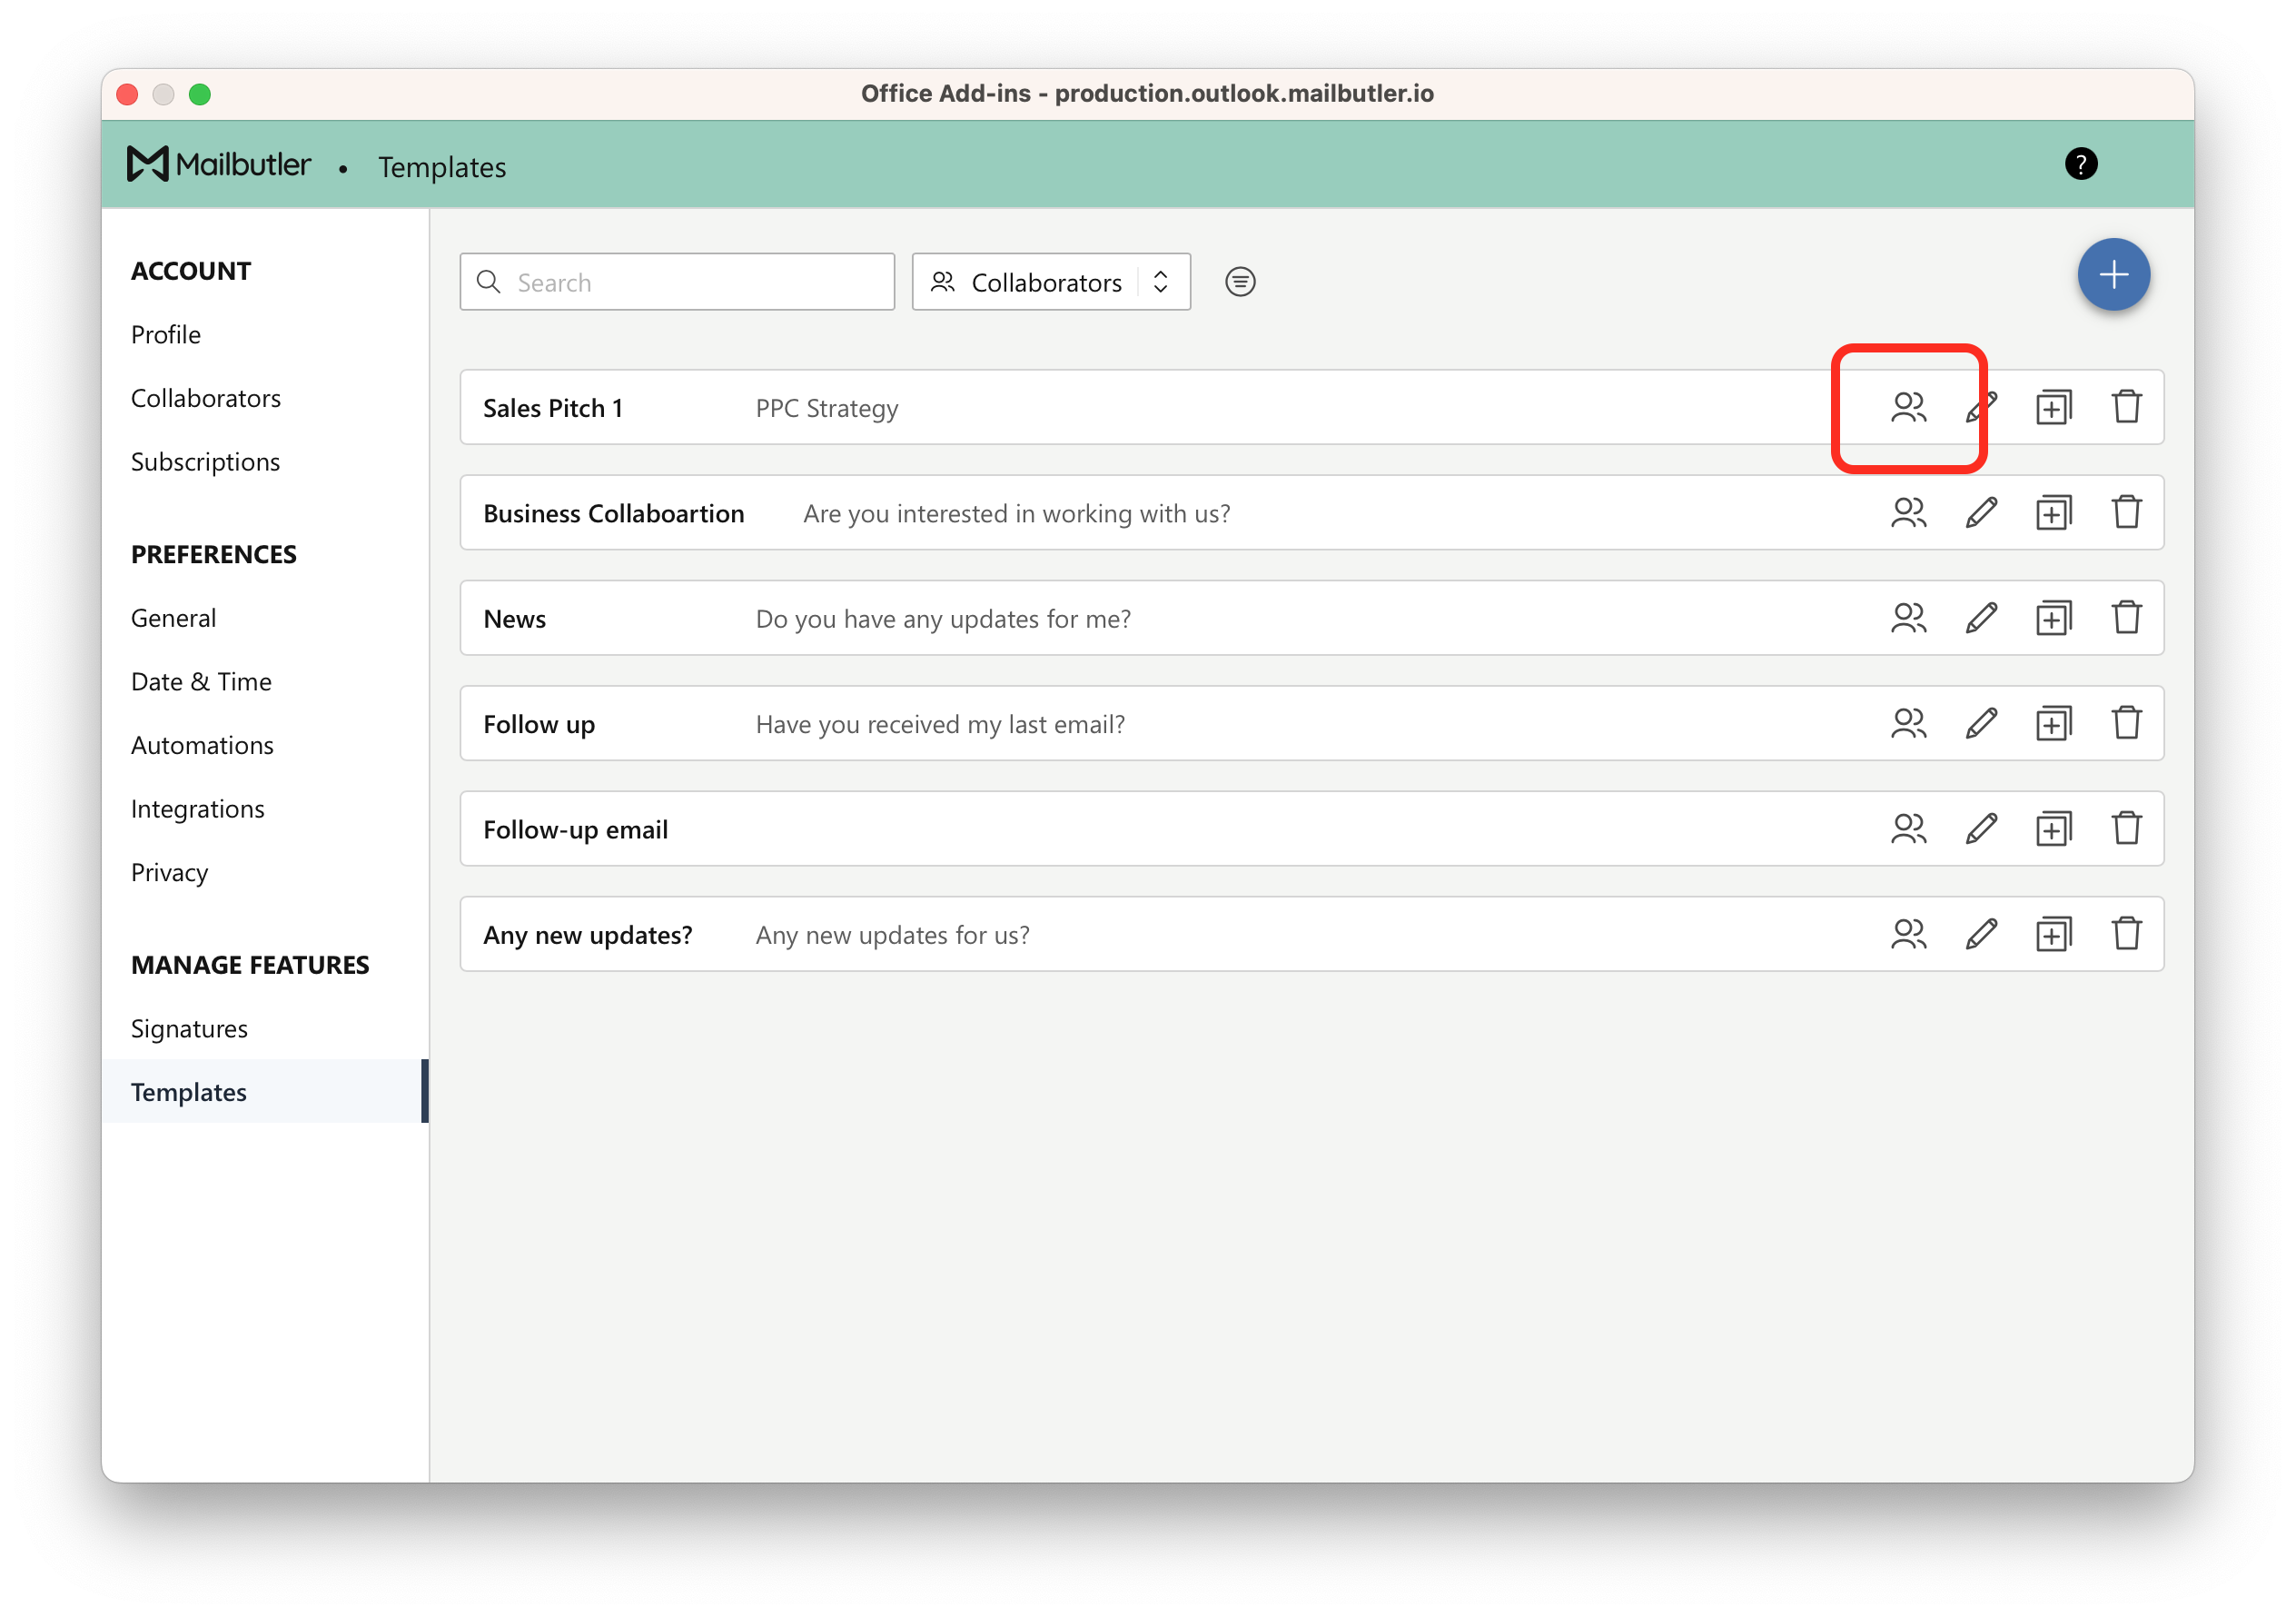
5. Select the Collaborator that you want to share the Message Template with and click Share.
Note: Shared Message Templates are read-only for your team members. Only the original creator has the option to edit, unshare or delete a shared Message Template.
How do I share Signatures?
Apple Mail
1. Click the Mailbutler icon at the top of your Apple Mail window to open the Mailbutler Sidebar.
2. In the Mailbutler Sidebar, click the three dots and then Account & Preferences.
3. A new window will open. Select Signatures under Manage Features in the sidebar on the left.
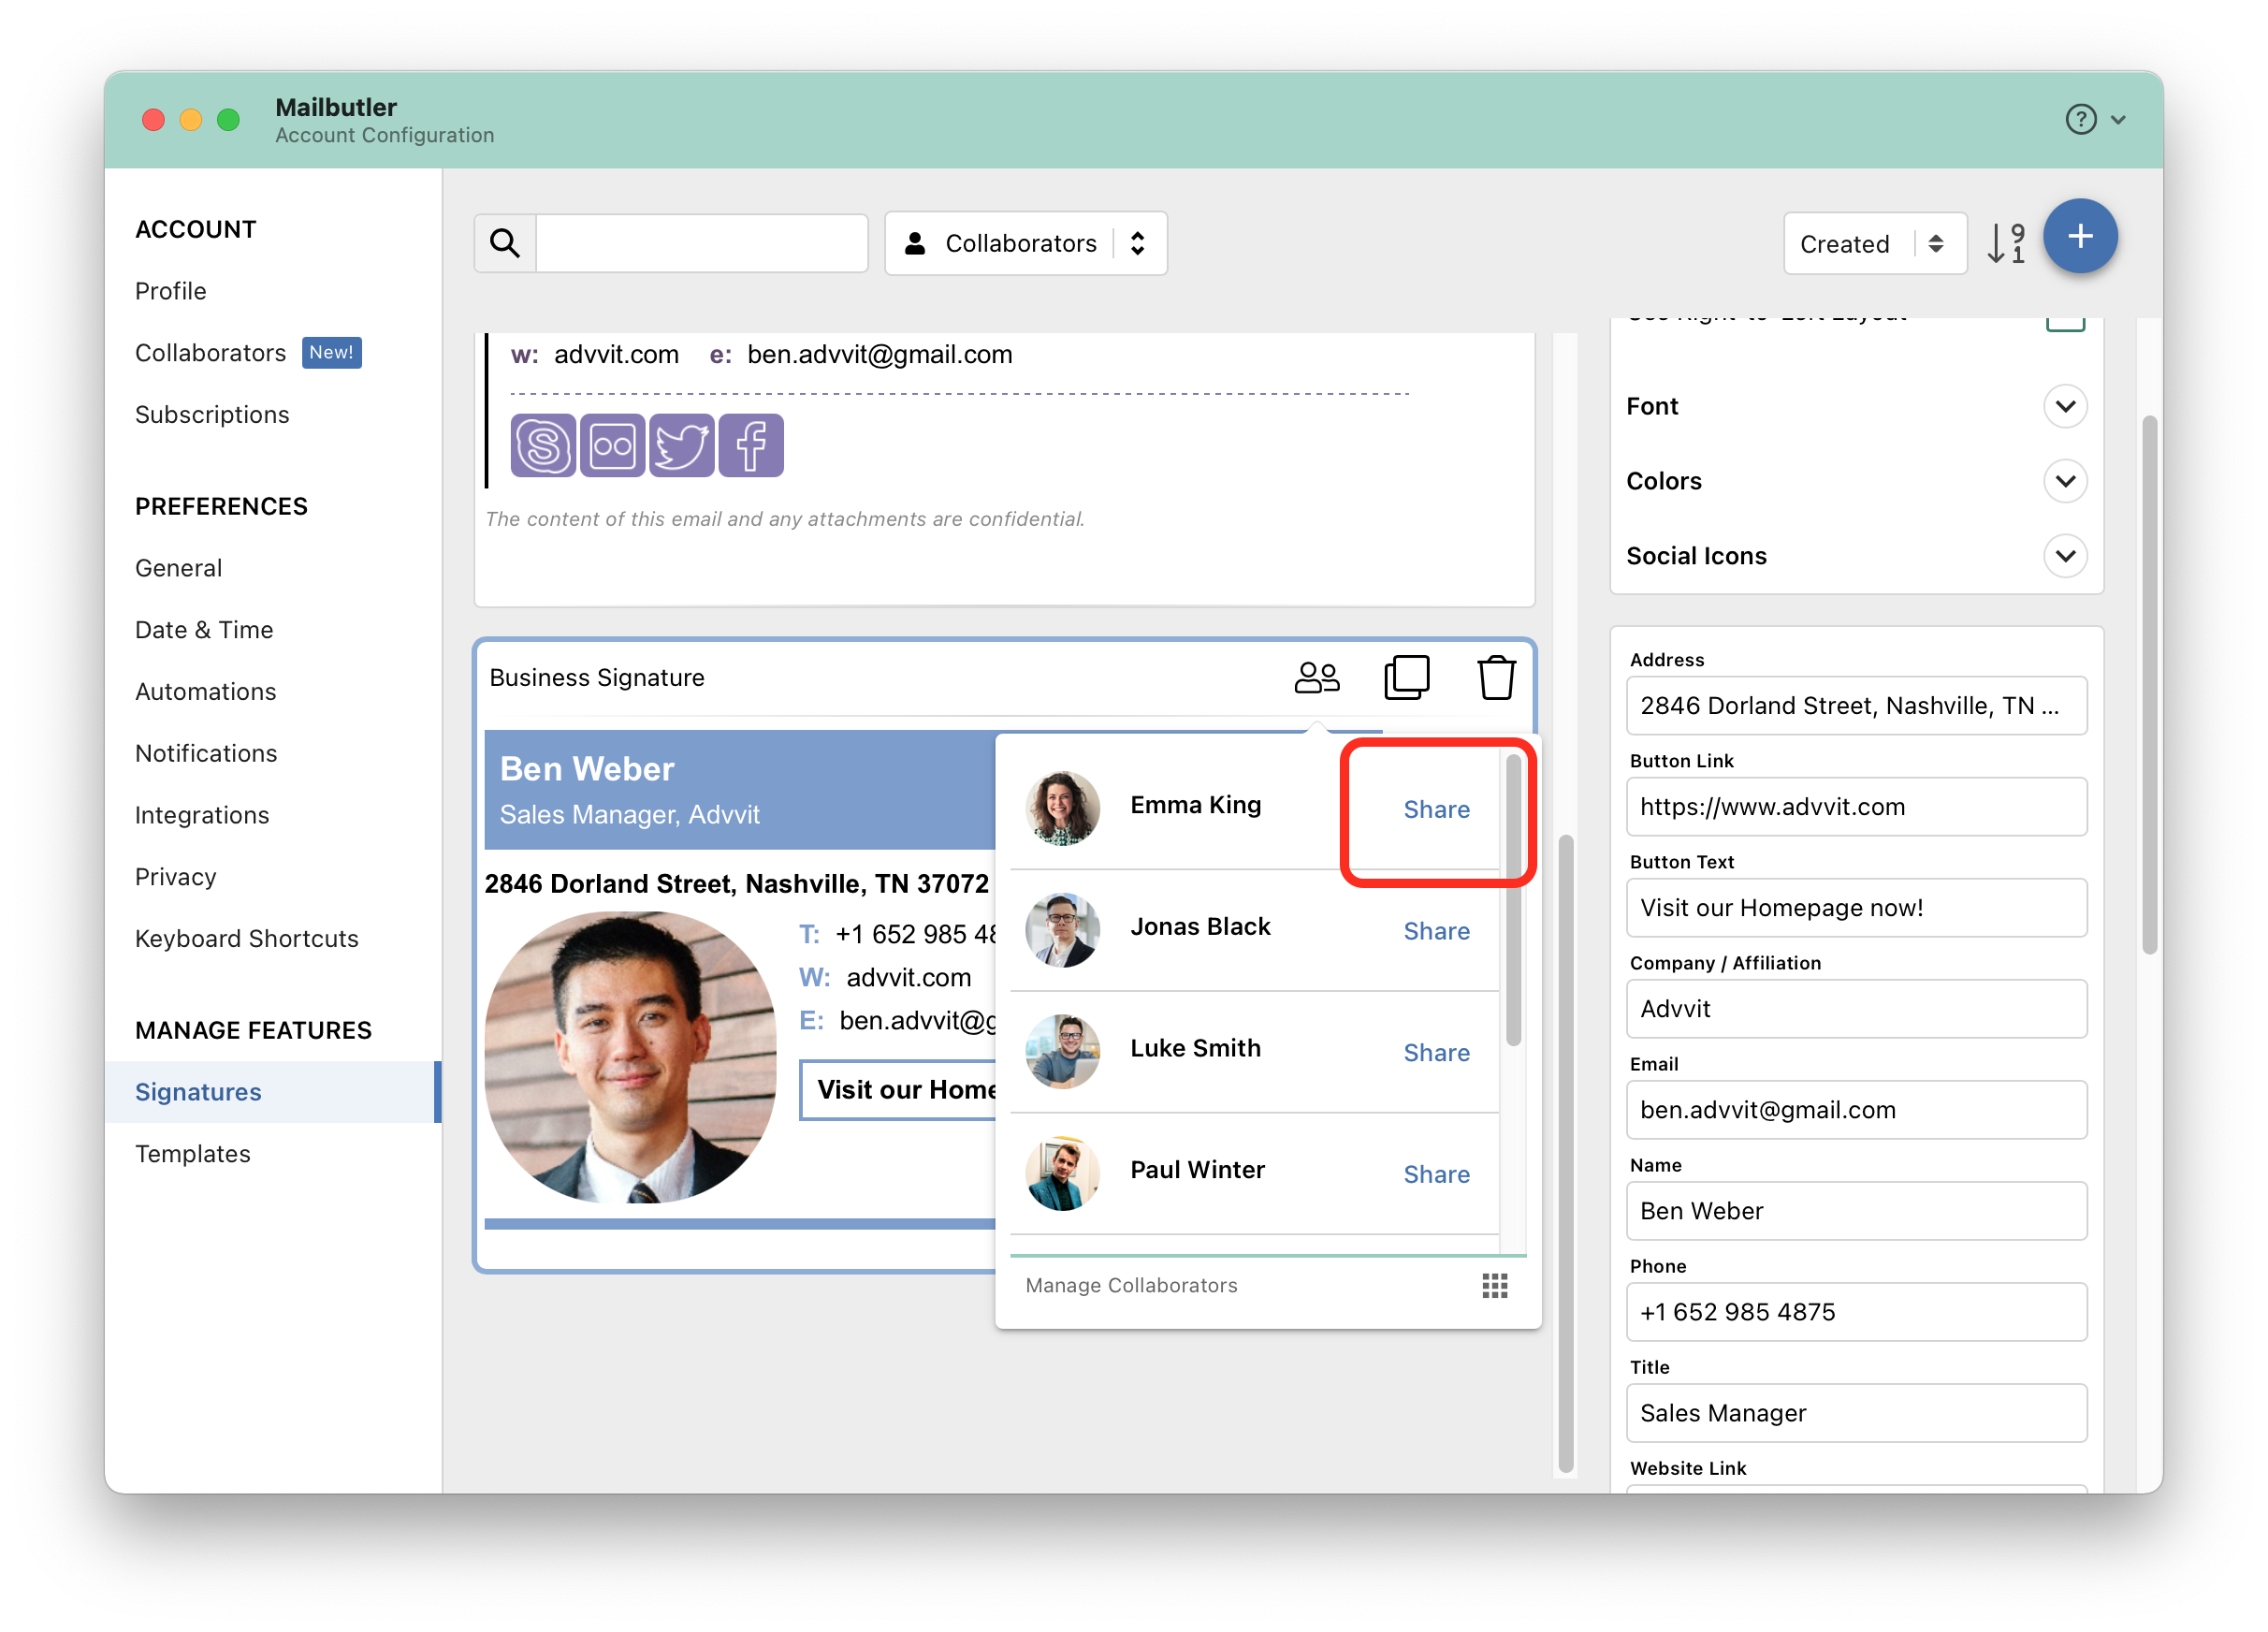
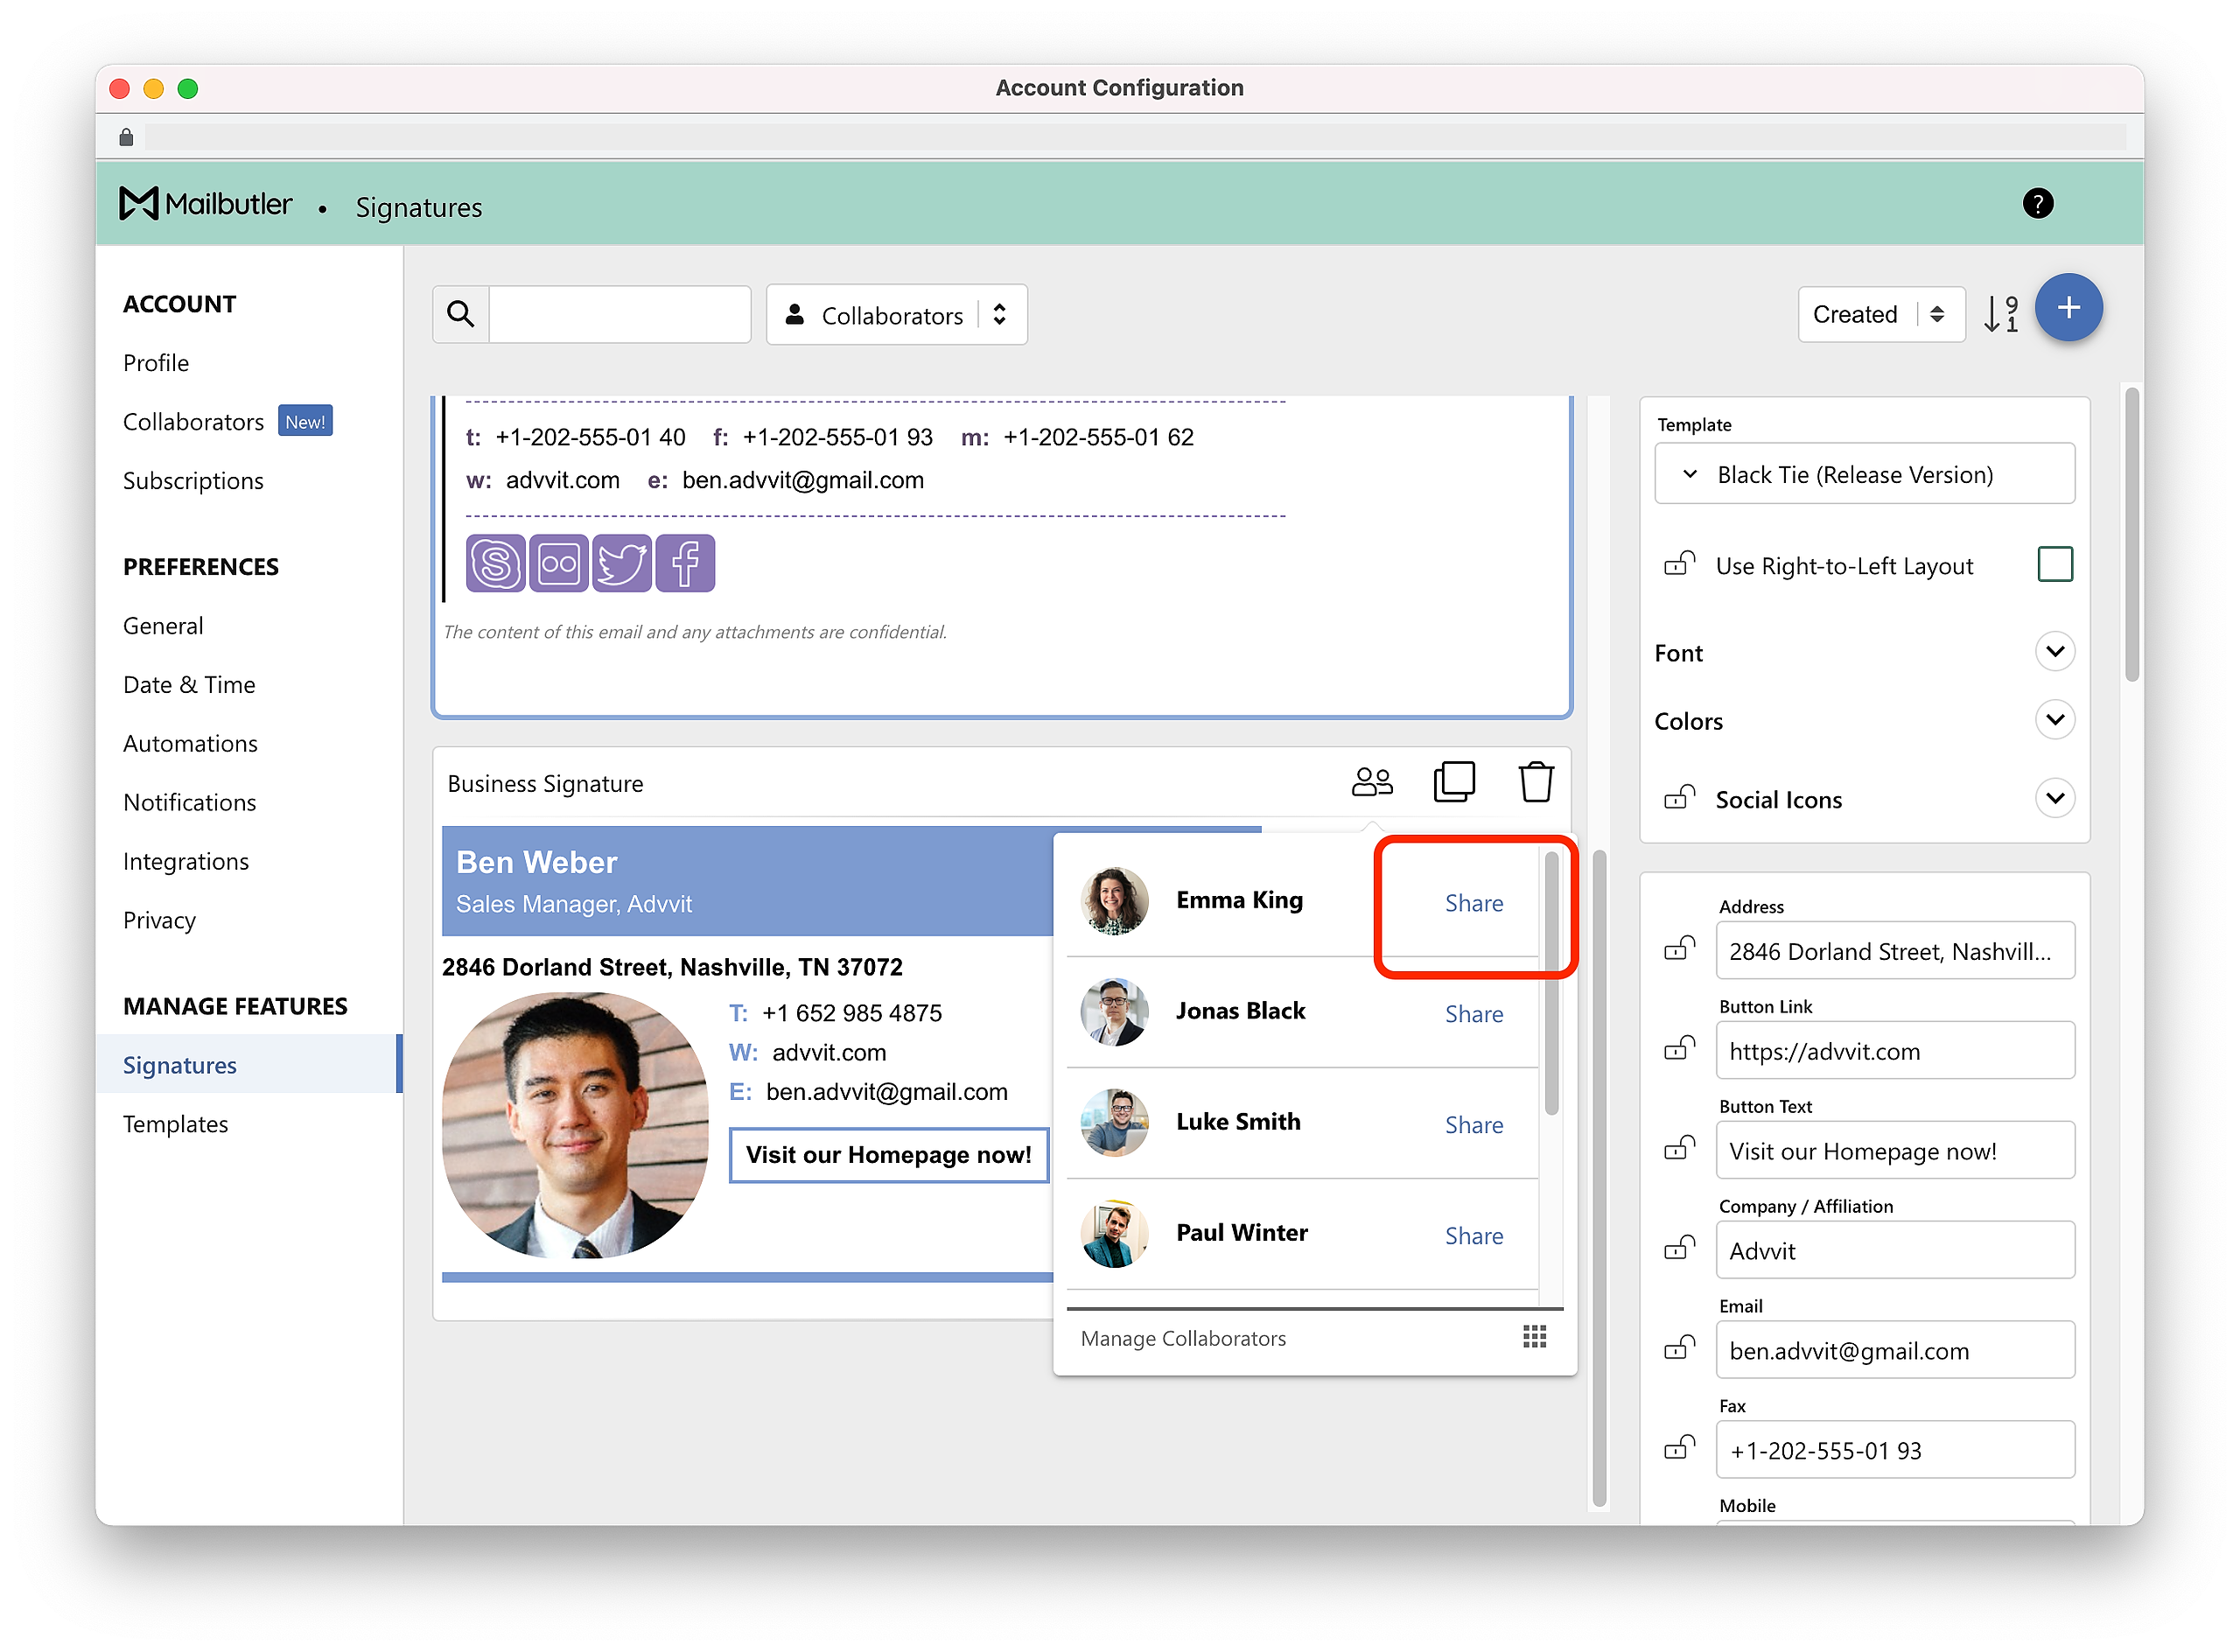
4. Select the Signature that you would like to share or create a new one and click the sharing icon.
5. Select the Collaborator that you want to share the Signature with and click Share.
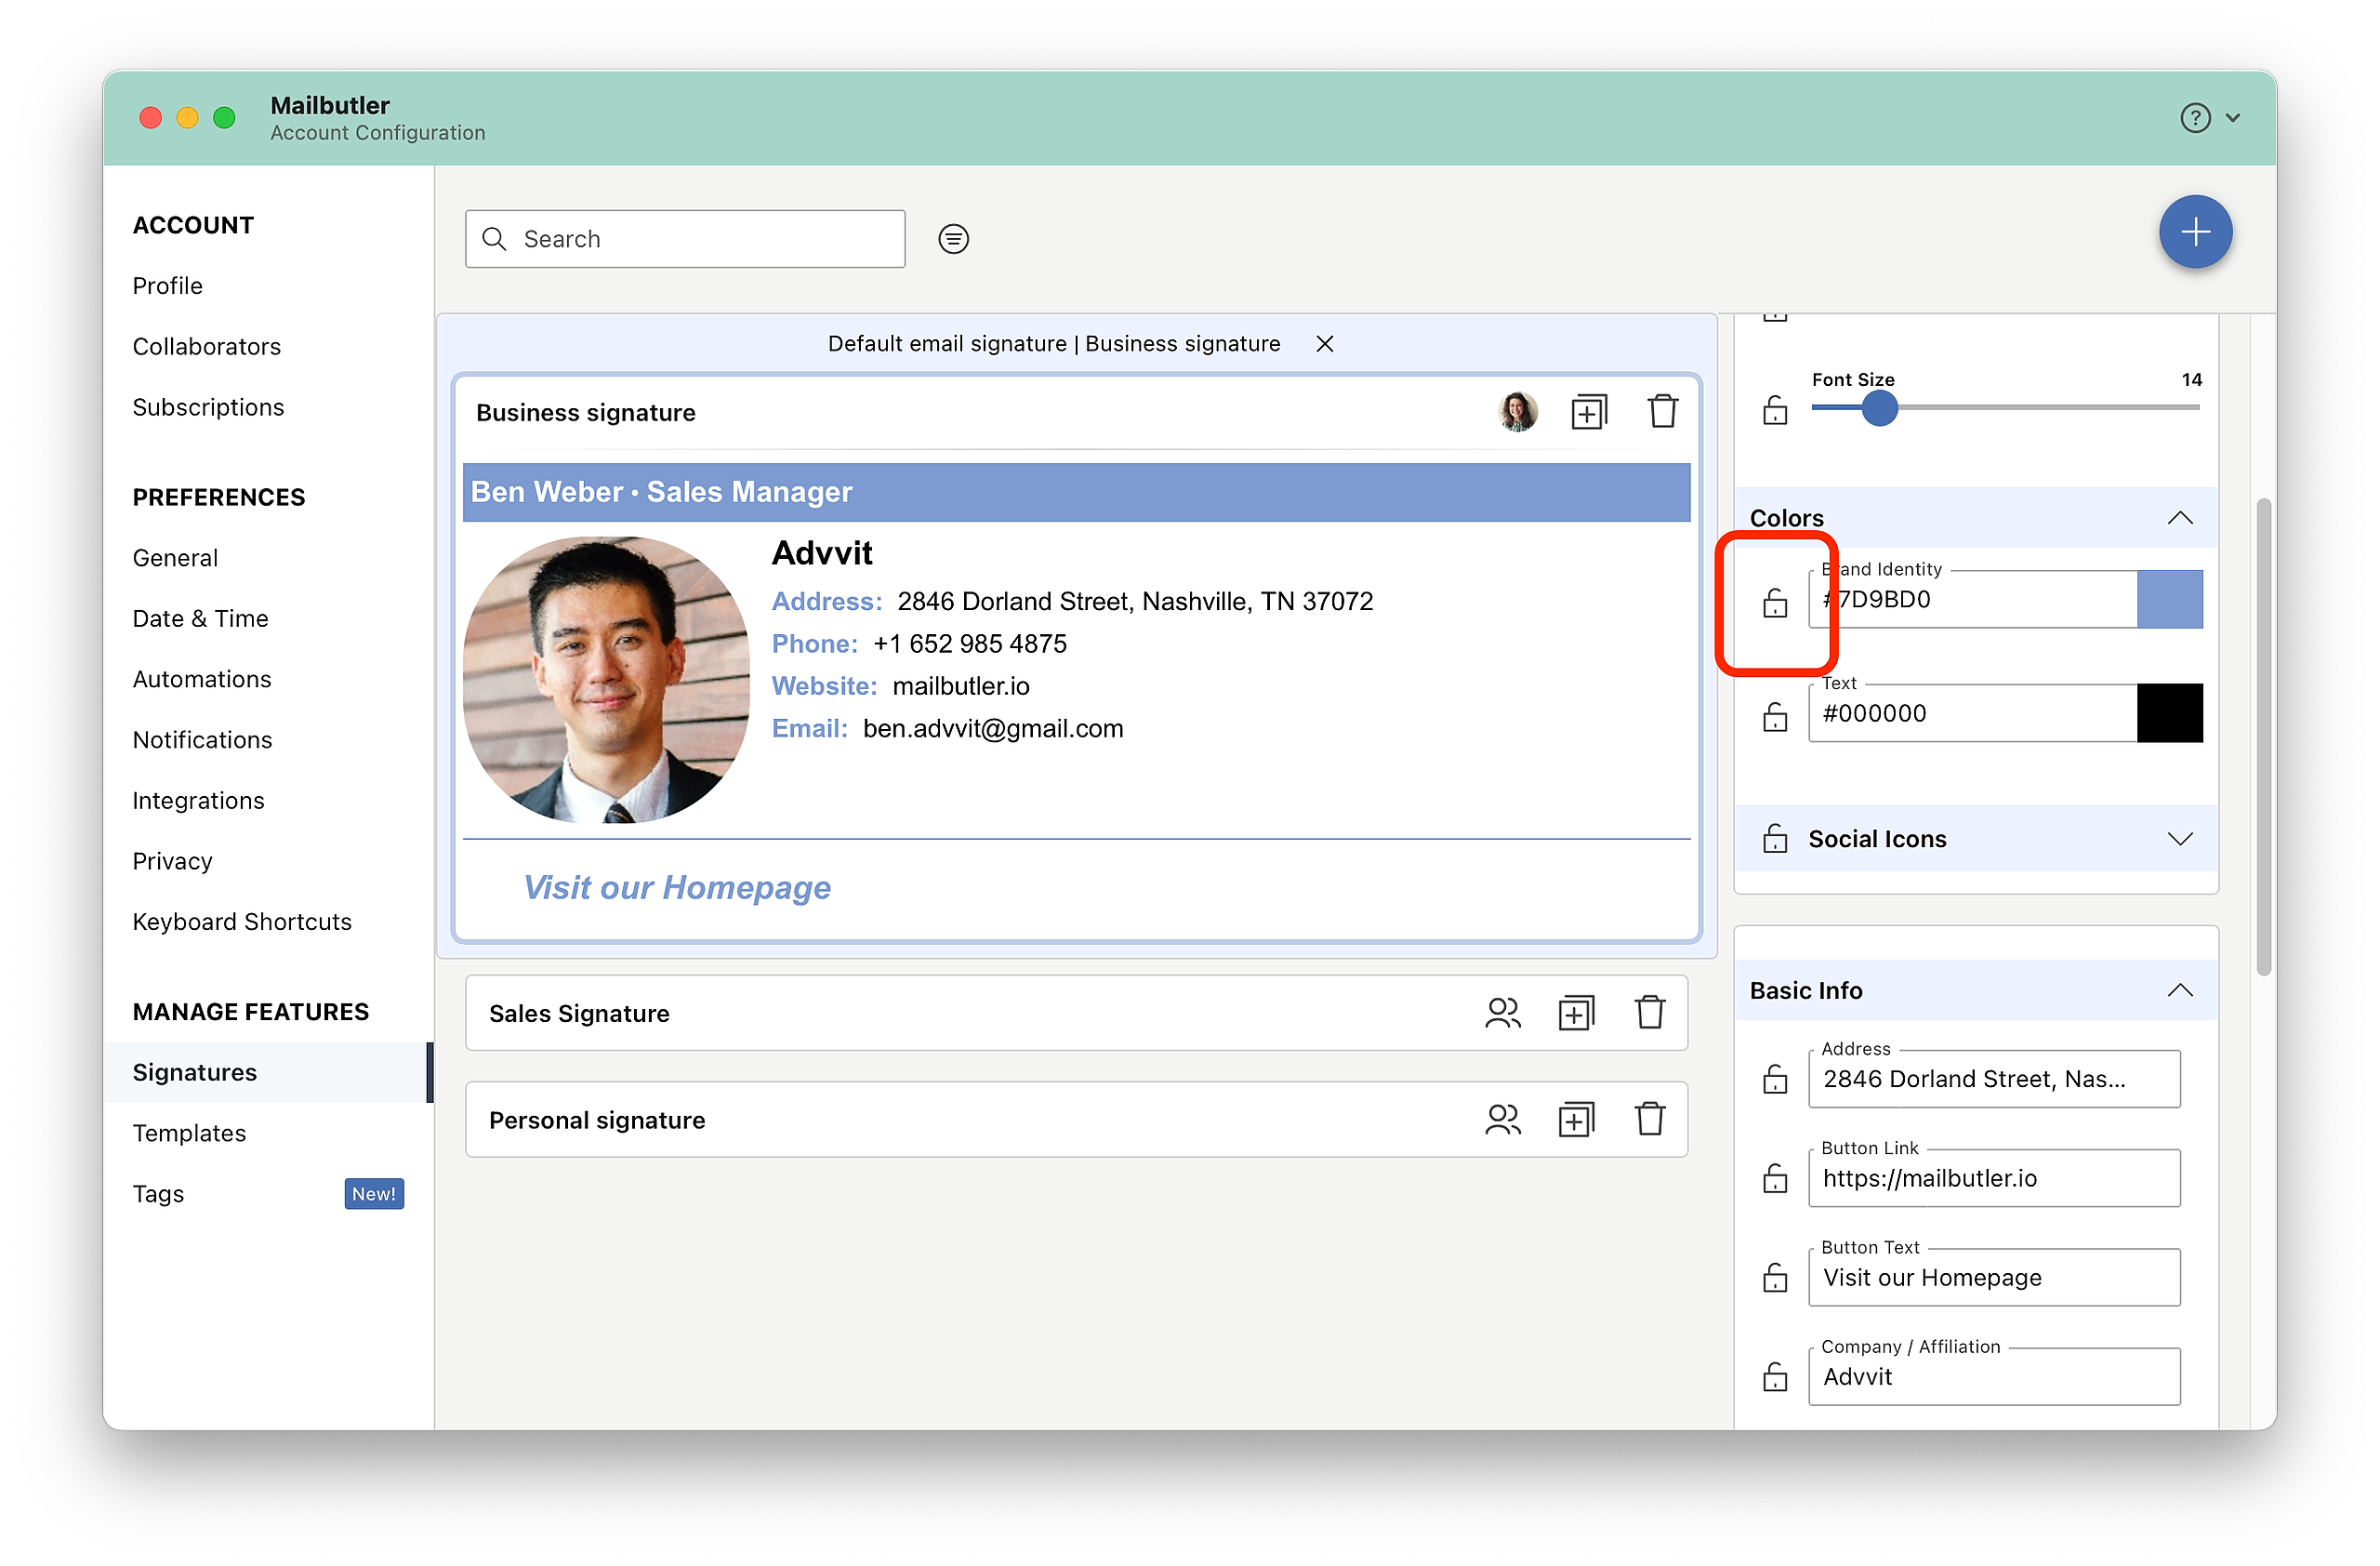
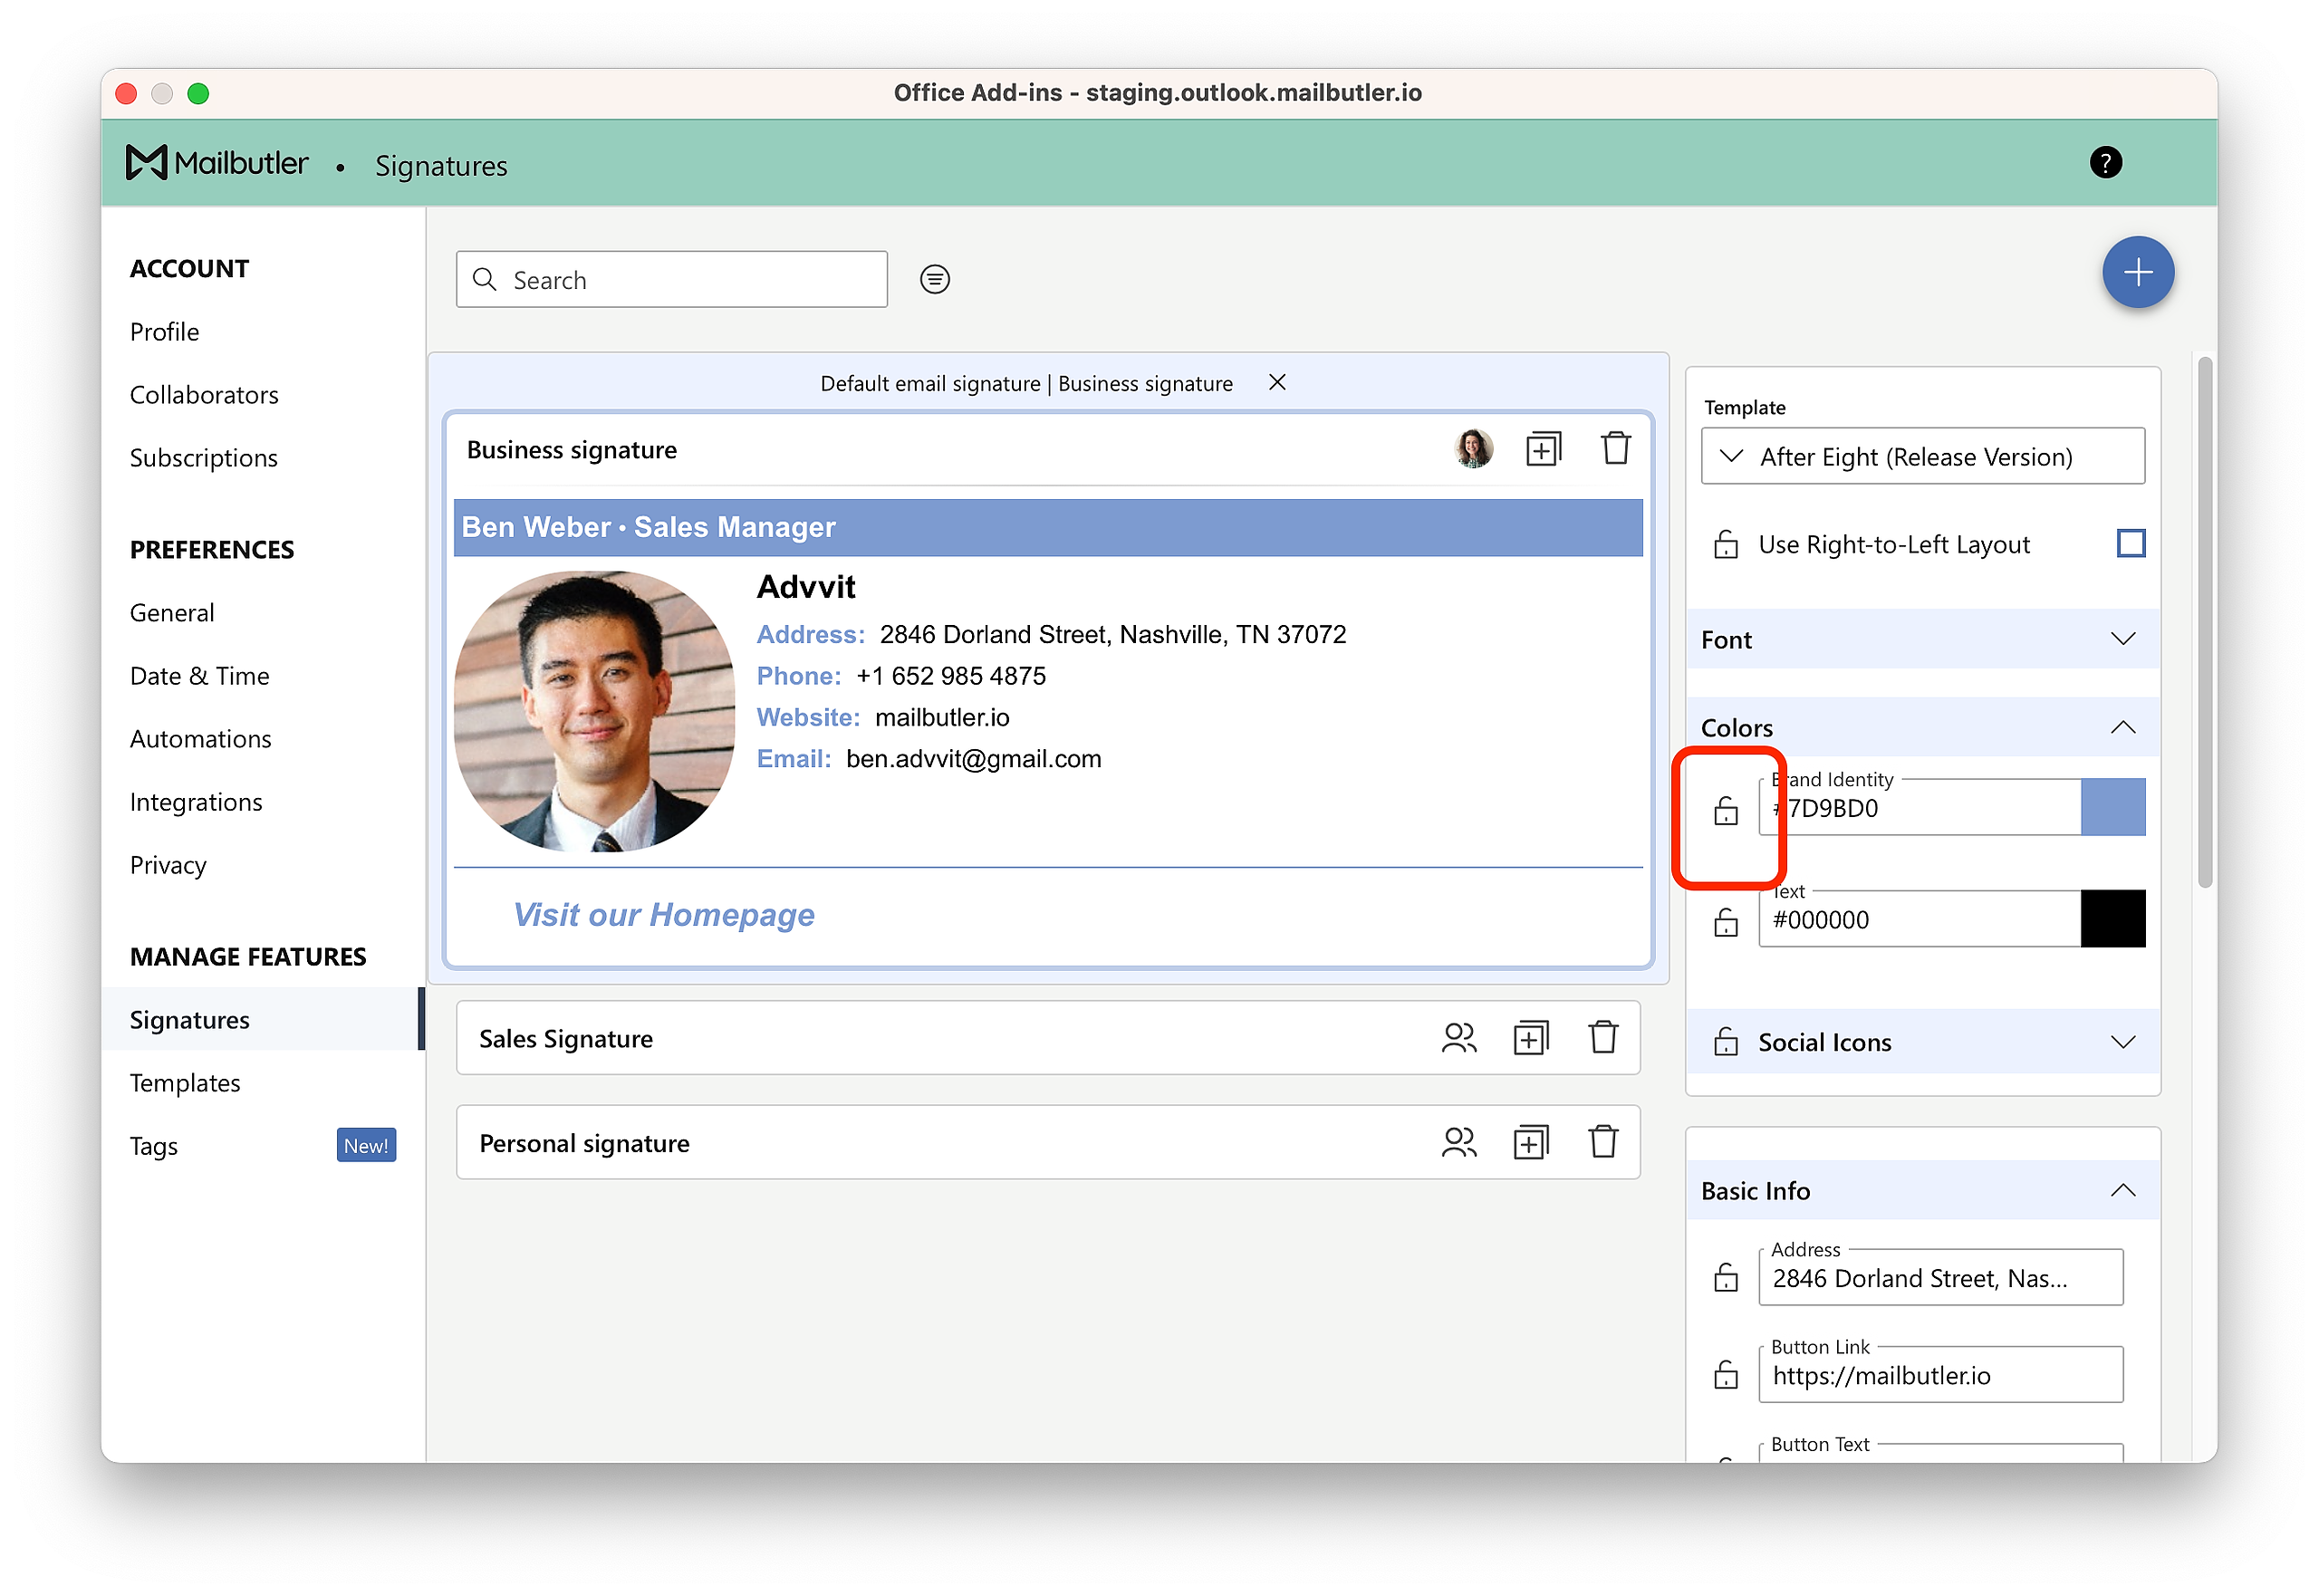
6. Select which sections of the shared Signature you would like your Collaborator to be able to edit and which not by locking the sections that you would you not like to be editable.
Note: If you make changes to the Signature design, it will also reflect on your Collaborators signature in real-time.
Gmail
1. Click on the Mailbutler icon to open the Mailbutler Sidebar.
2. In the Mailbutler Sidebar, click the three dots and then Account & Preferences.
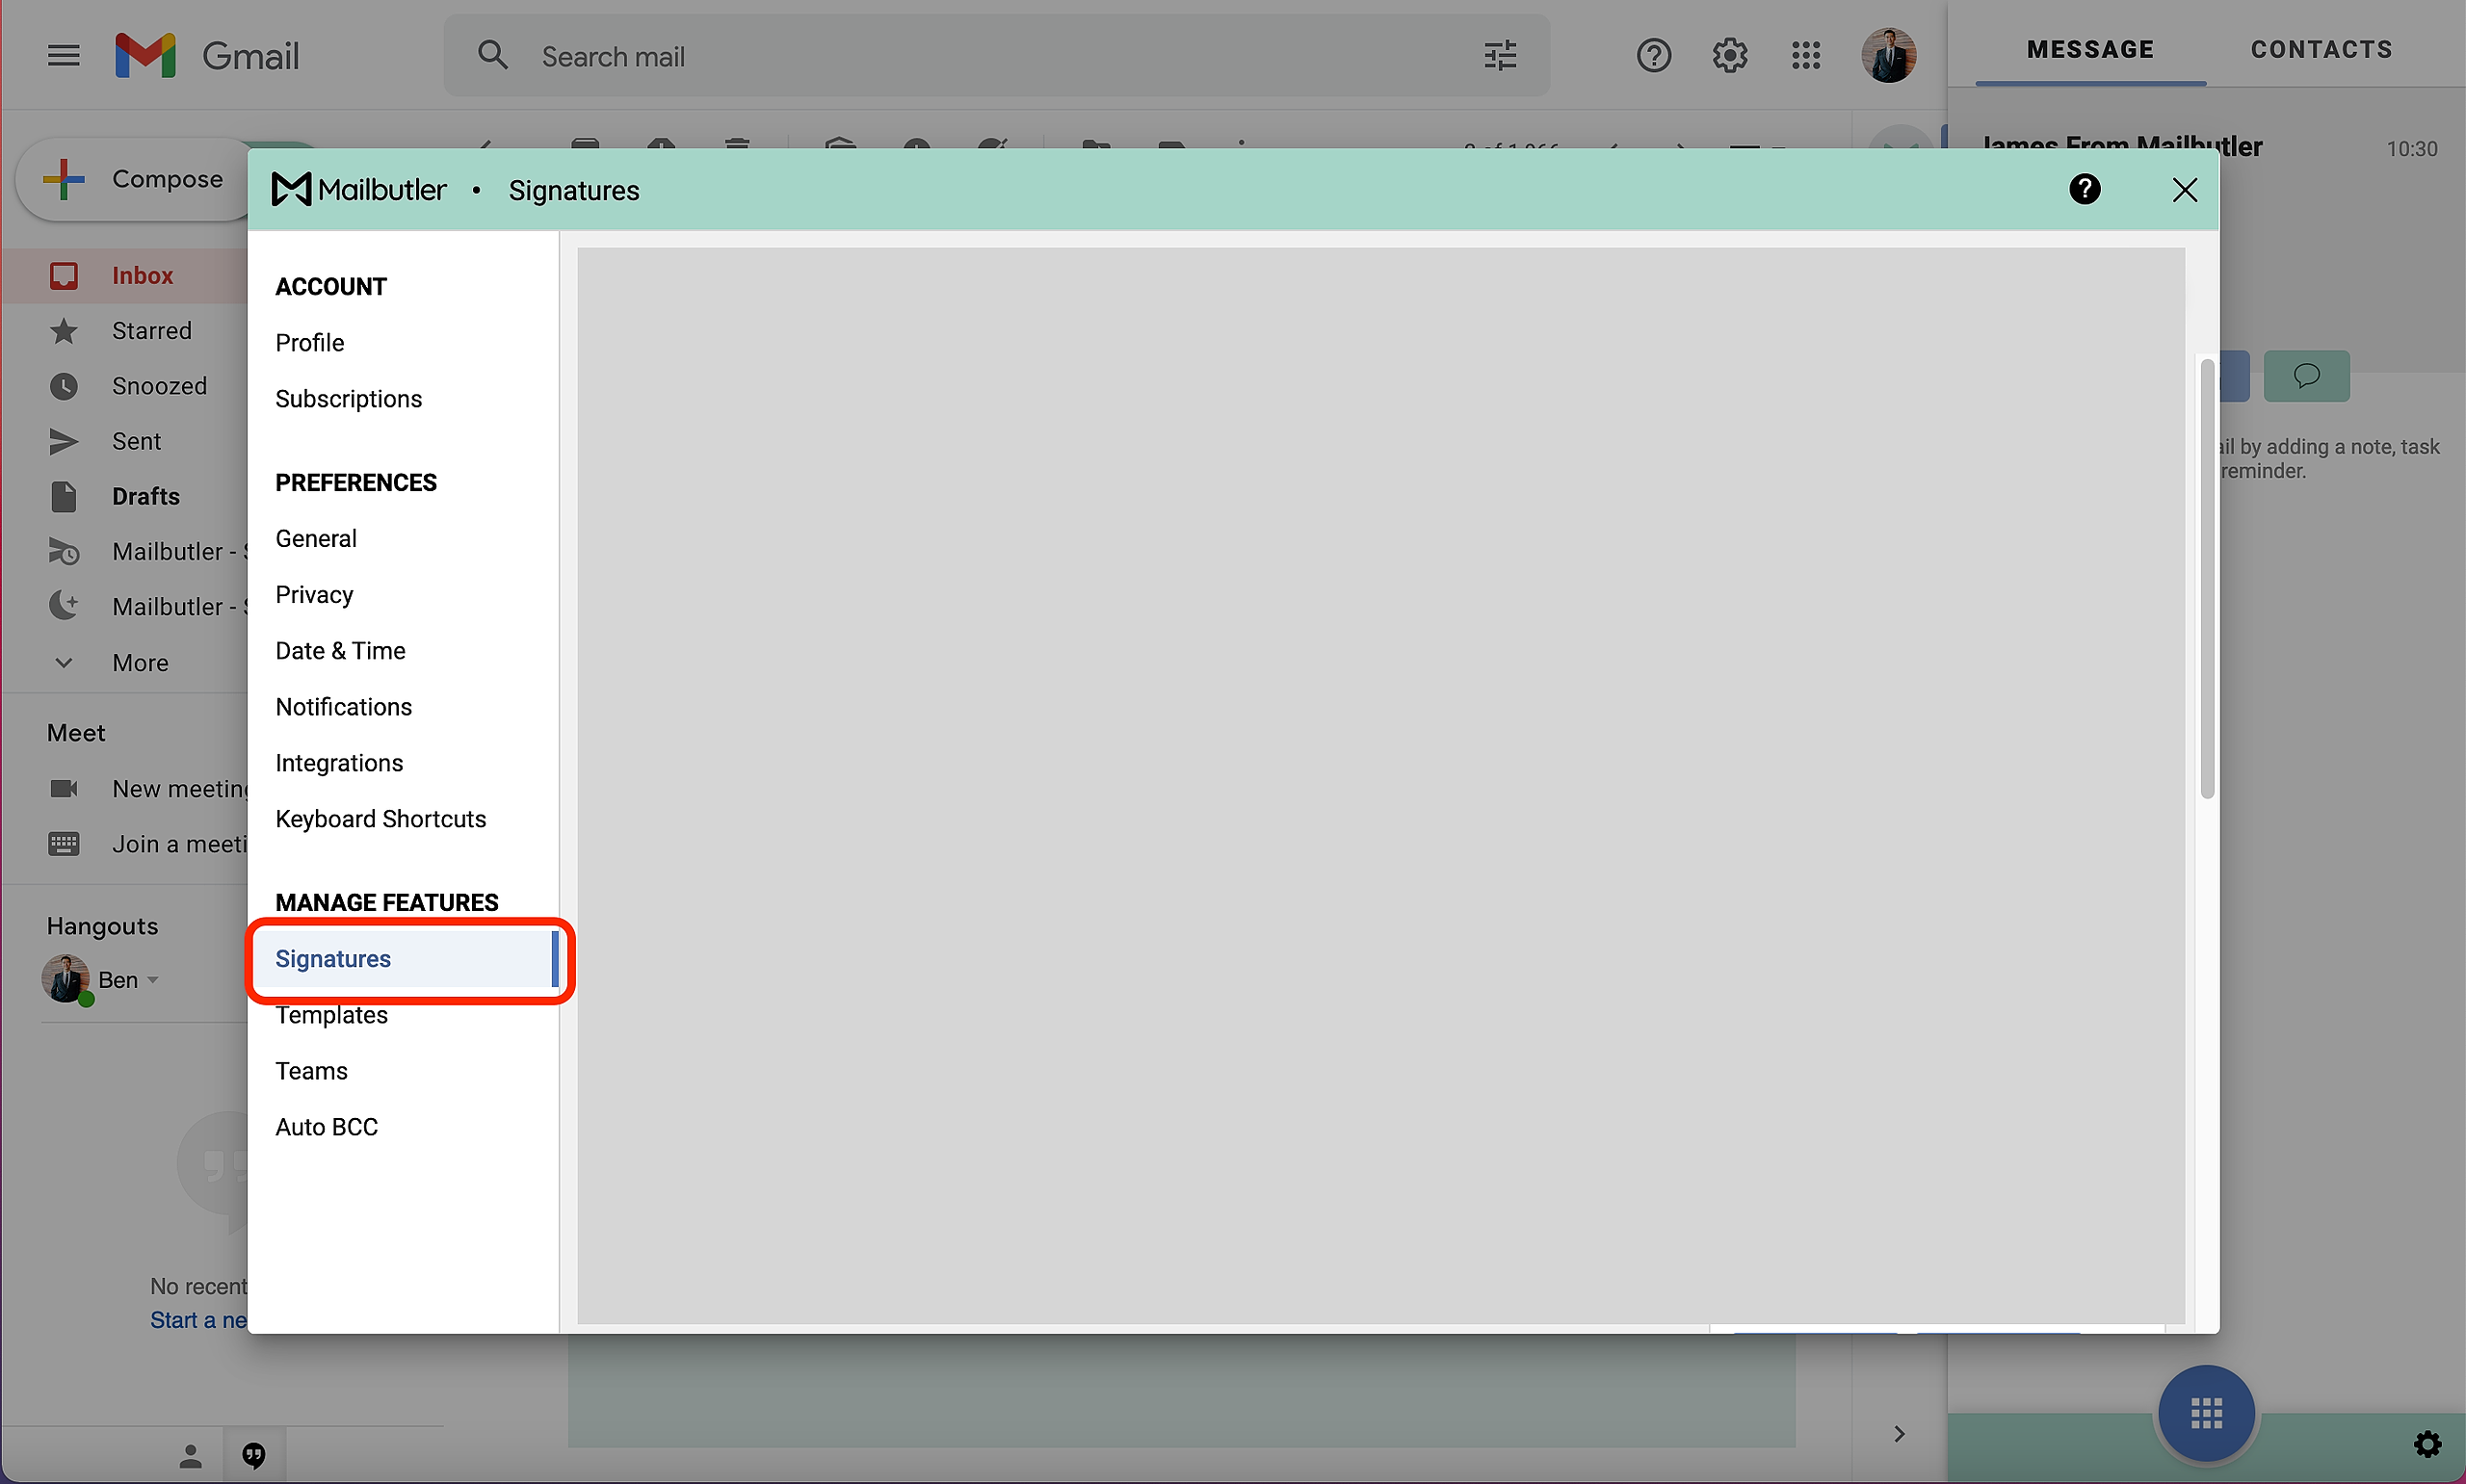
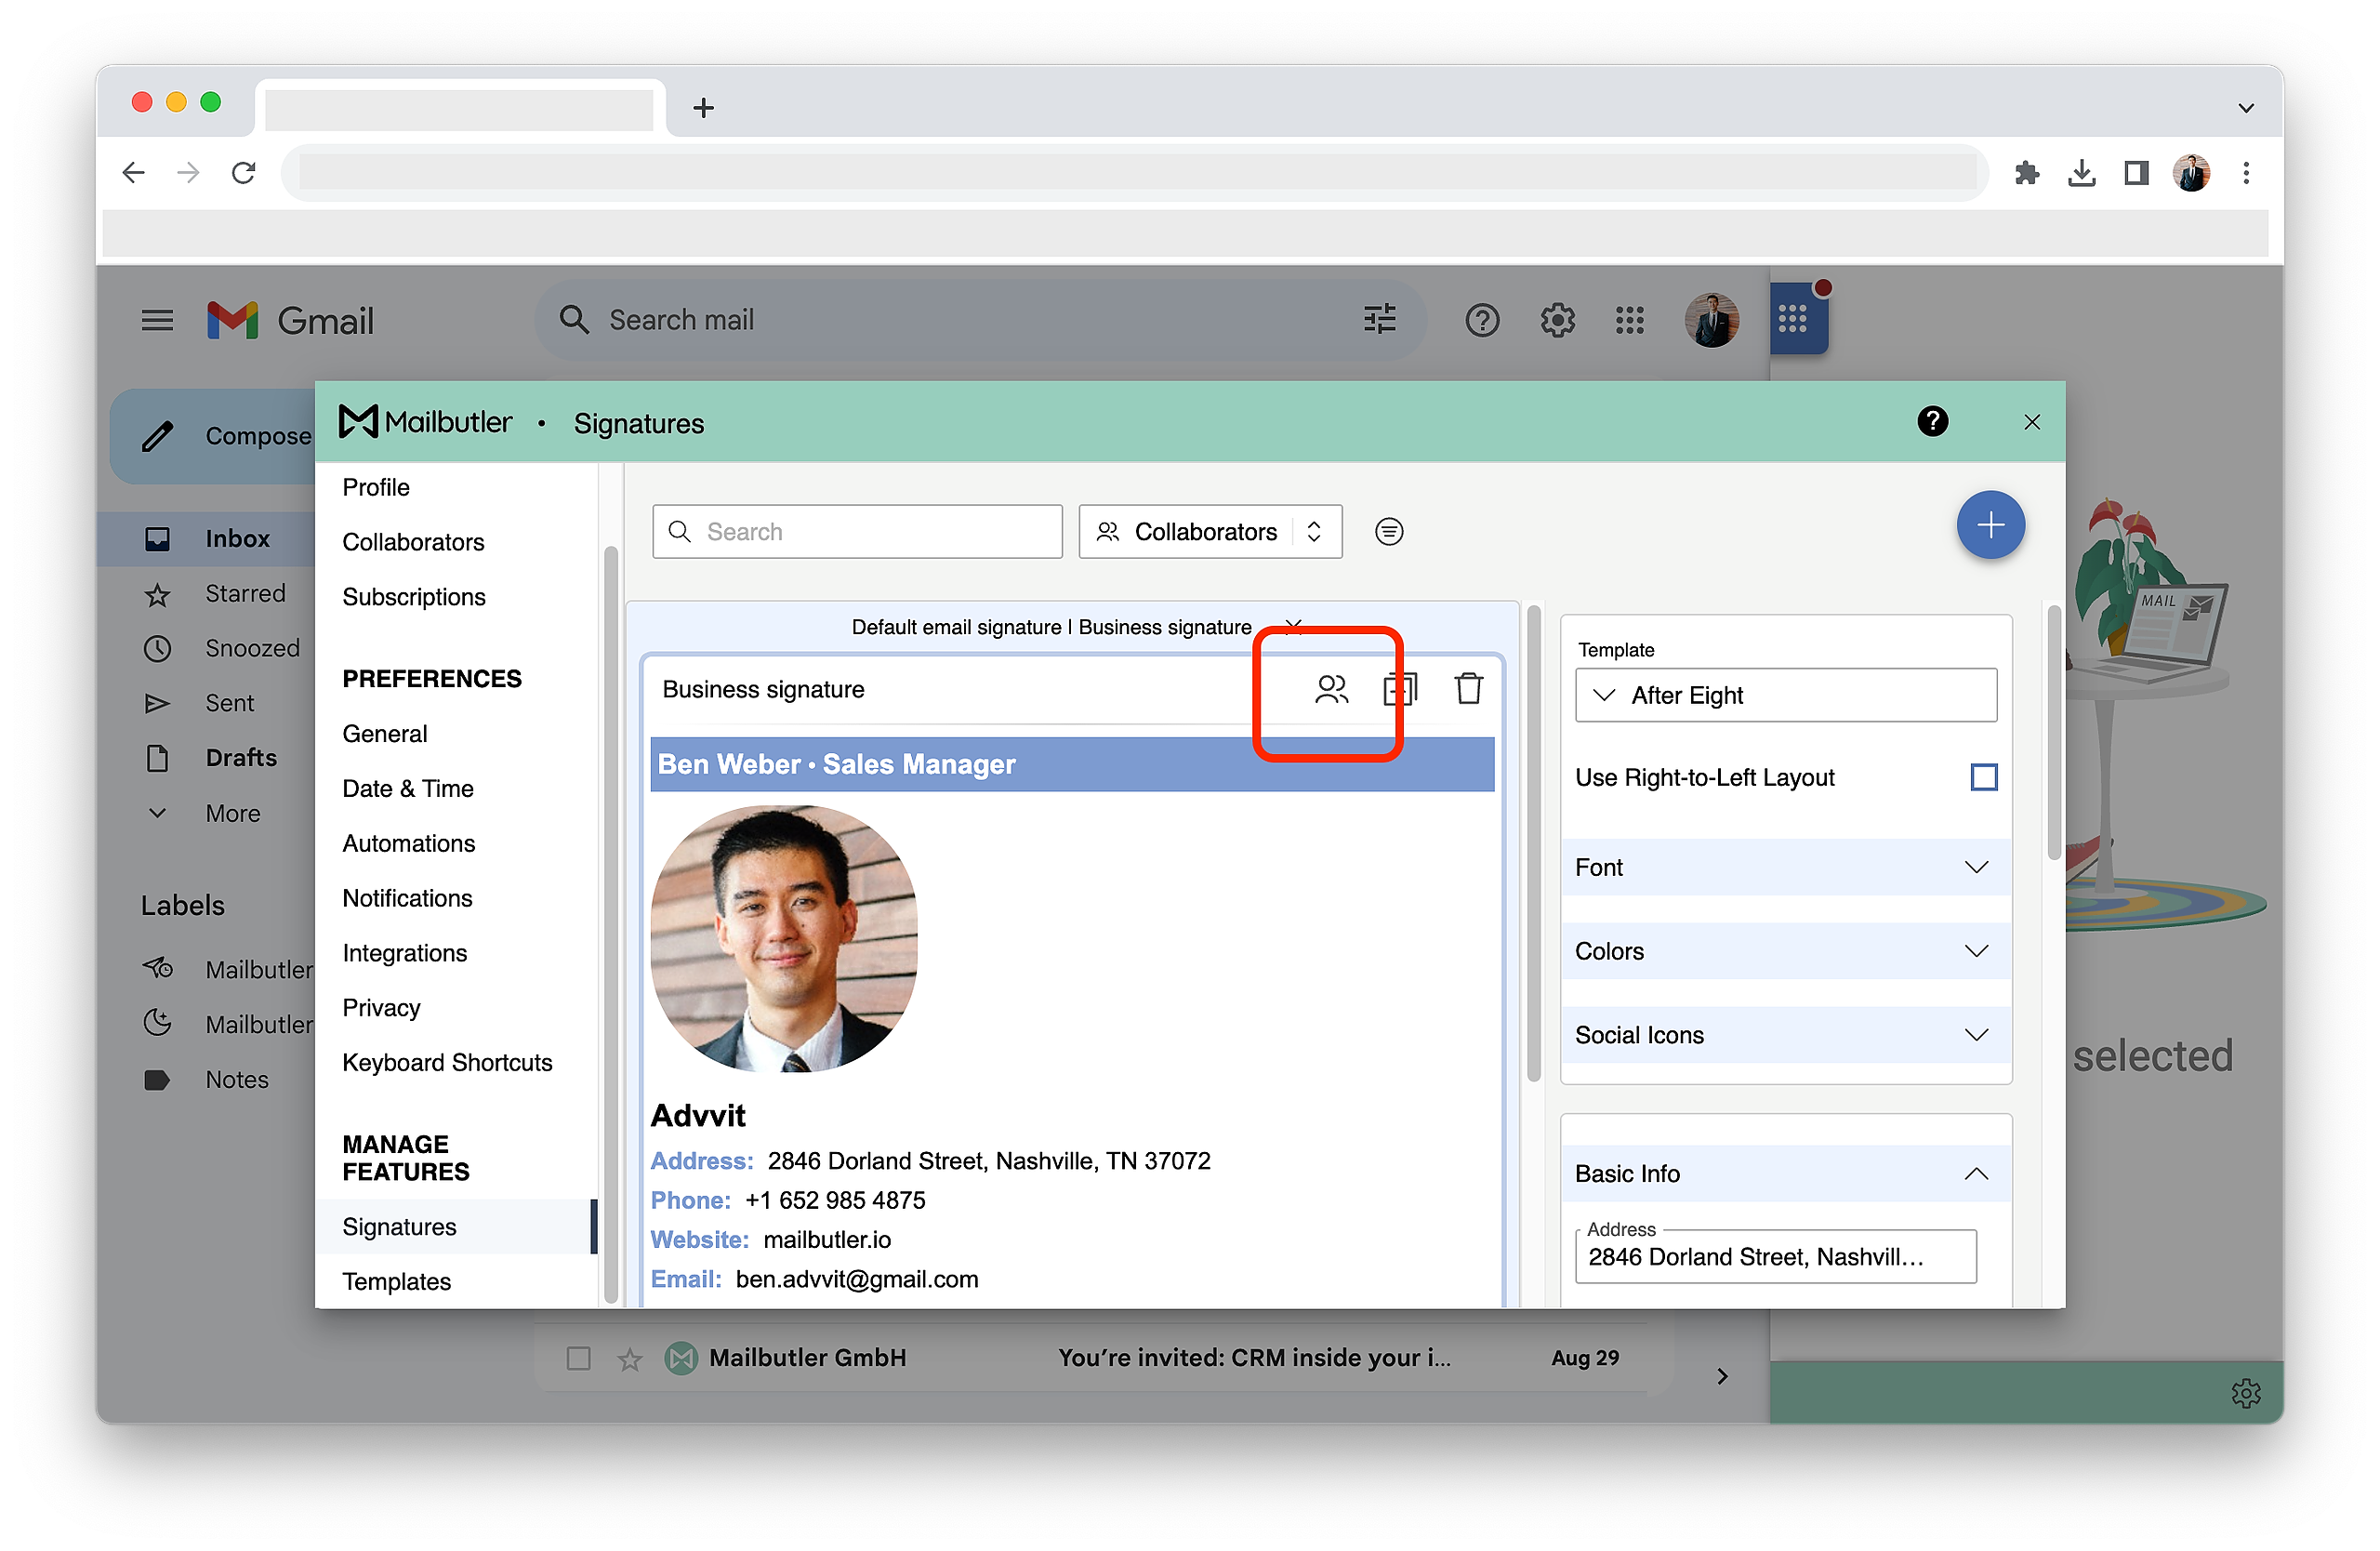
3. A new window will open. Select Signatures under Manage Features in the sidebar on the left.
4. Select the Signature that you would like to share or create a new one and click the sharing icon.
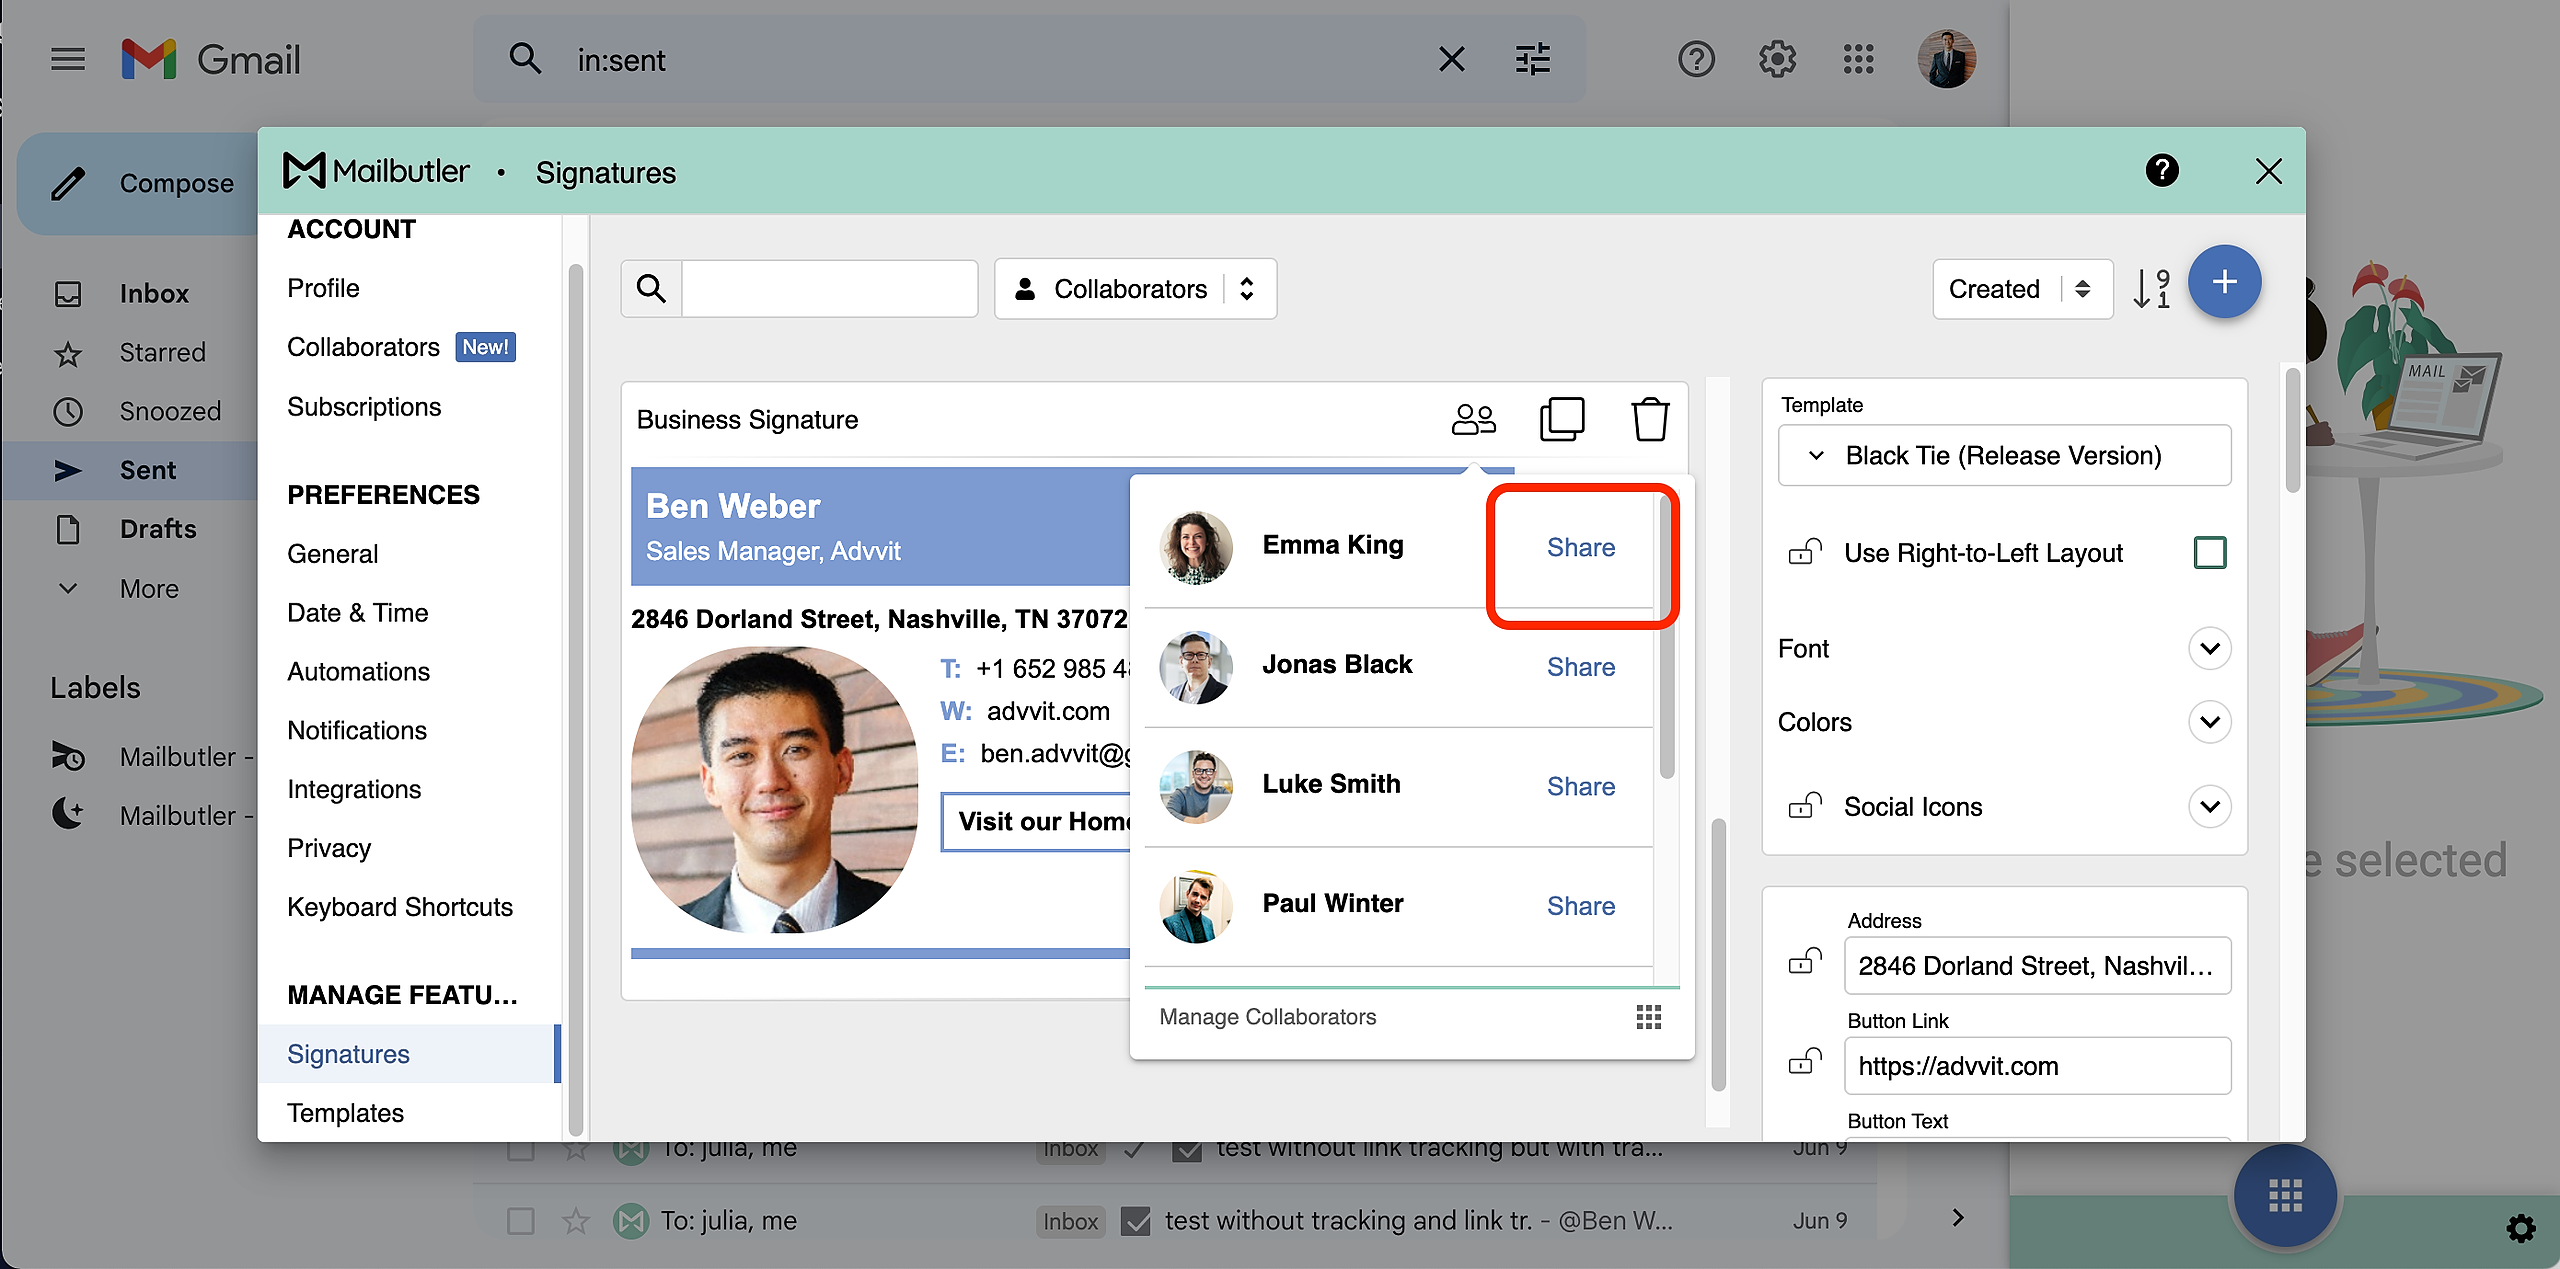
5. Select the Collaborator that you want to share the Signature with and click Share.
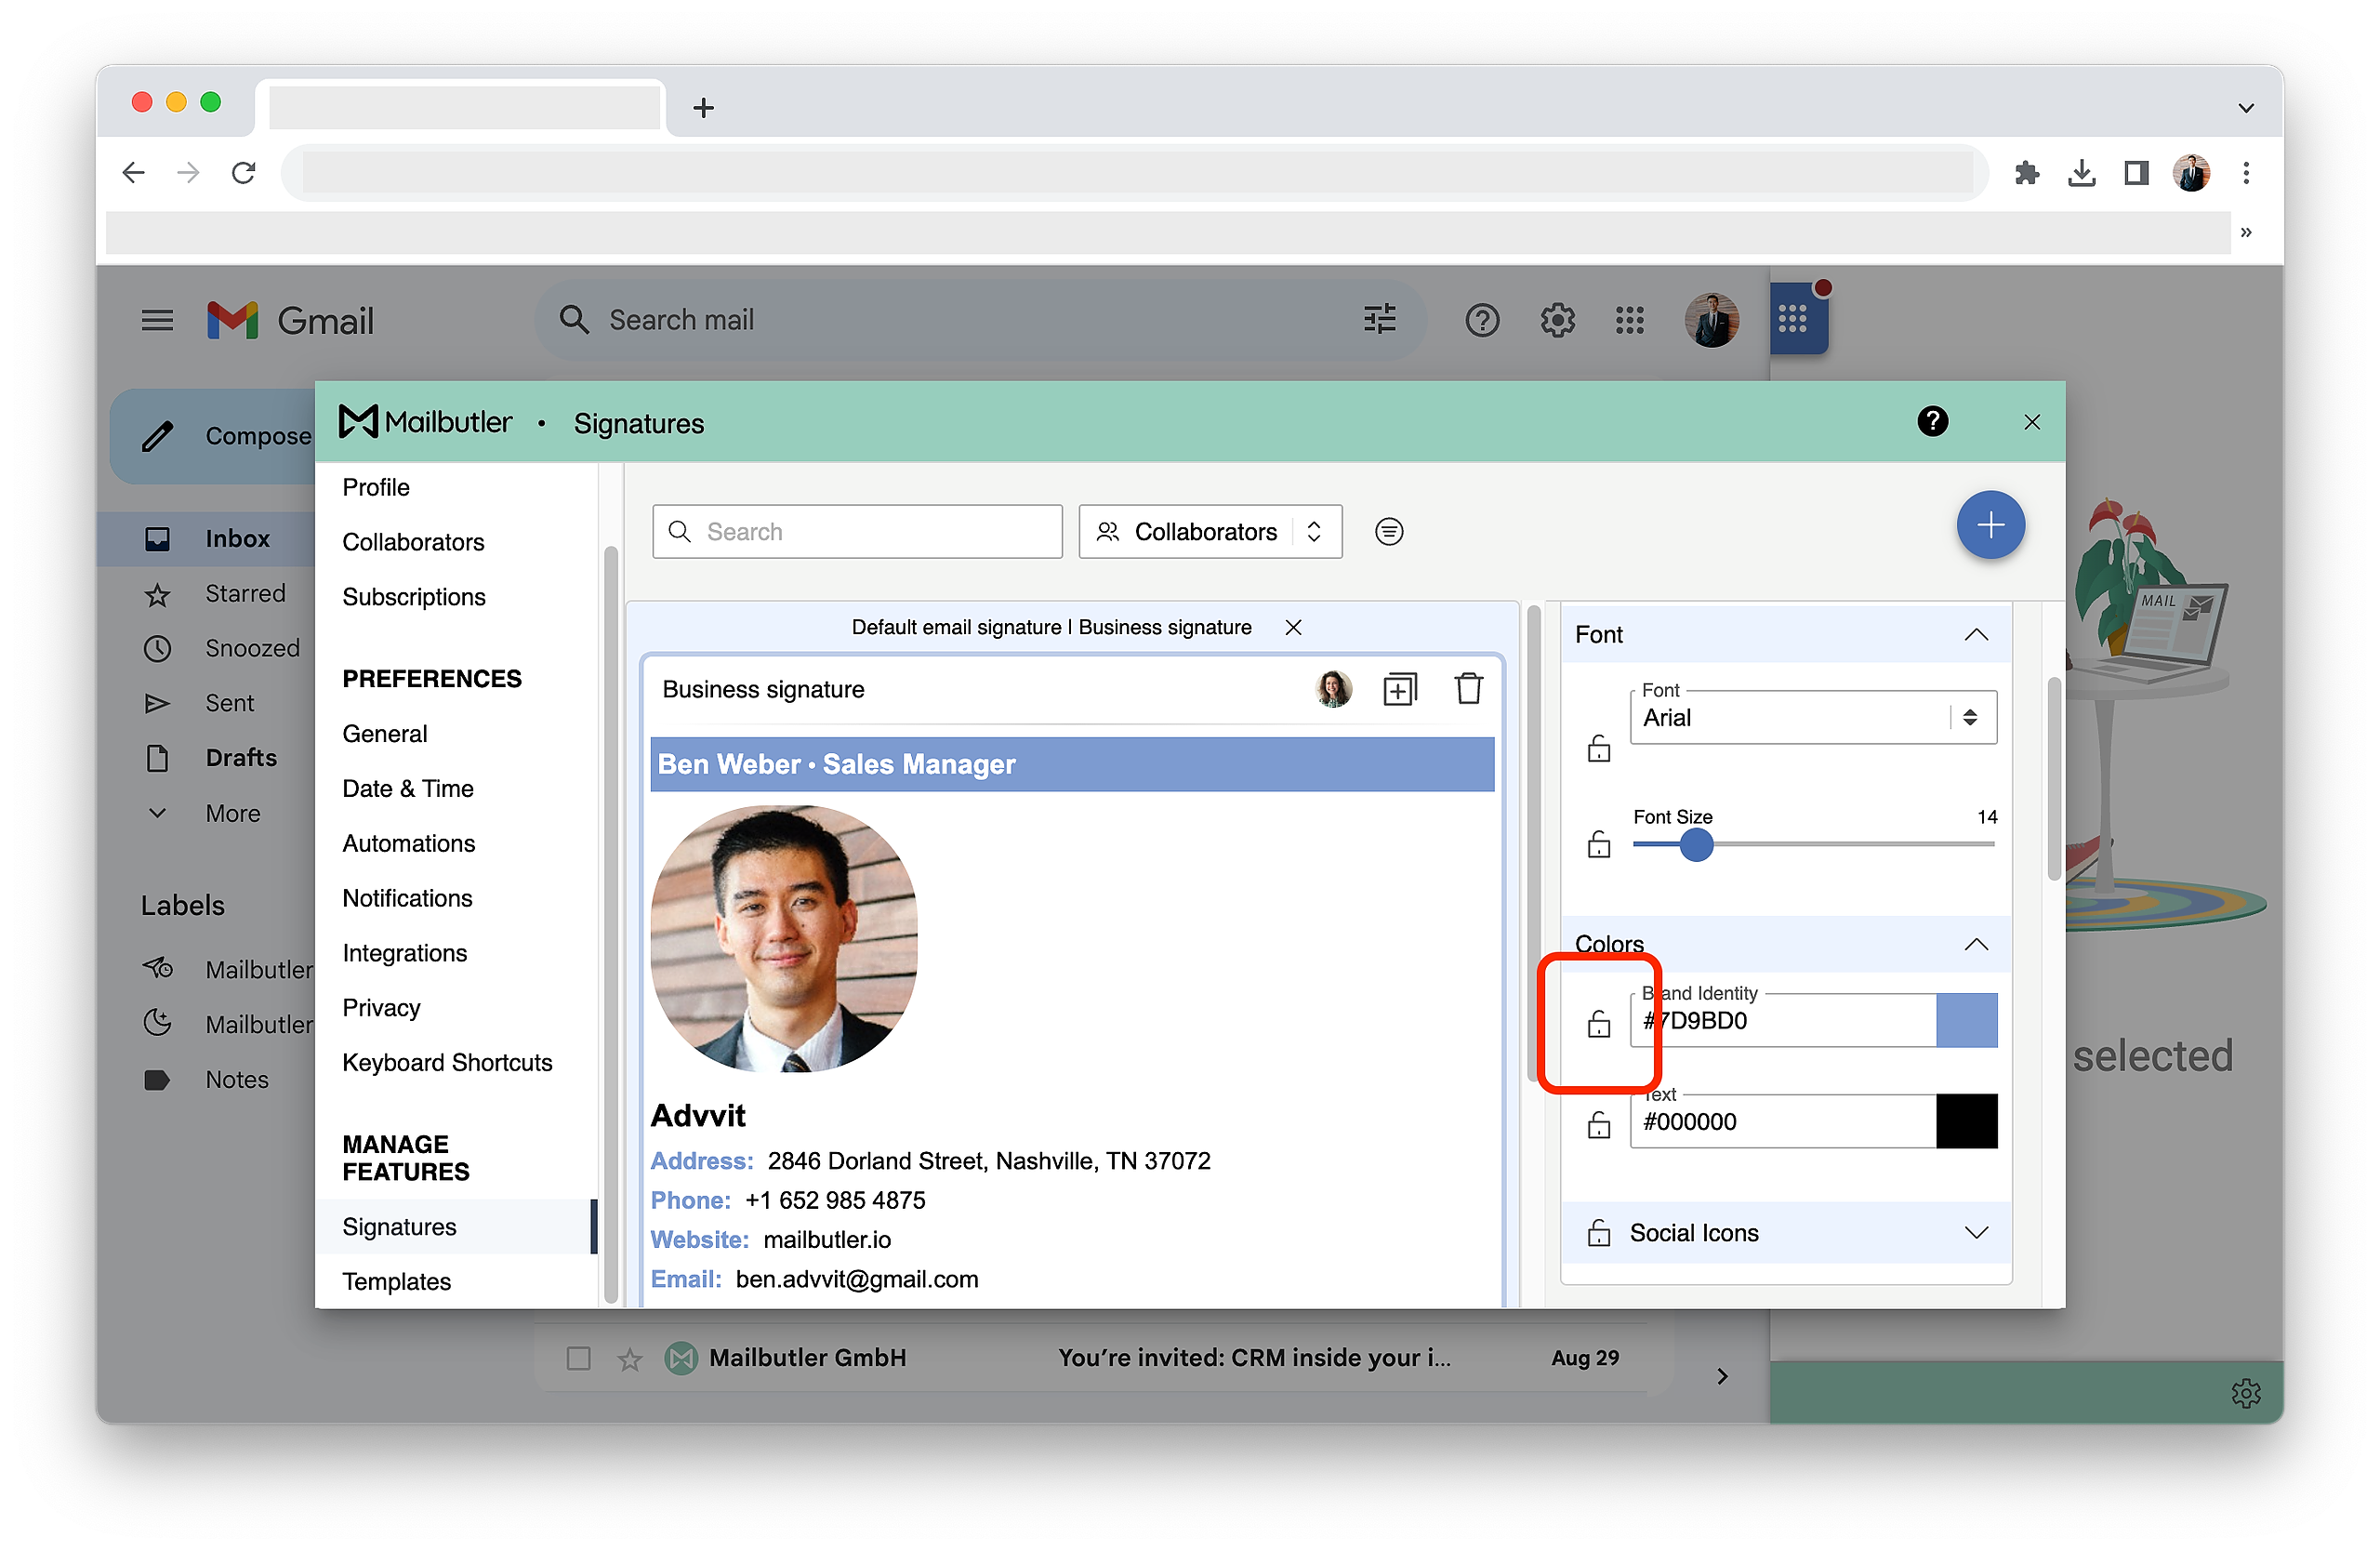
6. Select which sections of the shared Signature you would like your Collaborator to be able to edit and which not by locking the sections that you would you not like to be editable.
Note: If you make changes to the Signature design, it will also reflect on your Collaborators signature in real-time.
Outlook
1. Open the Mailbutler sidebar.
2. In the Mailbutler Sidebar, click the three dots and then Account & Preferences.
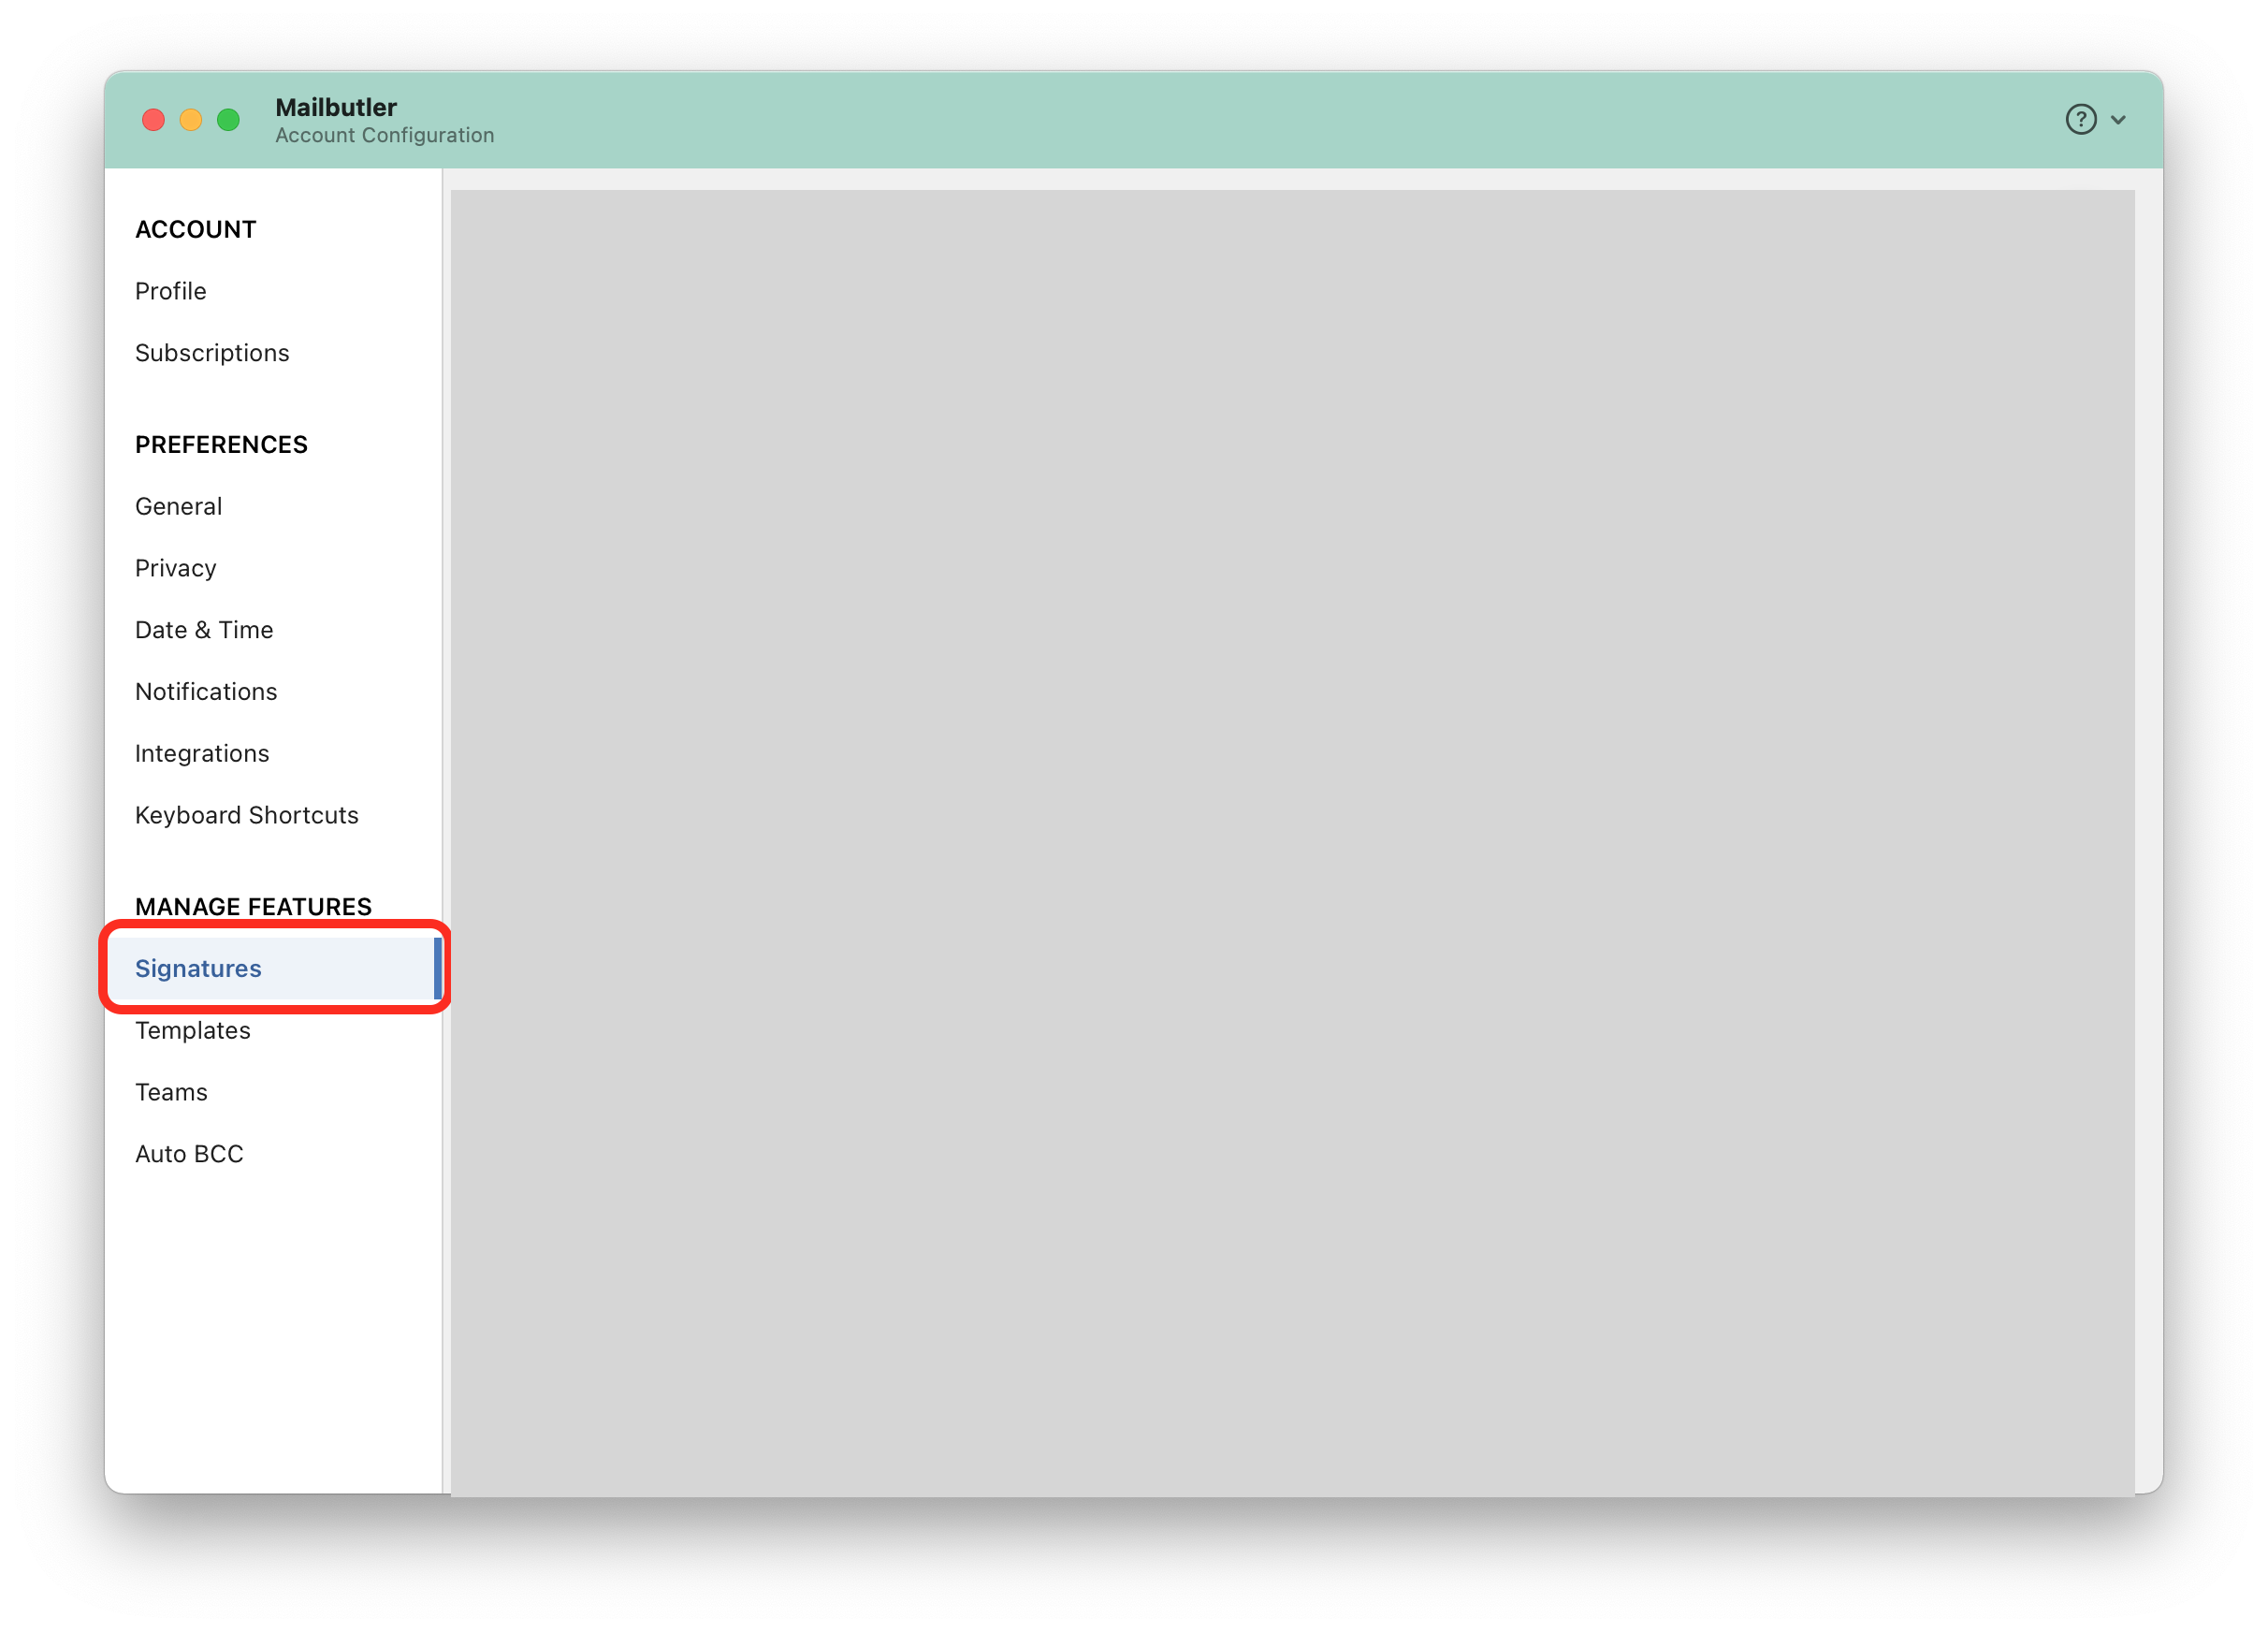
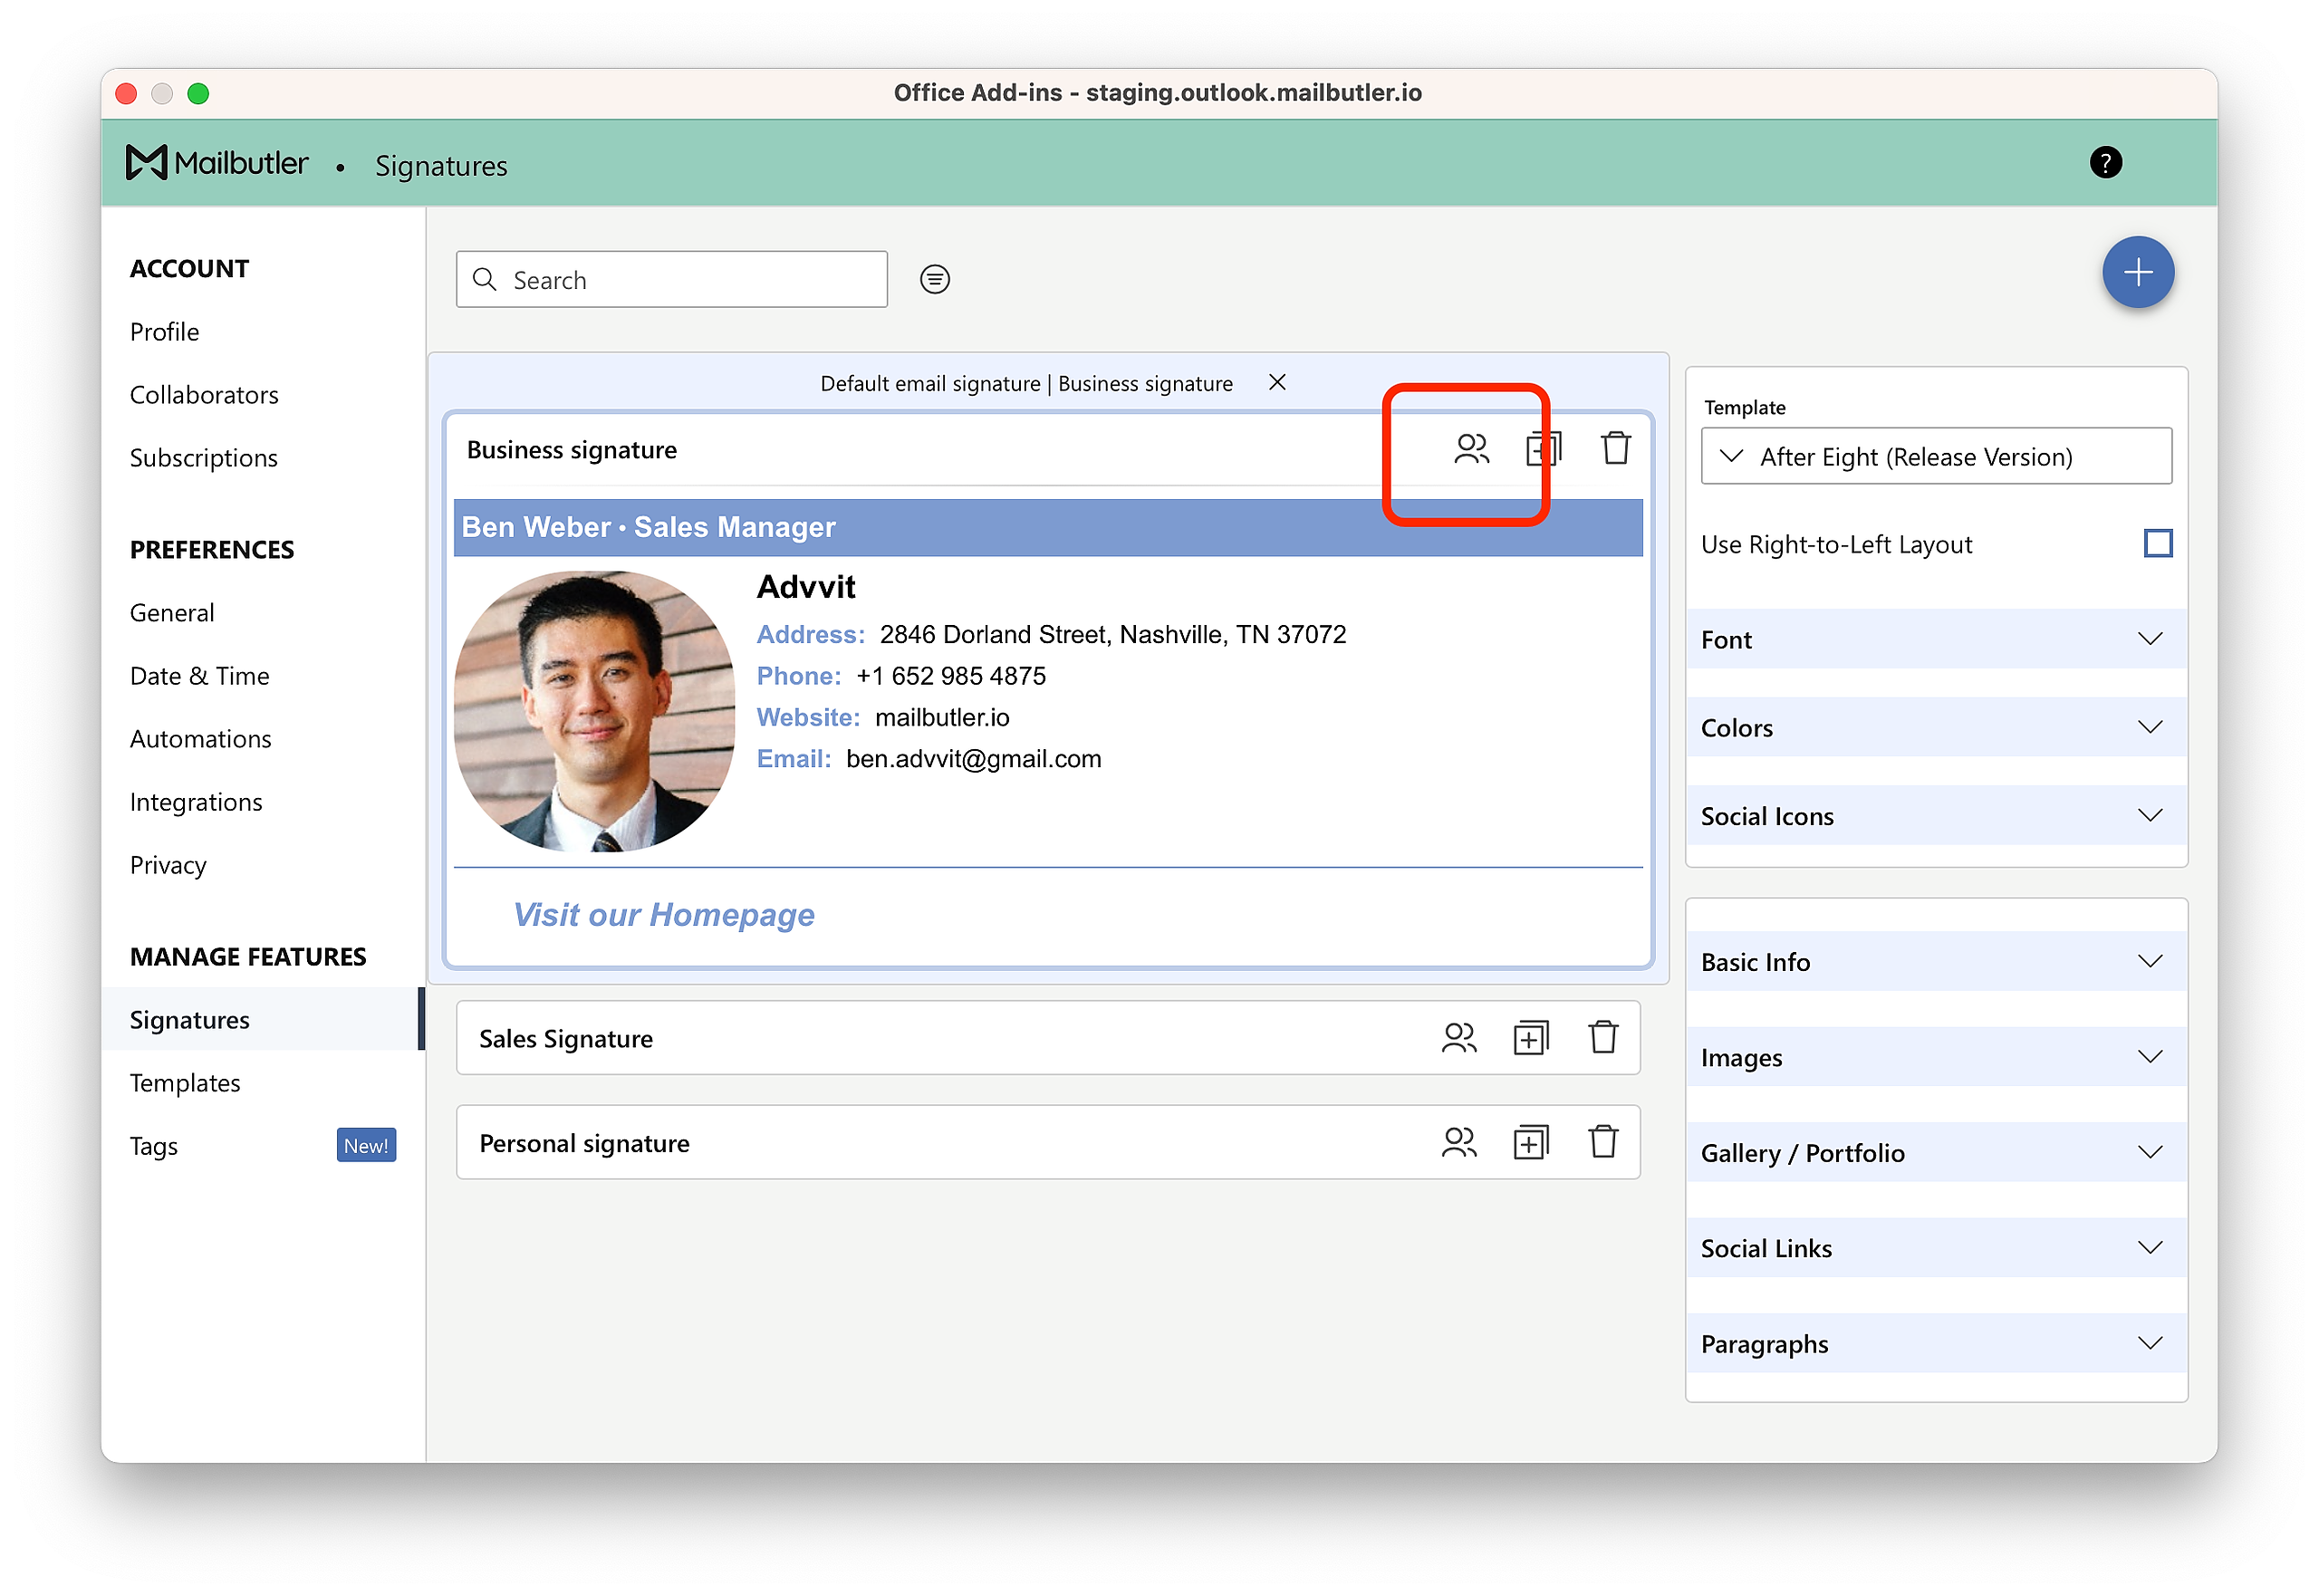
3. A new window will open. Select Signatures under Manage Features in the sidebar on the left.
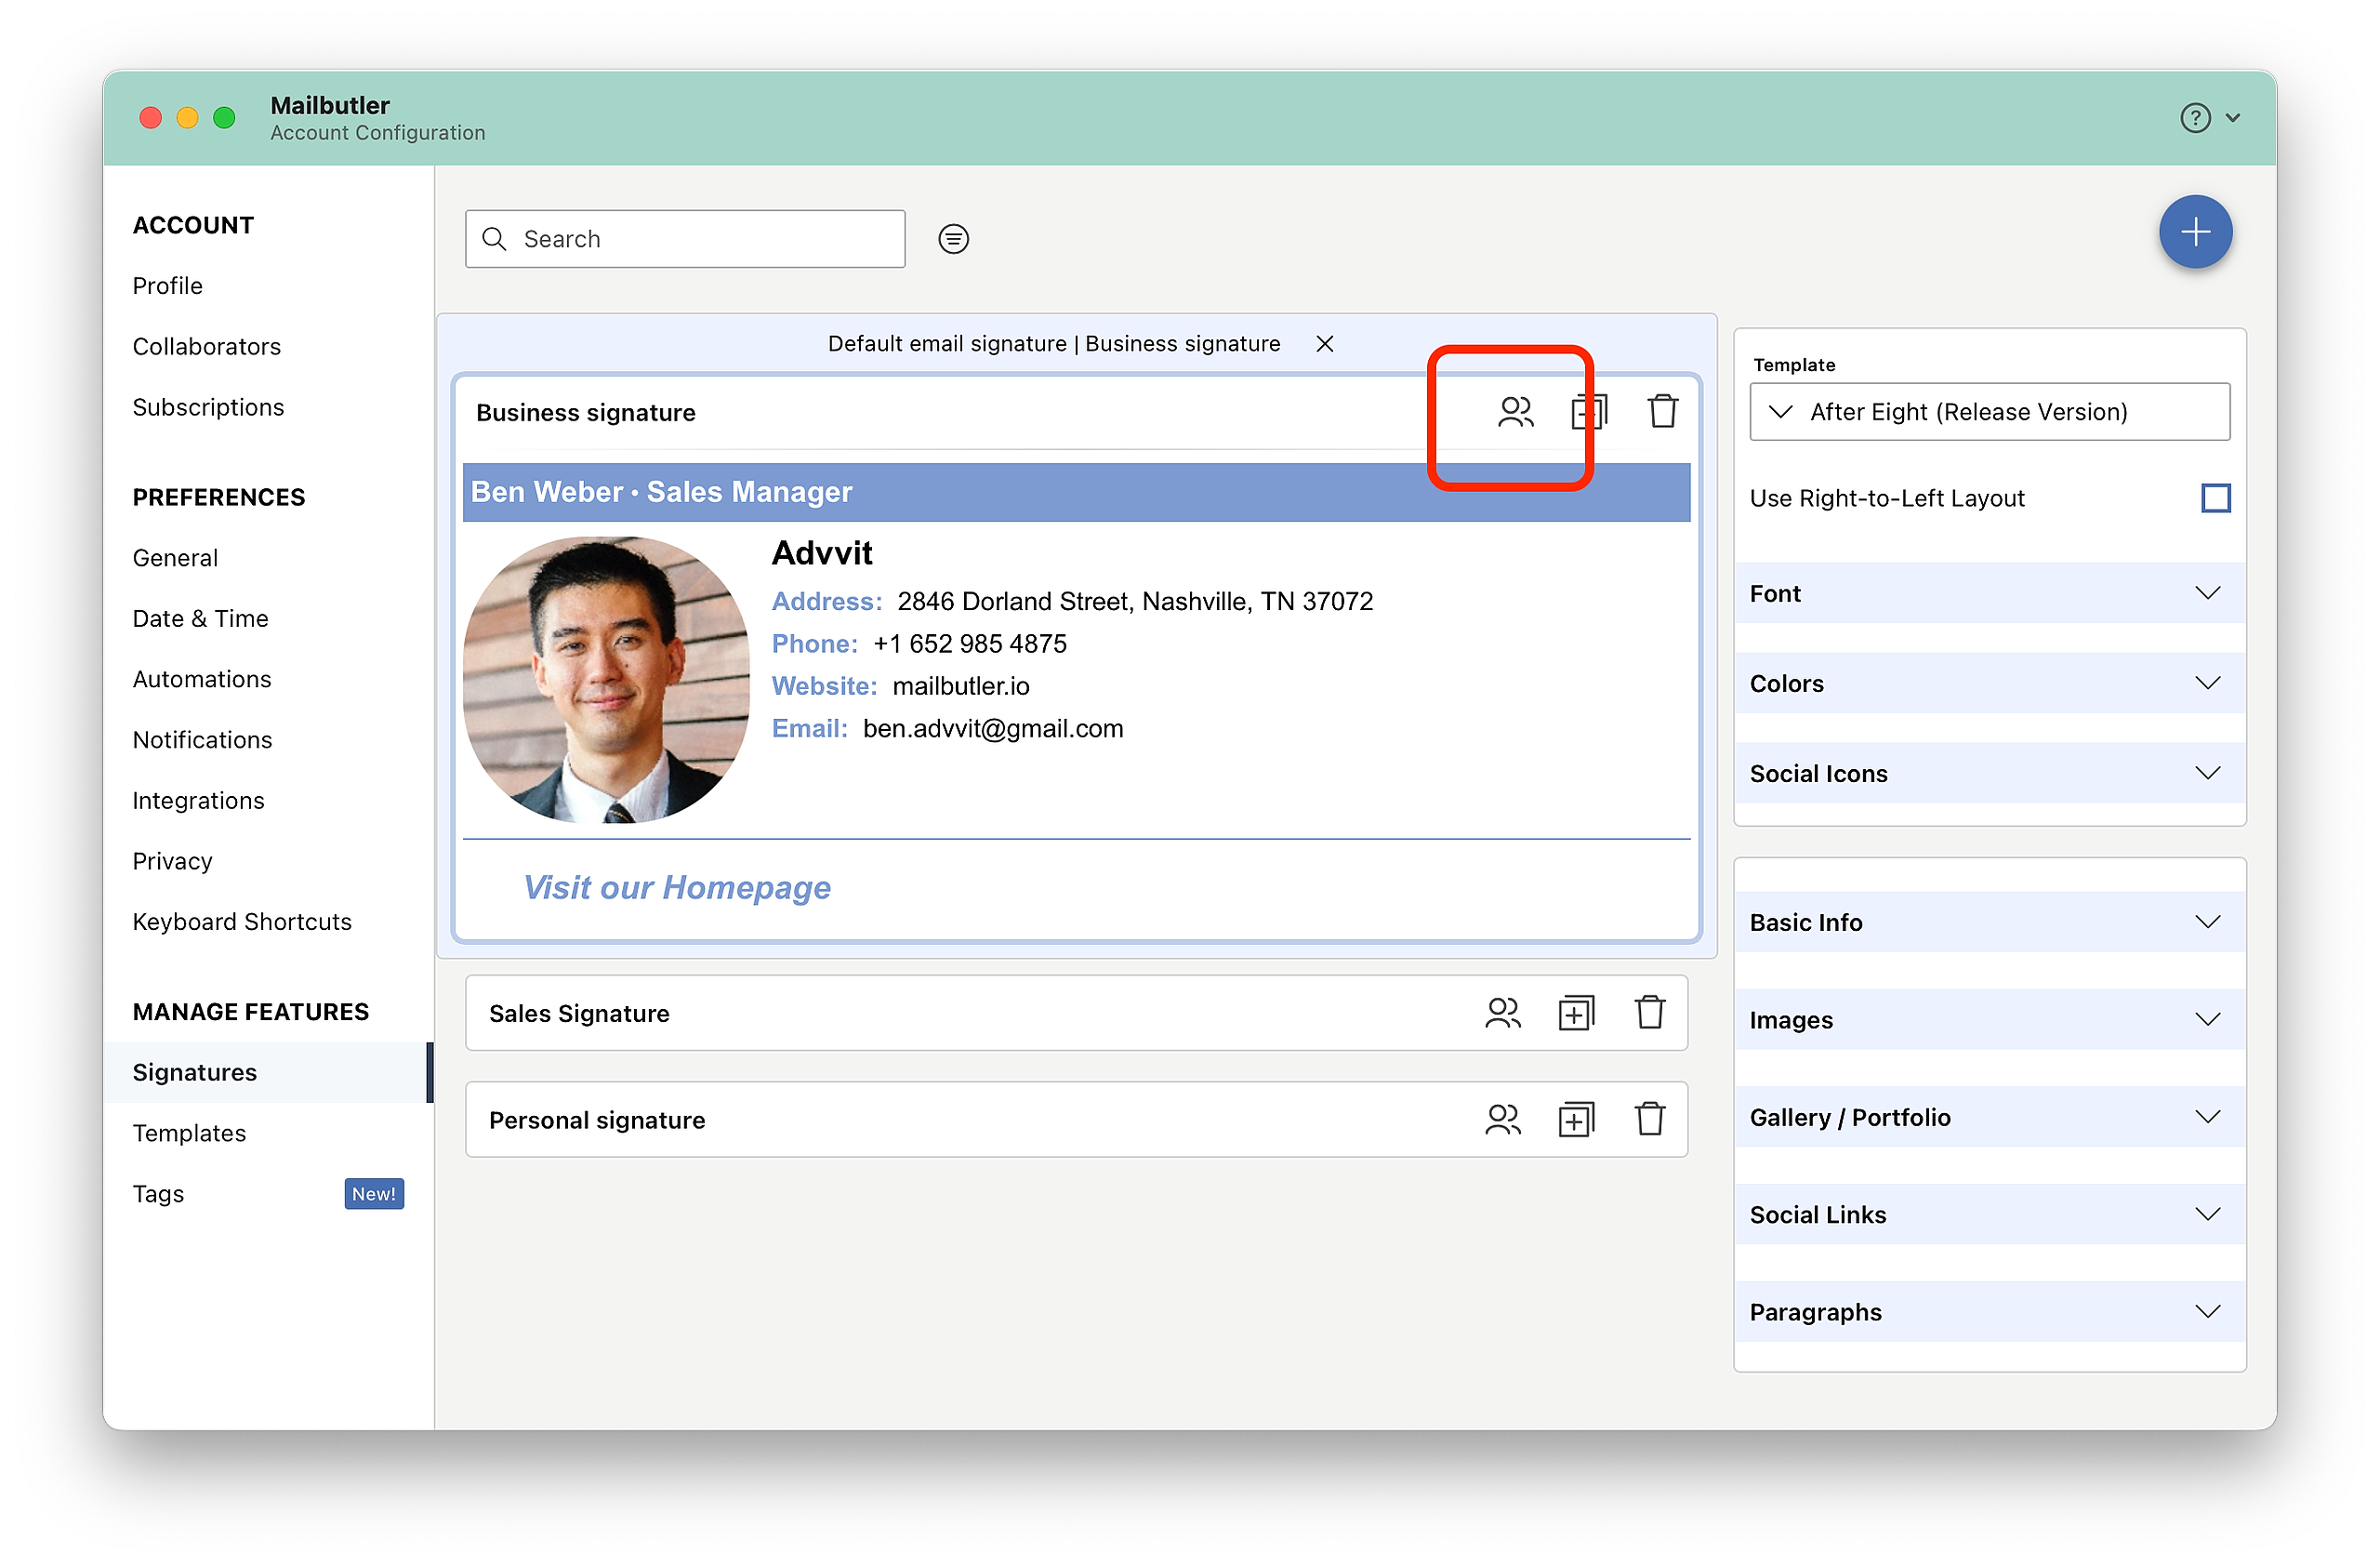
4. Select the Signature that you would like to share or create a new one and click the sharing icon.
5. Select the Collaborator that you want to share the Signature with and click Share.
6. Select which sections of the shared Signature you would like your Collaborator to be able to edit and which not by locking the sections that you would you not like to be editable.
For more general information about the Collaborators feature, please see here.