
How do I create a Signature?
Apple Mail
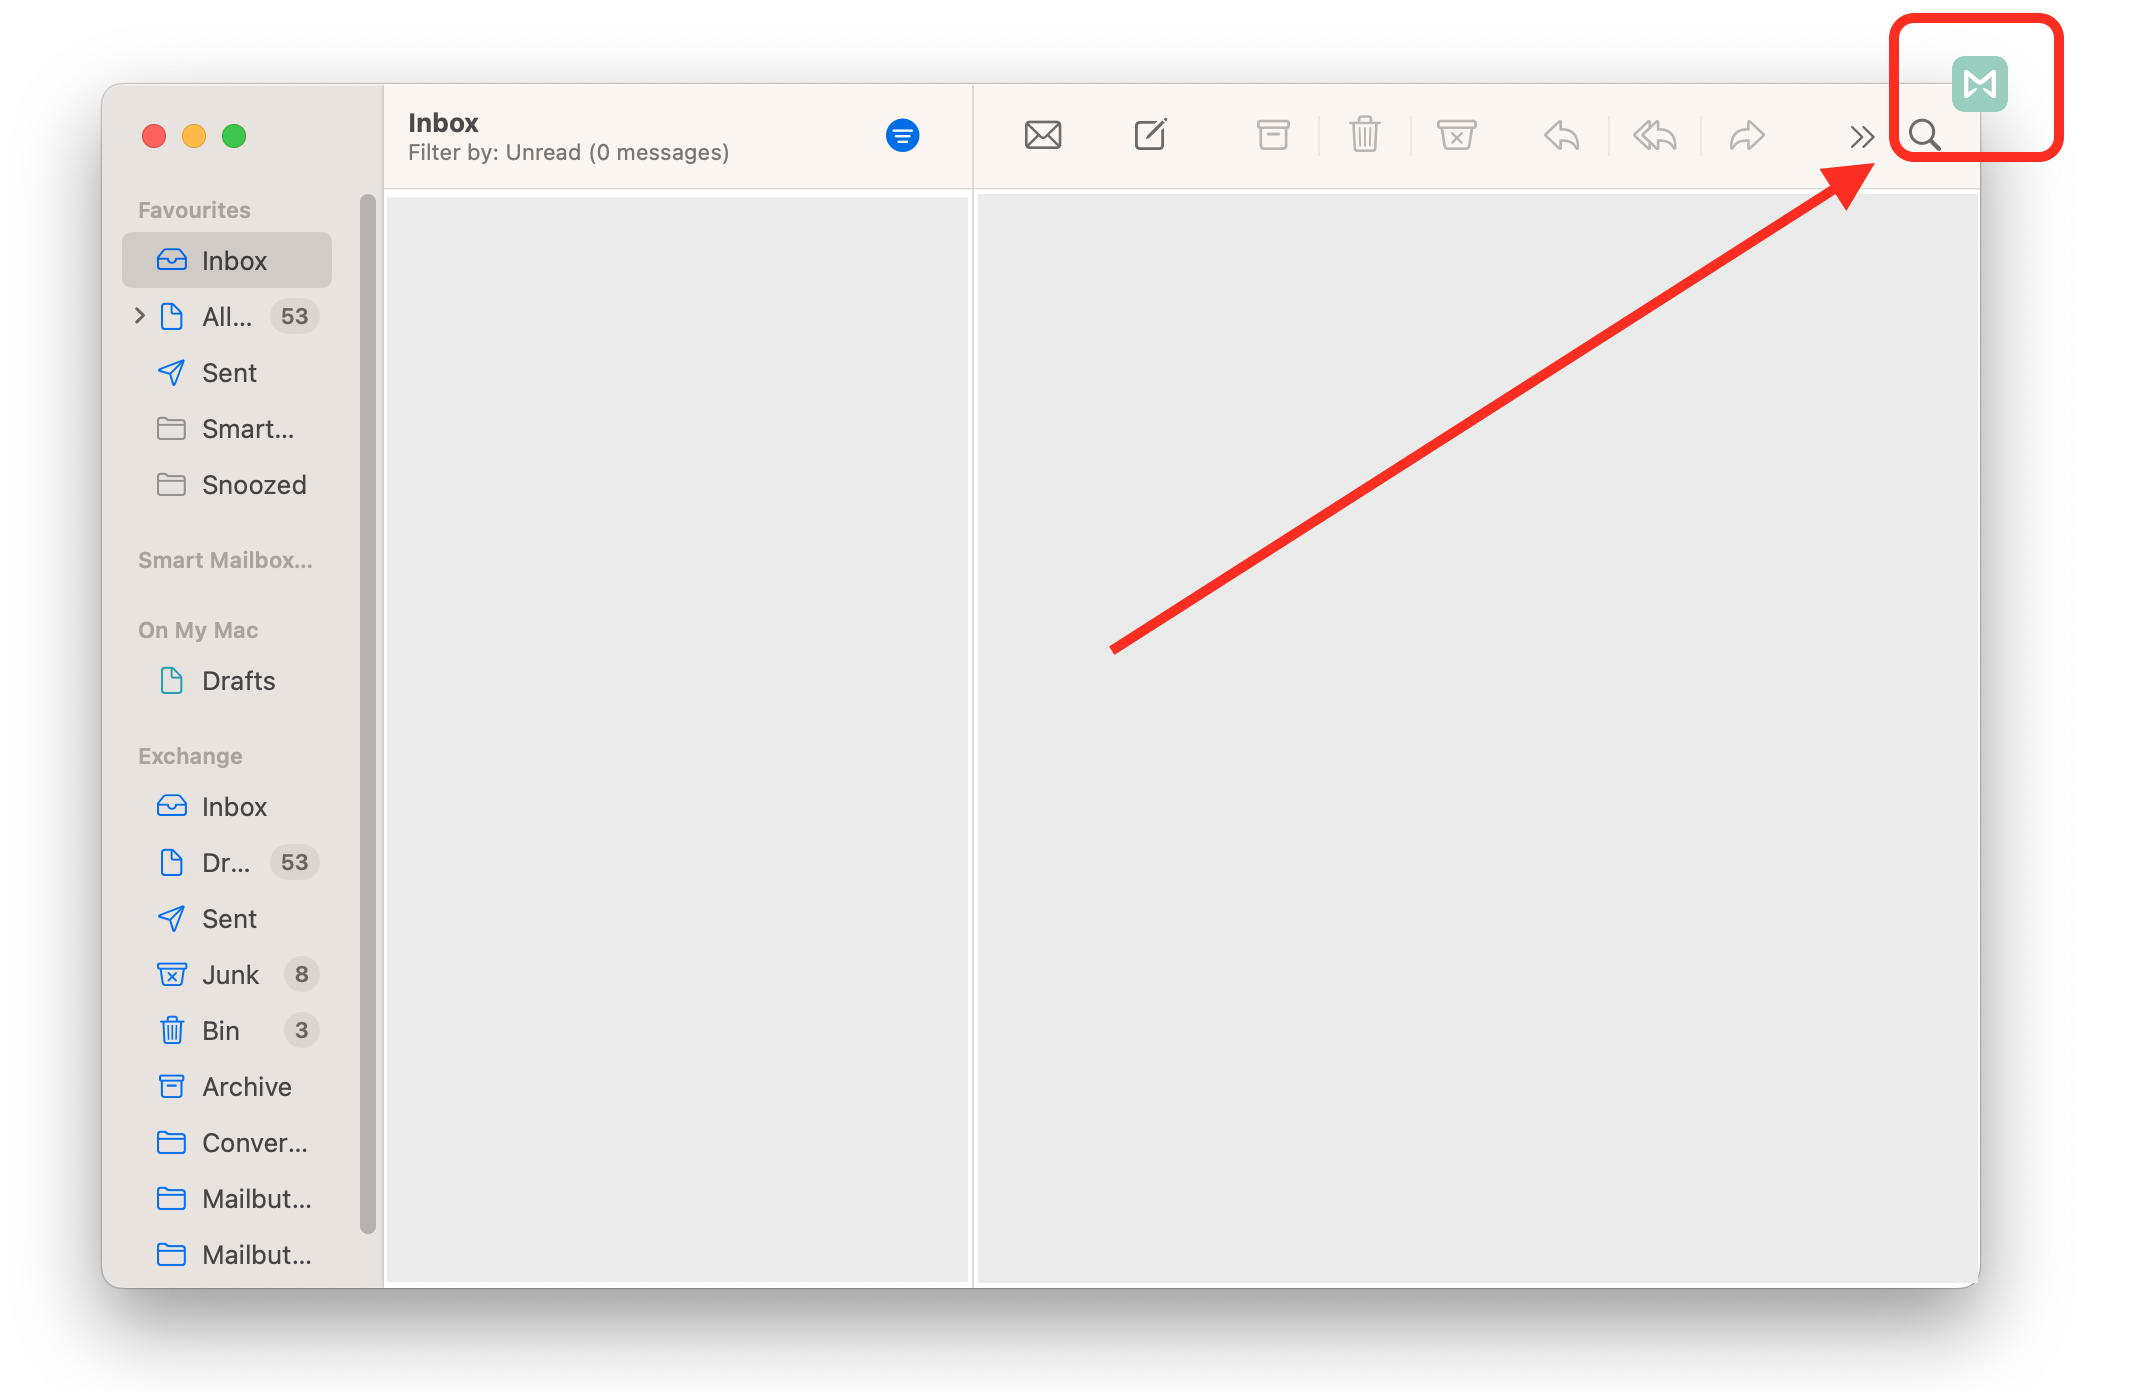
1. Click the Mailbutler icon at the top of your Apple Mail window to open the Mailbutler Sidebar.
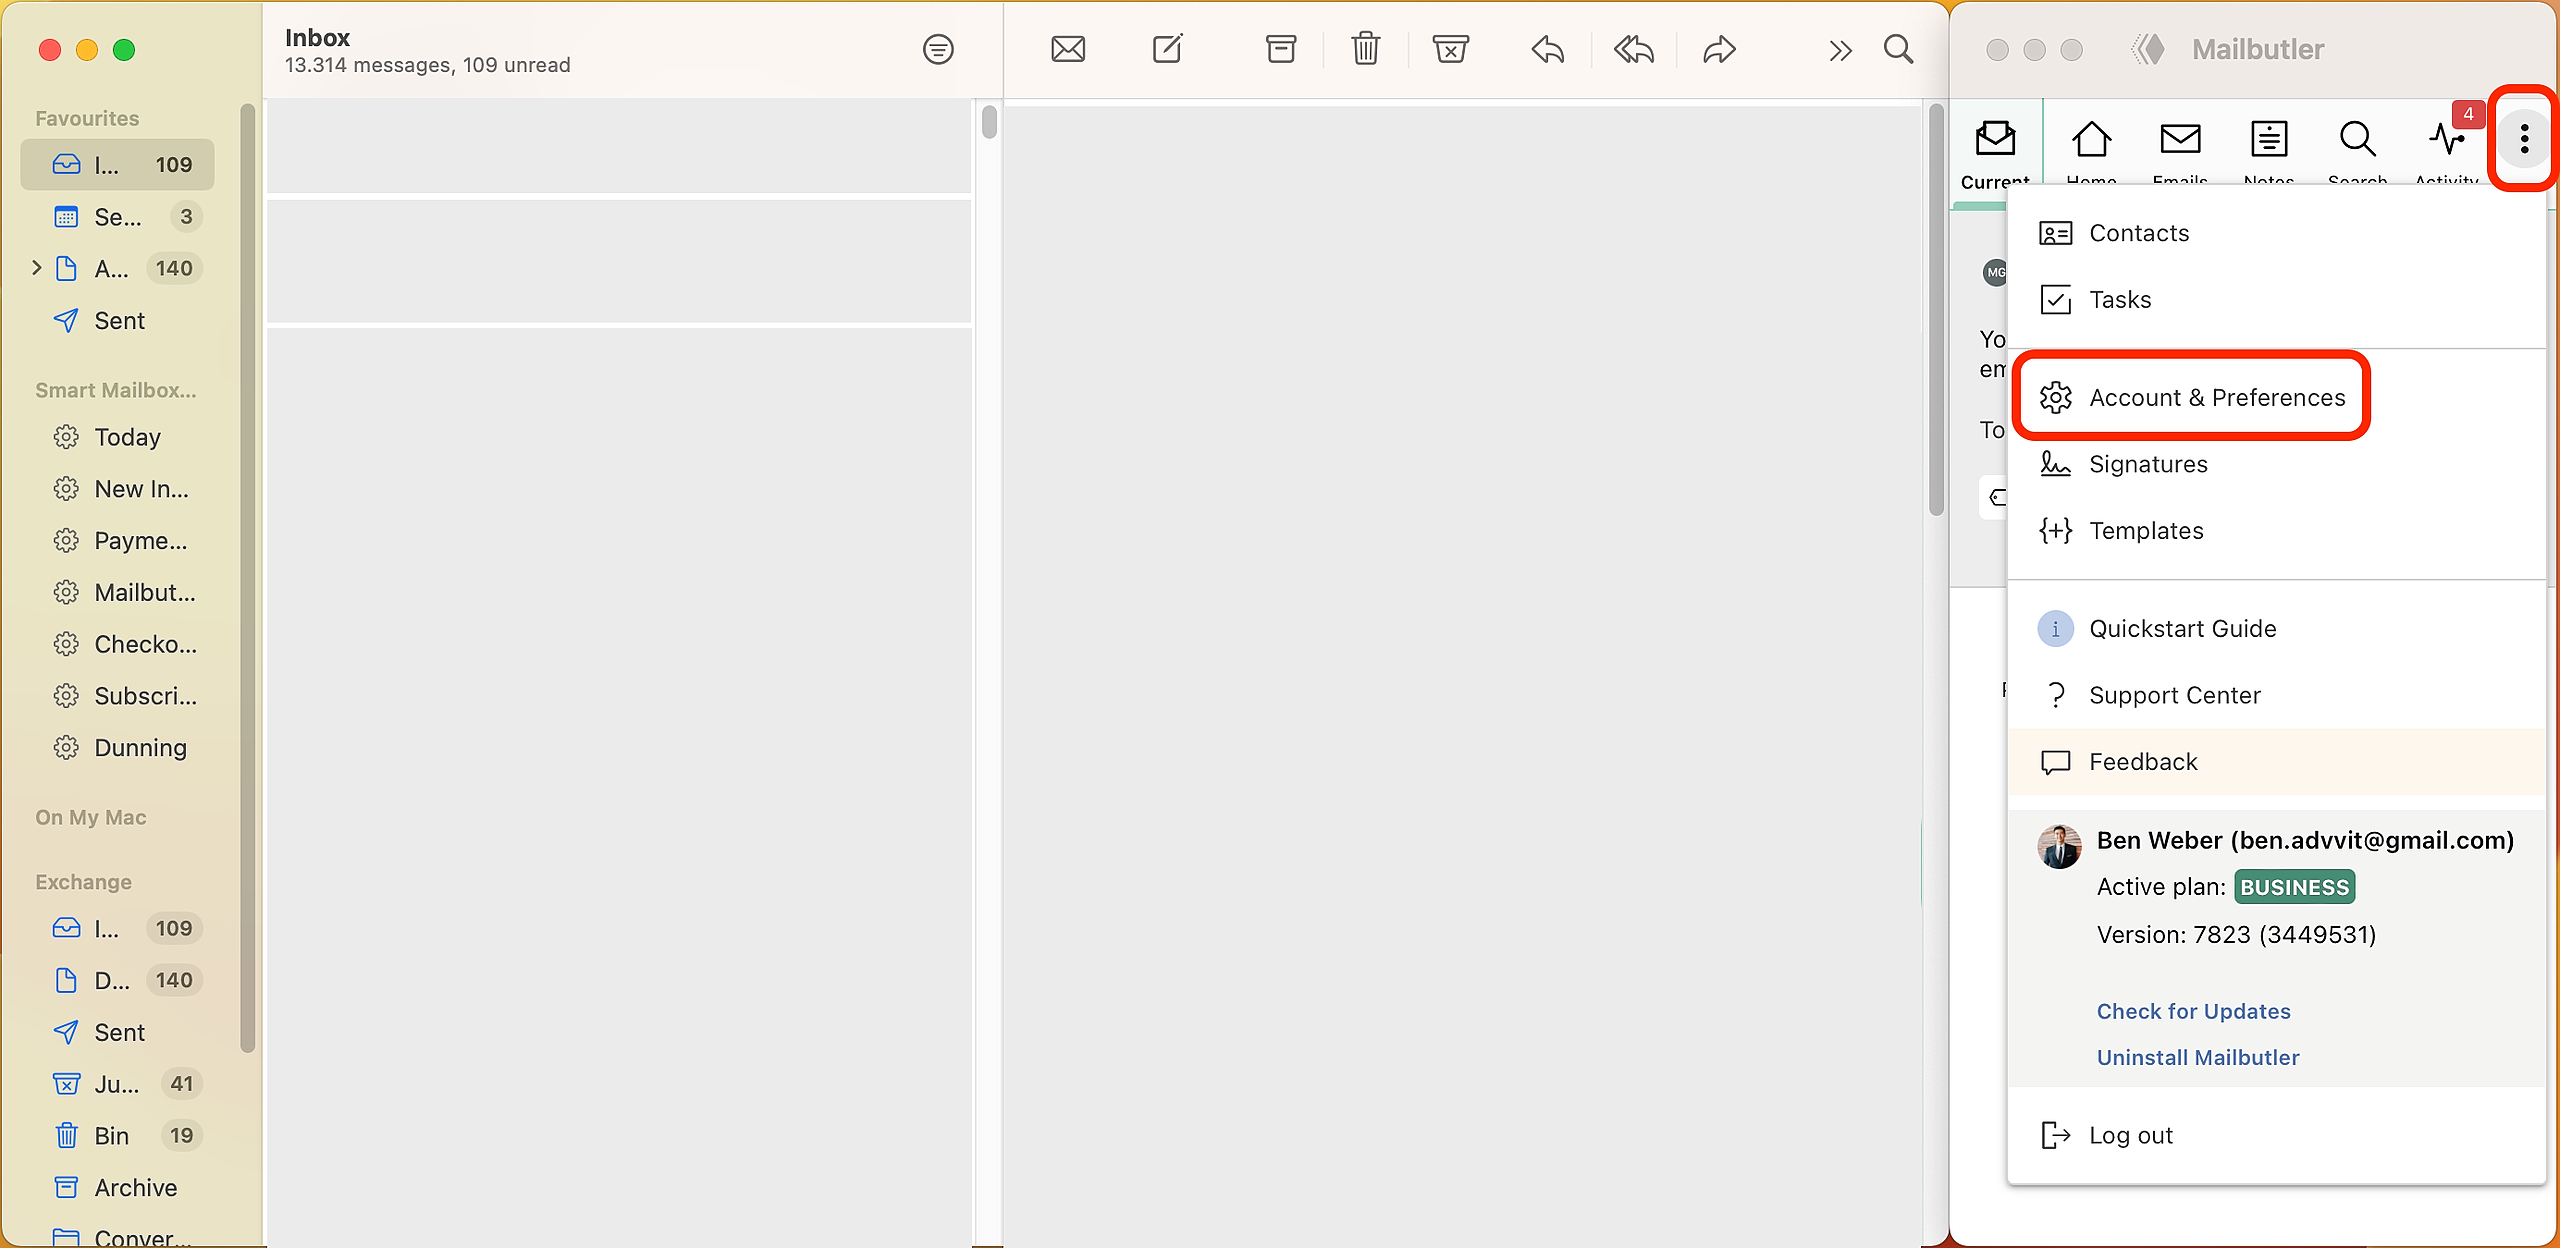
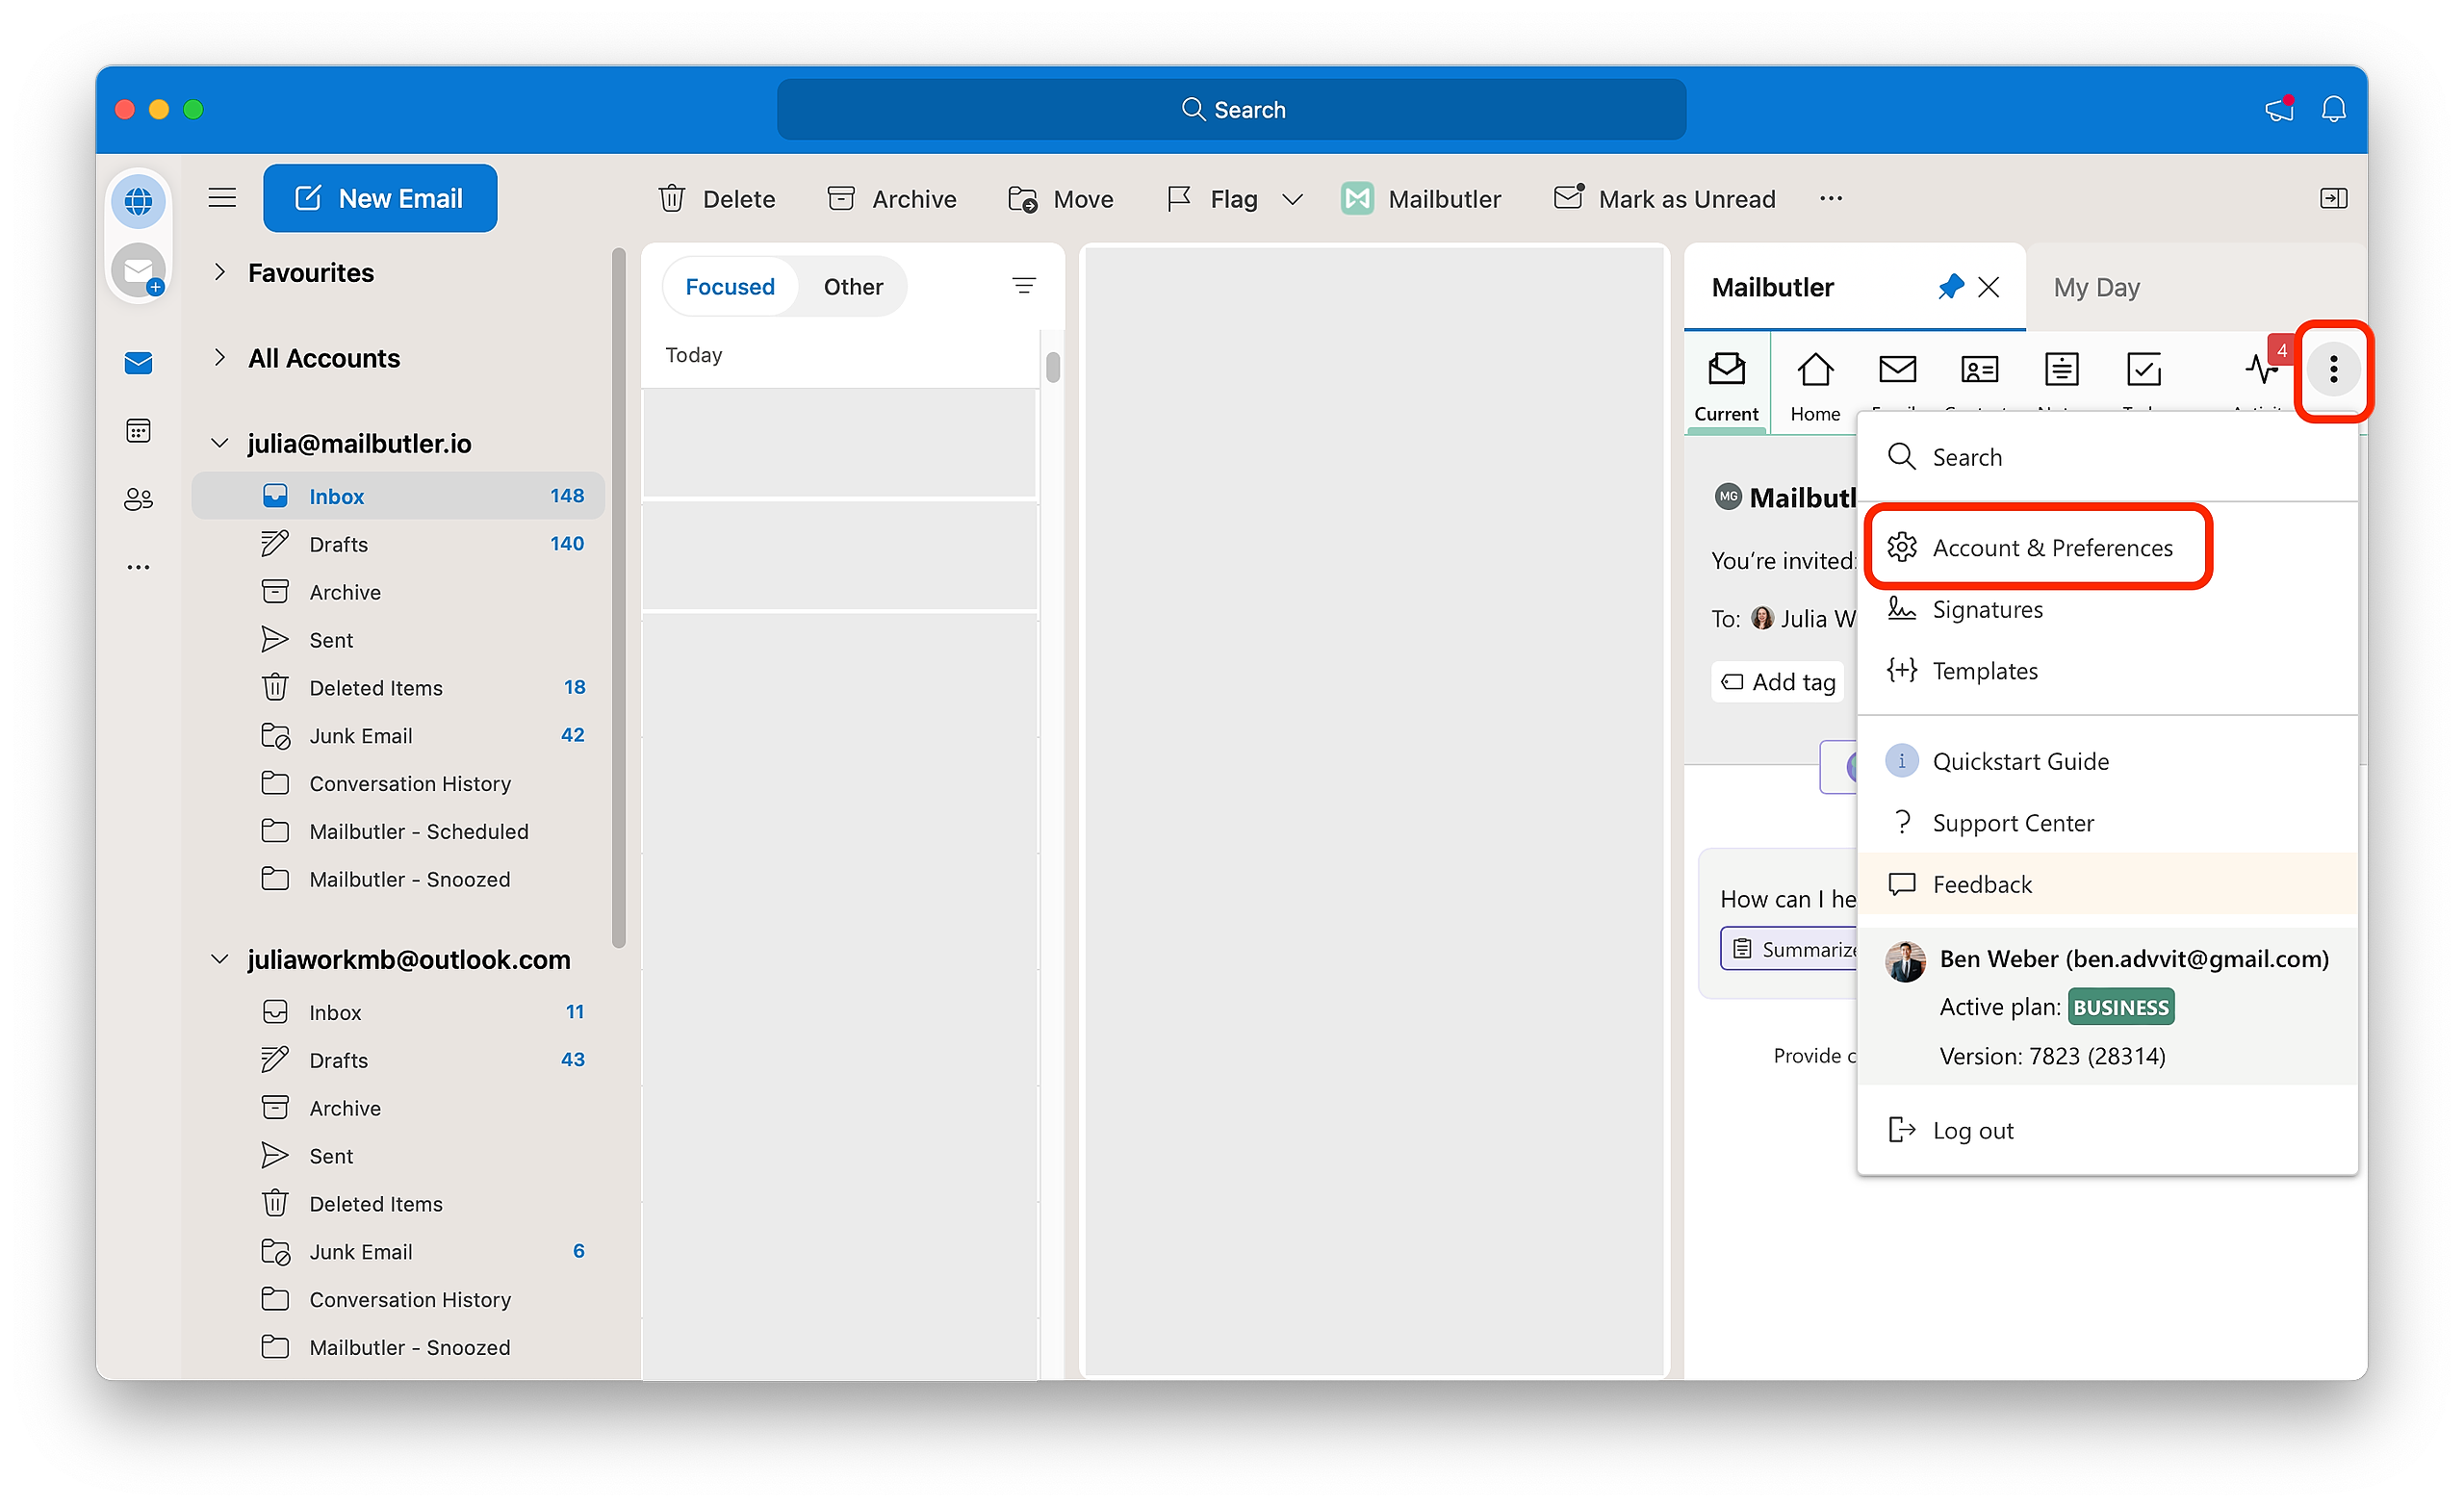
2. In the Mailbutler Sidebar, click the three dots and then Account & Preferences.
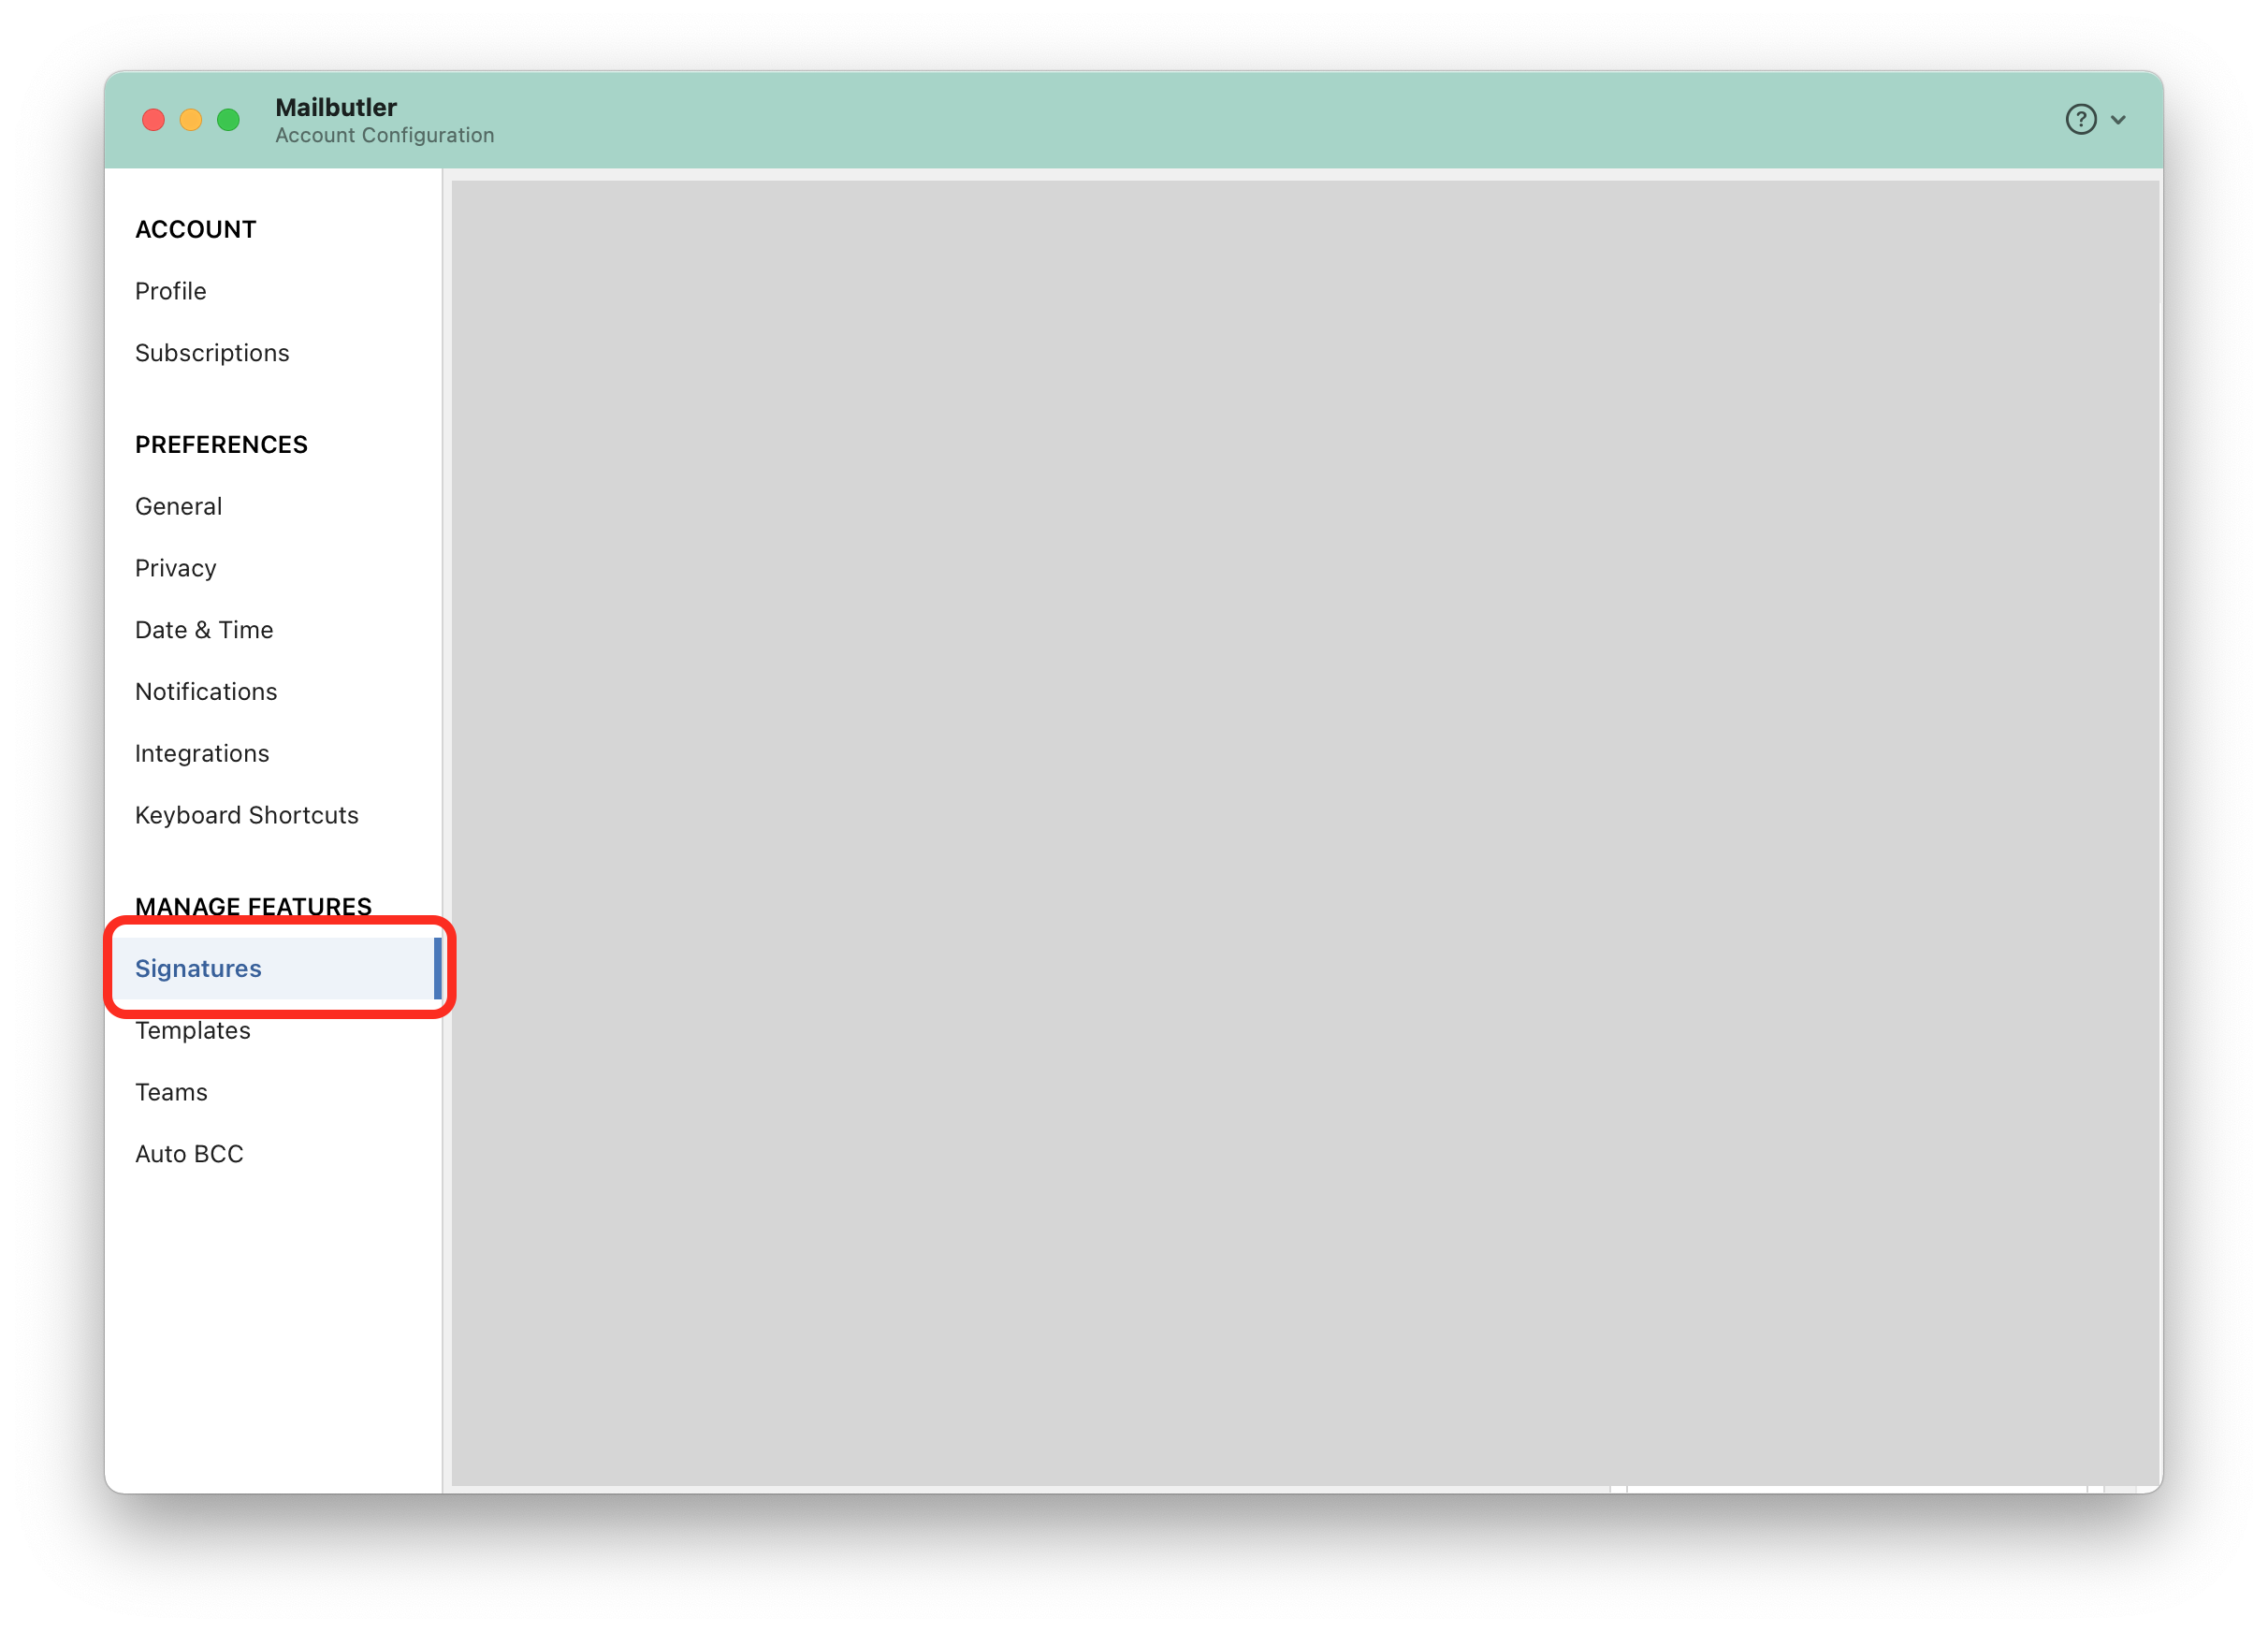
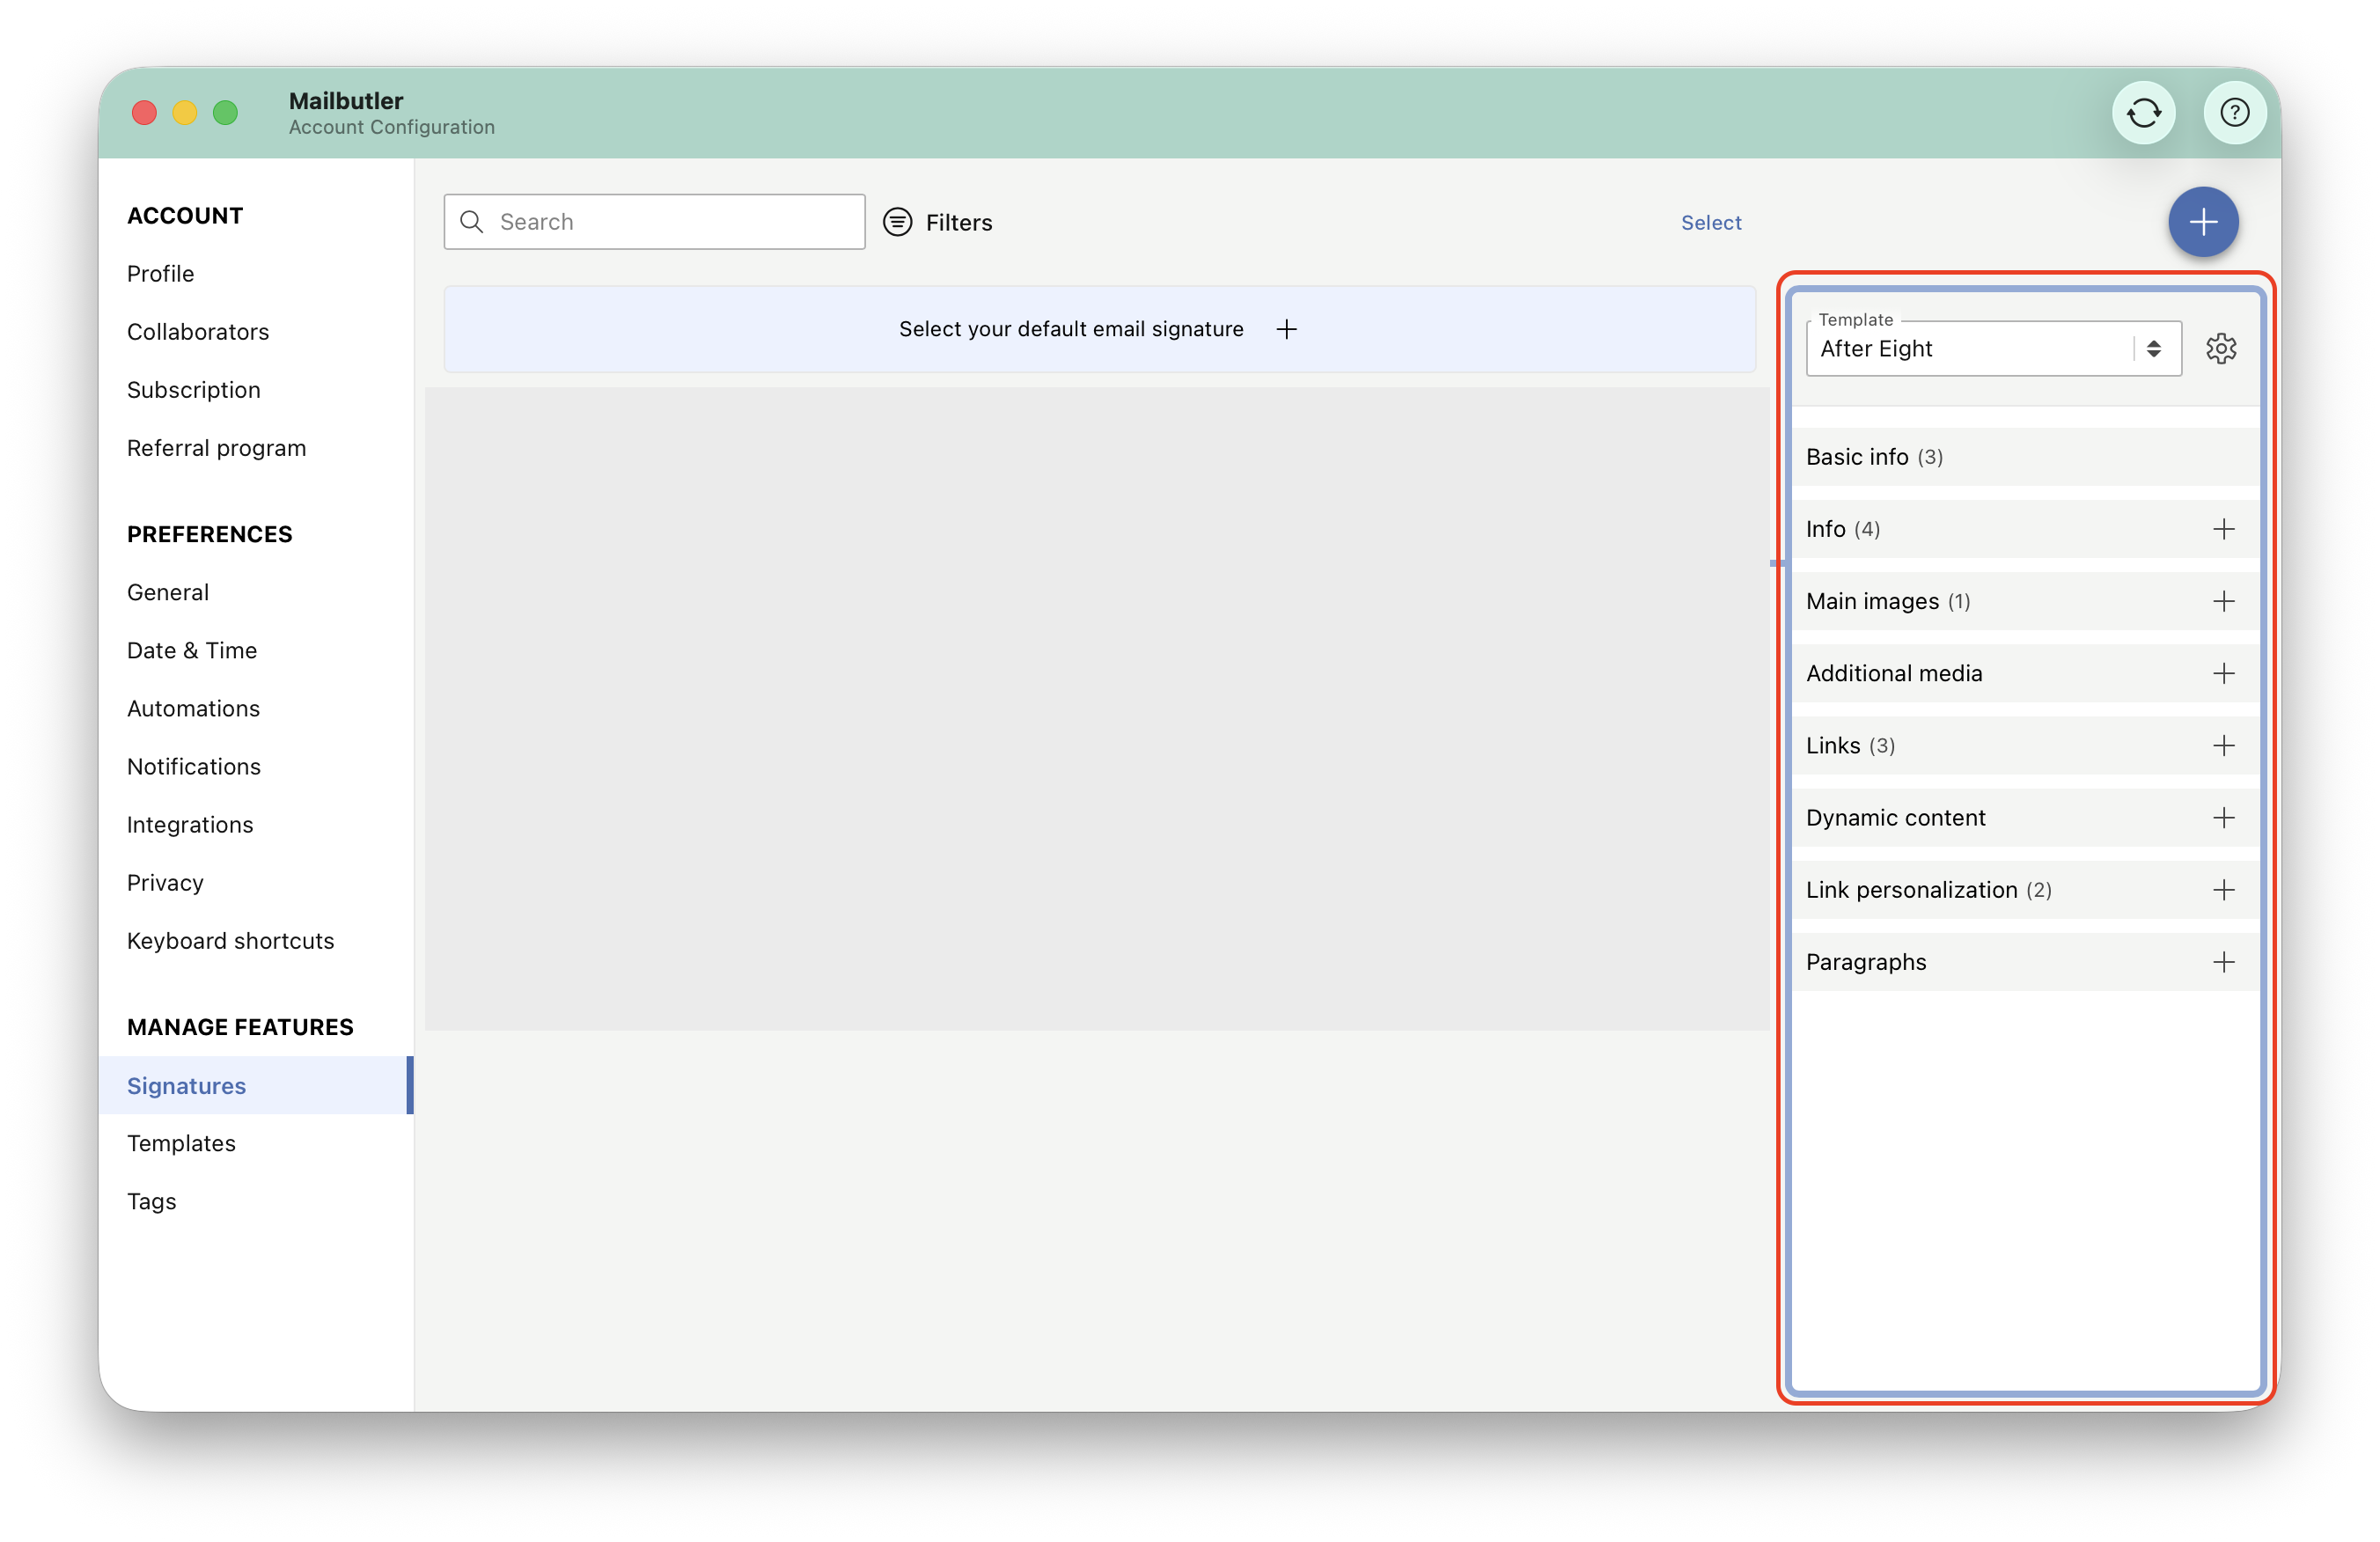
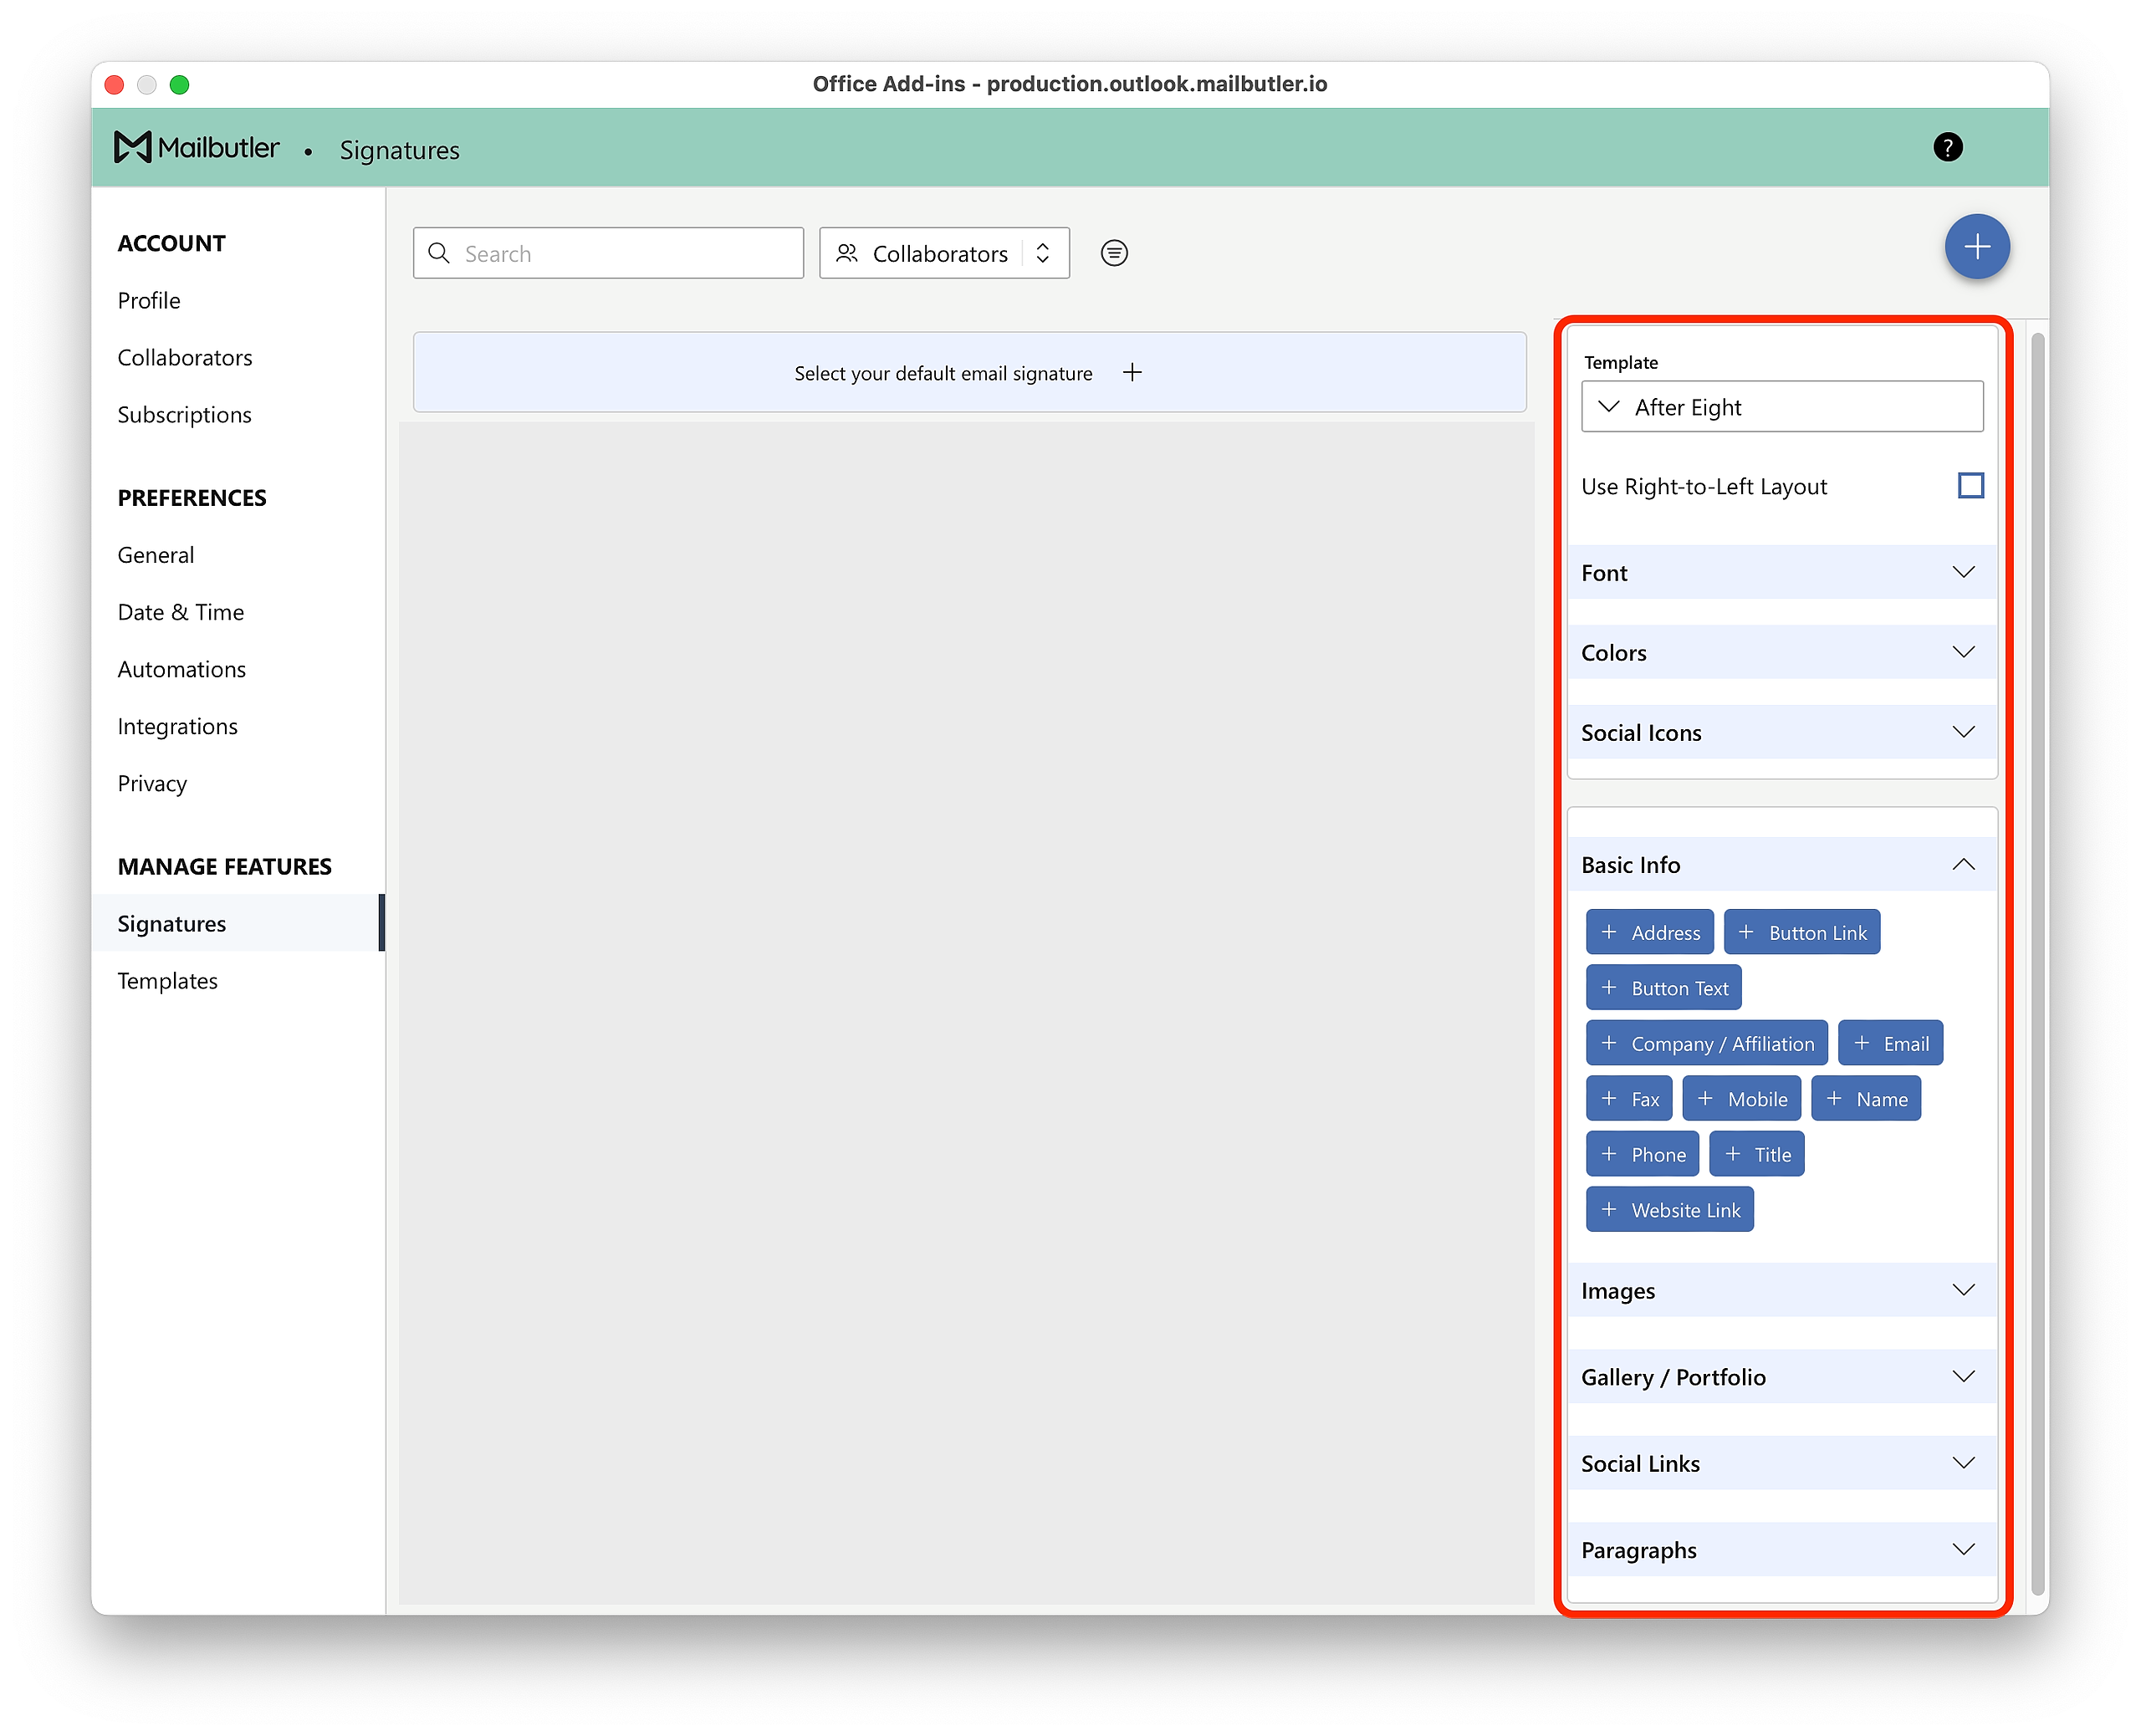
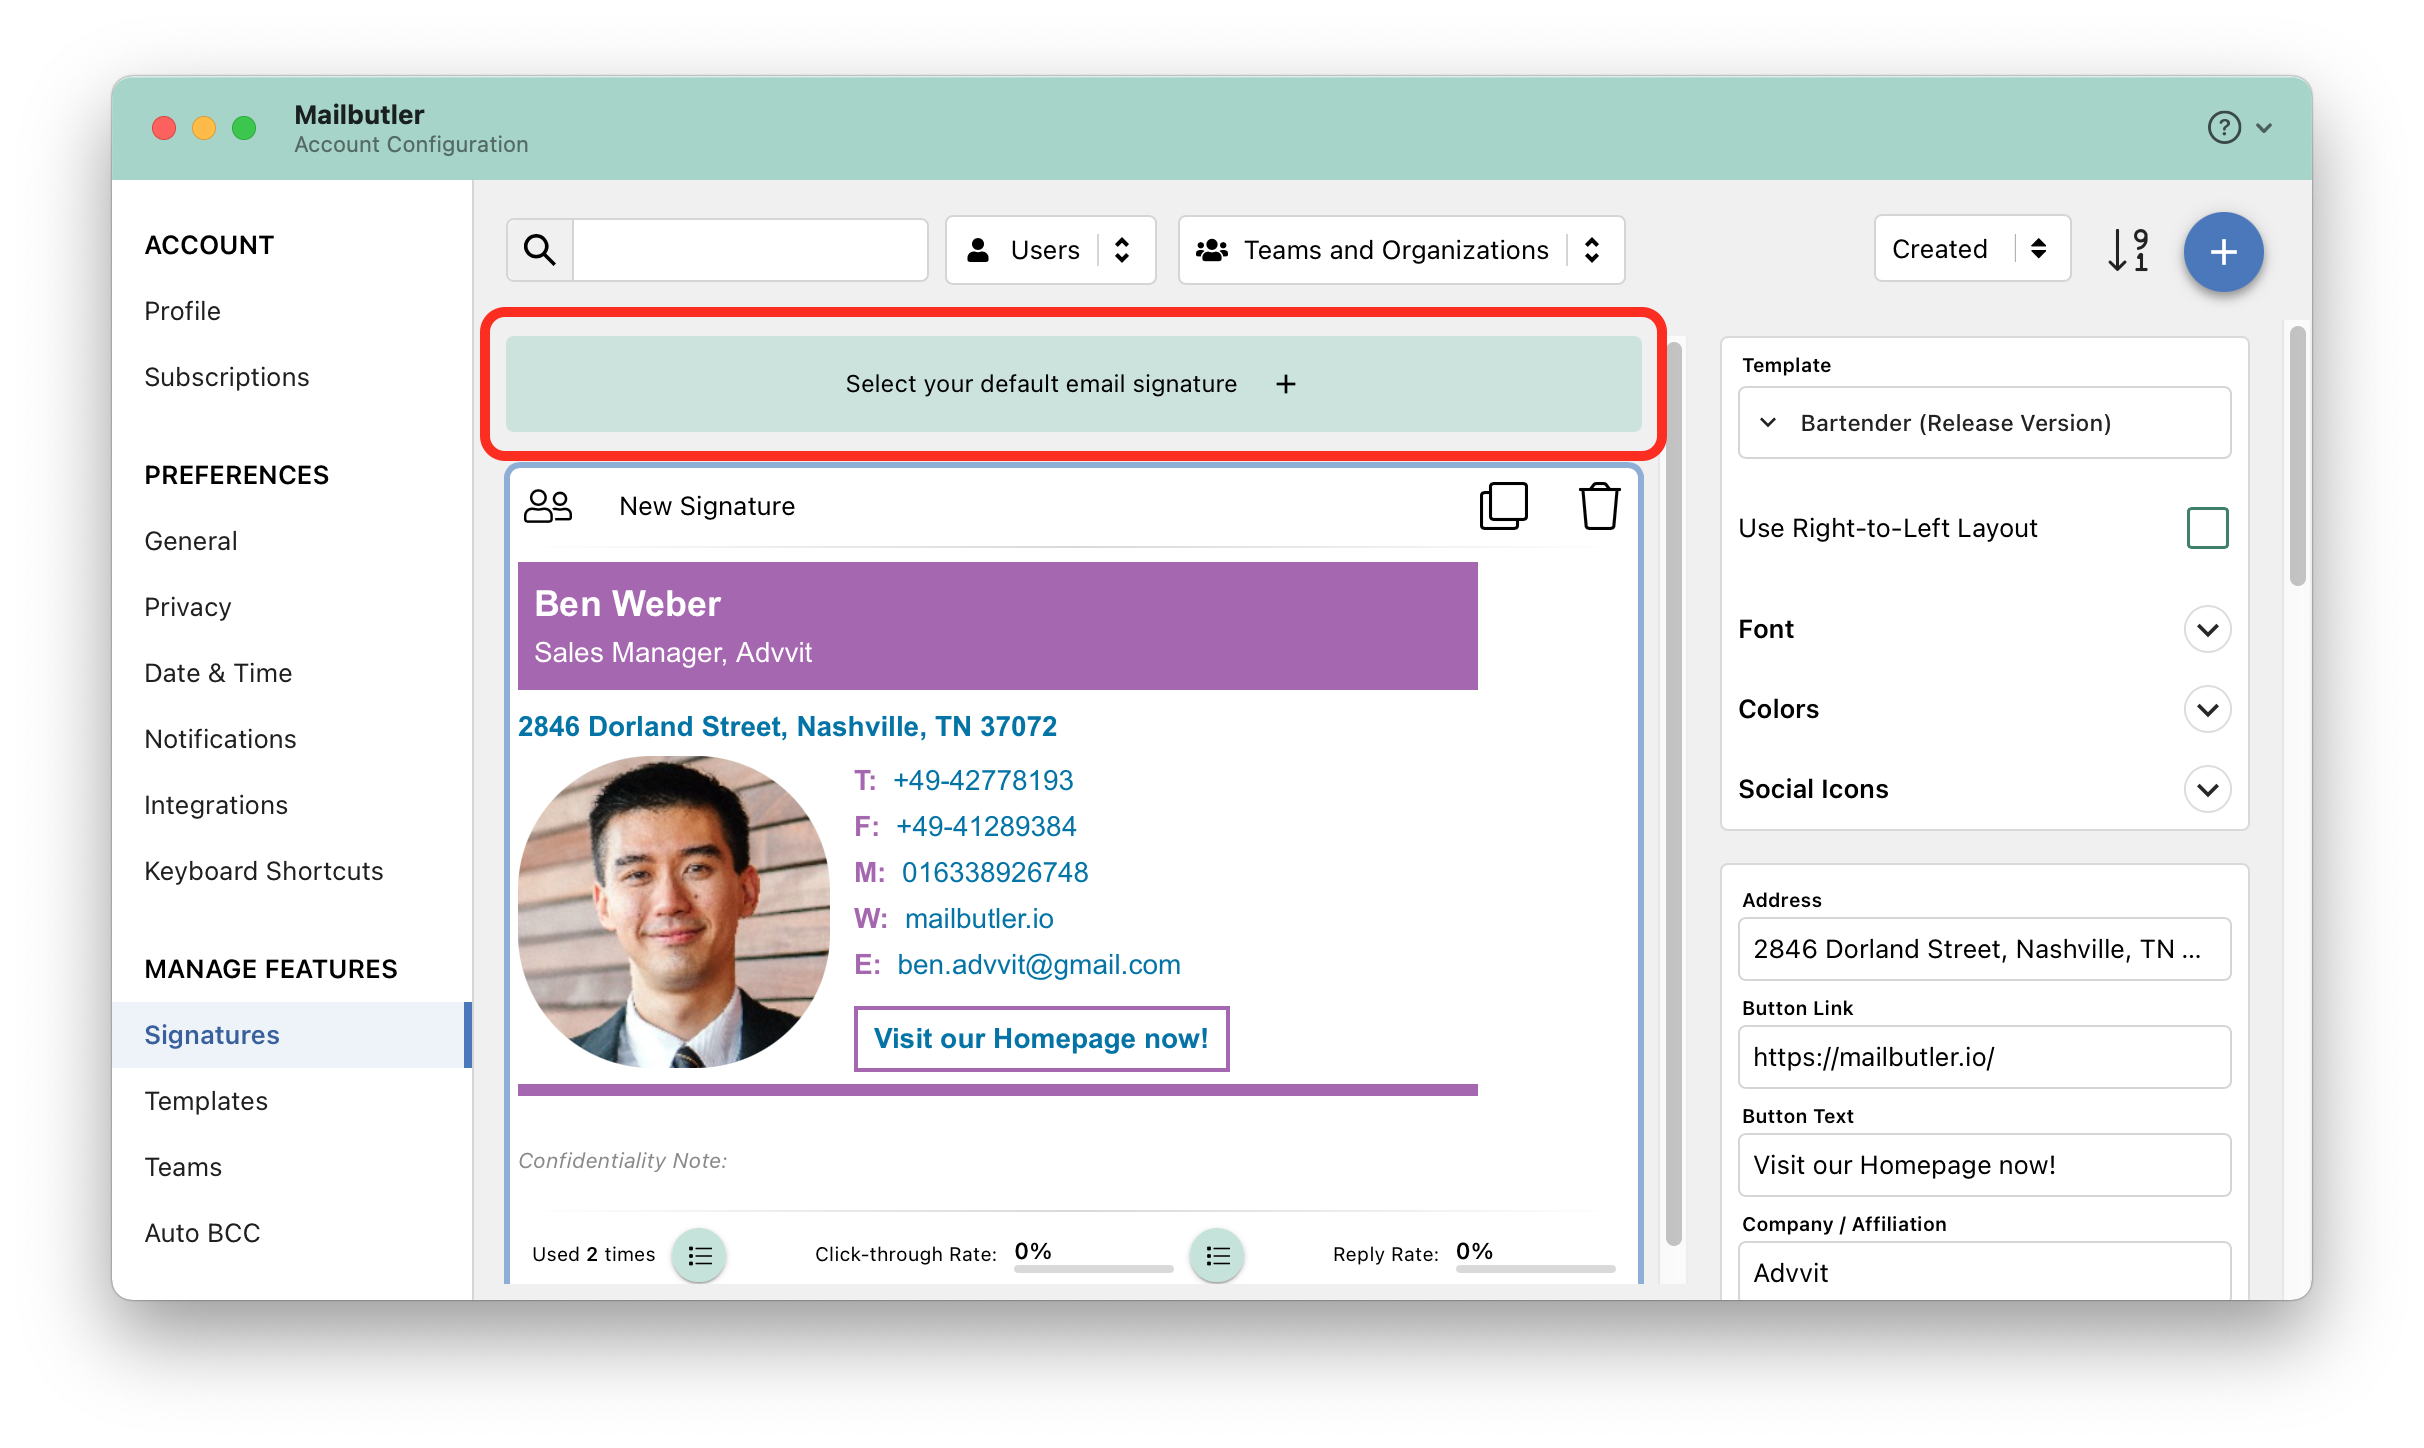
3. A new window will open. Select Signatures under Manage Features in the sidebar on the left.
4. Click the plus icon to add a new signature.
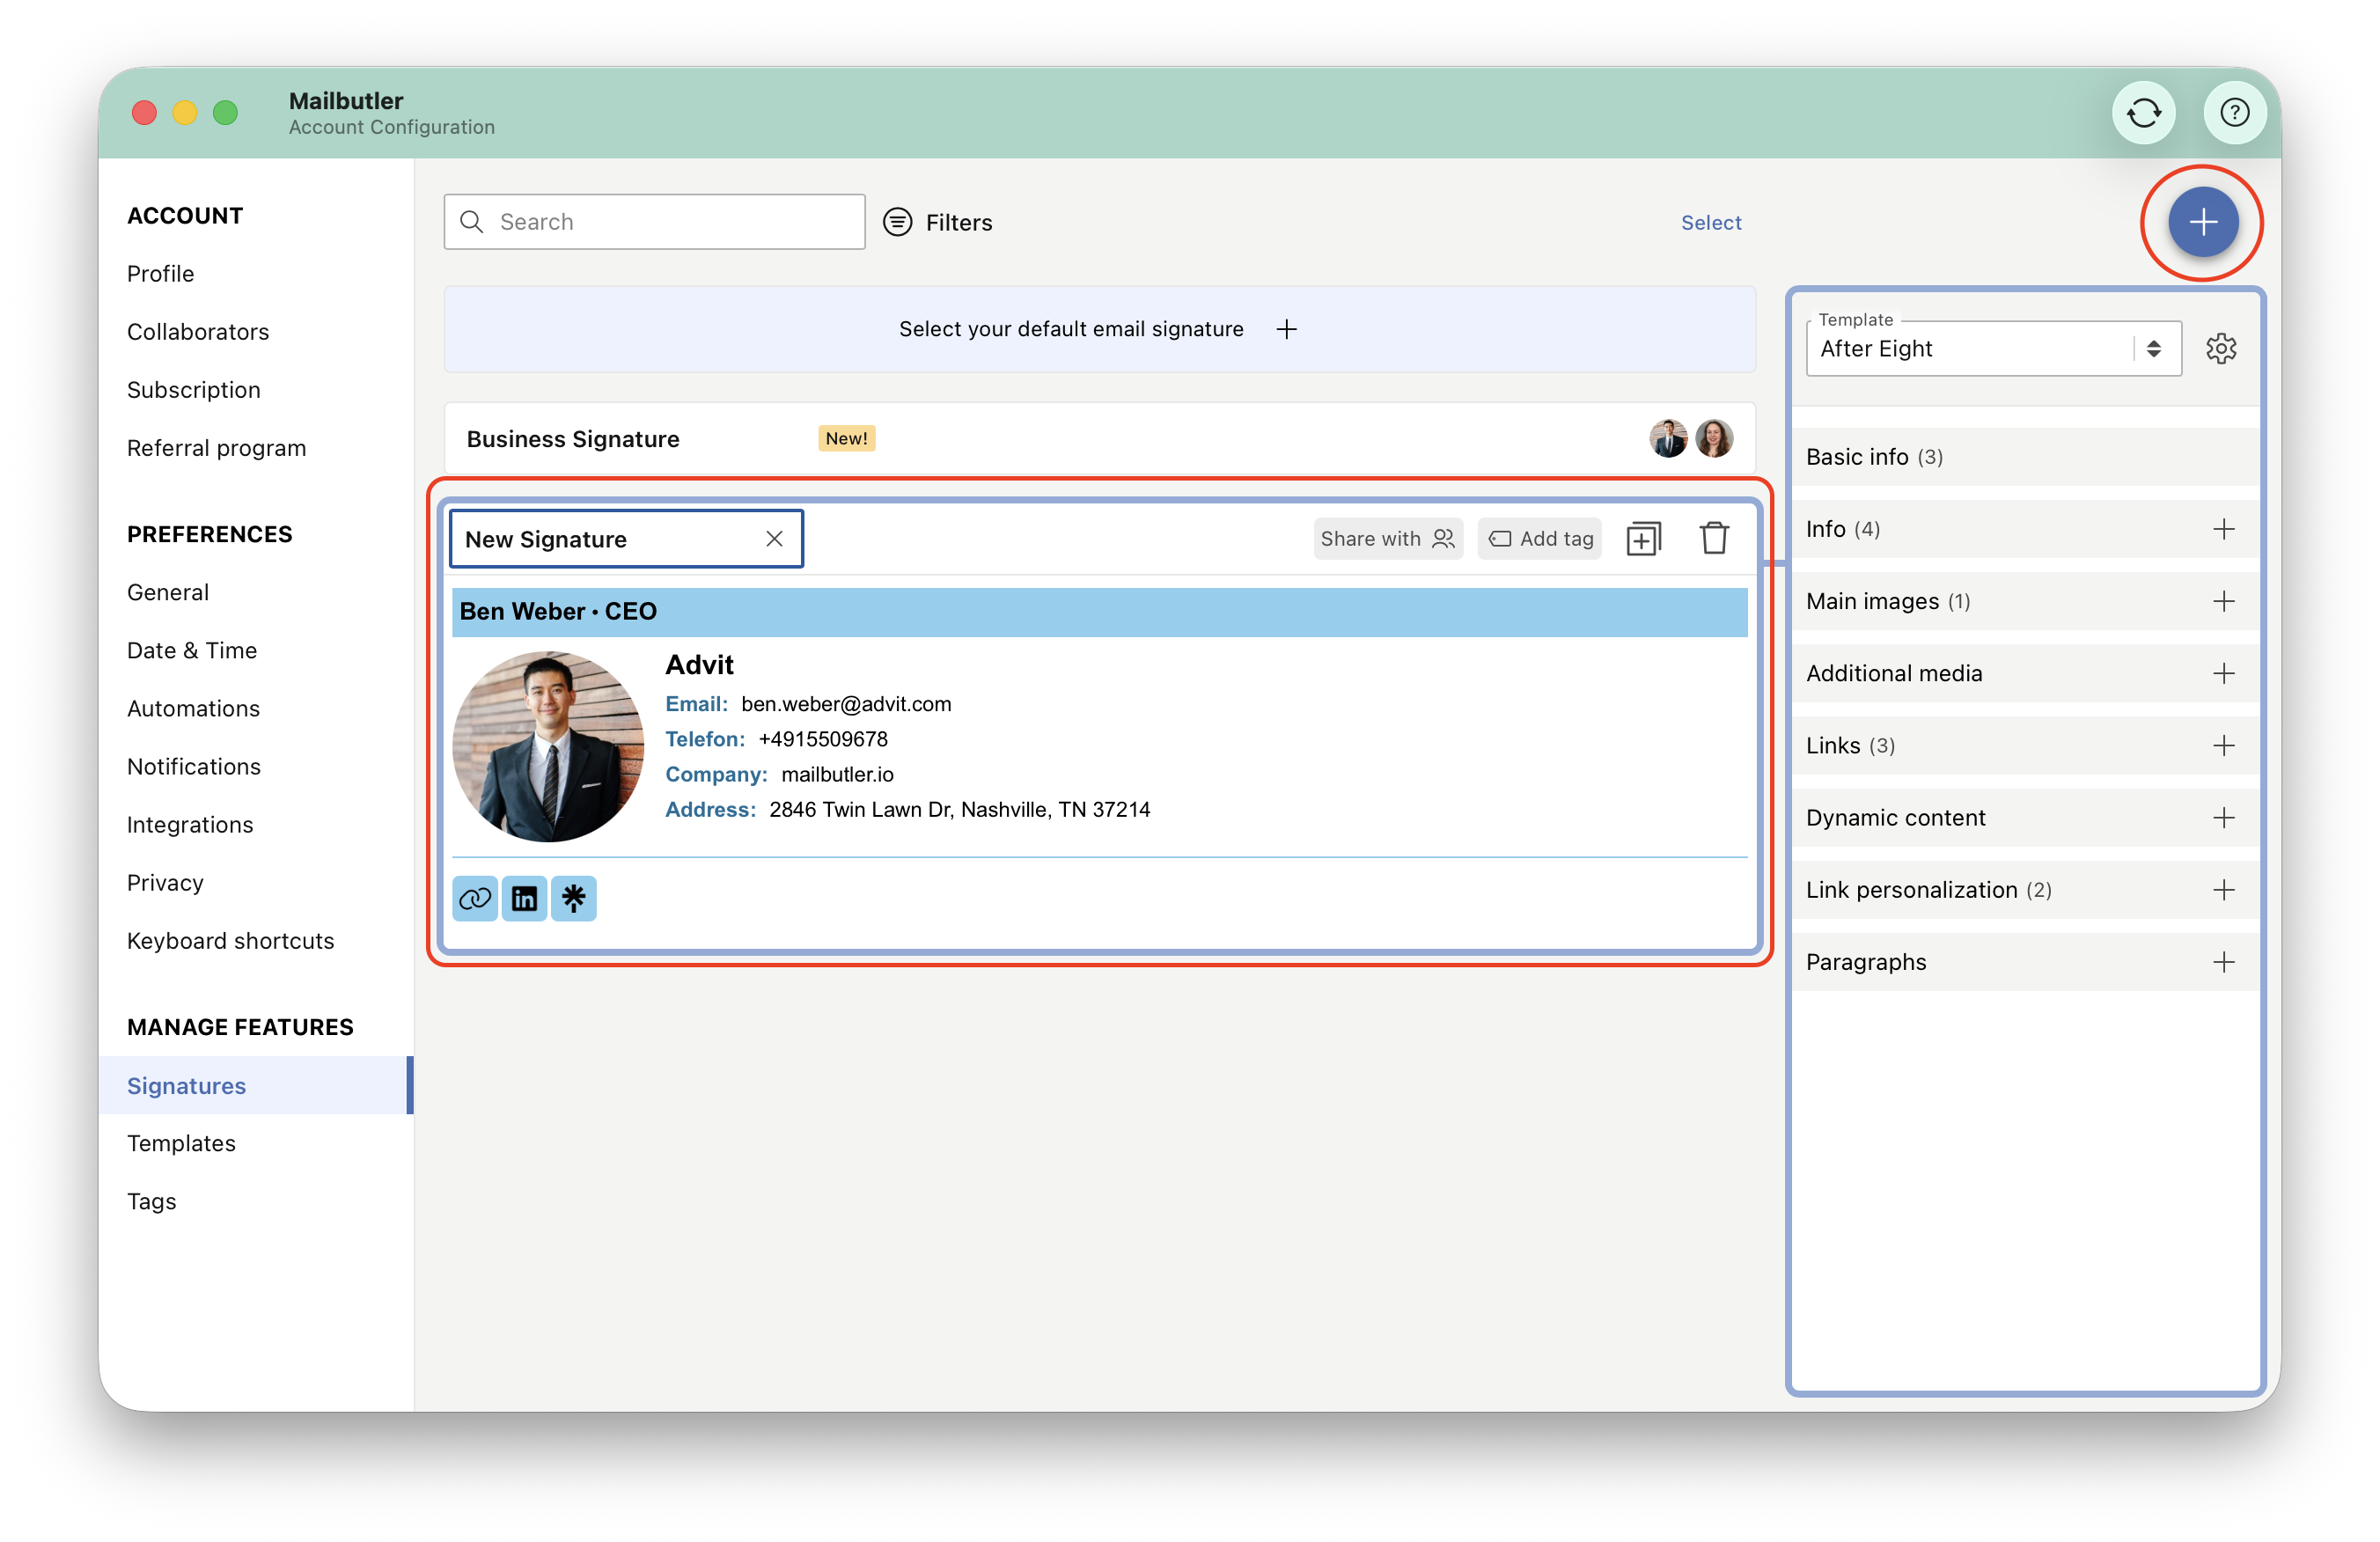
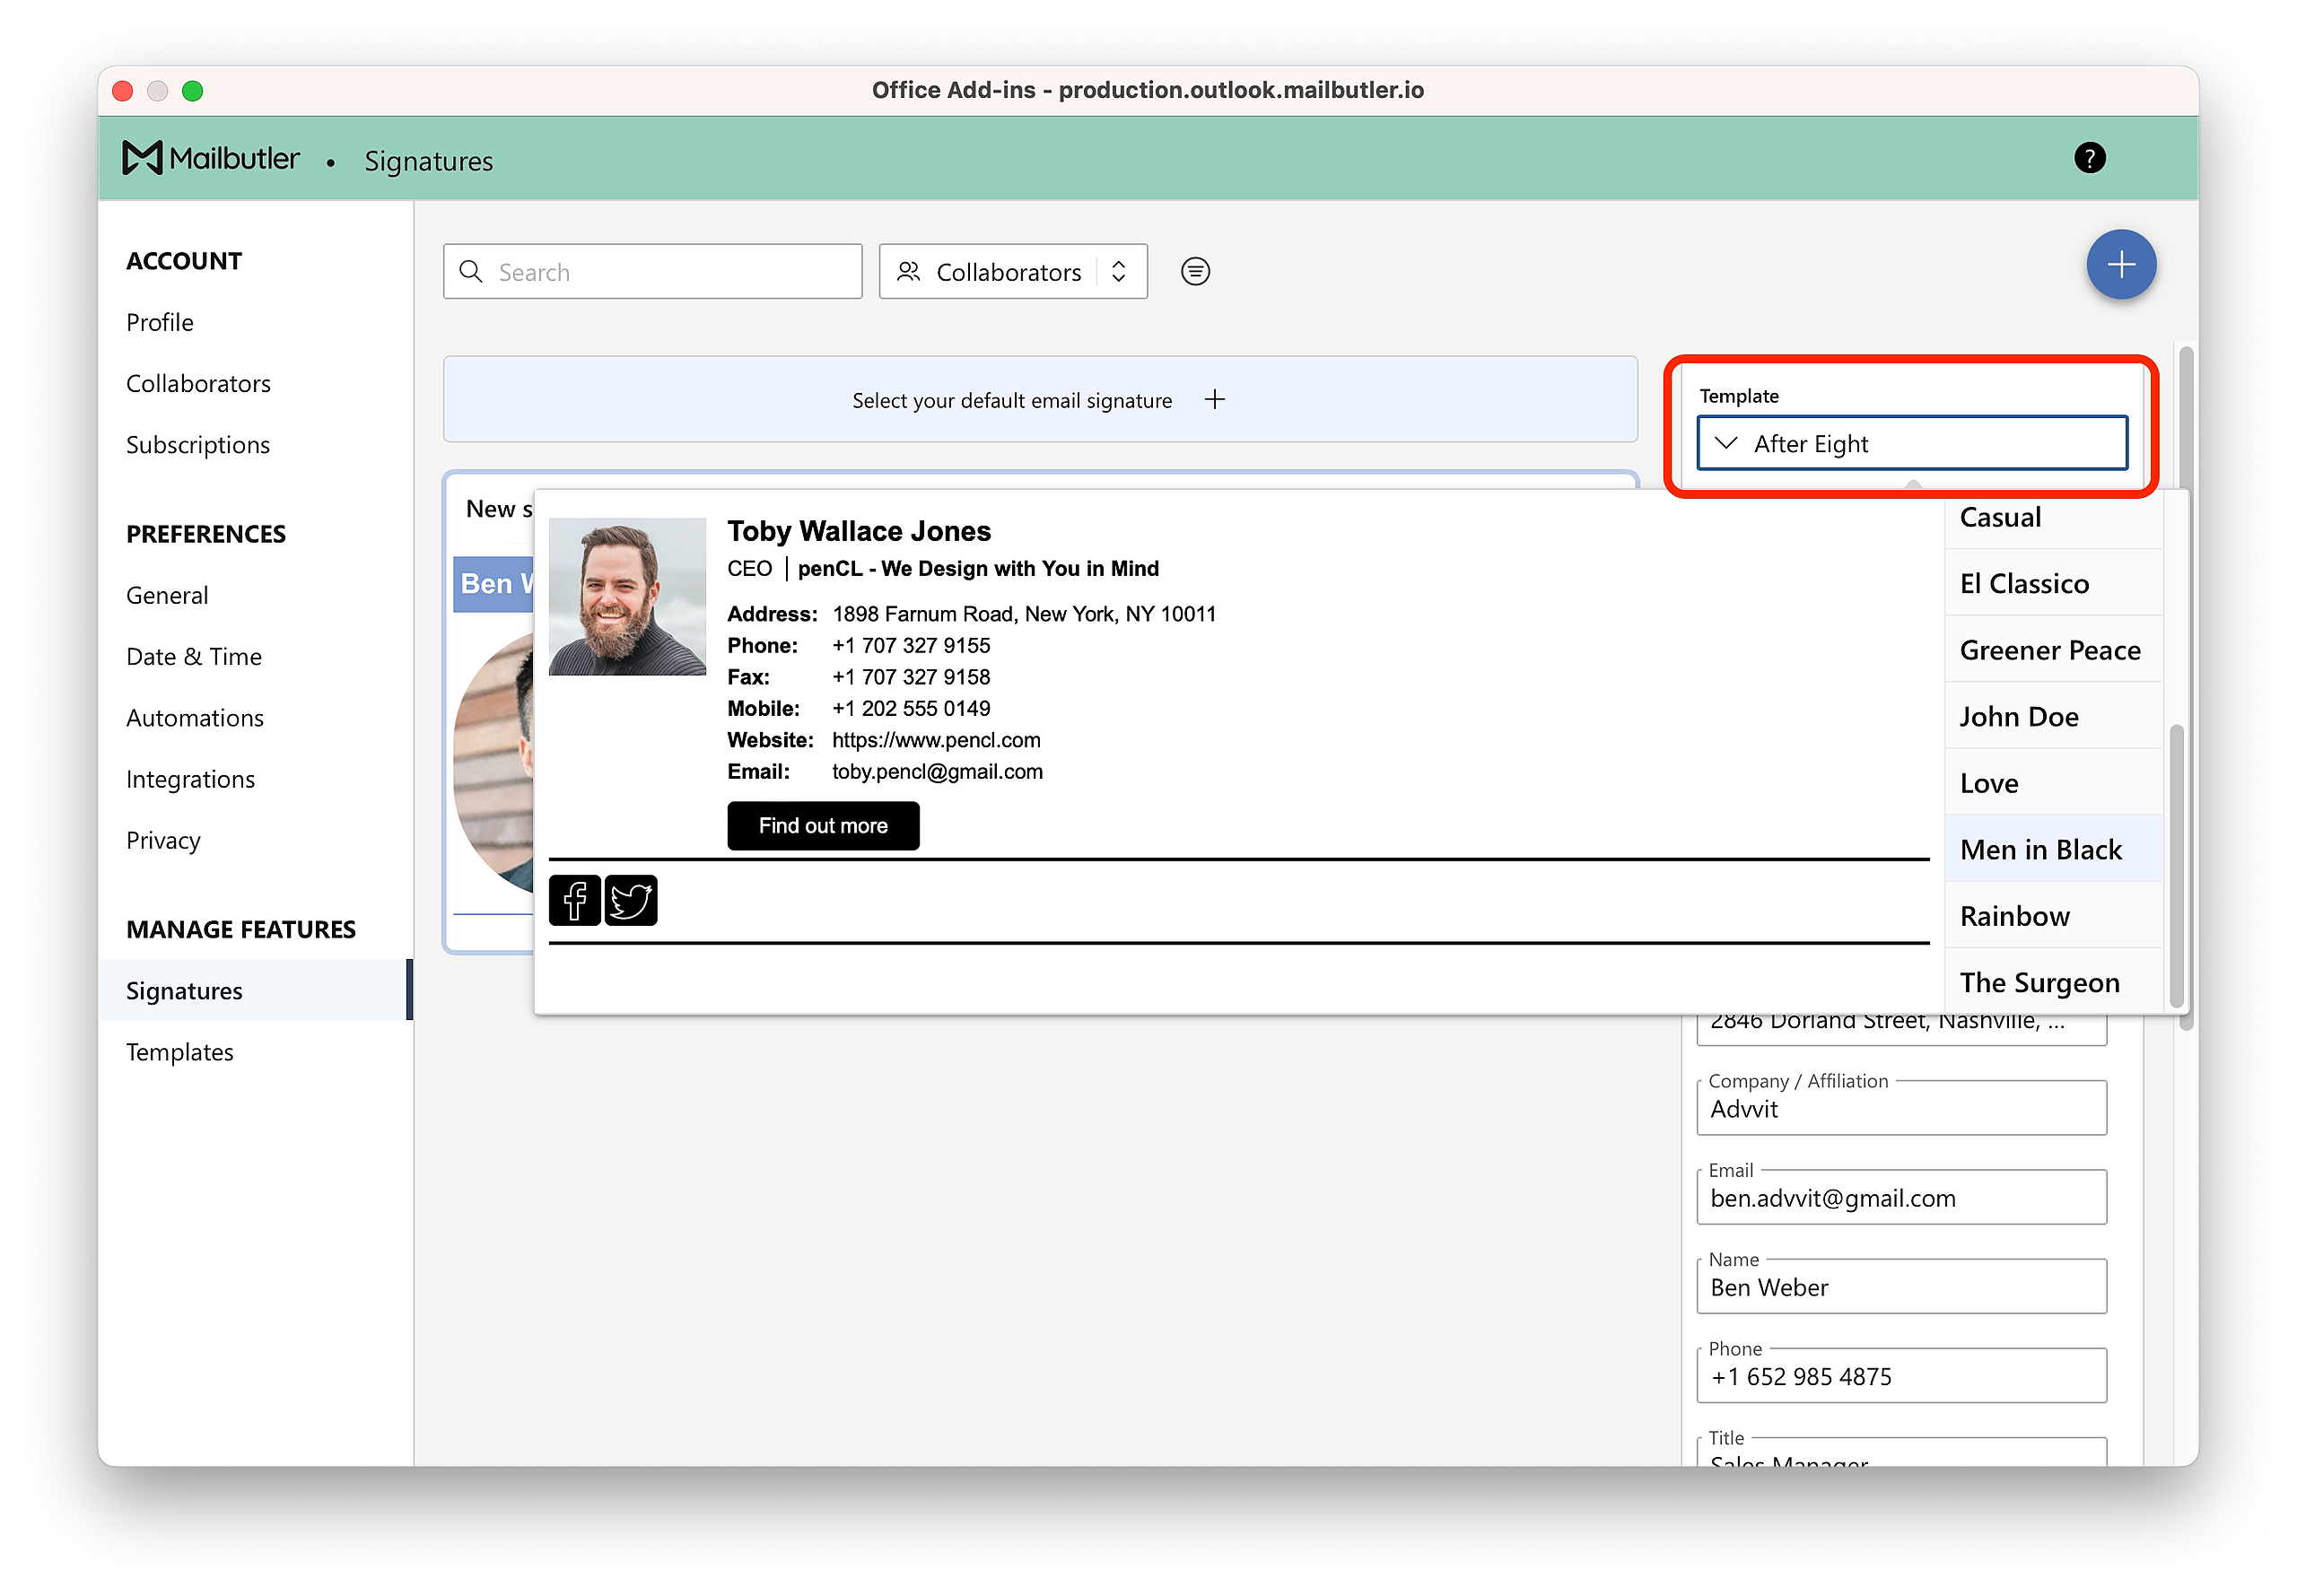
5. Click the dropdown button to select your preferred signature template.
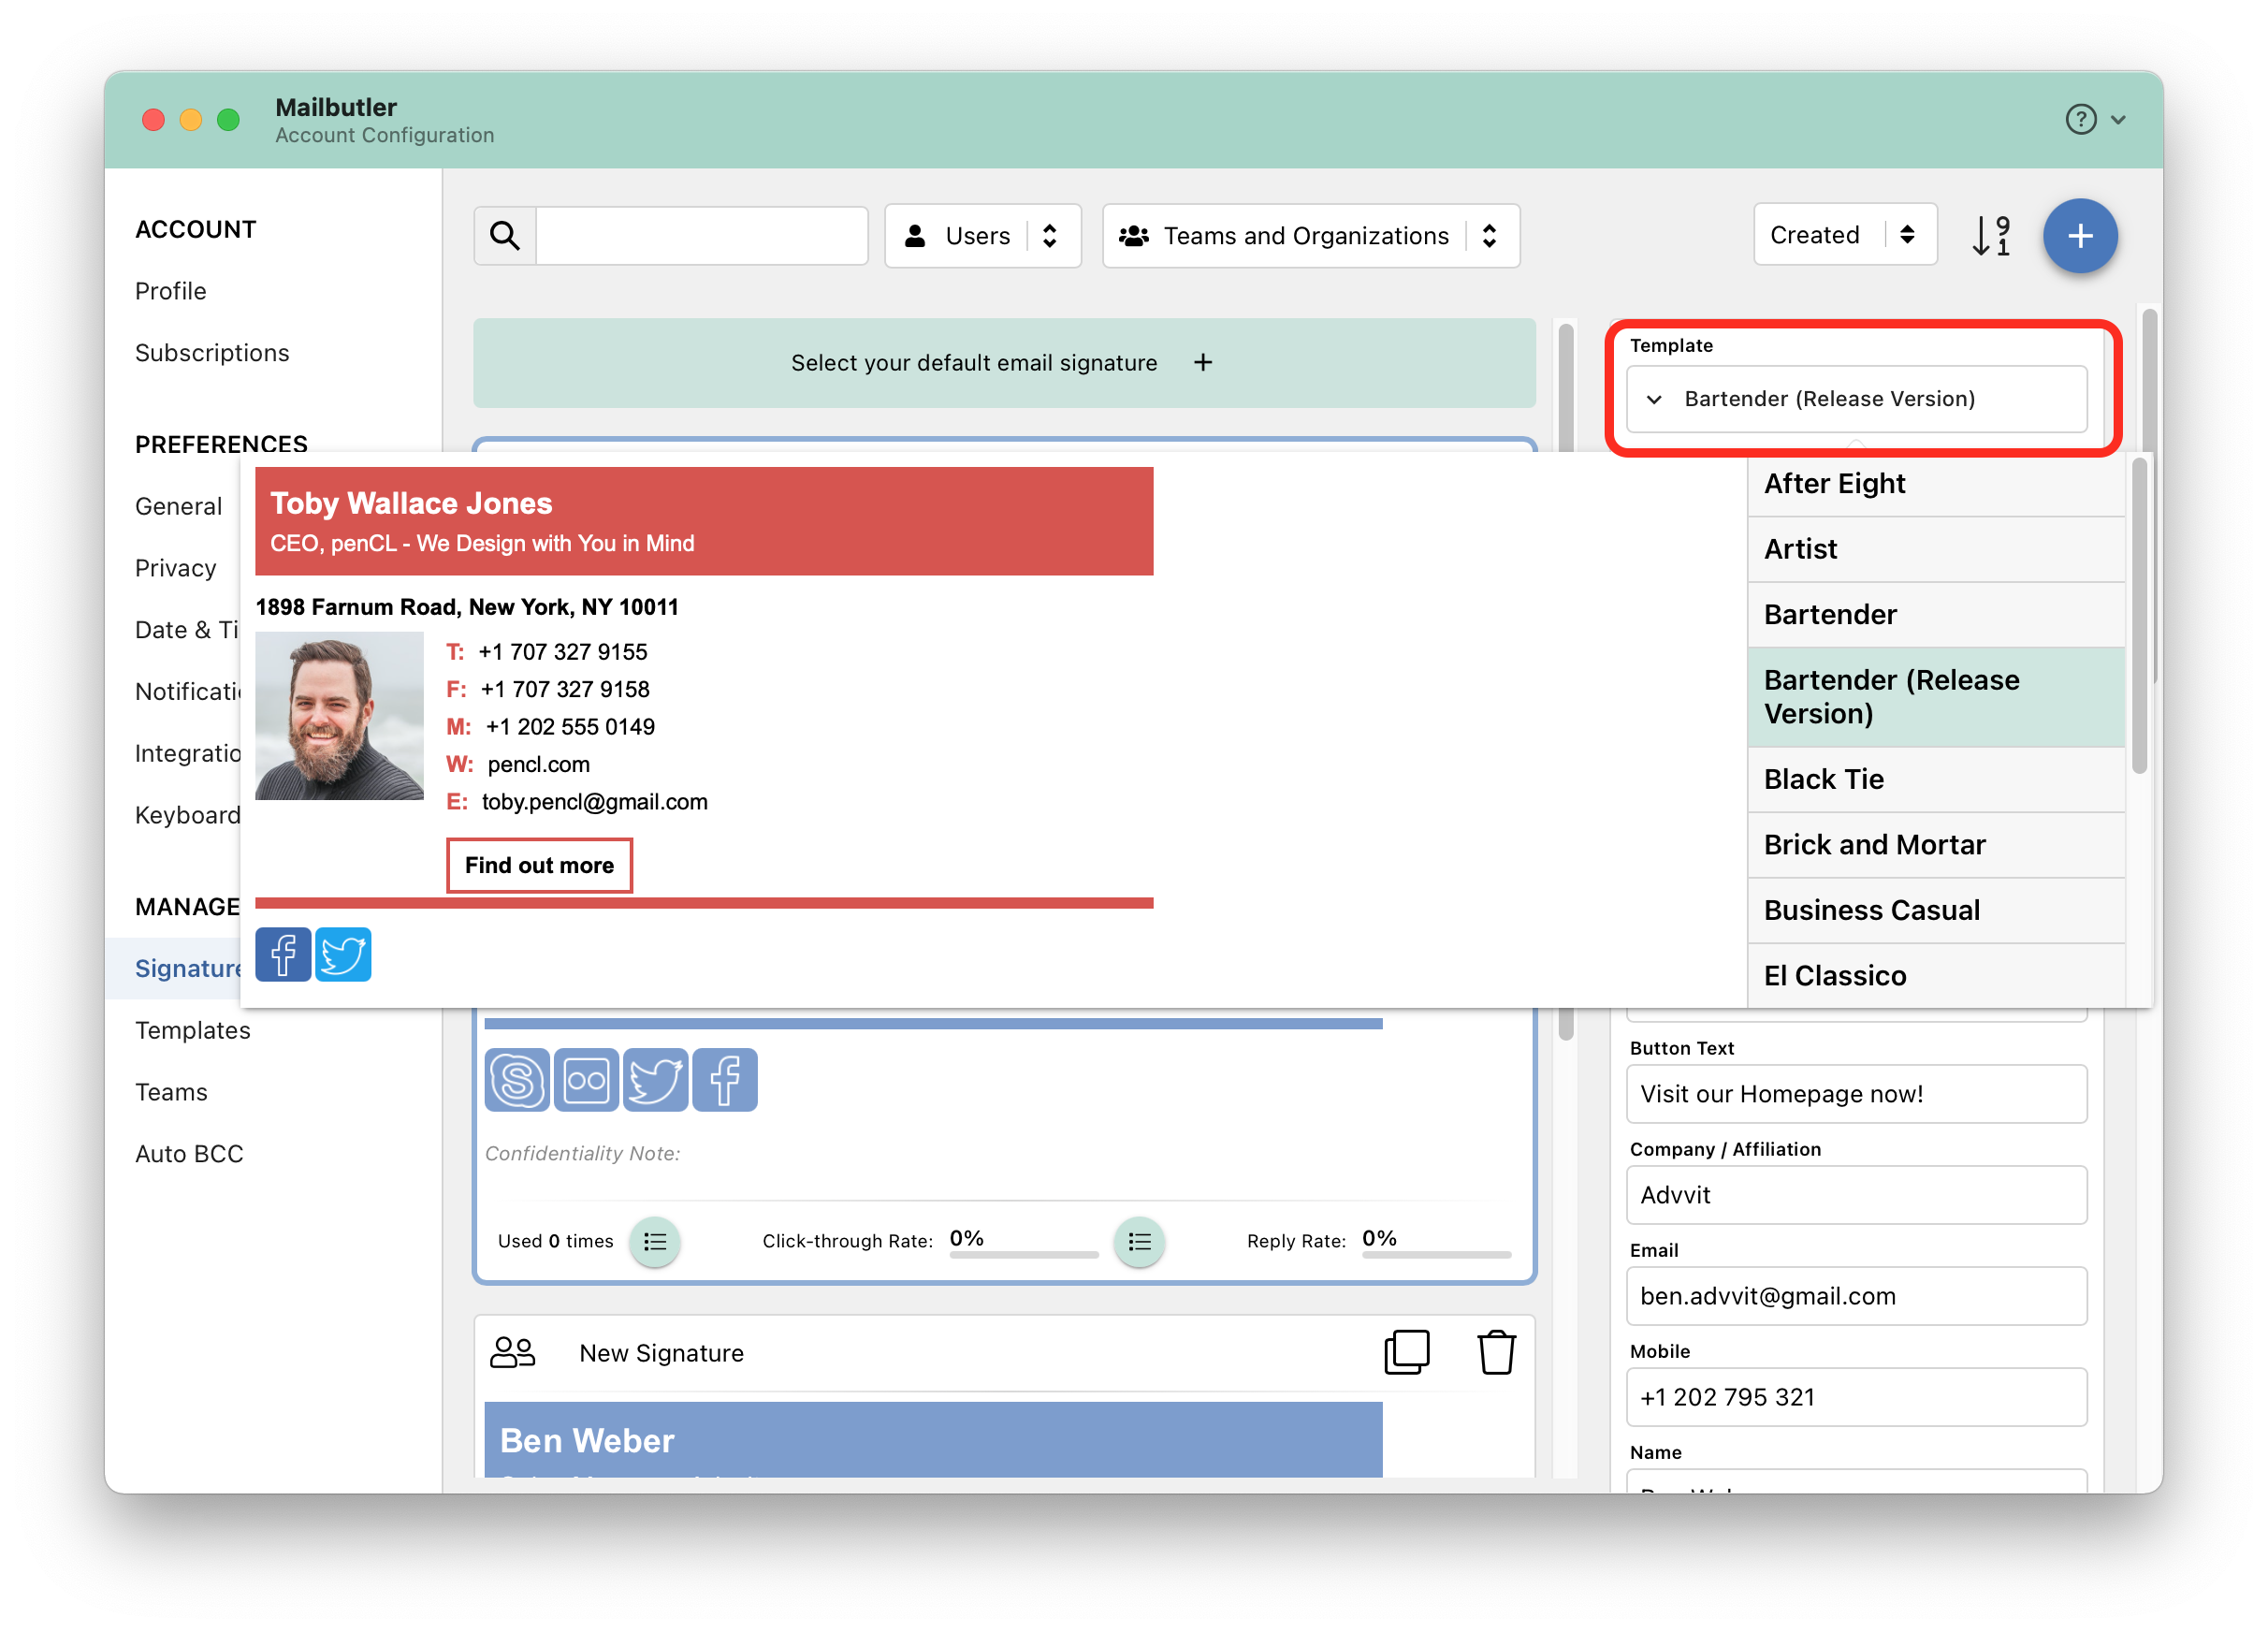
6. Now you can customize your signature to your needs in the signature editor. You can do the following:
add a profile picture, company logo and handwritten signature
add personal information
add a call to action-button
change font and colors
add social links
add images, videos and banners
add a closing and disclaimer
use right-to-left layout (for Arabic or Hebrew)
7. You also have the option to create an HTML signature or paste your existing HTML signature into Mailbutler. To do that, use the toggle button to switch the HTML Designer on.

Gmail
1. Click on the Mailbutler icon to open the Mailbutler Sidebar.

2. In the Mailbutler Sidebar, click the three dots and then Account & Preferences.

3. A new window will open. Select Signatures under Manage Features in the sidebar on the left.
4. Click the plus icon to add a new signature.


5. Click the dropdown button to select your preferred signature template.

6. Now you can customize your Signature to your needs in the Signature editor. You can do the following:
add a profile picture, company logo and handwritten signature
add personal information
add a call to action-button
change font and colors
add social links
add images, videos and banners
add a closing and disclaimer
use right-to-left layout (for Arabic or Hebrew)

7. You also have the option to create an HTML signature or paste your existing HTML signature into Mailbutler. To do that, use the toggle button to switch the HTML Designer on.
Outlook
1. Open the Mailbutler Sidebar.
2. In the Mailbutler Sidebar, click the three dots and then Account & Preferences.
3. A new window will open. Select Signatures under Manage Features in the sidebar on the left.
4. Click the plus icon to add a new signature.


5. Click the dropdown button to select your preferred signature template.
6. Now you can customize your Signature to your needs in the Signature editor. You can do the following:
add a profile picture, company logo and handwritten signature
add personal information
add a call to action-button
change font and colors
add social links
add images, videos and banners
add a closing and disclaimer
use right-to-left layout (for Arabic or Hebrew)
7. You also have the option to create an HTML signature or paste your existing HTML signature into Mailbutler. To do that, use the toggle button to switch the HTML Designer on.
How do I attach a Signature to my email?
Apple Mail
1. Compose a new email.
2. Click the signature dropdown button and select the signature that you want to insert into your email.
3. Or you can set up an Signature to be added to your emails by default, under the Signatures tab in your Mailbutler account settings.
Please be aware that this default signature will override your Apple Mail settings, and will apply to all email accounts that you use in your email client.

Gmail
1. Compose a new email.
2. Click the Signature button and select the signature that you want to insert into your email.
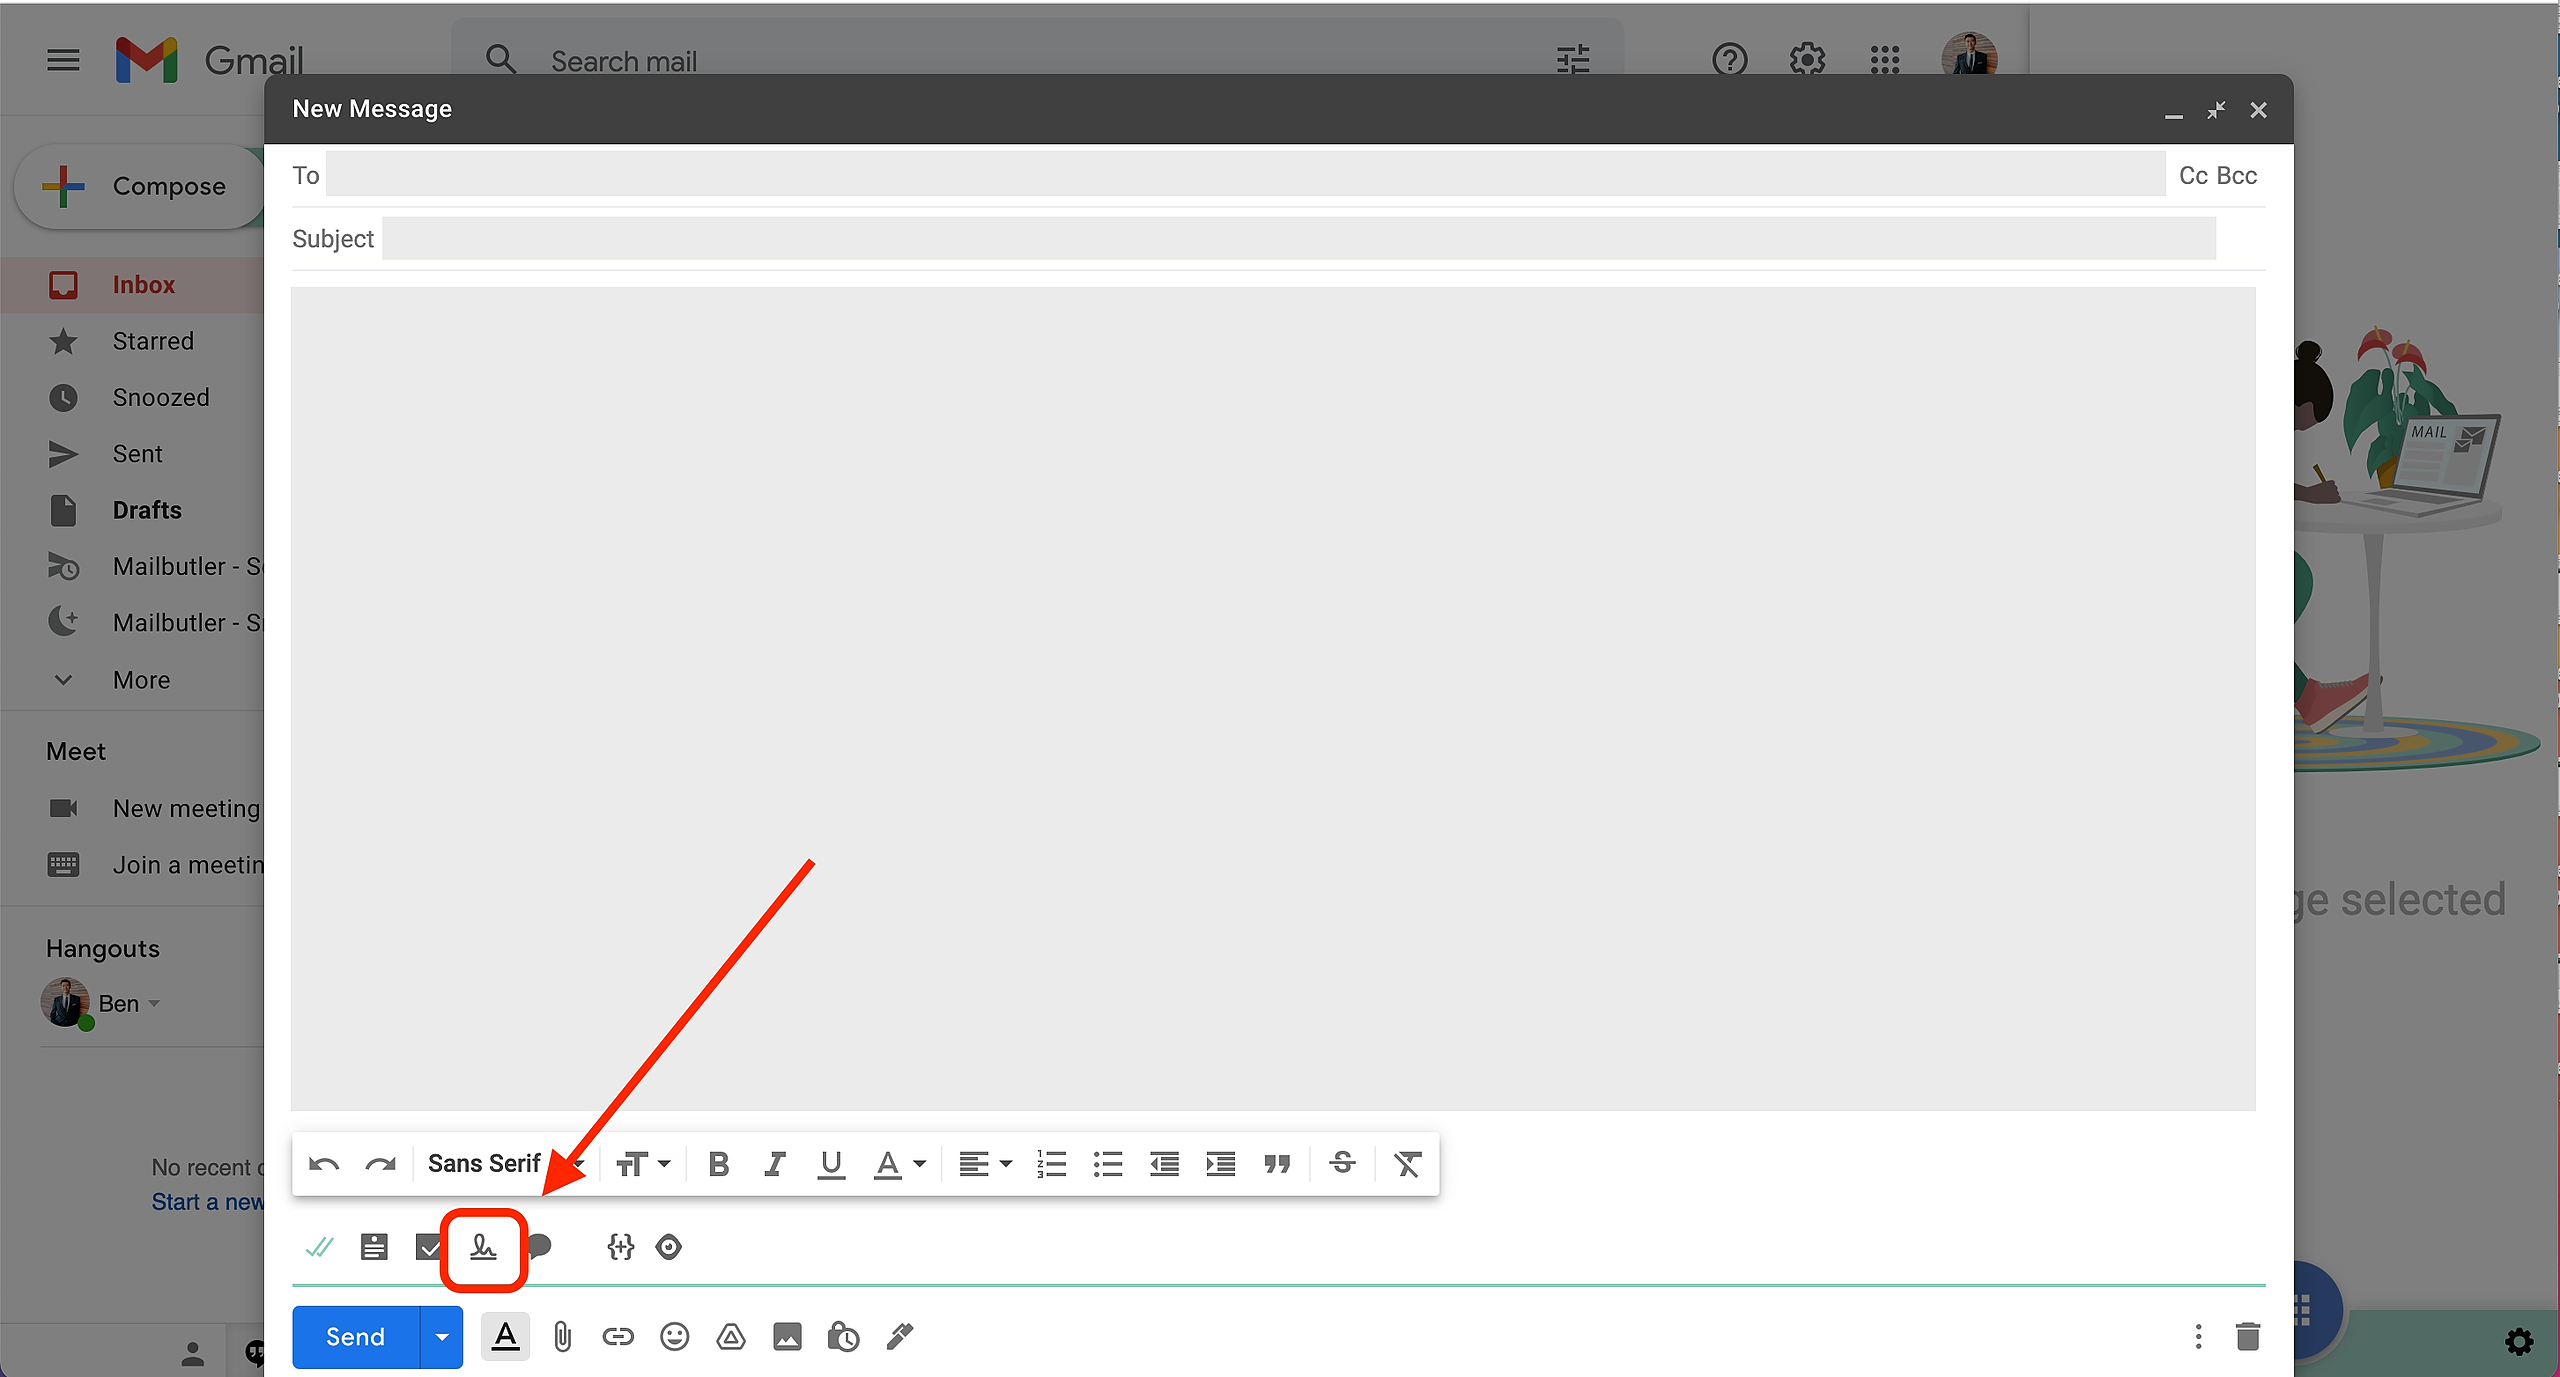
3. Or you can set up an Signature to be added to your emails by default, under the Signatures tab in your Mailbutler account settings.
Please be aware that this default signature will override your Apple Mail settings, and will apply to all email accounts that you use in your email client.

Outlook
1. Compose a new email.
3. Open the Mailbutler sidebar.
2. Click Select signature and select the signature that you want to insert into your email.

3. Or you can set up a Signature to be added to your emails by default, under the Signatures tab in your Mailbutler account settings.
Please be aware that this default signature will override your Apple Mail settings, and will apply to all email accounts that you use in your email client.
