
Mail Merge is the process of creating personalized bulk communications by combining an email template with a contact data source.
Please note: To ensure stable delivery and avoid exceeding email client sending limits, Mail Merge is currently set by default to send to a maximum of 20 recipients per email.
Apple Mail
1. Save contact information in your preferred native contacts tool — Apple Contacts, Google Contacts, or Outlook Contacts, or your CRM tool - Hubspot or Salesforce.
2. Connect your contacts tool or CRM tool to Mailbutler or upload a CSV file with contact information.
3. Create Message Templates with placeholders.
4. Start an email and enter your recipients manually or connect a group. To learn how to create groups, see the guides for Apple Contacts, Google Contacts, or Outlook Contacts.
5. Insert your Message Template.
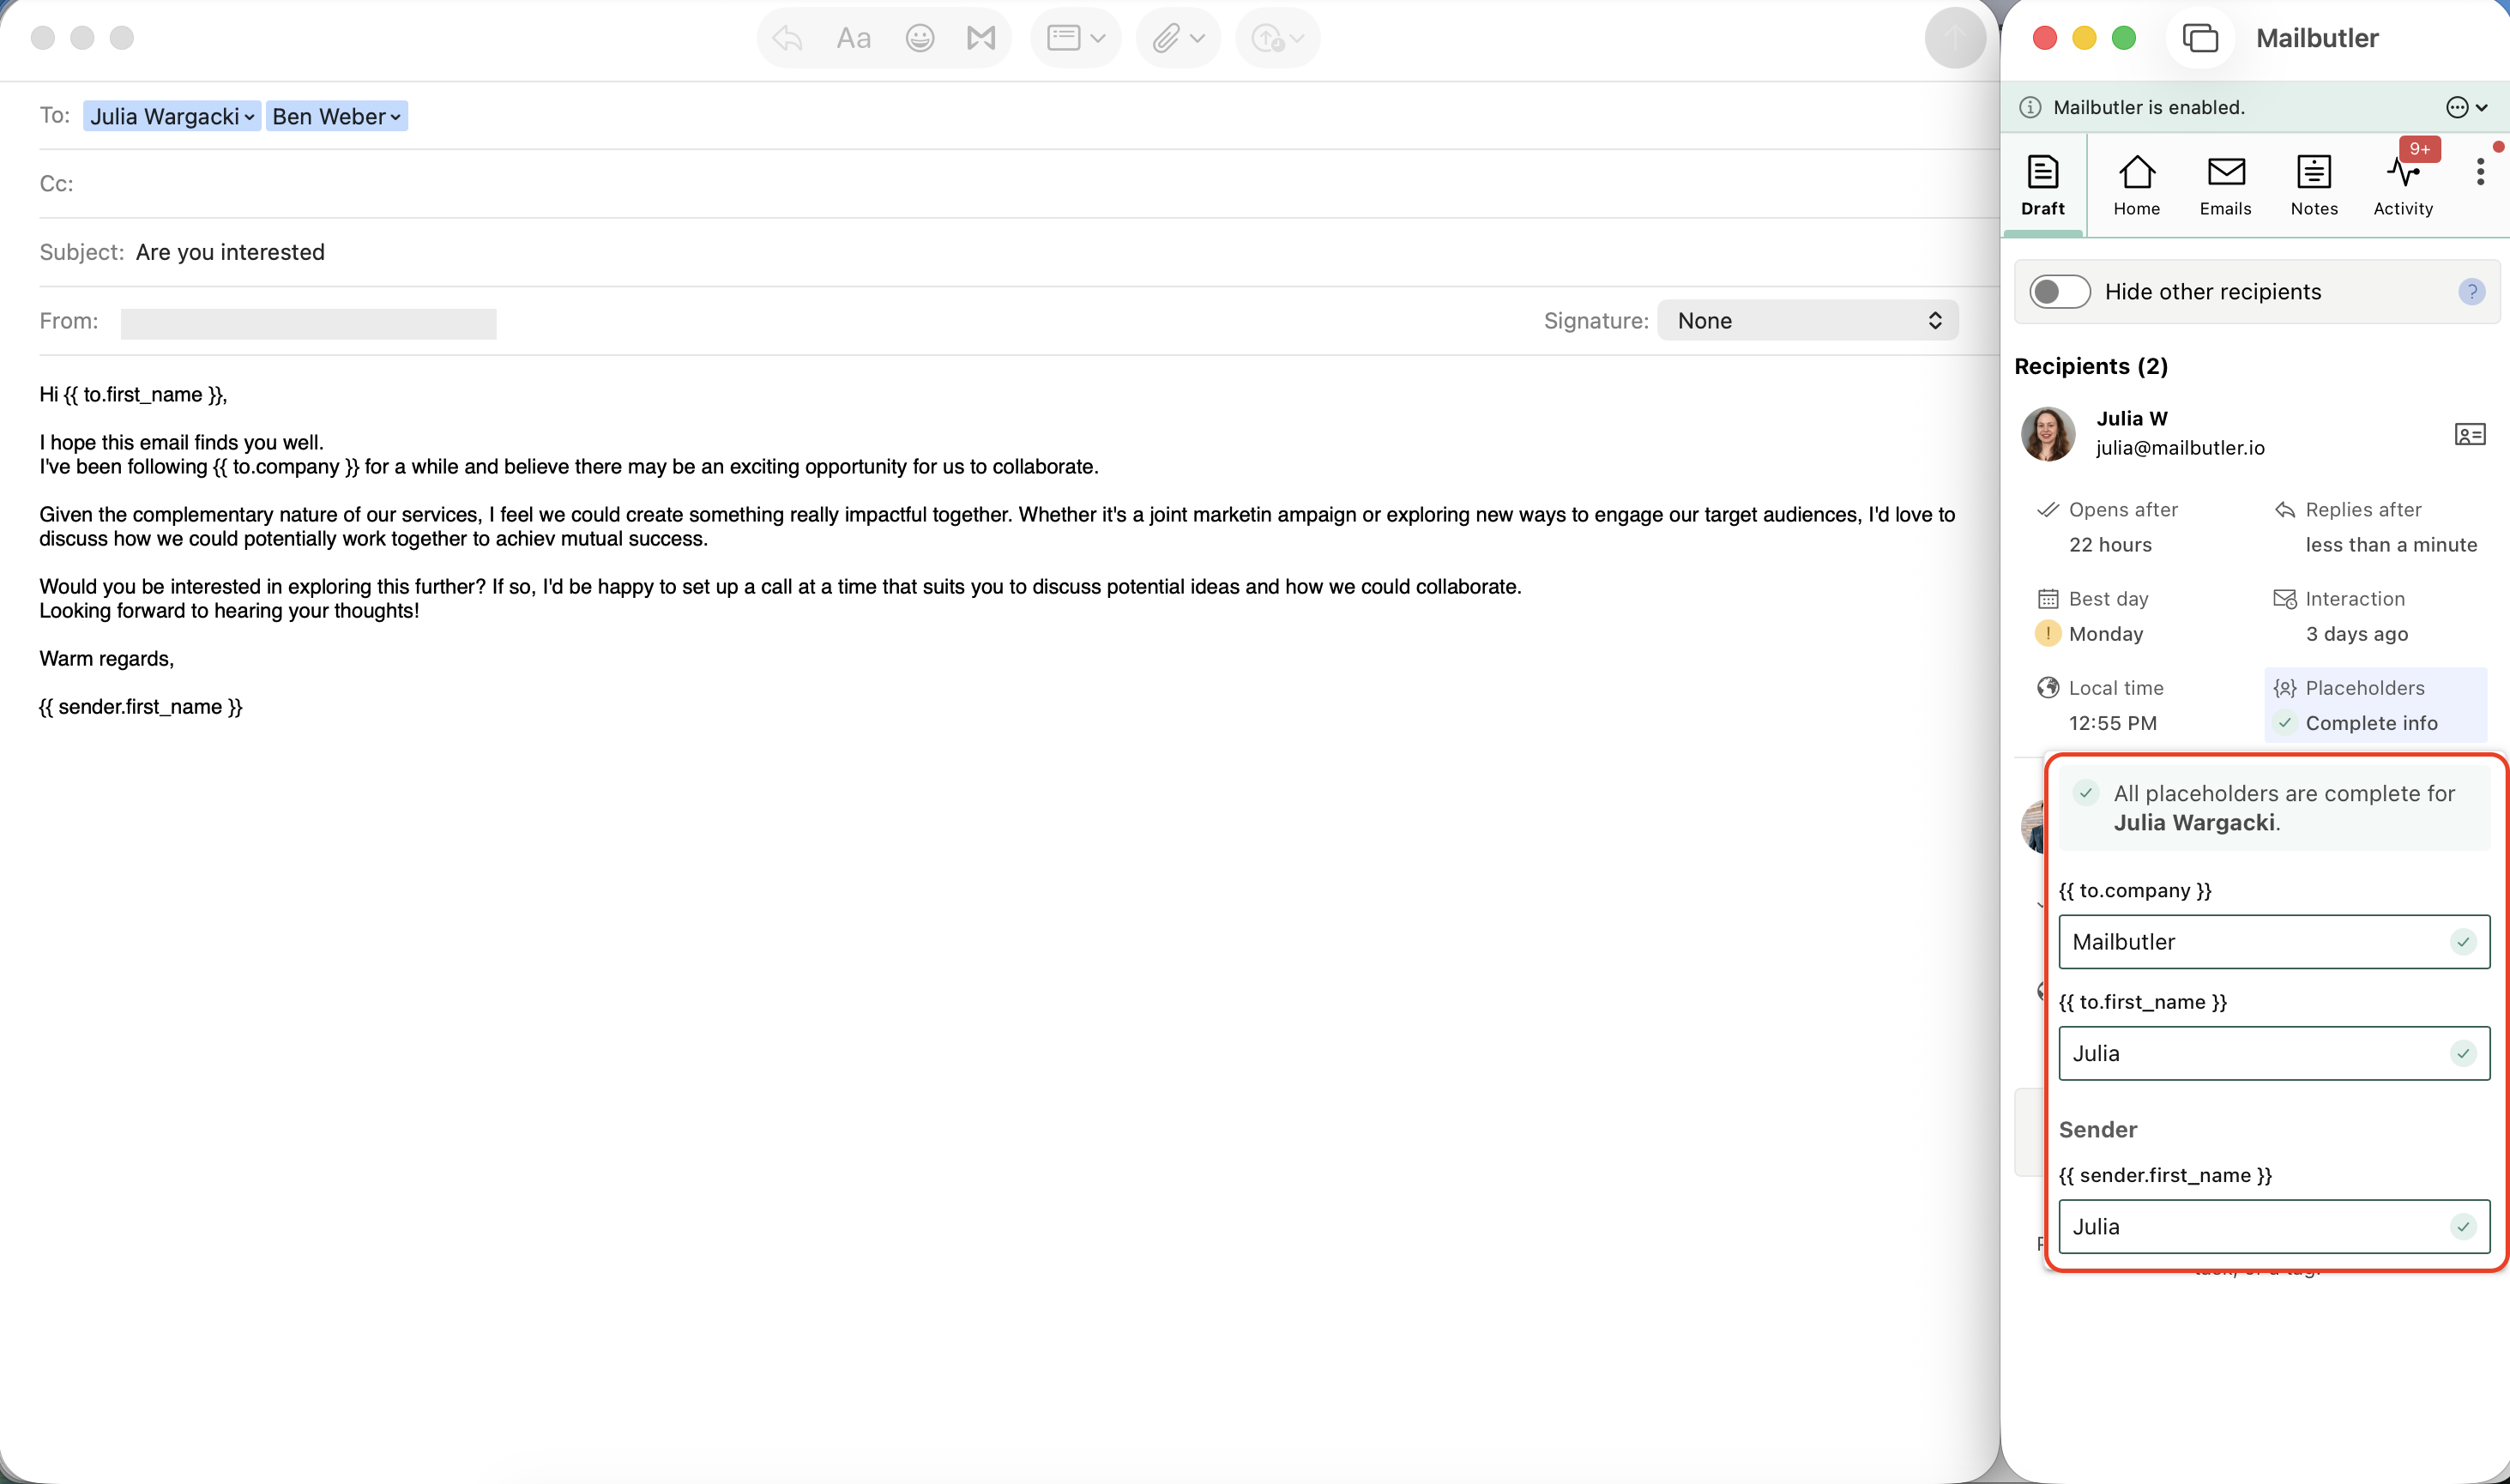
6. The placeholders in your Message Template will automatically be filled with information from your connected contacts.
7. In the Mailbutler Sidebar, you will see whether the placeholder information is complete or if details are missing, and you can preview what content will be inserted into each placeholder.
8. Send the email. Every recipient will receive a personalised copy.
Mailbutler will track your email by recipient, meaning you will see who out of your multiple recipients opened your email, as well as where and on what device.
Gmail
1. Save contact information in your preferred native contacts tool — Google Contacts or Outlook Contacts, or your CRM tool - Hubspot or Salesforce.
2. Connect your contacts tool or CRM tool to Mailbutler or upload a CSV file with contact information.
3. Create Message Templates with placeholders.
4. Start an email and enter your recipients manually or connect a group. To learn how to create groups, see the guides for Google Contacts or Outlook Contacts.
5. Insert your Message Template.
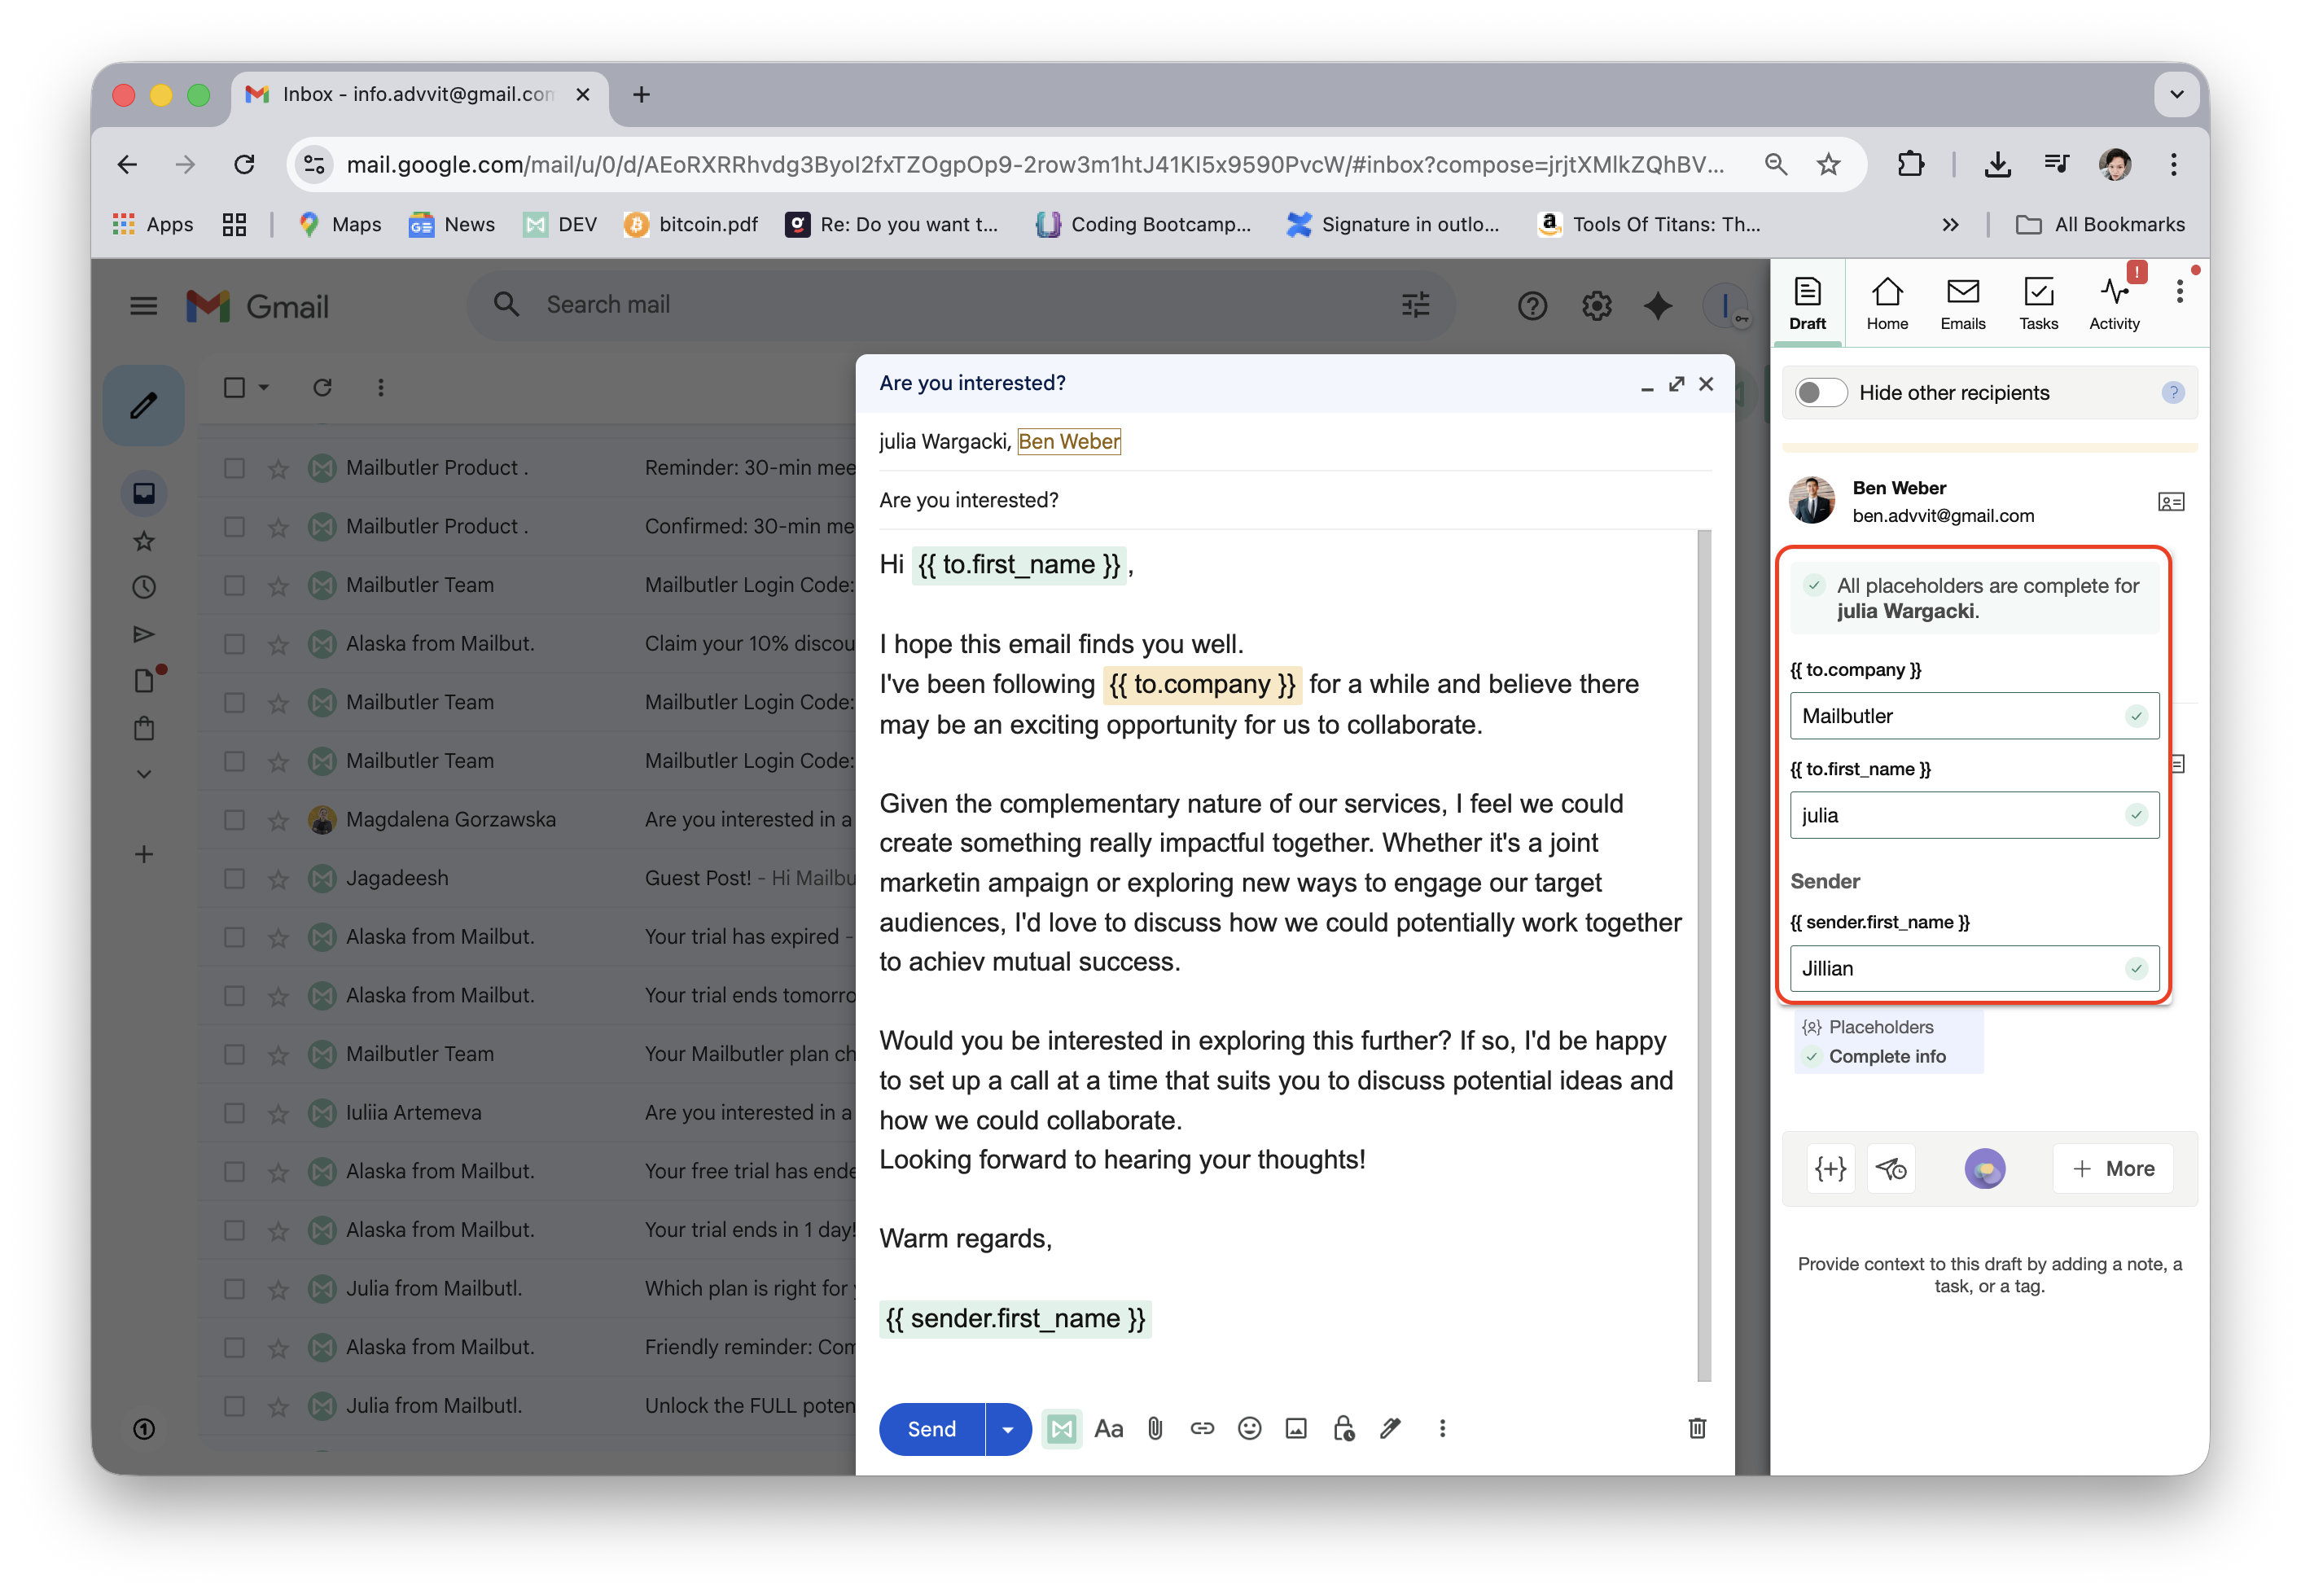
6. The placeholders in your Message Template will automatically be filled with information from your connected contacts.
7. In the Mailbutler Sidebar, you will see whether the placeholder information is complete or if details are missing, and you can preview what content will be inserted into each placeholder.
8. Send the email. Every recipient will receive a personalised copy.
Mailbutler will track your email by recipient, meaning you will see who out of your multiple recipients opened your email, as well as where and on what device.
Outlook
1. Save contact information in your preferred native contacts tool — Outlook Contacts or Google Contacts, or your CRM tool - Hubspot or Salesforce.
2. Connect your contacts tool or CRM tool to Mailbutler or upload a CSV file with contact information.
3. Create Message Templates with placeholders.
4. Start an email and enter your recipients manually or connect a group. To learn how to create groups, see the guides for Outlook Contacts or Google Contacts.
5. Insert your Message Template.
6. The placeholders in your Message Template will automatically be filled with information from your connected contacts.
7. In the Mailbutler Sidebar, you will see whether the placeholder information is complete or if details are missing, and you can preview what content will be inserted into each placeholder.

8. Send the email by clicking the Tailored Send button.
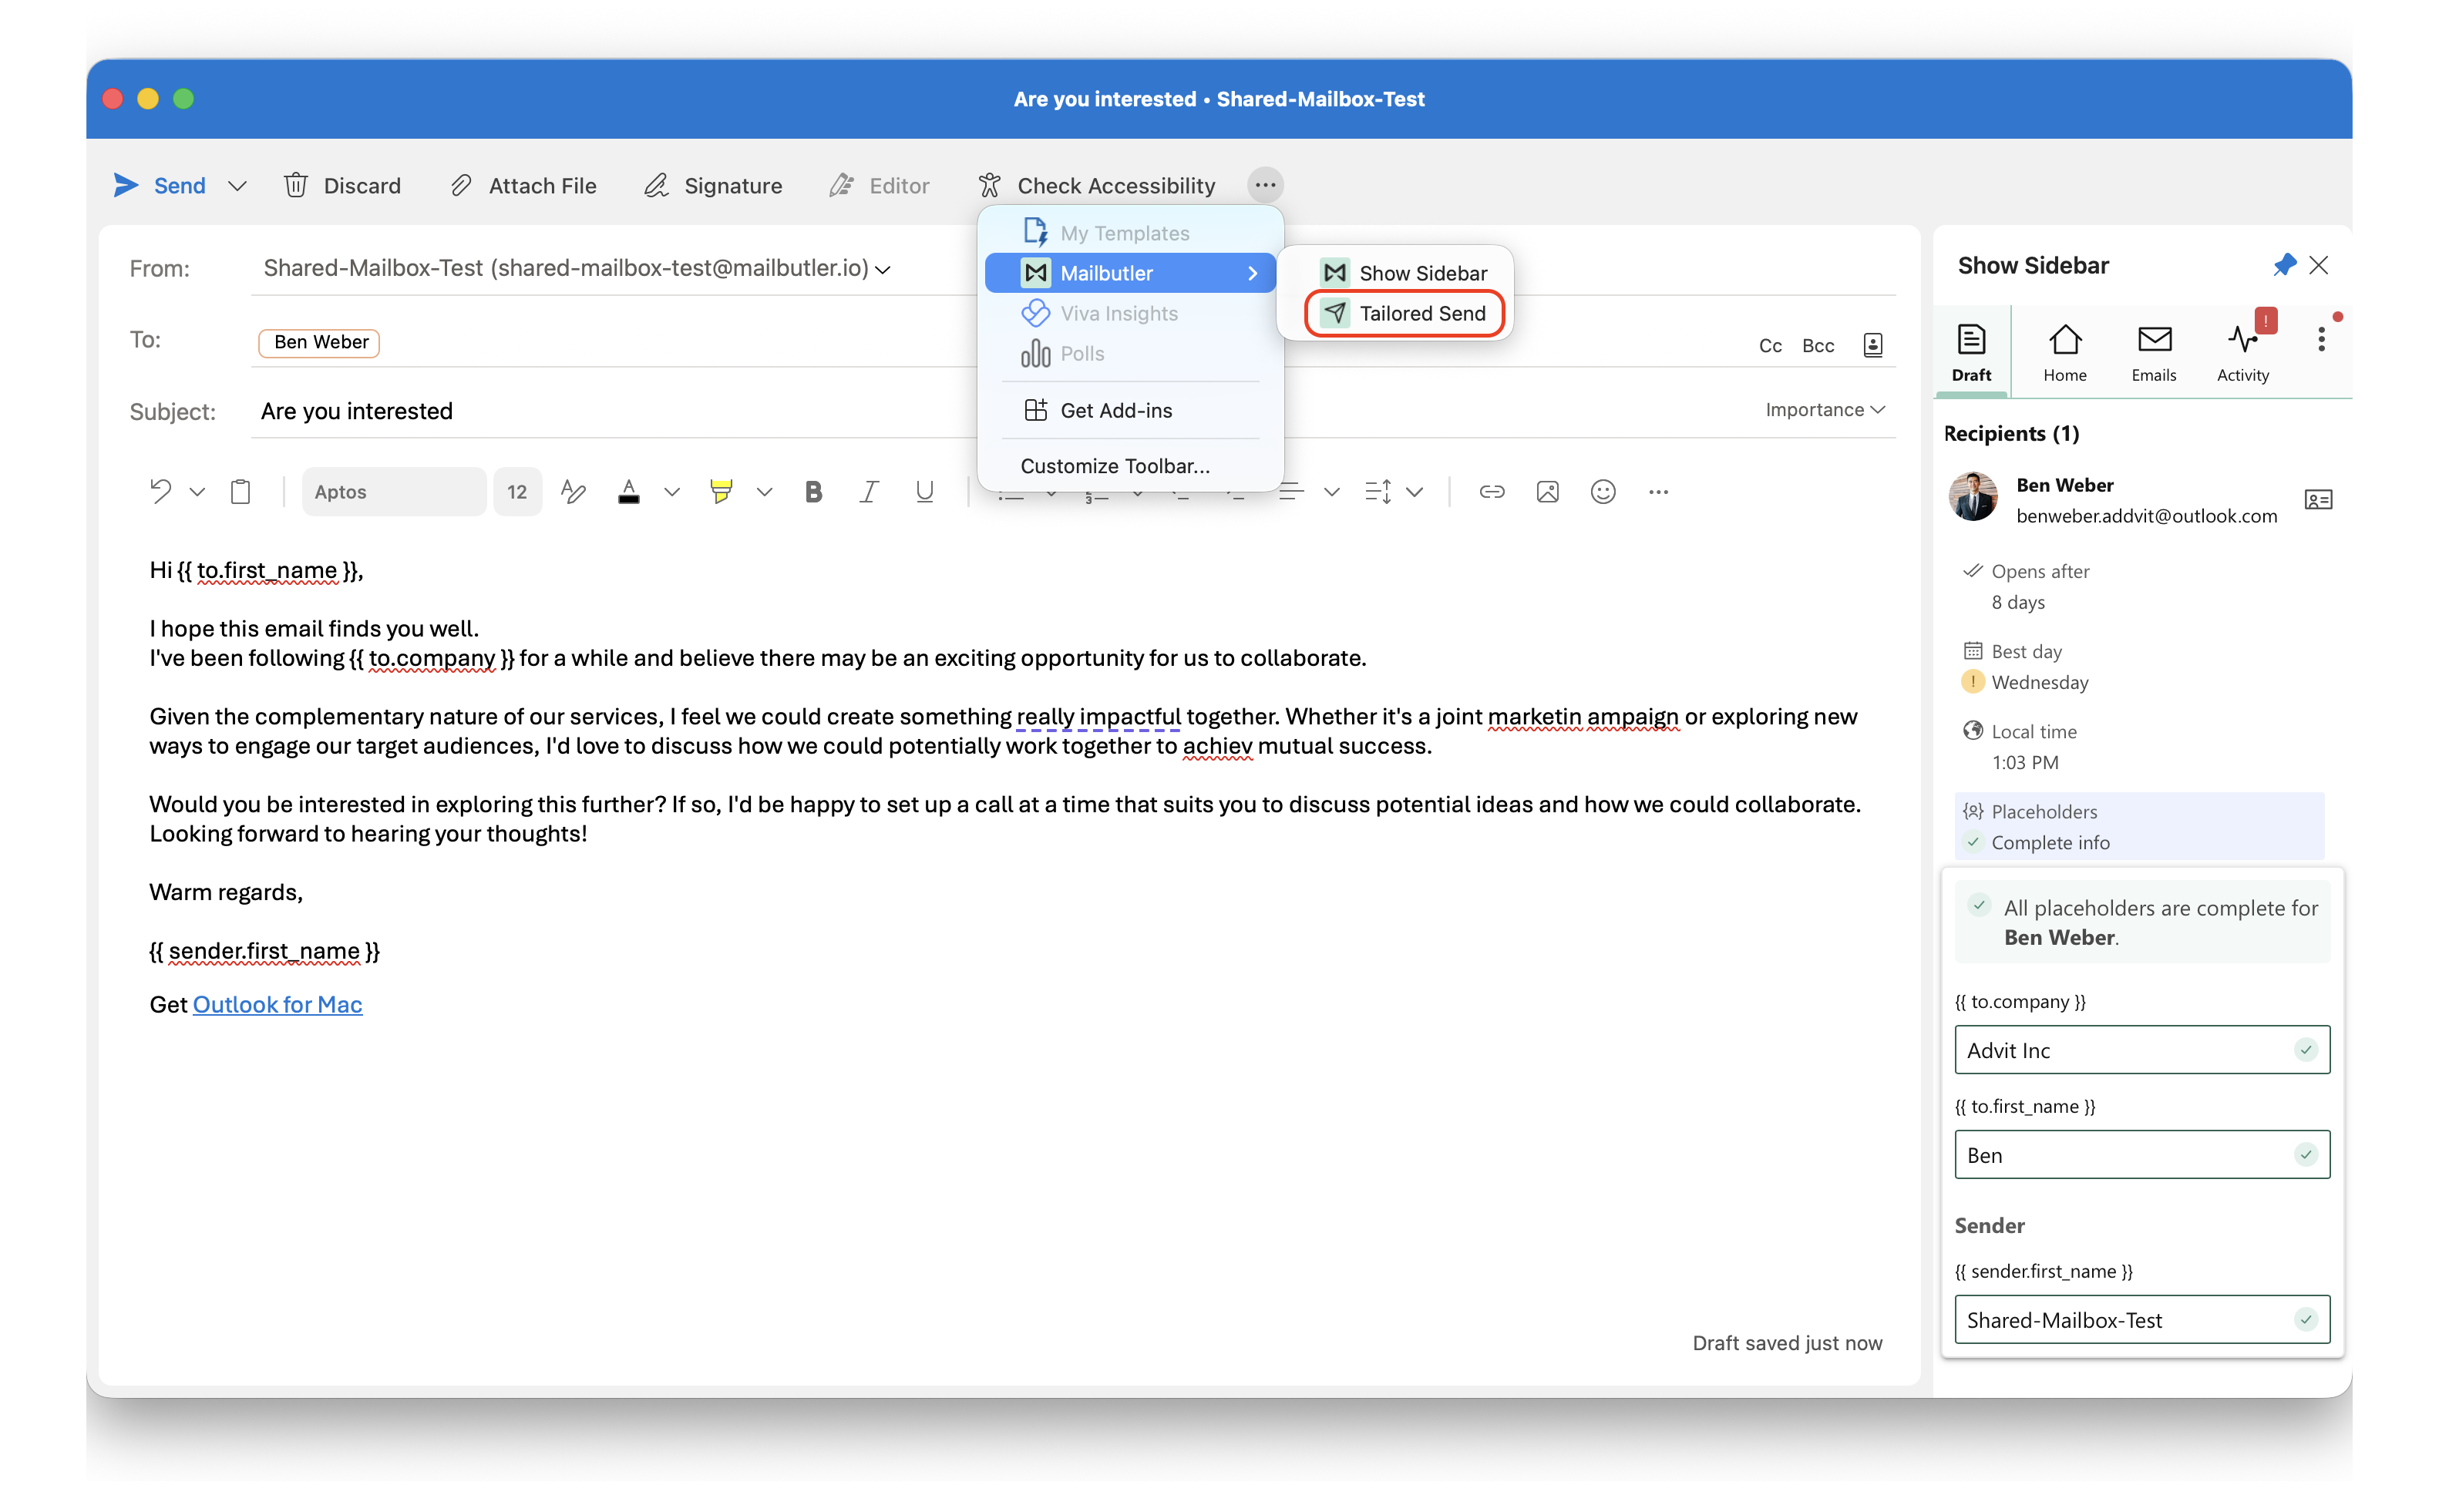
Please note: The location of the Tailored Send button varies by Outlook version. We recommend pinning it for easier access. For instructions on how to pin the button in your version of Outlook, see this article.
Mailbutler will track your email by recipient, meaning you will see who out of your multiple recipients opened your email, as well as where and on what device.