

Use Placeholders in your Message Templates, such as the recipient’s name and the sender’s details, which get automatically filled out when you insert your Message Template into an email.
Please note: Mailbutler's Placeholders take information from various sources. Your email client, if you've sent an email to the person before, and your contacts tool or CRM tool if you've connected it to Mailbutler. Your own information comes from your Mailbutler profile information.
Make sure that the placeholder name matches the corresponding contact field name in your contacts tool. That means, if you use the placeholder {{to.company}}, the company name field in your contacts tool must also be named company - not something different like business.
How do I add Placeholders to a Message Template?
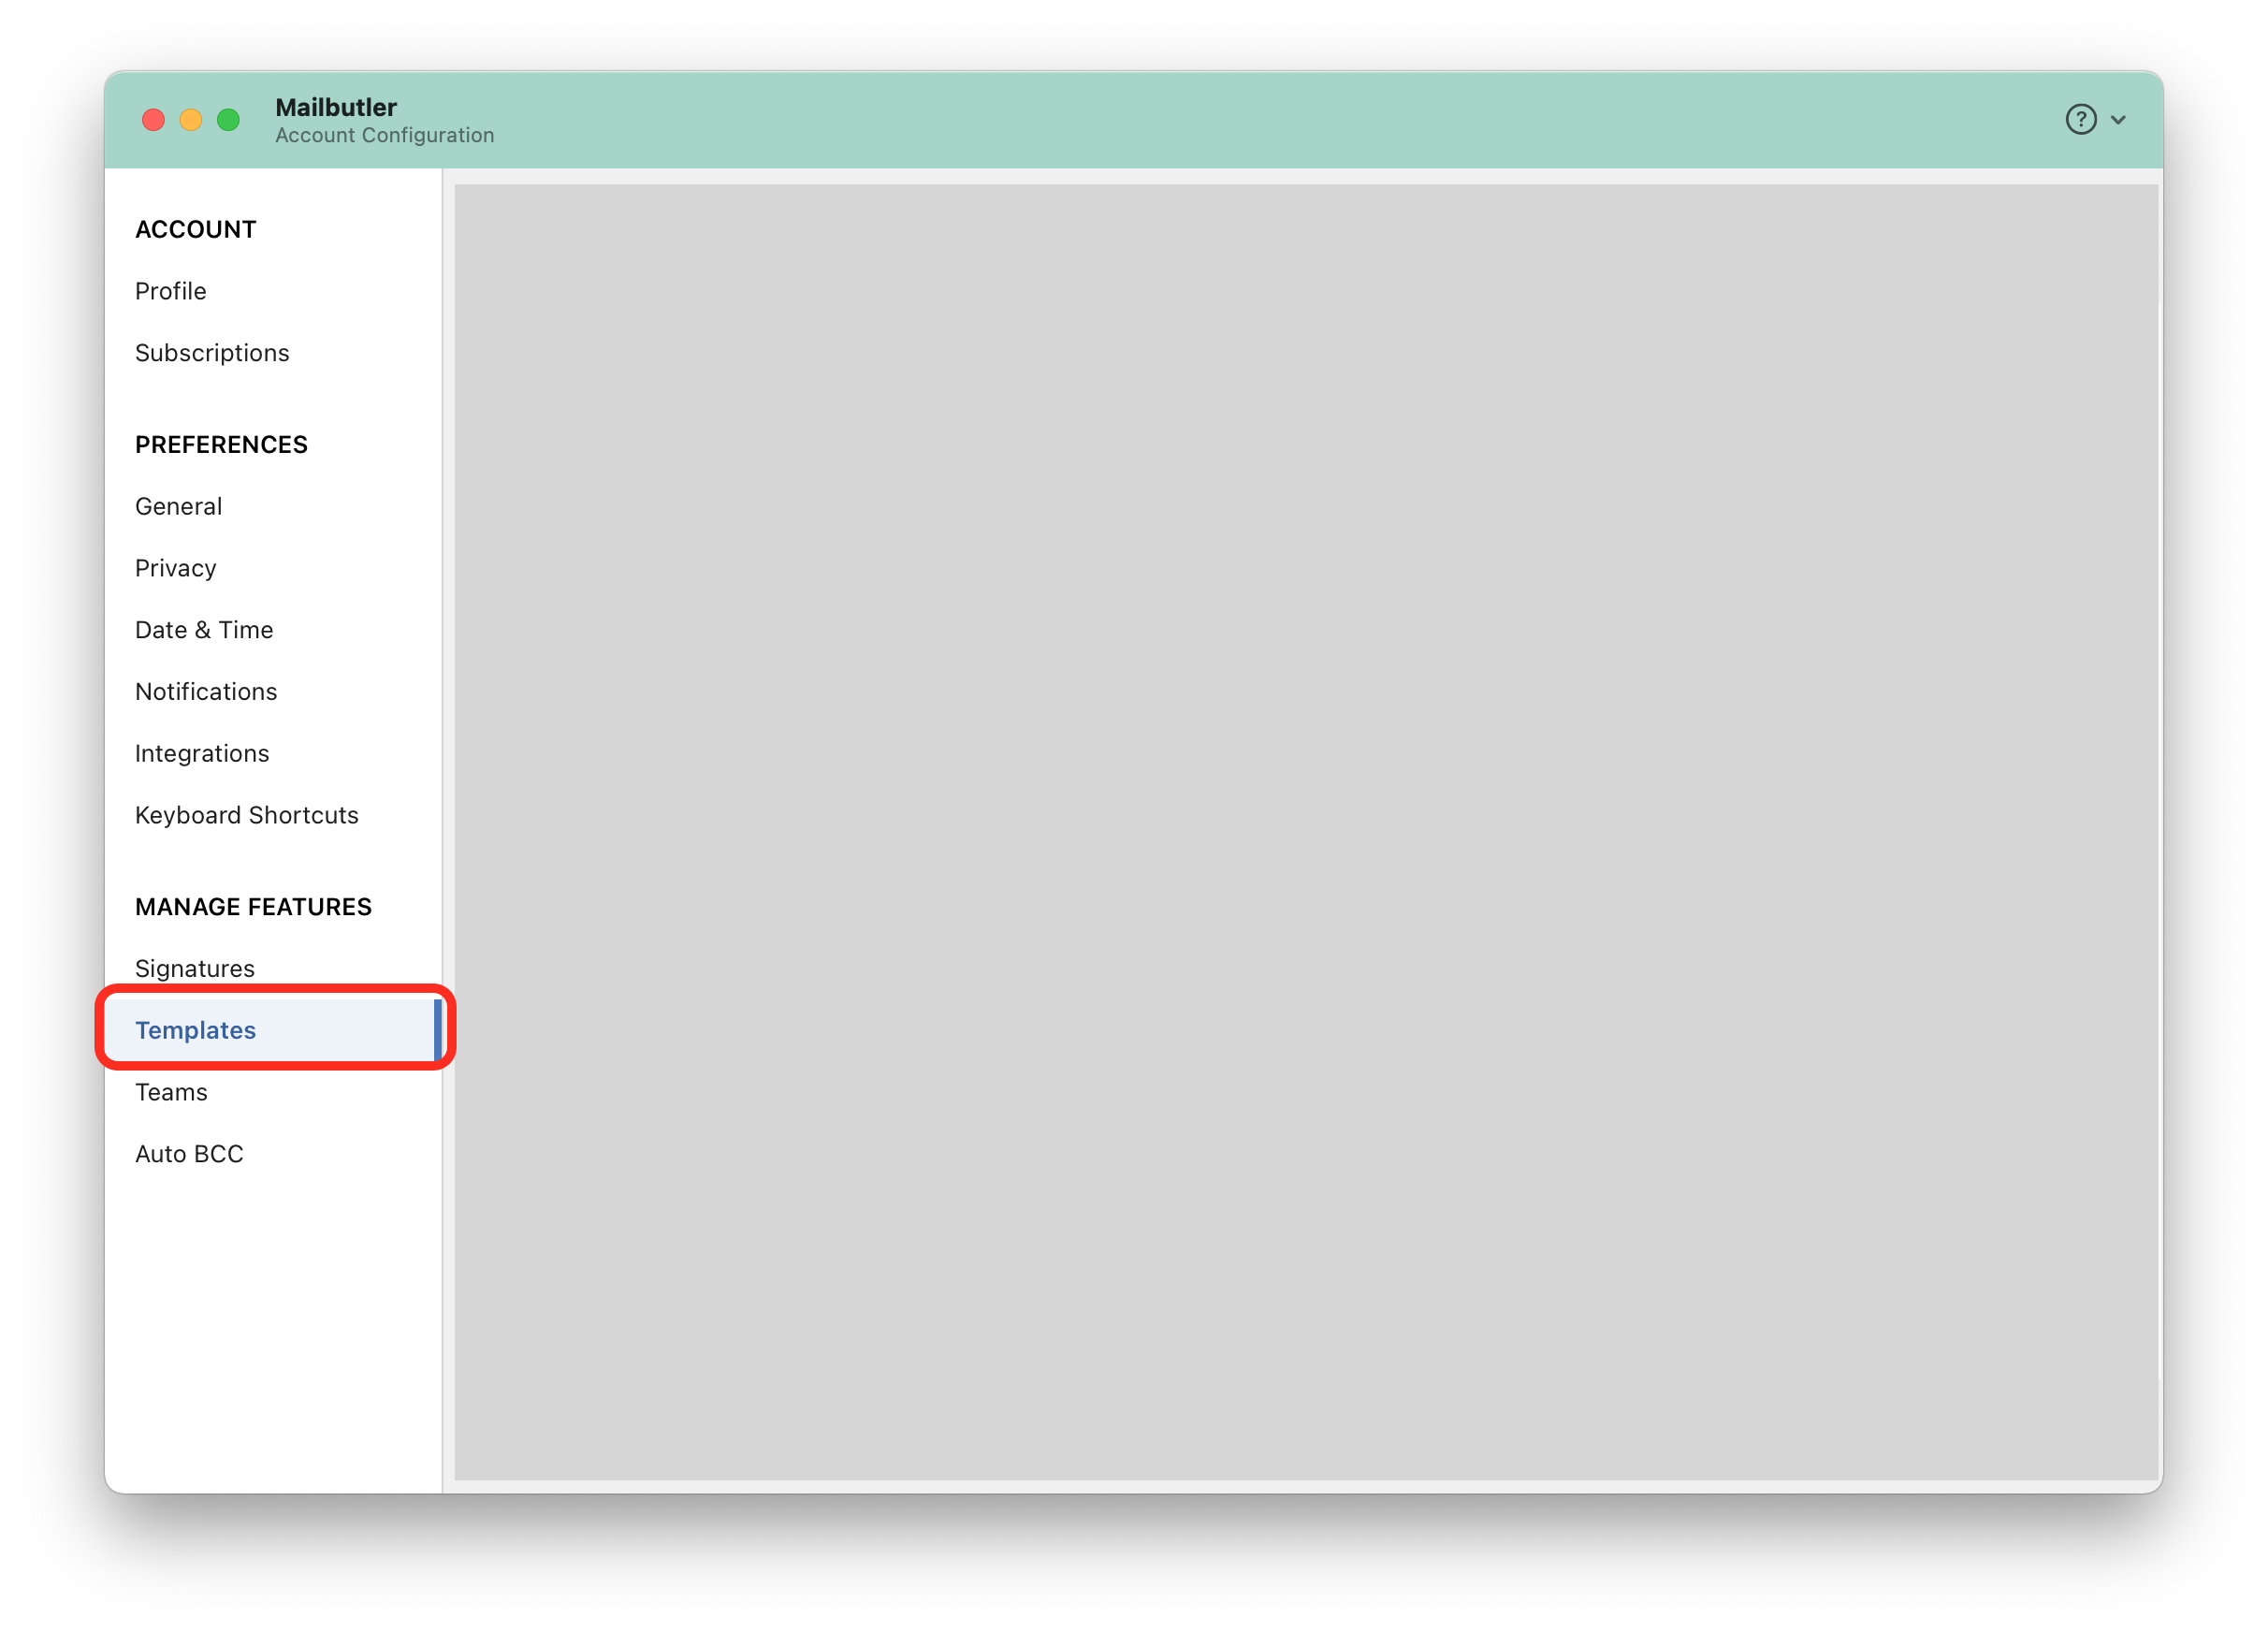
In Account & Preferences, select Templates under Manage Features in the sidebar on the left.
Click the plus icon to create a new Message Template.

Name your Message Template and enter a subject.

4. Write the email body in the rich text editor.

5.Click inside the Message Template in the place you want to insert a Placeholder.
6. Click the Placeholder icon and select whom the Placeholder should target (sender, recipient, CC recipient, BCC recipient) as well as the information the placeholder should get filled out with (name, phone, company etc).

Then, click Insert.

Or, choose one of the pre-defined Placeholders.

Or, create custom placeholders using double curly brackets, like
{{first_name}}.
Please note: While it's technically possible to use custom placeholder names, only the following are officially supported and guaranteed to work correctly:
emailnamefirst_namelast_nametitlenicknamephoneaddresscompanypositionwebsitebirthday
To ensure proper data merging, please stick to these supported placeholders. Using others may result in missing or incorrect data in your emails.
You can see the inserted Placeholders inside your Message Template.

11. You can now compose an email using your Message Template.
12. In the Mailbutler Sidebar, you will see whether the placeholder information is complete or if details are missing, and you can preview what content will be inserted into each placeholder.

How do I create Placeholders for dates and times?
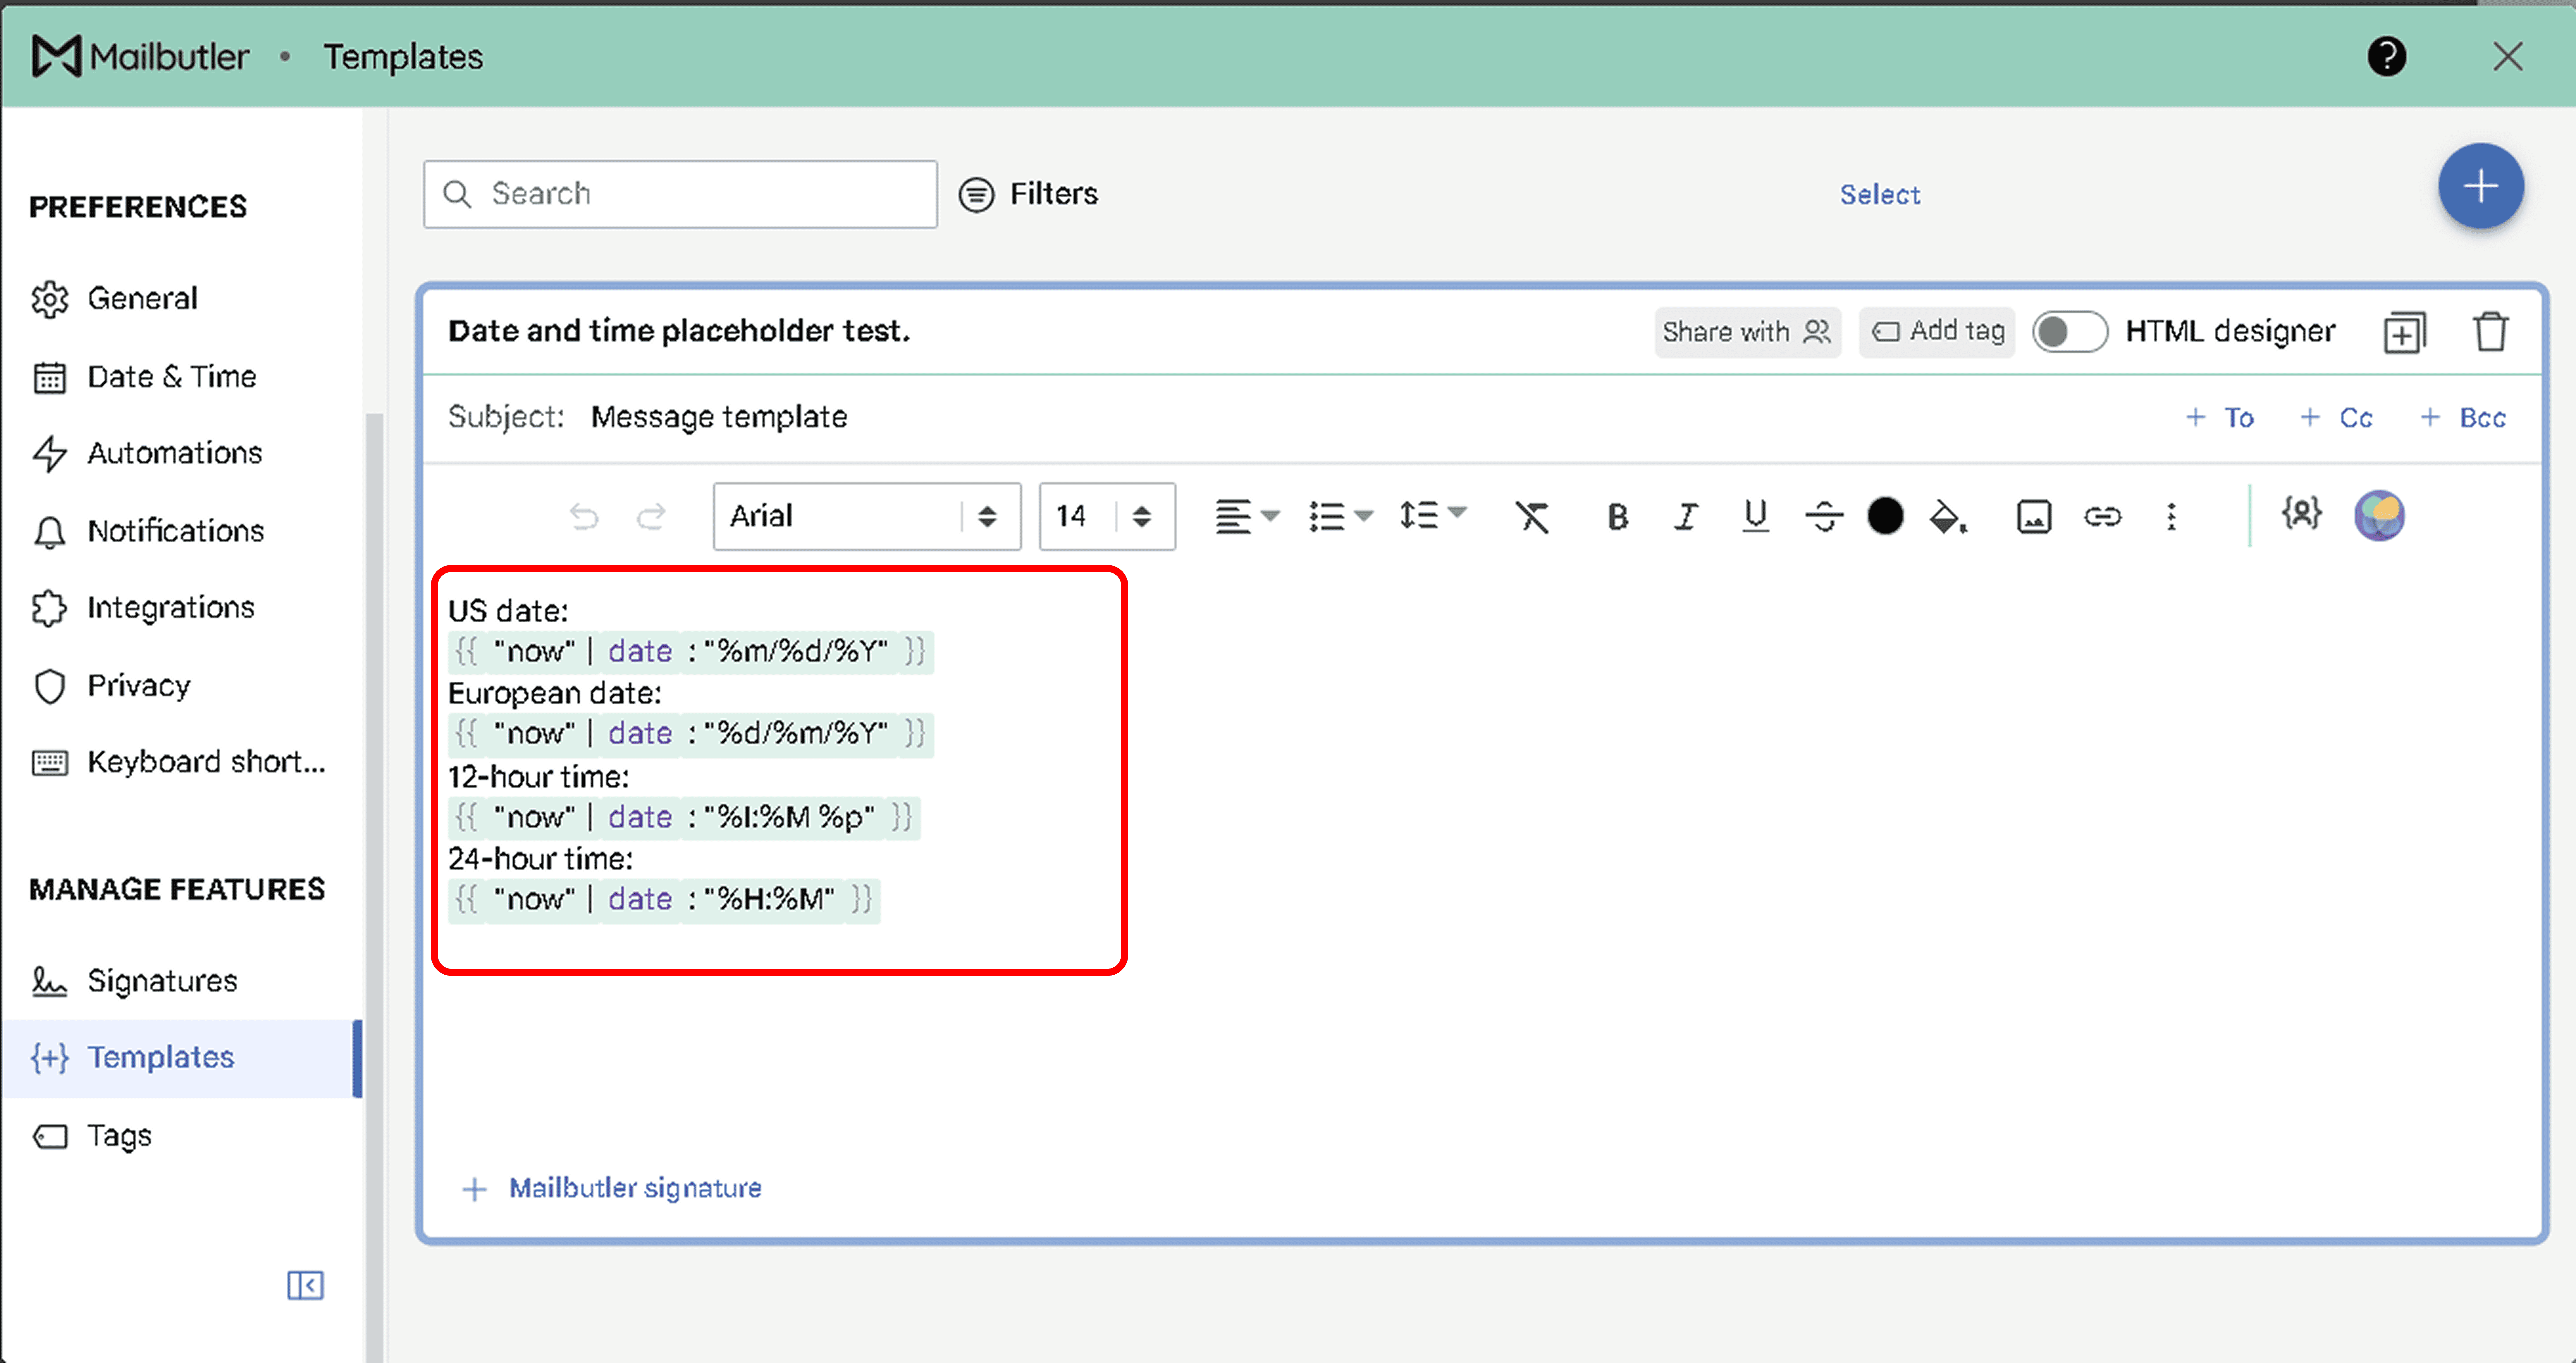
You can use Liquid placeholders to automatically add a formatted date or time to a Message Template.
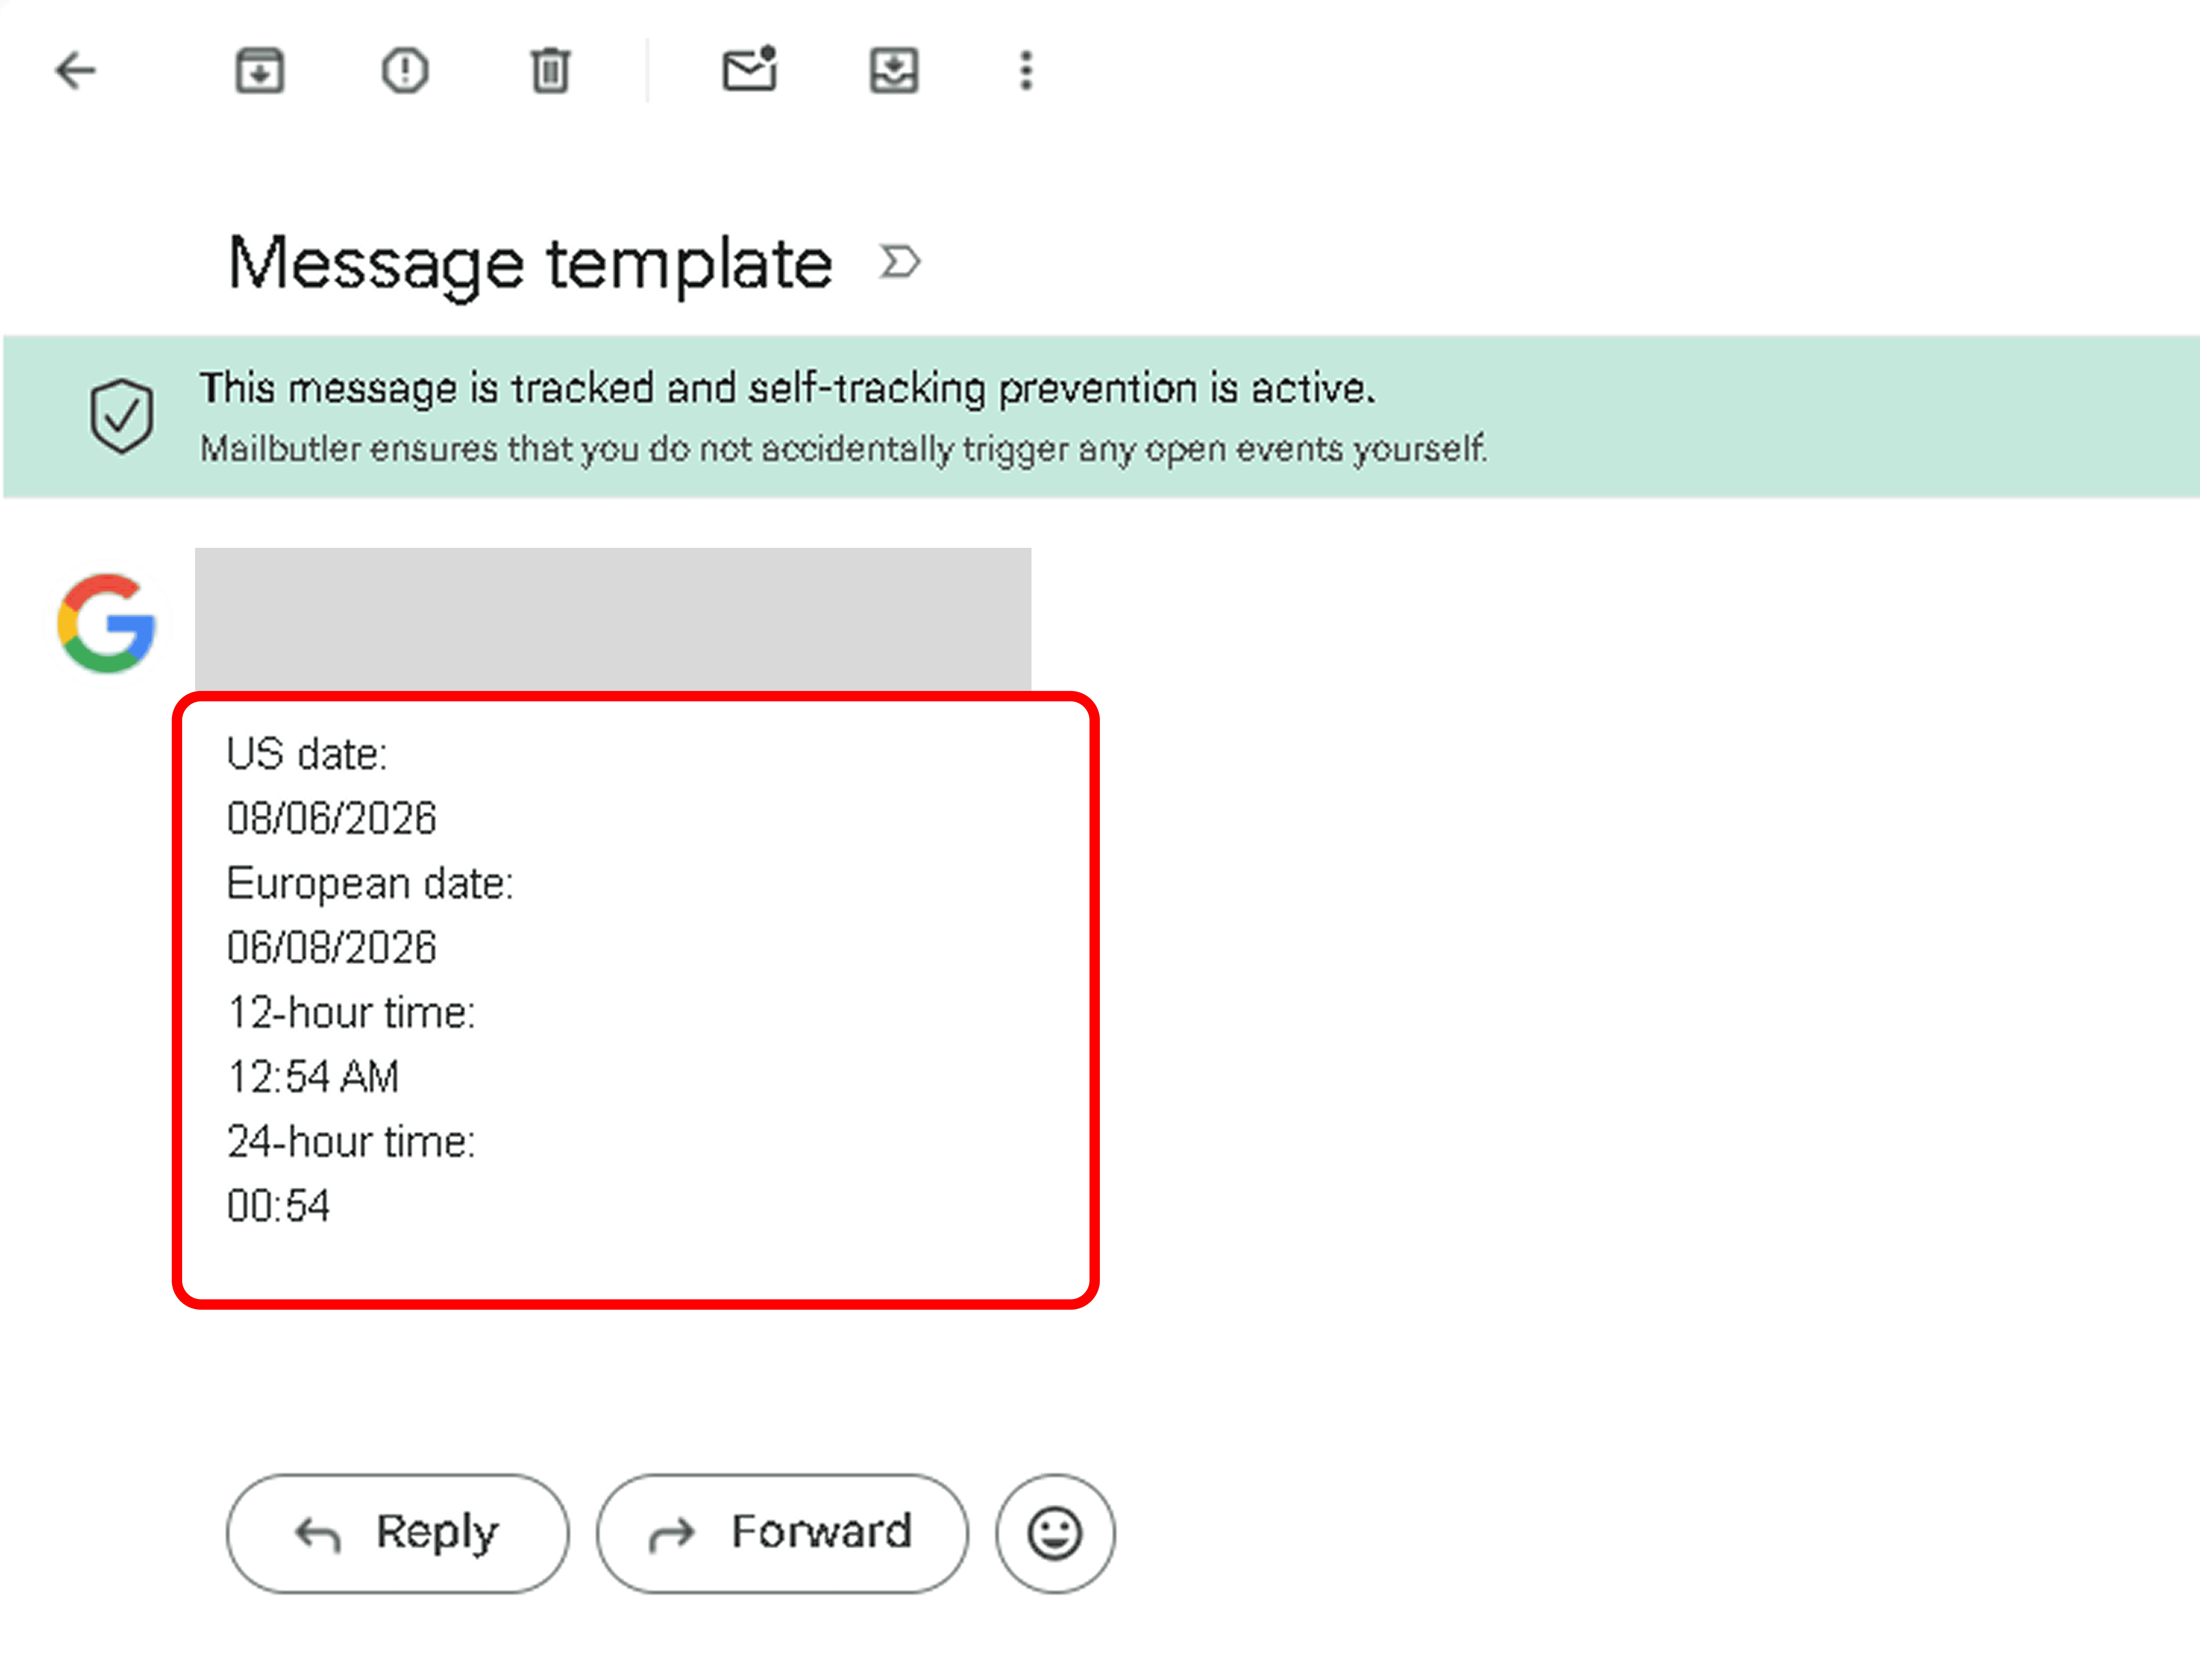
Here are some examples:
US date:
{{ "now" | date: "%m/%d/%Y" }}→08/06/2026European date:
{{ "now" | date: "%d/%m/%Y" }}→06/08/202612-hour time:
{{ "now" | date: "%I:%M %p" }}→12:54 AM24-hour time:
{{ "now" | date: "%H:%M" }}→00:54
To create another display format, use the Strftime format creator. Copy the format you create and replace the format between the quotation marks after date:.
For example:
{{ "now" | date: "%B %d, %Y" }}
This displays the date with the full month name, followed by the day and year—for example, August 11, 2026.
Display a future date
You can also use Liquid to calculate and display a future date.
The following example displays the date seven days from the current date:
{% assign seconds_in_one_week = 7 | times: 86400 %}
{% assign target_date = "now" | date: "%s" | plus: seconds_in_one_week %}
{{ target_date | date: "%B %d, %Y" }}
For example, if the current date is August 4, 2026, the result is:
August 11, 2026