How do I use Link Tracking?
Apple Mail
1. Make sure that you have Link Tracking enabled by default. Or enable it manually. For instructions see here.
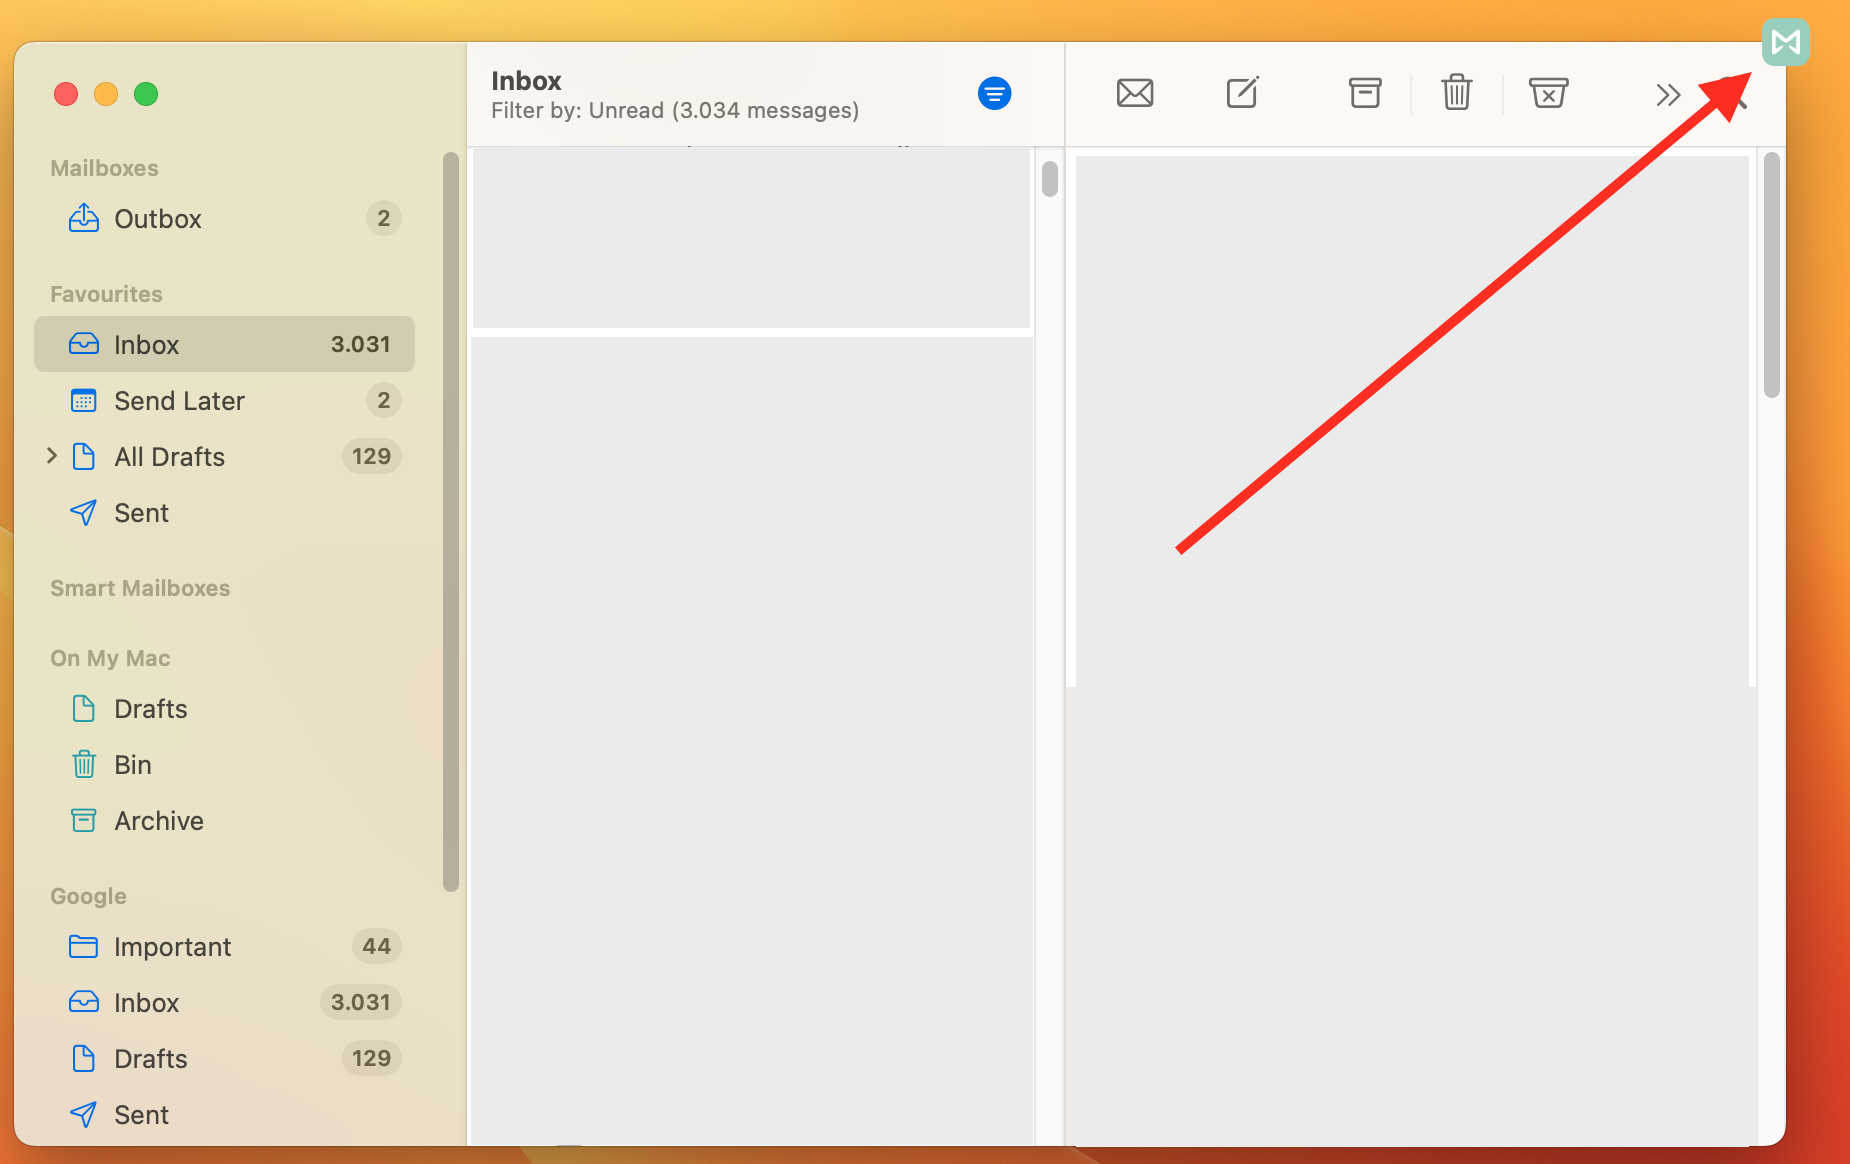
2. Compose a new email, insert the link(s) that you want to track and send it.
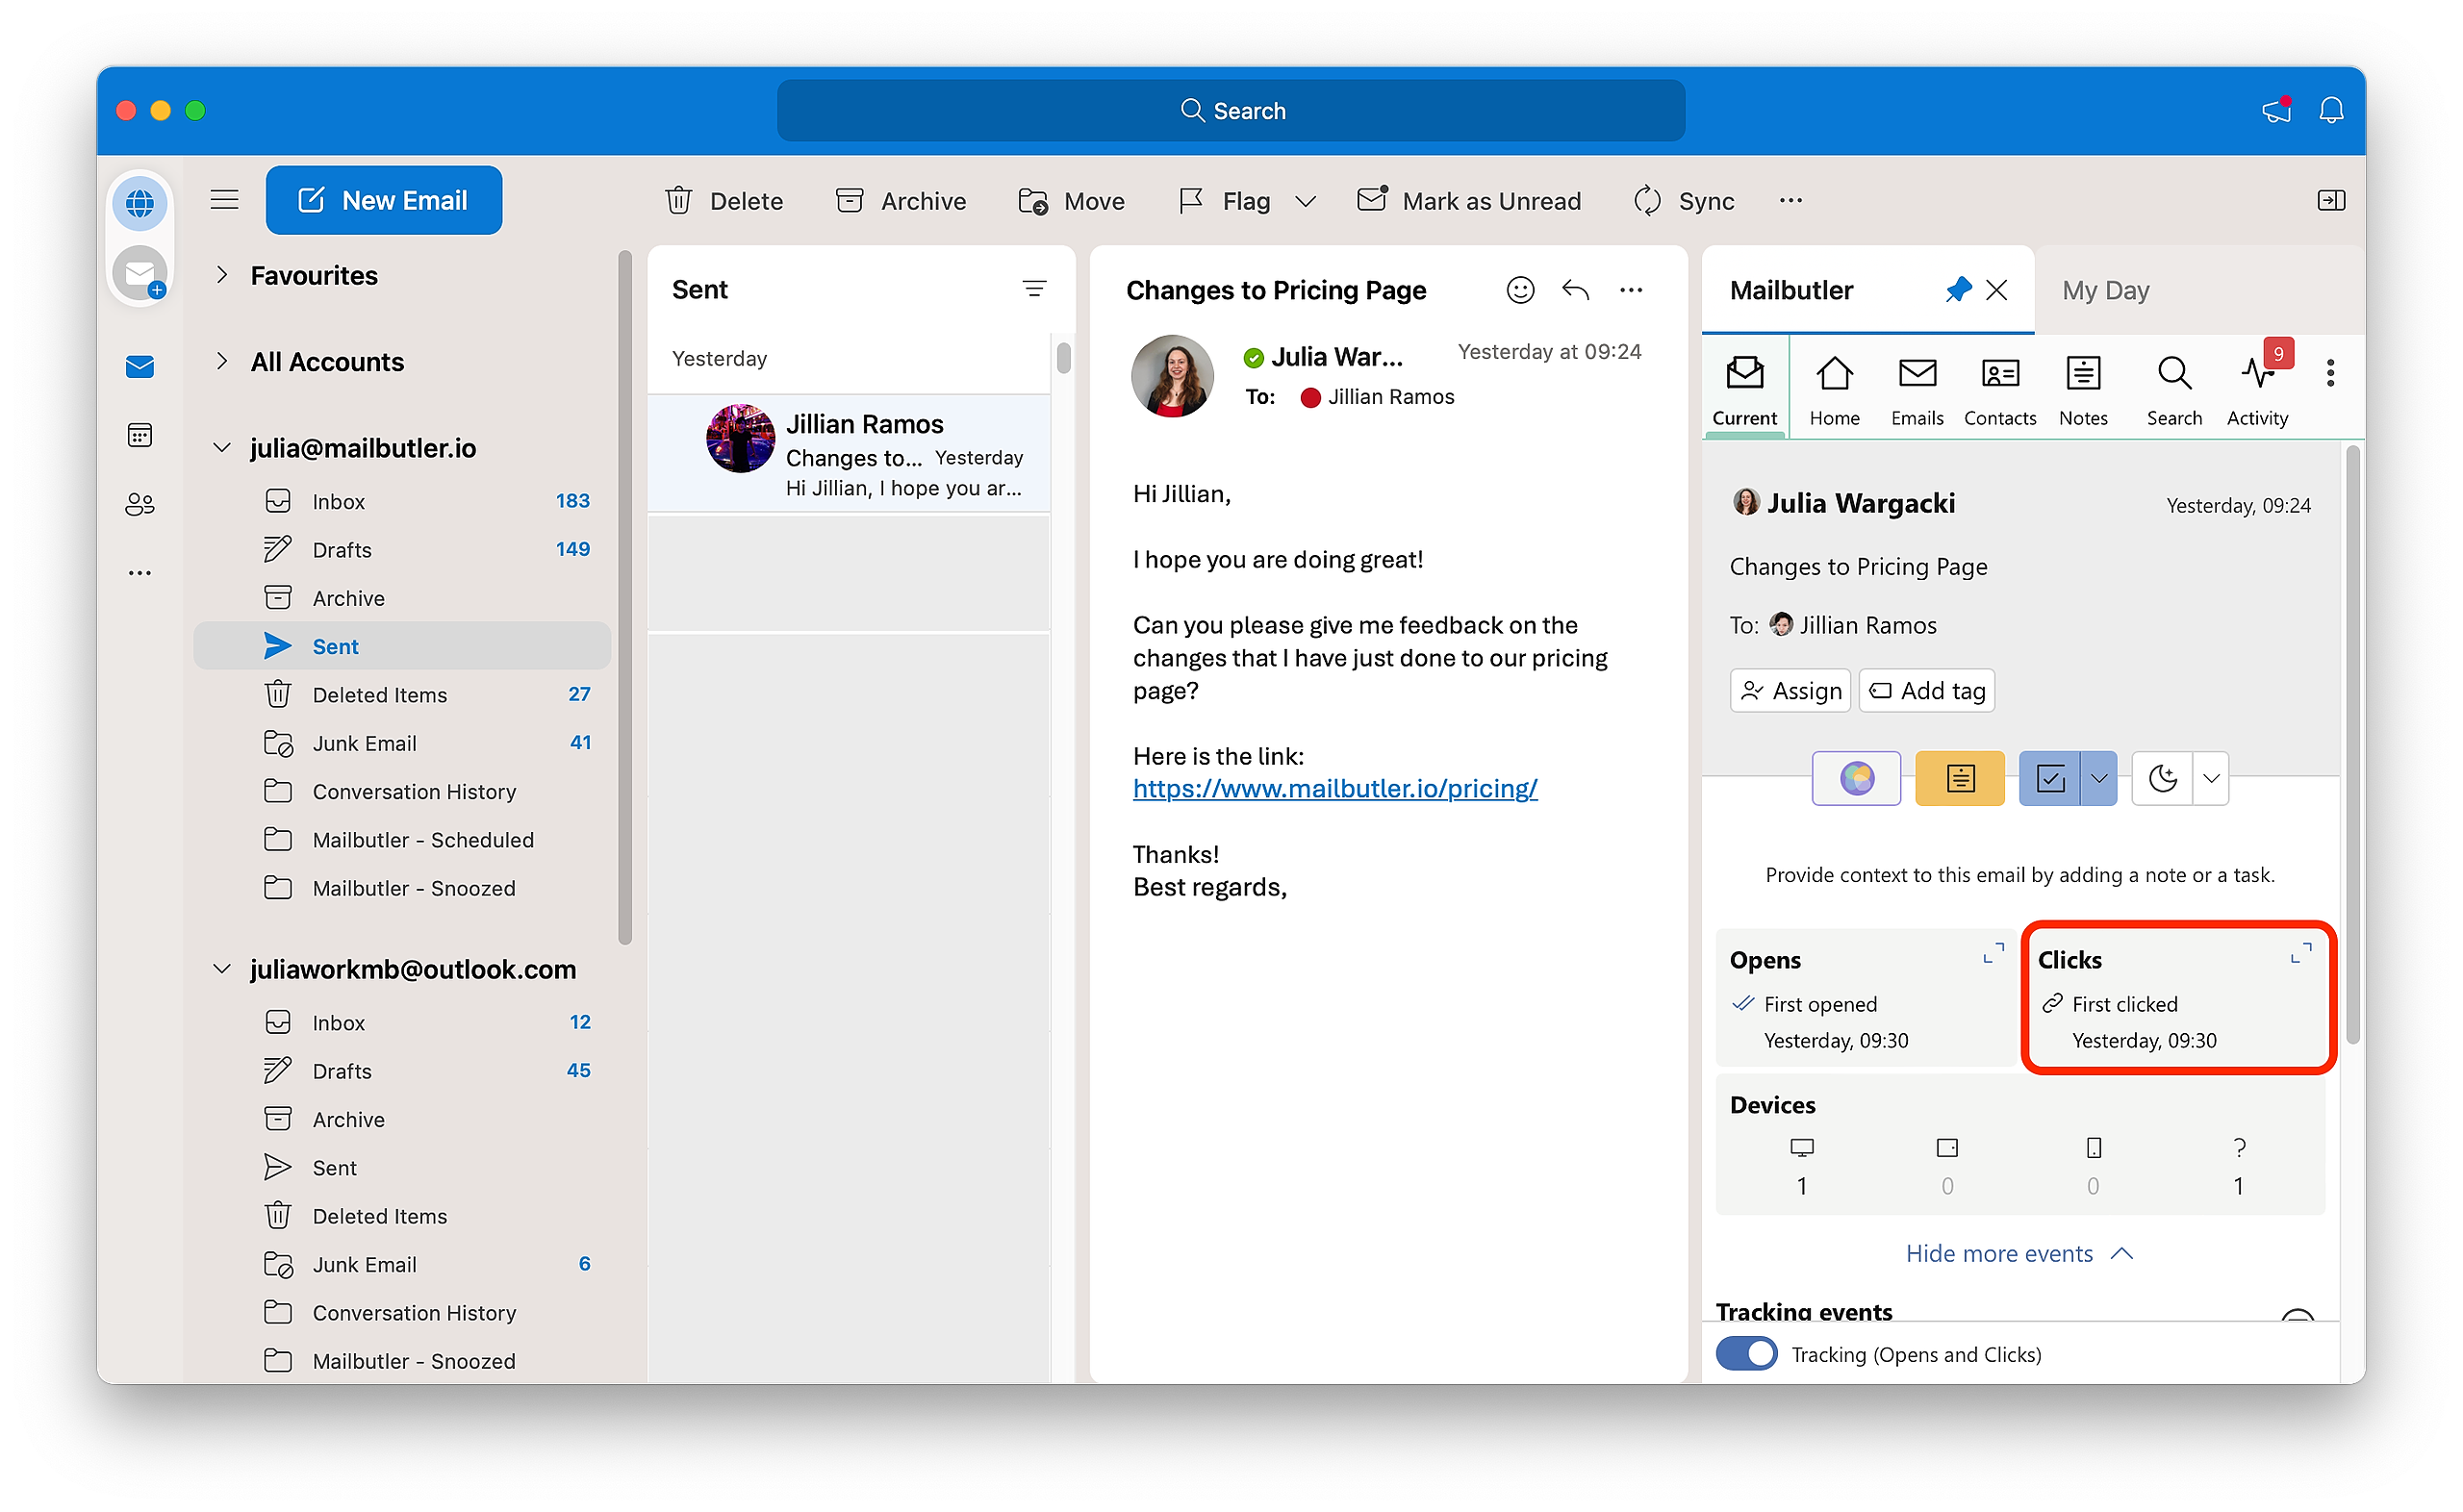
3. To check whether your link has been clicked, go to your sent folder and select the respective email.
4. Once your link has been clicked, you will see the date and time of the first click if you hover over the two checkmarks on your email as well as in the Mailbutler Sidebar.
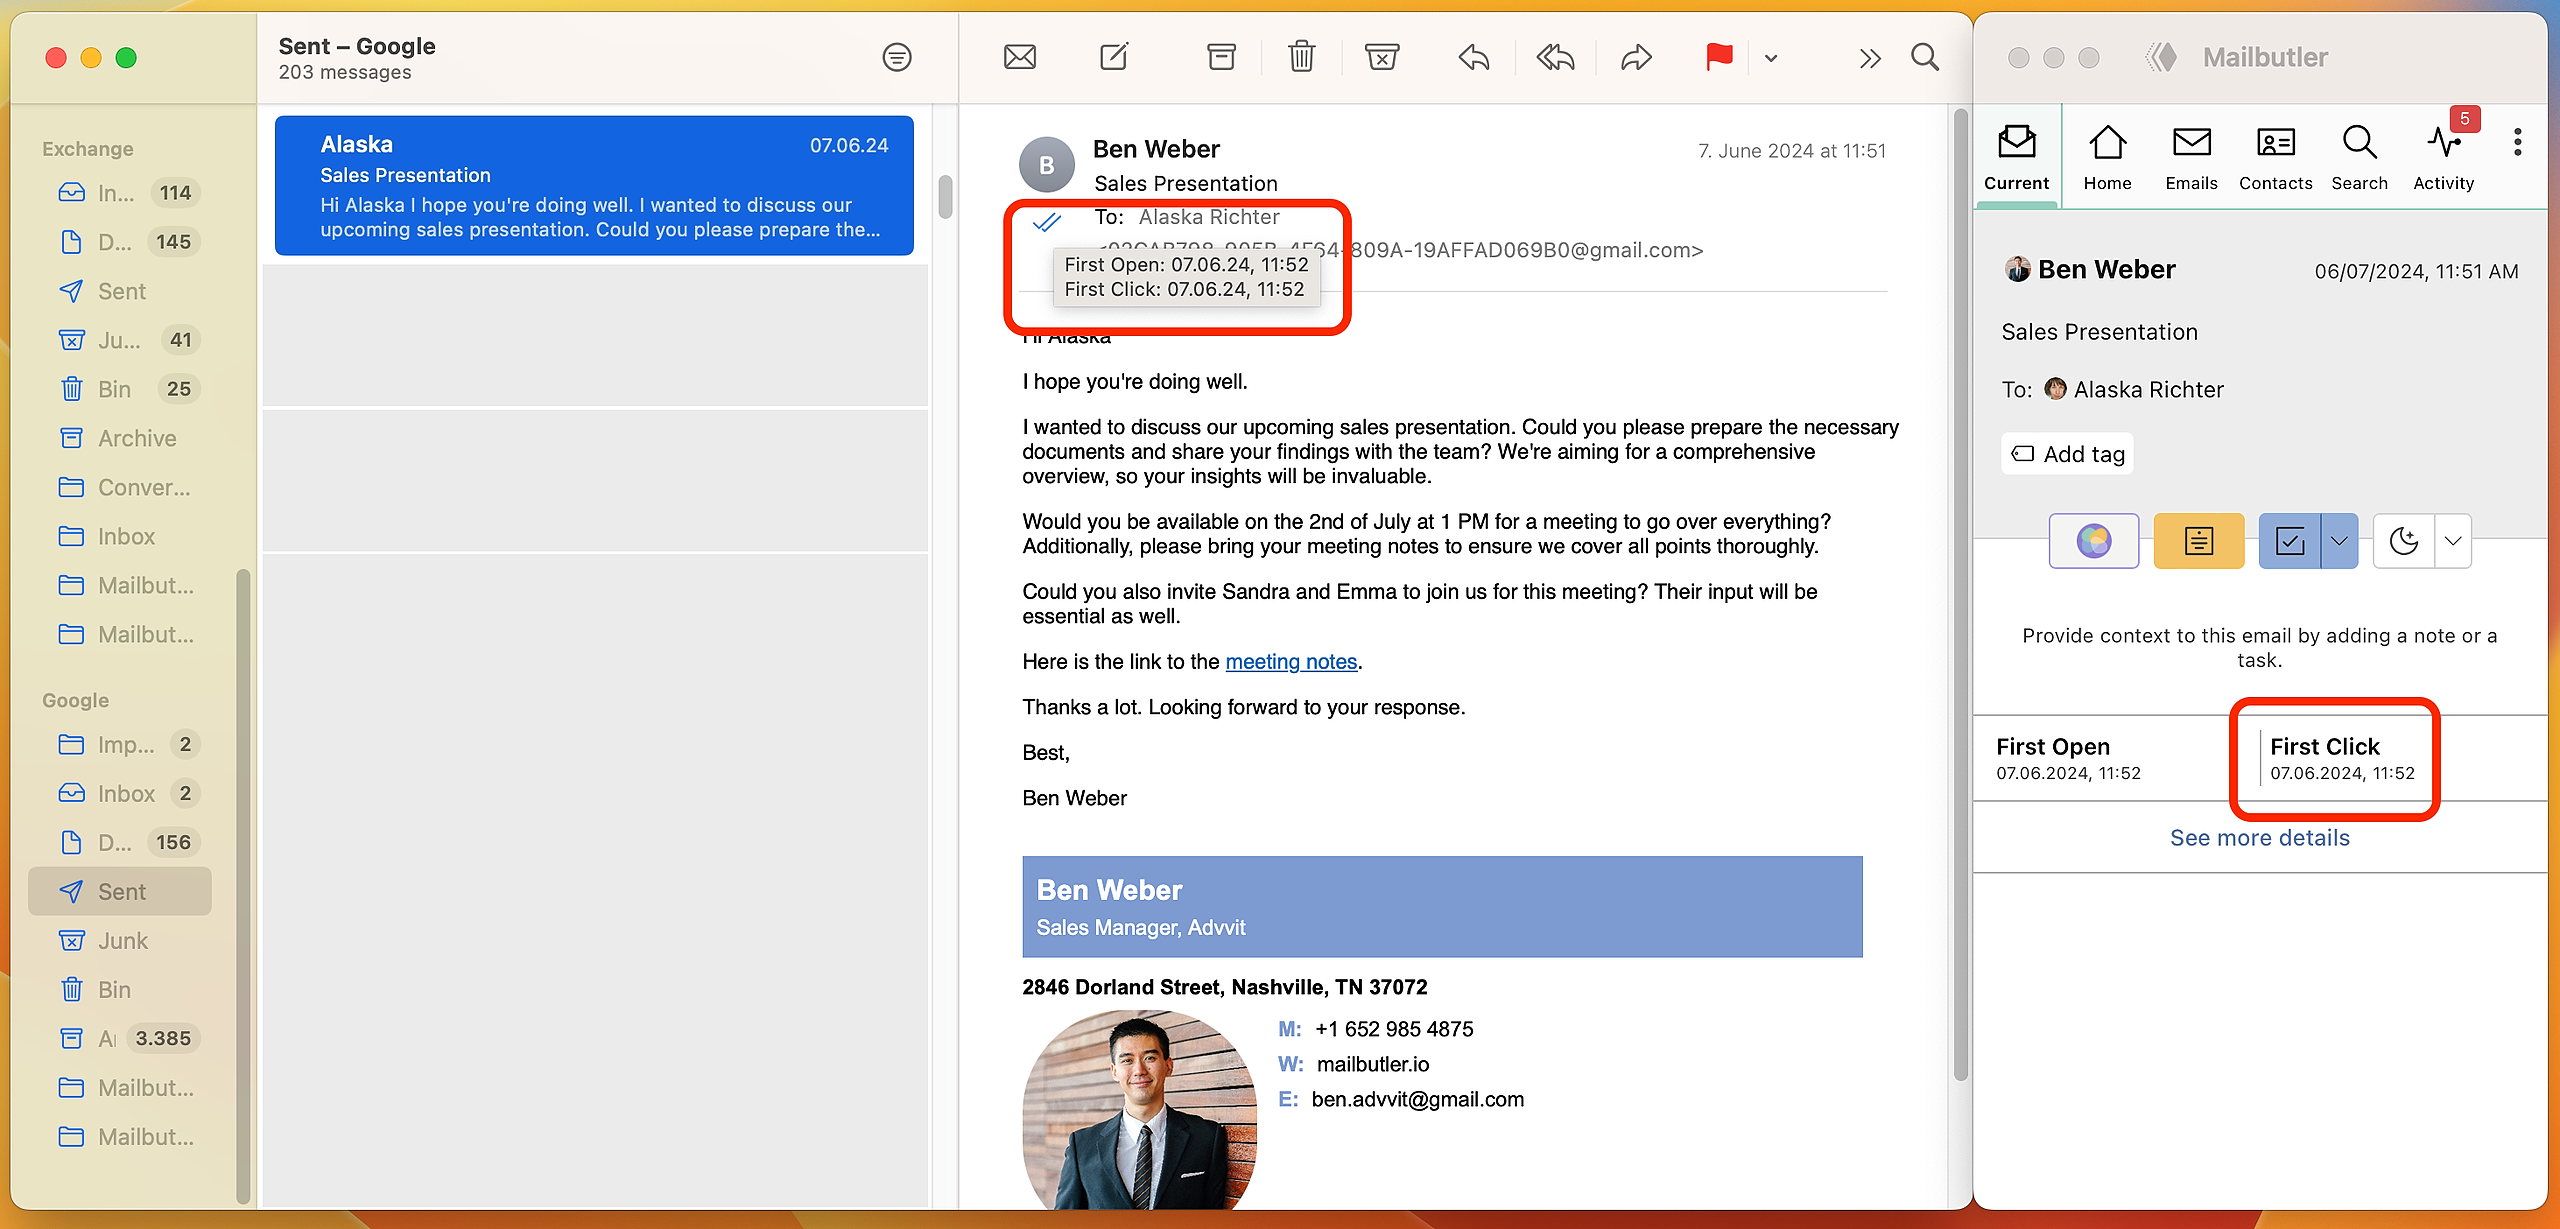
If you want to see more detailed link tracking information, head to this article to learn how to reveal Tracking Details.
Gmail
1. Make sure that you have Link Tracking enabled by default. Or enable it manually. For instructions see here.
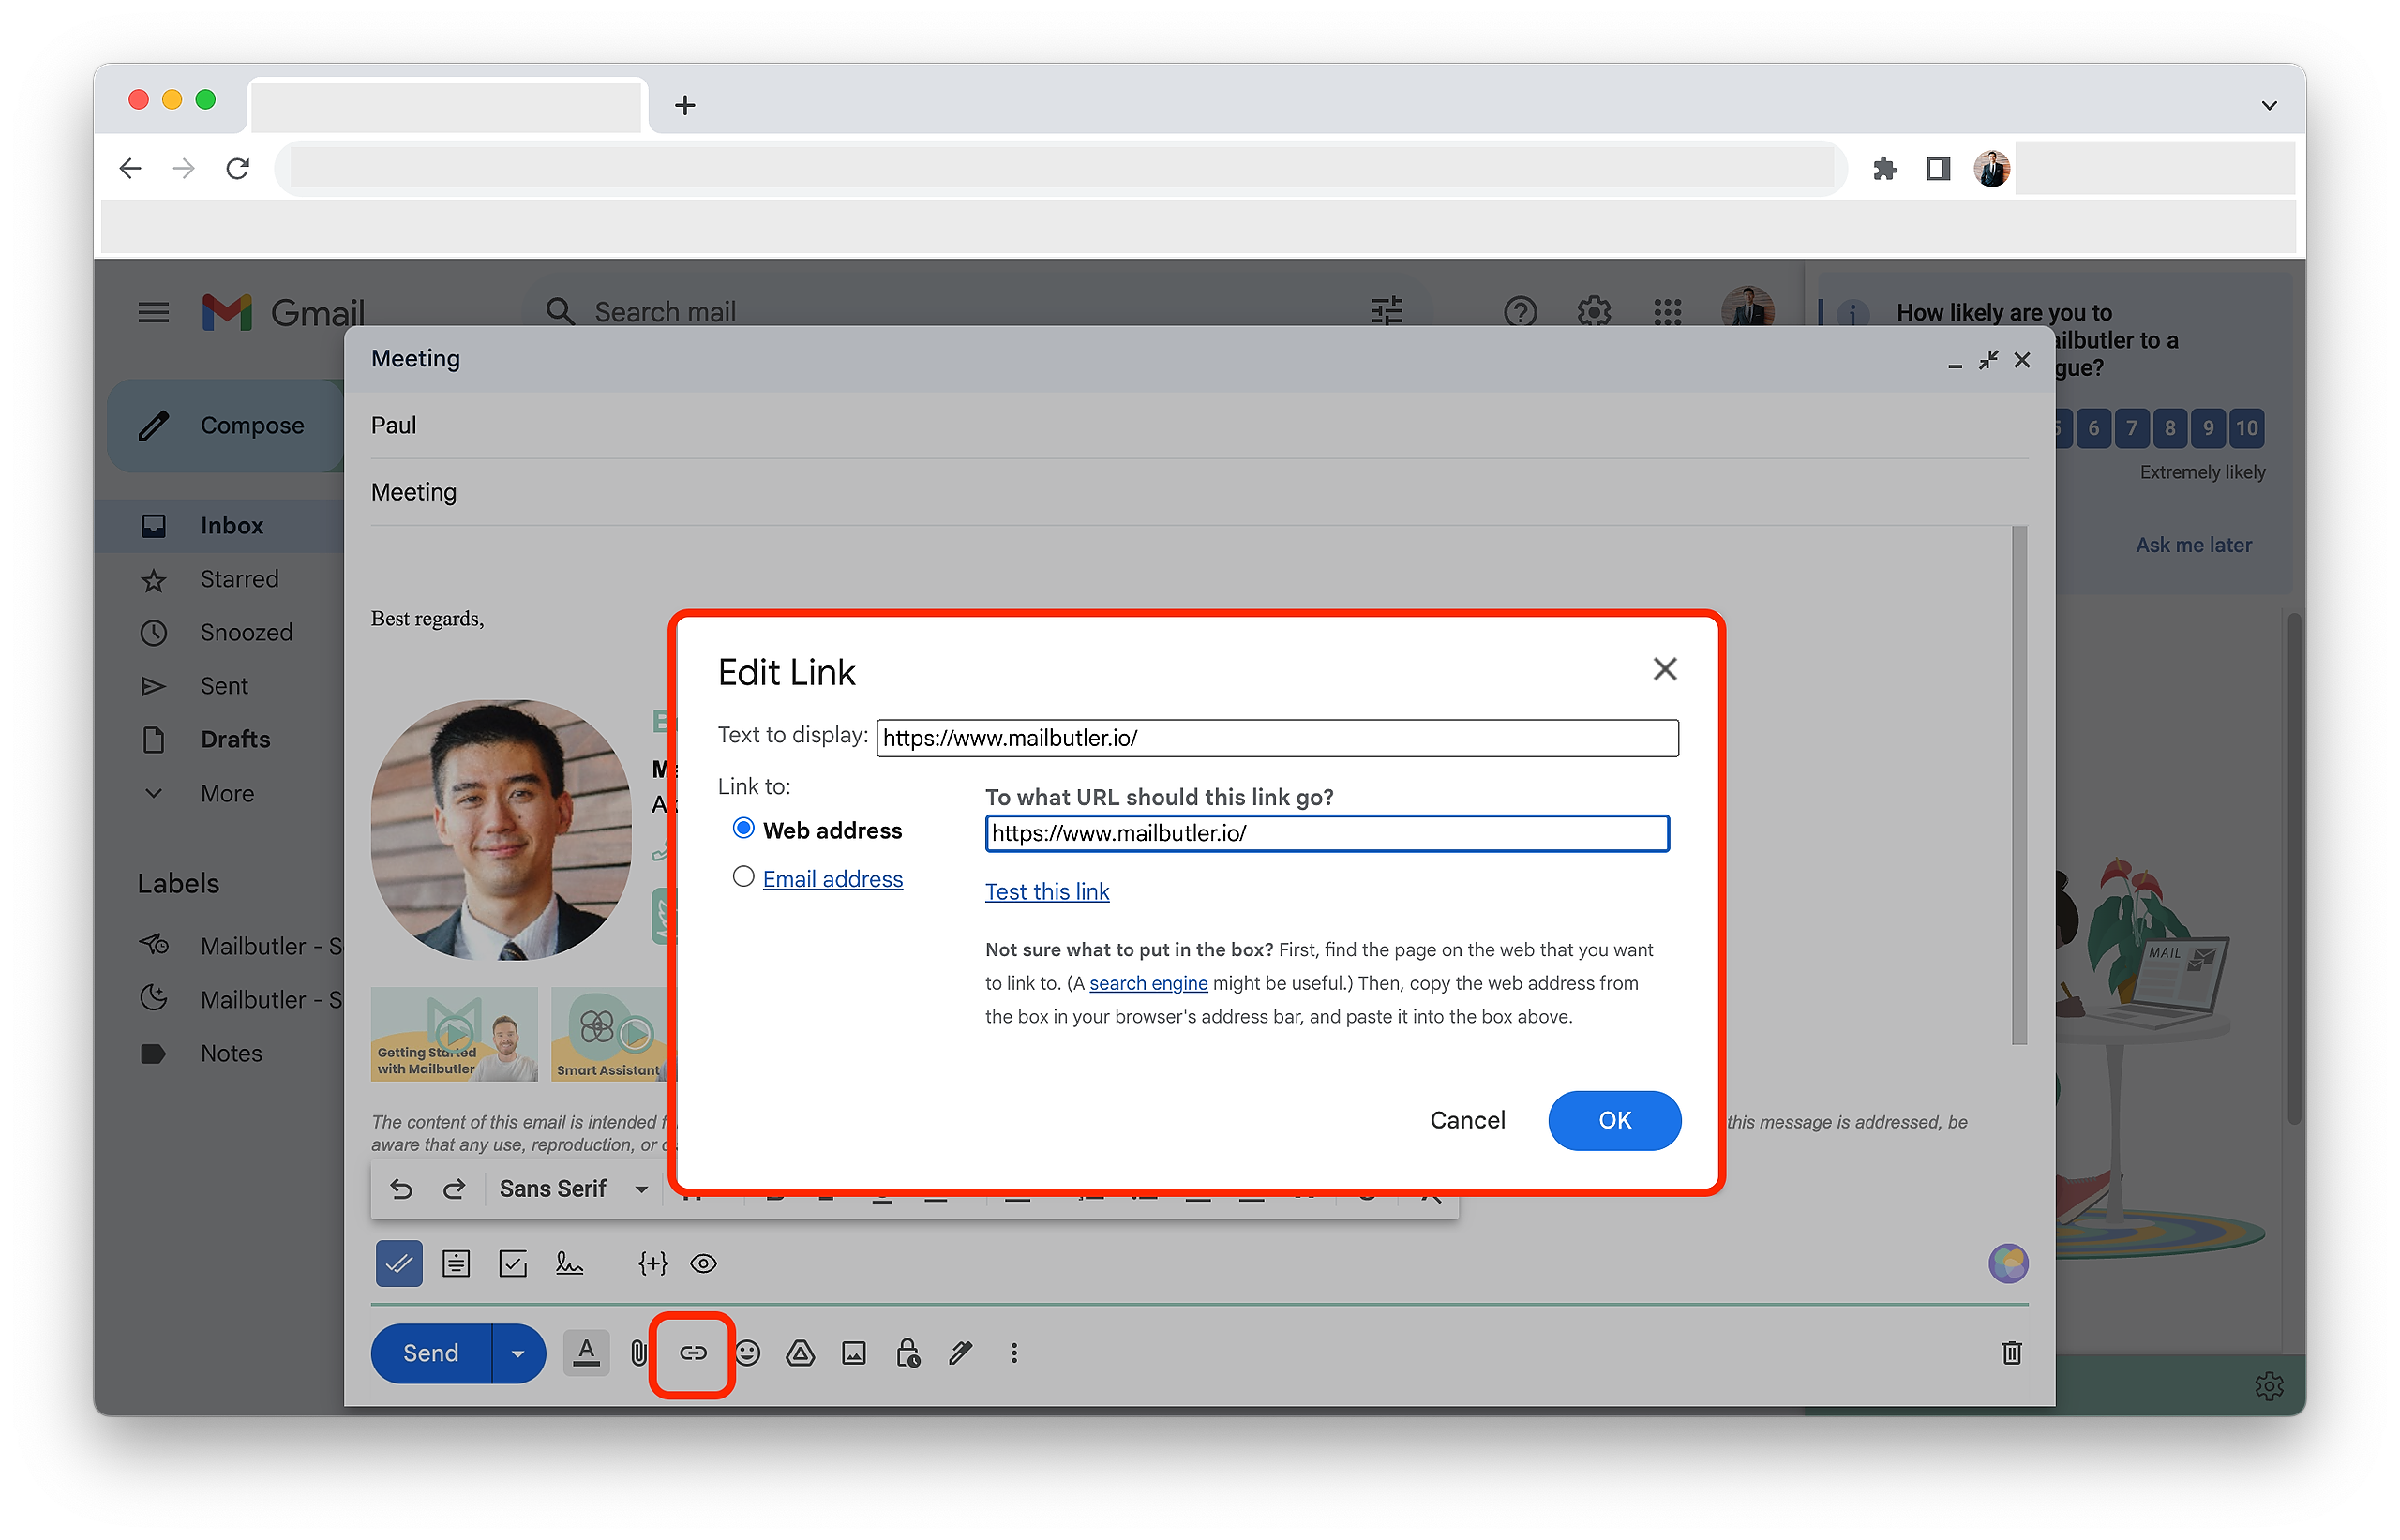
2. Compose a new email, click the Insert link button in your Gmail toolbar and insert the link(s) that you want to track. Then, send the email.
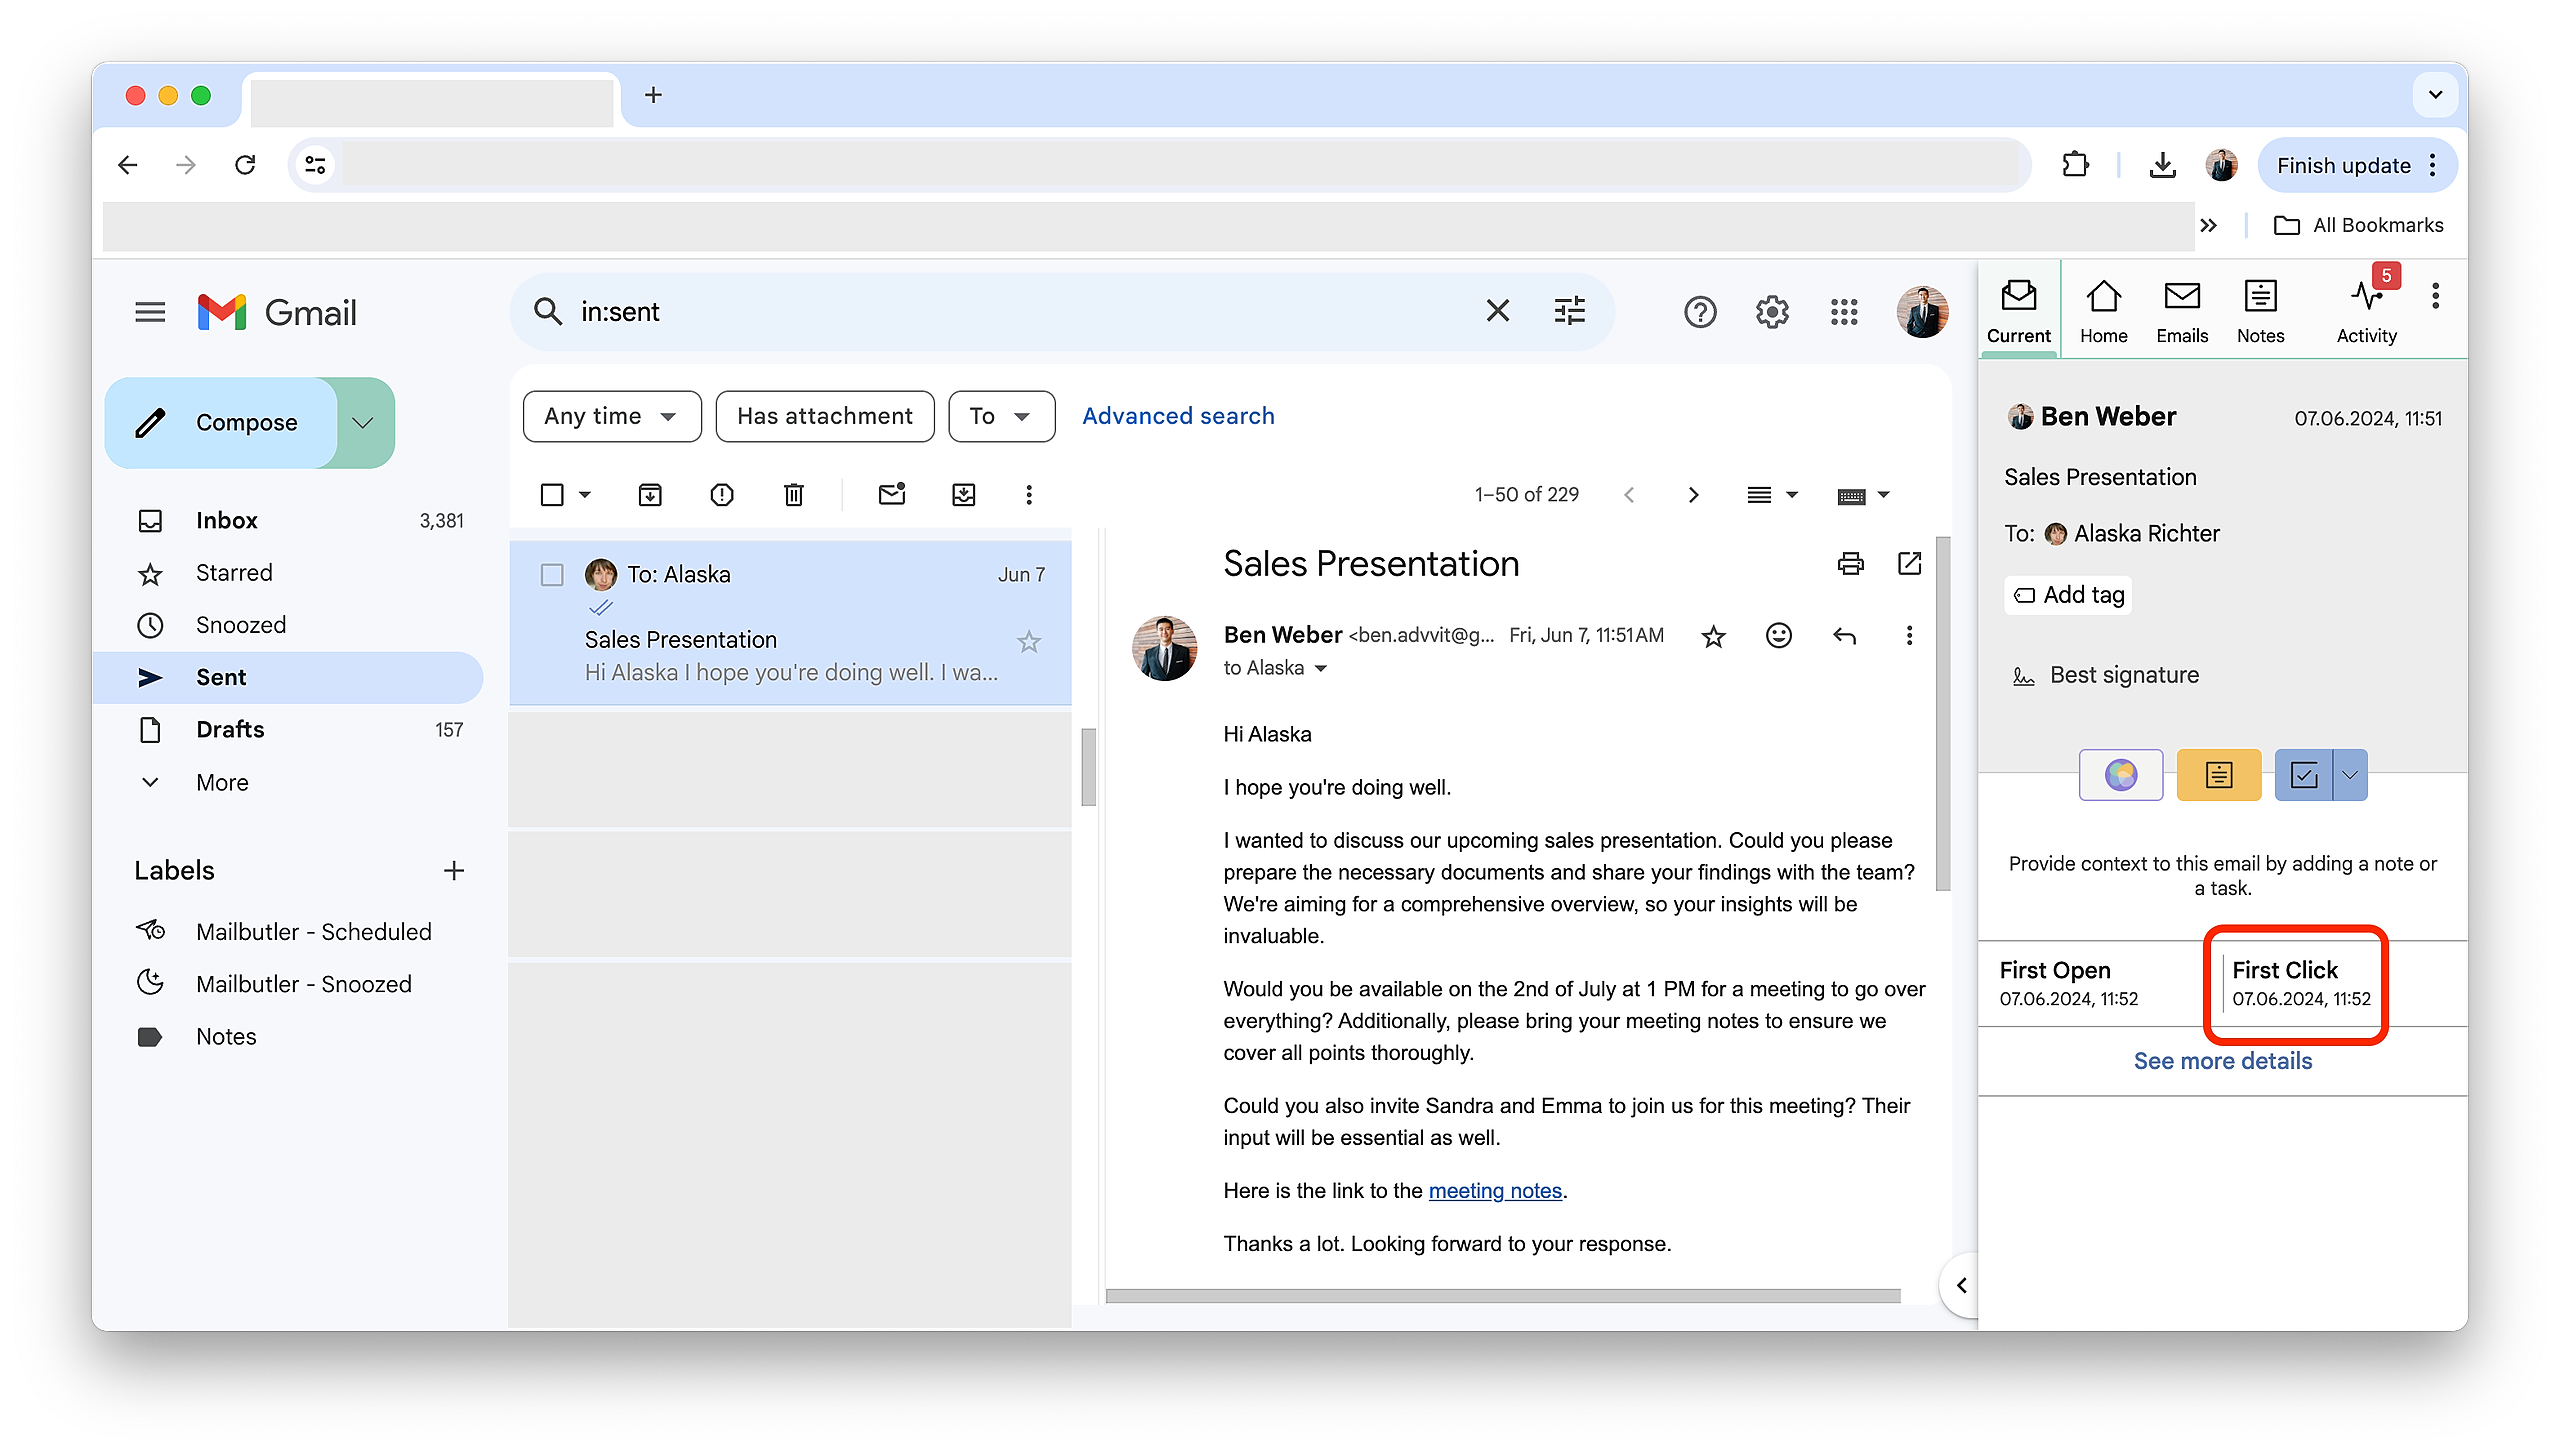
3. To check whether your link has been clicked, go to your sent folder and select the respective email.
4. Click on the Mailbutler icon to open the Mailbutler Sidebar.

5. Once your link has been clicked, you will see the date and time of the first click in the Mailbutler Sidebar.
If you want to see more detailed link tracking information, head to this article to learn how to reveal Tracking Details.
Outlook
1. Make sure that you have Link Tracking enabled by default. Or enable it manually. For instructions see here.
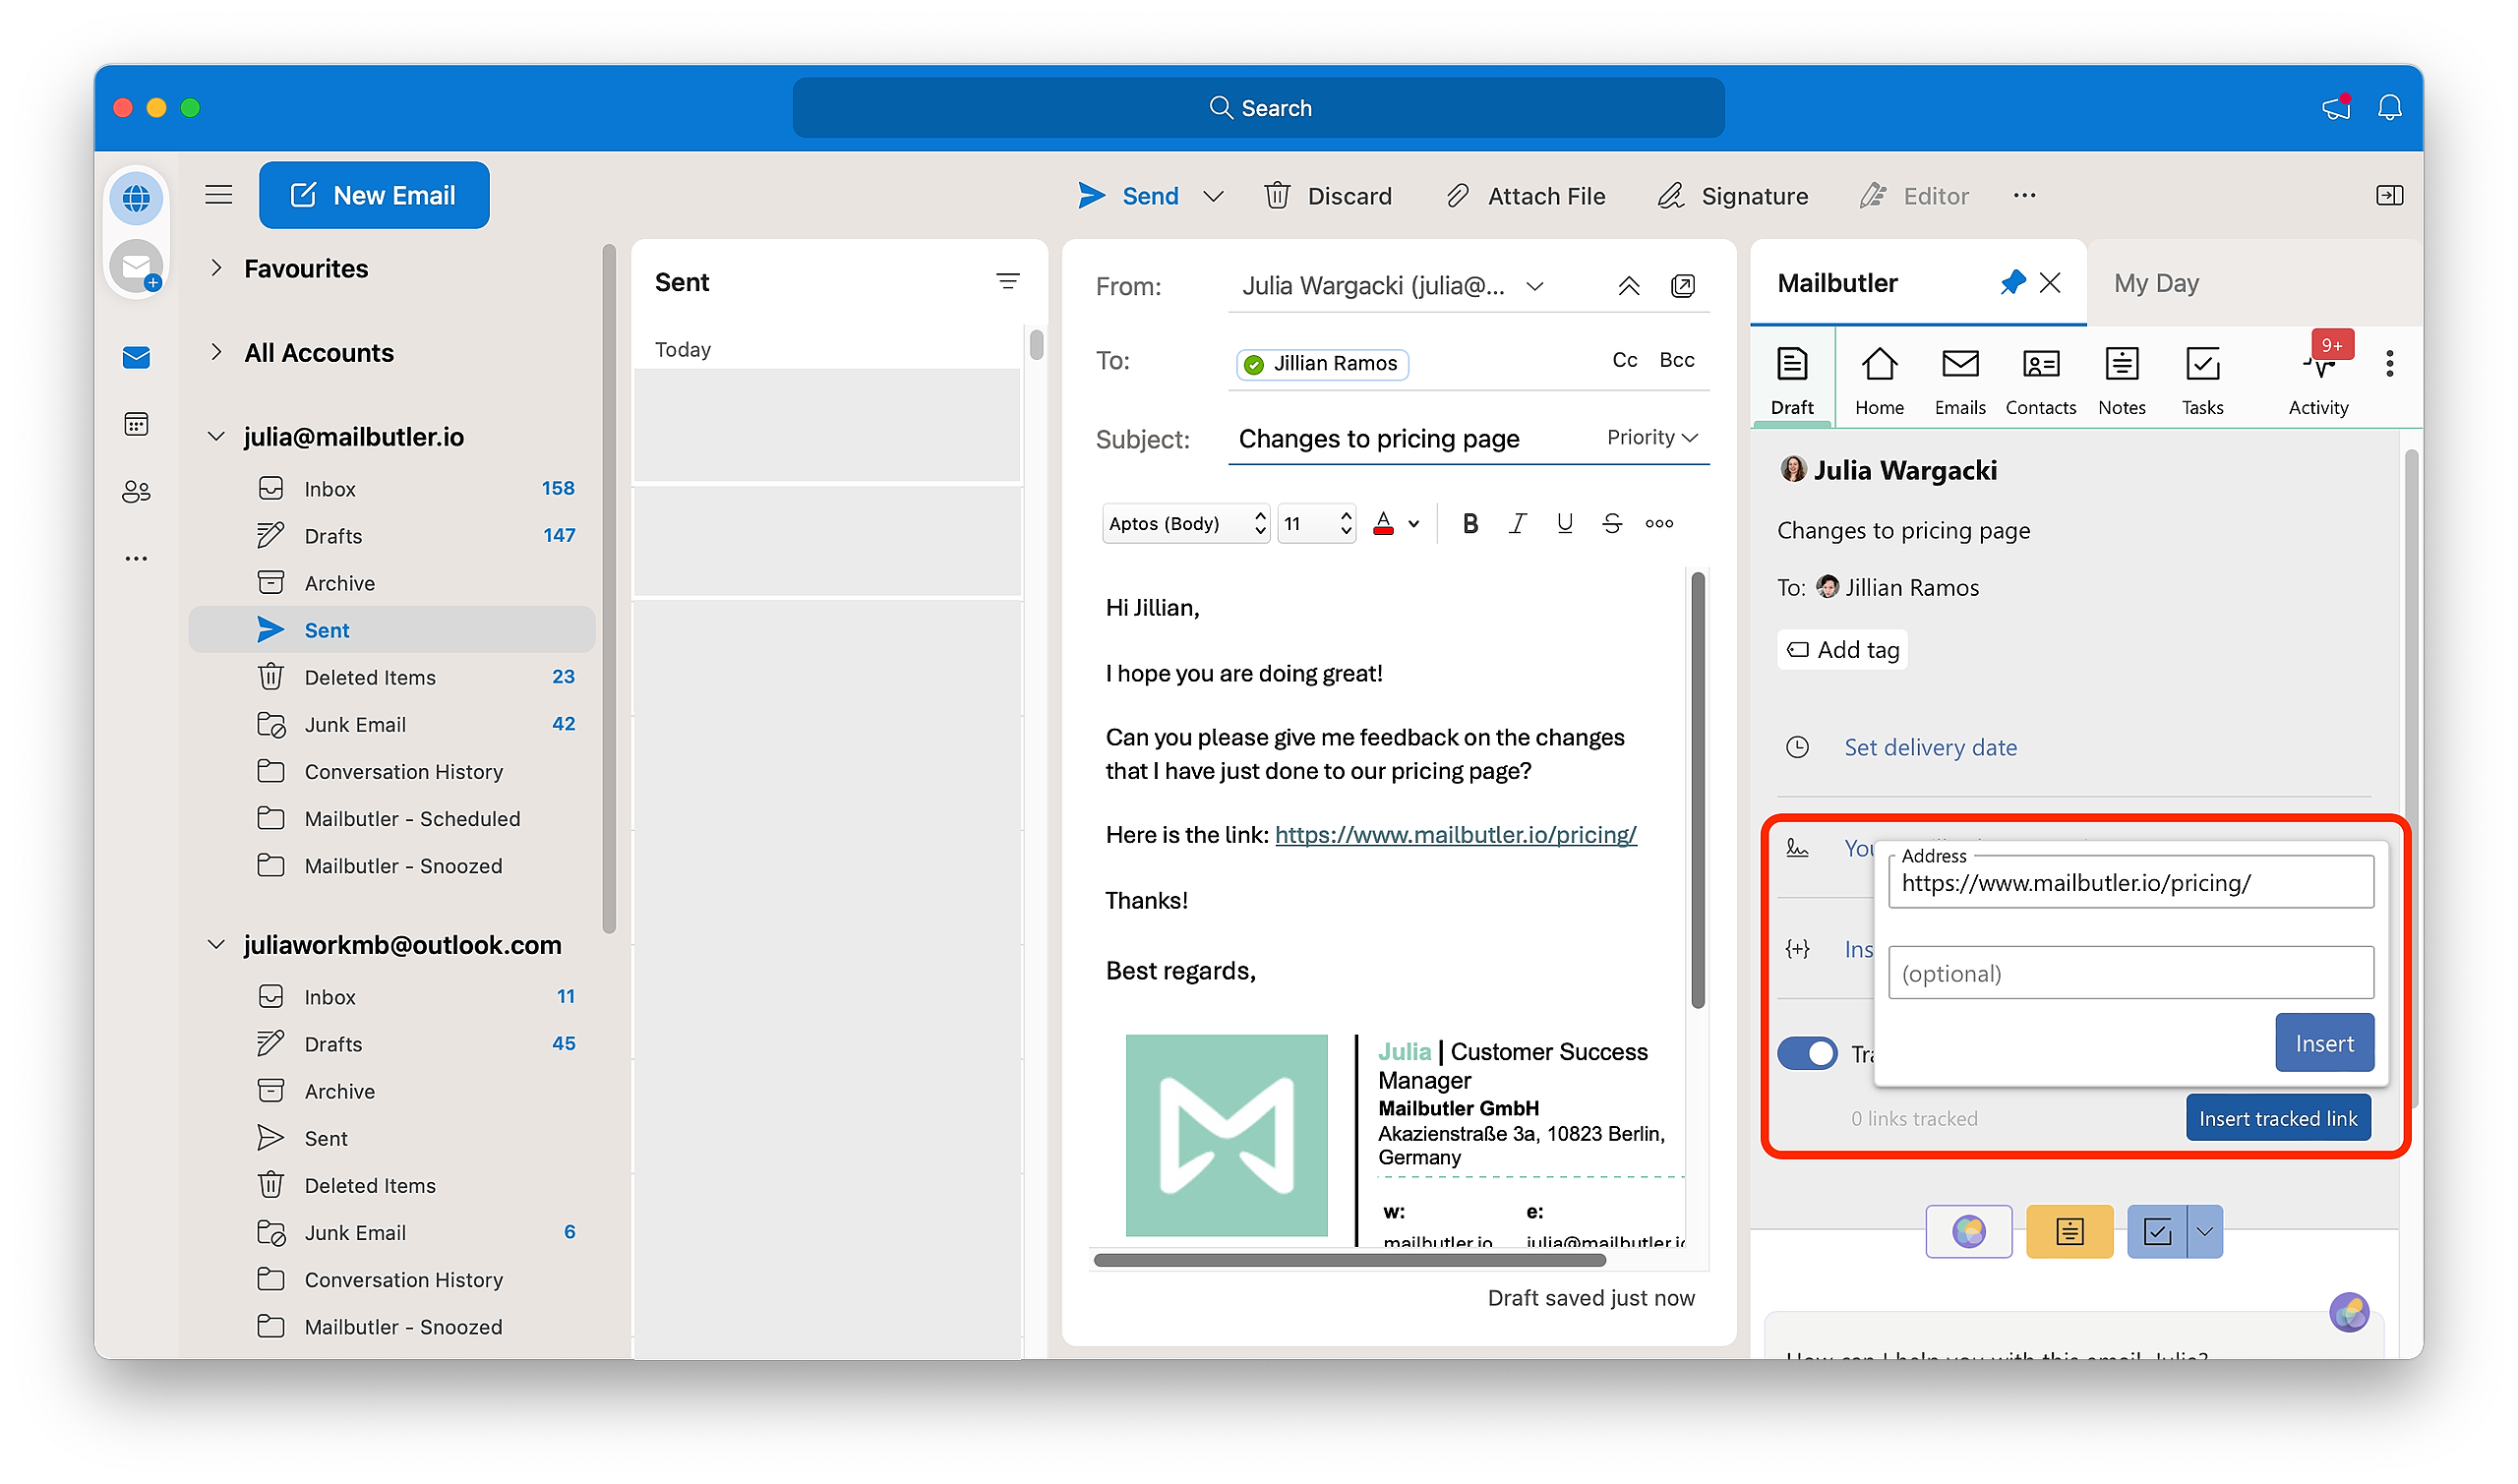
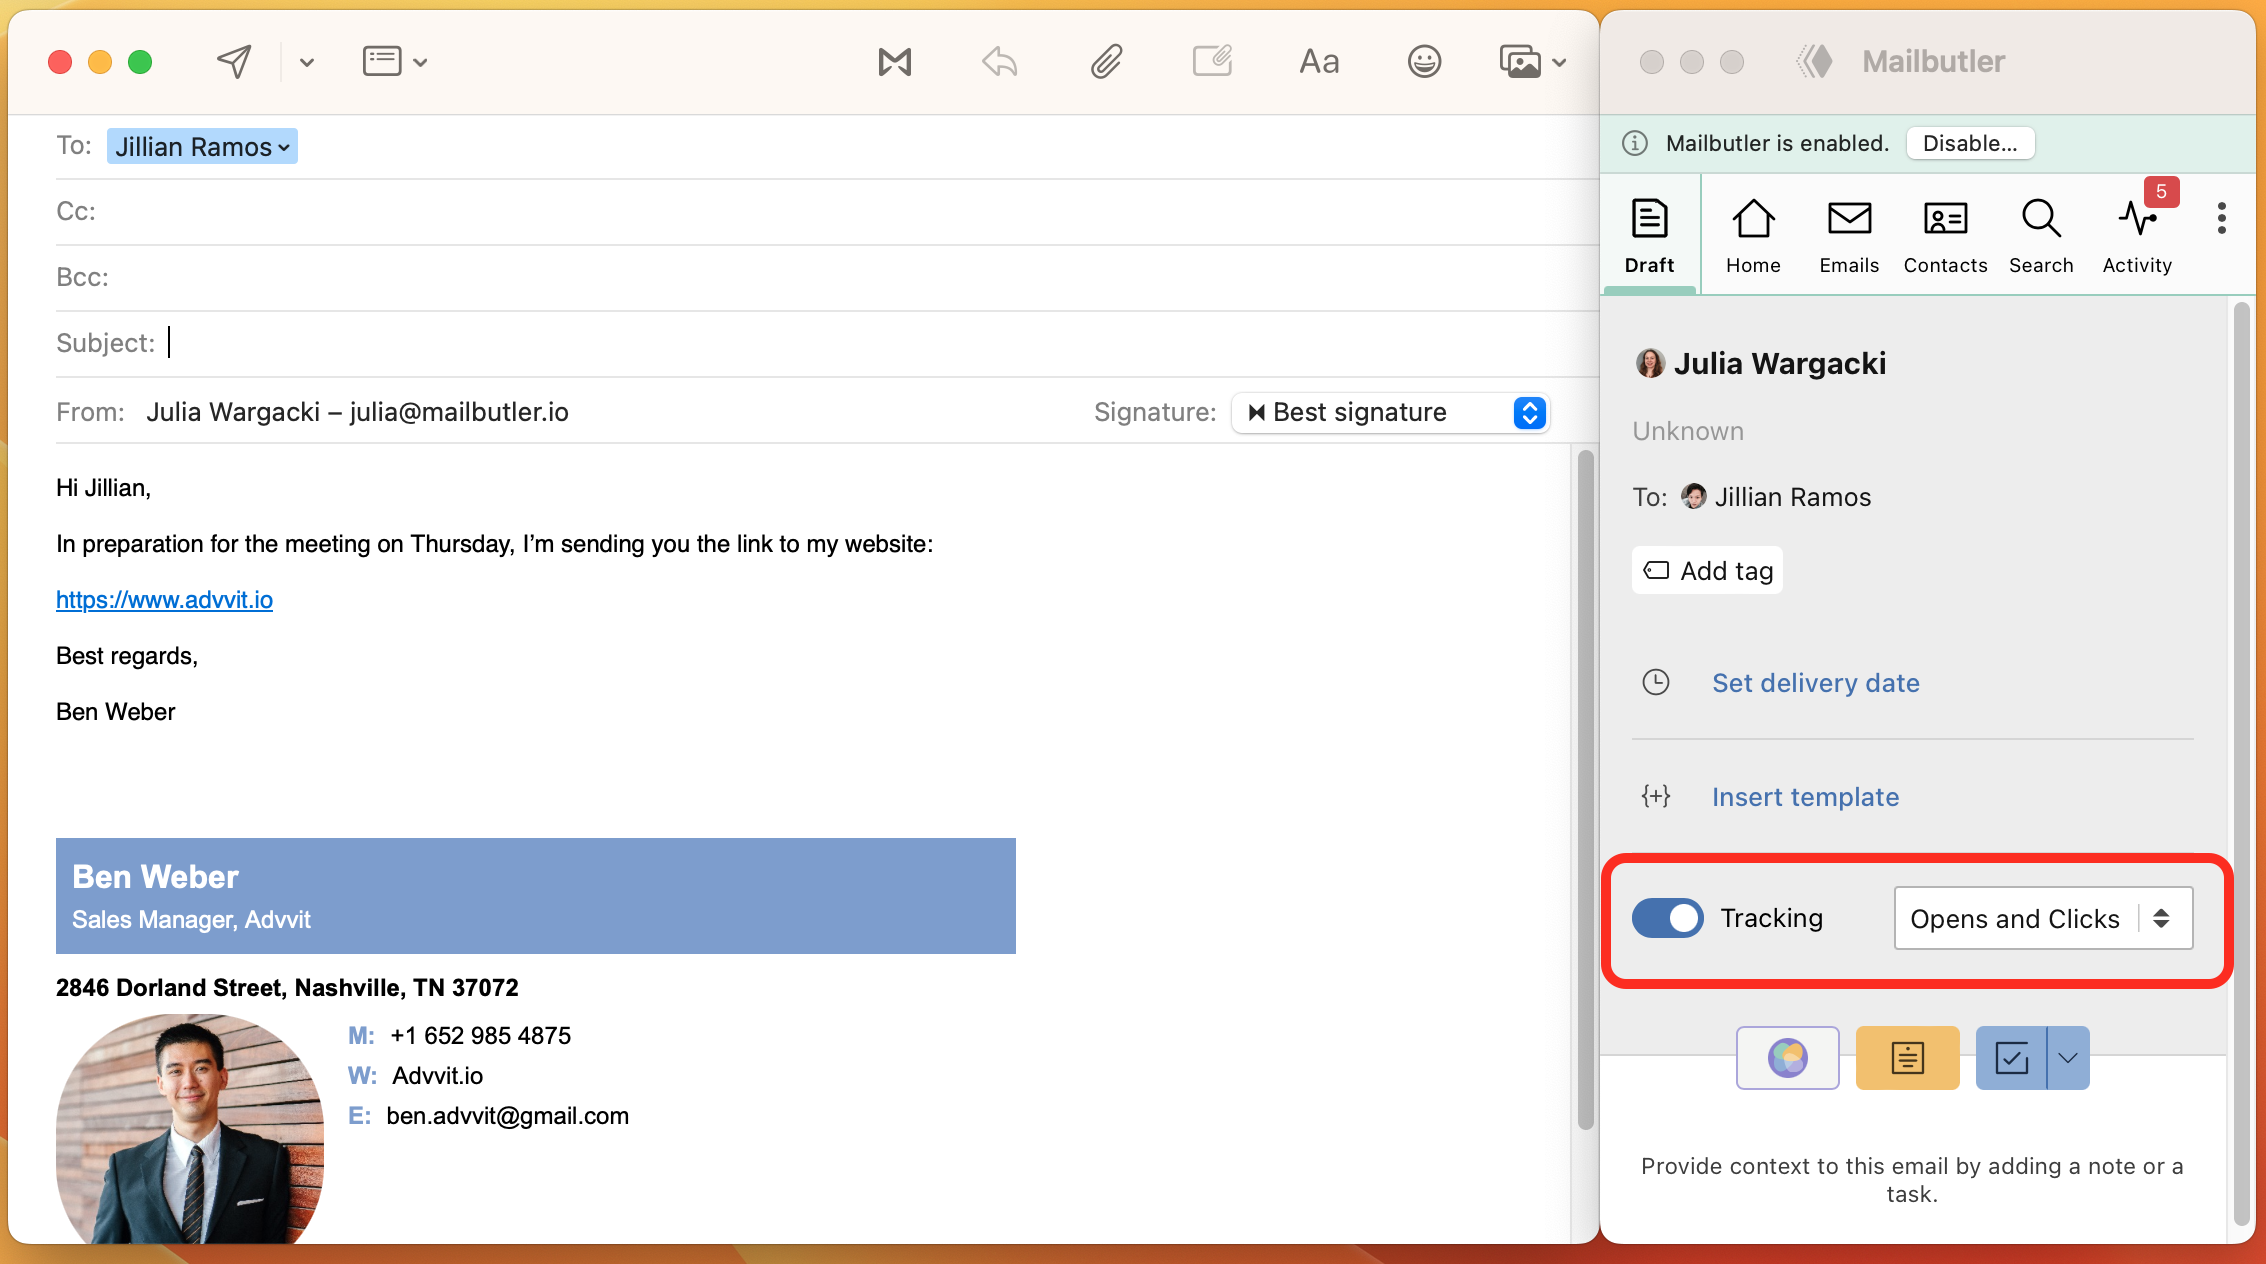
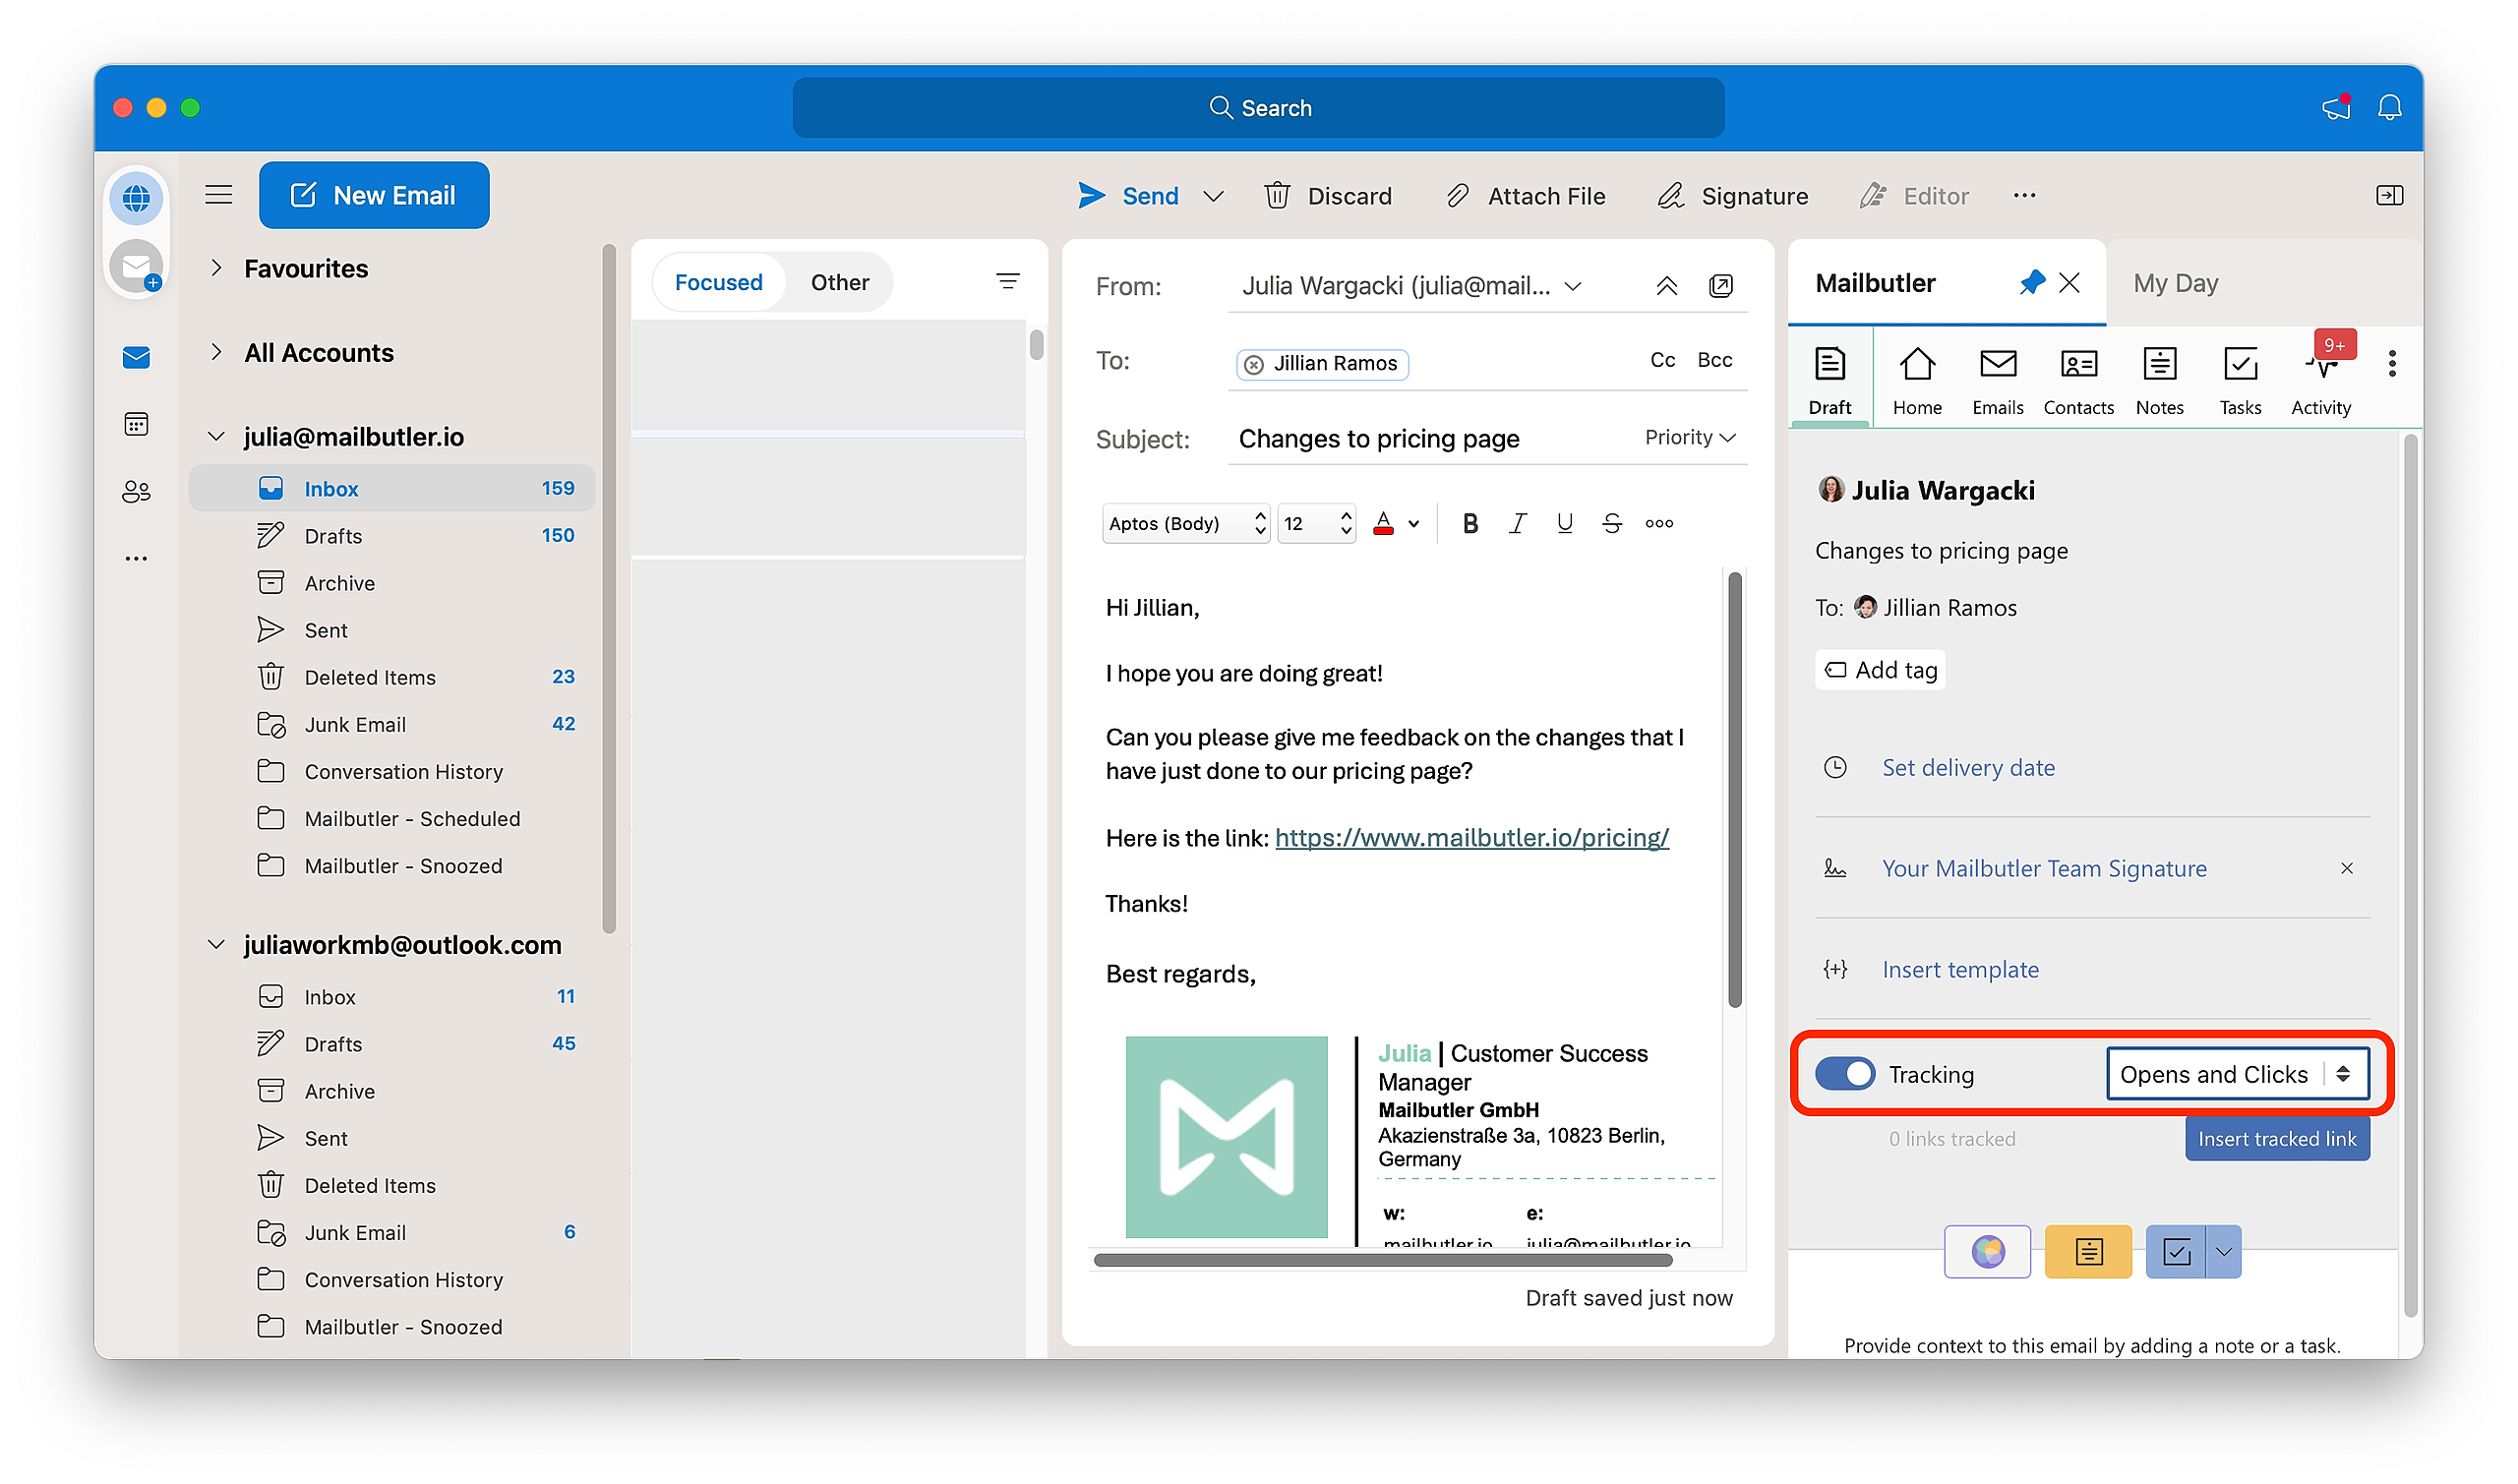
2. Compose a new email and open the Mailbutler sidebar.
3. Click Insert tracked link and enter the link that you would like to track. Then, click Insert.
4. Send your email. Please note that you need to keep the Mailbutler sidebar open when sending your email in order for your links to get tracked.
5. To check whether your link has been clicked, go to your sent folder, select the respective email and open the Mailbutler Sidebar.
6. Once your link has been clicked, you will see the date and time of the first click in the Mailbutler Sidebar.
If you want to see more detailed link tracking information, head to this article to learn how to reveal Tracking Details.
Mobile App
Launch the Mailbutler Mobile App.
Navigate to the email section and choose the email for which you would like to view the link tracking information.
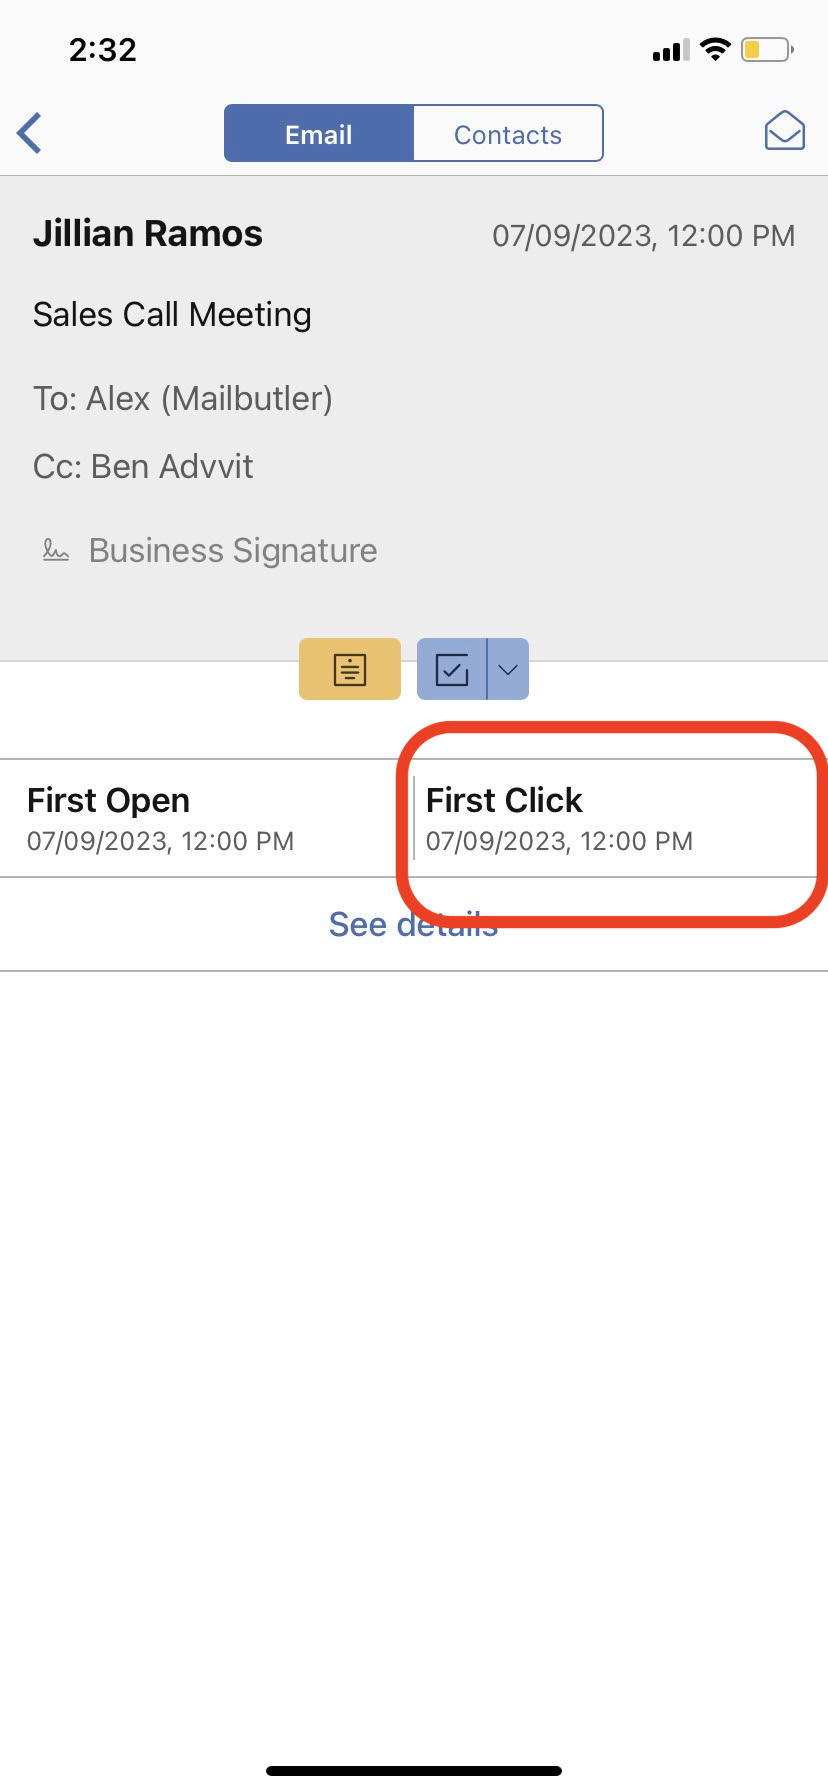
If you want to see more detailed link tracking information, head to this article to learn how to reveal Tracking Details.
How do I enable Link Tracking?
Apple Mail
Enable Link Tracking manually:
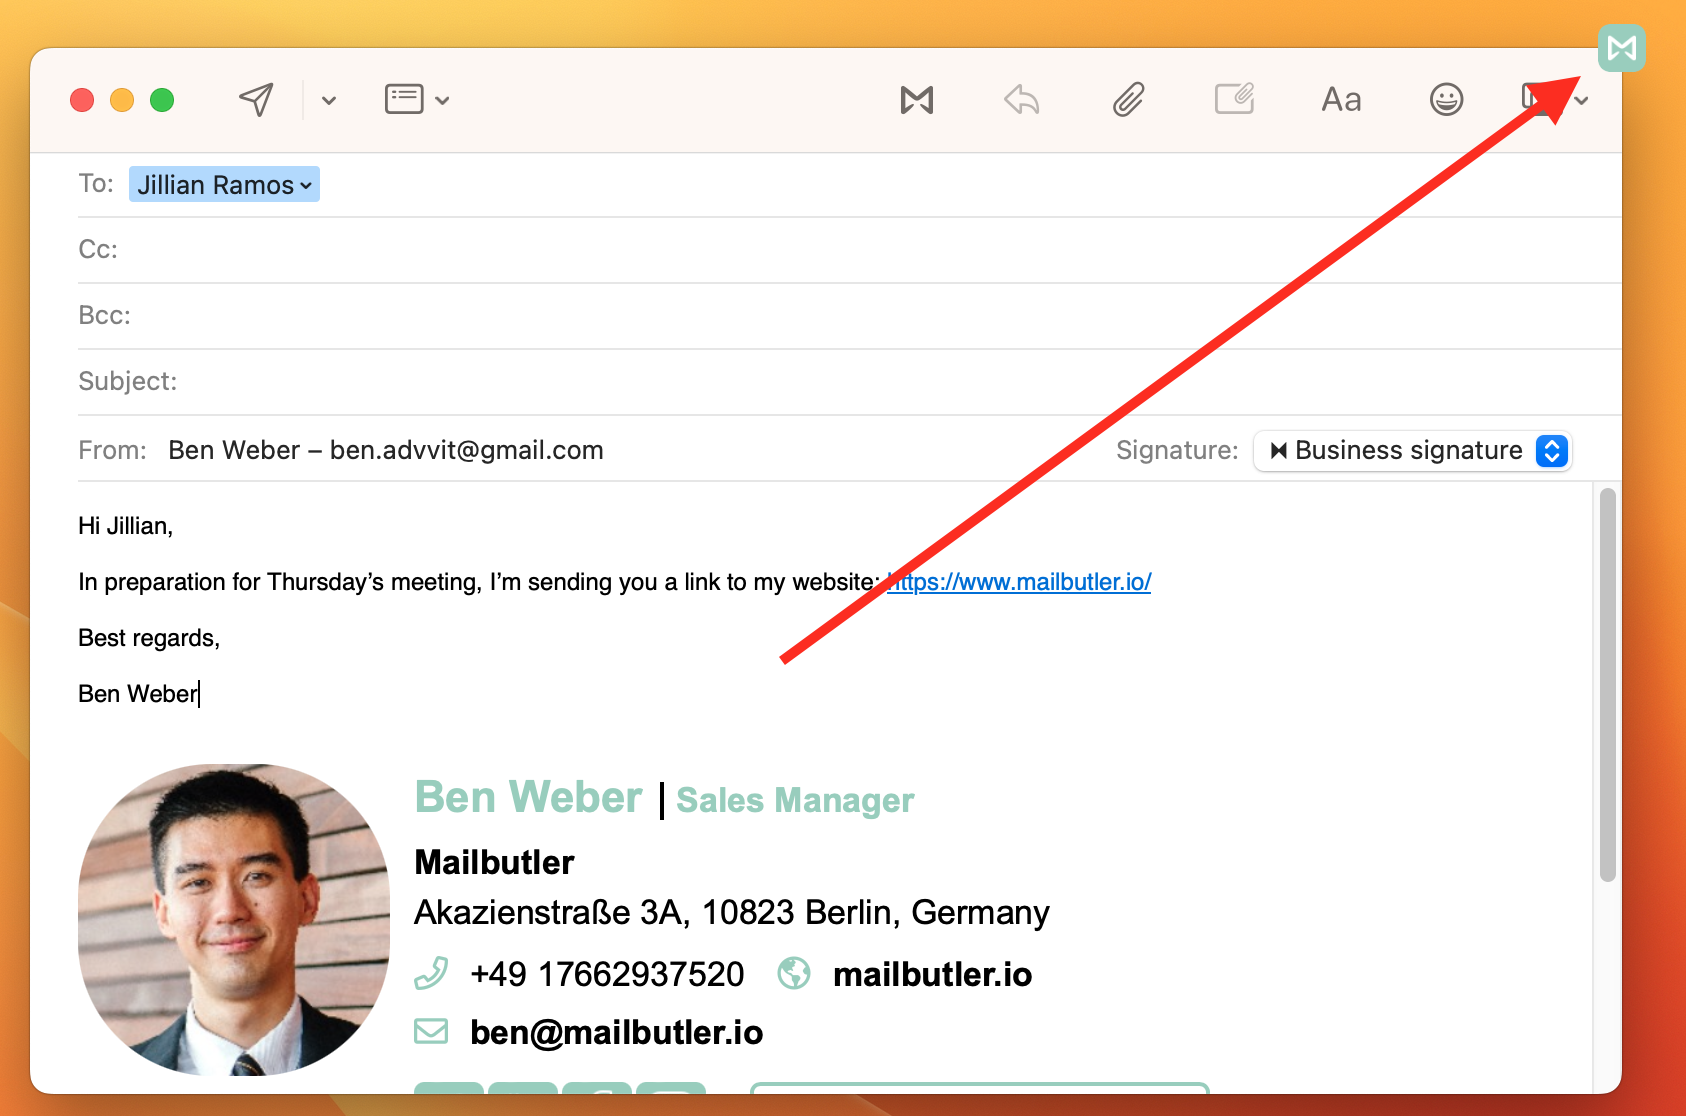
1. To enable Link Tracking manually when composing an email, open the Mailbutler sidebar by clicking on the Mailbutler icon.
2. Use the toggle button and select Opens and Clicks to enable Link Tracking.
Enable Link Tracking by default:
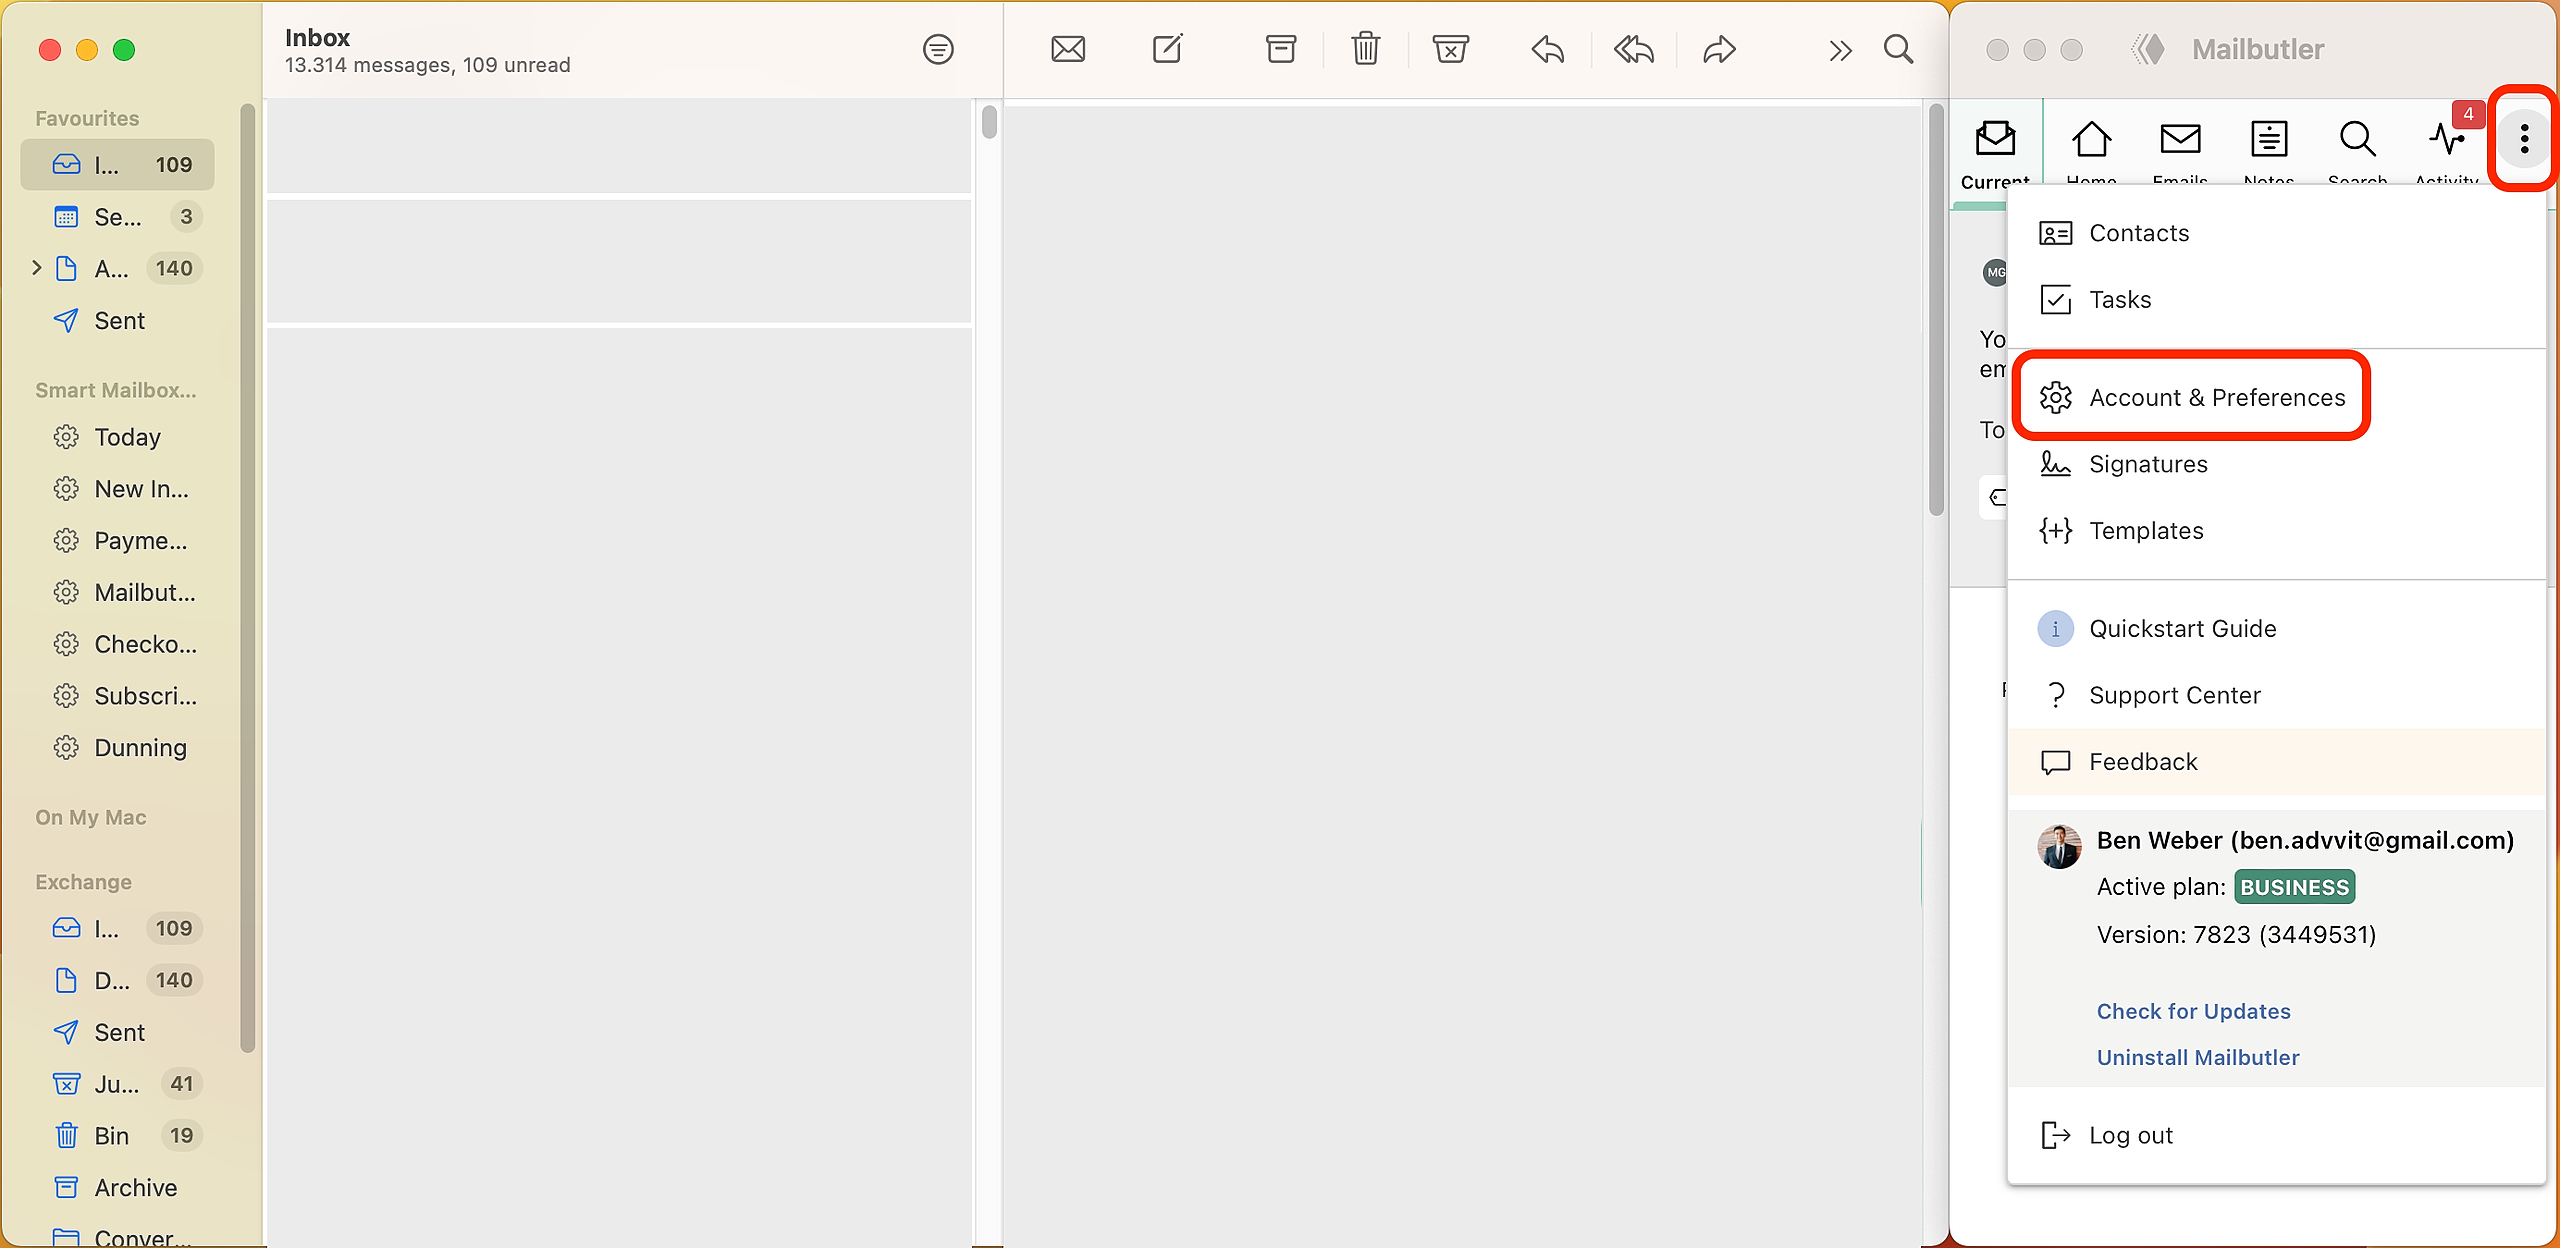
1. Open the Mailbutler sidebar by clicking on the Mailbutler icon.
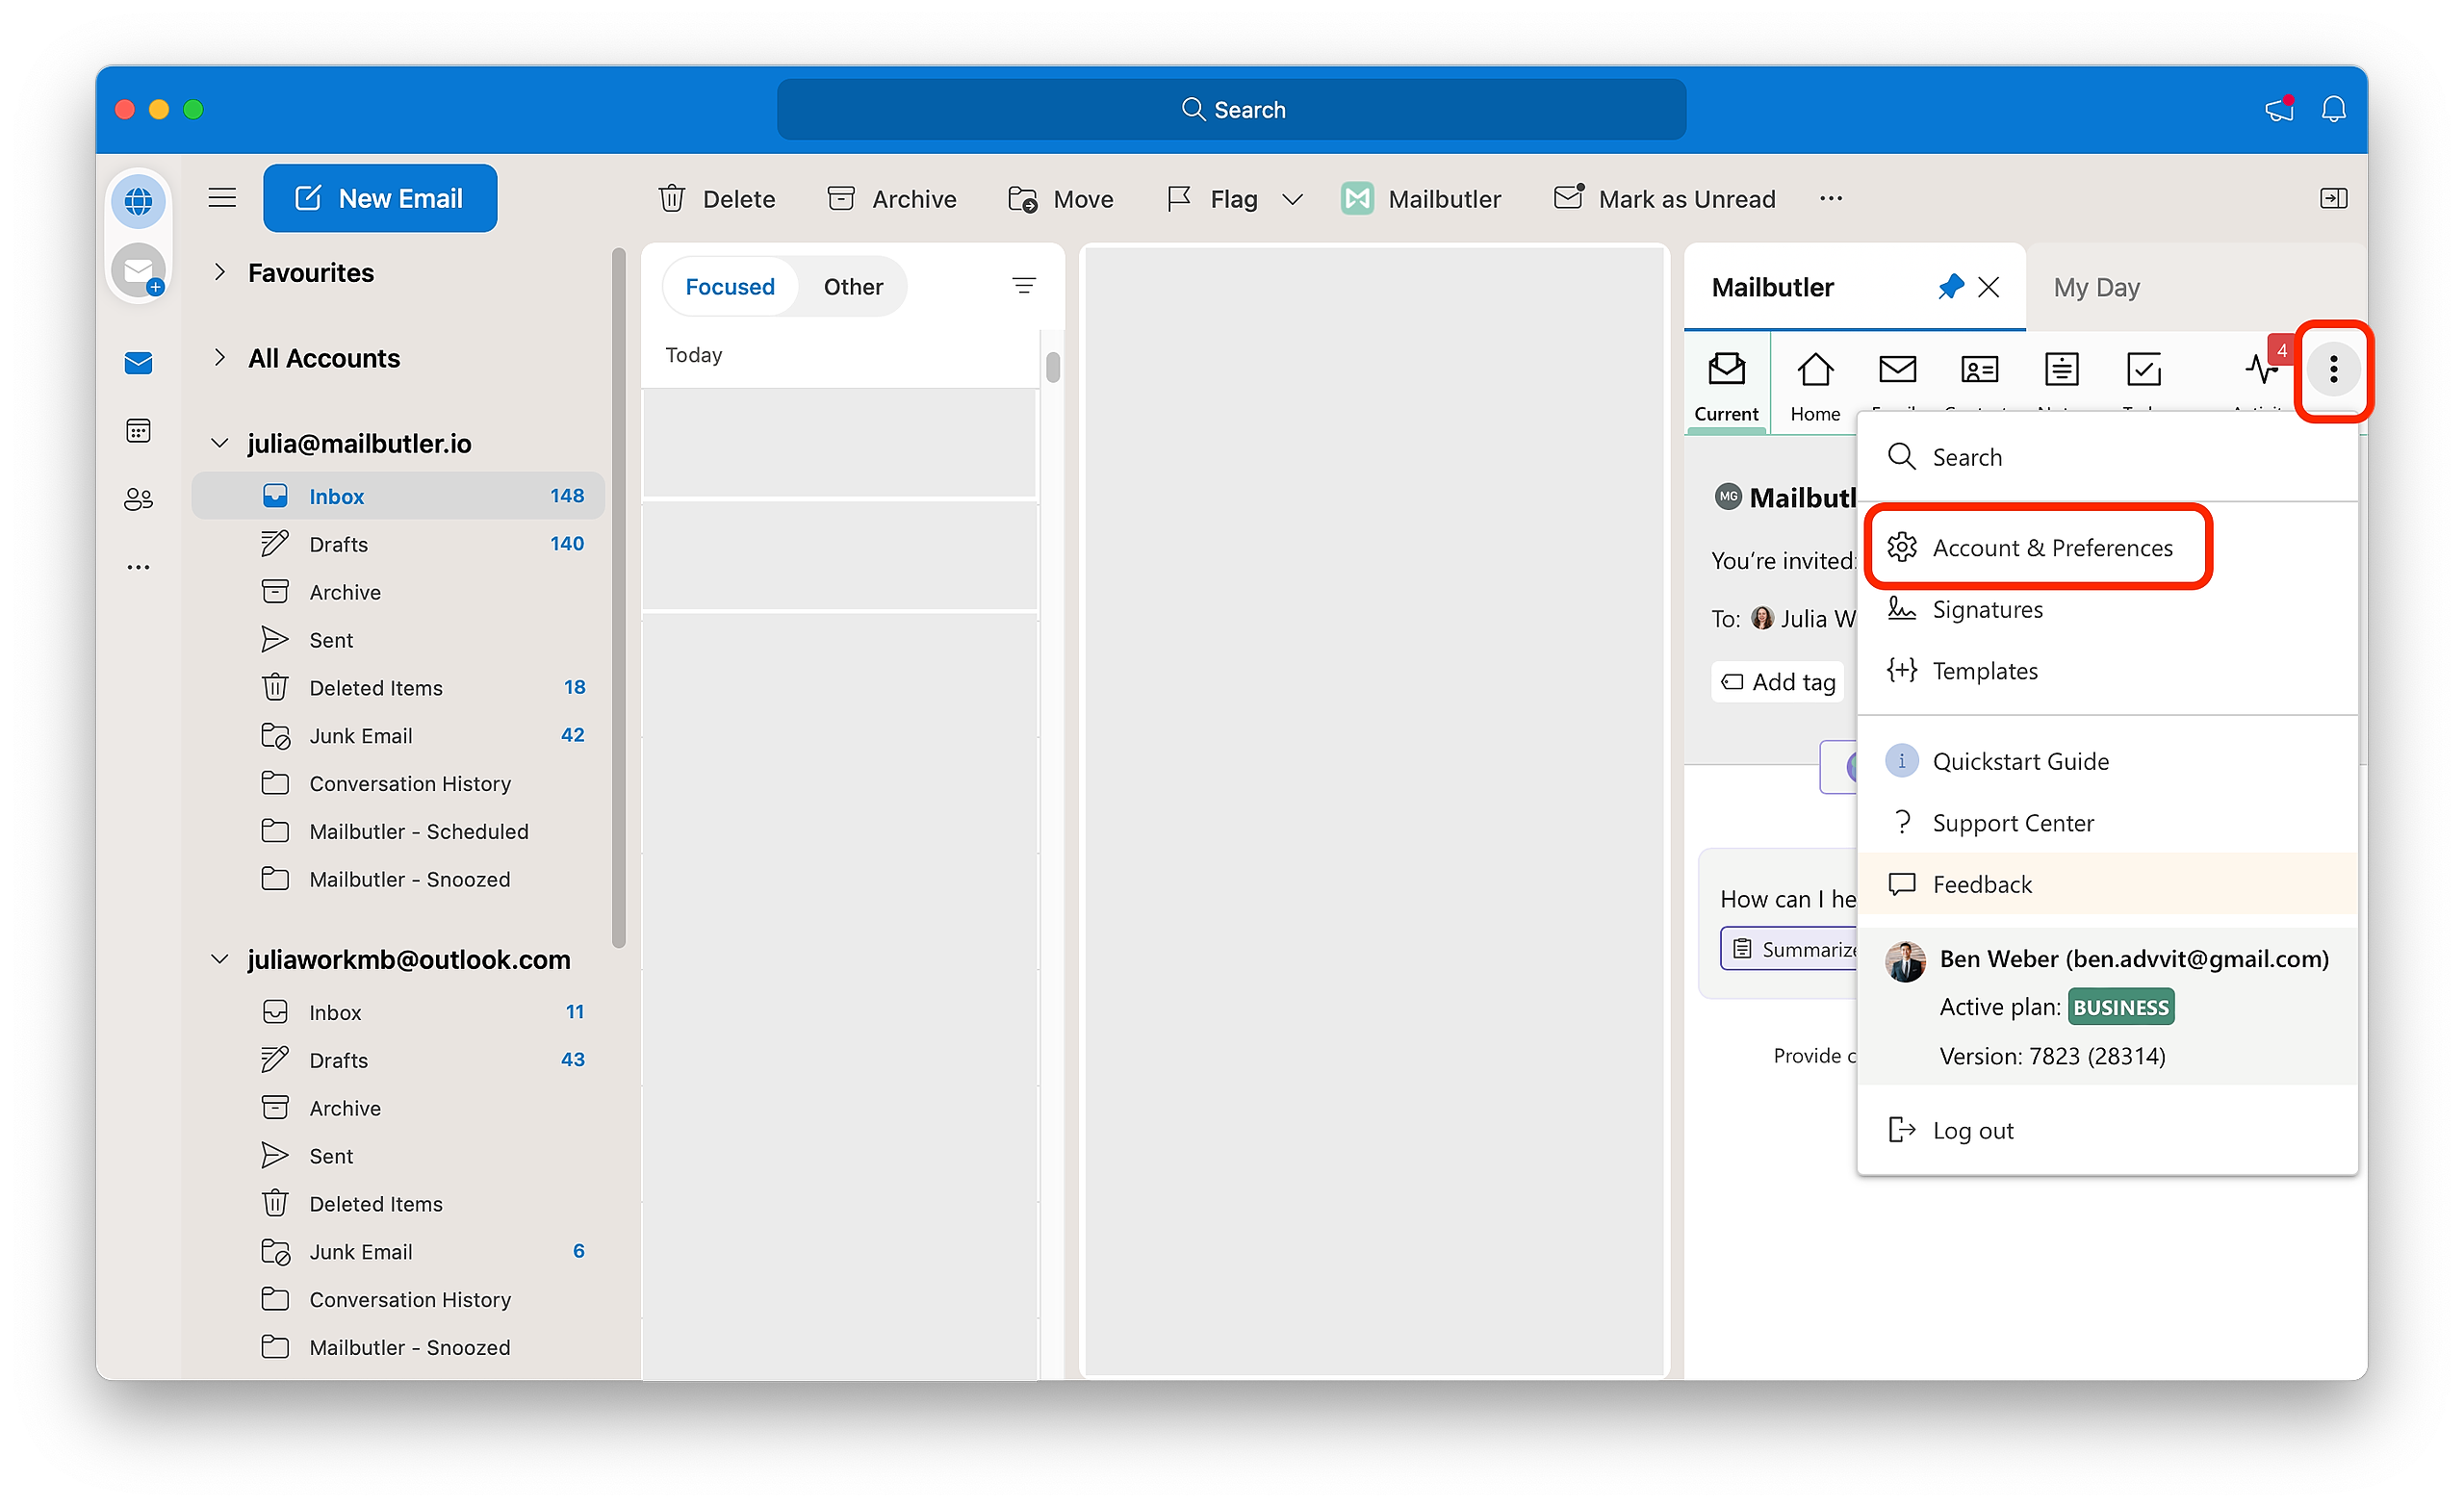
2. In the Mailbutler Sidebar, click the three dots and then Account & Preferences.
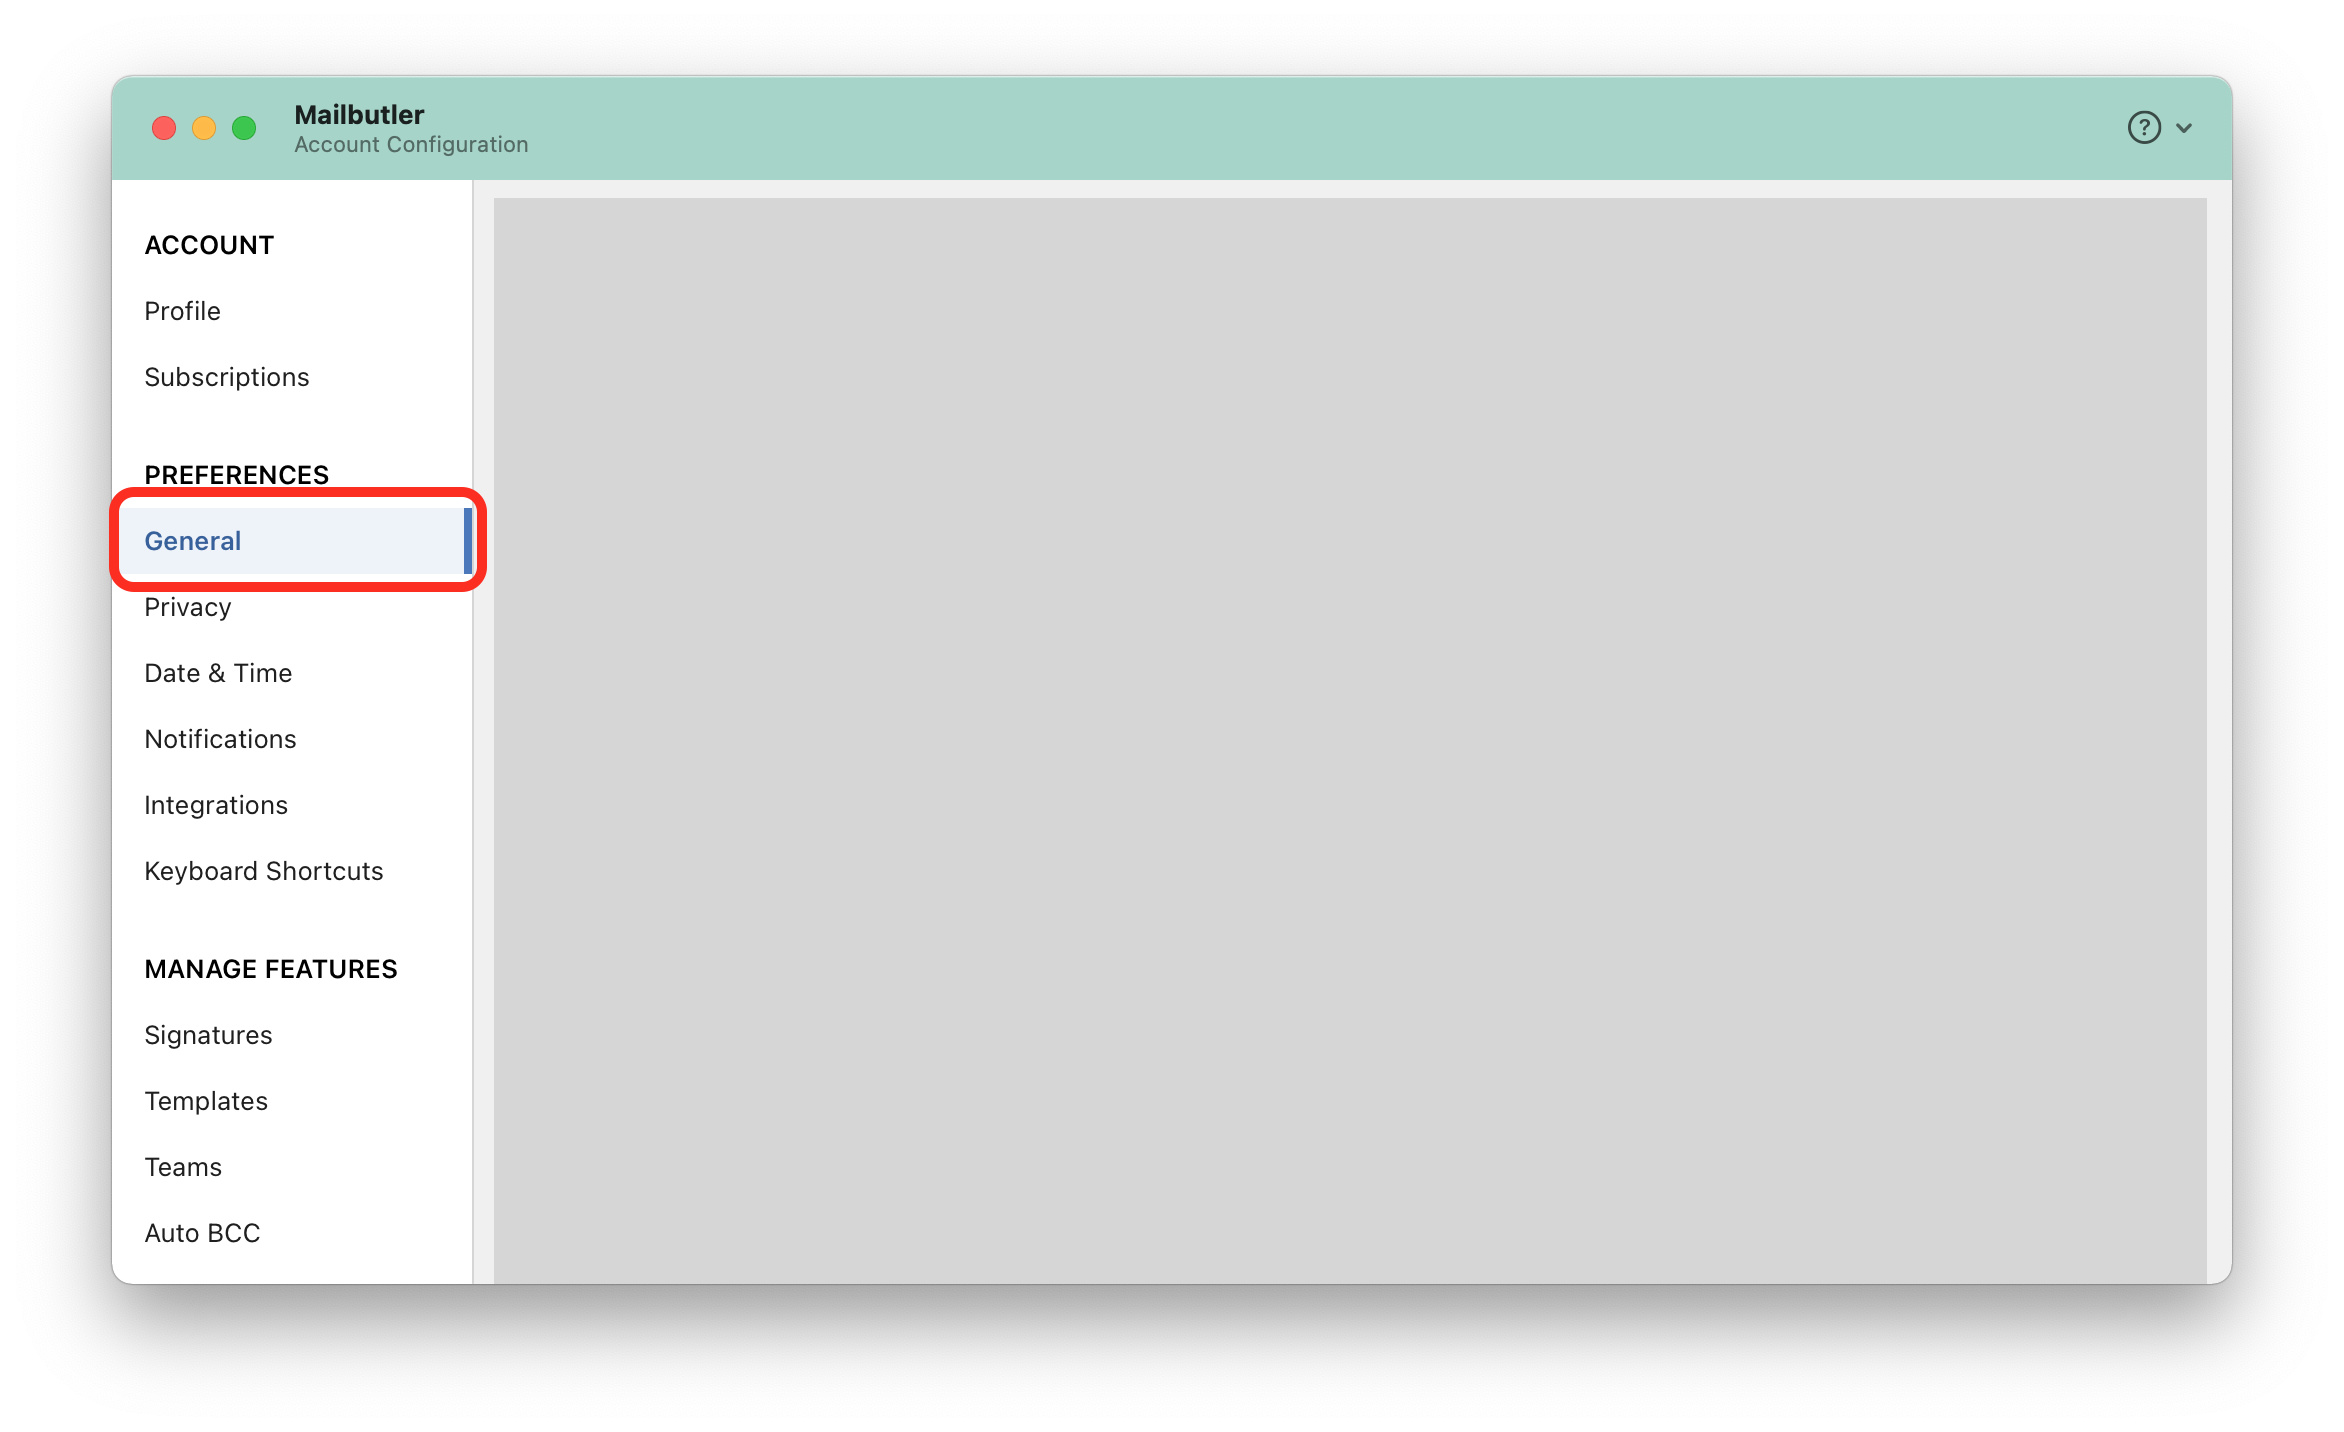
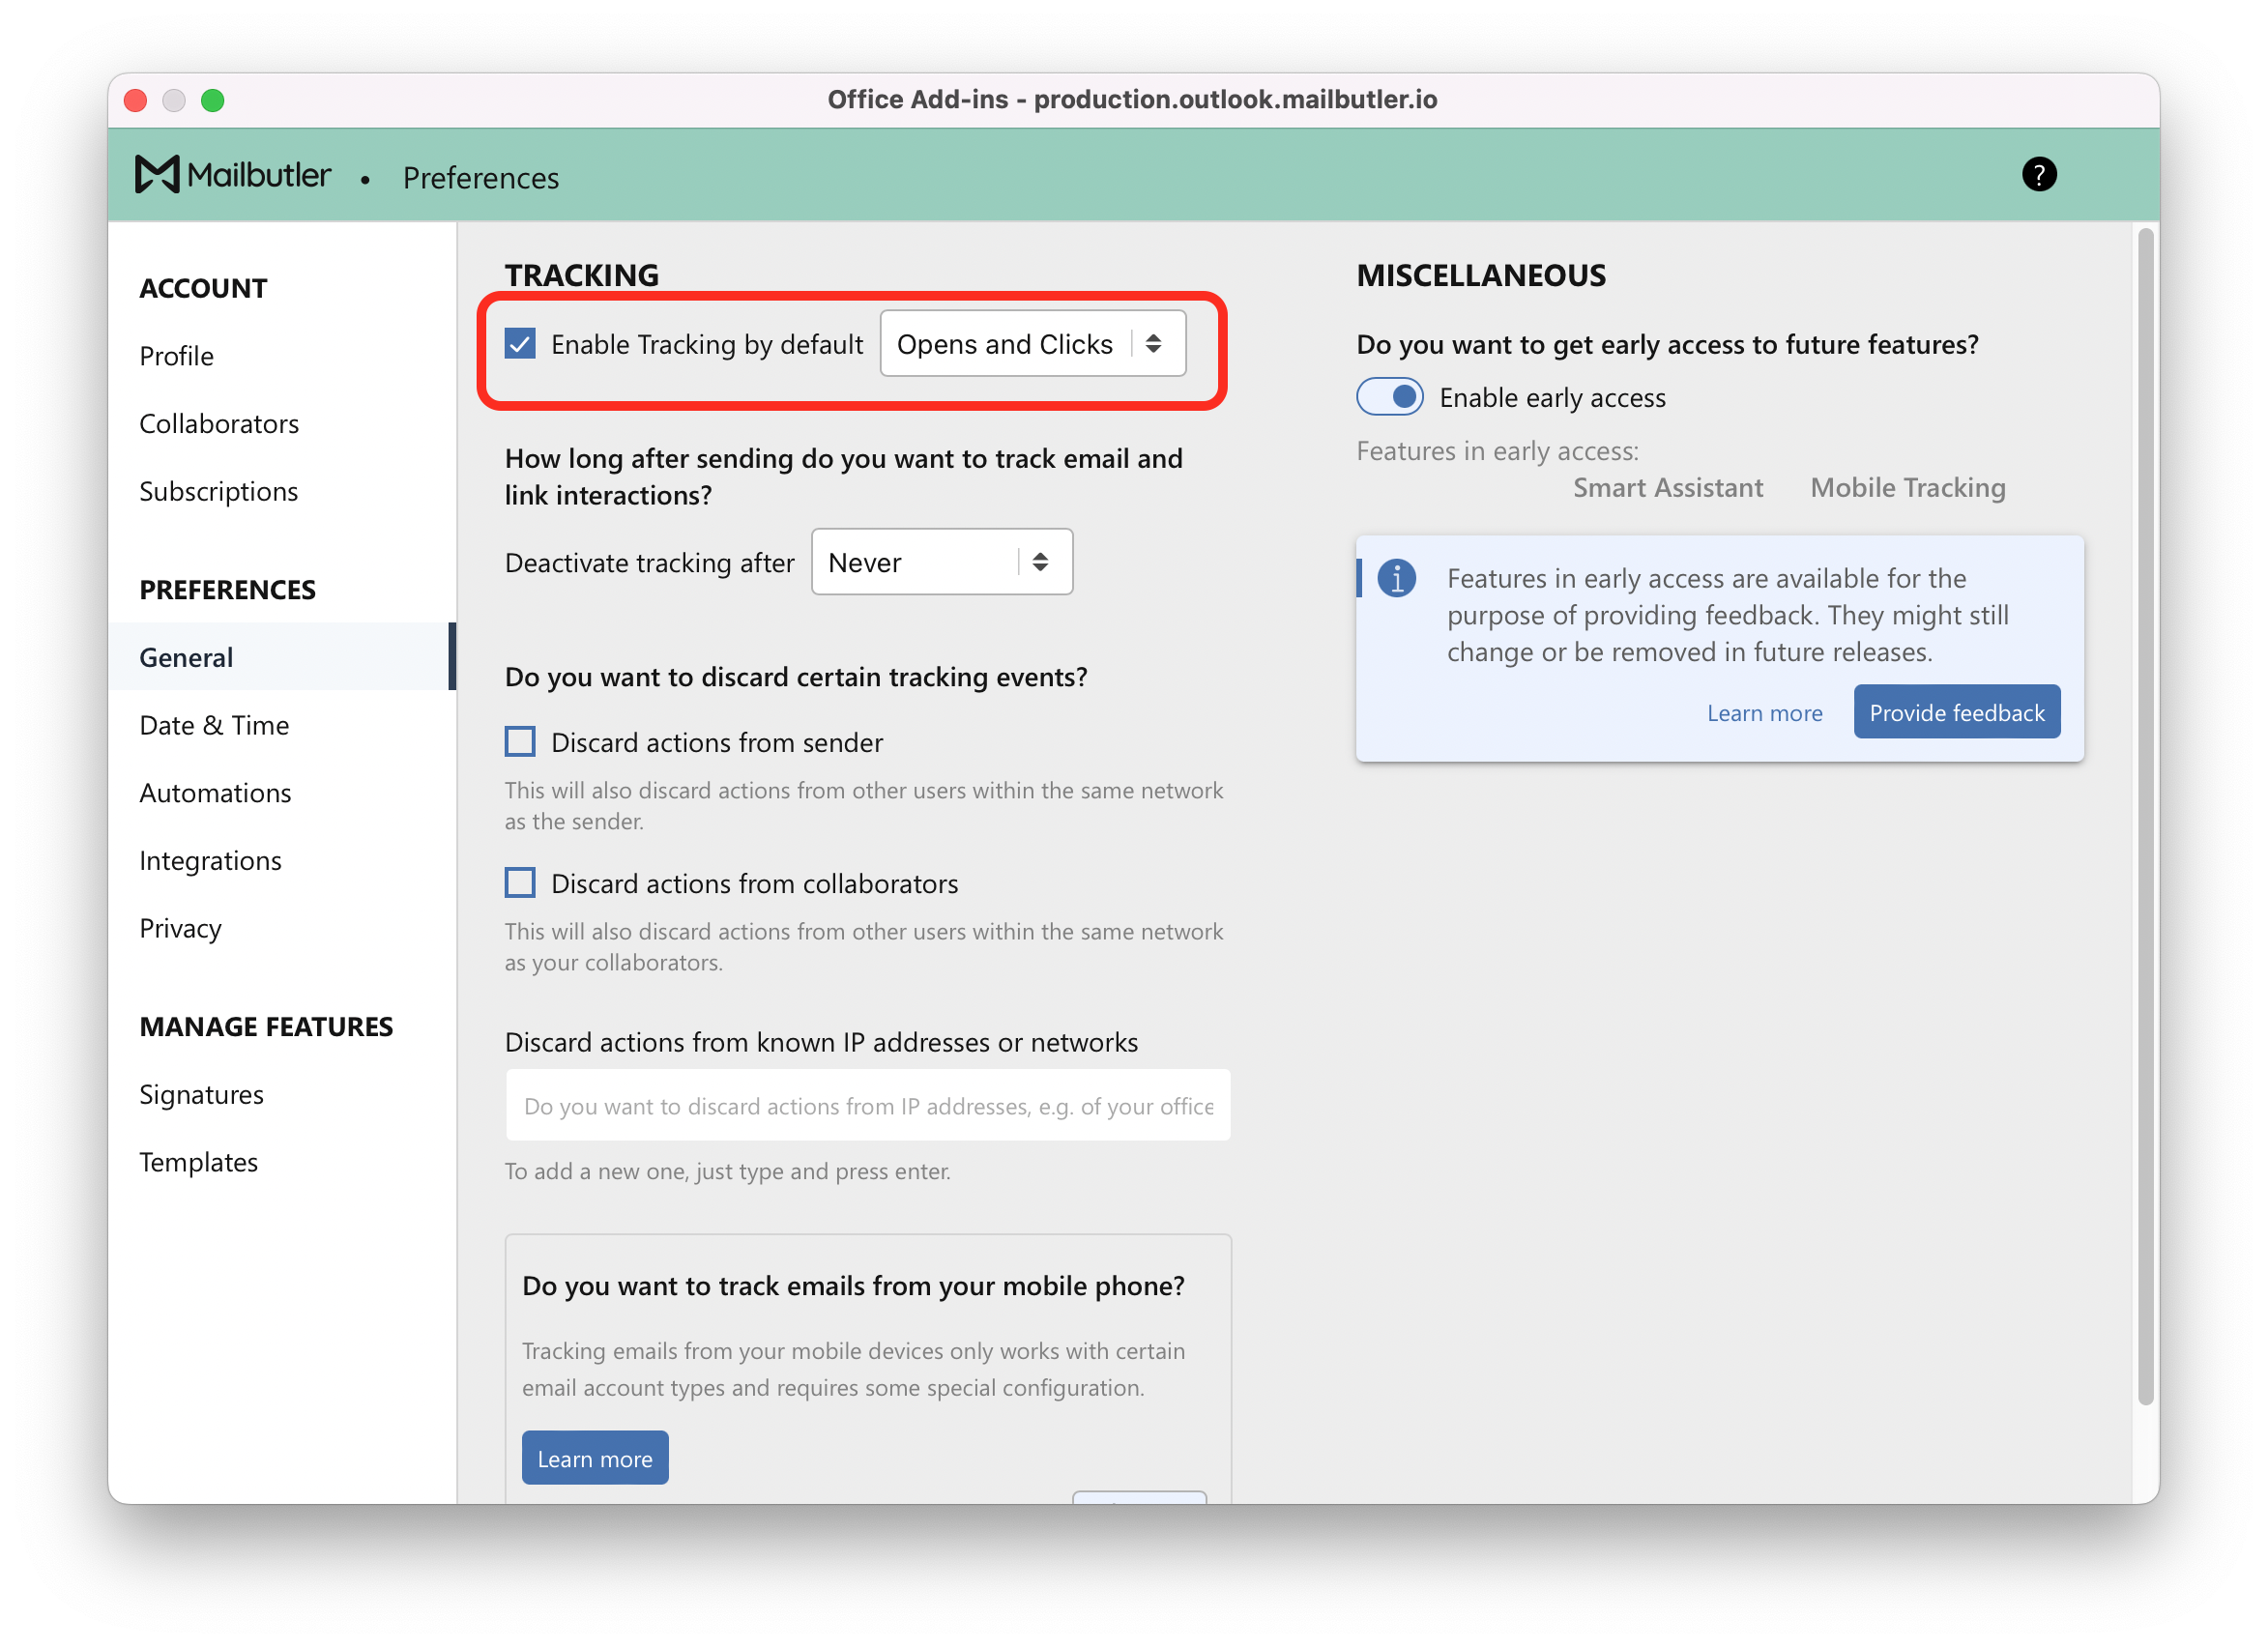
3. A new window will open. Select General under Preferences in the sidebar on the left.
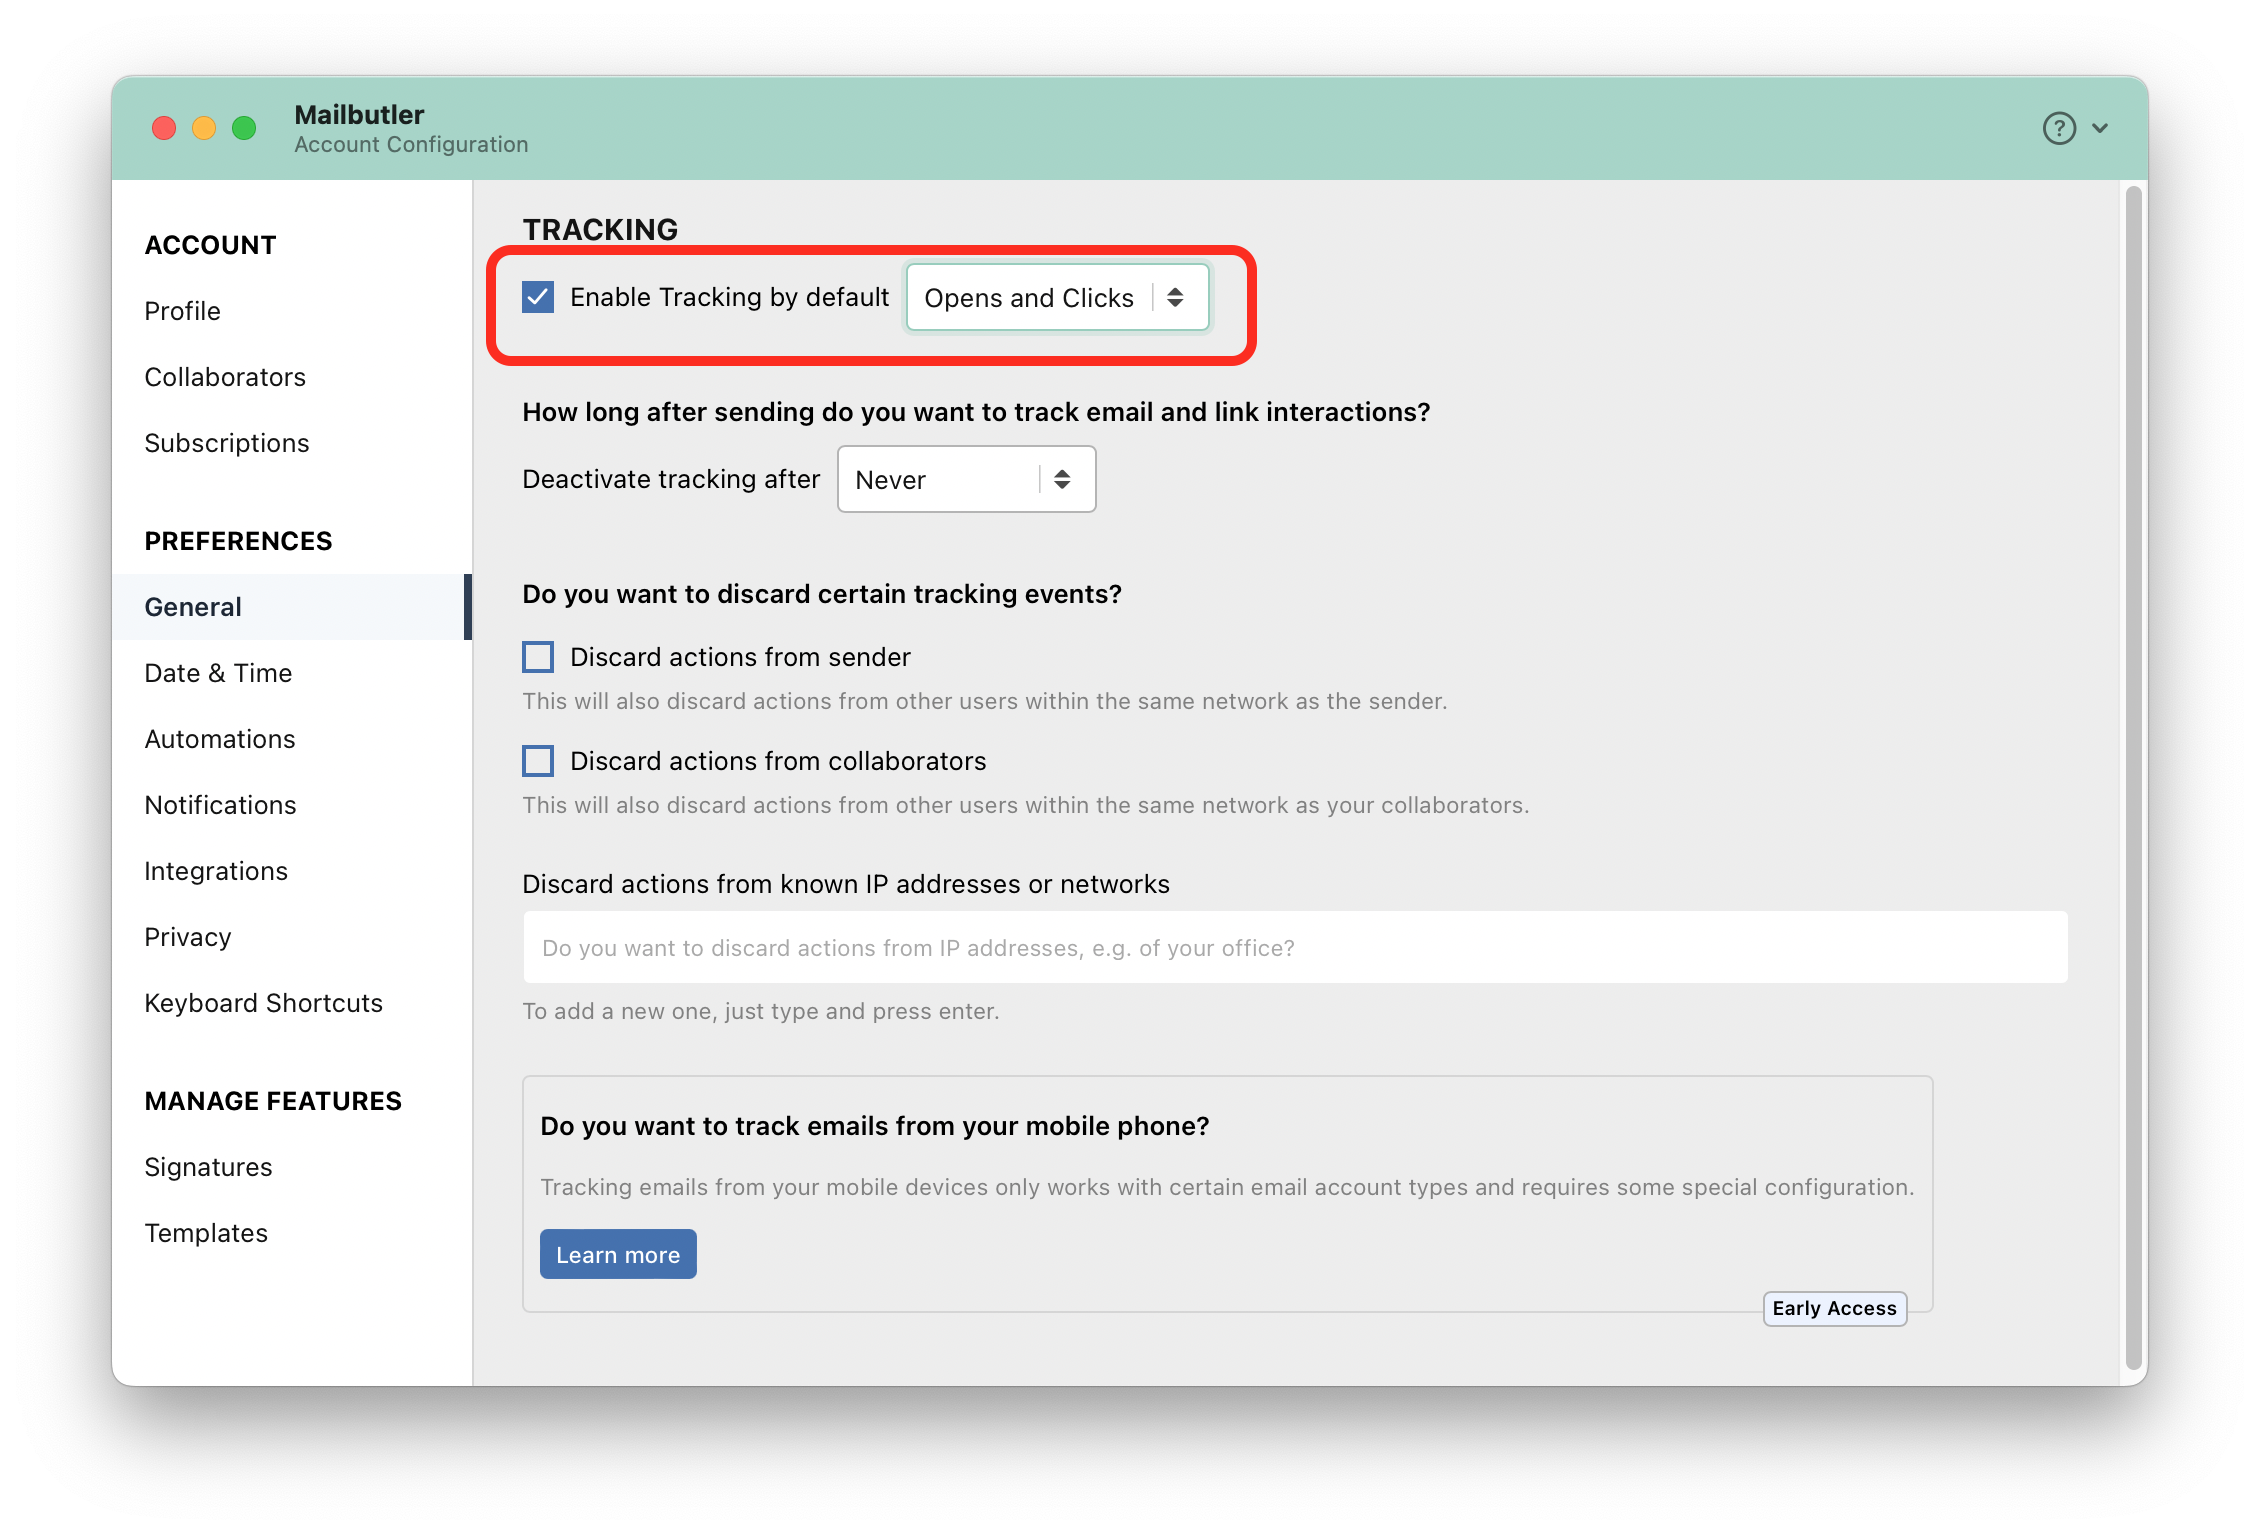
4. Check Enable Tracking by default and select Opens and Clicks in the dropdown menu.
Gmail
Enable Link Tracking manually:
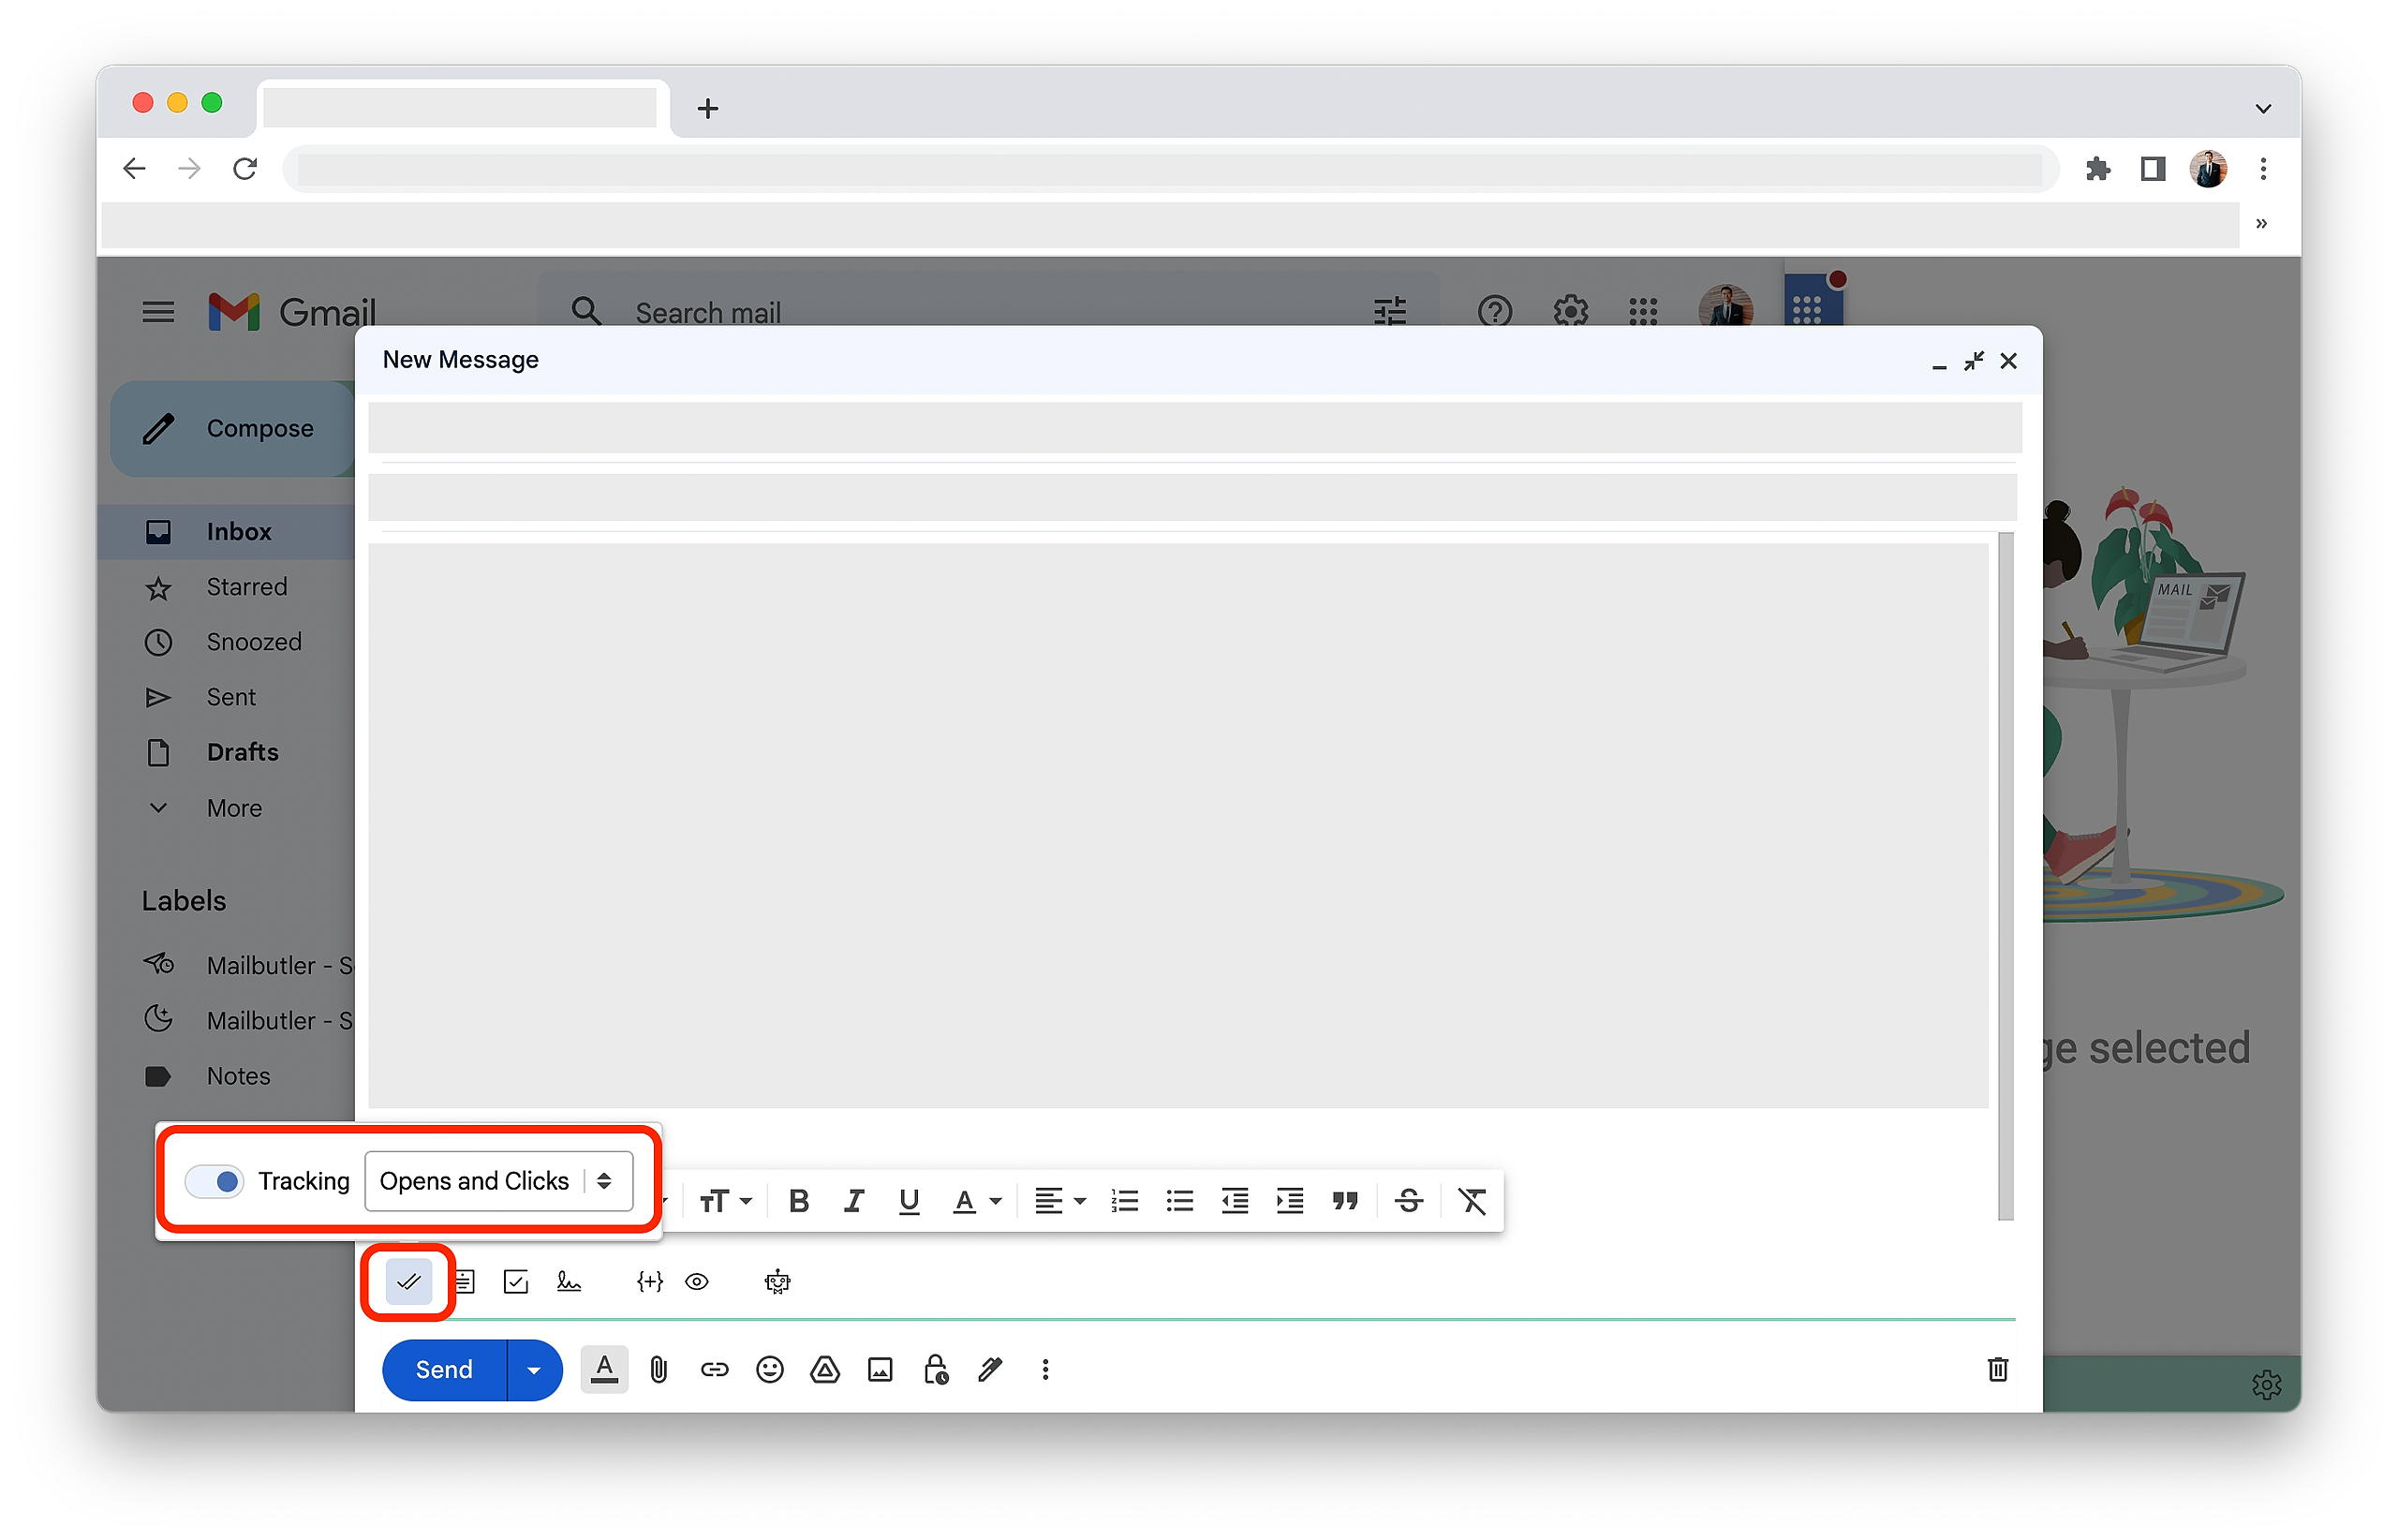
To enable Link Tracking manually when composing an email, click on the checkmarks icon in the Mailbutler toolbar. Then, use the toggle button and select Opens and Clicks in the dropdown menu.
Enable Link Tracking by default:
1. Click on the Mailbutler icon to open the Mailbutler Sidebar.

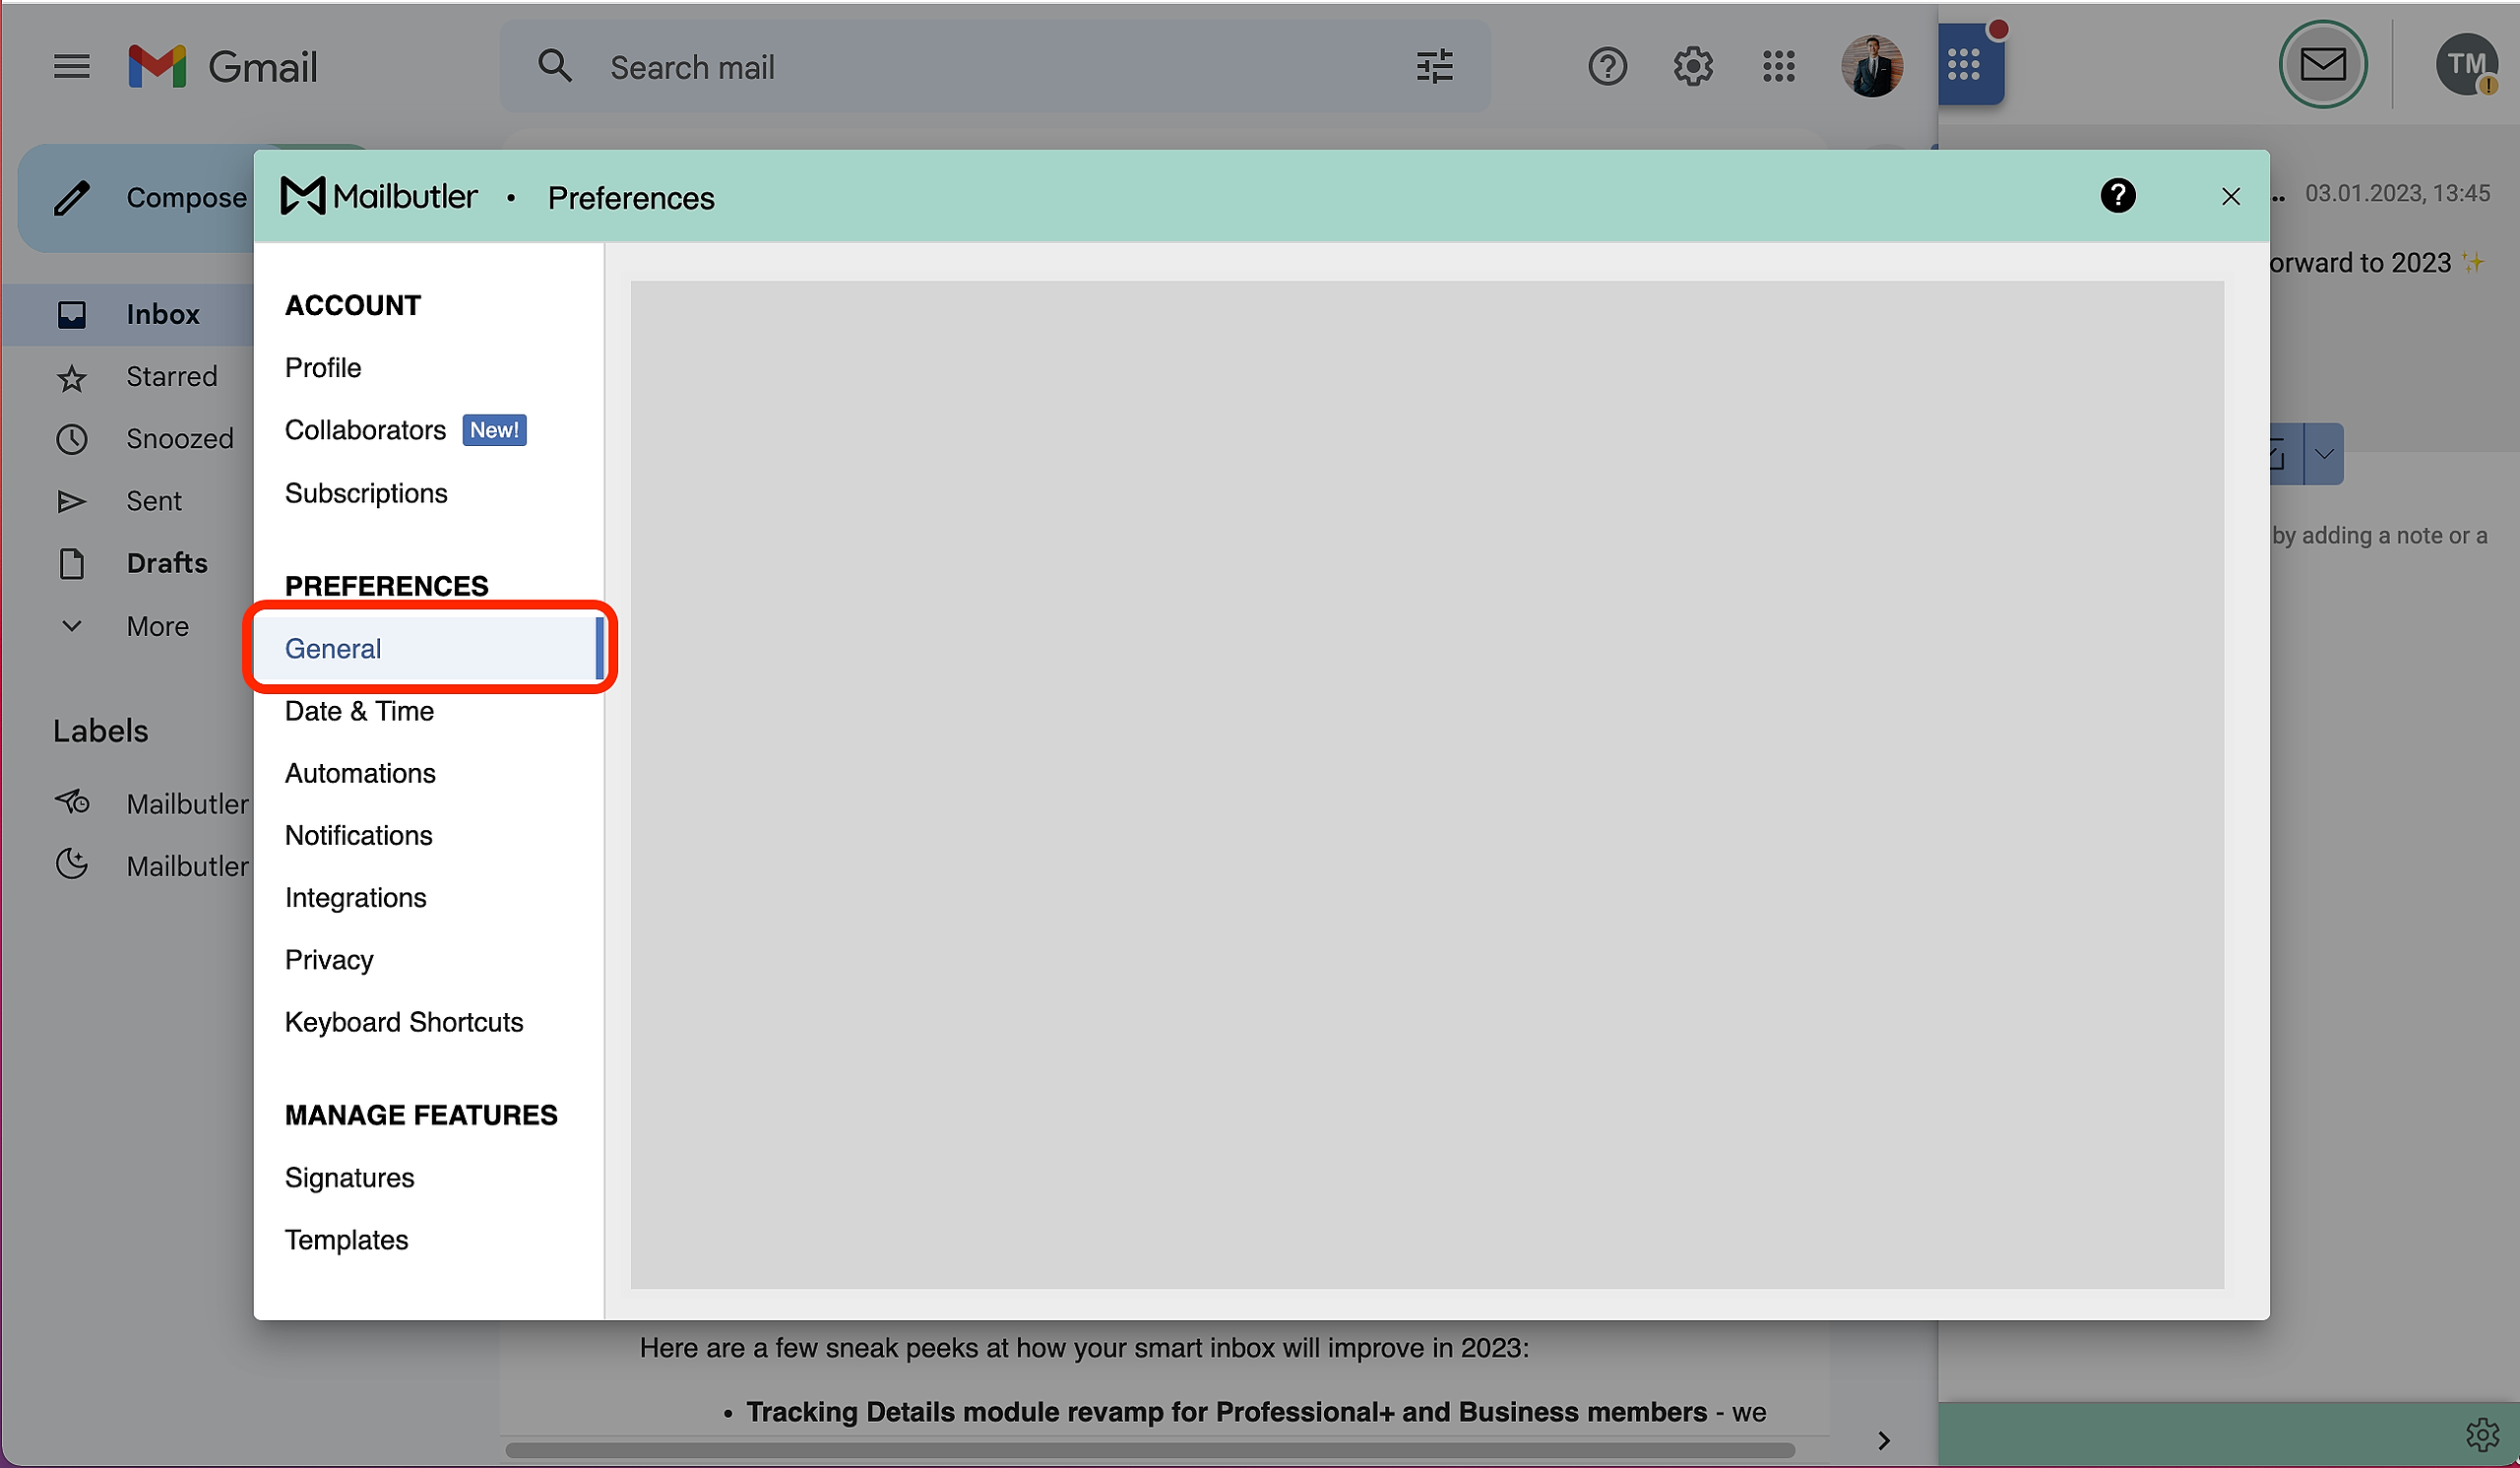
2. In the Mailbutler Sidebar, click the three dots and then Account & Preferences.

3. A new window will open. Select General under Preferences in the sidebar on the left.
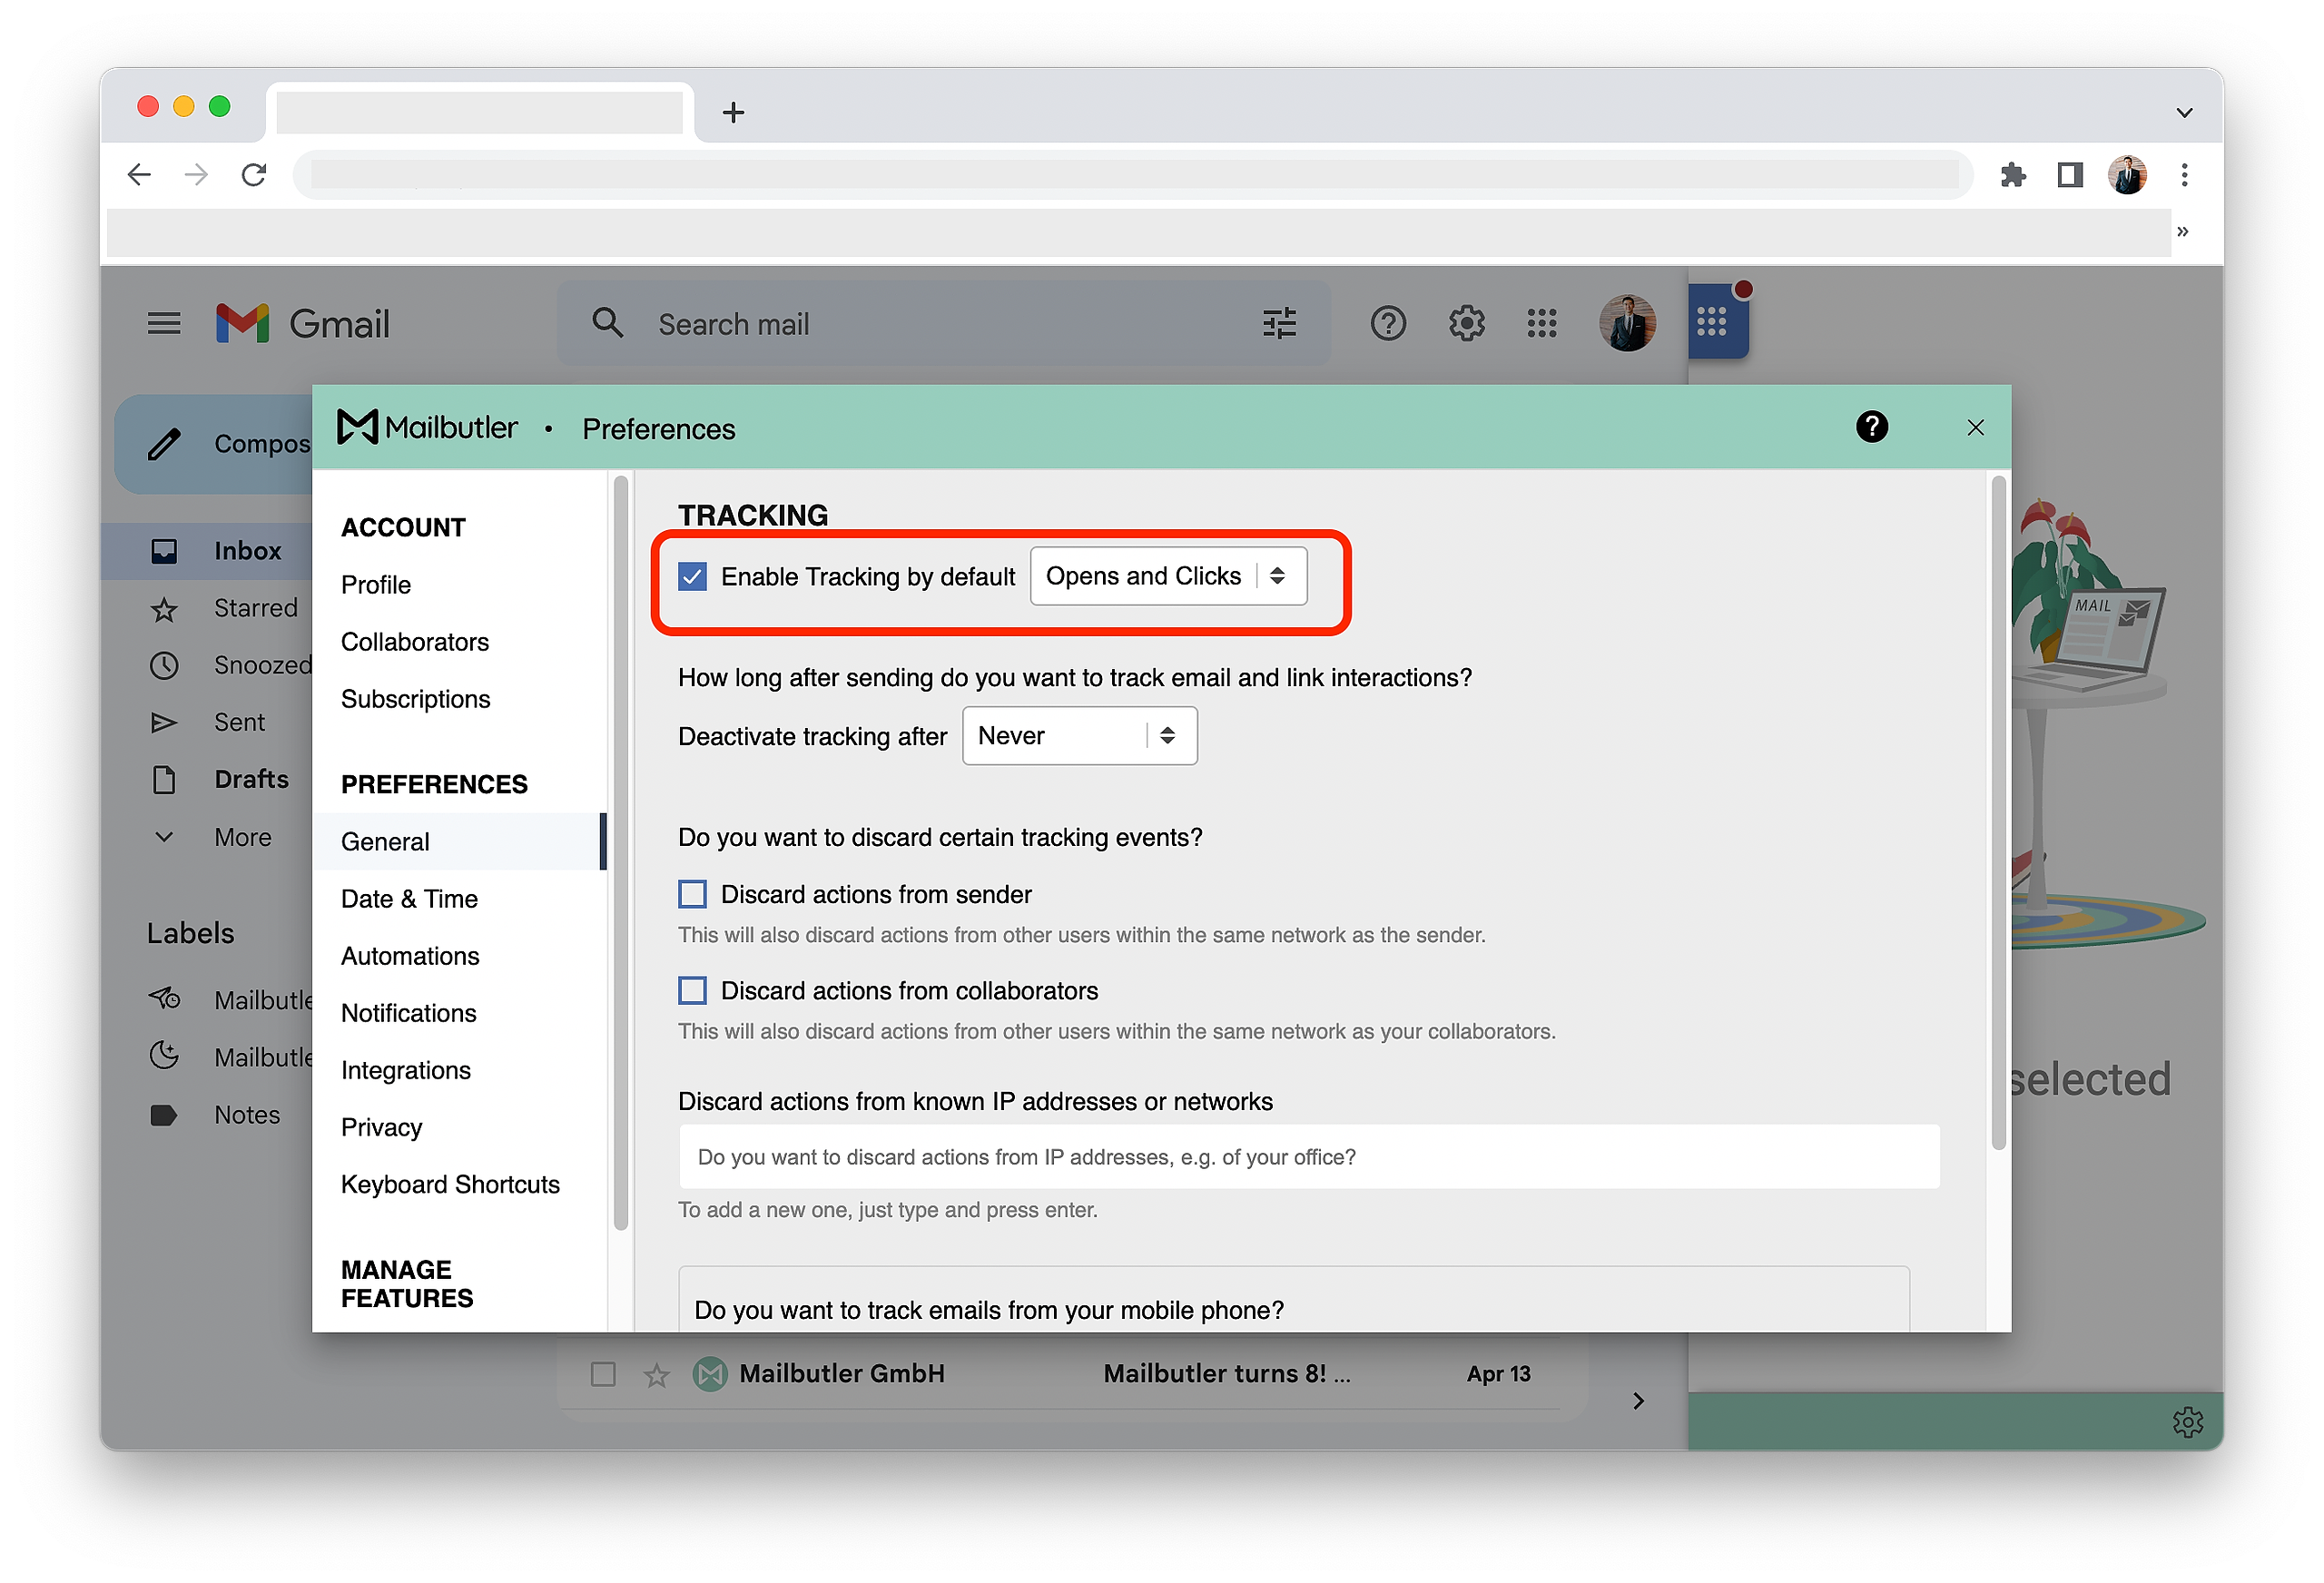
4. Check Enable Tracking by default and select Opens and Clicks in the dropdown menu.
Outlook
Enable Link Tracking manually:
To enable Link Tracking manually when composing an email, open the Mailbutler Sidebar, then use the toggle button and select Opens and Clicks in the dropdown menu.
Enable Link Tracking by default:
1. Open the Mailbutler sidebar.
2. In the Mailbutler Sidebar, click the three dots and then Account & Preferences.
3. A new window will open. Select General under Preferences in the sidebar on the left.

4. Check Enable Tracking by default and select Opens and Clicks in the dropdown menu.
How do I turn on Link Tracking notifications?
Mailbutler can send you notifications on your desktop to notify you that your links have been clicked.
Mailbutler's notifications are available for Apple Mail, Gmail and Outlook.com. It is not possible to receive notifications in the Outlook app.
1. Open the Mailbutler sidebar in your email client.
2. In the Mailbutler Sidebar, click the three dots and then Account & Preferences.
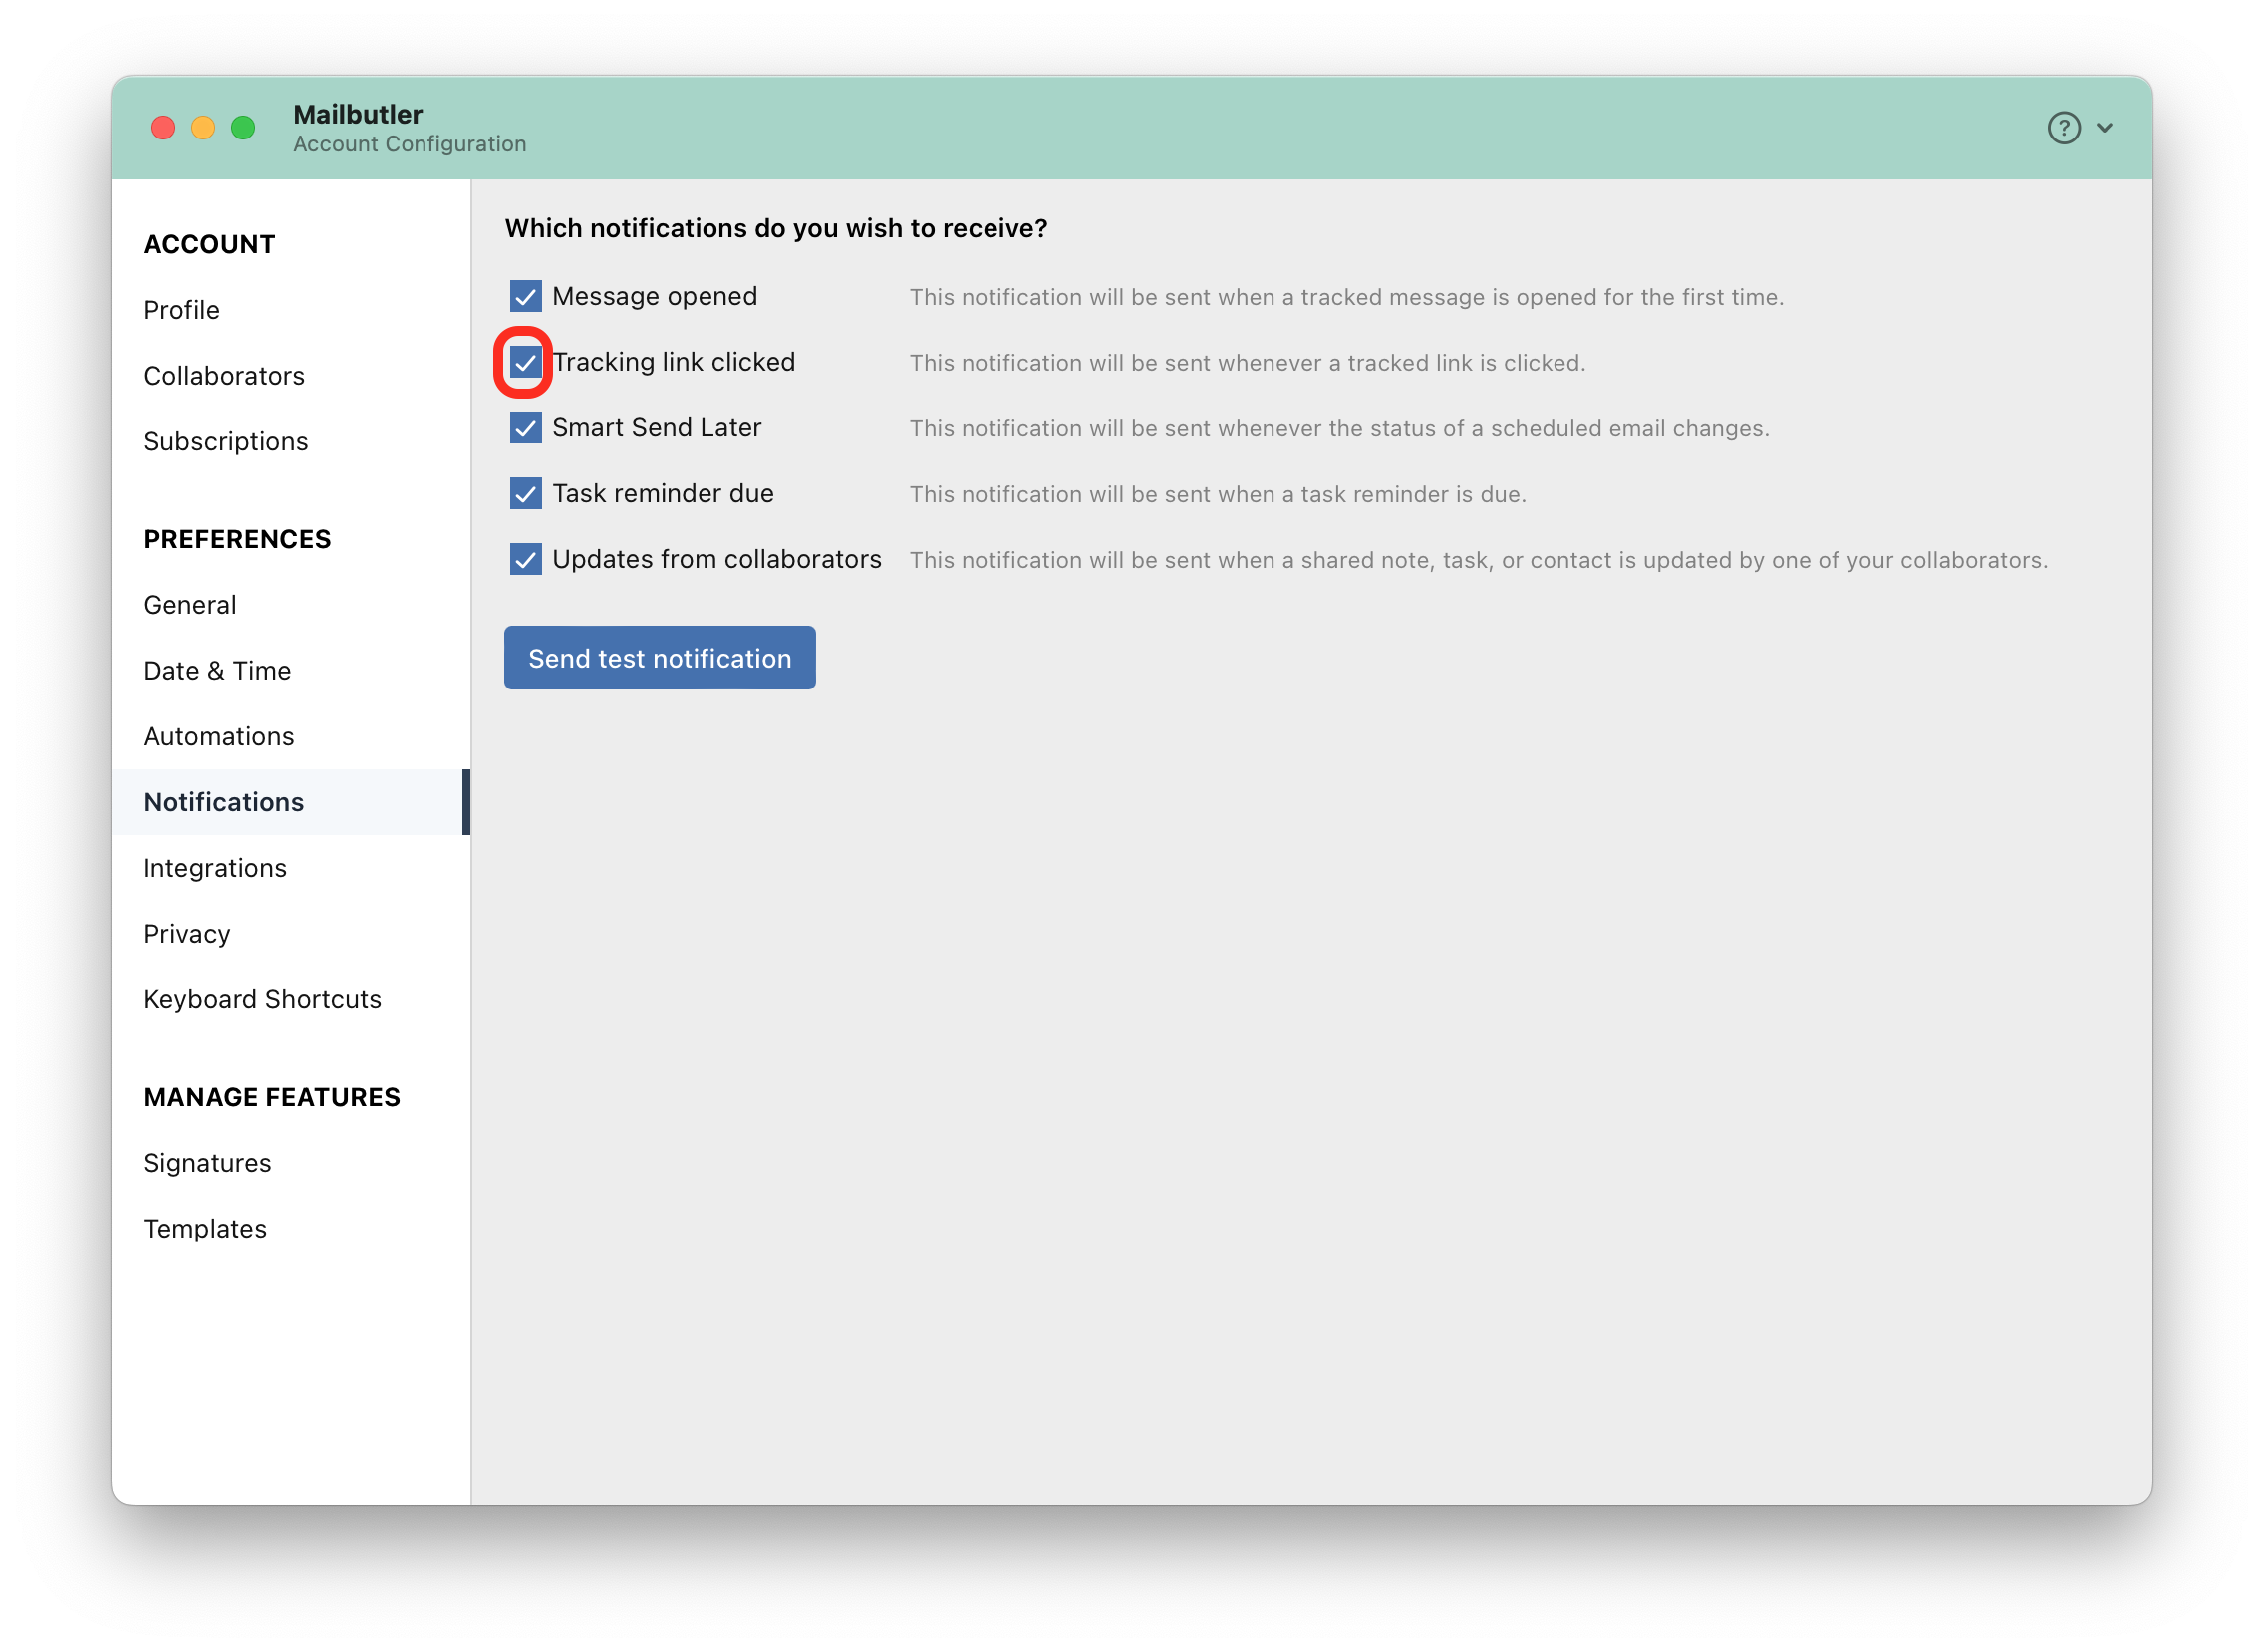
3. A new window will open. Select Notifications under Preferences in the sidebar on the left.
4. Check Tracking link clicked.

For general information about Link Tracking, check out our feature page.